Transcripts
1. Introduction: I have a little secret for you. Today's class is going to be
with my graphite watercolors again because I'm obsessed with these graphite watercolors. I'm Denise Love
and I'm an artist and photographer out
of Atlanta, Georgia. I want to create all day today
with these graphite pens and I want you to play with me. I want you to see
how fun these are when we put some graphite
pencil to the wet graphite that we painted on our paper and see how that paint
repels off our pencil. It's so cool watching
some of the things that these naturally
do as we paint, and mix, and draw
on top of them. You can certainly
substitute any medium that you want to play
with these projects. You can play with
regular watercolor. The sneaky super granulation
sets are really fun. I played with those also. They react differently than
the graphite watercolors. They don't repel the graphite when you draw on top of them
with a graphite pencil. On those, I might
let the project dry and then mark-make. But what I really love about the graphite pens is that
I can do it all wet. Mark-make on top of it wet, watch that color
repel off of it, and see the differences
that it makes as it moves and combines with other things that I've done on the page. It's really fun. I've come up with several different projects
in this class. We'll do some minimalistic
flower and leaf projects. We'll do some stripes with
some minimal mark-making, but watching those colors run from each other. It's super fun. Then some simple abstracts and then we'll go a
little larger at the end because I like seeing
the challenges of something being small and then how do we
make it bigger? We work out all our
challenges, and colors, and mark-making on
the small pieces so that when we go larger, we can pick a bigger paintbrush, a larger piece of paper, we can spread the color
a little further. Then we still don't get stuck because we can refer
back to our small pieces and our mark-making that
we've already worked out and we can mark-make
and finish our piece. I hope you enjoy
being in class today and doing some of
these projects. They're really fun. They're beautiful. They're simple. They're elegant. They're ready to
frame and give away or do whatever it is that
you'd like to do with them. I can't wait to see
what you create. Definitely come back
and share some with me and I'll see you in class.
2. Class Project: [MUSIC] Your class project today is experiment with one of
the projects that we did. Come back and show those to me. If you do one of every project, then come back and show
me your whole series. I'd love to see what it
is that you enjoyed. Did you try the graphite? Did you do it in
regular watercolors? If you were playing
in the graphite, did you get excited
about watching them run from the
graphite print pencil? That's like my
favorite part right there is just watching that watercolor repel from
the graphite pencil. It was so super cool. I hope you enjoy the projects
that we have in class. I can't wait to see what
you do with some of these. Let's get started. [MUSIC]
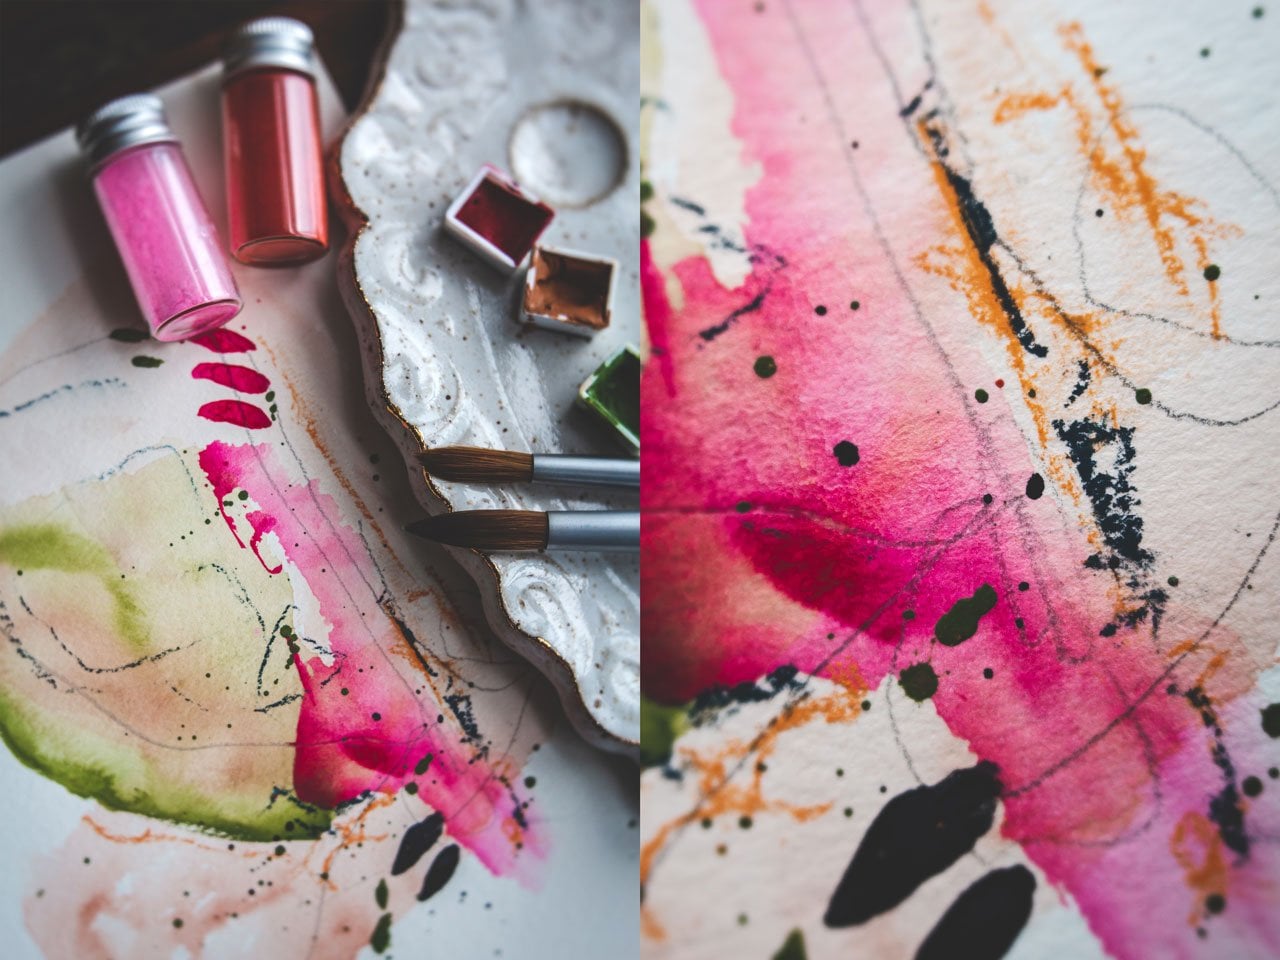
3. Supplies: Let's talk about the supplies that we'll be using in class. I've got some watercolor
paper here already cut up. I'm using the Canson
XL watercolor pad. These are 9 by 12 inches and I've just cut it in fours. That way I can
experiment and play on little manageable-size
pieces and still have a good enough size piece
if I love any of them and I want to do
something with them. I've cut those up. I'm using that paper, 140 pound cold press paper. Any watercolor paper that you want to use,
it'd be just fine. I've also got my
graphite watercolors. I've got my Kuretake Gansai
Tambi graphite pens, the five colors that I received. Then I've also got
the seven colors that I made in the make-your-own graphite watercolor class. I'm going to be
playing with those. I'm a little bit obsessed
with the graphite colors because they're so
beautiful and smoky. They give such cool effects when you're painting with them. I'm just obsessed with them. I'm going to be playing
with those paints. But you can use any
watercolors that you want. The thing that I like about the graphite ones is that when I use a water-soluble graphite pencil with them, the graphite itself seems
to repel the paint. It just shoves
that paint around. I like that repulsion, the way that it does that
repelling of the paint. The other watercolors,
I tried out some other watercolors
with this technique. I did the Schmincke. I played with a
regular watercolor, just some that I had in my pen. They do not repel the graphite, but they still look nice. It's not like you can't use
other watercolors to do some of these techniques. You can. I just like the fun effects
that I get from the graphite. The Schmincke colors, or super
fun for the granulation, if you've got some of those
super granulation colors, those are really fun
to experiment with. But again, they don't have the same repel the graphite
pencil effect, but they do look pretty. So if you have some Schminckes, those are fun to play with. I'll also be using 6B water-soluble graphite
pencils in class. That's what I'm going to
use for my mark-making. I like how dark it is. I like how it repels the
graphite watercolors. I've got a couple of
different brands. I've got art graphed. I've got the fabric Estelle. So any of those are just fine. You just want them to be the water-soluble for
what we're doing. If you don't have water-soluble and you do have graphite pans, I guess you could play
with the regular graphite. I'm just playing with those. I have a couple of
size paint brushes. I love the Raphael
Soft Aqua Brushes and this is a zero and a two. Then I've also got my yummy
nib that I'll be using. This is the Kakimori Brass nib. I love it because it's
a pen and ink dip pen. But it's different
than a regular dip pen and it really holds
a lot of ink. If I want to use, say some gold Micah ink or maybe some black ink or something other
than my graphite, those are what I'm going
to use as my go-to. So those are just
totally optional. I have them here as a just
in case I want to use them, but they are not necessary. You don't have to have those. Mainly what I'll be
using for most stuff is the graphite pencil and the graphite watercolor
because I love them. Now that is my basic for what
I'll be using a class a day. Tried to keep it simple. I want these to be beautiful
and elegant without tons of thinking about all
the supplies that I have. I just want to be able to
move a little bit of color and a little bit of mark-making and end up with something
really beautiful. I've got several
different little projects that I want to do in class with you today just to give you some fun here at your art table. So let's get started.
4. Testing Other Watercolors: I thought I would go ahead and do an extra video on this
one doing a few of these with some of these super
granulation Schmincke colors and then I have some random,
just regular colors. There's a few
Schminckes on here, but this is mostly
regular colors. I thought we'd just look at the difference of
doing some of these with other watercolors than
the one I really love. What I'm going to do is just
take a little bit of water and activate some of these and we'll just see what we get. This is the Schmincke super
granulating watercolors. I have a couple of sets, I have the Haze set,
the Tundra set, and the third set. I've got three sets over here. The third set is the Forest set. These are the Forest. These are the Tundra. These are the Tundra. These are the Forest. This must be the Haze
collection here at the bottom. I'm just pulling
from some of these to see what are they
going to look like. How are they going to
be a little different? Maybe we can do our
leaf project on this. I'm just going to take
it and spread the leaf. I can already see I
wasn't picking up nearly as much watercolor
as I was on my other sets, and I really more
than anything want to test if these are
going to do the same. Are they going to repel? It's possible. It's a little more of a test. I might just scribble down on these leaves and
see what they do. It doesn't really repel like the other collections
so that's interesting. Now what we might do
since we're in here, and we just want to
make them pretty, I'm just going to
pick maybe a blue and just dive these in there and let them do their
little spread thing. I might pick up, it's like a purply
shade up here, and just drop that
in there and see because I like when other
colors drop in these. They're really beautiful. Another test I want
to do real quick. I talked about using
my gold mica ink. I'm just going to shake it up. Let me get the name. I have the name over
here, Kakimori Brass nib which is a dip pen nib. I also got regular nibs. Those are fine too. But it might be fun just to see. Does the regular
watercolor repel from, say, this pretty gold? Or does it just blend in? Okay, little mark-making there. It is just blending
in mostly there. It's not repelling. With the Schmincke colors, what you're going to
need to do is paint it and then plan to do color
combining like we just did. Mark-making would definitely
have to be seconds. These aren't going
to do the same thing that the other collection does. Maybe we would mark-make on top instead of while they are wet. Then I have this set which
has regular watercolors, no special effects
going on here. Some of these are the
special effect ones. I think that's greenish amber. Look how pretty this color is. That's pretty. All right, so same test just
to see, oh, look at that. Now, this greenish amber did
actually repel the color. Look at that. That's an interesting
experiment. I don't know that
it's going to do exactly the same as
our other collection. But it did repel slightly
at the leaf itself so that was super cool. That's a pretty color too. Just in case you're wondering, that's the Senulier
greenish amber 203. This is one of my
favorite greens. I like them when they're like
deepen pretty like this. This is the oxide green. What if we put some oxide
green out and just test it? Let's just see. Nope, it does not repel. Maybe the greenish
amber was just special. That was an interesting test. But what we could
do is just drop some other color in here just off of our plate and see. We can still make
those real pretty just dropping some color in
here to do their thing. Again, another set that I would probably
mark-make at the end because you're not
going to really see it with all these colors
the way they are. Real pretty. Greenish amber did
repel a tiny bit but not really much
to talk about. That is just a test of
some regular watercolor. You can still get
the same effects. You can still definitely create these same projects with
regular watercolor. The difference being, if you experiment
and put the stem in, if they repel, that's fine, but they probably won't. If you want to do any additional mark-making on top of these, I'd wait until they dry
and mark-make on top, just as an FYI. I'll see you back in class.
5. Testing Mark Making Pencils: Thought it would be fun to do another little
experimenting video just to see what will
repel our graphite stuff. I've got black India ink, I've got our gold Mica ink, I've got our graphite pencil. I just want to do a
little test here and see which one of these will give
us some pretty repelling. We've got green. Oh yeah, look at that. Immediately. Immediate. Then let's just do a stripy one with our different colors here. Why not? We got some of this
other bluish color. That's my very favorite
blue-green combo. On this, let's do some gold, just going to dip my pen in, and then we'll just see
if we roll through here. Oh, look at that. Whatever is in these
little graphite things, man, they repel the
ink beautifully. Look at that. Let's clean that nearby out. Now, we're going to try the
black ink just for giggles. Let's see, we want to go ahead and
put another color on here. Let's do this yellow. I like making something
of my color samples, so that's why I thought
wouldn't this be fun to do these like this. This is the black ink. Look at that. It repelled really nicely too, look at that. Look how nice that repels. It doesn't give me a nice
fine line because it's wet, so it's just
spreading right out. But that was an
unexpected surprise. Really the finest line
that I'm going to get out of these is going
to be with a pencil. It might be interesting to see, because I'm using
water-soluble pencils, might be interesting to know if a regular pencil
would give us that. This is a regular pencil, not a water-soluble
graphite pencil. Let's just pick up another one. I got another piece
of paper over here. I like these experiments because this is how I
can figure out later, what do I want to maybe do? Let's see if a regular
pencil does the same. Oh, look at that. Very interesting. Does not do the same. Let's go with our
water-soluble and see. Oh my goodness. That's crazy. Whatever it is that makes this water-soluble
repel stuff in there. That's crazy. I didn't even expect
that to be the answer. I thought surely
that would work. Then we could try. Let's see, this is
a Tombow yellow. I don't know some
kind of pencil. Let's see what we can
get with a pencil. Let's do some yellow on here and see mark-making
with a colored pencil. Does not work. Does not work. Do you have anything
else over here? This is a Stabilo mark
solid black pencil. Check it out. This is another really
fantastic option. Water-soluble any of
your Stabilo pencils. Because look what that just did. Huge, surprise. I wasn't even expecting that. Looks like the key to
these really doing some fun things is
the water-solubility. This is a creator color. I've got some Pitt Oil
pencils over here. Let's see. Oh, this is a Chromaflow. Let's try that. Let's just try this. This is a sepia
light, creator color and a Derwent Chromaflow. Just grabbing a
few of the things that I've got over here. Oh yeah, and the Pitt Oil base, let's just try these because it's things
that I use a lot, so I want to try them out. Let's just get
enough color going. Here's the Pitt Oil
base, does not react. The Chromaflow, does not react, and this creator color sepia. Oh, well now it does, seem to be water-soluble, but it does not seem to
be repelling the color. Let me put some of this
down the side and see. Oh, yeah. These creator color ones do seem to be water-soluble,
they are not. Here's a black called charcoal. I think that's
water-soluble too. This one feels like a charcoal. Does not move it. Biggest surprise here
was that India ink, that black magic,
just India ink. Big surprise, the gold, I thought it might,
I wasn't sure. The pencil, of course
that was going to do it. But the biggest surprise
was the Stabilo. That one really worked great. Just showing you
some other options if you don't have a
water-soluble graphite pencil. But let me tell you, the
water-soluble graphite pencils are some of my favorite. I've got Art Graft and
the Faber-Castell, and they both work
about the same. If we run some of
this up this way, this is the Faber-Castell, this is the Art Graft. Both of them repel beautifully, and I like the 6B. I also have the other
one that is a 2B. That's a 6B, I
bought more than one because I thought I'm
going to use these. That's a 2B. Sorry, those are all 6Bs. This is my 2B. My 2B, it's just not as bold, but it's fine also. Look at that. Oh, just totally ran
that color around. Did you see what that did? The 2B is fine too. I just happen to like
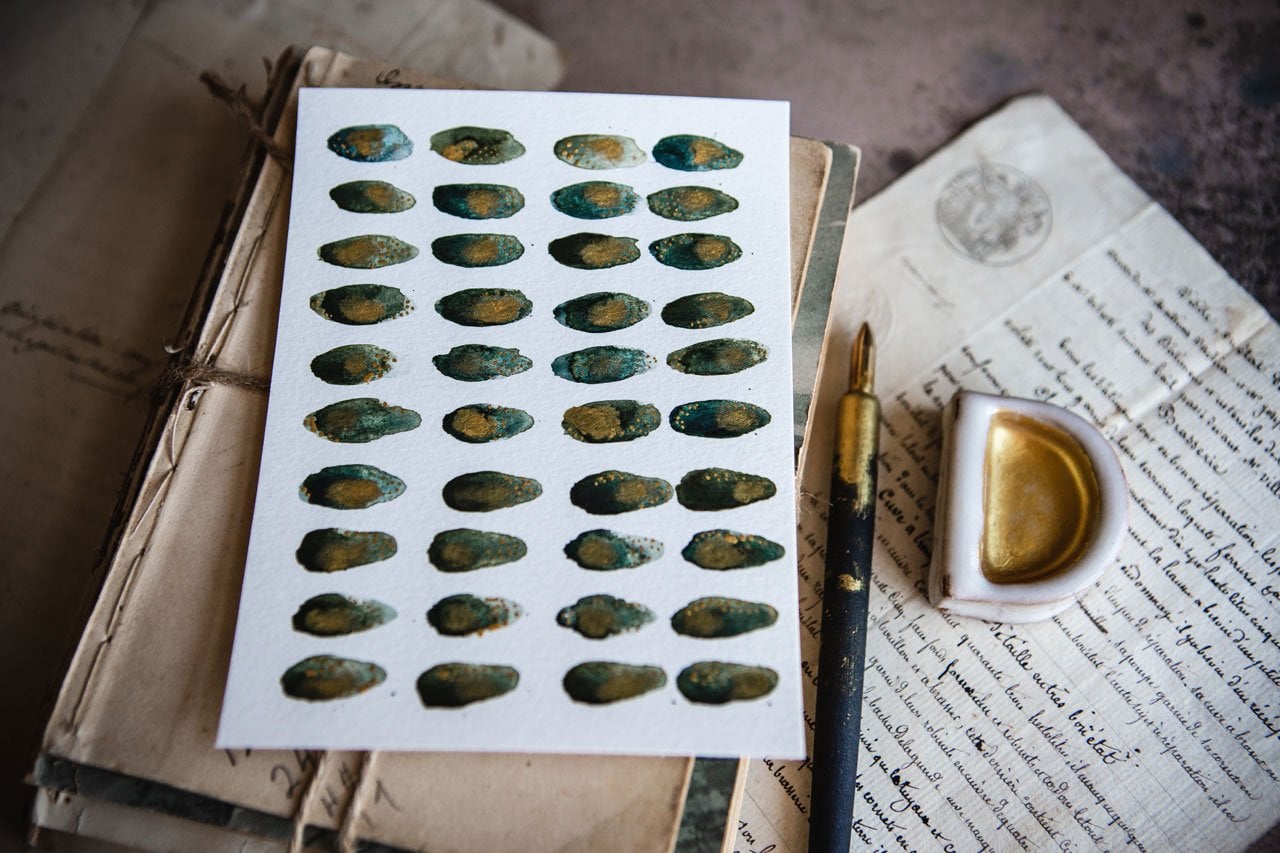
how bold the 6B is and that's why I have that one. Just fun a little color test. What I want you to do
if you're not playing with the graphite watercolors, or some graphite
watercolors that you made because these colors right here are the ones I made in
the watercolor class that I did for
graphite watercolor. If you're playing with
regular watercolors, go ahead and do a little
color sampler test and see, are you going to get any water repelling on anything
that you try, or do you need to let
it dry and mark-make? This is the color little sampler that you can just
throw that on there, play with your
different mark-making tools and see what's
it going to do. Do I need to let it dry first. Just a fun little
watercolor tests there with our water-soluble
mark-making stuff. I will see you back in class.
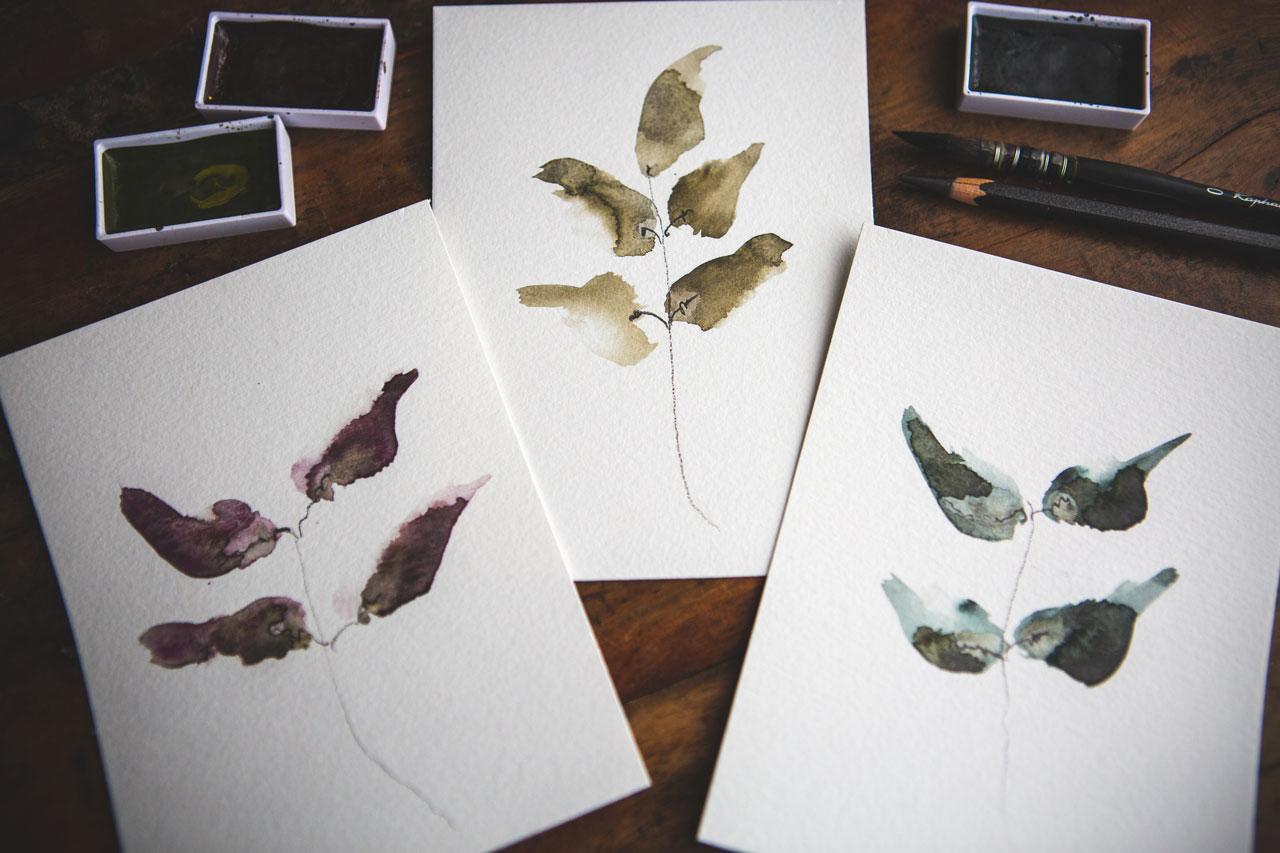
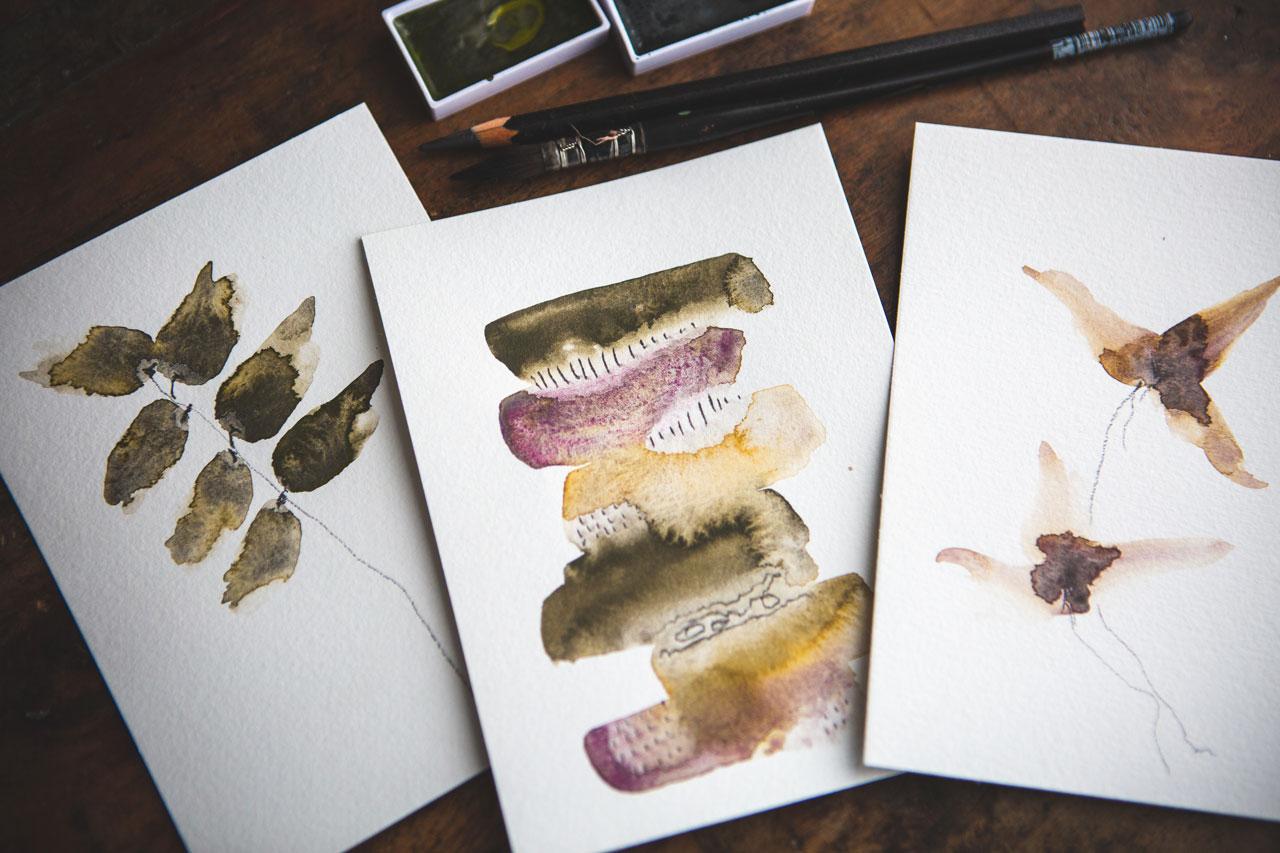
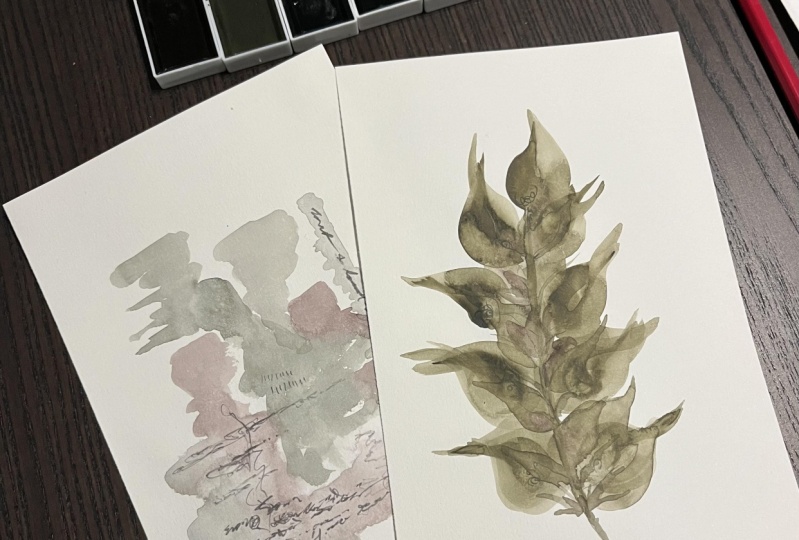
6. Leaf Abstract: I thought what we
might do is start with a simple leaf project because these are super fun. They look like an abstract
leafy planty thing. It's fun to start just practice and I'm going to be
using either the green, the graphite green, or the graphite
yellow to make these. I'm using my number
0 brush here. I'm just going to get this
covered in some watercolor. If you haven't swatched out your different little
colors in a while, this could be a good
time to swatch them out before you get started. I'm basically going
to squish this down and bring it up with a little
tiny twist of my brush. Because I really want
the granulation. I wanted to separate it out. But I wanted to
come back as a leaf and just see what we can get. I've almost thought too, let's just let this do
its thing for a second. I'm going to take
my graphite pencil, and this is the fun part. I'm going to draw a line out
here and attach each leaf. Then look how. If it's still wet, I love watching that
watercolor separate and jump away from
that graphite. Let's set this to the side. We'll let this one dry. I'm going to do a couple of these in some different colors. I want to be a little
more centered. Let's see if I can do that. Look at that. These are just abstract. I'm not painting
a specific leaf. I don't want it to be doing something so that you're like, that's a such and such plan. I just want something
fun, interesting, simple. Just see what we can get. That's pretty. I love that one. I can just paint
little leaves all day. Now, once we've got
like a one-color leaf, let's try two color. Let's jump in there
with multiple colors. I'm just going to paint
some and just swirl it out, just doing what we can get. Maybe we'll dip in
some of this yellow. I love that. Let's do a little
bit of graphite. Do you see how that? Look at how that just runs
that watercolor around? That was super cool. My goodness. Let's just leave
that one like it is. That just did like the coolest thing with
that right there. My goodness. That one's going to
be really pretty. Let's try some other, one other color here. Maybe let's try
this yummy purply. It's a pink that I mixed because it's one of
the ones I'm mixed. But it's so cool. Look at that. Maybe we'll mix that with I think this is graphite red. I will just throw some
graphite red out there. That's pretty, maybe
we'll go ahead and get a little stem
out there going. Just like watching that
watercolor run from it. That's really super cool. Maybe a little bit of
this graphite yellow. I just want to dab a little
bit of those colors in there and then just let them
run and do their thing. Then if we look at the ones
that's already drying, look how pretty that is. That is like so beautiful
and super simple. Now I could get a mat. Then this could be ready to
frame or make into a card. Look how pretty that is. It's very simple. It's very minimalist. We're just letting
the watercolor be the beautiful part
of that piece. This piece is still drying but look how pretty
that one's coming out. This one, look how beautiful
these colors are blending in. Just doing their
thing, so pretty. This one too. Colors are doing something
super fun and interesting. I'm going to set
these to the side. I'm going to let them dry and then I'll have
some photos at the end of this video on
how pretty these ended up. But I want you to give just
a simple leaf a tryout. This is some leaves
that I had done just for myself that I
thought were beautiful. Yellow and that pretty pink
or purple in there that its final color like yellow
ocher and then that graphite. Red, that's from the pens and then this pretty
graphite red. These just are so pretty. Like I could just
paint these all day. Look how pretty these are. I'm going to let these dry and then I'll have some
pictures at the end of the video on how they
look when they're dry. I'll see you back in class.
7. Flower Abstract: [MUSIC] In this
video, I thought we would expand a little bit on our leaf thing and maybe come up with just a simplified flower. Look how cool that is. We're going to do a real
easy, simple flower. I think I'm going to
do a little bit of my yellow ocher color
that I already made. Again, I'm just making a petal by squishing it down and
then pulling it out. Maybe we'll have
like two flowers on this one so maybe I'll do
a second one right here. I'm not thinking
too hard about it. I just want an abstract, something cool, something
a little different. Now I'm going to drop in maybe this pink graphite
pink that I made, is just like a light pink
with the graphite in it. We might dip in some of this graphite red
that's from the pan. I just want to watch them
spread out and do their thing. I don't want to
work it too hard. Then I'll take my
pencil and I'm going to put like a little
stem coming out here. That was a little darker up there that I wanted
because I actually want the little stems to be like
the least important part of this so I wanted them
real light but look how they instantly pushed
that watercolor up and started repelling and
doing something super fun. [LAUGHTER] Look how pretty
that is. Here we go. Let's just do. Let's just
see what else we can get. Maybe a little of this orange. I'm just putting it down and
twirling my brush out to get just a fat something petal. You can push your
paper around in different directions
if you want. You don't have to go
all the same way. Then maybe some of
this graphite red. Just let it do its thing. I want to do all
this while it's wet. Look how cool that is. Something really soft. Get a little graphite up
there at the stem base. Let it do its thing.
That one's pretty. Look what that's doing.
It pushes it all up. Super pretty. I'm loving that. I did drop my little graphite
and marked my papers. I do have one of these
little artist needing erasers and I'm just going to erase that piece of graphite or I didn't want it. There we go. Let's set that
to the side and let it dry. Let's try one more colorway. Let's see what do we want? Something fun. Maybe we'll do this green
in one of my graphites because it can be
like a maybe a flower that's not quite turn yet. We can even bring them
up almost like a daisy, like bring a petal up and then bring these out
and then bring it out like with a pretty
curved like maybe it's more like a not a
daisy up Tulip, like a tulip thing. That would be finals. Put this this ocher
color in there. Maybe a little bit of this
graphite red at the base. These are fun. Look
at that's doing. All love watching that water. Do its little thing
and spread that color. Then we'll put a
little base here. Come down for that stem. Little base here and come, oh, look how pretty that is. [LAUGHTER] I definitely
want you to try some of the flowers mixing and letting that watercolor just run
because when these dry, they're going to
be really pretty. This first one that we did
is already getting dry. I'm looking at the cool things
that watercolor is doing. Super fun. This one is drying. It's not completely dry
but it's getting there. I'm going to let these
dry and then I'll have some pictures at the end of the video on what
these look like. Let's do another
project. [MUSIC]
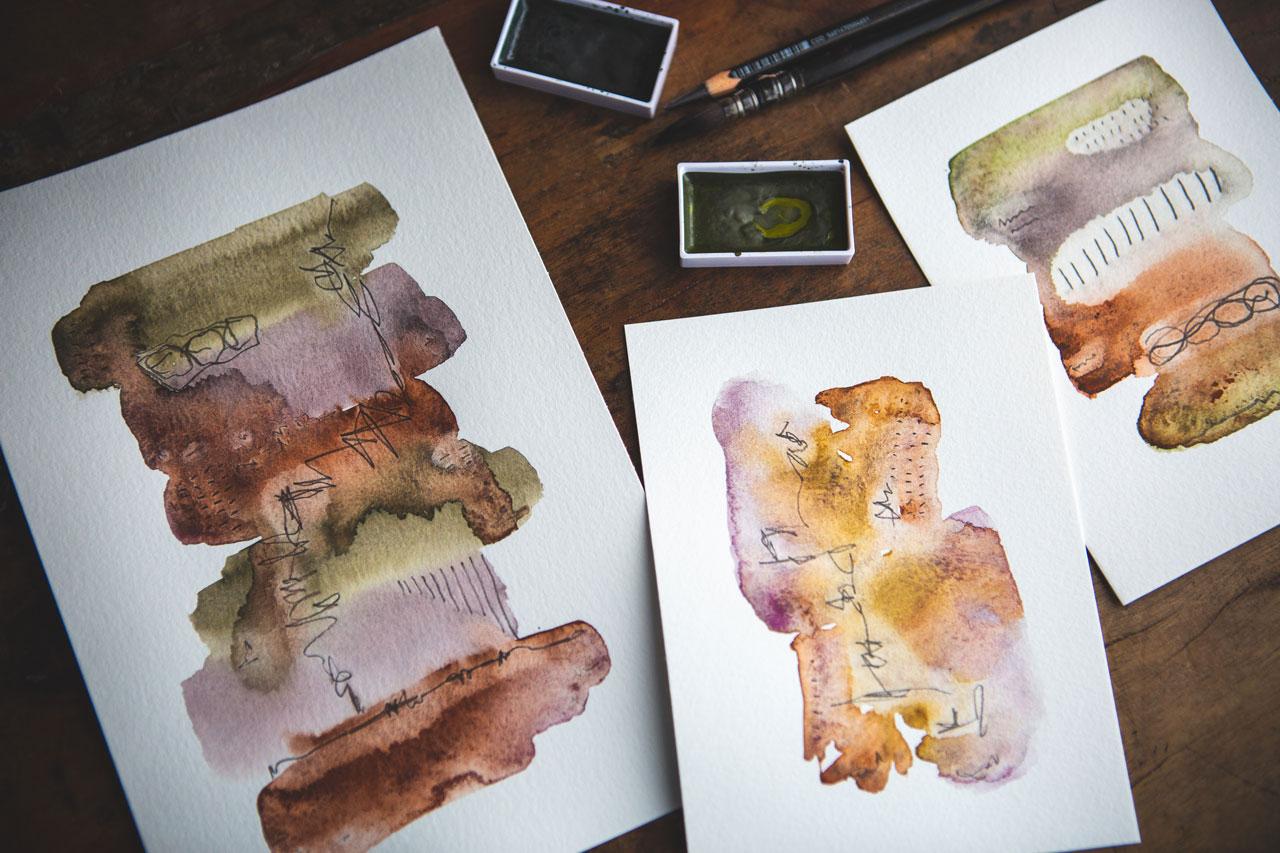
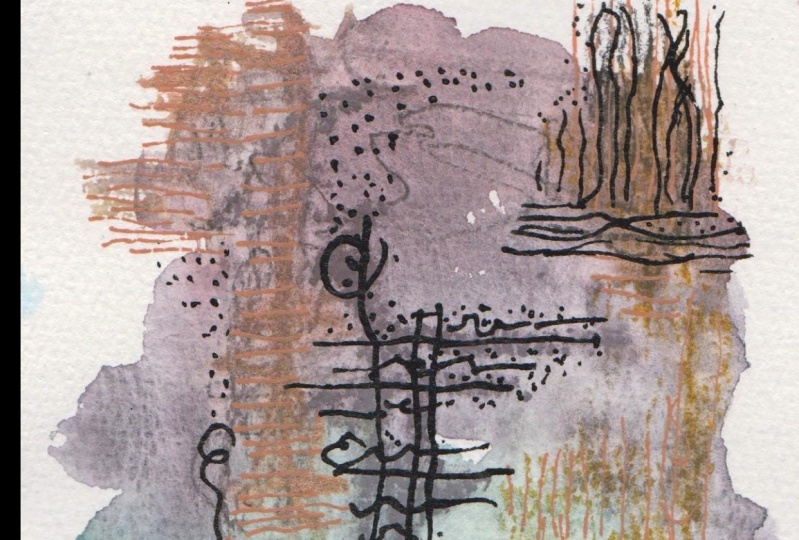
8. Stripe Abstract: [MUSIC] This project,
let's make one of these yummy stripe things. I like things that are
stripes or stones. I like the different
marks that we can make. Now, the difference here is if you're using regular watercolor, you might want to wait
till your watercolors dry and then mark
make on top of them. Because I'm using the
graphite watercolors, I'm going to be going
fairly fast and then, immediately coming in
with my graphite pencil and mark making because I
want to see those areas repel where they're going to do their fun thing and add to
the interest of my piece. Let's go ahead. Hello the yellow. Let's go ahead and
make a yellow stripe. I'm not doing anything
other than just laying the color down
in a stripy fashion. I do want the edges to touch because I might want
the colors to run. We're just going to
see what we can get. Look at that color. They don't have to be perfect. You can come in
here with not being completely a stripe,
more of abstract. Let's just go ahead and
start playing this. I'm going to just start
doing some mark-making, maybe some lines,
maybe some dashes. Look at that. I just love
watching that color run. Maybe I want to do
some just scribbly, swirly things over
here. Super fun. Maybe some little dots. See, look how pretty that is. Super-simple, really pretty. Let's do some more. Let's change up our colors. That's so pretty. Maybe
I want some green. Another thing that I didn't do, we're going to do
that in a second. Maybe we want this green
completely different. Maybe some orange. Not even thinking really
hard about what colors and what kind of layer
that I'm putting them. Maybe I want some
of these to run. Maybe we can tip the
paper while they're wet. Look at that. I just did. That's so pretty. Tip
it the other way. This will give me some
separation and some granulation. Maybe I want a little tiny
bit of some color in here. Oh, look what that just did. [LAUGHTER] I know you think
I'm a nut, but I don't care. Watch that color just
run from that graphite. That's super fun, and just totally made all
that color go whoop. [LAUGHTER] So
whatever mark-making. You could do lines,
dashes, swirls, dots, just want to see the interesting
things that it does. Just some scribble,
if you're feeling in the mood for some scribble. Super fine, just the way that
totally repelled all that. [LAUGHTER] Let's do
one more. I like doing a couple at a time. Some of them when they're dry, they're going to be like,
oh, that's gorgeous. Some of them are going to
be like, oh, terrible. If you do more than one, you'll definitely end
up with pretty stuff. These, I'm offsetting a
little from themselves. See if we can get that
watercolor to run a little bit. Super cool, super cool. Now let's go ahead and do
some fun little mark-making. Maybe on this one
we'll just get like a pretty little scribble
going all the way up there. Oh, that's super fun. Look how that
totally repelled and all the way up the line. [LAUGHTER] Look at that. Oh, my goodness, it's so pretty. [LAUGHTER] That's pretty. Just adding in some
little [inaudible]. It's real pretty. Look at that. [LAUGHTER] Right love that. So see how fun and simple
and easy these projects are, and look how pretty
these pieces are. Okay, so now let's go
paint some stripes. Do a little mark making. I hope that through some of these projects I've
convinced you, you need some
graphite watercolors because that was
totally thrilling watching that paint repel away
from the graphite pencil. Then the way that
they granulate and do their thing when you've
done that, look at this. That's so pretty the way that has granulated and separated. It's just added the
prettiest elements in there. All right, so I'll
let these dry. I'll show you at the
end of the video what they looked like
when they were dry. And I'll see you in the
next project. [MUSIC]
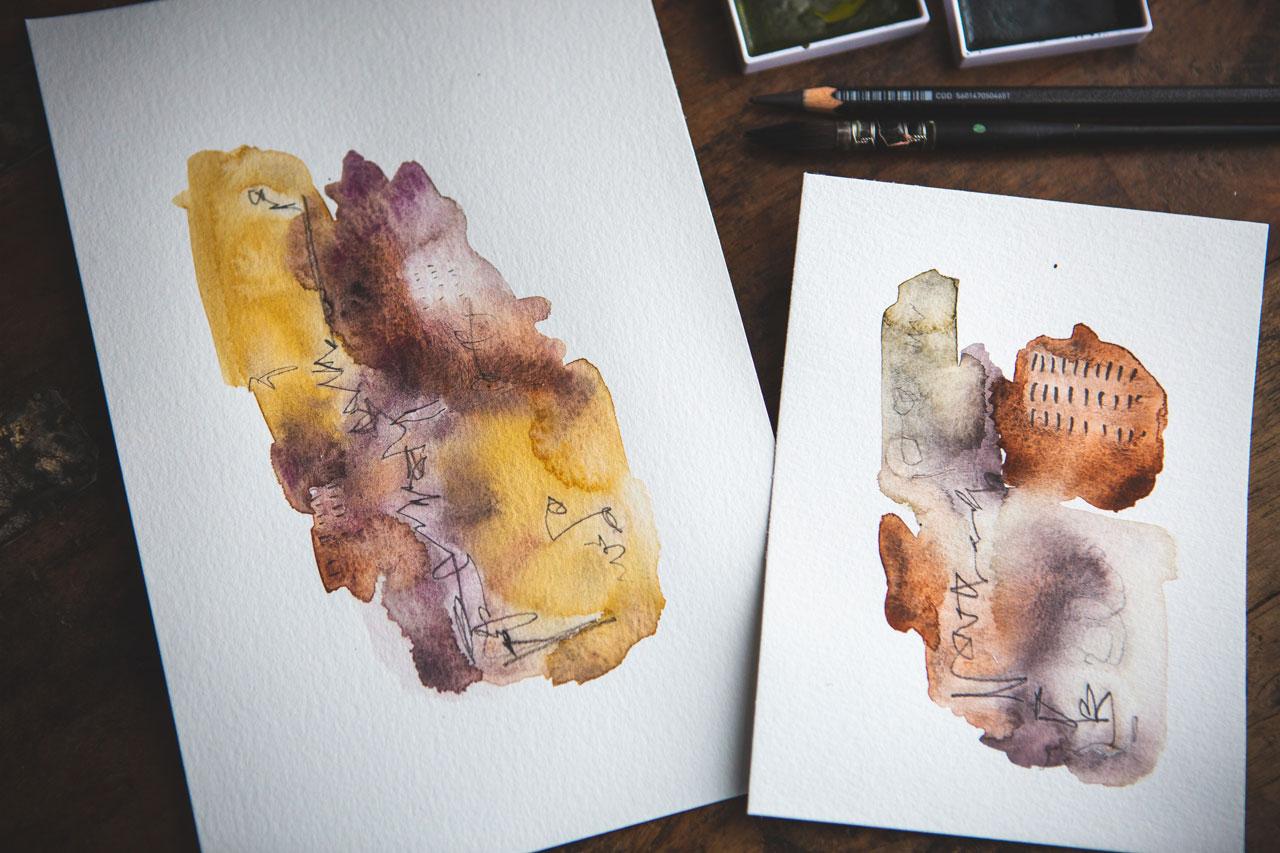
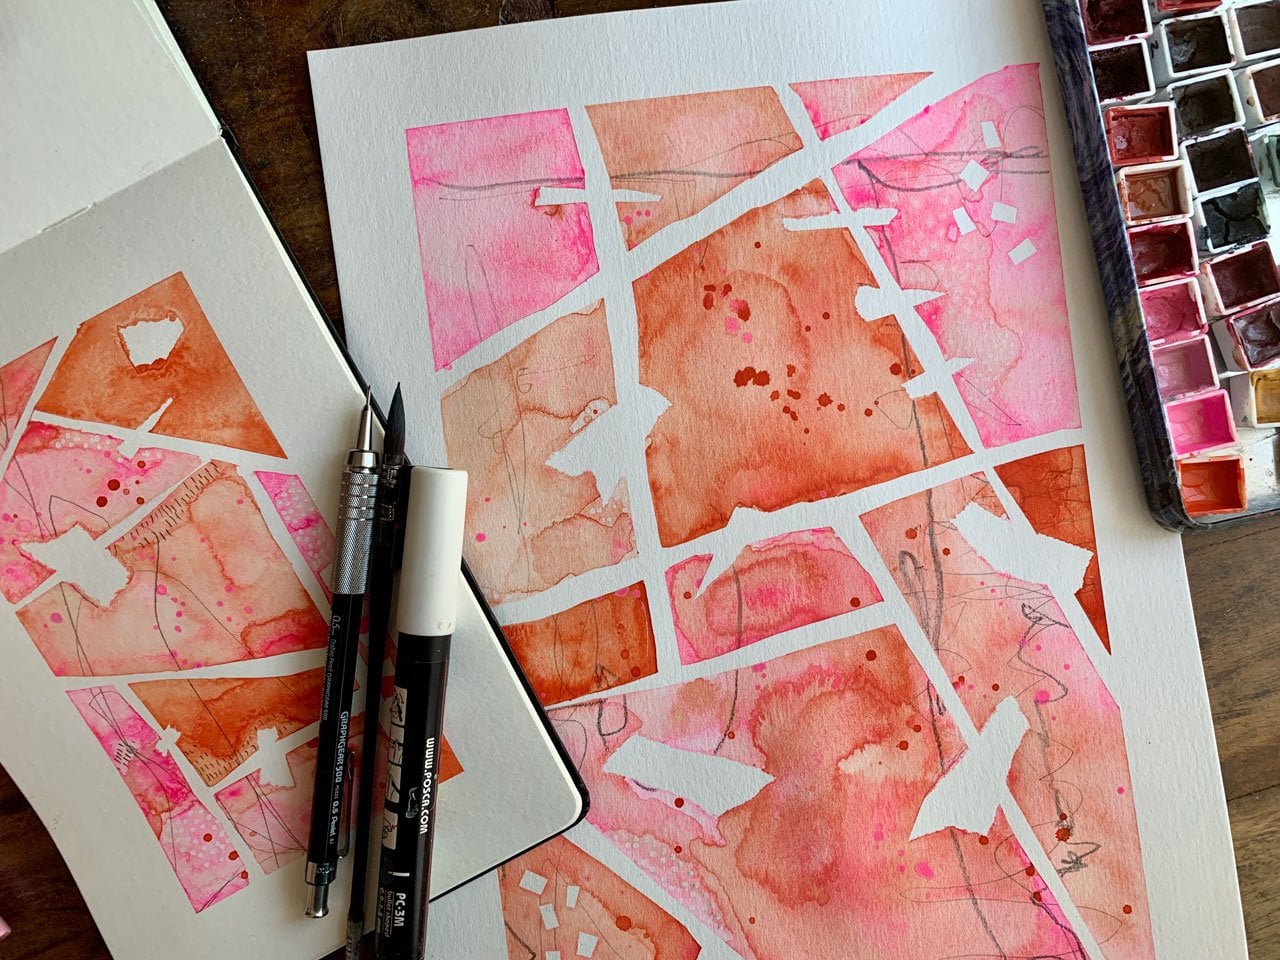
9. Random Abstract: In this project, I want to
do some abstract pieces, not too different from
our stripy pieces, and then do the graphite
and just see what we get. I'm just going to do stuff
that's a little more just seeing where
my paintbrush goes, and just see what we get. Maybe I'm going to put some
other colors in there, again, I'm just not thinking
super hard about this, I don't want this to
be something that's hard or stressful, I don't have any particular
idea in mind here, I just want to drop paint
in and see what can we get. This is cool and then
before it's dry, I definitely want to
do like some scribble, maybe like we did on one
of our stripes there, and watch that water repel
and do crazy stuff like that. That is crazy. Maybe some
dots or dashes, or lines, I'm just getting in here
where there's areas of water, so let's just let that dry. We're going to let
that do its thing. Water colors are magical because you're going to start
off thinking one thing, but because of the
way watercolor works, it's going to move around and do its own thing and we're
just going to let it. I'm obsessed with
pink and ocher, and even though this is
not really still a pink, it's more of a lavender, the way that it mixed
with the graphite, I'm still just obsessed. Let's do some orange in here. With that pinky,
purply, yellowy look. I even just redid my bedroom, I went to TJ Maxx. I guess I'm a little tiny bit ahead with the colors this year, because ocher and light pink
seems to be all the rage, all of a sudden, so I'm like, I'm a head of the fad. Just happens to be my own personal
current obsession and not fine when she like it. Has that ever happened
to you before? I have a degree, went to school for interior
design and I got to tell you, I've never actually been in
front of the newest fad, just because I was obsessed. I've always been in the
fad like as they said, "Oh, here's the colors
for this year." I don't know if you
remember years ago, but light gray and Peach, that's pretty I like that one, pretty, must do one more. I had gray and
peach, I loved that, there's lots of
times when I'm like, I'm buying right into the
popular colors this year. But this year I feel
like I beat the crowds. When I was at TJ Maxx, I saw that bedding and I'm like, "Oh, my goodness, I
got to have that." I have the prettiest
bedroom now with this pink quilt and these beautiful
pillows that pull in, and I'm not even a pink person. You don't normally see me use
a lot of pink in anything, even though I do pink and ocher
in my painting sometimes, but you don't see my house with a lot of pink in it at all. I'm more of a blue-green person, so now I have a pretty
bedroom totally in fashion, This one's fine. Look at this, this is fine. I'm going to do some
little scribble in here. Doesn't have to be heavy, you can do real, real light. Look at that one. Fine and these are so much fine,
I'm going to do one more. All right, let's pick some color that I have not already picked. Let's go with this one. Look at this, this
is yummy color. See these blues and greens
are what I tend to go for because that's me, that is I'm a blue-green
kind of person. But now, we can say I'm a
ocher-pink kind of person. What do we want
to put with that? Let's do some ocher. Let's just see what we can get, just drop some color in
there, maybe orange, blue and orange are
right there, opposites. That's fine. I am trying to get
these colors to run into each other
a little bit. Let's just do that. Look at that orange, just run, oh, my goodness I love that. Running these colors around
into each other, super fun. If you're doing the
regular watercolor, let the watercolors dry and then Mark make to your
heart's content with Posca pen or something
like that. Super fun. I'm loving these. We
can instantly take our little mat board
here and be like, "Look at these framed up, let's get the bigger piece." I can totally see that framed, I can totally see
this one frame, look how pretty that one is. These random, just
pretty little abstracts. These are fine. I could just sit here
and do these all day. Look how pretty that is. That is a pretty
framed abstract. These would make really
nice little gifts, these will make pretty little
card fronts, super pretty. I'm loving these little
abstracts are super fine. The stripes are fine, but the little abstracts
are super fine too. I'm loving this. I hope you love
doing this project. I'm going to let these dry and I'll pop them at
the end to show you how they dried and I will
see you back in class.
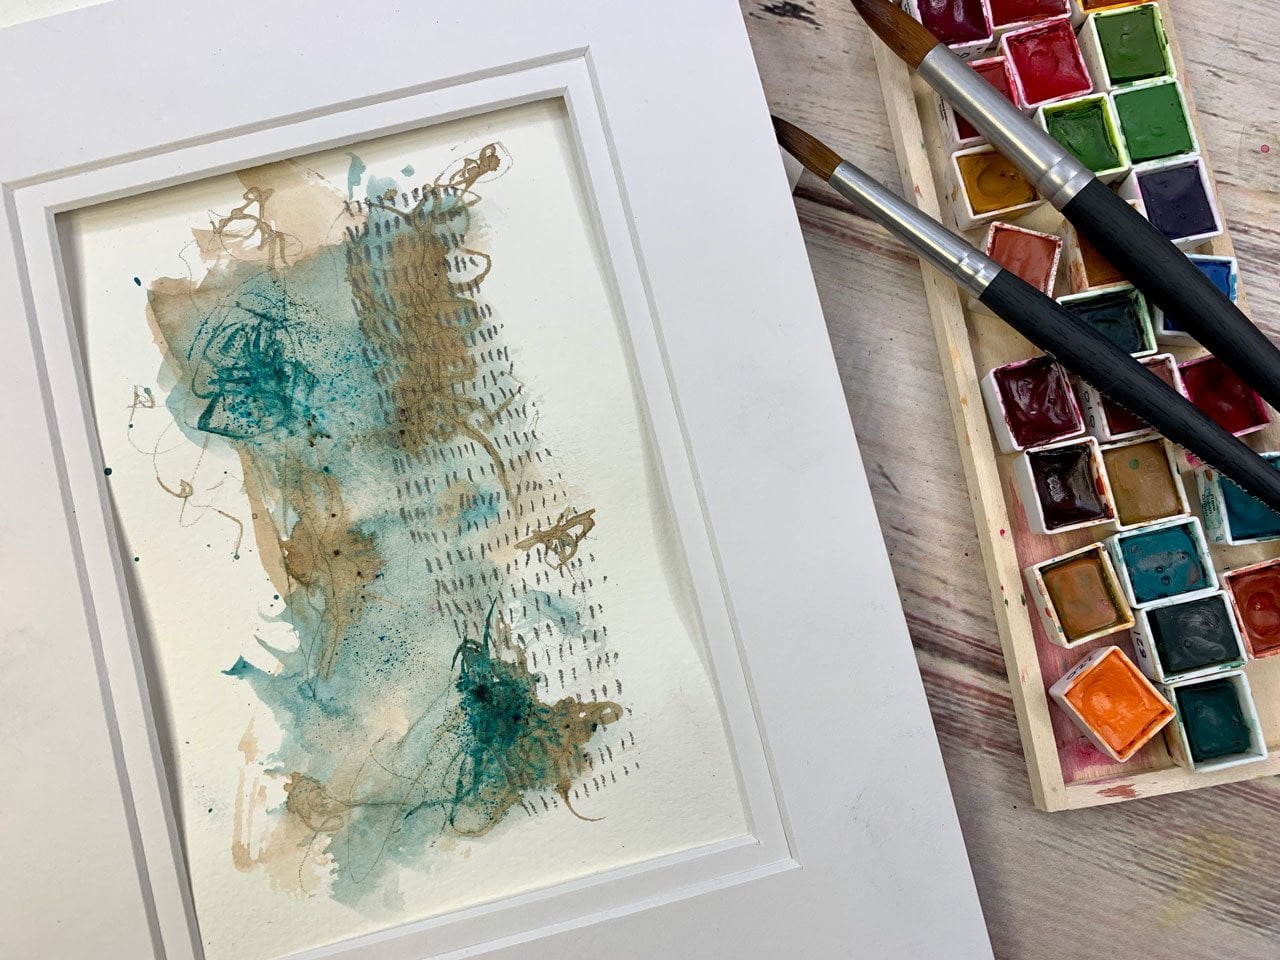
10. Going Larger: [MUSIC] All right
I've been having so much fun in class today that I actually
don't want to stop, so I thought, [LAUGHTER] let's
just play a little more. This is why I like
making workshops. It gets me up here at
my little art table, playing and doing fun stuff. I thought, let's just keep
going for a little bit because the projects in
this class have been so easy and pretty
fast that I thought, let's go a little bigger
with our abstracts and our stripes because
they're so pretty. I thought, what if we put the
graphite on the paper first and just a little bit
of some mark-making. Let's do one of those
little abstract ones and see if it repels, if the graphites below. I love doing little
experiments like this. Because this is
water-soluble graphite, so what I like about it
is we can add water to it and get it to do some fun stuff. Then we can put color
on top of that. I'm obsessed with this ocher. I can see that underneath
it does not repel. Super fun little
experiment there. I'll definitely do some
mark-making on top of this. Let's come back with
this yummy pinky tone that we know all of. When it's abstract, it's almost harder
because you're like, I don't know where I can put
stuff then going to like it, but it's almost easier
because in my mind, I have the freedom to
put some of this down. I don't have to worry about trying to paint
like a real picture. Actually, now that I said that, it is repelled a little bit, but it's not quite the same. Let this do its thing. Let's set this to the side. I don't want to do
the same colors but the graphite on top, and then let's see how
it's different [LAUGHTER]. Fun. It doesn't have to
be in the same place. I mean, I could go ahead
and make one of these. Also, this is why I
have the bigger brush which I have not gotten out, so let's get the
bigger brush out. We're going bigger. Sometimes it's easier to go
bigger with bigger materials, bigger mark-making, bigger
paint brushes just bigger. I'm dropping water where I
don't intend to drop some water so let's get that in there. Maybe because when I did this, I did like drop in some of that
orange in here. Let's see. After you do enough
little paintings and different things like that, you'll start to
see what you like, where you like things to be. Let's drop a little bit of
a different color in here. Look at that. You'll start to get
your own rhythm. Let's go ahead and
do some pencil. Then maybe you'll have your own definitive
style when you're done. You'll have things that you do that none of the
rest of us think of, or maybe you'll have your own little set
of steps and marks and places the way you
like to lay color. It's fascinating to see what we'll end up with
doing stuff like that. See, I can definitely
see that repelled and did totally different
things to the color. Because look at this one. This one, you can really see it actually did
repel a lot of the color everywhere that I had graphite
on the paper beforehand. How cool is that the
way that did that? This repelled
differently because there was no gray underneath and we're going to have
heavier bouts of color where we didn't over here. How cool is that? Super cool. [LAUGHTER] Let
me answer that for you. Super cool. [LAUGHTER]
Let's do the same thing, but let's do the stripes. Not the same thing, but I
want to do a stripe one. I need to work a little
faster than I just was because I don't want
the stripes to dry. I want them to run
into each other and I want to do some
of the color repelling, so I need to keep it wet
and moving pretty fast. See if we can get some
of this color to run. Look at that, totally
ran. Look at that. [LAUGHTER] Let's get some
shape and mark in here and get that color to repel. [LAUGHTER] My
goodness. Super cool. Just put some different
marks in here. You can do your
favorite mark-making. I'm not thinking hard about it. But the more I did of these that I would get a
little more exact and a little more precious about what I was using
and where I wanted it. But for this, I'm just
I'm keeping it loose. I'm like, okay here's what
we're going to just try. I'm not trying to do
anything specific. I'm keeping it fun
and loose for myself. That was a fun little
thing there. Look at that. [LAUGHTER] Maybe up here, maybe I want some lines. I want that yellow to move. I want to not get it on my hand. Don't want to do that. That's okay. That's
fun. Super fun. Let's paint one more stripe. I'm telling you, I'm just not ready to
get up from my table. [LAUGHTER] I do love
pushing color around. Let's do this green. We could go ahead and try to
put this in different places. Maybe this red, maybe we
want some of this pink. That was almost too close. Let's go ahead and just
pick up something else, maybe this orange. I'll let that blend
with that pinky one. Look at that. I like this. Don't want this water
drip right here. Let's just get rid of that. Let's see if these will
run before we mark make. Look at that. I love what's
going on right there. Almost don't want
to change that. But I might want maybe
some scribble down here. Pretty. That just
totally made that color run over here to the side. How cool was that? Let's just scribble right on that burgundy
little line here. Look at that pretty. If it's already dried,
I've waited too long, but I'm going to put some
graphite marks in here anyway. I'm trying to work fast
enough not to have it dry. I want to get lots
of little areas of something fun going on. That's super fun. Just a little bit of
light scribble or just touching that
watercolor makes it move. That's so cool. Pretty. Look at that one. That one's going to be pretty. I can't wait to
see that one dry. Super fun. We've got some
yummy little stripes. We've got almost dry, our fun larger abstracts. I really did like experimenting
with the color under, but I'll be honest and tell you that that's my least favorite. I like the color and then
the graphite on top. That's the kind of things
that you need to play and discover at your table. I want you to sit at
your table and say, what if I put this on top, or what if I put that on top? What would it look like
if I let things run, and what would it look like
if I let things not run? What would it look
like if I did this, or that, or what have you? That's how we run into
stuff that we're like, "This is my thing. I love
this or I love that." That's how we're going to
discover some of those things is by trying it one
way and then say, "Okay, how can I shuffle
that up a little bit and try it a different way?" I hope you have fun making
these a little bit larger. I want you to take
your smaller pieces as inspiration for
your larger pieces and just do a larger stripe or a larger flower or
a larger abstract. Because I still have two
pieces of paper left, why don't we just do some
larger leaf and flowers? Let's just go ahead, make two more big ones. We'll just play with
everything that we did today and go bigger. Let's do the yellow. I'm going to do
that flowery thing. Going bigger, I want one
here and maybe one here. Then I want the stems. I've got the bigger brush and I'm going to go
down and come up. I'll do it a couple times and get that flower
doing its thing. Maybe a little here. That one's a little bigger. See how we're just going down, and just pulling up, and
we're just giving it its own little moment
there to have a shape. Then maybe we'll come throw a
little bit of color in here. Look at that one. That one totally made
everything just go [NOISE] [LAUGHTER]
That was that red. Then if I come in here with
a little bit of a stem, maybe a little stem on this one. Super pretty. Look how pretty that is. I'm trying to stay
minimal on some of these, but because this is so big, I could actually go ahead and
do maybe even another one, maybe one right here. Maybe a little bit of orange. We could decide as we're going, yeah, let's make this a bouquet, or let's change
that a little bit. I don't quite have enough
because we went larger. I want you to figure out how can you make this work
when you went a little bigger? That third one, that did it. Look how pretty that is. [LAUGHTER] Let's do a leafy one. [LAUGHTER] I really
love the two greens. Let's do those. Let's have a leaf at the top. [NOISE] Look how pretty that is. Then let's have some
leaves come down, like we're doing a
fern or something. How about that? Let's
call this a fern. [LAUGHTER] Look how
pretty that is. Then I'm just going
to flip it over and try to do the same thing. You don't have to flip it over. I'm just totally
messing up that leaf, but let's just not
even say that. I'm going to just go ahead, come through here,
and then up here. [NOISE] Look at that. Just connect them. I want to be real light, doesn't have to be dramatic. Let's come back with a brown. I don't want that
water up there. This brush, if I got
it down in the water, picks up water at the stem. Let's do the red
instead of brown. I want these to
move through here. If it's not moving, I'm going
to help it a little bit. Then I'll just let
it do its magic. I want to see the two-tone feel. I want it to be cool. That is super cool.
Look at that. Super pretty. Then if you think, my
stems are not dark enough, you can come back in here and make your stem
darker if you want. I just like the fact that it's almost minimalist,
almost not there. Don't put your hand
in your watercolor. [LAUGHTER] Look how
pretty that is. This might even be pretty
if we came back in with some of this other tone, this other green, but it looks like a blue to me. They start to dry and then
they look so beautiful. These are doing their little
thing, they're drying. Then when they are
completely dry, I'll have some
pictures at the end to show you what we got. I hope you enjoy these projects, making things go larger. I want you to experiment. I always like having little
projects to test out color and just see what do we have, what do I like, how do I want these
to be if I go larger, and then taking
these smaller pieces as my larger inspiration. Because you can see
on some of these, I was definitely playing and
experimenting with color. Then I knew instantly, I
would love this to go larger. It's also a place for me
to work out my mark-making and different elements
I might want to include on the bigger piece. For this one, I like
this little scribble and I've got some of that there. I've got the lines, I've got little dots. I like seeing small
ideas worked out and then large
implementing those ideas and just seeing what you get. I hope you had fun
today in class. I can't wait to see
the different flowers, leaves, stripes, and
abstracts that you made. I kept playing and having fun and I thought, let's just
do lots of little projects and get you at your art table making lots of pretty
little things, and they're so fast
to do that I think you're going to really
have fun with these and I'll see you back in class. [MUSIC]
11. Final Thoughts: [MUSIC] I've really enjoyed
having you in class today. I hope you enjoyed looking at the different projects
that we were painting. If you tried out the
graphite watercolors, I hope you had fun
watching those repel from the graphite
water-soluble pencils. That's my favorite part. [LAUGHTER] I've become obsessed with these graphite pans. I love how smoky they look, and I love the unique
effects that you can get when you're playing in some
graphite pencils with them. I just wanted to have another
day to sit at my table and play in a supply that
I'm particularly loving. I hope that you do that too. I hope that you
have a few supplies that you get so excited about that your brain
is just thinking, what can I do with these? Let's go to my art room and
have some fun. Let's go play. Let's see what we
can create because I'm so excited about this
particular art supply. I love doing that myself. I've got a whole string of
graphite watercolor classes now because I got so excited about
that particular product. It's fun when you do that, then you can't wait to
go to your art room and create some art
and just play and watch the colors do what
they're going to do and enjoy the time that you
have when you're creating. That's my goal, is to enjoy the time
when I'm creating because I can't tell
you how many times I've come up to my art
room through the years and sat at my table and I've
got angry because nothing, no masterpiece was
flowing out of me. I was looking at the
blank page and thinking, I don't know what to create
and then I'd be mad for days. Now I approach art quite
a bit differently. I enjoy the process almost
more than what I end up with. Then when I end up with
something beautiful, well, I'm like, "I can't believe I made
this, [LAUGHTER] I love it." Then I'm framing things
and giving them to friends and I'm like hanging
them around my house. A lot of that just had
to be me figuring out how to loosen up and let
go of the expectations that I had to create
a masterpiece when I sat down on my table. Now I scribble on the paper so that it's not white
anymore if I have to. If I have to get past that
blank page paralysis, I'll just take a
crown or a pencil and I will scribble
on that paper and that will at
least get me started. That's how I got
over that block. Now I sit and I'm like, I'm not trying to create
something specific a lot of times because I like abstract art. I'm thinking, let me just
throw some color on the page, and let's see what it
does if I do this or that or whatever it is that I've
played with that I'm thinking, I want to try this or
I want to try that. Now I approach all
my art that way and the art classes
that I come up with, I'm like, let me take
these three supplies that maybe came in my
art box this month and see what we can
make with these. It's usually going to be
some fun abstract something because that's the
art I like to create. But it gets me out
of my own way. I can sit. I can enjoy. I can make some
crappy pieces of art to get to my better
pieces of art and I don't get angry about it. I enjoy my art-making
so much more now than I ever did before. I want that for you. I want to come up with
some easy wins for you. I want to come up with
projects that aren't too hard. You could do it as a beginner, but you could do it as
a more advanced artist because I've been doing
art since I was a kid. I feel like I'm advanced
in my art-making things. There were still many years
when I was angry at art. [LAUGHTER] Now I want to come up with things that are beautiful, that are not too
hard to accomplish, and that'll get you on
your road to creating and having some successes
because then you'll get excited to come to your room and create. You'll spend longer in your
art room tweaking things and turning into your own
techniques and your own style. It'll get you to
where you want to be artistically creating, because
you're up here practicing and maybe you're practicing
the project I'm showing you, but maybe next week
you tweak that into something that's different, then you're like,
this is amazing. I want these for you. That's why I love
coming up here and creating some of these projects. I hope that you enjoyed
today's projects. I really hope I've convinced you after all of these classes that you need some
graphite watercolor. [LAUGHTER] I can't wait
to see you next time. Be sure to come back and
share your projects. I truly enjoy seeing what
you're creating from these. I'll see you next time. [MUSIC]
 DENISE LOVE, Artist & Creative Educator