Transcripts
1. Introduction: Have you ever been worried that you don't have the time or the skill or the money to be creative? Over the years, I have gotten so many comments from people feeling like their creativity is just it's not something that is for them. It's not something that they could ever get involved in because of lack of time or money or skills. I want to change that. I want to make sure that anybody can be created for even 10 minutes a day without having to spend too much money or have any skills. And that's what today's skill share classes all about. My name is civic order Baldo. I am a youtuber, a podcaster and a freelance artist and illustrator, and I have been making content on the Internet for several years now. And one of these questions and comments I've gotten from people is about their lack of time , ability or money to get creative. Taking time for creativity is so important. It impacts every area of your life, not just the area where you're doing hobbies or being creative just for the fun of it. It could impact your parenting. It could impact your work life it can impact your relationships that can impact your self esteem all by being a little bit creative every single day. So in this skill share class, I'm going to walk you through 10 different exercises that can be completed in under 10 minutes each. That can help foster and stimulate your creativity each day. You don't have any prior skills for these exercises, and you could pick materials up for them for under 10 bucks total. By the end of it, you should have an arsenal of ideas that you can expand upon for being creative for even a couple minutes each day. And you'll know now that creativity can be both fun and easy, and it can also be inexpensive. I hope that you join me for this class that you hit the joint button and you follow along, and I will see you in the next lesson.
2. Keep It Simple: it's easy to get overwhelmed with all of the stuff that's out there. It's easy to get overwhelmed with all of the different skill sets that you could learn different kinds of painting difference of sculpting, different kinds of whatever. There's so much to learn. There's so much to buy, and all of those things require so much time. So to get through all of that and to just get right to the creating, I'm asking you to keep it simple. First and foremost, in this course, we're going to be limiting our time rather than giving yourself an hour or two hours or a whole day to be creative. I am asking you to give yourself 10 minutes or less for each of these exercises, because when you know the clock is running, when you know you're under a timeframe, you will be less likely to second guess yourself whether you use your phone as a timer at the 10 minutes and make it happen in that time, whether use your watch, whether you some other kind of big timer, give yourself a clock to work against because you will be much more willing to make decisions to not hem and haw over anything and just create rather than spend your time dilly dallying, especially the more practice you get, the more practice you get doing something in under 10 minutes, the more likely you will be to work really quickly. And then you can start expanding your time for him outwards if you want to. But in the beginning, absolutely limit your time. Second way I want you to keep it simple is to limit your supplies rather than going and buying all the things. And believe me, I am somebody who likes to buy all the things I'm not even gonna dig into how much crap I have in this office. However, if you're either low on art supplies or let's say you do have a bunch of art supplies that you never use, limit your supplies. I will be telling you which supplies you'll need for each of these exercises, and I suggest you only get out what you need for the exercise again to limit your decision making. To make it easier to work and not have to second guess yourself for a second. Guess your choices, but you'll also save money if you feel like every time you want to try something new creatively, you have to go out and buy a whole bunch of stuff. That's not what I want you to do here. I want you to work with a limited amount of materials so that you're removing the decision making from the equation. Said you can work creatively and quickly without letting your supplies get in the way of it , and the third thing we're gonna do is limit your scope. What I mean by this is picking simple exercises. Each of these 10 exercises are simple, so you don't have to worry about being too realistic or two technical or learning too many new skills. You get to do simple, basic things that create something interesting when you're done with it, and by limiting your scope, you don't start tripping yourself up over whether or not what you're doing is good enough. You're just going to be able to do it and then be proud of it. You can always learn new skills and skill shares a great place for that. But in this particular circumstance, where focusing on getting you being creative every day, not getting you to be a master artist, and no matter what skills you have, you can pick these up and do them quickly. But the idea is to limit the amount of things you're worrying about doing, so that you could really enjoy the things you are doing. So if you could manage to limit your time, limit your supplies and linda your scope, you'll be able to take each of these little 10 minute exercises and come out of it every day with a simple, creative practice that gives you that little boost whenever you need it, which from there you can expand it onwards, and in the next lesson, we are going to talk about the materials you're going to be using.
3. Materials: no. In the last lesson, we talked about limiting your supplies, and that's what we're gonna be talking about right now. The materials that I suggest you use for the course of this scale share course. Most of the things I'm gonna be listing here you can find online on Amazon or at your local craft supply store, and they should all be inexpensive. There are other options, and I will put some my recommendations in a bonus printable PdF that is in the projects and resource is tab of this class if you'd like to spend a little bit more money or explore your options. But for this particular class, I am going to be using things that are inexpensive. And first of all, it's always handy to have a pencil. I've just got a mechanical pencil here, but you can use any old number two pencil that you've got an eraser would be nice is well, you're also going to want a black pen. You could use other colors of pen. I recommend black, and ideally, it would be a water resistant pen pigment. Micron is a decently inexpensive brand. For this, you can usually get one single one of these pens at Michael's for a couple of bucks. Of course, you could always use felt tip pens, ballpoint pens whenever you've got lying about the house. But if you are going to use any water color, you want to make sure that Japan is labeled waterproof or water resistant. Speaking of water colors, everything that I'm doing in this particular skill share course can be done with a 99 cent little watercolor palette from your local drugstore. The one I will be using the prom water colors you can get at Michael's for around eight or $9 if you have a Michael's in your area, and they're actually very nice for student grade watercolors. But any inexpensive watercolor set that's meant for elementary school will work just fine, and you'll need a brush to go with that. Some of those pallets come with a little brush, but I recommend you either pick up a slightly larger tipped brush. The one I am using is a 10 round, but you can use any watercolor brush that you can get your hands on again. It does not have to be expensive. Paper is the next thing that you will need. And my recommendation for these particular exercises, at least at first, is to use something small so you could use index cards or a small sketchbook or watercolor paper or other kinds of paper that can come from the craft supply store. I am actually going to be using already cut hot pressed watercolor paper, which is a little bit more pricey. But to be perfectly honest with you, I didn't want to cut up a bunch of cheaper watercolor paper. For the sake of doing all of these demos, you could very easily get a inexpensive watercolor pad from the craft supply store for five bucks and then take those sheets and divide them up into quarters and have small pieces. I recommend using small pieces because you will be able to fill them up faster, hence staying within the 10 minutes or less zone. We're gonna be using crayons multiple times as well. Just pick up a pack of crayons from the drugstore. Just make sure that there is a white crayon in there. There are three other things that you're gonna need. You're going to need some water for the watercolors, some paper towels and some leaves for. The important thing about the leaves to remember is that you don't want them to be so dried out and brittle that they're gonna fall apart because you are going to be placing paper on top of them at some point. So you want them to have at least some sturdiness to them. And if they have some texture, that would be ideal. If you're having trouble finding fresh leaves because of the time of year, it is, you can use a big leaves from fake flowers if you want to as long as big guts in text and that's it. You confined options on a principle that air in the low, medium and high price point range in the projects and resource is tap, and throughout the rest of the skill share lessons, I will be bringing up other optional materials that you can use toe upgrade. If you decide you want to continue on with any of these exercises and make them a little bit fancier,
4. Exercise #1 - Word Clouds: the first exercise we're gonna work on today's called word clouds. The supplies you need for this air simple. A pen and a piece of paper and any words you want to pull out of your head. I'm starting with family, and the other thing you're gonna want to practice is how to draw clouds. You can start by making each little bulge in the cloud even, Or you can make them uneven, making some bigger than others. You can change the size of the cloud. You could make it tall. You could make it long and skinny. You can move your hand to make small clouds or move your arm to make bigger clouds. No, to start this exercise, just begin with the word in the center of your paper and draw a cloud around it. However you want to. You can add a second cloud around that. If that interests, you draw another word next to it. I like to use words that are related to the word, so I'm using my name because I'm going to put the members of my family. And then when I start the cloud around that next word, I'm going to start it from the edge of a different cloud than you. Just keep repeating this. Add more names or more words that have to do with your subject, then start drawing clouds around them until you start filling the paper up. You can vary the different styles of clouds that you do, and once you filled up the words you want to write, just add more clouds around the edges until you filled the paper up until you feel like it's done. Once you've put all the clouds in, we can pad different marks to fill in different parts of the clouds to make it look interesting from lines to cross hatching, where you do lines and the lines across you can add little circles, you can have little dots. This is actually called stippling. You could do circles that are the same size or dots that are the same size. Or you can vary the size, doing like polka dots with different sizes of circles within the actual clouds themselves. Aside from circles, you can also play with lines. You can do wavy lines or squiggly lines, lines that look like clouds except they're not joined. You can do zigzag lines. You could do diagonal lines. Pretty much the sky's the limit with all of these marks. I also think you should practice thes because thes will come in handy in other lessons in this skill share course. Now, when filling in, you can decide to fill in the whole thing. Or you could just choose different ones. And you can use different types of things different lines, different circles. Or you could do all of the same kind. It really doesn't matter. Drop shadowing can add some more interest. First, place your source of light. Where is it shining down? Then wherever the light is shining on your subject, the shadow will be on the exact opposite edges on that. In this case, the light is hitting the left and the top of my subjects. So I'm putting the shadow on the right and the bottom of my subjects. Remembering to put your drop shadows in the same place on each part of your subject will help your drawing look more consistent. Foreign upgrade. Replace your pen with different markers with different tip. Size is it can make it look a lot more interesting. I love to see your pictures of what you worked on for this lesson in the project section below
5. Exercise #2 - Lyrics Spiral: The second exercise is called the Lyrics Spiral. Take a song that you love and start writing it in a spiral on a piece of paper. Using a pen. I write really small so I can fit more words in and you start in the middle and you just start rotating the paper as you write in kind of a circular motion, as long as you make sure that each time the words meet the other side there, curving over it rather than just going straight into it. You can draw yourself some circles as a guide if you want to, But I like the look of it being free handed. I like the look of it not being in a perfect circle. Try alternating printing and cursive to add a little bit of visual interest to it as you write, maybe for different lines of the song or the lyrics. You don't just have to use songs, either. You can use poetry, you can use journaling. You conduce stream of consciousness thought or whatever else you want. All you need is a budget words to start writing in a spiral as you start working your way around and around rotating the paper as you go. Continue to write until you run out of lyrics or you run out of paper. This is where a small piece of paper conserve. You won't take that long to fill the whole thing up. It'll probably take you way less than 10 minutes. One of the ways that you can jazz this up is by adding in metallic pens, whether they are gel pens, whether they're sparkly jelly rolls are a great example of this unit ball signal. You can use different thicknesses of pens. Pigna microns come in multiple thicknesses. Try using different thicknesses of pens in one piece. Now you could also add other spirals to the same piece, whether it's lyrics from the same songer from the same band or other parts of your journaling or whatever much like we did with the clouds. When you hit the sides of an already existing spiral, just lift up your hand, move it to where it would be on the other side of the spiral and keep going. It should give the impression of them being layered on top of each other. I would love to see what songs and poems and other things you decided to draw into your spiral, so please make sure to leave pictures of this in the project section in the skill share course.
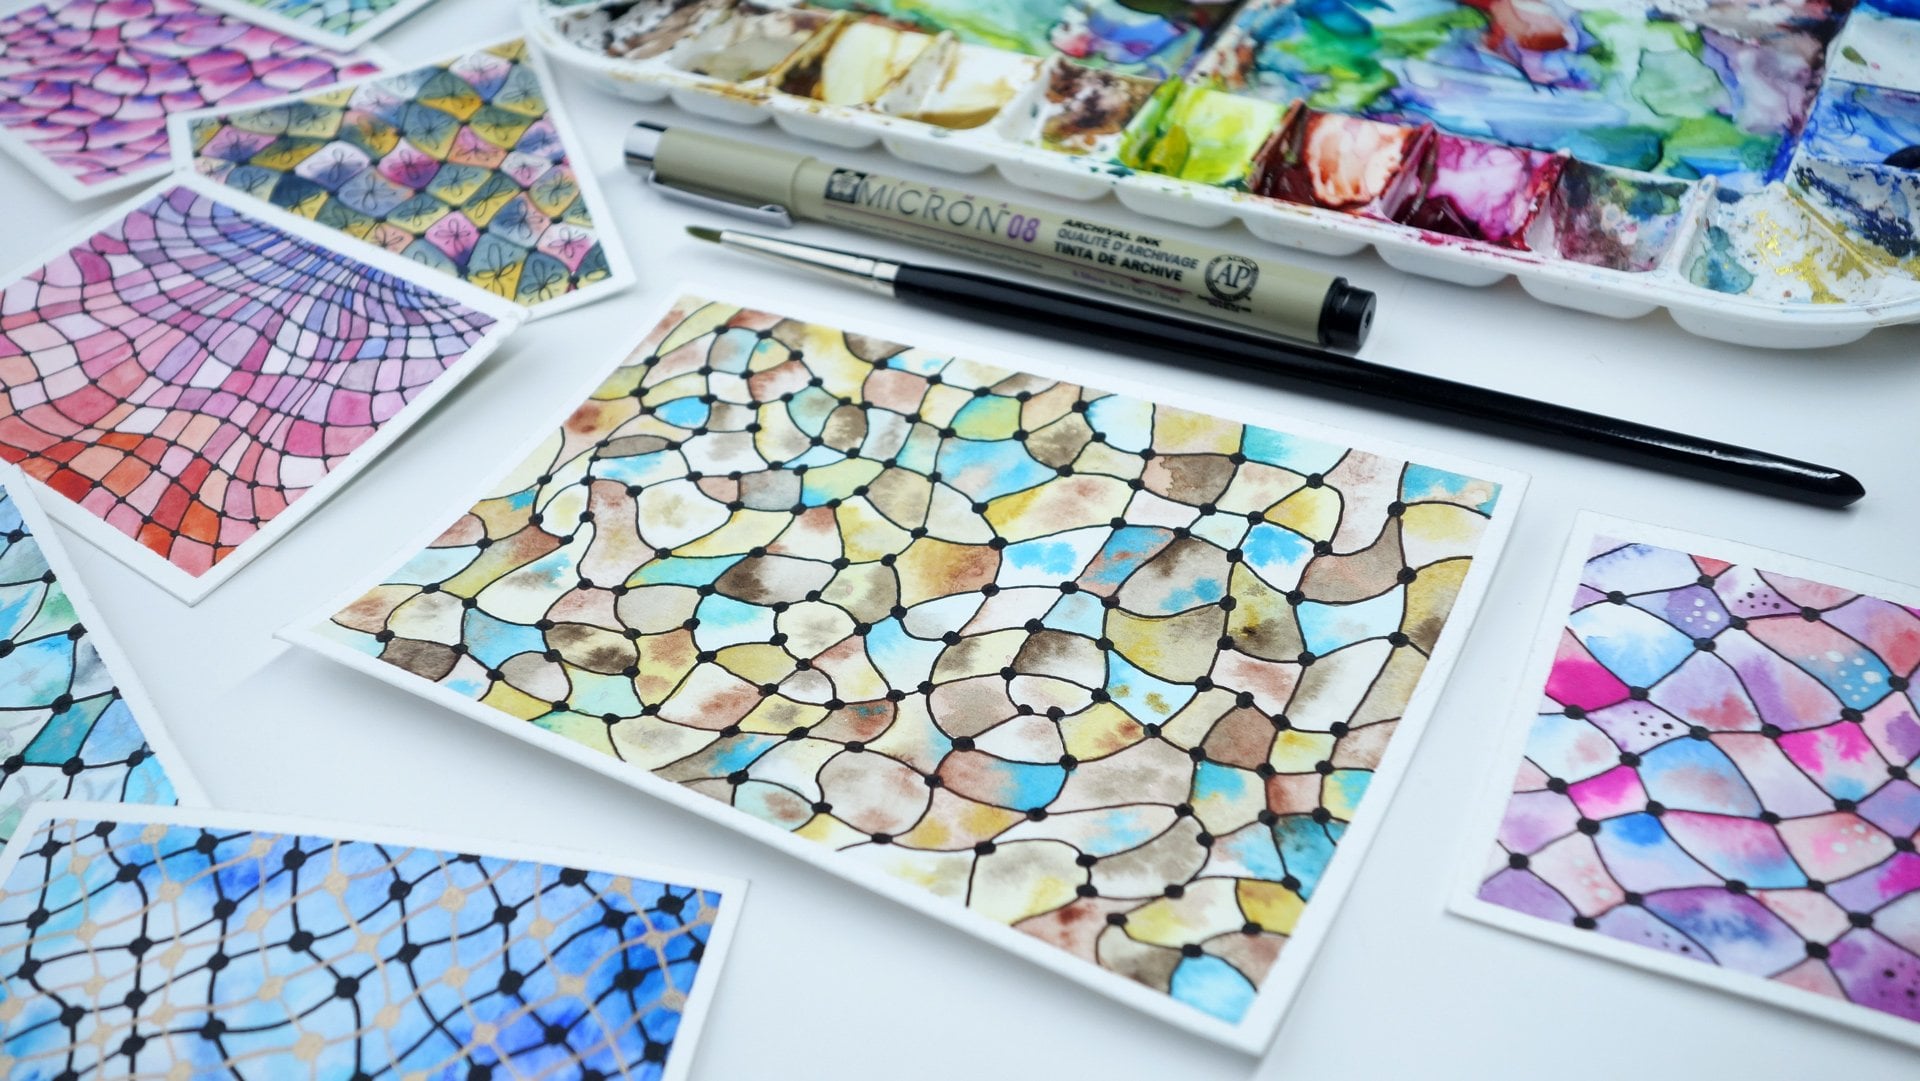
6. Exercise #3 - Page Of Shapes: I call this next exercise page of shapes, and it is arguably one of the simplest ones in this entire skill share course, however, on placing it here in the order of lessons, because this one can really take advantage of the other things we talked about previously in this from line with to drop shadow two different items that you can use to fill them in the different lines, the different mark making. All of these things could be used to fill up an entire page of shapes. Whether it's the same shape like these circles here, or whether you add different shapes into the mix, you can add all of these bits and pieces, drop shadows, whatever to make it look more interesting than if you just started from the beginning. You could start from the center like I did in the circle example, or you can come from the edge of the paper and start building outwards in this one. I'm actually using several different shapes. Some of them are really shaped like diamonds and rectangles and so on and so forth. Others don't really make any sense. I'm just doing whatever feels interesting with the idea of filling the entire page up. You could imagine doing this with regular black pen and then adding a gel pen and somewhere in the middle of it, or filling in all of the circles in this piece, even though there's a bunch of other shapes with a colored marker. Or you could use hash marks toe add in the ones that seem to be falling back to add a sense of depth. Or you could drop shadow some of the things like I did with the circles. If you find yourself struggling with how to fill the entire page up, this is where those marks that we made in the first exercise can come in handy. What I wound up doing here as I started to run out of steam after I put a whole bunch of shapes down, was start to add wiggly lines and circles and other things that normally I would use to fill in incident like the word clouds and instead here. I used it to fill in that giant gap to still make it look finished and to have it be completely full. But I just didn't want to draw another shape for the life of me at that point. So use whatever you've got in your toolbox to fill the whole paper up and when it's done posted in the project section.
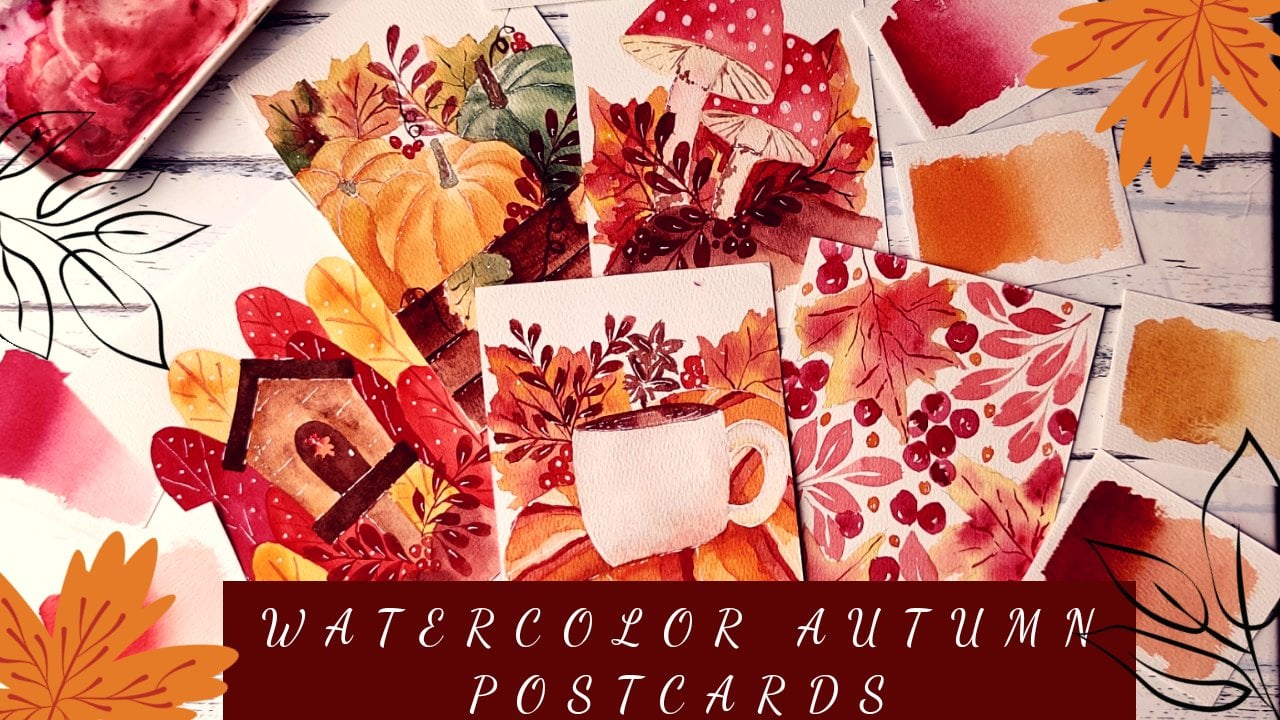
7. Exercise #4 - Leaf Resist: for this lesson, Leaf resist. You're going to need a few supplies. You're going to be an index card or some other finner paper than watercolor paper, crayons and leaves. First thing you want to do is take the wrapper off of your crown said you have a nice wide area of your crown to work with than take your leaf and lay it on the table and put your paper on top of it. Put the cream on, flout its side and just rub it all over until you see the shape of the leaf coming through the paper. That's a resist Now. You could do it simply with one leaf in one spot, or you can layer it by putting different angles of the leaf underneath. The paper may be using different colors. Toe layer them. You can create all sorts of different patterns. You can mix up the type of leaf that you're doing, the colors of the leaves, the way that they're under the paper, all sorts of things that you can use to make this look super interesting. Just be sure that you're pressing down hard enough so that the pattern comes through, but not so hard that you can't see the pattern at all and remember that some leaves will be easier to resist than others. This small, early fun using was a little bit more difficult to pick up, but I still was able to get a fun pattern from it. Just make sure they're not crispy and dry doubts that they don't like disintegrate underneath your paper, not giving you anything to work with. If you want to branch out in your resist work, there are many different ways to do it. Chalk pastels, regular chalk work really great, with different types of resist techniques. You can also change the thing you're resisting in the first place. One really popular hoppy is to take paper and go to cemeteries and use chalk to do gravestone rubbings where you're using the words that are on tombstones as your resist. Another fun thing I like to do with my resist things, especially in the fall, is to cut the resist leaves out of the paper and then write people's names on them and use them for gift tags or for place cards for like a Thanksgiving table. I'd love to see the work you do with resist in the project section down below
8. Exercise #5 - Watercolor Resist: to do a watercolor resist, which is our next lesson. You want to use a crayon to doodle something onto a piece of watercolor paper, then you want to put a wash on top of it and to do a wash, you load your brush up with water and paint, and then you work it in a line back and forth across the paper. Doing it this way without going back into your paint creates ingredient. If you want to make it more solid than you, add more paint to it as you work your way down. You can also add different colors into it or more water to it to create different effects. And I totally think you should experiment with watercolor washes. There are so many different things you can create with them. Now take your resist paper with the crayon on it and start running a watercolor wash over the top of it. The crayon should resist the water color, and so the color of the crayon is still gonna pop through. White works really great with this because it looks like you're missing the paper completely. Somehow this design is just popping through in this case, I've got a cloud underneath a blue resist, and you can see the crayon showing through the light wash of water color. The harder you press down on the crayon, the more crayon you leave on the paper, the more it will resist. And this does a really great job creating subtle patterns and backgrounds and greeting cards. You can take some of the marks that we made from Episode one. In this case, I used a bunch of different size polka dots, but different lines. You can even add them in by scraping them into the paper rather than adding crayon and having that pattern show through as well. In this particular example, not only am I using the polka dot pattern, I'm using a rainbow wash on top of that to have the resist show through one way to upgrade this something I actually don't have any of at the moment. So it's not pictured is masking fluid. Masking fluid is a kind of a latex that you put down your paper, the same as you will with the crayon decree that resist. But then afterwards you taken kneaded eraser, or you rub your finger over it and the latex comes off leaving white paper underneath. It's a fancier way to do this, but if you just want to experiment with it, crayons work just fine. You can even create cards for people if you want to, and I'd love to see what you do in the project section down below.
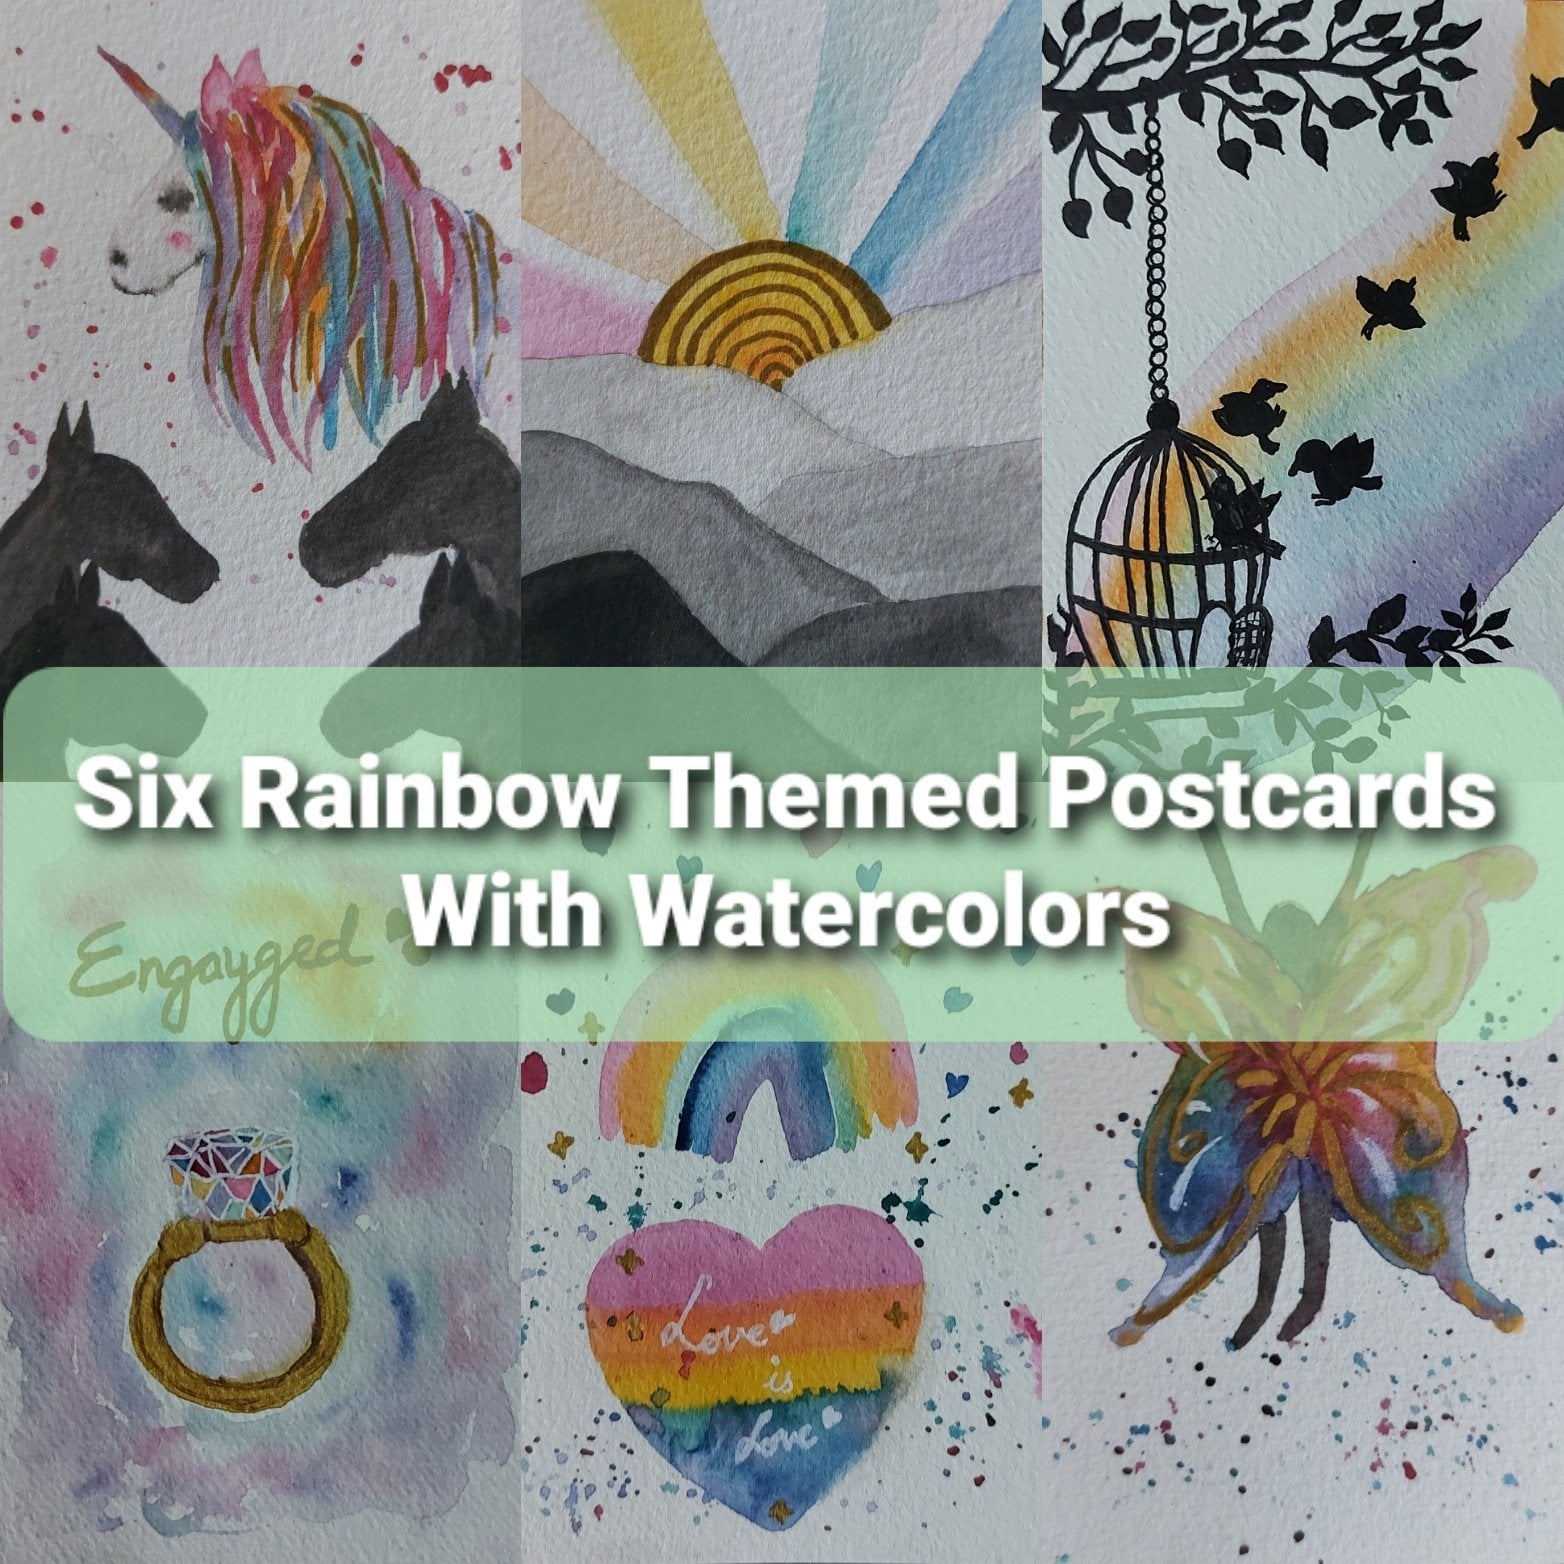
9. Exercise #6 - Watercolor Sky: This one is called watercolors Guy, and it's one of my favorites, much like we did in the previous lesson. Create a wash, but this time put the water down first and start adding your color to it. I like to do mixes of blues and purples to make night skies, adding and yellows and oranges and reds to make sunsets or sunrises. And then, if you want to create clouds, grab some paper towels and crumple them up. And you could do that in a few different ways and then gently press down, lifting some of the paint up in like cloudy kind of situations. Cloudy kind of circular motions. Just do until it feels right. No clouds look the same, so none of your clouds should look the same. If you want to build a sunset or sunrise, I start with water. Then I go to the bottom and add in yellow, creating kind of ah humped situation, and then over that I add a little bit of orange and then I add a little bit of red, and then I add a lot of blue and then at the top, a dark purple and I try and blend them together, looking to see if I think the colors look right and this creates that sense that the sun is rising in the skies. Lightning or the sun is setting in this guy's darkening. This creates a really beautiful kind of sky that you can use for different things. If you want a lift smaller clouds than take your paper talent kind of roll it up into a cone and use a much more precise tip to lift up paint for the different clouds on your watercolor sky. Another technique I absolutely love is to cover an entire paper with water, lay a color down and then take a paper towel and lift off of the entire thing. Just push the paper towel across the entire thing, lifting that first layer of paint up. This softens the color. It can help camouflage mistakes. It can help take the saturation down, and it still adds that little bit of texture that makes it feel more lively than just the basic watercolor. This is the 10 minute exercise that keeps on giving do a whole bunch in 10 minutes than another day. When they're dry, put a bunch of little EMS on it to be birds or letter onto it, right names or words to use them for cards later. You can get a whole bunch of creativity out of one lesson, and I'd love to see what you do in the project section.
10. Exercise #7 - Drips & Blooms: drips and blooms are so much fun. First you want to soak the paper, put clean water down so that the paper is shiny. You want to cover it up and have it all be covered in water. And then once it's all covered up, load your brush up with a lot of water and a lot of paint and go into your paint palette and start tapping it on to the paper. The little flowers, things that start to come out of each tap are called blooms, depending on how much water you have and how much paint you have on your brush and the type of painted is. Some blooms might be small. Others might be big, but it's both really satisfying. Delay the blooms down and to watch them bloom outwards. No bloom is ever exactly the same, and you can mix colors up and mix different amounts of water up to create different ones every single time. To do drips, create a really saturated, thick line of water across the top of a piece of paper, load your brush up and then add the paint to it than tilted upwards to get the pain to drip this could be a little bit tricky. You have to add more water and more paint. You can mix colors together, but you want to build like little saturation points where there's so much water, it can't help but drip. But again, like the blooms, you can't predict exactly what's gonna happen here, so you gotta be willing for it to go a little bit wacky a little bit less than what you expect. But suffice to say, it looks really cool every time you do it, and the more colors you put onto it in, the more they mix together, the more different varieties you're going to have of drips every time you try. You can also combine these methods by putting a bunch of water down like you do in the blooms. But then once you put the paint down on either side, tilting it back and forth like you do for the drips so the colors can start mixing together and creating different interesting washes. If you'd like to upgrade, check out liquid watercolors. They can be pricey, but they're very concentrated and beautiful, and when you put them down to bloom, they generally go super far and can make really vibrant blooms. I bet in 10 minutes you could come up with a whole bunch of drips and blooms, and I'd love to see what you come up with in the project section of this course.
11. Exercise #8 - Spatter Art: in this spatter artless, and we're going to get messy. First thing you gotta do is load your brush up with water. You could do a lot of water on your brush. Then you take the pain and you load it up so that the whole brushes saturated with pain. You can see here that the paint has kind of crept up the watercolor brushes and how the whole thing looks a little bit tinted red. This is an indicator that the bristles air completely saturated with water and with paint, so that when you would just lay it down. It has way too much pain to be handy for regular painting, but not for this particular situation. Want to add something to the background of this? You can either draw it on when you're done, or you could do what I'm doing here and write it down first. Once you have your paintbrush completely saturated with paint, you want to tap your paintbrush to fling the water and spatter it all over the paper. You want to quick hard taps right at the bottom of the silver Ferrell at the top of the brush. Another thing that you can try that is really important to do in the right direction is flicking. Load your brush up with water and paint than hold your brush over the paper and pull your finger back towards you over the bristles. If you pull it the other direction, you're gonna flick paint all over yourself. But if you pull the bristles back with your finger moving towards you, the paint will fling out onto the paper. You can try putting this on top of dry paper or wet paper. You'll get different looks for each with different colors. You'll get different looks, and like I said, you can doodle underneath it. You can doodle on top of it. You can mix spattering and flicking, or you could just do one or the other experiment and then posted in the project section below. You can also upgrade this with acrylic craft paint, mixing a little bit of water to make it more fluid and then do the same thing because craft paint is opaque. This will show up really great, not only on white paper but on fabric on toned paper on black paper. It's a really fun way to get the same effect with a different kind of paint. As watercolors are transparent
12. Exercise #9 - Brush Tip Flowers: this exercise is going to teach you how to make flowers and foliage with just the tip of your brush. So load your brush up with paint than layer, tip down on the paper and lift up. This will create one kind of pedal. You're keeping your brush a kind of a 45 degree angle to the paper at this point, with its tip laying down, how hard you press down and how long you leave your tip on the paper and as well as how much paint is in your brush will determine how big your pedals are. If you layer of brush fully flat, you'll get nice, big saturated pedals. If you only use the very, very tip of your brush, you'll have little tiny, delicate petals. It just depends, and so experimenting will help you understand what you could do with your brush. A team leaves is basically the same thing. You just lay your brush down on the paper and you can pull it down for longer leaves. You can just lay it down for smaller leaves. The longer you pull your brush on the paper, the larger and the longer the leaves will be to do stems and grass. Hold your brush at a 90 degree angle to the paper and for grass, flick it away from you. This creates little flicking motions that make little Tufts of grass and pieces of foliage and can even create interesting looking stems. You can also put your brush towards you to create other stems and have it be a little bit wavy to make it look a little bit more natural. The more paint that you have, the darker your stems will be, but the longer you go without it, the less saturated they will be. If you want to put leaves on to your stems, be sure to pull the little bits of stem that come out for the leaf in the same direction you pulled the stem in the first place. You don't want them to just stick straight off of your stems. You want them to lightly kind of come off in the same direction of the grain of your stem, and then once you've got a bunch of those in, start using the tip of your brush to add in different pedals. In different colors, you can create an entire garden these won't be very realistic looking flowers, but they will be beautiful because you created them and they're going to be unique to you. Try experimenting with your brush tip to create different sizes of pedals, different configurations of pedals until you find things that you like and that worked great for you. Changing the angle of your hand, changing the angle of your brush. Rotating your paper. All of these things create different effects, so I encourage you to experiment with all of them. Experiment with the length of your pedals. Experiment with the size of your pedals. Experiment with adding leaves and stems and other kinds of foliage until you have a garden that you can show us in the project section of this skill share Course. If you want to spend a little bit more money, you can use brush pens to do the same thing. If you have a brush that has the bristles, it'll create a similar effect. The water colors. But if use a solid brush like the Tom Bo, you'll come out with a lot more precise, smaller pedals. Again. Just experiment with how long you keep your brush on the paper. How you pull the brush away from you to create different sizes of pedals. You'll find that these ones are going to be a lot less loose and a lot more stylized, which can be a good thing or bad thing, depending on what you want to try. Creating leaves is the same thing. Just hold it on the paper, pull it away from you at a 90 degree angle, create your stems, create your foliage. Experimenting will help you develop your own flowers in your own techniques that you can go to again and again when you have a few minutes to sit down and be creative, and I'd love to see what you come up with.
13. Exercise #10 - Blob Flowers: for a final lesson. We're going to be doing blob flowers, and to start we're going to be working on different pieces of flowers and foliage. Takes him ovals. Add one little point to the side of the oval, make it look like a teardrop at a little bit of a wavy line for the top of the pedal. Experiment with circles and ovals and squiggly lines to make mayor golds. Really, you're not making actual flowers from nature here. You're just creating the idea of flowers. Teardrops are going to be your best friend here, whether they're standard looking or whether you elongate them like we talked about in the last lesson, when you're gonna make stems and have leaves come off of them, remember, toe have the bits, the little stems the leaves get onto to go with the grain of the stem going upwards rather than just sticking off. And then you can add teardrops of different lengths and heights to be your leaves for Tufts of grass. A little jagged e line works Great now to create your blobs, load your brush up with paint and then just slap it down on the paper in some random configuration, let it dry a little bit and then start adding your different pedals to it. However you feel like How did you feel like it? I like to add pedals to the bottom of like ovals to make them look like a blossom that's kind of looking upwards. Sometimes I like to take blobs and add squiggly lines all around it so that the middle of that blob is kind of like the center of the flower. And all of the little squiggly lines are pedals. The sky is the limit here. Like I said, we're not trying to create realistic flowers. Were trying to use little squiggles and teardrops and lines to create the idea of flowers. In this case, just adding a bunch of squiggles makes it kind of looked like a dandy lion, maybe question mark. Do different blobs in different colors. You can draw around your blobs like I did with these 1st 2 flowers, or then once it's dry here, I'm using the heat tool to dry it relatively quickly. But you can also just do a bunch of blobs one day and then the next day, come back to them and create flowers to make your creative time super fast. You can draw on top of blobs. I'm just using some lines here to create, like, the idea of, like a rose bud. And then I just add some stem since and leaves. And there you go. You have some beautiful blob flowers. If you want to upgrade spray ink creates some really interesting looking blobs that are a little bit harder to work with. But with some imagination, you can create flowers out of them. I want to see the garden of blob flowers you make. I love to see what they look like, so please post pictures in the project section.
14. What Next?: congratulations. You got through all 10 exercises. I hope that you're proud of yourself. I hope that you have proved to yourself that being created can be fun, inexpensive and quick. You don't need to have special skills. You don't need to have special equipment, and you don't need to have a lot of time to be creative every single day. And that is my challenge to you this month. If you want to go for a week, if you want to go for a month, if you want to pick yourself a frame of time, where you're going to do one of these exercises every single day to prove to yourself that a little bit of time of creativity can make your life better, I'd love to hear about it in the project section below. On top of that, I'd like you to think about these exercises and how you can take both what we talked about and all of the little bits and extras and your own imagination to expand them and take these concepts and make them into bigger pieces or more detailed pieces or more fun pieces . There's so much that you can do with a daily creative practice, and I would love to hear about it and see your pictures both in the project section and in my Facebook group. Llamas Love lettering Please post there join. You can find the link in the resource is section, and I would love to have you continue the conversation there. I would also love it if you follow me so that you can get all of the sculpture classes that show up and that you leave a rating in a review. If you decided you like this class and you found it helpful, you can find all of the things regarding me at www dot Cindy gunter baldo dot com. That's where you can find my YouTube channel and all of the other things to get more tips, tricks, inspiration, planners, all the things. In the meantime, I'm so grateful that you did this course. I am so grateful that you join me today, and most of all, I am thrilled that you are getting creative a little bit every single day, and I cannot wait to see what you do until next time. Piece out
 Cindy Guentert-Baldo, Planner/Artist/YouTuber