Transcripts
1. Making a Coffee Scoop in Solid Silver: Would you like to make your
own silver coffee scoop? In this class, you
will learn how to make a simple coffee scoop using
scrap sterling silver. The skills I'm going to show you include melting scrap
silver into ingots, rolling ingots into
sheets and wire, forming and soldering
all the pieces together, and finally finishing it
into a shiny coffee scoop. This class is for
anyone who wants to learn or try out
silver smithing. No previous experience
is required. Although some DIY
experience of using any kind of drills or sawing
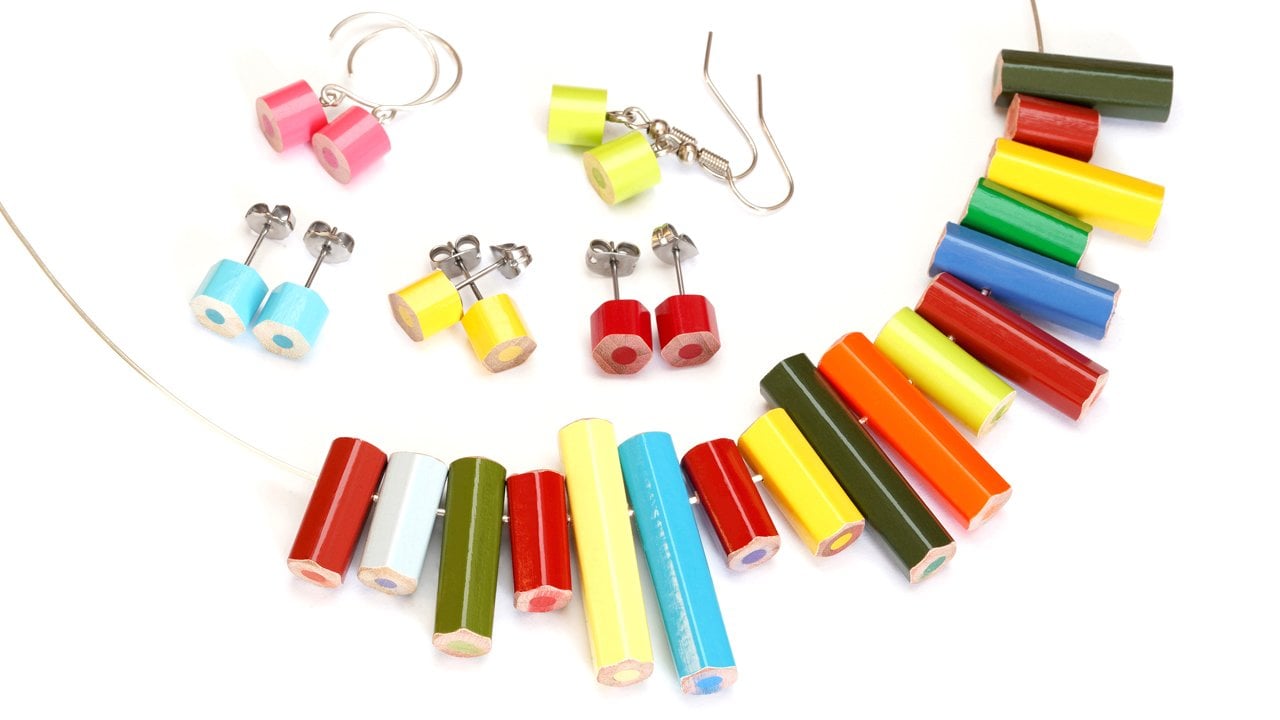
experience will be useful. If not, no worries. My other course
here on Skillshare, called Jewelry Making
for Beginners. Making color pencil jewelry
at home covers that. All the skills you
learn from this class are basic ones for
silver smithing. Hence, you can apply them to other silver smithing
projects as well. I will be using solid sterling
silver in this class, but the methods I'm showing
also applies to karat gold. Hi. My name is Huiyi. I have been working with
precious metals since 2003. My handmade jewelry and small
objects in silver, gold, and platinum, have been sold to over 50 countries around the world in the
last two decades. The benefit of learning from a practicing bench
jeweler is that I have lots of first-hand
tips to share. Let's get started and I will see you in
the class [MUSIC].
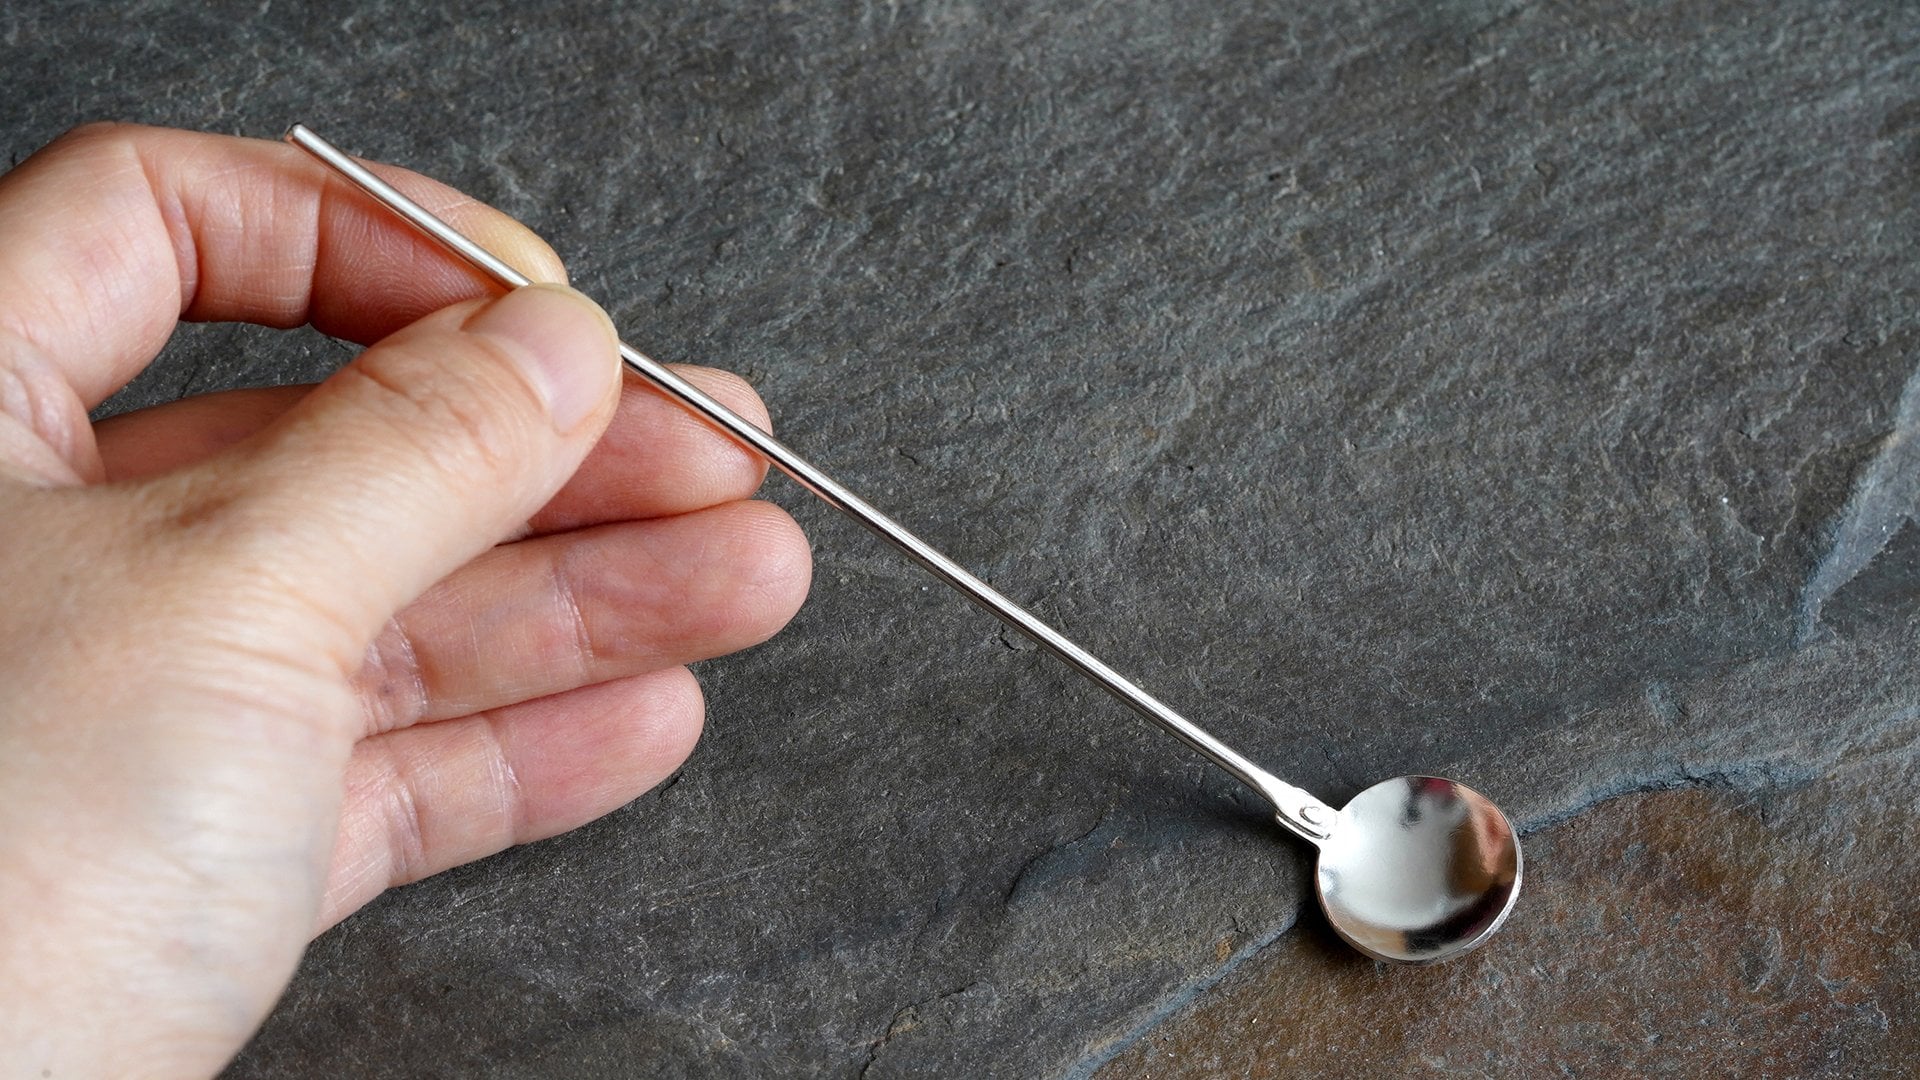
2. The Project: [MUSIC] The class
project is to make a simple coffee scoop from
scrap sterling silver. By finishing this project, you will have a silver
scoop of your own to enjoy or to give to
your loved ones. Each of the upcoming classes covers a simple step
of making your scoop. They are all a few
minutes long only. By following these
bite-sized steps, you will have a
clear idea of making your own coffee scoop in
solid sterling silver. The tools I use in this class
are listed in the PDF file. You can find it in
the resource section. It will be very interesting to see your process pictures, along the way as well as the picture of your finished
silver coffee scoop. Please post them in the
class project gallery. In the next class, let's make our ingot
from scrap. [MUSIC]
3. Turning Scrap Silver into An Ingot: [MUSIC] Welcome to the
class. In this class, we are going to make some ingots. Starting here is about 20 grams
of scrap sterling silver. All the pieces in
my crucible are off-cuts from other sterling
silver projects. To help the silver melt, I add a spoonful of borax powder on top before
turning my torch on. This process requires a
reasonably heavy duty torch as the melting point of the sterling silver is
1,640 degrees Fahrenheit, or 890 degrees centigrade. The torch I'm using here is powered by a propane
gas cylinder. All the tools I
use are listed in the resource section where you
can download the PDF file. This is about 20
grams of silver. It usually takes about
10-15 min to become fluid. We will need three
ingots in total. One to make the
base of the scoop, which is about two grams, one to make the
wall of the scoop, which is about 16 grams, and one to make the handle, which is about two grams again. You can see the fire inside
of the crucible is orange. That's the hottest part of
the flame in this case. This will ensure that we melt the silver in the shortest
possible time. Slowly, we will see the
silver turn to liquid. Here, you can see that I lightly shake the crucible when
the silver is melting. This action is
similar to stirring our sauce pan during
the cooking process. This will help the
silver mix well. It's very important
to keep the torch on the molten silver
while pouring. This is to make sure
the temperature of the liquid silver won't drop below the melting point before dropping into the
cast iron mold. This piece of sterling silver is what we have at this stage. To have this piece of
silver as soft as possible, it's very important that
we leave it to cool in room temperature for
about 15 minutes. If we drop it in cold water, it will harden the silver
and also make it brittle. We come back in 15 minutes and let nature take care of it. Now, this ingot is down
to room temperature. We are going to dissolve the
fire stain on the surface of our ingot by placing it in a
warm bath of safety pickle. The key of this step is to make sure the liquid
is not boiling. The red light
here shown through my glass dish is the
light of my electric hob. I find it quite cool
to look at when the container is
see-through glass. Here, I use a heat
resistant casserole dish to hold the safety
pickle and put it directly on top of my
electric hob to heat it for exactly two
minutes on full power. This will be enough to
warm up the liquid, but it will remain below
its boiling point. Here, we leave it in
the warm pickle for 30 minutes to have the fire
stain completely dissolved. This is what our silver
ingots look like now. We need to rinse it in
tap water thoroughly to get rid of any
trace of the acid. Otherwise, the acid
on the surface of the ingot will
destroy our tools. Here I have another ingot which was made in the exact same way. So I skipped a process. This bigger one weighs 40 grams. It's for making the
wall of the scoop. The small one we just made is for making the
base of the scoop. In this lesson, you
have learned how to melt scrap sterling silver into an ingot and here are the three key points
through this process. First, keep the torch on the molten silver while
pouring it into the mold. Second, let the hot ingot
cool at room temperature. Third, keep the safety
pickle below boiling point. Join me in the next
class and we will transform these rough ingots into two smooth silver sheets for our coffee scoop. [MUSIC]
4. Turning the Ingot into a Round Silver Plate: In this class, we will transform the small sterling silver
ingots we just made into a sheet for the bottom
of the coffee scoop. By the end of this class, you will have a
piece of silver in a circle shape with the
thickness of one millimeter. Here, I'm using a small Durston Agile C110
rolling mill for this project. You can use any rolling
mill you can get access to. As far as there is a flat surface on both
upper and lower rollers, it will work just
fine for this step. As my rolling mill is
hand powered by a handle, this process requires
a lot of patience. Just keep feeding the ingot through the roller
over and over, reducing the space between the rollers a
fraction each time. The key for this step is that for every single one millimeter, we reduce the thickness
of the ingot. We will need to soften the silver by evenly
heating it with a torch until our silver
glows a dull orange color. [MUSIC] After that, we'll leave it in the air to cool
down to room temperature. This process is
called annealing. This will not just make the
rolling process easier, it will also stop our silver
from splitting [NOISE]. As you know, this is
the small piece of silver for making the
base of our coffee scoop. The length is more
than enough to cover the diameter of
the bottom of the scoop. However, the width
is still too narrow, so we need to make it wider instead of unnecessarily longer. Here, I'm going to
cut these pieces of silver roughly in half. There are two benefits
for doing this. First, if we keep this silver in full length when
making it wider, the flat area on my
rolling mill is not wide enough to cover the entire
width of this sheet of silver. Second, a smaller
piece of silver is always more workable with
a hand powered rolling mill. Keep repeating the
process of rolling, and annealing rolling, and annealing until
we have reached our goal of one
millimeter thickness. This is what it looks
like at this stage, with the thickness
of one millimeter. This piece will be perfect
for the bowl of the scoop. Next, we cut the circle out of the template sheet and put some double-sided
tape on the back. The template is in the PDF file, which is available to download from the class
resources section. Now, we use a jeweler's saw
to cut this circle out. If you have never used
a jeweler's saw before, you can watch my other
class on Skillshare. It's called jewelry
making for beginners, making color pencil
jewelry at home. It covers all the details
of how to install and use a jewelry saw and how to use it in the most
efficient way. Next, we follow the black
line and cut the circle out. The key when cutting
this circle is that we would like to cut a little
bit next to the black line. There are two reasons
why we do this. First, by leaving a little
extra on the circle, it allows us to adjust the
edge more precisely later. Leaving more is always
better than having less. With more material on the edge, we can always take it
away but with not enough, we will have nothing to adjust. Second, by cutting next
to the black line, we will always see the guide. Now take off the paper template. We have a circle for the
base of our coffee scoop. In this class, you have
learned two things. One, how to turn rough sterling
silver ingots into smooth sterling silver sheets. The key of this
process is to anneal your silver for
every one millimeter you reduce the thickness. Second, the best
practice when cutting a pattern is to leave a
little bit extra on the edge. Now, the silver sheet
for the base is ready. In the next class, we are going to give it a little
style by making it domed.
5. Making the Coffee Scoop Bottom: [MUSIC] Welcome
back. In this class, we're going to dome this circle. Before doing anything, lets anneal this sheet of
sterling silver first. [NOISE] This will
soften our material and it will be much
easier to work with. Now, this is ready
for the next step. Here I'm using a
dapping block. It has different
sizes of hemispheres. As we want it
lightly domed only, we use the biggest
hemisphere and the biggest punch that
comes with this block. Place the silver sheet
inside of the hemisphere, put the punch on top and then lightly hit the top of
the punch with a hammer, like this [NOISE] Keep moving the sterling silver
sheet around while doing this. In this way, it will
give us a nice, even dome [MUSIC]. In this class you
have learned how to use a dapping block
to make a domed surface. Now we have the base
for our coffee scoop. In the next class, we're going to make
the silver sheet for the coffee scoop
cylinder. [MUSIC]
6. Making a Rectangular Silver Plate: [MUSIC] Remember that
we have two ingots. In the previous class, we worked with the small one. In this one, we will be
working on the bigger ingot by turning it into a silver sheet for the coffee scoop cylinder. The pattern we
eventually need to cut out is the
rectangular shape, so we need to make
this ingot long. As the width of this piece of ingot is wide enough
to cover our pattern, we just need to roll
it in one direction, in this case, [NOISE] same as we did in
the previous class. We will soften this
piece of silver for every 1 millimeter we
reduce the thickness. [MUSIC] Keep measuring it during the rolling process. Once it reaches one
millimeter thick, we stop. [NOISE] Now, this sheet of
sterling silver is ready. We cut off one end. No need to worry if it's not
that straight at this stage. Whenever cutting, the key is
to make sure that we have a little bit too much
rather than not enough. Measure it at 78 mm of this
sheet and cut it off here. [MUSIC] [NOISE] Next, we use the flat file to
make this side straight. To get the other side straight, we use a scriber to mark
at 22 millimeters and draw a line by using the
other straight side as the guide, like this. [NOISE] Once we have the
line for the other side, we cut off the extra material
with our jeweler's saw. [MUSIC] Again to make it straight, we file the edge with
the flat file like this and do the same for all
the other edges as well. [MUSIC] With this, the sheet of silver is ready. In this class, you have
learned two things. First, how to turn a rough silver ingot into a sheet of silver in
the size we need. Second, when using a jeweler's saw [NOISE] to
cut out a pattern we want, we would like to always leave a little bit extra
around the edge. This will allow us
to adjust later. In the next class, we're going to form it into
a cylinder shape. [MUSIC]
7. Making the Coffee Scoop Cylinder: [MUSIC] In this class, we are
going to form a cylinder of 24-millimeters diameter
for our coffee scoop. The tools we will use are the dapping punch
we used earlier, a bending block, a metal hammer, and a rawhide mallet. Always start from
the biggest groove. Put the rectangular silver plate on top of the bending block, and then lay the biggest
stepping punch on top like this, making the silver
plate like a sandwich. Next, we gently tap the tapping punch
with a metal hammer. You can see the
rectangular silver plate is changing its shape. Move the plates along and keep tapping like
this. [NOISE] [MUSIC] With the help of my hands, I bend it a little
more aggressively. The goal is to get
the two ends to come as close
together as possible. You can see the plate is still flat towards the
end at this point. Next, I put it back
to the bending block, Put the biggest punch
through the silver, and start to bend the two ends of this silver by
gently tapping them. When our silver
doesn't bend anymore, we know that we have reached the capacity
of this groove, so we use the next smaller one. Now, you see the gaps
between the silver and the dapping block handle are much
bigger than before. This allows us to keep bending the silver plate and close
the gap between the two ends. Keep tapping it gently
and change the size of the punch until the two ends
finally meet up like this. As I mentioned before, it is always a good idea to
leave extra material on. In this way, we can
adjust it later. Here, the cylinder
is larger than 24-millimeters diameter
after bending, so we cut the end off
to make it smaller. Use a scriber and the end
of the silver plate as the guide to draw a straight
line parallel to the end. Here you can see the shiny straight line if I rock the cylinder
to catch some light. After that, I cut this extra material off
using the jeweler's saw. [MUSIC] Here, I try
to close the gap and roughly see if it will fit
the bottom of the scoop. It works in this case. Before soldering these
two ends together, we need to file
them dead straight. So there will be a little gap as possible when they
meet. Take your time. [NOISE] Once that is done, we need to close
the gap by using the bending block and
dapping punch again, just as we did earlier. The difference is
that this time, I use a rawhide mallet. It prevents leaving
any unwanted marks on our silver surface
as I'm going to hammer it a bit
harder than earlier. Also, as the diameter of this cylinder is
smaller than before, I move to the next groove
on this bending block. Gradually, you can
see our gap is closing and then the ends
touching each other. As these two ends
have been hammered, they have been
altered a little bit. To get them perfectly straight, we use the same saw we used before to cut down
this gap like this. When cutting, try to hold the
gap tight with our fingers. Now, when I push the ends
together, they close nicely. However, if you notice, once the two ends are not held, they bounce back to leave a gap. The width of this gap is
the width of our saw blade. As the cylinder is perfectly round and the ends
are straight now, instead of going back
to the bending block, we wrap a stainless
steel wire around to hold our cylinder
tight like this. This stainless
steel wire measures 0.4 millimeters diameter. We twist the end of the wire together so it will
close the gap tight. When you don't see any light
coming through the gap, we have reached our goal. In this class, you have
learned how to use a bending block
and dapping punch to make a perfectly
round cylinder. In the next class,
we're going to close this cylinder permanently
with silver solder. [MUSIC]
8. Soldering the Coffee Scoop Cylinder: Welcome back to our course. In this class, we're
going to close the gap on the cylinder
with silver solder. You will learn some
of my personal tips on soldering small
silver objects. First, we grind some
borax flux and apply it onto the gap of the cylinder by using a small paint brush. This is the hard solder. The difference between
different types of solder is the melting point. Hard solder has a higher
melting point than easy solder. The melting point
for medium solder is inbetween the
hard and easy solder. Because there is a
stainless steel wire wrapping the outside
of the cylinder. We put the solder on
the inside like this. Then we are ready
to light the torch. First, we need to heat
up the entire cylinder. Once it's heated, we focus on the area which
needs to be soldered. Here is a tip, in order
to tell when it's time to move the fire
onto the soldering area. We pay close attention to
the color of the cylinder. Once it starts to turn orange, it's time to focus the fire on the soldering area instead of heating up the
entire cylinder. With my left hand
holding the torch, I hold the soldering pick with my right hand and place it very close to
the soldering area. In this way, I can always use the soldering pick to guide the flow of the solder
whenever needed. Once the solder melts, I will have about 1
to 2 seconds to do any adjustments before
the solder settles. Leaving the fire on the
soldering area for too long will weaken the solder and
eventually melt our cylinder. This takes practice. I still remember the first
time I soldered in 2003. I was so nervous
that on one hand, I worried it wasn't hot enough. On the other hand,
I worried that my fire was going
to melt my silver. If you don't get it just
right the first time with the soldering principle in
mind, just keep practicing. Now, our cylinder is soldered. Time to take the
stainless steel wire off. This wire is still in one piece, so we can save it for
our next project. Here is how the cylinder
looks at this stage. In this class, you have learned two of my personal
tips on soldering. One, how to coordinate both of our hands
during soldering. Two, how to tell it's time to focus on
melting the solder. In the next class, we're going to
solder the base of the scoop onto the cylinder. As usual, I will share my
personal tips with you. I will see you in the
next class. [MUSIC].
9. Soldering the Cylinder onto the Bottom: [MUSIC] Welcome
back. In this class, we're going to solder
the base of the scoop onto the cylinder. I will show you what to watch
out for in this process. This is the cylinder we
soldered in the previous class. Before soldering,
we want to make sure the end is completely flat. First, we file it with
a flat file like this. [MUSIC] Then we move on to smooth it with
an emery paper by grinding our cylinder in a
circular motion like this. Next, we leave this cylinder in our safety pickle to clean
off all the fire stain. This is the borax we are using. Instead of brushing the borax on the soldering
joint bit by bit, we can dip the entire
cylinder directly in the borax dish and put the cylinder onto the
domed circle like this. As the cylinder has hard solder on, here I use easy solder to attach the base
onto the cylinder. In this way, I am
planning to only heat up both the base and
the cylinder to melt the easy solder and move
the fire away before the entire object reaches the melting point
of the hard solder. The reason why I place the
easy solder on the outside of the cylinder is that if
the solder flows around, it will be much
easier to clean on the outside of the bowl than
if it is inside of the bowl. [MUSIC] Once the easy solder
starts to melt, we remove the fire. You can see it from this
angle the easy solder has flowed to fill up the gap between the cylinder
and the dome base. Here I'm showing you another way of soldering such an object, is to heat up the
bowl from underneath. The benefit of this, is that it will have
less chance to overheat the cylinder because the fire is directly focussed on the base. The stainless steel mesh is held by a metal
tripod like this. This is just another option. Now, the base has been
attached to the cylinder. We're going to clean
it by leaving it in the warm safety pickle
for about 25 minutes. [MUSIC] In this class, you have learned how
to solder the base of the scoop onto the
wall of the cylinder. [NOISE] In the next class, let's clean this small
silver bowl. [NOISE] [MUSIC]
10. Cleaning the Coffee Scoop Bowl: [MUSIC] Welcome
back. In this class, we're going to clean the bowl. You will learn how to clean a simple silver object
with a curved surface. First, we cut the
excess material off the edge by
using a jeweler's saw. Make sure not to cut it too
close to the edge [MUSIC] Always leave a little bit of material on the edge for us to clean later [MUSIC] Next, we use a flat file to take off the excess material on the edge. When doing so, always keep moving the file following
the curve of the cylinder. In this way, we will not make a flat area on the
curved surface. If we have left any marks
when making the wall earlier, we can smooth it out
in this stage as well. Now, the basic structure
of our bowl is finished. You have learnt how to clean
a simple curved surface. In the next class, we will focus on giving this
little bowl a handle [MUSIC]
11. Drilling a Hole in the Bowl: [MUSIC] Welcome
back. In this class, we will prepare the bowl
for receiving a handle. You will learn how to
open a hole on this bowl. [NOISE] First, we
use a marker to draw a guide for where
our handle will be. This is five millimeters down from the top edge of this bowl. Next, let's drill a hole. When making a hole
on any surface, it's always a good
idea to start from small and gradually
work our way up to big. There are two reasons for this. First, if the hole we drill is a bit off
the place we want it, we can relocate the
position by moving it a bit left or right
while making it bigger. However, we can't do it
the other way round. Second, when the
twist drill is small, it's much easier to
control than a bigger one, especially when you are working on a curved surface like this. Here, I use a drill
press to make this hole. This is a 0.7
millimeter twist drill. Because the wall I'm drilling is only about one
millimeter thick, we can press it all the
way down in one go. Here is my small hole. Next, I'm going to use a one millimeter twist
drill to make it bigger. When we need to hold
this little bowl tight, safety first, make sure your finger is not
behind the hole. My other class on Skillshare called jewelry making
for beginners, making color pencil
jewelry at home, explains in detail how to use
a handheld drill like this. The third twist drill
I'm going to use here measures 1.25
millimeters diameter. Bit by bit we are making
this hole bigger and bigger. After that, I'm using a 2.5 millimeter ball bur to enlarge
it to the final size. [NOISE] Now, this hole is ready. In this class, you
have learned how to open a hole on
a curved surface. In the next class, let's start making the handle for our
coffee scoop. [NOISE] [MUSIC]
12. Making a Silver Wire from an Ingot: I feel thankful that
you are still here, especially when you
have noticed that my English accent is
not very beautiful. But I hope my
jewelry-making skill and personal tips can
make up for that. So far, we have been
working with silver plates. In this class, we will
be working with a wire. First, we will start making the handle
for our coffee scoop and you will learn how to form a square wire from
scrap sterling silver. [BACKGROUND] Again, this is clean scrap sterling silver I have left from other projects. We will melt it just
as we did earlier. [NOISE] The only difference
is that we pour the molten silver into a
narrower groove like this. [MUSIC] Then we dissolve the fire stain by merging
it in safety pickle. Here is the draw plate that
we will eventually use to make the 2.6
millimeter round handle. But the biggest
hole on this plate measures 2.8
millimeters diameter. Our ingot is six
millimeters thick. The way to solve this problem
is to give this ingot a square section and reduce it bit by bit using
our rolling mill. Now we have the
ingot like this. All the surface
are a bit uneven. Let's feed this through
the flat roller a few times to make the
shape more defined. In this way, it's much
easier to feed it through the biggest groove
for a diamond shape. [BACKGROUND] The
key when reducing this piece of ingot is to anneal it once for every
0.5 millimeters, the size goes down. After heating it
up. Make sure to leave it in room
temperature to cool. Once the section is
down to three by three millimeters, we stop. After all the rolling, the piece of silver has turned more than 250 millimeters long. As our handle is only
85 millimeters long, we cut this piece of silver
at 100 millimeters length. Later, when we reduce
the size of the section, this piece of silver
will turn longer. 100 millimeters will be definitely
more than what we need. This is what we
have at this stage. In this class, you have
learned two things. One, how to make a square section wire from
scrap sterling silver. Second, in order to
make a round wire, we have to make it square first. In the next class, we will turn this wire
round and you will learn what to watch out for
in this process. [MUSIC]
13. Making the Handle: This is the three by three
millimeters thick wire we have made from
the previous class. In this class, we will turn
the section to be round. Let's have a look at the tool
we're going to use here. A round draw plate. The biggest hole
in this draw plate measures 2.8 millimeters and we want this wire to go down to 2.6 millimeters
diameter eventually. We're going to file the
end of our square wire down to less than 2.6
millimeters across. In this way, it can
go through the 2.8, 2.7 and 2.6 millimeter hole without us having to keep coming back to file
it three times. A length of about two cm away
from the end of this wire. This will be enough for our
draw tongs to hold onto. Now the end of the
square wire is ready. Let's move onto our next tool, the tabletop draw bench. This was made at my studio with all the materials found
in a few hardware shops. If you're interested, I do have another video to show
how it was made. In this class let's focus on how to use it to make
our round wire. First, we put the smaller end of the square wire through
the 2.8 millimeter hole on our round draw plate and put the draw plate
behind these two plates. Next, we use these draw tongs
to hold the end of the wire, which comes through
the draw plate. After that, we use the handle on the other end
of this draw bench to pull the wire through the 2.8 millimeter hole like this. Then we put the end of the wire through
the next hole down, the 2.7 millimeter diameter. Hold it with the draw
tongs and then pull it through slowly with the handle at the other end of
this draw bench. Do the same with the last
hole, 2.6 millimeters diameter. When pulling wire through the round draw plate there
are two things to remember. First, for every three holes
we pull anneal the wire. This will make the
wire very easy to pull and remain in good quality. Second, don't skip the holes. Always go through the holes
one next to the other. Skipping holes will
risk breaking the wire. At this stage, our 2.6
millimeter round wire is ready. In this class, you have learned how to turn the square wire into a round one by using the round draw plate and
the tabletop draw bench. [NOISE] In the next class, we are going to
solder the handle onto the bowl we made
earlier. [MUSIC]
14. Soldering the Handle onto the Bowl: [MUSIC] In this class,
we're going to solder the handle onto the
bowl we made earlier, and you're going to
learn how to direct the solder to flow
where we want it to go. Remember, we filed the 2cm
end of this wire down to less than 2.6 millimeter diameter earlier in
the previous class. Next, we cut five millimeters away from the
end of this wire [MUSIC] and put it into the hole we
drilled earlier in the bowl. It's sticking out a
little bit too much, so we file a little bit off. [NOISE] We only want
one millimeter of the wire sticking out of the
inner surface of this bowl. Here are the reasons
why I don't want to make it flush with
the inner surface. First, this is a
small silver spoon. The entire weight of this bowl and whatever
we're going to hold within this bowl will
be resting on this handle. If you look at the diagram here, the gap between the handle and the bowl will be
filled with solder. If there is a small section of the handle protruding
into the bowl, the silver will flow
around it and act like a rivet to secure the handle and make
the joint stronger. With a little bit hanging
out of the surface, it actually strengthens the
structure of the spoon. Second, I would like
to give this spoon some rustic style by having it hanging out a
tiny little bit. Now, we brush some liquid
borax on the joint, put some easy solder on, and move to the
soldering station. It doesn't show very
well from this angle, but you can still see my solder is on the
outside of this bowl. It touches both the
handle and the bowl. To keep the handle in position, I have it rest on another
soldering surface. If you don't have another
soldering board to hand, anything heat-resistant
will be fine. Here, I use the same torch as when I was making the ingot. Once the entire piece
is turning dull orange, we focus the heat on the bowl
to melt the easy solder. Because solder flows
wherever it is the hottest and I have put the
solder outside of the bowl. Now, I move the fire
inside of the bowl. The idea is to make the inside of this
little bowl the hottest. By doing this, the heat
will draw the solder through the gap between
the handle and the bowl, and eventually come out to
the other end of the hole. Here, you see the
solder disappear from the outer surface
of the bowl because it has gone inside the gap to the inside of this bowl to fill our gap on the inner wall. After the solder is melted, we keep the fire on the
area where the joint is for another 2-3 more seconds. This will make sure
the solder is settled. If we want the silver
to remain soft, after heating it up,
we'll leave it at room temperature to cool slowly. This is the final shape
of our coffee scoop. [NOISE] To make it more durable, we want to harden it by
pouring cold water directly onto the hot metal we drop
its temperature rapidly. This results in hardening
the shape of our scoop. This process is
called quenching. Here, I use rainwater
I collected over time to make the process as
eco-friendly as possible. As we want this handle to
be around 8cm long only, we cut off the extra bit using our saw [MUSIC] and then file
the end smooth like this. The best way to test if
it is still sharp or not is to rub the end of the
wire with our fingers. If it is touch smooth, it has passed our test. In this class, you
have learned how to direct the solder to flow
where we want it to go. In the next class,
we are going to clean this scoop. [MUSIC]
15. Finishing the Coffee Scoop: [MUSIC] This is how
our coffee scoop looks at this stage. In this class, we're
going to make it shiny. First of all, we want to
take off all the fire stain by leaving
the entire scoop in a bowl of safety pickle. How long it takes really
depends on two factors. First, how concentrated
the pickle solution is. Obviously, if it's newly mixed, it will work much faster
than a bowl of used pickle. Second, how much fire
stain is on the surface, and if there is any flux
residue left on our piece. In this situation, as my
pickle is newly mixed and there is very little
flux residue on the surface, this takes 25 mins to have all the surface of
our scoop clean. Here you can see the surface
where it touched the bottom of the glass bowl has not been exposed to
the pickle enough. There is still a trace
of the fire stain on it. We have to turn it
over and leave it for another 10 more minutes until it turns completely solid white. That's how we know it is done. Take this through running tap water to get rid
of any chemicals. Then we can use a 400 grit sandpaper roll to take off any mark on the
surface like this. [MUSIC] Once the surface is smooth, finish with sandpaper, we put this into a
rotary tumbler barrel. Seal the lid and turn the
tumbler on for 45 minutes. To mix the lubricant and
stainless steel shot, you can simply follow the instructions provided
by the manufacturer. The key when using the
rotary tumbler is to make sure the screw is not
too tight or too loose. Otherwise, the mixture
inside will leak. With the shiny stainless
steel inside of the barrel, polishing our coffee scoop, we can take a break. [MUSIC] Now, this is ready. Rinse our scoop
thoroughly in running water to reveal our
finished coffee scoop. [MUSIC] Tadaa! This is our
shiny coffee scoop. All that hard work
is worthwhile. In this class, you have
learned how to clean your coffee scoop and give
it a final shiny finish. Now, make yourself
a cup of coffee. You have earned it. Up next,
final thoughts. [MUSIC]
16. What We Have Learned: [MUSIC] Now you have finished all the classes in this course. Through the project
of making a simple coffee scoop in sterling silver, you have learned recycling
sterling silver scrap, making silver plates
and silver wire, using silver plates to form
a cylinder and a dome. Soldering a small
scoop and polishing it with my personal tips
to help along the way. If there is one takeaway
I would like to point out is that when working
with precious metal, always plan for the next step when working on the current one. All the silver smithing
techniques you have learned in this course can be applied to other silver smithing and
gold smithing projects. If you have made your
own coffee scoop, I would love to see your
process pictures and finished scoop posted in the project section
here on Skillshare. Thank you so much for
joining me in this class. I'm making more courses
like this on Skillshare. Please follow me here for upcoming classes in
the near future. I will see you in the
next one. [MUSIC]
 Huiyi Tan, Gemmologist, Diamond Setter, Jeweler