Transcripts
1. Trailer: Hey, everyone. My name is Jane, and I want to show you today how I create my mock-ups to share my art with others on my social media site. Often, it can be tricky to get the right lighting and the right background to show off our art in the way that we really want to. In this class, I'm going to show you the techniques I use, from creating a simple piece of wall-art, to adding in some texture and some background, and even playing around with the realism. Then I'm going to take you into using an iPad picture, and we're going to mask out the background, separate out the pieces, and use them to display our art on any kind of background that we choose. This class is done in a demonstration, step-by-step method so that you can follow all the things I do right along with me. I'll show you lots of tips and tricks that I use in Procreate to get the effects that I'm looking for. By the end of this class, you'll have all the techniques you need to make beautiful mock-ups. Whether you take photos of your beautiful paintings, or whether you create your art on the iPad, you'll be able to drop your images right into these mock-ups on the iPad itself. Then how handy is that? You can share right on social media without having to do anything else. Mock-ups are great way to choose the setting and the lighting on how you display your art, anytime, anywhere. Join me today while we explore some really fun ideas on great ways to show off our art.
2. Supplies and Set Up: Before we get started, I want to make sure that you have everything that you need. I do this class on an iPad Pro, with an Apple pencil. I'm using the Procreate app 3.2 version, and I'll also be using the Snapseed app. I have links to these in the description. In the attachment section, I provide you with two pictures of the iPad Pro that I use; one is before I fixed it, and one is after I do the scientifics. I'm also going to provide you with two of my background images; one is of a natural stone texture and the other is of a cement texture. On the class page, under the project description, you'll be able to find the link to the brush that I use for my masking here. Then you'll also find the attached files I just mentioned to the right, here. When you're ready, I'll meet you in the first lesson.
3. A Simple Wall Art Mockup : We're going to start with a simple mockup of some wall art. We're going to turn our art into an art canvas hanging on a painted wall. Begin by opening the procreate app and we're going to create a new canvas. In the top right, I hit the plus sign and I'm going to use the default screen size as my canvas. If I want to know what the settings are, I go into my settings, into canvas and into canvas metadata. It'll tell me right here, dimensions and DPI, 132 works for me. You can also create your own custom one. Next, I'm going to insert my image from my camera roll. I'm just bringing in a piece of art that I created in procreate and saved to my camera roll. The image comes in the full size of the canvas as best as it can because my image is square and on its own layer. I like to name the layers so that I can keep track of what I'm doing because I will be creating a few different layers. Once I have that in, I'm going to select that layer and then I'm going to create a new layer and I'm going to fill it with a black color, so that there is a black square the same size as my artwork. I'm going to name this one, my drop shadow. Once I have it named, I'm going to move this particular layer underneath my art layer. I just touch it and drag it down. I want to select them both, and then choose my transform tool because I want to resize them a little bit smaller on my larger canvas. Once I've moved my artwork with the shadow where I would like it, I'm going to choose just the drop shadow, go in and choose my transform tool. With it on magnetic, I'm going to slide it down into the left just enough that I can see some of it on the outside edge. I go into my adjustments and choose Gaussian blur. Then I'm going to blur it until I'm happy with how the shadow looks, I can go back into the layer itself, lower the opacity if I find it too strong until I get the look that I'm looking for. The size of the shadow and how strong it is totally up to you. That's what you play with the blur and the opacity. Now that I have the shadow behind my artwork, I can change up the background color to enhance the artwork or I can leave it on a white wall. Now you've completed your first simple mockup of a piece of your art hanging on a painted wall. In the next lesson, I'm going to show you some more ideas for our background, as well as we're going to play around with the edges of our canvas.
4. Backgrounds: Let's change up that wall behind our art. We're going to start by creating a new layer and we're going to move it underneath both the art and the drop shadow. Next, I'm going to go into my brushes and I'm going to go into the folder called industrial and use this brush called caged. I'm going to choose a medium to a light gray, and I'm going to make sure that I am working on the new layer that I created. I will make my brush as large as it can go, and I will start to paint on the layer itself. As long as I keep my pencil or my finger on the screen and I don't lift it, the pattern will stay consistent, so I will just keep on going until I get it as dark as I want it to be. This one gives me the look of a nice light white brick wall. Now, I can go and change it up and I can create a new layer. I'm going to stay with the gray but go a little bit darker. I'm going to go into my brushes, and this time I'm going to choose the cement brush. I'm going to be on the new layer and I'm going to make my brush as large as possible, and I'm just going to paint. Then just speeding this up a little bit, making sure my brush stays in contact with the iPad at all times. If you lift up your brush, it does break up the pattern, but sometimes that's not a bad thing, such as in this one with this cement. Now, I can go in and change my background color and then I'm going to go into the layer and change that cement layer to the overlay mode, and then it brings out more of the background color with texture. Now, I can keep going in and changing the background color and it gives me a little more texture on that solid color, so that my wall now looks a little more realistic than just the smooth painted color. You can play around with those brush textures in your colors and you plain modes, and you can get quite a few nice wall textures of those. Now, I'm going to show you how to bring in a background image. I've gone back into my camera roll and I'm going to insert an image that I took of my deck. You can take your own pictures of some nice textures around your house or your neighborhood, or you can get some nice ones online as well. Now, once I have my background image in there underneath everything, I'm going to add a new layer, and I'm going to fill this new layer completely with white. I'm going to change the blend mode to overlay, and I'm making it a little less opaque. It is sitting right above my background image, but still below my artwork, and it gives a bit of a whitewash to my decking. I can try other background images with the same effect. I will go back in and insert an image, and it takes me back into my camera roll. I'm going to go back into this folder that I have my mock-up pictures in with some more textures that I took pictures of. I'm going to choose one that's a little more like cement. This one I believe was a cement brick. I have it here and if I want to, even though it's a fairly white brick, I can make it even whiter with my overlay. I like the white overlay, it makes it look like it was a little sunnier out that day. Let's try one more image here. Go back into insert flat image, into photos and into my album. I'm going to go down and pick a third background image. This one here was literally a picture of a rock sitting on my waterfront. I have the overlay on it already because it was already on, I can take it off and it gives a little bit of a darker look. But you can see it would be just like as if it was hanging in a gallery on a rock wall. Go take some pictures in your neighborhood and bringing them in and put them in behind your artwork for a really fun mockup.
5. Blending Edges: Now that we have our background in place, I want to show you a little trick I do with the edges sometimes, to give them a little more realistic look. Working on the same project, select your art layer by tapping on it and choosing Select. Then you're going to choose a black ink, create a new layer, and you're going to fill, and it will only fill the same size as your artwork. Before I go any further, I'm going to rename this layer so I don't confuse it with my drop shadow. I'm just going to rename it my edges. Now we're going to move it underneath our artwork and this is why we renamed it. We wouldn't confuse it with our drop shadow. Using the transform tool on magnetic, You're going to pinch it open slightly from the center, so that you have a nice little black frame around your artwork. Back into our layers. We're going to choose our art layer. We're going to select. Then we're going to go back to our edges. We're going to clear, and that's going to clear the center out. All we have left is the edges. Now I want to bring this size of this down just a little bit. I'm going to move it above my artwork. We're going to play around here using my Transform tool. I'm going to line it up with the edges of my artwork. Now I do want it to overlap ever so slightly. I think I'm going to move it back down below my artwork because I want it to slightly show around the edge. Again, I use my Transform tool in magnetic and I give myself a really, oops, be careful there that you don't hold it too long or it will distort it. I just want a very slight black edge around my artwork. There, now I know it's slightly overlapping, so I do want it to lie on top and I'm going to change the blend mode to overlay. Now the overlay, let's it blend in a little better, but it's still too crisp for what I want. I'm going to go over to my adjustments. Now before I do that, I actually want to duplicate this. I want to bring the duplicate layer underneath, because I'm going to use it as a mask later on. Since I'm going to do that, I should probably rename it or I'm going to get it confused with the one that I'm going to blur. We're going to rename it mask and just turn it off. Now you might get a little confused with this drop shadow, so I'm going to turn it off while we do this and I'll turn it back on after. Now on the edges layer, I'm going to choose Gaussian Blur, and I'm going to blur my overlay layer. This gives it a nice soft edge look. If I zoom in, you can see that the part that I did the overlay on has a nice softness to it. Now, I'm going to lower the opacity so that it doesn't stand out really strong. It gives you a nice soft shadow, as if there's a little bit of a beveled or curved edge around your Canvas. You can zoom in and zoom out and work with the opacity on that and see what really appeals to your eye. Once we've played around with that, we're going to go back to the mask. You don't have to turn this layer on, but you can select it. It's going to select just the area around your Canvas, the same before it was blurred. I'm going to go to the art layer and I'm going to choose Gaussian Blur and now I'm going to blur the edge only of our piece of art. I don't want to blur the art. I just want to blur the very edge and only slightly, what we're trying to do is just soften up the edge that blends in nicely with the overlay section. Just make sure that you have that selection on so that you're not blurring out your artwork, only the very edge of it. When you're all done with that, turn your drop shadow back on and it gives you a much better idea of what this looks like. Now you can turn your backgrounds back on and you can play around with that. Now you can see that the edge of your Canvas has a slightly beveled and softer edge to give it a little more of a realistic look. The goal with your MockUp is to do all of this only once. Then all you have to do is drop your artwork into the MockUp. You create groups out of your layers. I have a MockUp Square and I have a background group and within those groups, I already have the layers that I've completed and the only layer that I will replace is the one where the artwork goes. I have a set size that I use for my artwork. I generally do my artwork in a square, so that I can drop it into my MockUp quite easily. I do the MockUp completely based on a square format. That way, all I have to do is replace it with a piece of art that I'm working on. I have about two or three mock-ups that I've made based on different sizes of artwork and those are the sizes I stick to, so that I don't have to redo any of my MockUps. Have some fun with this and play around with the techniques and ideas that I've shown you. When you're ready, meet me in the next lesson, where we do a MockUp of an actual iPad.
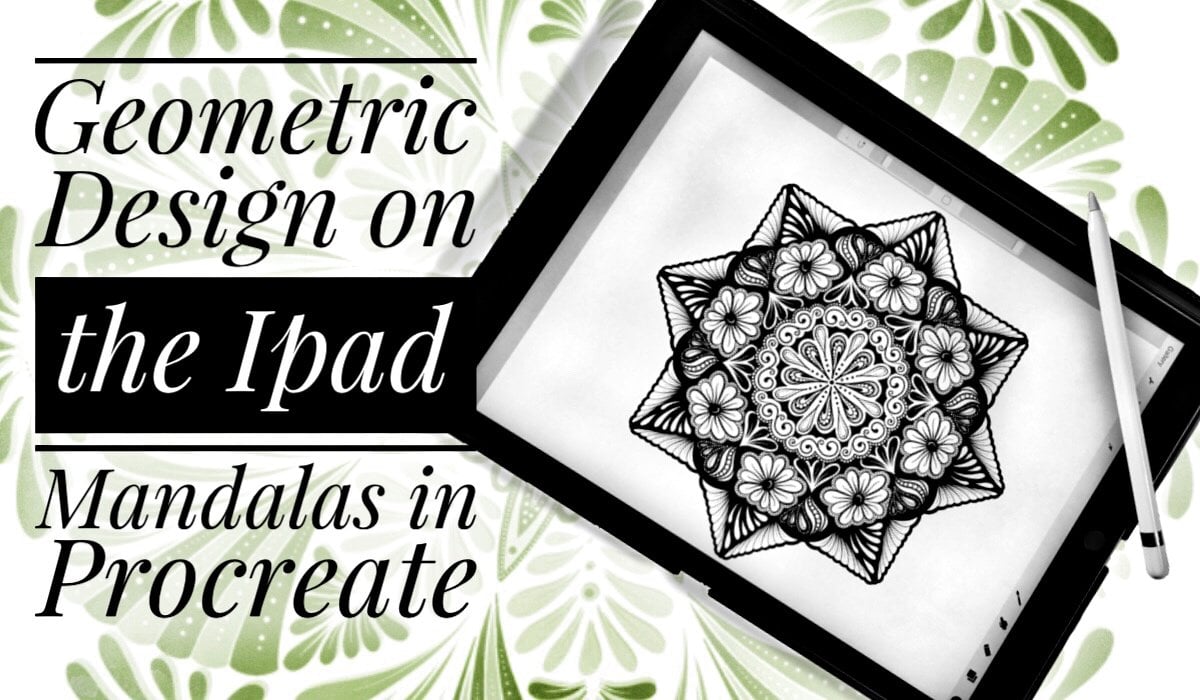
6. IPad Mock Up - Preparing Your Image: Let's get started on working on a mockup scene that we can present our artwork in. I do most of my artwork on the iPad. So when I post pictures of my work in progress, I like it to be on the iPad, but I don't always want to have to retake the picture. The lighting isn't always right and sometimes it's just not convenient to do so. I've made a mockup of my iPad and I can change up the background to any color or texture than I'm looking for and I can change the picture that's on the front. The techniques I'm going to show you today could also be used to do other mockup scenes. You could do a desktop, perhaps you'd like to do your computer or you can do some nice frameworks on the wall. To start with, you're just going to need a plane picture of an iPad. My little setup is really basic when I take my picture, I put my iPad on a white surface and I light it and then just take a picture from above. Once you have your picture, I'm going to show you how to tune it up. I use the app Snapseed, and I already have one here that I've worked on, but I'll show you how you can go into your camera roll and open up a new one. We choose open, open from device and I have quite a few pictures in my camera roll, so I have them in an album from my mockups, and I have lots of pictures in here of iPads, some have already fixed and some of them I haven't, so I'm going to choose one that's right from the beginning. I think one of these in here you can tell that the lighting isn't the greatest. We're going to start with this one and I have provided you with this one so that you can play around with it as well. Once you have your picture loaded, you want to edit it here on the bottom right, you get all these tools and I want to start with white balance, go down here and use neutral color then drag my eyedropper over to my white background, see how the temperature changes here. I can also adjust that manually, but I find that the dropper does a really good job to get you started. Sometimes this is all you have to do to get the picture to the right coloring. Click the check mark. Now, I do want to brighten it up slightly, but I have to be careful reading here I don't want this Apple pencil to disappear into my background because when I'm removing the background it will be difficult. I choose tune image and go into adjust then work on the brightness. See there's many you can use here but I want to do brightness and I'm just going to drag it up slightly, adjust. Am concerned with just the iPad, the background doesn't matter I'm going to be taking that out anyways. There is the picture I'm going to work with so to save it, I click on Save and go down to export, which will create a copy with permanent changes and it's going to put it into my camera roll. Now we're ready to go back out and get into procreate and start our mockup.
7. Masking the Background: So let's get started. I'm going to open my Procreate app and I could import the picture, but the picture has a 72 DPI and I want more than that because I'm adding stuff in. I'm going to go back and just use my screen size, which gives me a 132 DPI. Because I'm creating a new image I want some control over the size of it. Now I'm going to insert a flat image and I'm going to bring it in from my camera roll. I've put it into my mock-up album. It comes in on its own layer, and I want to make sure I'm going to create a new layer because that's where I'm going to start working. But I want to make sure that I rename this layer because it's my original. I want to make sure that I know which one I'm working on. I'm just going to name this one the iPad. Now my new layer that I created, I'm going to name background mask because this is the mask that I'm going to use to remove the background. I'm currently working in Procreate 3.2, so there isn't a masking function and I believe that's probably on its way. But for now, we're going to do a workaround. The next thing you're going to do is pick a color that we're going to do our mask in. Pick something bright and something that appeals to you. I'm going to choose this blue, and then I'm going to go in and choose a brush. I want it to have a distinct edge and I want it to be full opacity. I use my plane tech pen that I created and I'll also provide that for you if you'd like to use it. I'm going to size it down quite a bit because I want to get my detail right so I can't have the pen being too large. I'm going to go all the way around the outside, and this Apple pencil, I'm going to do that separate. I'm just concerned with the iPad and I'm going to draw all the way around. Now I'm going to start on a corner. You want your pen to be at full opacity. But if you want to be able to see through it, change the opacity on the layer itself, not on the brush itself. Because when you go to remove it, it's going to remove with the opacity of the brush. Make sure you're zoomed in nice and close so that you get a good view of the detail as you draw around the outside of your iPad. Remember, you're on the layer that has background mask for its name. You don't want to be drawing on the picture itself. Now because the edges of the iPad are perfectly straight, I can use the quick line feature, so it tells me quick line created and then I can draw as far as I can see. I want to be zoomed in enough that I can get good detail on my line and be accurate, but not so much that I can get a nice long line going. You'll know you have the quick line when here it says quick line created up top and then you can just stretch it out and place it wherever you want and it maintains that perfect straight edge. This whole edge of the iPad, I know is a straight line. I use the quick line feature everywhere that I can. Now I have this little part where I will have to dip in, I'm just going to draw that myself. I've downsized my brush quite a bit so that I can get into the detail. Then this little straight section here, I can also use the quick line on it as well, so I drag it and then the quick line snaps and I can just set that in there where I feel it fits. I have my iPad in an iPad case, so you can see here at the corner the case is showing, so I'm just going to cut that off, I don't really want that in my picture. I'll draw around the corner and then when I get back to the straight stretch, I can do the quick line again. I have shadow here, but I'm going to create my own shadow later and I'll show you how to do that, so I can get rid of that as well. I only want the iPad itself. Don't worry if you feel your line is off a little like here. If it bothers you and you notice it right away, you can hit the Undo button and do it again. But I will show you how we can clean up any glitches later on after we've gone all the way around the iPad. I'm just going to quickly speed this part up and go round the rest of the bottom half of the iPad and you can stop and fix anything along the way. Now when I get to this section here, I'm back up to where the Apple pencil is. As I said before, I'm gonna do the Apple pencil separately. I'm only concerned with the iPad. I'm going to go ahead and draw right over top of it as if it's not even there. I use a quick line to get a nice straight edge even though the Apple pencil is lying there, and then I'm going to speed through again and just do the top half so that I can complete my mask all the way round my iPad. Now I have that outline all the way around the iPad on this layer, I'm going to use my Fill tool and I'm going to fill the background on the layer of the Background Mask. See how it covers everything except the iPad. Now I'm going to use that to delete the background, so before I do that, I should have done this earlier, but I duplicate my picture and I'm going to lock it down. I want to have one that I don't touch and then I also want to have another duplicate that I'm going to use to help me fix any mistakes. I'm going to name them the one I lock, I call backup and that's the one in case I really mess up, it's there. Then the other one I call fix it because it's the one I'm going to use to help me fix any issues. I'm going to go to the background mask, bring the opacity right up to full on the layer and then go and select. Now I go to my iPad layer and I clear, now I turn off my background mask layer and I have to turn off these other two as well. You've remove the whole background of your iPad picture and you just have an iPad sitting on a transparent background.
8. Fixing Mistakes: I'm going to show you how to use our fix-it layer so I'm going to Zoom in here and see this area here I took too much off the iPad. Best way to tell is you go in and turn on that fix-it layer, see how nice and smooth that should look? Now I'm going to slowly lower the opacity and you'll see where it is I took too much from my picture. You can see this better if I turn the mask on the area I'm talking about, so what I'm going to do is create a new layer and use my masking brush again on that new layer to put some of it back on and I'm going to get it from the fix-it layer. I'm going to go back in and make sure that I have the same brush that I use and I'm going to use the same color. A little side note about the quick line you can find under the preference section in your settings the quick line didn't lay and you can change that, adjust it to whatever length of time you want for that quick line to pop up when you hold your pencil on the screen. Here is how you put something back into your drawing so on my new layer I'm going to draw a quick line over just the area that I believe that I left out. I may be doing a little more than I need here but that's okay, it'll just copy over top of what's already there. Once I'm happy with the area that I feel was removed by mistake, I go back into my layers, I select the contents of that new mass, I go to the fix-it layer, now I hold down this selection tool until my mask is reloaded and then I hit those double line bars and it creates a copy of what was on my fix-it layer under that mass. So see how this is so much cleaner now than it was a minute ago so I'm going to take that layer that I just created and I'm going to place it above my original picture, and if I turn that off you can see what was missing and when I turn it back on it's there so that is how I fix those. Now, I can merge it down into my clean image and it is part of the image as if I had never taken it off in the first place. Just to clean up my layers, see I don't want that new mask layer so I'm going to delete it, but I am going to keep my background mask, I may want that going into the future, it's just a good thing to keep around. You can go around your iPad, Zooming into the areas and making sure everything is the way that you want it, and just to check you can use your fix-it layer and you can turn that on and off just to see if there's anything that really stands out. When you're happy with how everything looks, we're going to move on to the next lesson.
9. Masking Individual Items: Now we're going to work on our Apple Pencil and we're going to put it on its own layer. So we did cut it out of our original iPad picture, so we're not going to use that. I am going to use the Fix It picture and I'm going to make sure my Opacity is up to a 100 percent. Next, I'm going to choose a color that I want to use for this mask. I think I want to use orange for this one, and again, I'm going to be working on a new layer. So I'm going to create a new layer and I'm going to bring the opacity of the layer down a little so that I can see through my pen. Remember, it's the Layer Opacity you change, not the Brush Opacity. Now I'm working on the new layer, but I'm looking at the Fix It layer. So now we're just going to work on this Apple Pencil. This technique you would use for any items that you want separated out from your picture to be lying on separate layers. This works because with the Apple Pencil, it is lying on top of the iPad and I'm going to be putting art work on the iPad of my own kind, and I want the pencil to still be lying on top of my artwork. This is why everything needs to be done in layers. So working your way around the pencil, you can use the Quick Line where you want to, because I do know that the pencil edge itself is going to be perfectly straight. It is a little tricky where it hits the white. That's why I said when we brighten up our original white picture, we have to be careful because when your Apple Pencil blends too much into the background, you lose where your edge is and you have to start guessing. I'm going to be creating my own drop shadow for this pencil so I just want the pencil itself. It does have a little bit of shadow reflecting onto it and that's fine, I'll put that in as well. I do highly recommend when you take your picture of your item that you take it on a white background, I have done it on colored backgrounds thinking I would see my white item better, but you actually get a reflection of the color of the background showing up on the pencil itself. So then you end up with this color on your pencil that you don't know where it came from because you've cut the whole thing out of the background. So I highly suggest that when you take a picture of an item, do it on a nice clean white background. Another really nice function of this Quick Line tool is once you've done the line, if you don't really like where it lines up, you can use the Transform tool and you can move either end of it up or down just to adjust its position. You can only do this right after you've made the line. Once you've committed to it, you can't do this, but it's a nice little tool to use if you just happen to notice that you're off a little on one of the ends of your line. So once again, we're only concerned with the pencil itself. Don't worry about any shadows that is casting on the background. I'm not interested in those because I'm going to show you how to create a drop shadow using the pencil mass that we've just created, and once I'm finished with the outline, I go ahead and fill it using my solid color. Now this time I'm using the mask for an item I want to keep instead of an item I want to delete. I go to the Mask Layer, choose Select, go down to the Fix It layer because that's the one the whole pencil is still on and go up to My Selection Tool, hold it down, hit the "Double Bars" and what I've created is just an layer with only the pencil that lay under my new mask, and as we did before, we can do a little clean up on it, any areas we might have missed. We can go back and use the Fix It layer to bring back in, or we can just go directly to the pencil layer itself using our Eraser tool and we can just clean up the edges the way that we like them. Zooming in and zooming out to see what appeals to your eye, and when you're all done with that, go into your layers and just make sure that that pencil layer is on top of your iPad layer so that it shows above the iPad, that's where you want it to lie. So now you see how easy it is to divide your picture into layers.
10. Drop Shadows: We have our iPad and we have our Apple Pencil. But I took out the shadows when I was doing the masking. Now we're going to put them back in on our own. Choose black because that's what we want for our shadows, and I'm going to start by doing the iPad drop shadow. Go to the "iPad" select it, add a layer and then you're going to fill and it will only fill the selected area that the iPad is in. You want to move that layer below the iPad layer and then while you're on transform and magnetic, you're going to shift the shadow down and to the left. My original of light source in the picture came from the upper right, so I'm going to stay consistent with that. Now we're going to go to, adjustments and use our gaussian blur. This is just like we did in the wall layer. You're just creating a drop shadow that's lying behind your object. I want to stay fairly consistent with what was already there. I can adjust the shadows slightly from what the original would've looked like, but I do want to stay consistent, especially since my Apple Pencil has a little bit of a shadow on that same side, so I want to keep with the realism. I find if I can, I much prefer to make my own shadows because then I don't have to worry about trying to capture them perfectly when I'm doing the masking. Now that we have the drop shadow for the iPad, let's make one for the Apple Pencil. On the Apple Pencil layer, choose, select. I'm going to show you how if you'd like to choose a different color so that you can see it better. It is hard to see the block sometimes, so you create a new layer after you've done the select and you fill it, and you have the shape of the Apple Pencil filled in red. Now, move it below your Apple pencil, and now you're going to shift it down and to the left with the transform on magnetic. Make sure that your shadow is fairly consistent with the one behind the iPad. Now, your shadow is red and you don't want it to be red. Easier to see when you're shifting it, but you need it to be black. We go in and we change our color to black. Then making sure that we are on that layer with the red, we go into adjustments and hit recolor. Now where this little white cross is, is what it's going to color. When I move it to the red, it changes it to black. Really handy little function. As we did with the iPad shadow, we're going to go to adjustments and do the gaussian blur, and we're going to blur our shadow and then we'll play with opacity if we find it a little dark. It is lying on top of the iPad, so you want it to be subtle, but definitely still there. You want to keep some consistency between the two drop shadows simply because there are coming from the same light source, but they need to be on separate layers so that you can control when you put the artwork in. One is going to be lying on top of the artwork and one underneath. It's also a really good idea to make sure you keep up on naming your layers. I tend to get behind on that, but I need to name these shadows so I know what I'm looking at when I open up my layer panel. Now we have the basic pieces of our mockup and next, I'm going to show you what to do with them.
11. Adding In Your Art: Now we have all the pieces of our mockup and I'm going to show you how to organize them. You want to place the main pieces into a group. We want the Apple Pencil, the shadow, the iPad, the iPad shadow, and I don't want that fix it. Again, we just select these four, and then I'm going to go up and hit these little lines and I'll put it into a group. Now, I want to name that group, my mockup. Keeping things in the groups keeps it a little more organized and easier to control. Now I can turn this mockup on and off and see everything is included. I can turn off the background so you can see that it's actually a true mockup that could go on any background. I can use the Transform tool on the group which allows me to rotate everything including the shadows and I can even change up the background to any color I choose just like I did with a wall art. I'm going to further organize these layers and put my mask into a group and I'm also going to use these backup layers and put them into group called backup. To get even more organized, I'm going to create a new layer and I'm going to call it Artwork. Now, let's get to the fun stuff. I'm going to show you how to put a piece of art into your mockup. I'm going to start by bringing in a picture that I created in Procreate and saved to my camera roll. Go into your settings, go into insert flat image from my camera roll and I'm just going to select a picture and it pops up into my project under the artwork layer. Now using the Transform tool under magnetic I'm going to try to resize it onto my iPad. But as you can see my picture is square in my iPad which was taken on an angle is not. Here's how you make your artwork fit on to your mockup. You're going to want to do at one corner at a time. You hold the dot down until it allows you to distort the picture. You want the Transform tool on free form and don't be moving it around there, it's still on transform. To get to the other corner you have to take it off transform. Turn you Transform back on. Now, it's starting to distort the picture but that's okay. Hold down on that corner and then pull it and it allows you to distort the picture until you can line it up with the corners. Get it as close as possible before you do this because it really starts to distort, and I don't think I quite got it big enough here so my corners are very distorted, but that's okay. Just keep pulling on it. Over we go until we line that up and you really have to zoom in to know if you're lined up or not. Zoom out and see how you're doing, and then zoom back in, hit "Transform" make sure you're on free form, hold the dot till it allows you to distort, and then I just need to zoom out a little to get the right angle and then I can just pull that into the corner. Once you have it lined up and it looks good, you go back into your layers because we want this one to be lying under the Apple Pencil. Open up your iPad mockup group and pull your artwork into it underneath the pencil shadow, but above the iPad. Now it looks like the artwork belongs there. As I did before, I can change up the background color and I can also transform the group as a whole and put the iPad on an angle with the art and the shadows included. Now, let's say I wanted to show a work in progress, not just a finished piece of art, something I'm actually working on on my iPad like this for example. If I want this whole screen maybe with all the layers, I am going to take a screenshot of that, go back to my gallery and into my mockup, and then I'm going to insert that screenshot from my camera roll. Now it's in my mockup and I'm going to resize it so it's generally the size of the iPad screen, but see how all of this matches the gallery and the settings and the icons. This is going to cover the entire screen. Now, again, it's a nice rectangle and my iPad is not a nice rectangle. Again, I will use the Transform tool to distort this image into the shape of my iPad. I'm going to try to make sure those corners are lined up as close as possible before I start the distorting. I go in and I hit the Transform tool, and when the corner pops up, I hold it down until it distorts on the free form and then I drag it to where I want it. Again, I do this all the way around the image. See how this isn't quite lining up. Now, I'm going to go down to this corner and I'm going to distort this image, holding it down and then pulling it out and it will line up as long as I have that one of the top lined up. You may have to go round and tweak it a few times, but you'll get the hang of it the more you do it. It'll be a matter of just pulling each of the corners in where you want them and then it will fit perfectly. My image is lying on top of my iPad mockup and I want it to be underneath the Apple Pencil and Apple Pencil's shadow. I go in and I drag it into the mockup group into the right location, and when I turn that off I can see that it's in the right spot. Now, I'm seeing a little bit of a shadow on the other side of this pencil that I don't know if I really like. That's because now I have a piece of artwork lying under that Pencil instead of the original iPad. You can still go in and tweak some of this if you want to. I have to make sure that I'm on the right layer, but I can do a little bit of erasing here with my Eraser tool until I'm happy with that. Then I zoom back out and I'm happy with my picture. Once I have this finished, I can turn off my background. I can transform it and put it on an angle. Now I'm going to put in some backgrounds the same way we did with the wall art. Everything now is pretty similar to what we did with our first mockup now that we have the official iPad mockup in a group. Here I am bringing in some pictures I have on my camera roll of different textured backgrounds. You can play around with a bunch of different backgrounds. You can put them in their own group and call it backgrounds and that way they're already in your mockup, so that every time you put in a piece of artwork you can choose which background you want that piece of artwork to show up on. Remember the point of the mockup is to have everything at your fingertips so that all you have to do is put in your piece of art and change up the background. I'm going to show you one more trick if you'd like to do just a little bit of a hand lettering on your iPad right on the mockup. We're going to create a new layer because of course everything should be on its own layer, and I'm going to fill this layer with white. Then I'm going to use the Transform tool and bring it down to fit the square that's on the iPad itself. The iPad square is a little dimmed out because of the picture, and I want to have something bright and white because I'm going to change the background and I want my artwork to show up I'm basically creating a clean slate that I can draw on right into my mockup if I don't feel like bringing in image in from somewhere else. I'm using the Transform and Distort tool to make this white square fit into my iPad mockup. Nice thing about this as well is that you can draw on any of your artwork. Say you bring in a piece of artwork and you want to add something to it, like your signature or a little comment, you can draw that right in as well on a separate layer. Now, I'm going to bring this square down into my mockup so it lies under my Apple Pencil. I'm going to go in and choose one of my lettering brushes, and I'm going to draw right on the white square. I could even draw on a separate layer yet again, but I'm just going to draw on the white square. There you go, something very simple to add to your mockup. Now you have lots of ideas to go and experiment with. Keep in mind that when you take a picture of your item whether it's an iPad or a frame, or even a desktop, it's not going to be square on. Every time you add a piece of art, you're going to have to distort the size slightly so that it looks like it was realistically in the picture. That's what's so great about the Transform tool in Procreate, is that when you hold onto those corners, you can distort the picture to fit perfectly into your scenario. With a little bit of practice, you'll be making beautiful images to share on your social media.
12. Inspiration and Ideas: Now you know how to take a picture of your art, a picture of an iPad, and a picture of a background texture, and make them into a mock-up. Have some fun with this. Go take some pictures in your neighborhood, or maybe even in your own house of some fun textures that you can use for your backgrounds. You can try taking pictures of your favorite frame with nothing in them, hang it on your wall to shoot it, or leaning against a tree or a rock outside. Use these create some beautiful mock-ups that you can just drop your art into no matter where you are or what time a day. It will look like you just did a professional photo shoot, and got the most perfect picture of your piece of art. Thanks so much for joining me in class today. I'm really looking forward to seeing how you're going to show off your art in the project section.
 Jane Snedden Peever, Living the Creative Life