Transcripts
1. Class Introduction: Hi. Welcome to Shape Up
Drawing and Illustrator. My name is Tim Aggert I'm
a freelance illustrator, and I do a lot of different
work, especially vector work. I used to think that
artwork had to be complex or very detailed in
order to be captivating. Like this painting, there's a lot going on in
so much detail. And this is my favorite
album cover of all time. I just love the storytelling
and just all the details, all the little intricacies. But what I've learned is that artwork doesn't have
to be complex to be good. It can be very simple and you can do a lot
with very little. In this class, we'll
learn to draw with only shapes and we'll
make a landscape. What we will learn is how to
draw shapes and modify them, how to use the pathfinder tool, how to compose a landscape, how to draw using some simple shapes and how to create objects
with simple shapes, and then using color
and gradients. What you'll need for this class is a laptop with Illustrator. Now let's hear about
our class project.
2. Class Project Overview: Our class project
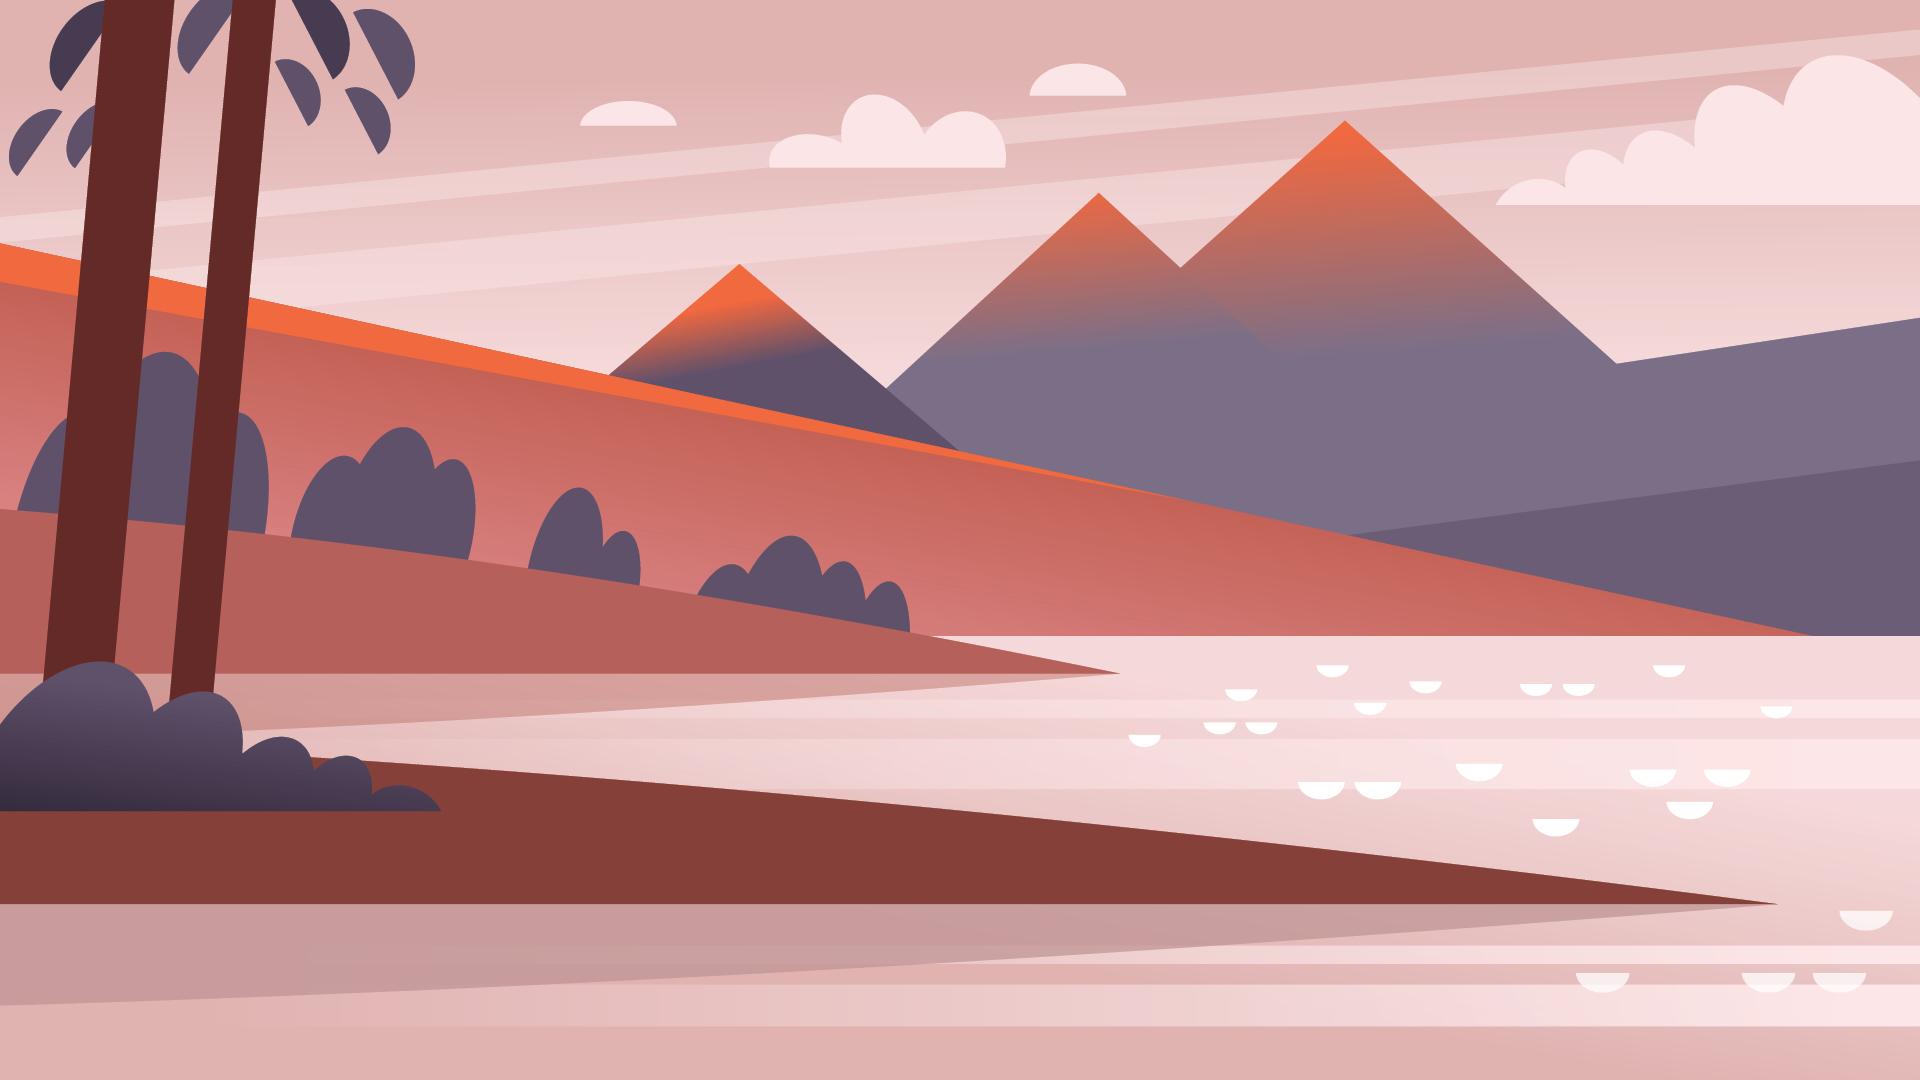
will be to make a simple landscape out of
basic shapes in Illustrator. What we'll do is
choose an image, which I have some that
you can reference. And then the steps
that we'll go through are choosing the
reference image, making our main basic shapes, adding more complex
shapes and adding detail, and then incorporating
color gradients. At the end, you'll have
a colorful landscape built out of just
some simple shapes. Alright, let's get started.
3. Drawing and Modifying Shapes: Okay, we're going to start drawing and modifying
shapes in Illustrator. I'm an illustrator here, and I have an artboard
that's set to 8 " by 8 ", just big enough that we
can draw some shapes. So we're basically going to
learn how to draw shapes, and then we're going
to learn how to modify them in a couple of ways. And then we're going
to use pathfinder to do three tricks that I
use often in my work. So Alright, to start drawing shapes, we'll
start with the circle. We're going to do three shapes. It's going to be circle,
square, triangle. So to get to the
circle or ellipse, you can press L, or you can go over on the left side
here and click Ellipse. I like to use shortcuts when I can. So you have
that cursor there. And we're going to be doing
this a lot of drawing shapes. So you're going to click
hold Shift and drag. And then let go of everything. I'm gonna take my stroke off. When you hold Shift down, it's a very symmetrical. If you didn't hold Shift down, let's delete that.
Let's do it again. So I'm just going
to click and drag. You see how now it's an
oval, it's not symmetrical. I'm going to do shift. Boom, snaps into
being symmetrical. Alright, so there's a circle. And now this is another key command that I'm
going to use a lot, so maybe you want to practice it, or maybe you
already know it. So to make a duplicate of this, I'm going to press Option. See the two arrows
there. I'm going to click on it, but
don't drag it yet. Now press Shift
and then drag it. And then it stays
by pressing Shift, it's stayed perfectly aligned. It's just something
that I use a lot. And then we're going
to do it again. So I'm going to have it clicked. Option, get the two arrows, click Shift, and then drag it. And I'm going to do
it one more time because we're going to
build something here. Alright, so we have
these all in a row. Now, if I don't hold shift
and I pull from the side, you can make this in
any size you want. So we're gonna kind
of mix this up. This is how we're
gonna start modifying. So now I'm I have kind
of an oval shape. We're gonna make an
even bigger oval shape, and then one that like,
we'll do that one. So now we have three shapes. Now we'll start using the
pathfinder tool here, which you can either go up to Window and go
down to pathfinder, or I have it over here. So the first tool we're
going to use is Merge, which is right here, or Unite, I guess. It's called Unite. So I'm going to click
on that. And you see how here I'll do Command Y. See how it's three shapes. I'll select them, do unite. Boom, now it's one shape. And Command Y just turns it into like a wireframe
mode so you can see. Alright, so now we have this. And now we're going to use
our second pathfinder tool. I'm going to draw
a line this way. We're not using the pen tool in this class, so I'm going
to do it this way. I'm going to click
drag and hold Shift. So now I have a line with
no stroke and no fill. I'll go to Wireframe
so you can see it. So now we have this line. I'm going to hold Shift,
click on our shape, and now I'm going
to go to divide. And now this whole
thing's grouped together. I'm going to go to
object, ungroup, and now I'm going
to delete that. So now, we took a circle and we made like maybe it could be a bush if you
had a few more circles, maybe, or a cloud. I use this a lot for clouds. So that's the circle tool. Now we're going to move
on to our second shape, which is going to be
the rectangle tool. So you can either go up
here or you can press M. So once again, I'm going to
click Hold Shift, drag it. So it's a perfect
rectangle. Alright. And now we're not going to do a ton with rectangles
in terms of pathfinder, but here, we'll duplicate this, so we'll do option, click Shift. So once again, I'm not going to hold Shift, but
I'm gonna pull this over. And now I'm going to
go I'm gonna press A for my direct select. And now I have one
corner highlighted. Do you see how this is blue, and the rest have a white
fill? I know it's very subtle. So now all I'm going to do
is press up on my cursor. I pressed V to get it to get
it off of direct select, and I'm just going to click
anywhere on my Rboard. Alright, so now we have
this, and you might say, Oh, that's kind of
boring. What is that? Well, I use this a lot for land, like horizon lines,
large masses of land. Like in our landscape,
it'll come in handy. And now I'll kind of show you. So I'll take this. I was on the arrow tool V. I click Command C, Command F. So now I have a
duplicate in front, which doesn't look
very interesting. I'm going to make
sure I'm on my fill. And now I'm going to
just do a gray Alright, so now I have a gray box
in front of a black box. I'm going to click on this. Using the A, direct select. I'm gonna click on
that. Hold Shift. Click on that and
then cursor down. So now I have a box
on top of a box, and they're perfectly aligned. Now I can do something
like this where I take one corner,
kind of bring it up. And so I'll do things
like this just to add dimension or add You know, if I added color gradients, this would actually be
a lot more interesting. But rectangles, a lot of
times I just use it for land. I'll put a rectangle
on a rectangle and then kind of modify
it like we did here. So that's rectangle. Our last shape we're
going to do here. Now, I don't know of a
key command for triangle. What we do is actually
go to polygon here. So this is gonna make
a six sided shape. I'm not I'm not
gonna hold shift, but what I am gonna do, so I clicked and dragged.
I'm still dragging. I'm gonna go with your cursor
or your arrow key, sorry. Go down, down, down, hold shift, and you can drag
here. So I'm holding shift. You have a perfect
perfect triangle, equilateral triangle. So that's how without
doing a pen tool, that's how I draw triangle. I start with a polygon
and then click drag, arrow down, and then have shift. And a lot of this stuff
comes with practice. If it's like, Oh,
gosh, this is tough. So I click on it, and then I'm going to
do option, click drag. Alright, so here's what
we're going to do here. I'm actually going to make
this smaller hold shift. And triangles I use a lot
for mountains and trees. So we're going to do I'm going to do A for direct select. Yeah, I can do this
one of two ways. I'm actually gonna click on it, and you can just drag it up. And then, boom, you
have a simple tree. And then I can do
M for rectangle. I did eye for Eyedropper. I clicked on that to
get the dark color, and then I'm going
to click on it. Command X, Command B for behind. And then we haven't
aligned anything yet. So here's what we're going to do. We're going
to click on both. Go up aligned to selection, and then center it horizontal
align center, and boom. So now you have a
real simple tree. So I'll move this over. And then sometimes I do a
little more complex. I'm going to do
option, click drag. I'm going to make this. Oh, this is another
important tool or, you know, trick, I guess, tip. So I'm going to click on this. I'm gonna go up to my corner, and I'm going to hold Option. I'm going to click Option
Shift and then drag down. And that is going to make
it smaller from the center. If I didn't do that, click Hold from the corner, do Shift. It's just going to go like
that from the corner. I don't always want
that. Alright, so I'm going to take this, go down. And then I'm going
to do Command C, Command F, move it up. Command C, Command
F, move it up. And now I'll just take these
three and go back to align, make sure I'm
aligned to selection and not aligned to artboard, and then I'm going to do
vertical distribute Center. And that's just going to make
sure that all these three are equally, like equidistant. So now we added a little
more complexity to our tree. And then there's one
more thing I want to show in terms of pathfinder. We'll do copy paste. So I'm going to do
copy or Command C, Command B. I'm
going to move this. Let's make it a different color. And then I'm going to scale it from the corner, hold shift. And now I'm going to do
Command X to cut it, Command B behind it. We're going to select both. And now I go to pathfinder. So we've done Unite,
we've done divide, and now we'll do minus back. You can play around
with these others. I don't use them as much.
But here's minus back. I use this a good
amount. So whatever's behind the shape,
it'll take out. So, boom, now we have a moon. So here, we've made
we've made a cloud. We've made land,
we've made tree, and we've made a moon so we
did all these simple shapes, and that was just with
modifying and doing pathfinder. So let's move on and really
start our landscape.
4. Composing Our Landscape: Now that we've
learned how to draw shapes and modify them
in different ways, let's start our landscape and start thinking
about composition. So, no matter what you're going to do in terms of
your landscape, whether you're going to
use one of my sketches or a photo of your own, let's talk about composing
it and breaking it down. So it's not like
we're going to take a very complicated photo
and draw it exact. What we're going to do
is take it and think about simplifying it and
breaking it down into shapes. It's not going to be
a mountain anymore. It's going to be a
series of triangles. It's not going to
be a tree anymore. It's going to be a series of maybe circles and
things like that. Your ground is going
to be a rectangle. Alright, so here we have a mountainscape with a lake in front of it, and
then some trees. Instead of making this super complicated, let's
just break it down. So my mountains are going
to be some triangles, and then I'm going to
have the mountains and then some hills
and then the lake. And those are just going to
be a series of rectangles. And, of course, I'm
going to modify these. And then the trees
off to the left, I think I'm going to make
them a series of circles so they have like
this rounded element, but that could change. So now we see the original
photograph. Here it is. And then here's my shapes on top of it, just
to give you an idea. And then what I'm
going to do is sketch this. So here that is. I've already sketched it.
And so that just shows you a simplified interpretation. And that's what I'll draw on. So now you can either use one of the sketches
that I've done for you. I've supplied a few,
or you can take a photo that you like
and simplify that. But I really love to get
you to look at things, start looking at things
and seeing, you know, not a car, but, like, Oh, that's rectangle,
rectangle, circle. You know, like, start looking
at things when you're drawing and breaking them
down. That's really the point. So let's start working
on our landscape, bring this sketch in and start laying down the ground
in the main shape.
5. Drawing the Main Shapes: Alright, now that we have established what
we're going to draw, whether you're going
to do, you know, a photograph of your own or a sketch of your own
or use one of mine, I'm going to work in a size. It's going to be 6.4 "
wide and 3.6 " high. And I know that sounds
like an odd size, but it's the same
dimensions of, like, 19 to six ratio, which would be like a video
or a wide screen movie. And it's going to be the
same size as my sketches. So if you want to work for one
of my sketches, feel free. So I did place. I'm just
going to click on it, and it's the exact same size. So this first layer first layer, I'm going to call
FPO, which is just, like, a term for
positioning only. You could also call it like sketch or something like that. And then I'm going to
draw on top of it. I'm going to label it by, like, background midground,
foreground, kind of. So I'm going to do mountains
that's my background. You know what? I'm
going to I unlocked it. I'm going to go
and just make it. I'll just make it like 45. Less than that. 30%.
So I can see it, but it's not gonna
be distracting. I'm going to lock that layer, and now I'm going to
start drawing my shapes. And this particular video, this segment will be pretty brief because
we're just blocking out the main the main shapes. So here's my polygon. I'm
going to bring it down. I'm going to make
this very wide. And you don't have to
feel like you have to match everything exactly. So I did the move where I
pressed option to duplicate it. And I will fill these in
with color pretty soon here. Actually, I'm going
to work in grayscale. I know it's going
to sound weird, but it's just to
kind of simplify it. And then we'll add color.
So I'm going to do this. I'll just work in these default it's gonna be pretty light
it's towards the back. So it's my first mountain layer. And I'm gonna do the next. And that's gonna be
I'll do a triangle for that one. Another triangle. And I'm going to This is going to be bringing
it to the left. And I'm going to
do direct select, that's A and just
drag it so that it's just flush
with the left side, and then I'm going
to drag this over. I'm going to give this
kind of a darker color. And there's my hill. So already, it's looking
like I know it's simple, but it's looking like a, you know, we got a
landscape going on. And now I think what I'm
going to do I'm going to do this one more piece
on my mountains. I'm going to start
with a rectangle. So I'm gonna do and just, like, do this over here. I'm going to select it. Select the same
colors my mountains. What this is going to be is kind of a we'll see if it looks good. It's like this
jutting out piece. I think it'll be fine.
And then I'm going to I don't love it, but it's okay. So
I'm gonna keep it. It's just like a piece of the mountain
that's still going. Alright, so now I'm gonna
make these go away, and I'm gonna put my lake
in the front of these Lake. And that's just gonna be a
rectangle, all the way across. I'm gonna make
this pretty light. So you take away our sketch? And then I'm gonna
take these away. Now I'll do these two
pieces of land that are, like, on top of the lake. I don't. I'm not being
very inventive in my You know what I'm gonna do? I'm actually gonna
take this, copy it, and I'm gonna duplicate it. And then I'm just going
to modify it like that and then modify
it like this. You know, as much as we're
not using the pen tool, well, I don't have
to break the rule. I'll show this just
to show it to you. Anchor point tool. So
it's not the pen tool. You can take that and drag one of your pieces to give it a little
bit of a curve. So I'm going to make
all these visible. I'm gonna make this darker 'cause it's getting
closer to us. So it gave it a little
bit of a curve there, so it's not so geometric. And now I think I'm going
to do the same thing. I'm gonna copy paste in front, drag this over. There we go. So now this is really looking like I know it's simple,
but it's getting there. And I'll do sky
as my back layer. And then in the next video, what I'm going to
do is do any kind of detail or anything
that's complex, which in this one,
there isn't much. It's gonna be basically shapes. And I'll do a little bit in
the sky on the next video. But, yeah, just by doing well,
I didn't mean to do that. Alright, so just by doing a couple of basic
there's our sketch. And then here's the
main composition. And as I'm looking at this, I'm going to make a
few tweaks simple. But I I want your eye to
kind of go up like this, so I'm gonna go like here. I'm gonna bring this up a bit. I'm gonna move it
over a little bit. I want your eye to
kind of move this way. So I made it kind of like
a little staircase there. But here we go, just by doing those couple rectangles,
couple triangles. And even though we're
working in gray scale here, we've got our main composition. And now in our next video,
we'll add some details.
6. Adding Details and Objects: Now that we have our
main composition, we're going to add some details. So what I'm going to do, I'm going to take my sketch,
put it up at the front. I dragged it up in layers, and I'm going to lock it. I think that'll be good enough. And since it has some
transparency on it, you can bring it
to the front and it won't you can see
through it, of course. So I'm going to do some true
Let's do some clouds first. They're basically going
to be made the same way. So I'm going to zoom in here and I'm going
to start drawing. I'm gonna lock everything,
but the layer I'm on. And I'm going to go to white and I'm just going to start
drawing these circles. I'm going to do one, tilt it. C, control F. I'm just
going to do it in front. Since I'm drawing on white here, I can always go to my Command Y wire frame and it makes you see it
better, you know what I mean? So I'm going to duplicate these, and they're just
going to get smaller. You can also kind
of squish these a bit just to mix them up. And I'm just making like So I just have a series, and I'm going to
go back to this. I'm gonna go still got
pathfinder over here. I'm gonna unite them. I know it looks
kind of silly here, but I'm gonna do So I have a line going through it that doesn't have a stroke
and doesn't have a fill. That I do because if you have
a stroke on it, it's weird. It can be a little weird when
you when you do the divide. So now I have this
complex shape and a line, and the complex shape is a fill, and I'm
going to do divide. And it basically divides
it, but it's group. So then I'm going
to go to ungroup, and now I'm going to
delete that and boom. There's a cloud that I I'll drag it over here
so you can see. I like that, so I'm
going to keep that. Don't worry. This
thing is going to come to life when we add color, and now I'll do trees. And that's really
the detail we're adding in this
one. Not too much. Go to my layers.
So we have clouds, and now we'll do
trees over here. And we're going to do
trees the same way. I don't always do
trees with circles, but when they're kind
of bushy and stuff, I kind of like doing it. Oh, and I'm going to show
you another trick, as well. Now, in this next part,
I'll speed up a little bit. I usually don't speed
up, but all I'm doing is taking the shapes
and aligning them and kind of moving them around,
like we made our cloud. So what I'm going to do, I'm
making a series of these, and then I'm going
to take a line and just divide on the bottom, just like we made our cloud, and then I'm going to
put it beneath our hill. The land here, put
it above the trees. So, boom, you see
how that looks? Now, this is fine, but I want to add
a little bit of, like, movement to it. And to do this, I'm going
to actually duplicate this and just move it over here. It's just out of sight
in case I need it again. But I'm going to take
these that I've made, and I'm going to go up
not scale, but shear. And I'm going to just I don't know what your
default settings are, but I'm going to
click hold Shift and just just move
it a little bit. And all that's going to do is give it a little bit of
a slant to the right. And I held Shift down it kind of just it makes it
along the horizon, so it doesn't just, like, start it's hard to explain, but just, like, start
shifting around. So I'm going to kind
of there we go. So it gave it some
movement, so it's kind of leading your eye towards
the mountains there. So now we have some detail and some
clouds and some trees. I'm going to do one more thing, and then we'll add
color in detail here. And here's the one
thing. This is just a subtle thing
that's going to help us once we add color. I'm going to add some We're gonna add some, like, bands of color in the sky, which right now won't do much. Who would we add? When
we add the color, it'll work. I think it'll work. We're actually gonna take these Copy and put them above the lake lake highlights.
Bring them down here. That'll become useful
when we add color. So yeah, now we're going to
add some color gradients, and this thing's really
gonna come to life.
7. 07 Shape Up Adding Color: Now that we've
added some details, it's time to finish
up with some color. So I'm going to make
my sketch visible. I'm going to delete that. I
don't really need it anymore. I'm going to add a
layer to the bottom, new layer, call it colors. And you can choose
your color palette. You can you can literally
search color palettes. You can look for photos
of mountains and sunsets and then pick from there with the
Eyedropper tool. I recently, you know,
planning this class, I did an illustration that I enjoyed that was kind of
training to do this landscape. And so I'm going to actually bring that in because I
like the colors of it. You'll see the similarities
of these drawings. And I just love these colors, so I'm actually going to
use I'm going to draw some how I'm going to choose my swatches here or make my swatches is just by
making some squares. And then, that's going
to be my light sky. That's going to be my darker sky than my mountains
are going to be. And I'm going to change
these a little bit. But this is going to be kind
of a guide for my colors. Let's see. And then this will be a good starting
point for my swatches. So I'm going to go over
to my swatches here. I'm going to do
Select All unused. And sometimes I do this at
the beginning of a project. And now it deletes anything
that's not being used. I'm using the gray scale here, but I'm going to do
these and then go over and do add selected colors. So now I have a nice
little palette, which I'm going to add to, but it's at least a good
starting point. And for gradients,
it's very helpful to have these colors in your
swatches so you can just, you know, slide over and get your let's
move this over here. So I'm going to use gradients
and swatches a lot. Alright. So now
to do a gradient, I'm going to click
on a gradients, it's going to be very garish. It's not going to look great, but it'll only last a second. And then you're going to choose your light color and
then your other end, which is the gradient. It's like you're
choosing one color on one end, one
color on the other. You can also play with opacity. And this is set for
light to dark here, light to dark, but
then I'm going to do G and then have it go. My light colors down here
and my dark colors up here. And then I'm gonna select
these, make them very light. And then I'll keep them
like that for now, but I will play with opacity. And now I'm gonna have my
foreground be a dark color. And then mid let's make
that a little lighter. And then we'll see how
these bushes look. They're either
gonna look good as this dark purple or I'm gonna make them into
something like this. Let's see. 'cause I do want
my foreground to be darker, midground lighter,
and then these will be I'm gonna play
around with these. I know this example,
they're dark, but we'll probably go a
little lighter than that. Let's see what we got here. I think we want
something like this. Gonna have this one be darker
'cause it's more forward. And then here You know what? I'm gonna have that I'm gonna have that be
closer to this. And a lot of this
is playing around. Once you have your palette, you're just kind of playing
around with what colors work. And then I'm going
to reflect the sky. Do G again, and I'm going
to go from light to dark. And these bars that I
added in the last video, they're going to
serve as kind of a little like kind of
not really reflection, but more kind of like
a little highlight. So I did copy paste in front. We'll see how I like these. And these are going to be
like a light very light. I'm going to do this
here. We did gradients with 100% color
going to 100% color, but now we're going to
do something different. So this is the color
that they are. I'm going to click
on my gradient, and then I'm going to choose
that shouldn't change, and then slide this over. So it's going to go from
one color to one color, which doesn't sound interesting, but this side's going to be 100 and this side's
going to be zero. Maybe, we'll do zero. So now it's going from
this light color to zero. So down here so it just
gives it this nice little I'm actually
going to flip that. Yeah, we'll see how that works. It might not. It's more subtle. Then these I'll just
make transparent. So I'm just going to bring
them down to about 70. And then I'm going to do a
little trick here with these. Let's go to my layers. I'm gonna lock everything
except for those. And I'm going to
do direct select and then just choose
the one side, and I'm going to bring
these up and then bring these down just to kind of mimic the angle that the that the mountains going. Now that we have
that in the sky, what I'm going to do is
make a new layer here. We're gonna add some
trees to the left side. So I'm gonna press
M for rectangle. And I'm doing this so that there's something in the foreground over
here so there's, like, foreground,
midground background. I think I'm going to make these. I don't know if I've
explained much what I'm doing over here with
a color picker, and I apologize if I haven't
really shown you that. So I'm going to do an eyedropper for the
ground. That was eye. And I want it to be darker, so I don't have that
in my color palette, so I'm going to go
here, double click. And then you kind of
just drag around and find here are your main here's your main
spectrum of colors. And then within that, you
can do tints and shades, which tints would be lighter, shades would be darker
versions of that color. So I chose a darker color. And then check this out. We're going to start reusing
pieces that we already have. So I'm going to take
this cloud, copy, and then I'm going to
do a bush on the left. Drag it over here, make it dark. And I'm going to
do O for reflect. Option click. And then it did
the vertical flip. And if I did a copy,
it would make a copy, but I'm just going
to do Okay and it's not going to make a copy. So I'm just doing that.
One, we already had it. So we basically took I'm
going to make that darker. So it just adds a
little bit to it. I'm also going to do I'm going
to take this little Cloud, and that's going to
become two things. I'm going to make leaves holding down shift in the corner. Let's see if this looks good. I zoom in. She doesn't really want to give me
the corner. Not sure why. All right, so we're going
to just make these. And so I took my cloud
and then made it into some leaves here. So you can, like, reuse pieces, and these will
probably get smaller. Yeah, play around with
shapes and see what works. Sometimes things work,
sometimes they don't. And, you know, that's
all part of it. I'm also going to
take all these, so I'm gonna hold
shift and click. And then I'm going to do shear, hold shift, and then bend it. Oh, did something there.
I'm gonna do it again. And now I can kind of move
these around if I want. Now I'm going to
take this piece. This will be the final
thing we do here. And then I want to add a
little reflection in the lake, so I'm going to do I'm gonna
make it white just so it's I'm just going to copy
and then paste in front with F. And I'm
just going to make a bunch of these. It's just
to add a little bit of, like, reflection in the water. And you can keep
adding little details to what feels good and do it. You know, you can experiment. Then one last step here. We're gonna do some I want there to be a
highlight on the cloud, so I'm gonna I'm gonna go to
my gradient, select that. And I want the orange to be
reflecting from the sun. And so I'm gonna go to
gradient and press G and just do the top. So you see I don't do
G to the whole thing or don't do the spectrum to the whole thing, the top here. I could do my eye dropper,
just do the top of that. And I'm going to
do it to this one, as well. Apply my gradient. And then just the orange on the other end and then just
do it subtly at the top. Al step will be to go to File, Export, do Export As. And then I'm gonna
save a JPEG here, use artboards, because
then it'll just be the size you want.
And I'll do Export. I'll do RGB, just so it
looks good on screens. You can do CMRK if
you're printing it. But, yeah, now we have a final landscape that's
a nice JPEG there. Alright, let's wrap it
up and do our closing.
8. Class Closing: In closing, thank you
for taking this class. I hope you've learned something, and I really hope
that you created your landscape and finished
your class project. If you did, please post that. I'd love to see them,
give it feedback, and I just love to
see what you've done. Lastly, if you could leave a review, that would be amazing. Reviews mean so much
to Skillshare classes. So please leave one
if you have the time. I hope you've
learned some things, I hope you've drawn with me, and I'll see you
in my next class.
 Tim Eggert, Freelance Designer/Illustrator