Transcripts
1. 01 Skillshare Video Introduction: Welcome to Line Engraving in Adobe Illustrator My name is Tim Maggert, and I am a freelance illustrator. I draw with different styles, and one I really enjoy is a line engraving style. It uses intricate lines, toe add shape and shadows toe objects. When I started it, I wanted a good tutorial, so I looked and looked and looked and couldn't find an in depth one. So I'm making this one. I'm teaching this course because learning a line engraving style will help you increase your illustrator skills. Once I learned it, I got Mawr design projects because it looks great on packaging and in logos as well. A surface patterns. We will use lines and the pen tool, as well as the blend tool two drawn object in our class project. And, as an added bonus, totally optional part of the class, I will take you step by step, showing you how to draw this desert scene. What you will need some knowledge of the pen tool adobe illustrator and an idea of what to draw. Let's take your vector, our work to a whole new level
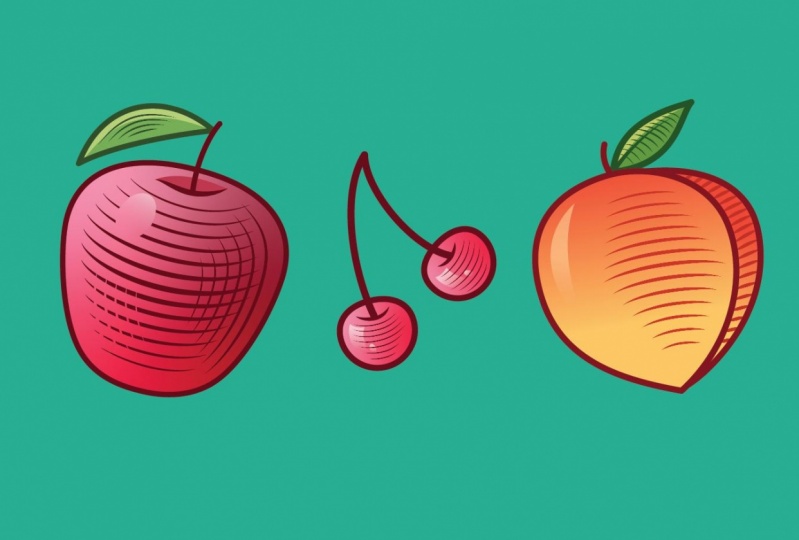
2. Basics of Engraving: The engraving style is basically a series of lines making up the forms and shadows of an object. Examples of this are found in engravings, lie no cuts and even scratch board. The lines can either be thin and delicate or thicker. No matter of the style, the lines are very important. When you make a line or draw a line and illustrator, the default gives it square ends. Most of what you will see me drawing with or either tapered ends like this or rounded ends like this. It is up to you, but I really like the effect of tapered lines. We will cover these in our class project next. There are also brushes you can purchase from different websites, which will give your lines and added texture. And I will cover those a little later. Many times when we draw, color defines the shape we will be drawing shapes using lines, and really, when we start, we won't have color. We'll start with black and white. Since line work many times just just does have one color like black, it is important to create shadows and light using line with and the spacing of lines. Here are some examples of how simple lines can convey shadows on the left. The texture, as well as the angle of the lines, creates the shadows in the middle. The curves really gives the shape of an object will be doing a lot of this and then on the right, you see up Top is a very thin stroke. Leading down to the bottom is thick, which gives the look of light to dark, which is very important as well. Now here's how we're going to draw our objects. I start withdrawing the outer border or stroke of an object, and then I go in and add the line work, which gives it the shape and shadows that really define it. We will be drawing a simple object like this for a class project. I will be doing a series of fruit. You can choose a fruit plant flower. I suggest something organic or natural because leaves and fruit really have great shapes that are good to practice with and have curves and textures that really look great in this style. So hopefully you've been thinking of what you can draw. Keep it simple just to start and let's go on. Illustrator
3. Class Project: Taking Shape: Okay, so now let's start our class project. Hopefully, by now you've chosen an object that you think would be good to drawn this style. Like I said, something organic or natural is good. Because of the shapes like leaves and the texture, it's just it looks great. So I'm going to do a series of fruit here, and I have placed I'm in, Illustrator and I have an art board that's eight inches wide by six inches high makers any size that works for you. And in my layers, I have my photos. I grabbed a few reference photos. I'm gonna loosely look at him just so I can kind of see the shapes of what we're drawing, and then I'm gonna I locked that, and then I'm gonna draw on top of it with a new layer, my strokes. So all we're gonna worry about right now are the The outside lines were basically making our shapes, and then next class will do are intricate our lines. So I'll sort of the apple, And I'm just going to start drawing with my pen tool. Kind of just my my main shape here, and this is just to kind of get it going. So, yes, at first this is gonna look very simple, which is fine. And now when I'm drawing, I've got my black stroke, which I like to work in. And then you can choose your stroke with here and just an example Make a quick stem here. So right now I have squared ends on my strokes, all Zuman. What I like to dio yes, around my cap and then around the corners, which isn't going to do much here, but it will later on. And then all also show you the tapered end. So right now I'm I rounded caps Gonna come down here to profile, put in my taper and it gives it kind of that nice top of the apple. And this is really all I'm gonna worry about right now. I may change the shape a little bit, but I just want my simple shape just to have something. Then I'll move on to a cherry. You can do one object, but I just want to show a few Justo cover ground, especially as we're we're drawing our line work. So I start with the circle any time you can use like a perfect shape and then modify it. It's great, cause then you're you know, that it started as a perfect shape, and then you kind of and do my stem here. So this is where the corner of your stroke. You see where it sharp here, zoom in, Gonna go over to my rounded caps and then I rounded corner. See, it gives it that nice round corner. Don't keep that and I'll do another chair here. I'll make it kind of short with my direct select tool. Turn it to kind of match the stem in the same way that I did one of these lines. We'll do the same thing off here just to kind of give it a little bit of Ah, a little bit of dimension. So, yes, these will start is pretty simple. And, uh, and then we'll work our way into the shadows and really giving this style underway. - There we go, ever cherry in an apple and then I'll throw in a peach here just for something else. I do not have a reference photo peach, which maybe good and maybe bad. And then when I'm doing a Siri's, like if I'm doing a label for an illustration for packaging that has all these fruits on it . I try to keep the same stroke with just so I can kind of have some continuity. Here we go, looking more like a peach Here, give it shape here. And I like toe work in with smart guides on. In that way, when I'm drawing these things when I'm on the path, it tells me so. Then I know that my lines meet and it gives just a little more accuracy to my artwork. We'll do that. And I'm gonna do a stem off of here. Think of short stem, right? I think so. And then another tip. When you're drawing, you can always have. It's too long. You can always add a point with your pen tool and come up here to lead it. I do that quite a bit. And then I'm gonna add all quickly at a a leaf here. And this is where it's gonna be really nice for our our lines when we do leaves, It looks really looks really great from the start up here. Come down here. All right. So once you have your, um, really simple uh outlines. We're going to move on and at our lines, and these things were really going to start taking shape.
4. Class Project: Blend Tool: Okay, Now we're gonna start drawing are intricate line work which really makes up this style and what were largely gonna uses the blend tool to do this. Because when you first look at engraving style, you see Oh, man, there's so many lines. It's so intricate, it's complicated. But the way we're going to do it is you draw two lines or three lines, blend them together, and illustrator really does a lot of the work. So I'm going to start with an example, and I'm doing three fruits here. You do not have to do three. You could do one object, but this allows me to have a variety of examples to show you. So I'm going to start with just a simple example of the blend tool. I'm going to go in. We have our stroke layer. I'm gonna make a new layer. That's just line work. And this is where I'll put my inner lines for all of our objects. So I'm going to go in here, and the first thing I'm gonna do well actually lock my stroke layer just so it doesn't get moved around. So I go to my pen tool. So here's how the blend tool is gonna work for us. We're going to draw our first line dragon pull drinking poll, and I'm gonna you see how this is the Phil shift. X swaps, your stroking fell and we go appear to my options. Gonna change the profile. And I want this to be kind of a thin, a thin line. We can always tweak these lines, layers, lines later. So basically, I have my first line and then that coffee paste. This will be my middle line. We can either blend two lines or three lines. You can blend multiple objects. I'm gonna keep it pretty simple here. And the reason why I'm not doing blending two lines is because I want our shadows to start here, come out here a little wider and then go back to being a lot less wide. So I'm adding a point and then we've been direct select from deleting it, which making, which makes it a small. So here's how the blend tool is gonna work. You take multiple objects two or three, which will start at and then right here in your menu is the blend tool so you can go to blend tool. When you see her asterisk, that means you're on your first item and then anything beyond that gets a plus plus plus. And so now what it's doing is filling in between sits blending illustrators doing the work here. So to modify that we're going to go to object, blend and then blend options. Keep in mind, you can also go to make to make your blend tool. You can click on your objects, do make, and then it will just automatically make it. Here we go. Blood options. I'm going to do specified steps and right here you're telling it how maney lines how many objects who's gonna put between each one. So right now I have one click on preview toe Look at it and then as you bump it up, it's gonna ADM. Or and this is really where we're getting our intricate look at that. I mean, it looks like you spent a lot of time doing each one, and it really gives it that nice shadow. And then the beauty of the blend tool is we can go in here. Let's say I want the I'm taking my direct selectable. I'm just changing one. Did you one point gonna curve this a little more? It changes everything else that's applicable. Or maybe I want to add a little more curve. It'll adapt everything else. And so it's really helpful. And this is really the bread and butter the main part of this engraving style. And so, in this example, I started with a thin line with and stayed with a thin line with. I will also do another example here with my apple where I will do my first line because if we look here, I mean, I'm loosely looking at this shape, But look how up here it's It's like this bright red and that goes to a dark red, this shadow line, and then it gets lighter. So I'm kind of going to do the same thing take for this. That's a little bit of an angle. Yeah, I'm gonna go to this and bump it up. So it's thicker, but and I may not love this, but experimenting here. All right, so now I have a thin, thick and thin I'm gonna go to my blend when tool Asterix asterisk is the 1st 1 plus sign Post is so now what it's doing is starting thin and then going second and going thin again , do my steps. So now we can really see how it starts really thin, gets thicker and then gets Then again, which looks cool. And that has a nice It's just really well Don and it looks like you went in and drew so many lines, and then you can always go back in in tweak thes. And so right now what you have like if we're going to go to our outlined mode, you see, we have 123 lines and in this line down the middle, that is because when you're working in the blend tool until you expand it, it's three lines with an effect on it. So now when we expand it now, we can manipulate all of these lines, which is very, very helpful. So now if you win in and kind of moved, all of, um, they wouldn't affect each other. So once you expand your blend tool, your lines are on their own, and then I'm gonna show you another example. So leaves are great for this tool. One tool. This is how I usually do leaves so I'm gonna start with this. We've been doing this profile, which is fine. I like to do something like this. So it starts thick and thin, and then I usually bump this up, and that's just it's already looking like it has a lot more dimension. And then here's where the blend tool comes in. And this is fun to dio and this stuff you can get really intricate with it if you want. So I'm gonna do some shadow on this leaf. So I'm gonna use the same that same thick to thin, and I'm gonna bump it up with my thickness. I'm talking actually going to do here. It's a lot less thick. And you also want to be careful when you do stuff like this that, like you don't get things like this that which look really not great. So you want to make sure you're not only do your points match up, but you also want to make sure your thickness doesn't cross over and look kind of not what we're looking for. So here I have this thick to thin, and now I'm gonna go to our blend tool, and then it's gonna add over points. I'll do my steps here. Can you say, Oh, this doesn't look good. Remember, the beauty of this is that you can go in with your direct select. I'm really gonna change the angle. So what I did there is they used my direct, select tool, clicked on it and then press V and that gets this line alone, and then you can, like, rotate it, and then that gives us some some shadows, which you can always go in here and expand this so that you can go in and kind of tweak, tweak your lines. And as long as the spacing looks you know, pretty good it's okay to do something like that. Another way to draw leaves is all Start with curve line, Do you really think? And then all to on this we'll do a better one up here and I'll do my one tool. And with this middle line, you can go in and change the direction of it and that it alters everything. So instead of moving each line, you are just moving one point and then everything else gets, uh, gets moved. And then with the blend tool, you just move one thing, and then everything moves on with that. So that's that's a fun way to kind of add at textures and lines. Then you can do thin to thick, you know, possibilities. A. Really unless and then when you you do things like this, it's like I wanna add a little bit more shadow to it. It was just a quick line here can always tweet. Get this style can be is complicated or as simple as you like. It's really up to you, and the more you do it better, you'll get at it. And you'll really start to do some cool stuff because you could dio, you can do things where not only do you have shadow lines here, but you also have You can do the blend tool across. Now do, um, blend tool here. Go to here and I'm getting this nice kind of cross hatching. No go and add some steps, and then that's looking even more. I like this style so you can play around with this blend tool, and if you have any questions, please reach out. But that's pretty much a good way to get going on it. I can show one more thing here where we can do something like draw your line and I'm gonna give it no stroke. No, Phil. And then I'm gonna do draw simple object here, and I'm gonna do a blend copy and paste in front. I am going to blend these two objects together so I'll do it differently. I'll go to make. So now I have this which are blended gonna have this. I'm going to go to blend, replace spine. And now what that does is take your blended thing and put it if you have a line selected and your blended replace spine takes whatever is blended, it makes a path out of it. And I don't do stuff like this often. Um, but I wanted to cover it, and then you go to blend options, and here orientation, it changes the direction instead of having everything be the same, you know, it's facing the same direction. It goes with your curved line, and then you can go in here and change the steps. And then you get this cool pattern, which is, um you know, so you get these little tick marks, which can kind of adds some texture or you turn it almost into a line pattern, so that's something else to kind of think about, so the next step would really bring some detail to your work.
5. Class Project: It's All in the Details: Now that we have are intricate line work drawn. I've done a few tweaks to mind. I'm gonna show you a few ways to add some texture. And so one of those ways that's can be pretty simple. So you saw me draw these lines here which added some shadows, and now I'm gonna add some lines that are going to be used. Toe adds some texture. And so I've got these over here, I use the blend tool, and now I'm going to change the color to match my background color. But she'll just be white. And now, just like that, using your background color and making intricate lines, it gives the appearance that you've cut through all these. And now you have this intricate pattern, which looks very cool. The thing that gets tricky is if your background isn't white or isn't solid, like as long as your stroke is the same colors your background, it looks fine. But if you're going to do a Grady int and you want all these lines to be invisible, so to speak, you're gonna have to take away these actual which, which I can show you here. Now, I was having a little trouble with minus back, so I'll show you a different way to do that, which takes a little bit of work. But it's okay. And so I'm going to take these, which are now, um, blended, and I'm gonna expand them so that they're strokes and then I'm gonna go and outline the stroke. So now it shapes and then I'm gonna paste it behind. I'm gonna do the same these air strokes, so I'm going to outline those. So now I need to get rid of this area, so highlight everything. And then I'll go to my shape builder tool. And right now it's set to go plus, which would add shape if you press option, it takes away. So it's gonna delete anything that you draw a line through or select, which this is a helpful tool. And then the tricky part is you have to go in here and take out all this. But once you do it all, let's say I did it. Did all that? I mean to do that once you do it all you have, this is invisible on it. It will give you the nice texture and then another Cool thing to do with that shape builder is let's say you want a highlight of your apple and you don't want any lines to be in a certain shape. You're going to do the same thing where you're gonna go in and take it out. And then you could put a high if your coloring in you have your fill color and then you highlight here and it'll look really nice. So that another option. So that was using shape builder. Another option is to use actual textures. And like I mentioned, you can purchase textures. I've I've purchased them from retro supply not getting paid to say this, but they have great, um, textures, which really add a lot of depth to your work. So by simply I'm just gonna dio a little bit of blend tool that's set for a lot of lines. Were gonna goto blend options and really take down those steps. It's just something a lot less do something like that and I want to make sure So now what I'm gonna do Are you sure you kind of hold the steps here? I'm gonna take this expanded and now what? We do the same thing we just did. Which I draw a curved here curved line here, which is gonna gonna cut off. We're going and cut off a lot of this. So I have this curved line and then my newly made lines vertical lines here or horizontal lines here. And I'm going to go in with shape builder and delete those. See if this works here it does. So that's a quick way to kind of get curves. And, uh then I can go in here, delete that line, And now I can take this, come over and find, you know, maybe maybe a nice texture here that I like. I'm gonna go over to stroke, can make it smaller there. And so I've quickly not only done contour lines kind of easily, but I've also I'm gonna take I can do my stroke. I'm gonna do the same thing we just did, Um, that lines in there. So I'm gonna select my stroke, my outer stroke in my inner lines, and then I'm gonna go to shape builder, and I'm gonna press option to do minus and I'm gonna draw through these guys and boot just like that. I've added nice texture lines, and you can always, you know, play around with different lines that you purchased but what you're looking for if you want to buy some online as brushes for illustrator and this is an engraving set. So it adds some some quick lines and then I'll show you another way. The last way that I would add texture is I just copied these lines and this this I don't love doing, but it's it's a possibility. So these air strokes right now so you can go. I grew up these and Illustrator. I don't use it often but hasn't has an eraser tool. And just by just like a brush, you make it larger, smaller, and then you can go through here and I'd normally don't do this. See, when you make this line shorter, it kind of scrunches up here texture, which I don't love. Finally, switch this up. I'll just go back to a I just left all my lines to the eraser tool, and then you can go through and kind of quickly give these different. If we go and select smaller stroke. It's just a quick way to kind of go through and manually add textures. Like I said, if you buy one of these, you can kind of You could do that already. It has a lot of options. Toe. These are kind of crazy, but it gives you just these cool effects that you can play around with. And that's really kind of the goal is to kind of practice this a lot looking engraving work that you really like and then not copy, but kind of you say, Oh, this is how they did the shadow on a tree and then you kind of you learn from that. So this style is really I've taught you the basics here, and then you can really kind of play with it and try some cool stuff. So those are different ways to add texture and, uh, now color this and wrap it up.
6. Finishing Touches and Conclusion: Okay, So our last step in our class project is just to add the finishing touches, which for me is going to be color. And so I'm just gonna color one of these just to show you how to quickly color him in. And the nice thing about working like this, where you dry your outlines and then you're intricate lines in the middle with our stroke layer. I already have outlines of the apple and then the leaf. So that's gonna make coloring very easy. And so you select both of these copy than copy them. And then beneath my line work layer, I'm gonna do a new layer just called a color. So right now I have feels that are black, So I'm just gonna go in here and choose. You know what I couldn't dio. It's just sample kind of close color toe orders, picking just general ones. It's a little over an ish. Yes. And so when you work like this, where you your dear outlines first, that makes it really easy. Um, if you didn't have that, you basically just draw in, and as long as you are underneath your stroke, it will be so I'll also do so the ways the two ways I like to color this stuff in is either like this where it's very solid. And then I'll come in and do, um, here I'll just do an example. I'll do these like thick shadows and highlights. I want to say thick, I'm basically just saying, like, there their shapes, they're not Grady INTs. So if you start doing stuff like that, um, that always looks good. You could also do the same thing. Toe. Here's a way I like to use what I already have. So I'm gonna copy this red copy it, put on my shadow level, and then I'm gonna take away. This was preventing me from having to redraw. So I'm gonna use what's already there. So I deleted with the direct select to a part of it, and I'm going to go in and just kind of complete. So I already I used what I already had and kind of made a shape out of that, which is a lot of times how I like to do shadows and then if you recall, we deleted this with shape builder tool, but I couldn't always kept that shape and then use it as a highlight. I'll draw something kind of similar and then I'll go in. This doesn't have to be exact. - If you start doing these different layers of geometric shapes to make different levels of highlights, that's that's always a cool style. And then something that always looks great when you're doing engraving is right. Now we use black. But if you go in, take this red, make it a little darker, a little darker, a lot darker. And now I'm gonna add that to my swatches. So now I can go in, and this is gonna change everything on my art board. But that's OK. I can actually here I could do. This lock might fills when we go to a stroke that's black to select same stroke color. And then I'm gonna go to my swatches and make it that dark red, which, in retrospect, I would make even darker. And then I can go in to this Phil select same fill color and make it that so I would make that a little darker. But when you have instead of black, you make something that's kind of in the family of the colors you're using. It really is. It really looks great how I'm going to use my Grady in tools. I'm gonna click on my my read and I'm gonna go to Grady int, choose a Grady Int, and then I'm gonna start it lets you add points. So first I added some points and then I'm gonna go in and I'm gonna as and I'll use some defaults here. Good choice. So that gives it amore. Um, kind of smooth, smooth, radiant so that the Grady in And then you can move these around. It's like you can move this. You could move this closer to your highlight. And of course, I would change some of these these highlights, if not, delete them. So the Grady int this freeform Grady in is really helpful in setting up different points. So I like to use that as well. So I hope you've learned something in this class about creating ah, the engraving line engraving style and using the blend tool and and and ways to make it more textured and interesting. And I'm really excited to see her class projects. Please post them. If you have any questions, feel free to reach out on the discussion board or reach out to me via Instagram. All right, back and uh yes. Thank you for taking my class.
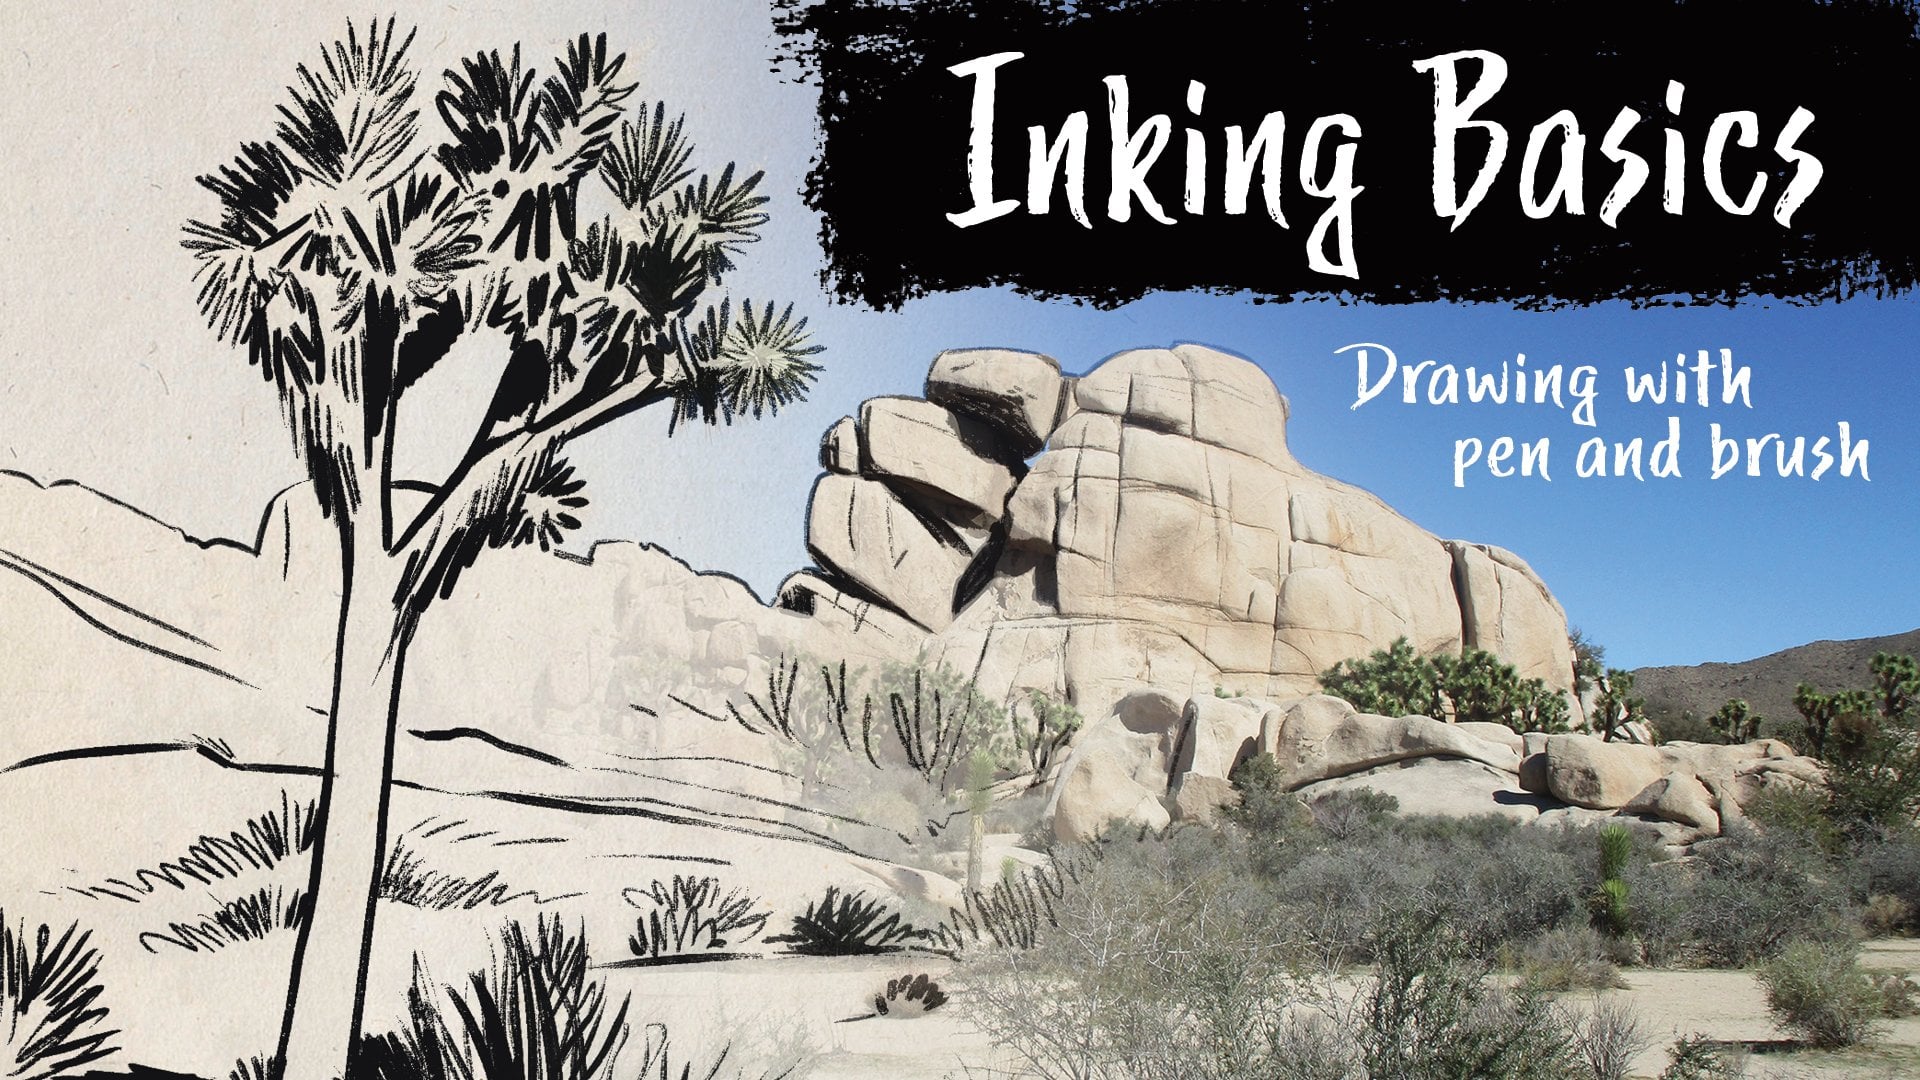
7. Bonus Tutorial: Desert Scene: So this is a bonus part of the class after our class project. This is just me showing you how to draw this desert scene which appeared on the class cover . It's just a fun little exercise that really helps show you not only the blend tool more, but also shows you some textured lines and some the way I delete lines with the shape builder. So I'm gonna kind of do this somewhat quickly, but also spent time explaining it. So the most important thing that I can say is I'm going to start making sure on our board you can choose any size you want. But the first thing I'm gonna do is make a guide. That's going Teoh have It's gonna be centered, and that's gonna be very important because I am going to use some symmetry in this drawing so that I lock it and then everything else is gonna be on its own layer. I have this over here, my finished illustration just as a sample. But when I'm doing right now, who knows? It may look like this. It may look a little different, but this is just to kind of keep me grounded on what I'm on. What? I'm gonna show you here. So the first thing I'm gonna do is draw this outside border, which I'm going to use something that I do all the time, which is I draw half of it. So I'm gonna click on my guide, and I have smart guides on. And then I'm just gonna start drawing this border and hold shift down so that it's straight . I go to my center guide, very important that this is on the center, and then I'm gonna pull this out using shift, and that's gonna ensure, um, that when I flipped this. My bottom curve is symmetrical the bottom because we're gonna draw half of this, flip it and then turn it into a stroke. So I'm gonna press option to break that, and I go up here. So right now I have half my shape, which I'm pretty pleased with. Click on it. And another thing you could do when you're gonna flip thes, use your direct, select, grab those points aligned to our board center, and that ensures that it's directly in the center and I'm gonna click on it. I'll goto, transform, transform each reflect X and then you do this side. So it'll flip it right there a copy. And now I have click, shift, click going Unite that shape. So now if I had this, you'll see that I have, ah, have one shape and that is going to be my border. I'm gonna make it the thickest of all the lines I use. And now from here on out, I'm basically going to draw my scene with a lot of lines that are using blend, tool and things like that. So I'm going to go in, got my border. I'm gonna do my mountain. I'm just gonna kind of drawn mountain scene riel Simple. Here. The my curves. You may say, Well, you're going off the you're going off your border. That is part of this tutorial. I'm gonna show you how you can kind of I don't say works sloppily because you're not. But you're gonna trim all that off, and it's gonna make it easier to do this. So I want to kind of problem that you can make any scene you want here. But I'm just doing like a simple a simple mountain, a desert scene with a mountain in it and I'm going to my other lines as well. Then I'll also do my I'll just do my cactus here and my cactus may look complicated, but it's really not. I'm gonna start with a rectangle any time you can use a shape like this and then alter it is great. So I'm gonna I made a rectangle I'm gonna click my direct select shift click Bring those down till they snap If anyone wants to earn some brownie points and explain to me So I love using the rounded corners But then you get this. I've got two dots here. If anyone can explain to me how to get rid of that of course I didn't google it, but you'll, uh he will earn my respect. So I'm gonna draw now I'm gonna draw the arm of the cactus. I think I'm gonna do that somewhat in the same way I'm gonna pull this arm out shift. I'm gonna do this that I'm gonna dio option click. No, I have to tweak this, of course, just to get something that I really like. And then I mean around these as well, I don't like it as much as what I've done earlier. So I'm going to kind of tweak this, see if I can get it to a place that I like it. And I'm not gonna dwell on the fact that I don't love this right now. This is just to kind of show you guys. And so right now I have kind of the beginnings of the scene. Bring this over. Bring this up, this kind of And now, before I go in and do my other lines, I can just show you what I would do here. I'm going to select all of these, but just my normal Aargh. And then I'm gonna go Teoh shaped silver and the default is to add we're gonna do, hold an option. It's gonna subtract it subtracts. And then So I just did these lines. Now I'm going to do the cactuses well, so I'm gonna select all these that are going to be affected, and then my shape builder, I'm gonna do option, and then it subtracts. So instead of going in there and kind of doing it on my own with adding points and stuff, that just easily does it for me that I have one more here, which I'll just do this and then all do that. So already, this is, uh this is taking shape and looking more like the desert scene that I want. And now here's where the real engraving part's gonna happen. And I'm going to come in here to a new layer. Engraving lines will just call him. And now I just do my sky. And now I'm gonna have to make this a little less thick. And this is how I'm going to do that's gonna drawn here. Copy. Paste in front. Drag it down. Now I'm going to do well. We'll do it this way. Do a blunt tool click. I think I want you can. My example. One it endured a little more vertically to I think this is pretty good. I may add one more. We'll just do this one more. So right now, Fry, I have seven steps. I'm going to eight, which just adds one more. Actually, don't think I love that. I'll keep it at seven. All right, so now I have those. I'm gonna go to them expand. So now they're on their own. And now unlock those. I'm gonna just take these ends off just so I could do it easily while I'm thinking of it. Option mightiest. Take him away. And now you say, Oh, this is complicated. This is something I do a lot if I have something very, um, complicated. This would be a pain to do. But something like this I can kind of quickly go through here and you see where it's his line extension. When you're doing something like this and just moving your lines, even if they're angled, he'll get this guy that says line extension, which basically means you're on the same. You're on the same level. So you didn't move your line at all, which is exactly what you want. And I'm using my direct, select tool to grab the end, slide it back, and I'm just going to kind of move these so that they're out of the way. See, that's good. So all I'm doing here is kind of all of this, how close it is. So I'm gonna go in here. I will move this, see if that's fine. Deliver that, um and then I'm gonna go in. I'll do my I'll do my ground here. I just do that on the same level. Not too worried about that. I'm gonna make this a little less thicker than my horizon line, and then I'm going to do copy piece in front. Bring it down here. From this day, these I want to be a little closer together than this sky. So I'm gonna just do I blend to click Click. That's a lot. So I'm gonna go up here, blend options. I'm gonna change this. Do four. I'm gonna bring this last one down a bit. I don't want this gap to be too wide. Here we go. I'm good with that. Then we're gonna cover this. Expand it that way, all these lines are on their own. Now go in here and I will take away anything I don't need. So I used my normal arrow, the V no. Go in here and take all these away option Harry girls looking pretty good. So now I could also add I'm just gonna add in a few simple lines to my cactus. You see how that's kind of off center? Sometimes I go into outline mode. I can move this just so I can see just the frame of it all and see what I want to do here. That I can go here, zoom in and make sure that my lines meet. Here you go. There you go. And now, here's where I'm going to go in and kind of quickly adds some texture. And I do that by doing my brushes. Slide this bank. All right, so I'm gonna go in my brushes, see if it remembers them. Yeah, so I have I have recently used brushes. Like I said, I buy my brushes from retro supply. They haven't engraving set. Um, I think they're called grave, eh, True's. And they just have some really cool texture stuff. So I'm gonna go in here and do a few different things, actually going to see if I have the whole library, you know, se Yeah, grave edger. And then when you load these brushes, you get all these. So this is fun for this, This cactus. You know, it kind of has this old western theme, so it z called a have some different different lines to play with. So I like these that let's see, like, the ones that have, like, some dash. Yeah, some dash and then they kind of do that. I don't want these to look exactly the same. So I'm gonna go through and pick something that's kind of somewhat similar. It's a little too different. Yeah, they're similar, but not the same. And so, uh, then you can also mix up like changing your, like, having this one be really short. Then this would be longer. And I'm gonna come through here and choose all these and then and he's just give a nice texture to him. These three are kind of squished versions of this, so I'm gonna go in and make him a little, become a little less in thickness, and then I'll go in here troops thes. And I like something that kind of starts thick and ends. Uh, actually like something like, that's kind of nice things like that. And then when you're doing something like this right now, they're grouped. I could use copy paste in front, slide them over that where you're gonna keep your same horizon lines, and then we have select all these. I mean, I can either go through one by one and shorten them, or I can select all these and uh, trim them by the shape builder. What shall do you hear? They say always a pretty squish speak. Remember, we could go back in. You can hear, change the profile and make him something else. Something thinner. Or you could just make him a little thinner. That makes it a little less. Right now, I have some texture, much like this. And the thing that really brought this toe life, I feel, is Thea is the color in it, which I won't go through and do all the color cause I already did that with the class project. But like I said, you can always go through and do just add a new layer beneath and just call it color. And then, like your border, you already have the shapes you're gonna copy, toe lock these pace behind, and then, yeah, he can dio you do a Grady int, or you can just do a solid fill color. But Grady, INTs are nice on things like this. And then, basically, I would just go through. I would actually just I would give I like to give each thing on their own layer. So I would you sky and then I go through, I'll just show you. I mean, you can either use what you have and like, copy this, paste it, and then you're just going to finish the shape so you can just dio click, click, click. This is not to be perfect. And then you get some kind of in the same family. And then, boom, you got color so you can start doing that for everything you know, just your cactus, your grounds. And then I picked, you know, earth color earth tones That really worked well with this. So this will show you how to add some texture. And, uh, hopefully this has been a good little bonus. This actually was an idea by one of the students that said, uh, you show me how you did that cactus seen in your cover. And so I was like, Oh, that's a great idea. So this is actually inspired by one of the students, which I appreciate, But hopefully this helps. And, uh, yeah, thanks for learning with me here.
 Tim Eggert, Freelance Designer/Illustrator