Transcripts
1. Introduction: Hey, I'm Mark. During this class I will
show you how to draw over 70 different vector shapes. Why do we need to focus
on vector shapes? You ask? Because everything we draw using Affinity Designer
or other factors, software is actually just
assembled from simple shapes. So beautiful logo, I call
a vector illustration you saw can be deconstruct
into basic shapes. If you can deconstruct that, we can also build up. We can assemble anything
we want if you know how to draw basic shapes. I have prepared our digital
world book for you. So after each class you will
be able to open this file and draw all shapes we
have learned in lesson. One artboard is for one lesson. This way you can practice just after you finish
watching the video. First few artboards are
really easy and basic, but then later I will show you even more advanced
techniques this way, as I mentioned before, it will be able to draw
70 different shapes. Using that knowledge,
you will be able to assemble beautiful icons, illustrations,
logos, and clip art. I will see you in
the first lesson.
2. Lesson 1 Basic Shapes: Welcome to the lesson
one of this class. Before we can start, you will need to
prepare yourself. You will need to
download this workbook. I have prepared for you. So you will have exactly
the same document asked me. I put nice gray guidance on each artboard for
you so you will know what shape you need to draw. For each lesson, we will only
take care of one artboard. Alright, so don't be overwhelmed after you
open this workbook, done multiple art boards. But we will do them one by one, lesson by lesson together. First, I will show
you what to do. Then you will do it
yourself on your workbook. And after that, you can
move to the next lesson. Let's get started
with the first one. In this lesson we will talk
about very basic shapes. We'll start small
and then lesson by lesson at more
techniques and tools. Okay, here we are in very first art board called basic shapes in our
digital workbook. So our goal for this lesson
is to draw eight easy shapes. Before we start,
let's set up a color. I'm using sliders on the right side to
customize my color. I'll be using bright orange
so you can see it easily on this gray color that is already there
on our art board. And I recommend you to use a bright color
like this as well. So I got my color here. Fill color is setup. We don't have any stroke color. Ready to start. I'm using
rectangle tool right now. Holding my mouse down, I can draw any rectangle I want. If I hold shift like this, I will keep the
proportion one-to-one. And I can easily make
a square like this. You can always pick Move tool and click on the
object already drawn. This way, you can
adjust the colors after the object is
already on our artboard. We can also add a
stroke color here. This way you will have this
outline around the shape. In Stroke panel. We can
adjust the look of that line. We don't need a stroke
for this project. I will kick it out and I will stick with the fill color only. All right. We can always re-select your
shapes with Move tool. You can also use Move
tool to transform shapes. You can adjust size, you can even tilt
them like this. This talk them in
few other ways. Like we got rotation. We can move them
to the right side. So the move tool
will provide you with basic editing needs. All right, Let's move
to the second shape. As you can see, we've
got circle here. We can use oval tool and
it's work exactly the same. Hold your mouse down to draw, hold Shift to make
a perfect circle. We can also draw the
circle from the center. To do that, simply hold
Command key on your keyboard. Then you won't be drawing
the shape from the center. We can also combine this with shift and wrinkled
perfect circle. Next is polygon. So let's open this
menu over here. This one is a little bit longer. We got multiple shapes here. Let's start with polygon. Click and drag to draw a shape. So I'm holding my mouse. Here it is. The last one in the
first row is star. Again, we got special tool
called Star tool for that. It's really easy. And this set rectangle, circle, polygon and start as a
standard set for AB, any vector creation tools. And in fact, editing program
will need all of them. But here in the bottom line, We got some alternative
version of edge shape. So let's take a look.
First is square, but with rounded corners. We can change corners
over here at the top. We could also this slider so we can control them precisely. Next thing is just
half of circle. We got a special tool for that. There are three tools actually that surface similar
purpose here, we will test the PIE tool first. Let's use PIE tool. Here's Pi tool, and now
we can make adjustment by pulling this
orange control point. And this way we can very quickly draw just
half of the circle. Next is triangle. Let's use Polygon Tool again. Because this is kind of
the classic approach. You use Polygon Tool then reduce the number of sides to three. And this was a way to draw
triangles for long, long time. Luckily for us,
Affinity Designer and got dedicated
to four triangles. We don't need to do
that every time. We can just use the dedicated
to, and here's triangle. We can even control this triangle more
precisely thanks to this dedicated to just one shape
left for this first lesson. This is double star.
Then take a look. There is special
double star tool. We don't need to actually merge two separate stars together and we can just use
double star tool. And here it is. All right, and this
way you can draw all eight shapes from
the first artboard. Now it's your turn. So please head to our
digital world book, zooming into the first
art board and draw all eight shapes before you
move to lesson number two.
3. Lesson 2 Smart Shapes: During our first lesson, we covered basic shapes
on our first art board. That's done. It's
time to move to the second artboard
called smart shapes. We've got eight more shapes here that a little
bit more complex. And we're going to use smart
shaped tool to draw them. So there'll be a
smart control for us to alter the shape
easily and quickly. Alright, let me show you. We're going to use this
tool on the left here, the lowest one down multiple
smudge shape beneath it. If the tool could
different icons, That's because it showed
the last selected shape. Today we're going to start
with this square star. So it's like star, but it could score arms
like this very handy tool. We can just draw it from the center as I
showed you before by holding Command
on your keyboard. Here it is. And take a look. There is orange point
that I can drag. This is how you can alter
the smart shape easily. If you see orange points
on your smart shapes, means there is a way
to alter the look. We can also use the menu at the top context menu will
also alter the shape. We've got the slider
exactly for the same thing. There's one more here. We can decide how many
arms do we have here? Very quickly, quickly just
by moving the slider. Alright, next shape is circle the whole insight and a special doughnut tool for DAT. We don't need to make like two circles and then
do some operation. There is a built-in tool
for this kind of shape. Again, hold the Shift together proportion to have
a perfect circle. And if you double-tap on
it with the move tool, you will see two orange points. So orange points are
smart controls that can alter this mode
shape really quickly. Take a look. That's really smooth process. If you see orange
point on your shape, there's a way to
alter the shape. Very handy staff. Alright, and the next smart
tool we're going to use is super underrated and
very powerful tool here. And as you can see, it is quite complex shape if
you want to draw it by hand. If you use this tool
regardless shape in seconds. And more than that, so many smart control
points in this tool, we got five different smart
controls that we can adjust. And we can turn this shape
into anything we want. This tool is really,
really powerful. We'll play with
it later as well. Just want to remember
that these to exist. So many people that switching
to Affinity Designer from other vector software like Adobe Illustrator,
vector knitr Enscape. And they get used to basic
shapes like circles, squares, and triangles so much
that they totally forget about our smart shapes
selection here. All right, The next
one is very unusual. One bigger, this teardrop
droplet shape over here. That's also very nice. We got to stop shape
quickly without altering any ordinary
shape. And it's done. So smug shapes. We've got four down,
four more to go. And as you might notice, most of them are actually
exactly the same tool. So this is also R
square ending star, but I simply modify
some smart controls. I pull this down. I increase the number of arms. And this way you produce and totally new shape by
using smart controls. All right, For the next one, I not going to use
doughnut tool. I will use PIE tool
because they got exactly the same set
of smart controls. So even though this is PIE tool, we don't have whole inside here, but I can make it by
pulling this smart control. And it's the same for donut to, I can open it on a tool as you saw before and turned
into PIE tool. Actually done a tool by TO
are very, very similar. They got exactly the
same control so you can alter one to be
another very easily. All right, two more to go. And this flower-like
shape is actually also the same tool I
used before above it. So take a look. We just need to make some
changes using the controls, so reduce the number
of arms here. Then we can make this
holoenzyme much larger. We will make this one
to be spiky like this. And then we will add
the curve to it. So it's a little
bit round and it's more like a flower shape now. Right? And there's one last shape for us to draw on this
second art board. Look-alike flower a little bit. It's not a star. It's actually smart
tool called Cloud tool. Take a look. There is something
called Cloud tool here. If you use this tool, you will end up
with little cloud. The edge is Bill of
circles like this, but we can alter them by pulling this orange smart control down. And we turn this cloud into
a flower really quickly. All right, that's how you can draw smudge shapes from our
second artboard, right? Feel free to experiment a little bit with
different controls. You can see controls
are marked with this little orange
circles on shapes. Alright, please move to
your digital workbook right now and draw shapes from
the second artboard. And I will see you in
lesson number three.
4. Lesson 3 Boolean Operations: During this lesson, we will work on our artboard
number three, all about Boolean operations. Let me get started with
simple circle here. I'm going to right-click
and duplicate this shape. All right, Let's
move it to position. And how can we join
two shapes together? First, we need to select
them both and like this. And then from the
top menu, select. This way, we can turn
two shapes into one. Alright, I'm going to click Add. Now take a look. I got just one shape. Now I'm forming new
shape from two circles. Now I'm going to show you
second way, alternative way. So I got two circles again. And before I click Add, I will hold Option
key on my keyboard. Take a look for this difference. I see this new shape here, but on my layer panel
we've got compound shape. So I can still open that. And I see all building blocks
for this shape so I can modify the circle
that was there first, even after I joined them. So that's the only difference. Dot compound shapes are
more editable later on. To keep this lesson simple, I will stick with normal
Boolean functions like this, just joining shapes together. Alright, let's move
to the second one. Here we got a square. I will make a duplicate by dragging with Control or Command key on my keyboard like
this. Select both. And for this one I
will use subtract. Second function and
take a look subtract, helped me to cut out the whole. So the top shape was used to cut out the hole
in the button shape. Alright, let's get ready
for action number three. With this circle, I think I need to make it a little
bit larger like this. And then I will make a
copy of that at this time. Command C command V, copy and paste shortcut. Position this one here
similar to the first one, but let's use different
function now. We will intersect. Take a look. This way. We keep only the
intersecting part. Everything else is gone here. Very, very handy function. Alright, let's move to the bottom line here
we got a heart shape. Luckily for us,
Affinity Designer, I got, I'm ready to
use hardship tool. We don't need to
draw with ourselves, so let's just put it
in position over here. Then we need a copy of that. I will just drag with Command
key on my keyboard to make a duplicate bit of
rotation resizing. And this time we're
going to use x or function Exclusive
OR take a look. We kind of Meghan opposite
to our previous one. So instead of intersecting this intersecting part in
the center, now it's empty. So we delete the
intersecting part. Right? Here's our next example. Next action, actually
the last one on the list that we
need to learn today. So let's create this
rectangle here, the square. What kind of action should we use that will allow us to take this center part away
from this shape. So the last one on our
list is called Divine. Take a look. Let's select both shapes and pick
the last action. It will divide this into
three separate shapes. Alright, now I can pull
everything separately. Take a look. Nothing is joined together. Any longer. This action will divide the
shape for smaller shapes. So we know all five Boolean
operations right now. So let's make one more
chance for practicing. We will use arrow tool
for the last one. Doesn't look like arrow tool, but I telling you this is the one that we
want to use here. With few modification, we can easily changed
this arrow into shape. We want, take a look. We already know about orange control points
in smug shapes. So let's use that, not this one, but over here, tau. Now simply duplicate
this existing shape. Alright, It's not exactly
what we need to take a look. We've got this little gap here. So how can we get this effect? Very easy. So let's duplicate
the one on the top. And only purpose of this
duplication is to make it larger and use
as Subtract Shape. That's very common practice
by working with shapes. So I'm going to click,
Subtract and use this shape at the top to cut the hole in the bottom shape and the shape at the top
disappear in the process. Sometimes you duplicate
shapes only to use them for some kind of
Boolean operation later on. Alright, That's
our lesson number three about Boolean operations. I will see you in the next one. Next one is our mini project.
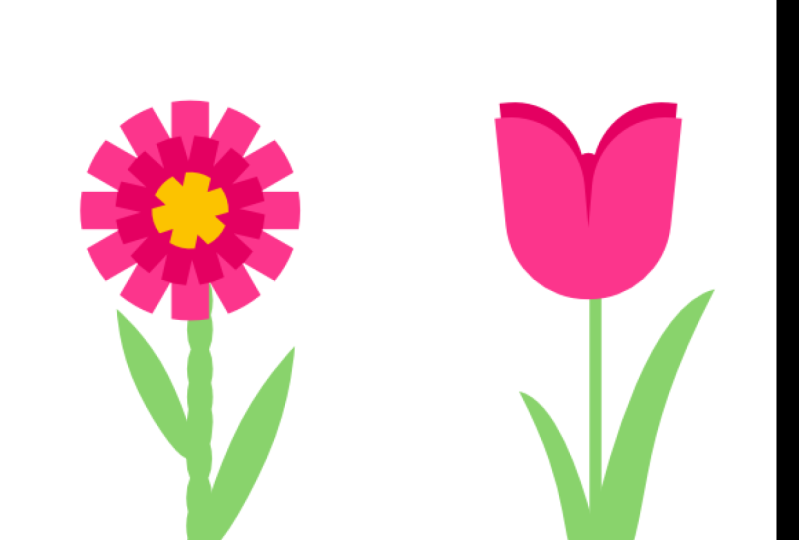
5. Lesson 4 Ice Cream Illustration: Okay, Let's put everything we learned so far into good use. Our next outboard
is many project. We're going to illustrate
this ice cream here. We already know all about
basic shapes, smart shapes, and Boolean operations, so
we should be able to do it. On the way. I'll also show
you a few new tricks as well. Alright, let's get started
with our shape tool. We can detect which shapes we
need for this illustration. As you can see, we
got three circles and one triangle and
extra rectangle. All right, so I draw
my first circle and now I'm going to duplicate this with the trig
I showed before. So I just drag while holding
command key on my keyboard. All right, next
step, our triangle. We need to add some
rotation to it, hold shift for
snapping like this. And the final shape when it is rectangle with
rounded corners. Over here. Everything in orange now, so let's change that. I will select those two shapes and now you can use sliders, you can use, we'll ask, well the wheel is like default way of picking
colors in Affinity Designer, so we'll use that here. We get a new color for
con, for our triangle. Let's modify the
color of ice cream. Alright, this will
be something like blue, yellow, and pink. Alright, since like
we got all buildings, building blocks in here. So let's reposition elements. You can say good snapping
turned on so I can see additional guiding lines
here under appearing. So I can position
my shapes easily. This one should be on the top, so let's drag it above others on the layer
panel like this. Now, we'll position
this at the top here. In the center, I can see this
nice extra guiding line. Here's the snapping option. You can turn it off like this. And when I turned it off, I cannot see extra
guiding lines. So let's turn it on
again and take a look. Now, my shapes are
snapping together. Very, very useful. Alright, seems like we
got basic shape here. Now we will just add
a few more details. So first illustration, we got this melting ice cream here. How can we do
something like this? Let's go with rectangle first. I cannot really say it, so let's drag it up
on the layer panel. Here it is. All right, let's just
adjust the corners now. Change forms from Steve
to round corners. And now the radius to
be really, really high. We got like the
circle at the end. And quick duplicate
of this over here. One more here at the top. Now we need to change
the color of this one. So I will use color picker, pick disc, yellow, and now
I can use it from here. It seems like the top part
is almost ready and just one little element,
this shine here. How we can do this, we can use smart shape for Dan. Let's go with the
smudge shape over here. Modify the color to be
brighter like this. Now, we can use orange control
points as we remember, if we alter the shape, a little bit of rotation here and we tried to position this. In this case actually
this snapping is pulling my shape to
different positions I want. So I will turn off the
snapping for a moment. I can position this one
exactly where I need. Then I turn it on again. All right, the top
part is finished. Let's move to the bottom
part of this illustration. As you can see for this element, we should use gradient. So the gradient tool and draw the line from the
top to the bottom. Let's switch the colors
like this darker app. You can modify the
colors from here. In my case, I'm a really happy with this
color they gave me, so I'll keep it, maybe I'll add a little bit of noise here. So I go to texture. This is vector, nice,
so you don't need to be worried about data,
about scaling. Alright, the last element, how we can make
this texture here. Let me show you how we can
add texture to this element. I will zoom out a little bit and I will pick rectangle tool. Let's draw a rectangle here. I will change the
color to black. Now I will duplicate by dragging this element y
holding Command key. Here's my duplicate. Now I want to make
one more duplicate with exactly same
transformation. I want to move it down again. I can use power
duplicate function here, edit, and duplicate. Command J is the
shortcut for it. As you can see, not
only make a copy, but also move this copy
at the same distance. When you use shortcut Command J, you can do it again
and again and again. Very handy feature Power
duplicate not only copy objects, but also copied transformation. I will duplicate all
of them and rotate. Now I select all
black rectangles, the vertical one,
horizontal one altogether. We already know how we can
add them all together to create a new shape and
add function on the top. And here it is a new shape
made of multiple rectangles. Rotation, scale it
down a little bit. Alright, so how can we hide unnecessary part of the shape? We just want the one
overlapping web.com. I will show you one more
trick called masking. We can actually drag this kind of like under the existing shape
to mask it out. Click on it on the layer panel and drag it inside
the existing shape, not below, but inside.
More like this. This is below and this
is inside. Here it is. We mask out the
unnecessary part. It's still there, but
we cannot see it. Perfect, Let's change the
blending mode for this texture to overlay and
reduce the opacity. And here's the effect we
want. All right guys. So we kind of test out
our knowledge so far. Plus we add few more
tricks with masking, with dragging shapes
inside other shapes. Okay guys, I think
we are ready to move to the next lesson,
but before that, don't forget to draw
your own ice cream using our digital worksheet. All right guys,
it's your turn now, so please draw
your ice cream and then I will see you
in our next lesson.
6. Lesson 5 Pencil Tool: In this lesson we're going
to explore pencil tool. So let's swap our
fill color with stroke color, like this. And now we are ready
to draw the line. We can also decide about
width of the stroke here. Maybe like this. Let's select the pencil
tool here on the left. Let's try to just
draw this line here. As you can see, the program
tried to stabilize my stroke. I'm using mouse right
now, so that's helpful. All right, Here's my line that they draw using pencil tool we have stabilized on.
Let's switch it off. Now the line appear
direct directly after the tool is a little
bit less smooth. All right, let's delete this one and try again this
time when we switch the mode, there are two modes how we
can stabilize your tool. So let's switch to the
first one and try again. This one is even better, in my opinion, even smoother, we've got less points. That's good frame. You can adjust the late of it. So if you just make it longer, you will have even
smoother curves like this. That's kind of cool
way to use this tool. It's filling like you're dragging something
behind your card, line is appearing
behind the tool. It's much easier when
you are a mouse user. All right, and let's modify options once more
for the second line. Back to this mode. Make this shorter this time. This way I'll be
able to make turns easier if you've got very
curvy turns like this. If the line that stabilize
my tool is too long, it will be really hard
to determine like this. You need to adjust. Stabilize depends on what
kind of curve you want to draw with this
pencil tool or you can switch it off
completely if you're using, for example, tablet, who got better input
device in mouse? All right, Let's try
to draw closed shapes. All right, and as
you can see here, the shape didn't
enclose itself and dads are missing feature
in Affinity Designer. Unfortunately, it was,
it's still not resolved after waiting for more
than four years now. So we need to do the trick. I need to click out. I need to use Boolean function
to close the shape myself. The line will not
close the shape. We need to click. To
close the shape ourself. As you can see, I've been using
the sculpture of feature. Let's turn it off for a moment. I will draw half of the
shape and then I will try to continue without
sculpture turned on. So instead of joining
the existing shape, I end up having two
separate parts. So that's what this
capture feature is for. If it's turned on, you can continue drawing the
line you left off. If it's turned off,
you will always draw a new shape every time
you use the tool. Let's do it on a draw
this part first, I stop and I can continue now. This will be still one shape. All right, this is one
shape but it's not close. Let me show you this is kind of missing feature in this tool. We cannot force close the shape, this little gap here. To fix that, we must click art. Boolean function art were
created the line in-between. Like this. Alright. Let's draw the final shadow
shape on this art board. So kind of organic,
hand-drawn triangle. I encourage you to play with stabilisation to slider so you can kind of fill
it for yourself. And here it is. And again, it's not a closed shape. I must click art after I
finished drawing shape. That's the kind of trick that we need to use here
because we got missing feature, we cannot force
the pencil tool to draw closed shapes here,
repeated designer. Alright, as you can see, this pencil tool is
not very precise. So in the next art board, I will show you how you
can go back and fix your lines and shapes with not to see you in the next one.
7. Lesson 6 Node Tool: During the previous lesson, we use pencil tool is a
little bit messy and precise, so it's perfect moment
for us to introduce NO2. No2 will help us to
fix and customize existing shapes. It's over here. Look like white cursor. Take a look. This little white
cursor can move notes, move points around. So we're not going to
move the whole shape, but only nodes only points. The black cursor, the move tool on the very top move
the entire shape. But the white one denote
to move only one note 1. Unlike this, this way we can customize and modify any shape. Alright, so let's try to draw some new shapes using
this node tool. So in this exercise
we're going to draw shapes with
shape tool like this. And then we will convert
each shape two curves. Clicking this button at the
top, convert to curves. And now we can use Node
tool on it to make some custom changes like this. I can move this wherever I want. Let's position this here
to match the gray shape. Alright, first one. For the second one, we're
going to start with circle. I moved the entire shape with Move tool, the black cursor. Then I convert to curves. I use the white cursor Node
tool to move the node down. You may notice some nodes
are sharp and some nodes are curvy like this and got additional control points
that I can bend 11 right, to change the curve. The first shape, as you can see, this is sharp point. But I can change that by
clicking this button at the top. I can smooth that and I can convert sharp point
into curvy one. This way I got this
additional point to make it more curvy. Alright, I can do it
other way as well. Convert this curvy
one into sharp point. Here it is. All right, So there are
two kinds of points, curvy one and sharp one. The sharp one is
mark with rectangle and curvy one is
Mark worth circle. It's time for our TED shape. Let me got our triangle
convert to curves. And I don't have note,
I should move here. I can add new one. By clicking here, I will
add new node point that they can use to
modify its shape. Not only moving existing nodes, but adding nuance as well. We can add notes so we
can also remove them. Take a look, I got
star-shaped here. All right, Now we're
going to convert to curves node tool again. And now I can remove this node, just click on the node and
hit Delete on your keyboard. And it's gone. We can remove
unnecessary nodes as well. Alright, first row is finished. Let's move to the
second row below. Going to start with circle here. You know the drill. Before we can modify that, we need to convert to curves and then Node tool, pull it up. And we need to convert this
curvy one into sharp node. All right, In the next example, I not going to click on nodes. How going to use
NO2 to pull site of the shapes that also possible here in
Affinity Designer. So take a look. Cannot
do anything yet. I must convert to curves first. And now I can pick Node tool. And I will not
click on the note. I will just click on the side
of the shape and I can pull it itself without
adding new nodes. Right? Next thing, we got two
more shapes to go. Here's rectangle. We're going to
convert to curves, use Node tool to modify
to customize the shape. I'll move this here. Alright. Now we need to experiment
with this node. We can also normally,
as you can see, when you're using
this curvy at points, control points, it's
trying to balance itself. There is a way that you can move only one and holding Option
key on your keyboard, you can move them
out of balance. Like this. You can simply add a new
node and put it here. Alright, and the
last final shape. Pretty easy. You can start with
triangle or a rectangle. Now convert to curves. Move this guy over here. This one should be here. Let's transform this
one to be smooth. So we got additional
control points. This one should be
smooth as well. And flip this here. Alright, as you can see, this node tool is perfect tool to customize
existing shapes. So you can quickly
customize shape that you've already
got in your project. All right, Now it's your turn. Go to our digital
workbook and tried to draw eight shapes on
Node tool, artboard.
8. Lesson 7 Pen Tool: It's time to finally
learn about Pen tool. Many people believes
that this is the most powerful and
most important tool for vector creation. So it's a bit similar
to pencil tool. But in this case, we
will not draw the line, but we will draw notes points. Instead, we will
have great control. Alright, let's pick
a stroke color. We can change the stroke width over here using this slider. And now I will select
Pen tool from the list. Here it is. We got some additional
properties at the top here. I will keep it in pen
mode, the standard mode. And over here I will
switch off this temporary. So I got very standard options. Turn on the basic set, and now I will draw
the first line. So click here and click here, click here, here, here, and here, and the last one here. So as you can see,
if I simply click, I will add nodes, and nodes will be connected
with straight line. On the right side, I
click and drag my mouse click and drag, click and drag. This way I create curvy nodes that are
connected with curvy line. That's the difference.
If you just click, you will have straight line. If you click and hold
your mouse down, you will draw curvy line. All right, let's try this
one more time in part with rubber band mode here so I
can kind of see the line, can you see this ghosting line, the blue line
following my mouse. This is helping us to estimate and location
of next node point. So that's very helpful
option to turn on rubber band mode. The last one here. Then you can press
Escape on your keyboard. If you want to finish
drawing this line, you don't need to
close this shape. Sometimes you just
want to draw a line. You can hit Escape to finish. I just changed my pen tool
from pen mode to smart mode. In this mode, the software
will try to help you out to make your shapes smoother,
your curves smoother. So it's control a
little bit different, but it's kind of editing the
past line for you as well. So even you already
put the point out, it can slightly changed even the previous line to make the overall shape looks
smoother as you can see here, It's more elastic line. I'm not a big fan of this mode. Myself. I prefer the pen mode, but it's also for you to notice something
called Smile mode. We have more elastic line
that follow your pen tool. All right, what's next? There is one more mode here
to explore Kolb polygon mode. As you can guess, this mode will only draw straight lines. You cannot make curvy
note in this mode, even you click and hold, you will only make
straight line. So this is something
that you want to use on various core objects
like this one over here. And now I'm closing the object. You can see this little
circle indicating that next click will close
the object and I can fill this new
shape with color. All right, let's go
back to pen mode. Click and drag to make
curvy line click and drag. Click and drag here. Click and drag and
close the shape. Now we close this shape and we can also fill it with color. Let's use pen tool to
draw the last shape. This is kind of the default
function for our pen tool, drawing strange,
organic custom shapes. We don't need to use pen tool
to draw circles or squares. We can use Shape tool for
that as you know already. So Pen tool is the tool
to go if you need to draw some strange organic shapes like this one over here
and then close the shape. As you can see,
it's not perfect. So we can use our Node tool
we learned before about. And we can move our notes, modify the curve of each node to enhance our results with pen to especially when you are begging and with
this tool when you will make some little mistakes here and that's normal,
That's all right. Use Node tool to fix
your little mistakes. And this way you'll be able to draw any custom shape unit, pen tool, super important tool, much better than pencil tool. We got great control. We placing nodes, replacing
points, ourself here. So definitely it's worth to practice and learn
more about this one. All right guys, we learned
about three new tools, so it's time to do a
little mini project again, I will see you in the
next video where we're going to design our own MOG.
9. Lesson 8 Emoji: All right, seems like
we are ready for our second mini project. As you can see in your
digital workbook. Now we're going to design
a module like this. And also at the end we will apply some Layer Style effects. You can see this plastic
like glow on it. We will add this to
our design as well. But first let's draw
all necessary shapes. So on. Of course, we need a
rectangle with round corners, That's the base shape
for this emerging. We can adjust the corner using the orange control
points as we just saw. We got base shape. Now for
the smile, for the mouth. There's a special shape here. We can segment the circle. We don't need to draw
the whole circle. That's very, very cool. And many people tend to forget about this one and they
use full circle and then they tried to cut out however it we need
to rotate it on. We can also flip the
whole shape like this. All right, here's our Smile. What's next? Eyes?
Pretty simple, just little circles. Duplicate. We need two of those
glasses as well, and also tips here. So one more for the mouth. Over here, just a
simple rectangle. We'll use this later on with some Boolean operators
and also glasses. For that, we can use
doughnut tool because we got this built-in hole inside and we can adjust the size of the hole, the radius of the hole. And we need both
sides left and right, like this over here. And we got almost all shapes necessary for this
little illustration. Now her, as you can see, this is very organic shapes, so we will use our
newest addition to our toolset pen tool. Pen tool is perfect for strange
organic shapes like this. So I just drawing something
similar using my pen tool. Remember, click and hold
to make the line curvy. If you just click, you will make the line straight. You must click and hold. Alright, seems like we've got almost all elements right now. So I think we can
start adding colors. In vector graphics
is really easy to recolor elements
simply click on something and then
change the color from the color palette on
the top right corner. So let's start with
the main color. We need this yellow here. You can use color
wheel like this. Select two at the same
time so you don't need to pick the
same color twice. Just hold shift to select
more than one object. All right, we won't go with blue her feel free to
remix this design. You can make this a little bit different to match your needs. Gray here. This will be white later. I will change the color
later so I can see it now. I got white background. So
if I change color to white, they cannot see the element. Alright, let's position this in the center and move it here. Now change color to white. And it's time for our
first Boolean operation, we will select two
shapes and use divide. Here it is, as you know, I can now move
everything separately so I can delete unnecessary
part of the shape. We place the eyes here, select both shapes
at the same time. You can kind of position them
in the center like this. All right, time for glasses, we need to move shapes to get. So we will add them together again using Boolean operator. Let's add them together. Now it's just one shape. Right over here. As you may know, we can
always use Node tool to modify any shape we want. So I'm using Node tool right now to make some little
changes here. I can change notes to
be sharp, like this. I can add new nodes by
clicking on the line. All right, nice. Maybe also here I will
make a sharp node. And we can move this up using
totally new node like this. I think it's much better now. There's one more element
I almost forget about. We got tongue here
in psych his mouth. So let's use an
ellipse for that. One ellipse here. Some dark red color. I will also duplicate
done, I need to. So let's duplicate
that by moving with Command key down together. A little bit of rotation. It should be around here. But we don't want to say it all. We just want to say
it inside the mouth. So let's drag it
inside the mouth. Let's mask this using other
shape like this outside. Inside. Okay, this is the same trick we use with ice cream illustration. All right, We got all
colors or shapes in. Now, let's just add some nice layer style to give it a little bit
of plastic glow. So I will select her
first to experiment with their style before I apply
this to all other elements, here it is fx below your
layer, panel, layer styles. It will open a new
pop-up window like this. Here we've got multiple styles. We can apply them just by
clicking this checkbox. You can apply more
than one style. But in our case, we just need some
kind of 3D like glow. We can use Bevel
and Emboss here. We've got one that's inside
the shape and then we can adjust the size, color, and blending mode
direction using sliders, using built-in properties here is also very similar
thing called 3D. This is very similar function. It will give us
this fake 3D look. And also we got
set of adjustments here that we can put in place. So I'm using this 3D frame, as you can see, I can
change the direction, I can change the size of it. And it's also giving us
this glow here we get a little bit less
control on colors. We cannot change
the blending mode separately for light
and dark color. That's a little
disadvantage here. Let's take a look. Here's my layer with
Layer Style effects. Now I'm going to copy
this whole layer Command C. But instead of
pacing this object, I will just paste this
style on other objects. So select the shape, go up to Edit and
Paste FX paste style. Here is this way I don't
need to start from scratch. I can copy and paste
style between my shapes. All right, I will
undo few steps. I'm going to modify this style before I paste it to
all of my objects. So I would just changes from Tweedy to Bevel
and Emboss again, because here I can kind of customize it a little bit better by adjusting
blending mode. So I can change blending mode
to overlay, for example. And it will blend a little bit better with the Agena color, especially for the darker color. Take a look. All right, that's a little
bit better in my opinion. So I'm going to go with this
one, this effect software. And this should
be actually very, very bright, so may be
hard light like this. All right. You can also
add a profile like this. This one, we got few
built-in profiles. You can also do it yourself. In my case, I will skip that. I don't need profile
for this one. I need this soft fill here. All right, I'm happy
with this layer style, so we're going to
Command C. And now I will paste this style
to all other layers. So I will select all my
remaining layers here. I will go up and Paste FX. Now, all of my layers got
the same layer style. I will modify layer style
for eyes and mouth. I want this to be kind of
like hole inside the shape. So I will modify fx
here, switch this off. And instead of this effect, we will add inner shadow. Let's turn this one off by
clicking on the checkbox, we add in a shadow. And again, we got sliders that will allow us to
modify this effect. This will be like a hole in
the shape not popping up. Alright, that's nice. We use two different
layer effects. Every time you add layer
effects to the layer, you can see this little
icon fx next to it. All right, last thing to do is just group all of your shapes. So you've got one
group for this MOG, like this. Alright, well done. Now it's your turn. Try to draw this emoji. You can even do this
exercise several times. You can draw different emojis if you like to practice more. And I will see you
in the next lesson.
10. Lesson 9 Cornel Tool: Next we're going to
use corner tool. It's very underrated but
powerful shape building tool. Let's draw a shape over here
and just a simple square. Alright, and now I'm going to select corner tool from the
tool panel on the left. Here it is. Now you will be able
to simply click on the nodes and apply
corner effect. In this case, I got round
corners selected by default. You can even select two nodes at the same
time while holding Shift. Then you can apply the
effect at the same time. This way, we turn our score into leaf-like
shape very quickly. All right? Of course you can
apply the effect on all corners in the shape. You can select corner
tool and you can make a selection box
to cover whole shape. And then you can simply drag the corner down to
apply the effect. Let's change the
style of the corner. Maybe something like this
will suit this shape. All right, we can also use
the slider at the top, but as you can see it, good Limit 50 pixels here. If you want to
extend that limit, the easiest way is to simply use your mouse and drag it to
the center as you want. All right, so this
is the second effect we can use with Corner tool. And we can blend
those two effects, round corner and cut
in corner like this. So take a look. Let's create this sheet-like shape very quickly just by
using Corner tool. At the very top we
make little cutouts. The button will be
completely rounded until we get half
of the circle here. Alright? In this way, we create
this shield super quickly. Alright, let's try to apply corner effect
on different shapes. And square might be
triangle this time. So let me just draw a
triangle over here. Now we will use kind of
like negative corners, something that will just
cutting out the shape inside, not rounding nicely like this, but cutting in sharply
sharp corners. All right, like this, pointing into the shape. As you can see, you can also use this method to
create new shapes. How to make R0 quickly? Why not to use corner tool? Let me show you. We got this rectangle. Now using coordinate
tool onto right side. We can apply around corners, but we can also
change the style to be straight, like this. In fact, so that you
can quickly create our shapes in
average a designer. Alright, I got one more
example to show you what we'll start with the
star shape this time. So far I was
applying this corner to online outside nodes, but this time we will apply this corner tool
on inside nodes. The one next to very
open angle like this. And instead of
cutting the shape, we will add to the shape. Take a look. We can pull
it outside of the shape. So you can not only pull
it inside the shape, but you can pull it outside
the shape to add extra part of the shape like this
very powerful tool corner TO and very underrated. Alright, so don't forget
about corner tool while you're working
on your shapes.
11. Lesson 10 Contour Tool: In this lesson, we will
explore contour tool. It's fairly new addition
to Affinity Designer. The main purpose for this
tool is to extend the shapes. So take a look.
Here's the circle. I select Contour tool
here from the latest. Now I can click on
the shape and extend the shape all around like this. You can also make
this shape smaller. You can drag this
inside the shape. All right, so nothing
too impressive, bad. Sometimes you will need to
make the shape a bit smaller, create a little bit of
gap between shapes. So it's super handy
in that situation. Also, we got some
use cases that will lead us to an interesting
effect. Let me show you. First, I will just
draw two circles here. And I will combine them
into one compound shape. Something we did before in
Boolean operation lessons. So layers and our create
compound from those two shapes. Alright, and I will, let me show you what will
happen if I tried to use contour tool on
this compound shape? Let's make it a little bit smaller and you can
see it already. There is a connection
in-between two compound shapes. I can even move them afterwards. I can even duplicate one of them and create Ted shape here. That will also be
under this effect. All right, So this is how
people use contour tool to get a compound shapes to create this sticky glue between shapes effect
easily and quickly. Alright, so that's how, that's the one way, how you can use contour tool. The second way is to
open up the shapes. So let me show you on this star. Let's create a little
star with forearms here. Contour tool. We can of course
make it smaller, make it larger, but we can also change how the contour act. So let's modify the option
over here at the top. We want to open up. This way you will create
a hole inside the shape. You are creating this
content from the stroke, from the border of the shape. We can adjust nodes to
be sharp like this. Rounded by default. This way you can quickly open up the shape using contour tool, right, to create the next one, as you may guess, we will
create a compound shape here. So we've got two
rectangles, two squares. Then we will merge them
into one compound shape. This time, I will use shortcuts
or I select them both. Hold Option key on
my keyboard and then click art and
very top here. This is shot way how you
can create compound shape. Now I can extend that, I can make it smaller. Of course I can move them
after I apply this effect. So if I open this group here, I can move them. And they should be
sticky like this. Right? When we get to
squirt stick together. And there's one
more thing we can do if this contour tool, we can apply contour
two strokes, two lines. So let's pick pen, tool swap, Fill to stroke color. And we will draw some
simple line here. I will click and hold to
make it a little bit curvy. Then I will use Node tool to adjust the line on
this side as well. Alright, here's my line. I can duplicate that on, just start with one. Maybe it will be better
so I can just copy the final result
after Y. Alright, so I got lines here, not shapes, keep that in mind. We got stroke color,
not fill color. And now I'm going to
apply contour on it. And you will end up with
something like this. You can fill this new
shape with Fill color. Now, I can actually put
a fill color inside. Even though we started with simple light and the
line is still there, we can modify the
line any moment. Alright, so that's how
you use Content tool. It's not very popular, but in some specific use cases, you will need it. So don't forget
about contour tool.
12. Lesson 11 Mixing Tool: Our next artboard is not
dedicated to any specific tool. He will mix all tools
we have learned so far, all techniques we know. We will do with a
little bit different. Instead of you
watching me first, I want you to try. Before you watch this video, go to our digital book
and try yourself. Check which shapes
you can re-create. Which shapes give you troubles. And after you finish, then watch this video and maybe you will
notice something I did, you didn't, and you can
add this to your workflow. All right, so let's do it
differently for this art board. First, try yourself and
don't be stress if you cannot make it exactly as it is on the example on
the gray shape. All right, try your best. And then after you finish, watch this video and maybe you'll be able to
catch up something. You forget about something
I did, but you didn't. That can improve your workflow. Why building shapes
with multiple tools? All right, I hope you are ready. So here's our first shape,
looked like shield. So I'm going to start
with rectangle tool, which is simple rectangle. And now I will expand this shapes so I can do some
modification to it. Convert to curves. And then at very top I will
use corner tool like this. The bottom I will use
corner tool again. And I will beg this appearance. Now, we can swap the fill
color with stroke color. Resizing. We've move tool, hold Shift to keep
the proportion. We need to change the
bottom part here. So I use Node tool for that. I can remove this node and I will make this
node here sharp. Little bit of adjustments
to make both sides equals. And we got our shield
shape already. Now we just need to fill one part of the
share with color. So I'm going to draw
secondary shape, select them both and now divide. After that everything
is a separate shape. So I can kill this out and I can fill just half of it with color. So we add fill color here and here's our first shape,
a little shield. Alright, let's start
with the second one. And again, I will use
Rectangle tool for stud shape. I already can see
that I will need additional shape here at the
very top we got this circle. So let's also draw the circle. All right, and now
we will need to do some Boolean operations
using this circle here. Let's make a duplicate
of it over here. And subtract. Duplicate here. Again, let's try subtract
and we got the wrong result. We must move this
above the main shape. Now we'll do subtract again and now we
got correct result. Alright. Now we need to make those
curves on sides of the shape. There are several
methods we can use, but I will use Node tool. And now I will hold
Shift and arrow. Then shift an arrow instead of dragging this point of my
mouse, I use keyboard. We can make this smoother using Corner tool
again like this. And we end up finishing
our second shape. We could one more shape in
this row look likely to MOG. So definitely we need a circle
as the base shape here. We got our base so-called. Let's move it to the side
for a moment so we can see some facial
features like eyes. Easy, just a circle
here as well. And then some kind of smile that few ways of drawing this, I will maybe try
segment tool so I can just have part of circle
our starting point. I can use orange control
points as you may remember, to modify appearance
of the smart shape. Something like this. Now, let's duplicate
this whole shape. Let's make a copy of it here. Stretch like this. And we will subtract. Final touch will be to round corners here just a little bit. In this way, we create this
Smiley face not we can now subtract from
the main shape here. All right, so let's position everything like that and
move back the main shape. We can add this together. Eyes and facial expression
that all as one shape. Now, even though not
connected directly, we can just subtract
this using this one. Click over here on the top, subtract we make a hole
in the main shape. And this way we've
finished our third shape. All right, this look like little compass icon you may see before. So how can we do that? Let's start with Donald tool. This is the circle
of built-in holes, so we don't need to
make a whole ourselves. We got already hole here. All right, Next we
will use star tool. Of course, we need
to reduce the number of arms we need to adjust for. So let's change this
number here on the top. You can use Slido, you can
type it from keyboard as well. Using smart controls, we can modify the shape now, perfect. And a finishing touch will be to make a duplicate of this star. Then we will use
this duplicate to subtract from this donut
from this circle thing. Alright, so this is a
little bit larger than the original one and
now we can subtract. So we got this kind of
gap in-between shapes thanks to that
duplication, right? Two more shapes. This one looks scary. So how can we start with
this flower-like shape? Let's go with smart shapes
again, Coke shape here. Not like, looked
like flower at all, but we will modify this shape using smart controls,
orange points. Alright, this is
our starting point. We can move it up, down here. There are several
different controls in the shapes. And
let's take a look. Let's explore what we can
do here. More like flower. Now, we can move it completely Downer
until the disappear. So we got this hole
in the center. Now we can fill this hole in the center with
additional shape. We've got our base shape ready. And the second shape is
something called double star. Here on the list as well. Double Star Tool
from the center. All right, As you can see, we need to do some
modifications here. Move it down. This one must be kind of like go inside completely to the center. We need one more arm
winning six arms. And make it up like
this. And here we are. We just finish our next
shape using smudge shapes, the one with orange
control points. Cool. There's only
one shape left here. We got kind of like intersecting
hearts into locking. So let's start with
a heart shape. I want to open up this. I wanted to have
hollow inside gov, few techniques we can use, but I would go
with contour tool, contour and then
open up the shape. Now I can beg this appearance. I can make this shape permanent here at the
very top bake appearance and now it's just
a normal shape, not the contour tool. Rotation. We need one more copy of this, so just drag holding Command
key, rotate even more. Let me adjust the color of the secondary one so we can see how they
should interlock. Make it a little bit darker. We want to have this
interlocking effect like one is logged to another. And even I switched the
order of layers here. It's not odd, we exactly need. It's always like one is
at the top of another. We cannot achieve this effect simply by moving
objects on layers. We need to divide this shape. We can re-color this
part to mimic the shape. This is the fastest way of doing interlocking
shapes like this. All right, and this
art board was a little bit more challenging than
the previous one for sure, I hope you were able
to do it even though you use maybe a little bit different techniques,
different tools, dots or write down
many different ways to achieve the same shape
as you may learn so far. All right guys, now
we are ready for our last final project
of this class.
13. Lesson 12 Icons: You already have learned about all key tools for shape
building in Affinity Designer. I'm pretty shoe, there'll
be no problem with our last final mini project. Here we go into
design weather icons. We need a Cloud. First, easiest way to
build a clown is to use so-called shape like this. Four circles we'll do now we can adjust them slightly
using Move tool. You probably guessing what
is the next step here, we need to combine them
together into one shape. Select all at good one shape. And now thanks to know Tool, we can remove unnecessary
nodes from below. Take a look. If I
select all nodes here and hit Delete
on my keyboard. I got a nice straight
line down here, so our cloud is finished. Now we can simply
resize this element. We can decide about
color right now, so we didn't need to
recolor this later. So let's pick a shade
of blue here from this color wheel on the
right side of the screen. Something like this
will do as you notice, I use gradient here, so let's use Gradient
tool as well. Gradient from top to the bottom. All right, Another detail you may notice already
I add some noise to the dark color so we can
add it from here using the noise slider in the
gradient tool itself. Here's the noise slider. You can add this nice
vector noise to it. Cool. Here's our Cloud. We got to bright clouds
and two dark clouds. So let's duplicate this one
because we're going to reuse this bright cloud for
the snow icon as well. Now we can make more
copies of this, so lets me copy here. I'm going to flip this. Flip. Alright, now we will change
color to a darker blue. We need to dark clouds as well. So let's adjust color in
this gradient over here. This one even darker. Maybe let's modify
this one once more. Here's our dark cloud. We're going to reuse this
dark club phone calendar so for storm icon. So let's move it
down here as well. Okay, we've got four
different clouds now. All we need now just
weather effects on them. So the first one is sunny. Sunny icon. So let's create a sun. The easiest way, as you might guess already is
to use Star tool. So let's do that star. We draw a star here, modify the number of arms
using this slider at the top. We don't need very long
arms, shorter like this. Alright? You can also round it, but in this case
we will not do it. This our base shape for sun. For this, we'll need
some yellow color. Again, I'm using color wheel on the right side is
our yellow star, I would say a yellow sun. Cool, one, finishing touch. I convert this to curves
and got normal shape here. And now using Corner tool, I will select inner
nodes like this. I can round them
out, take a look. Now, drag them out a little bit. I got sharp arms, but the space between
them is rounded. So now it's a little
touch for this sun icon. Cool. Now we can position this behind the clouds so
we need to change the position of the Cloud
on in the layer panel here, and let's drag it up. Just be careful, don't drag
it inside other shape. That's mistake. I do quite often, so drag it above, not inside the other shape. Cool. Rotation may be like this. It seems like our first
icon is finished. We can move to the
rainy cloud now. We need to draw raindrops. Lucky for us, Affinity Designer got built-in and drop tool. It's over here just
above hardship tool. We can just draw raindrops with just one
click, click and drag. And here's our raindrop. Of course we got
orange control points to make shape adjustments. Just slightly adjusted and maybe more to the left
like this. Cool. I will need some
copies of this shape. Forest too many, maybe 33
copies in the first row. And then some more
drops below done. Just using Move tool
to reposition them. And then two more copies here. Here's our rain cloud icon. Nice. We've got two ionic icons ready Two more to go. Next. One will be for storming, whether we got this. Lightning here. I will start with
triangle tool this time, this is normal triangle. Then pick the color
from the sun's surface, the same yellow color. Now we can move control
point to the right. Just like this, and
let's make a copy of it. So right-click and duplicate
on the layer panel. And we will flip it horizontally and then vertically as well. Like this, you can also use rotation for this overlapping. Now we are ready to join them together using add function. Cool, We got our little
lightning already. This will be above the
cloud around this area. All right. The last one, but the most complicated
one will be to create this Snowflake for
our last icon. So let's use pen
tool in this case. So we will use lines, not shapes for a moment. So Pen tool and I want to create this kind of this snowflake. I don't think this is equal. So I will need to adjust that in a moment
using Node tool. But first let's add color to
this line so we can see it. Alright, I got non-equal arms
here and they cannot snap. I cannot see where
I should stop. So we will need to use
manual guide for that. Let's drag out a line
from the ruler like this. Then you can adjust the light of this guy and you can drag this back to the ruler.
And we are done. This is perfectly
symmetrical so we can copy here and flip
your pen tool again, draw the line in-between. Cool. We can select all. We can even make a
group now out of it. So it's easier to work
with a little group here. Duplicate the whole group
like this rotation. And just two more elements
to a line like this. Diagonal line in the center. Again, duplication. Right-click duplicate
on the layer panel. Then mirror flipped like this. And here's our flake. All right, if I want to turn
those lines into shapes, will be natural to
try to expand stroke. So let's try this now. If I go up to the Layer and
try to expand my strokes, my lines into shapes. I got some error here. Half of this design disappear. We will ungroup it first. That's the easiest way
to avoid this error. Ungroup everything
is separately now, we can turn it into shapes,
expand strokes done. We will do the same thing for the little cross in the center. So I got two more lines
here in the center. This one and this one. Already ungrouped. So just expand them. All right, all of my lines, I'll turn into shapes so I can select them all
and add together. Now this is just one shape. Cool, resizing and reposition
just below this cloud. This is how you can create
your own weather icons using tools that we
learned about so far. Guys, feel free to stay
on this last exercise. If you feel like you want to do more icons than four,
That's all right. You can practice a
little bit longer here. And this is actually our
final mini projects. So this is the best
place to practice. We already learned
all about tools. Now, just practice. I will have one more lesson with some extra practice
exercises for you. So see you in the next one.
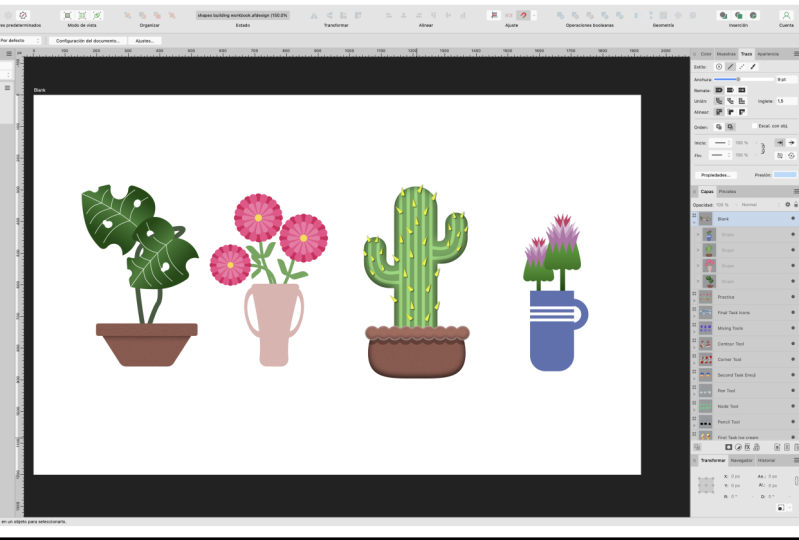
14. Practice Lesson: Congratulations on
completing this class. Now you know how to
draw all basic shapes. You can use this knowledge to combine your little basic shapes into more complex icons,
logos, and illustrations. Do you need now is a
little bit of practice. It's why I have added one extra
artboard to our workbook. Now it's good time to check out your workbook one more time. See that you've got
some output or domains. All you want to redo to practice
certain tools once more. And then under very end, you will see artboard
called practice. This is what we're
going to do right now. We will practice with
this last artboard. As you can see, I already
draw flowers here. And your first practice exercise may be to simply recreate
what I did already. So you can use shapes, you can use pen tool, corner tool, and other
techniques we have learned. Redo my shapes like
this flower over here. Let's start with circle. Alright, What next? I'm going to go
with the Star Tool. Keep in mind is always more than one way of
drawing certain shape. Here is my star tool. I can now round the arms, make it smaller
here in the center, we can use the
slider at the very top to add more
arms to our star. And this way we can form
a nice little flower. All right, look alright, we can now adjust the colour
of the selected shape. Assemble a little plants, so this should be in
front of my star. Over here. Let's drag it to the
side so we can see the tempo, the template. All right, Here's mental part of the plan that I
have prepared for you. So very simple rectangle and then we will
make some leaves. Again, drag this down
in the layer panel. To make a leaf. And technique I like to use
is to start with a circle. Actually, if you
start with circle and then expand this
shape convert to curves. Take a look, I will
draw a circle. Then I will convert to curves. And I can pull out one
note up, make it sharp. And this way you can
quickly make a leaf shape, all right, scale it down. Of course, we can
modify the color. We can even pick the color from existing elements like this. Duplication. Drag while holding command
key to duplicate quickly. We can flip it here. Now we just need to draw
some kind of flowerpot here. So let's start with
trapezoid tool. This is kind of perfect
tool for flower pod. Alright, Now a bit smaller. Then a finish here at the top of this pot, something like this. We can modify the colors using color wheel
or color sliders. How about corner tool? Let's round some corners. This one, and maybe
this one as well. Cool. I will make this a little
bit brighter like this. And here's my first plant. Let's modify this leaf, make it a bit larger. All right, so what should
I do if my little plant, I prepare for you a blank art board at the
very end, take a look. There's a blank art board here. You can move it to this
new blank art board. Then you can try again. You can draw different plants. You don't even need to
follow my template here. You can walk with
your imagination. You can draw any plant you like. So let's draw one more together. Let's go for the
second one here. We'll start with the flower
using our smart tools. So this is **** and we can just modify this tool by
dragging orange points. And that's the beautiful of this smart shapes in
Affinity Designer. Very quickly. Alright, we transform this
flower and just in few clicks. Nice. How about the next thing? You already used the
trapezoid tool before? So that's what I
going to do is again, this time I will
flip it like this. And how we can make this
circle at the top dog, two ways of doing that. But I prefer the corner tool. So let's go with the corner
tool here and rounded top. Perfect. Now we are ready to
add some spikes. So for this I will
use simple triangle. Darker n. Again, my favorite
corner to here. We got nice rounded
and of the spike. We can now duplicate
this several times. Add some rotation,
try to randomize those elements to
look more organic. K. And we are ready to place
our flower here at the top. So let's drag it to the top. A bit too dark
folder color I pick. So I will modify this quickly. Cool, and we need some
port for this little guy. So maybe let's start
with oval like this. Then expand this
shapes so we can use Node to longhand expand. And now we've node two. We can kind of make it a
little bit more like It's something in-between a
square and circle or an oval, very rounded shape. A little pot like this cool. Place it here. Here's our second plant. All right. I will leave it to you to
figure it out more plans. You can use my template, but I encourage you to also draw some of your own
plans based on your ideas. All right, so fill
this last blank. Artboard width.
Little plants like this to practice or
we have learned. Feel free to share your little practice sheet with us on our Skillshare
class project. Alright, that's
all in this class. Thank you for learning
with me and I hope I will see you in
my next tutorial. Bye-bye.
 Mark Krukowski, Kru Mark Tutorials