Transcripts
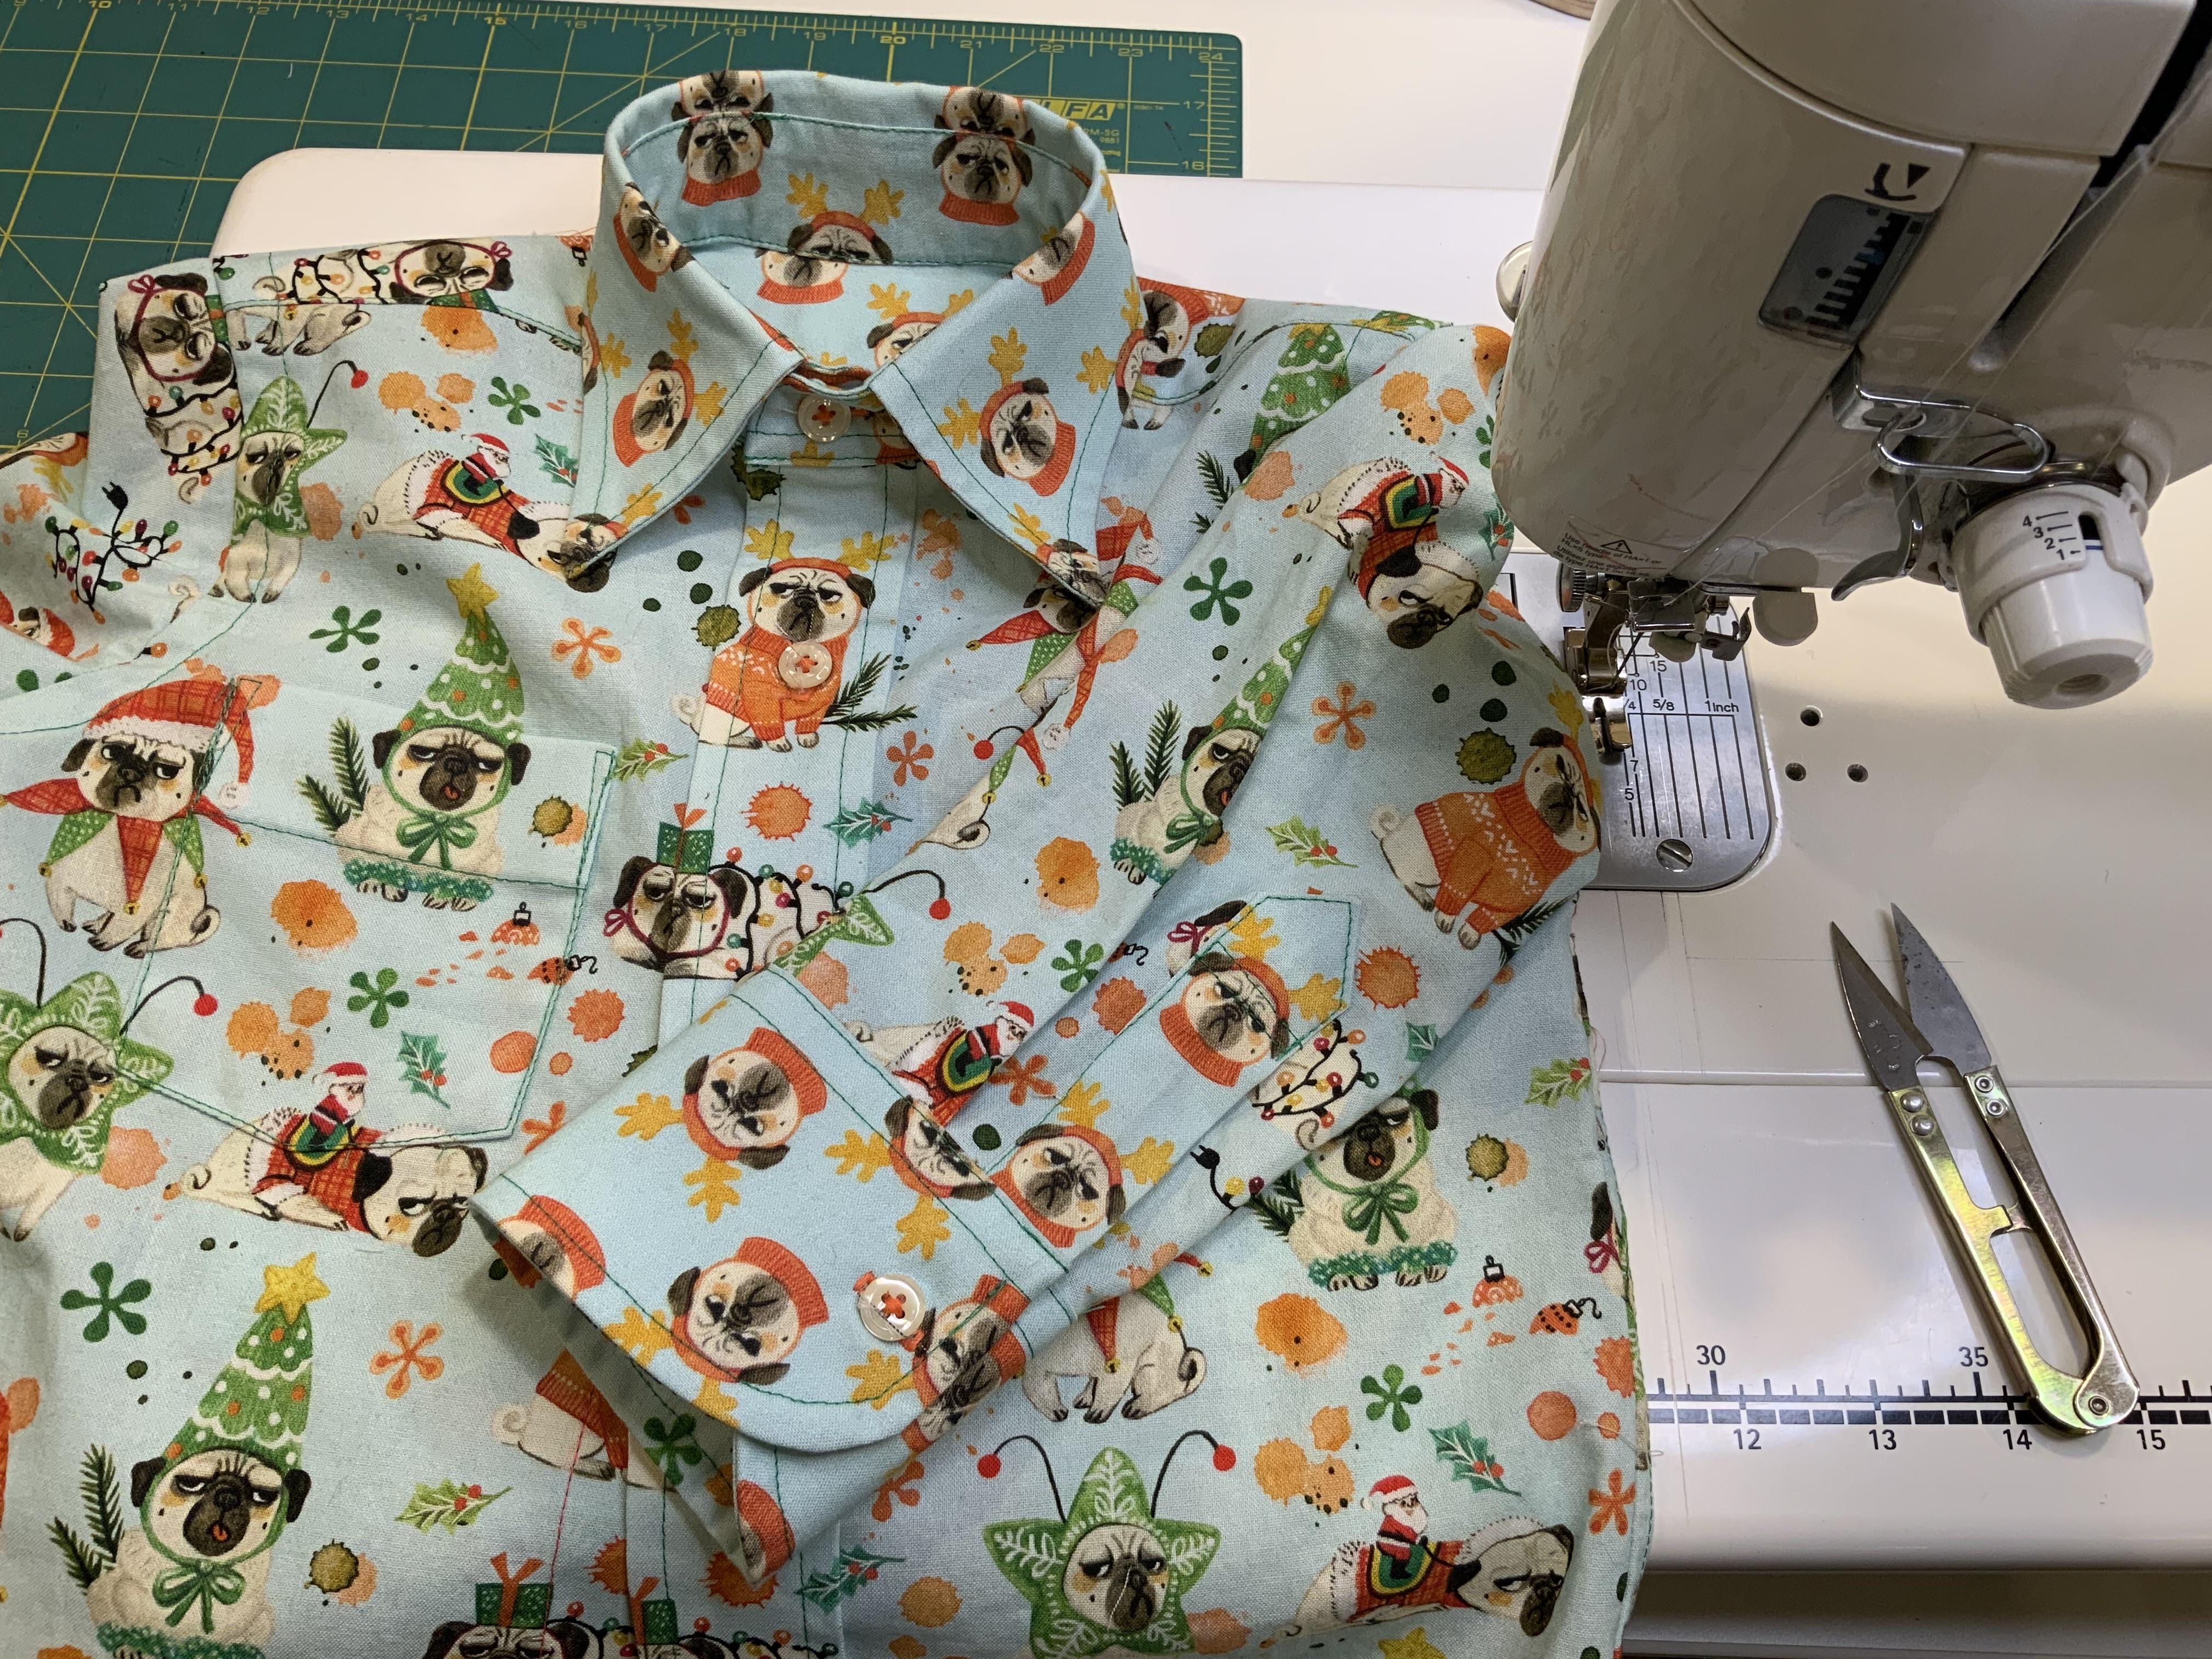
1. 01 Intro Get your toddler shirt together: Hi, I'm Leah buoyant, cheap sewing officer it away. We so and I'm here
to help you get your toddlers shirt together
and time for the holidays. Have you ever wanted
to make a cute shirt for your cute kid
in a cute fabric? Will, I'm going to tell
you exactly how to do it. You'll learn how to match those prints accurately
all the way across, even when the shirt is buttoned. And how about adding a pocket? How cute is that? You will also learn
layout and cutting techniques for working
with the print. And of course, our signature
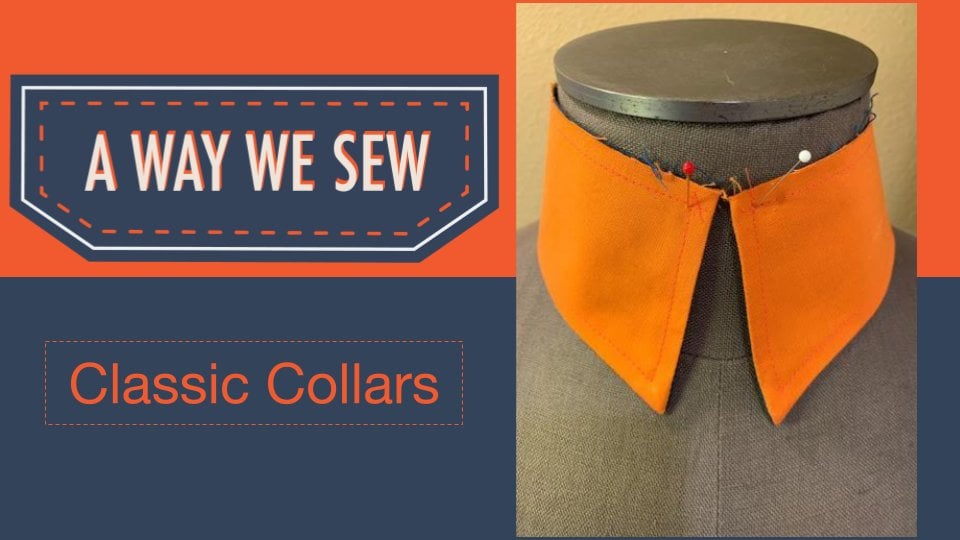
methods of getting accurate. Pointy callers, smooth color bands, and
good-looking cuffs. We'll pay particular
attention to that tricky part right at the front and center where that color
band meets the color. You'll learn how to get
a nice joined there. You'll also learn how to attach the yolk all in one using
our burrito technique. So the top stitching
looks as good on the inside as it
does on the outside. Will also learn how
to flat fell side seems these seams are
sturdy and smooth, perfect for a toddler shirt. You'll also learn how
to do this, smooth him. You'll understand how to sew
along the inside curve as well as along the
outside curve for a really nice
finished treatment. You'll also learn how to
make this cute packet with a nice accurate tower and
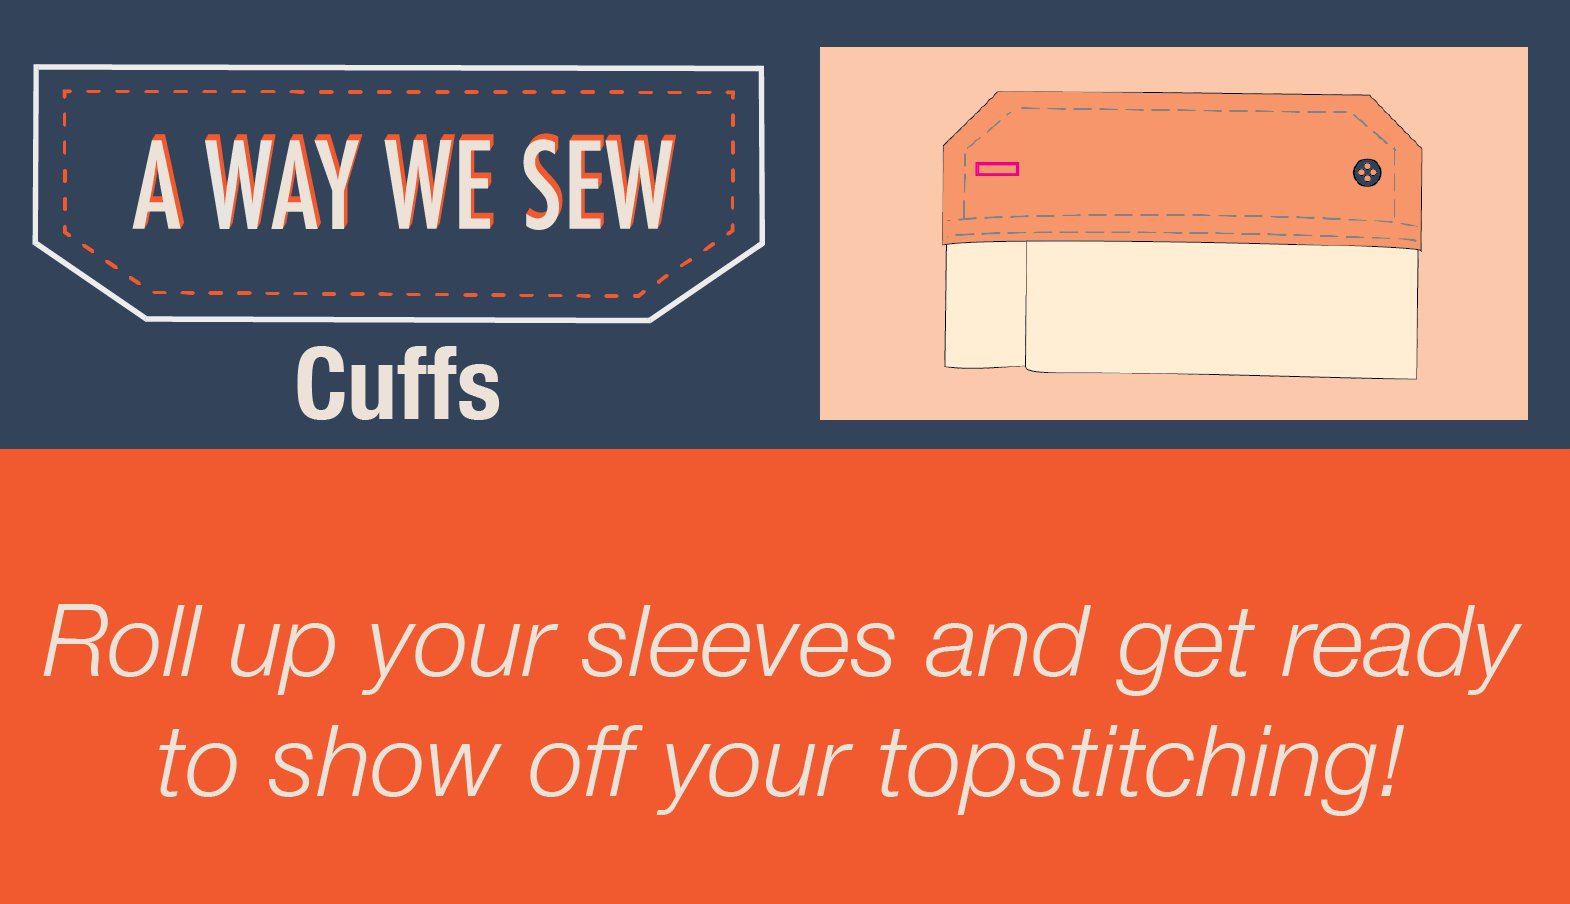
how to insert the cuff. So many things to show
you what the shirt. But before we get started, please check out our
other Skillshare classes where you'll learn how to
do a nice pointy color, beautiful color, and a
really lovely color band. And how to make the cuffs. We have three separate classes
just on these techniques. So go ahead and check those out first and then come on back and join us for a way we get our
toddlers shirt together. See you here.
2. Know your fabric before you sew.: In this video,
we're going to show you how to get to
know your fabric, will talk about fabric grain and the repeat of the
print and give you a general idea or
hopefully a better idea of what kind of fabric to pick
for this type of project. And then also what
to do if your fabric isn't quite behaving
or equate on grain. So just do yourself a favor. Get an extra yard of
fabric if you can, or at the minimum,
a half yard and then you know that you
have enough wiggle room. Now, we want to make sure we get quality fabric to begin with. And what I mean by that is
that it is printed on grain. If you're not familiar with
how to establish grain, all I've done is I've snipped
in to the salvage edge, that's that tidy factory
edge and wrecked it. So cut in about a couple inches and go ahead and rip
all the way down. And then you'll get this
cross grain that is on grain. Then take a look. So here I've ripped it
with his little hat. Star is almost ripped off
there and then look down here. Okay, it's about in
the same position. So you're doing pretty well. You can see a little bit
of the star here again, a little bit the star here. So it's pretty good. It does get worse as you go. So take a look down here. So even a little further away, starts to sink a little bit. So you can see as
muzzle is showing here and it's starting to dip. Still pretty good. I recommend this fabric. This is a company
called Dear Stella, purchased at Bainbridge
Island at esters fabrics. The other thing to
consider though, even from the same company, it might not be on grain. So what are we
talking about here? So this is kind of a
compliment to the Bah Humbug. And look at what's happening. My little pugs are
starting to go away. So this is not printed on grain. That's okay. We're going to force it to be on grain using our interfacing
as template method. And I'm going to use this
particular piece for the cuffs and a plaque it and
some of the smaller pieces. So it's fine that it's off grain because our interfacing is going to control the grain for us and for small little sections, it's not going to be a problem. However, I would
not recommend using this off grain fabric
for your bigger pieces. Think about gravity. The longer you have to go, the harder it is going
to be to have that shirt fall properly in nice and
on grain for instance, on the center front. Let's talk about the repeat. You have a horizontal
and a vertical repeat. The bigger the repeat, the more fabric
you're going to need. And just as an approximation, I say two times the
vertical repeat. So let's say you repeat, happens every 10 inches, get 20 more inches of fabric. So this is a very small repeat. There's a line of pugs
looking this way and then a line of pugs looking that way and then they repeat again, but that's just offset. So really this is, you could say it's
just these two that are repeated here and here, and here and here as you
can see how it goes. So you don't need much
additional fabric in order to match this repeat, because if you needed
to get to this PAG, you could do so
again, very easily, pretty much anywhere you
don't have to go far over or far down to
get the same pug. So you wouldn't need excess of fabric if the repeat
is small like this. And one last thing about the repeats in the path's make
it very easy to see this. So we have both a
vertical repeat. So a little Red Hat, green star, Red Hat, green star, Red Hat green star. So our vertical repeat is
only a couple of hugs. We have it again here. Green had been, he's writing Green Hat than his writings
or vertical repeat is really just these
two and happens again here he's all tied up and
he's got an orange sweater. And then we've got back to the
green hat and the Red Hat. So we have three columns
and two rows of repeat. So this is a unique column, unique column, unique column, and then it repeats, repeats, repeats, repeats,
repeats, repeats. Okay. So keep your wits about you because you can run out
of fabric pretty quickly. Because if I need to
match up this pug, I'm not gonna be able
to find them again till over here in that might not give me
enough real estate up here so that I have
to go way down here. Hopefully you get
the idea that you just want to make sure
you buy excess fabric. Particularly the more and the wider and the longer
the repeated.
3. Prep: Center Front and Separate Buttonhole Placket: So with matching prints, the key is to prepare
your pattern. And key to preparing
your pattern is to find the center front for our particular pattern
we're working with the jelly to 10, 11. They have marked the
center front line for the shirt front. And in that particular pattern, we're using the same
pattern for the shirt, right side, the button side as the left side,
the buttonhole side. And in the instructions
they show us how to do this kinda cool origami
fold on packet me, show you actually
what that looks like. Finished. It's just a
little tuck right there. It's very cool. It's
a great technique. It's fast. It's simple. For solid. It's perfect where I do this. All right, We're gonna do a print or a plaid in this case, we're going to show
you how to do a print. However, when you're matching a print across the
front of the shirt, the fold on Plunkett origami
technique won't work because you will break up
the print, so to speak. So for our purposes we need
a separate cut on Blackett. And what I mean by
that is this is an entirely separate unit
that we then stitch on top of our fabric we're going
to be using are interfacing as template technique that will cut the width
of the interfacing, the final width of our packet and then
Folder fabric around it. And then we're going to be stitching that right
on the fabric. So we'll show you
how to do that. But the point is
here is that we need that separate front pockets. So we're going to use
the right side to find our center front vaginas
I mentioned is marked on the pattern and we're
not even going to use the left side for matching,
print end clades. And I'm going to
show you how we do this with a projector as well, which is kinda fun, but
don't worry about that. Just cut out this side and
draw on the center front line. Yeah. You don't have to do this, but I thought it
would be helpful is, it can be helpful to
two is to actually draw the fold lines and
even the stitching lines that kind of help you understand what's
going to happen here. You're going to fold once
on this blue line here, and then again on the blue line. So it can be helpful to have these little nips here
when you cut this out, to do a real small little nip on the fabric
to know just where you're going to
fold it and do that down here and up at the top to make sure they're very
shallow though you don't want to get into the seam
allowance there. Hey, so let's continue
to talk about center front and why
it's so important. So when we determined center front to that sort
of rules, everything else. So this is actually cut
out of wrapping paper and I highly recommend you practice first on
wrapping paper. Just make a little sample
just as I have here. It doesn't even have
to be full length. You don't even have to use
the arms or anything that you can just do this
little front section. To practice, I have
determined I want my center front to
be in the middle of his little piggy nose. And this isn't long
enough to show you, but there would be like
another piggy nose down here. So any case, that's what I liked to have as my center front. I also need to figure out
what is front and center. I don't want to
have a random host sticking out into the fabric are coming down or having
something funny looking there. So I like the way
this will look once the band is attached up here, it's going to look cute, but not anything
startling there. Or maybe you do want some
startling there again, I think to think
about with placement is around the bust area. And perhaps you don't want anything pointing to that area, or perhaps you do. It can be really cute.
Have fun with it. It's your shirt. Again, back to the center front though we do need to mark that because that is what's
going to help us match all the way across, of course we want. So right and left
sides to match. And then also the
separate buttonhole packets so it matches all
the way down perfectly, including ones we get obviously
the buttons in there, everything will
just be seamless. You'll be even hard for you to tell that that's not
one piece of fabric. Very cool, very simple. So let's continue to
show you how we do that. I wanted to make sure you were aware for finding
the center front. This is center front right here where the button hole
is gonna go is center front. And over here where the button is gonna go is center front. But this distance between
here and here may not be the same as the distance
between here and here. And that's actually by design so that things kind of
Nestle on top of each other. And also to make sure that the pocket is covering over
this line of stitching. Here.
4. Layout and Cutting: Hello and welcome to away we, so the projector addition, I'm going to show you how I use my projector to match the
center fronts on prints. Now, don't worry if you don't have a projector lying around. I'll also show you how
to do it just with your regular pattern paper or with our freezer paper method, which we've loved to
use for pattern paper. And what are the many, many benefits of
using a projector for sewing is that the pattern stays still and you move the fabric around to match whatever
it is you're trying to do. So we talked about
front and center. So that's where the center
front of your pattern pieces, where it's going to
match your color bands. So all of your sort of face and chin is
happening right here. So we start with the right front piece and
now that's the buttons side. If you're a buttoning left
overwrite the buttons themselves are on
the right-hand side. We always start
with that because typically that pattern piece is widest because it does a
fold on button plaque it. So I start with the right front. We talked a bit about placement. We want to find front and
center on our fabric. So I've determined I want this little pug to
be front and center. So I want his face to be right
in the center of my shirt. So center front is right down the middle of his muzzle there. And then I want to make
sure I don't cut off his antlers and that there
isn't anything kind of weird, you know, hanging down there. So all I do is move
my fabric until he's front-and-center and
I like the way it looks. I can maybe bring
them up just a touch tiny bit more and that
might be even better. And I just kind of scooch things around until it looks good. Just make sure you
don't run out of real estate here or over here, because obviously you need
to cut your whole shirt out. Now if you don't
have a projector, let me turn the
lights on and I'll show you our favorite method of doing this with freezer paper, and I'll
see you here soon. I trace the pattern
onto freezer paper, and then I use that
as my pattern piece. Now, we've set this right front
pattern piece up already. We've located center
front and unfolding the pattern piece back on itself exactly along
that center front line. And then I use this to find right in the
center of the muzzle. And then also make sure you
can kinda peek behind that. You've got your
front-and-center place so you're not going to
cut off his antlers, then grab your iron. You want to make sure
it's pretty hot. Just iron that side. And while you're iron's on their unfold the rest of it
and just iron it down. That fabric won't go anywhere. Now I can go and
cut around it using scissors or my rotary cutter
or ever works for you. I could even use my
electric shears. Alright, so that's how we lay out and meet me back here and we'll show you a few
more tips and tricks. You've got your pattern piece. The next thing to do
is to simply fold that pattern piece along
the center front line. There's couple of
ways you can do this. If you've used the
freezer paper method. So easy because you
can just fold it along that line and then
peel the paper off. If you haven't done the
freezer paper method, you could use a ruler
and score that line. Or you could also fold the tissue paper back
along that line. And then draw lately with
your removable ink pen. But since I did use
the freezer paper, I am just going to fold
right along that line. And now I can just
peel the paper away. And I have pretty good
center front line there. If that doesn't work
for you, don't panic. You can always
just replace it on your pattern piece and fold
it there as you need to. Or you can note where you want that center
front to be and just make sure that it's
folding right along the center of his
muzzle on right. Now that you have
right side complete, we're going to use
this piece of fabric to cut out our left side. So once again,
we've got to get to know our fabric and I repeat, you don't need the
pattern piece anymore. You just need a piece
that you cut out. You might be tempted to just use this and cut all
the way around it. And then you realize right
after you do that you have to write sides. You need a right
and a left side. So keep your wits about you. Fold this over like this. So now this is going to
be the left side as worn, then all you need to
do is hunt around. Matching pug phase and just
align it until it's perfect. Now, lookout, don't
run out of space here. Make sure you haven't
run out anywhere else. And really align
it just perfectly. And if you're finding
that it's skew, sometimes your fabric might
be a little distorted. So you can also kind of push or pull on the
fabric underneath. Now all you need to
do is flip this back over and now use that to
cut out your second layer. If you feel more comfortable, you could trace it first
and then cut it out. Okay, The next step is to create your packet and we'll
show you that in a minute. The final step for matching
with a separate front, but in whole packet is to cut
out the buttonhole packet. The buttonhole packet
is going to be attached to the left
side of the shirt. So when we realize here we use the right side of the shirt to cut off the left
side of the shirt. We're going to use
this right side one more time now this is the side where we folded it
over on our center fronts, we need to use it one more time to find center front
for the packet, the left piece you
can put away for now, you won't need that for this, I do use a rotary cutter and a ruler or you can also
mark it with a pen. You create the front packet an inch wider than the
width of the packet. And I usually do a
couple inches longer, so I have some wiggle room. So your first job
is to just keep your right front side
folded along center front, and then once again
go hunting for pugs and all you do is just
match it up exactly. And then I put my ruler on
that and I need 2 and 3, 8. So let's just say
2.5 to make it easy. So I do one and a quarter
from the PAG phase. So that one and a
quarter line is on my pug line and you
can just draw a strip. I need 15 or so, 16, something like that. So somewhere down
to there there'll be as long as the shirt. So I can just go
ahead and cut that. It's not this piece
that's just scrap. We can use this for the
sleep pockets, so keep that. I'm done with my right front
now I can put that away. And now 2.5, this is my packet. The center of this
is the center front. So the next thing I
do is just fold this in half to mark
that center front. You can iron it if you want to. So now just check your work. So you have your right
front, left front. So if you fold this
over, they'll stack up. And then your front pocket, which I messed up. I'd like to say I
did this on purpose, but I did not I didn't
make it long enough. I didn't give
myself enough room. See, you had the wrong
pug here. I think. I don't know who knows. I was on camera, got confused. So I need to make sure
that that piece is 15 from here, not from the top. That was my mistake. So I'll just recap this piece. Not a big deal. Got glad I checked my work. If you wanted to have it all
set, you certainly could. I mean, it's totally up to you. I don't know the puzzle mind, but if you wanted to
make sure it matches, then you need to
cut it long enough. You can use that pug and you
have more poke down here. Alright? So usually at this point
I'd fold them in half, make sure that I've
got them correct. And the next step is to cut an inch and three-eighths
wide strip of interfacing. We fold that in half and we match it up and
glue it onto here. And then this piece is ready. We'll be using that
interfacing as template concept once more for our front pocket
here in a few minutes. So to make your front pocket
just use your clear ruler. So just remember
what the front was. And for me it was
the orange Pogue looking Solon as they all are. And we need to have the width of our packet finished
with b, 2.5 inches. The sizing is usually
an inch wider than the finished with of your packet are finished with the plaque. It is an inch and
three-quarters, but just to keep it
easy, I'm gonna say 2.5. So I have flux of room and
it's easy for me to just say one and a quarter is the width that I need from
the center of my pug face. So I can easily
line up one and a quarter right along
the middle of my pug. And let me make sure I'm going to make this
long enough. Okay. So quarter-inch,
quarter-inch, quarter-inch, and just go ahead and cut. And then, depending on how
you like to use your ruler, I tend to turn things around
and this is going to be 2.5. So make sure that quarter-inch
still in the center. And that's it. Now fold this in half and
just check your work. Make sure everybody has space, got the right pug. Next step is to cut
out an inch and three-quarters width
distributed that are facing and iron
are down here. And I'll show you
just how we do that. See you here in a minute. Our next step to grab
a hunk of interfacing, and we're going
to cut this to be an inch and
three-quarters width. So I'm just folding mine up
because it's a little easier to work with that way for your culture, you're
familiar with this. I'm just gonna give
myself a nice clean edge that around in an inch and three-quarters and we only
need 15 or so inches long. So just give yourself a chunk. Then I'll we do here, fold this in half and
I'm just scoring it. That should kind of nestle
in your other fold lines. Go ahead and iron metal, and we'll show you
the next step.
5. Shirt Front - Buttonhole Placket and Pocket: The next step is to
prepare our pocket. So we've already used
the right side of the shirt to cut
out the left side. And we've used the right side of the shirt to cut up the packet. And this packet is going
to plop down on the shirt. And we have the right length of pockets so that we
have a little bit of wiggle room if we need it and everything is going
to turn out fabulous. So to prepare your
plaque it apply a strip of interfacing the
final width of the packet, which in our case is one and three-eighths inch and then just match
up the centers. And I just do this
simply that the iron, I just mark a little bit
where the center is in, plop it down and then fold over. So you've ironed, you're
interfacing onto your strip, that's going to be
your front pocket. You've matched the fronts so that when you fold this over, the front of your little
guy, wherever you want, center front is equidistant
between the fold lines. Now all we need to do
is go to the machine. And I like to use a quarter-inch
top stitch foot because we're going to sew
a quarter inch from here along this edge here. So meet me at the machine and we'll show you
the next step. We're back at the machine. Make sure you have your
quarter inch foot on that. You have the top stitch
length that you want, the thread that you want, et cetera. I've got
a little crazy. I'm going to use green
on the top it just because it's already
in there and I think it'll look cute and, you know, it's kinda crazy shirt anyway, your first job is to just plot this down as if it disappears. So I do a lot of
flipping back and forth. And you can actually get started off of here that
can help you out. So you have like a third
hand kind of thing. And then just adjust
this until it's perfect. And this can be really fun. Just do one little
step at a time. Getting your next match point. Make sure that it's folded
over the interfacing. Just blast on down. Go all the way off. But don't backstitch
because we are going to have to back this off
of that debate here. Then we're going to do
the same thing over here. But first we need to trim away this excess and
we'll see you here soon, okay, or next step is to
just trim away the excess. And all I do is use
a rotary cutter. I trim about a half
an inch away from the folded edge of
the packet and I just align that all the way
down so it's nice and tidy. And that's it. Our next step. It is to fold that excess under. And you can do this at the iron, but I'm just going to show
you where it on camera. And you only need to fold
it under a little bit. Just like that. So you want about an
eighth of an inch or so on the inside of your packet. Go ahead and hit
that with the iron and meet me back here
for the next step. So we folded under the
excess of our shirt. So that's a little bit
narrower than our pocket. And now all we need
to do is top stitch. The second side. That's it. Doesn't that look great. Our next step is to put in the button holes
for the left side. And then we'll use that
to make sure we match up to the right side.
Will see you here soon. To prepare to put in
our button holes and written out here what
the pattern calls for, for where the first
button hole starts, what they suggest is two
inches from the seam here to the start of
your button hole. Now I use a five eighths
inch button hole. And then I'm using
a two and an eighth between the bottom of the buttonhole to the top
of the next buttonhole. So what I like to
do is just mark both sides of the buttonhole in case I can't remember
when I sit down, you know, is at the top
of the bottom this way I know that the
buttonhole is this. One little dot to
mark on my fabric. I use this little drill press, which is really convenient. You can just make a
tiny little hole. You could also just poke
it all the way through with a sewing
machine needle case. All I'm doing is using
this as a template. Now on the top here I haven't
trimmed anything off yet. So you do want to
kind of make sure you're accounting for your
eventual seam allowance, which is three-eighths
of an inch. And I'm just letting this
kind of go straight down. So it's nice. And even along here, if it's not in the
center, that's okay. We're going to find center
when we apply the buttons, we really just want to know
where in space to put them. I've marked my button holes. So now I know I'm going to have a button hole in between
each of these marks. So it's so much easier to
put the button hole on now rather than once the
shirt is constructed, plus we're not too invested. If we mess up, we can still take things out and redo
them at this point. Alright, so meet
me at the machine. I'm going to put
these button holes in and I'll see you
back here in a minute. Okay, I've made my button holes and I've also cut
the buttonhole. And now I'm ready to determine where the buttons go
on the right side. So imagine we just pull up this down and we make it match. Exactly. And then I just grab my marker and I put a
hole in the middle. There's different theories
about where to put the button. When I'm doing matching, I put it right in the middle
because I feel like then you have the most flexibility if you need to sketch
it a little bit, just make sure that
it made its mark. And we're pretty much right on target to
our center front. Now we just need to do
some folding and be careful if you're using these markers because they
will go away with heat. So you just want to
make sure you haven't lost your little
buttonhole placements. So this is where it can be
really helpful to just poke a hole where the button is going to go and
it'll be covered up the button obviously. And this doesn't
really put a hole in, it, just kinda
separates the fibers. Okay, Now we do the fold, fold, so we're just going to fold ones along our little snip line. You can also use a
folding template. You can use a Manila file folder or one of these
hanging file folders. This is just about an inch. In fact, that's almost
perfect because you do want it to be just
kind of a scant inch. You can fold, fold, just make sure that that is on the cut there and even
hit that with the iron. Okay. So go ahead and do
that and meet me back here. All right, The final step to preparing our right front is to simply do a line of top
stitching or edge stitching. I'm just gonna stick
it into the machine. I have my edge stitch
foot on and just push go. If you're noticing
your material starting to curl or maybe it doesn't seem like it's really behaving. And you can always check
your work as you go to make sure that's
about an inch. You can adjust slightly. You can sort of pull on
your fabric underneath or pull on the top layer. I would recommend pulling
slightly on that bottom layer. And there you go. Check your work one more time. Is an acute. And now you can attach the buttons and you're
done with your front. The next step is to put the pocket on the right front, and I'll
show you how to do that. To apply a magic pocket, you actually don't need
the pocket pattern. You can use a pocket
template and we'll talk a little bit more
about that in a minute. But really, the first step is to just get a hunk of fabric that is approximately pocket
shaped, bigger obviously. And is the right repeat for where your pocket
is going to be. So we've marked the two
little edges of the pocket. So I've gotten a blob of
fabric that I know is wider than my pocket and longer. Then all you need to
do now is match this onto the fabric so that
that top piece disappears. So you know, it's all
matching all the way around. Then folded back until you
see your little edge points, those two little dots there, it might be hard to make out because there's lots
of little dots. And then score that line
with your fingernail. Then head over to
the machine with this shiny side of
the interfacing face up and one edge of it aligned against that score line, that fold line that
we just put in. This interfacing is
one and an eighth inch wide and just long enough
to fit over your pocket. Head on over. And then
we're just going to use the edge of the interfacing
as a stitch guide. I'm just using the
edge of my foot. It doesn't really matter
what seam allowance here. And you'll see why
in just a minute. We just want a nice
straight stitch. Make sure that
this edge is still riding along that fault line. Now we can just trim
this little piece. Now I like to use my
fingernail to kinda train the seam open because
once you get to the iron with the interface and it can be a little tricky. You're going to fold this all
the way over at the iron. Just want to favor the
printed side a little bit at that edge and go ahead and iron that and meet me back here. Okay, we're back. I don't even know
if you can see the little beginning
of a pocket here. So I've ironed it over once and flipped it and
ironed it one more time. And then I just check my work. I make sure that when
I plot this down, that it is indeed just
where I wanted to be. Our next move is to grab
the pocket template. Now put it upside down
so the shiny side is up. Plop this where you
want your pocket to be. Plop this back down, making it disappear again, and then bring
everything over to your ironing board and
hit it with the iron. I'll be right back. Okay. I'm back. The reason to bring the
shirt over is it can just help as a carrier
for this whole thing. Now, that's stuck on there
just where I want it to be. And now I can just use the
pocket as a folding template. You can do this at
the iron as well. What I find is much easier
is to just run a line of stitching around the
edge and use that. Now note I'm doing this teaching just to the left of the edge. Notice how my stitching
is just to the left of the pocket template that
gives me some bend allowance. When I turn this over, I'll have a little bit of ease kind of built
in there and you won't see that stitching
line on the correct side. Before we forget,
let's just do an edge stitch along this fold-over. Okay, now we're ready
to plop it down. Fold over the edges
if you need to, you can really smash. That might be a little bulky there without
interfacing in there. So smash that down as you
need to plotted on your work, making sure it all matches. Now what I like to do is I do a couple of stitches across. So first, I line this up
just where I want it to be. And I dropped my needle right where I want
to start stitching. I take a couple of stitches, rotate, then I go down to here. And then I go back up again. Then I turn the whole thing around and I go
back down that way. That has been reinforced
a couple of times. But you don't have to reverse. It looks, I think,
a little tidier. Now. I just pull on the
shirt a little bit if I need to get that to match up using my fingers and get down to the bottom. Forget too far, flip it up. Now you could use your folding
template if you need to. I'm just gonna go for it. Can fold that extra piece in. You need to is any cute matches perfectly
and you're all set. All right, that's how we match our beautiful fun
novelty prints. Thank you so much. This
is Leah with the way we, so we'll see you next time.
6. Shirt Back - Pleat and Yoke: I want to show you how we
make this beautiful yolk. Also how we do the pleat
in the back of the shirt. And mentioning the
yolk is sort of all in one treatment
where you're not going to be able to tell what
side you top stitch this from because
we do this sort of burrito technique for the yolk. But before we get there, I want to show you
one more tip that I like to do for the yolk. And that's using the top yoke
to cut out the under yolk. So you do need to yolks. You can use any
kind of fabric you want if you've already cut them out, don't
worry about it. Go ahead and go through
our steps just Exactly. It'll be totally fine. But what I like to
do sometimes is used the bottom yogis to create the top job because
with thick fabric, you might need a little extra
to kinda get over the hump. And sometimes it
means you can kind of run out of real estate
here in the neck. And that's really where
you don't want to run out of real estate, okay, so grab a hunk of fabric, that's going to be
your second yolk. And then I would just
use this to align it to, this is not on the grain. So I'm just going to use
this yoke here to get all my little pink colors
in line and just go. You could use your pattern to, that's easier for you. And then the sides as well. Okay. That's it. Don't bother cutting
anything else out for now. Next step is going
to be prepared. The back of the shirt
will see you here soon. The next step is to, so the box pleat in
the back of the shirt. I think the hardest
part about this is just remembering to fold the shirt wrong
sides together. And then you should have
made a couple of clips where the back plate goes. All you need to do is so the width away from the back plate that you
want the back pleat. So in our case, the back
pleat is that wide. Great. That's where I'm going
to so very simple. And I just saw about
a half inch and just match your center
back. That's it. You can also double-check this against your yoke to make sure. And it's fine. The next step is to attach the yolk to the back. The next step is to, so the outer yolk to the back. So you want to do right sides together and this is
what's going to show. So when this is all said and done, you should
put it this way. It's going to look like that. So we match our center backs. And if you haven't marked
center back on your yolk, simply fold it in half. You can nip it if you need to
or just score it like that. Right sides together. My gosh, the first pin I've
used, I think, stick a pin in there. And then you're saying this at three eighths of
a seam allowance, no need to backtrack
on this one. Now you might notice these
don't fit that well. It you can very easily managed them by
using your fingers. You'll see there's a little
bit excess here on the back. We want that this is
actually a straight line. This is humped up a little bit. Get your hand under there. Kinda scoot that in. Same thing under here. Okay. The next step is to
attach the inner yoke to the inside of the shirt back. So put the inner yolk
right side up and make sure that everything is
going to be correct. So when you saw this
and flip it up, your little guys are
facing the correct way. So the upper part of
the pattern should be facing to the left,
correct? Side up. And then the inside
of the shirt plops down and just find
center back real quick. And I just stitch right
on my prior line of stitching actually just to the left of my prior
line of stitching, so it doesn't show up in this.
You do want to backtrack. Now. You're going to top stitch, but you're only
going to top stitch. The top layer. The outside. The inside actually
will not get top stitch. This is just a lot flatter. It's just much easier to
get it nice and accurate. So just open up the
top yoke like a book. The bottom yolk is
still underneath. So all of your seam allowances
should be to the right, your top yogis to the right, the bottom yoke to the left, and your back shirt to the left. Slide it under the machine. So just use my fingers
to kinda score. Spreading open the seam. Now. Flip the yolk forward and press. Give it a nice good
Press and then we'll cut around and create
the inner yolk. Okay, you've done
the top stitching. You've ironed very carefully the yolks together and
now we just need to trim. And we know the yolks match. Okay, The next step is to attach the front of
the shirts to the AUC. See you back here in a minute.
7. Yoke - Sew to Front : The next step is to it. So the outer yoke
to the shirt front. So we do this in a
couple of steps. The first thing we want to do is get the inner yolk
out of the way. So I just shove it
back underneath, like it was never there. And now your setup,
the other thing that's tricky is it's very easy to get kind of confused
and so the wrong front, and it just can
get pretty tricky, particularly if you're not paying attention,
which I often enough. So we wanna make sure to
just build our shirt. So when we open it up, we have the right side,
right front together. All of the sides we want to see are going to be the ones that are on
the outside, etc. So go ahead and just
plop this down. And so it at a
scant three-eighths over to the other side. Okay, Let's check your work. The next step is what
we call the burrito. So watch what I do and I'll
show you how it's done. Okay, we're gonna so the inner
yoke to the shirt front. And we do that one says sort of burrito or butterfly method. So your SRT should
look like this. The inside facing up the
front of the shirt facing you grab the shoulder seam of the
yolk that you just sewed. Find the other shoulder seam and wrap it around the
shirt till they match. Shoved the shirt up in there and that's creating the burrito. And then go ahead
and so the seam, just make sure there's nothing, no shirt stuck in that scene. This I'm sewing at
three-eighths of an inch, so we want to go okay. And stuff, your burrito. That's what it looks
like, the inside. And that's what it looks
like on the outside. Side. Number two, same thing. Grab the shoulder seam
that's been stitched. Grab the loose sight of the AUC, wrap it around the outside of the shirt till
those seams match. Stuff the shirt inside. And so that seam and stuff it, give
it a good Press. And then the next move is
to top stitch. This scene. We'll see you here. Same.
8. Working with Prints: Collar, Band and Cuff Layout: The next step is what I like
to call the tricky bits, which is the color, the color band, and the cuff. We have a detailed
instructions on how to do each of these
techniques step-by-step. There's videos just
on doing the color, the color band, and the cups. So please start there. What I'm going to demonstrate
is specifically how we do our techniques with
using a print. And really it's just helping you lay it out in avoiding
some pitfalls. So with our techniques, we use the interfacing
as a template. And as you will now know,
having reviewed them, you always have to
have good margins around the outside edges because this is actually going to
be where you're stitching along the color here, where it attaches to the band, that is actually your cut line. And similarly with the band, the outer band edge here
is the interface edge, but that's where you're
going to sew it, attaching it to the neck here. And then this is the actual
seam line along here. So hopefully that will help
you determine where you want to place these templates
on your print. So this can help knowing that this is the outer collar edge. You can then determine placement
because maybe it looks cute to have this little color sticking up from your color. Likewise with the color band, I find the center
alignment as I want to, and then I turn it on. And I should also mention
the direction here. Some of the patterns will show you your grain line
going this way, which may lead you to
believe that you align this color going this way to be parallel
with the salvage. You don't have to
do that at all. You can align it
anyway you want to including even on the bias. So back to our coughs,
the other tricky bits. Same thing. We can put
this any direction we want to and just make sure you have good margins all the way around because on
our cuff we don't have any seam allowances is just the template is the
finished shape of the cuff. And again, I've
just used this as my center line here
and I decided, you know what I want to showcase on the cuff,
and that's really it. Now you're ready to proceed with the tricky bits and
thank you so much.
9. Band Tip: Fit Shirt to Band: Another hot tip, big question, how do you get the band
and the shirt to come together so that they're
beautiful know puckers. The shirt is nice and smooth. The band is smooth. The band itself is a nice fit. The rents the neck and
the shirt fits the band. That is the key. You want to fit the
shirt to the band. So in step 5 and 6, we talked about applying the inner color to the
inside of the shirt. And when we were demonstrating that I had you stab through the stay stitching line and matching that up exactly with the
shirt stay stitching line. So that's your first pass
now with a little samples, Everything's going to fit
because we made it that way. But in the real-world, a lot can go wrong
or just get altered, unbeknownst to you while
you're building the shirt. So there's a lot of areas here when you're touching
the yolk the scene, could it get bigger or
smaller if perhaps are the front packet that maybe isn't the same size
as it was supposed to be. So the shirt neck
opening can really stretch or change shape from
the original pattern size. What does not change
though, is the band. And when you think about it, you've done a lot of
work on this band. You have interfacing and there you have a
lot of stitching, the band is done. The band is also what you
measure to fit a shirt. So in the real-world, let's say you're
a 16 and a half, you would measure from
about an eighth of an inch from the edge
of the buttonhole, all the way to the
middle of the button. So this little color, an 8.5. So obviously this
is just a sample. That's how you measure
for a shirt neck, so you try it on if it fits
your neck, you're good. The color band is done. You in that change, that measurement is
not going to change. What will change is
the neck opening. So think of this as the
circumference of a circle. So we're looking down
bird's eye view. This is what back
the yolk front. And your neck is
around here somewhere. So that neck opening
is a circle, the band is a straight line. So this is not going to change. This is, so let's say you
start attaching your band. Now, I start here, I keep this the same. This green here represents the seam line for your
pattern, whatever that is, keep that there
because you do want these sides to match
and you don't want to go Finland around here
because you want to keep the distance from that
first button hole to the neck static. So this is matching up
to your color band. So start there, then add or
subtract as you need to, as you go around the
circumference of a circle. So your circle will be kind
of oblong, slightly oblong. Let's say the shirts too small. You ran out of shirt. If the shirt to small, make the hole bigger. So you'd start here. You're stitching line is
going to change on the shirt. Just on the shirt,
not on the band. So your new stitching line
will look something like that. And if we were to measure the
circumference of this now we probably gained about
a quarter of an inch, maybe, maybe a little more. So now pin the color
band to the shirt. In the shirt is now
a bit figure shirt. Two big same idea. So instead of the green line, which is the original
stitching line, if we were to attach
on that line, the shirt was too big. No problem. Just bring it in. And this is why if I hadn't
mentioned and I don't think I have on your pattern when you're cutting
out your pattern, you want to keep a
big seam allowance here just so you have
some space to work with. Some pattern companies will have trimmed this to a
quarter-inch already. Keep it big and beefy. Just mark your stitching line so you know where it's intended to be and then you can
adjust it accordingly. All right, so I hope that that helps fit the shirt to the band. You'll let me know if
you have any questions and we'll look forward to seeing your beautifully
fit color bands. Thank you so much.
10. Collar Band Unit - Sew to Shirt: This video is going
to show you how we attach the color band. The first step is to find
center back of the color band. Simply fold the color
band in half to match the front points and
make a small little nip. Or you can mark it with
a pen or a marker, just a very shallow
marking there. Do the same with the center back of the shirt
to center back. The next step is to match the inner band with the
inside of the shirt. Now we've used two
different colors of fabric to help you
see this on camera. The inner color band is red, and the inner yolk is also red. This is just one
of those places. It's very easy to
get twisted around. So just double-check to
make sure you are touching the inside of the color band
to the inside of the shirt. So first match the center back, then you're going to
match the center fronts. So you'll go to one side
and match the center front, pin that down as needed. Now you see me
matching that front by just lining them up so they
stack on top of each other. And again, noticing
whether the length of the color and the length
of the shirt is correct. Then head on over to
the other side of the shirt and give yourself
a haircut if you need it, those little whiskers
actually can get in the way. So trim as needed and do the same thing for site to
stack everything together. Now, if you have done a
quick test and it looks like the color is way off
from the size of the shirt. Stop what you're doing and watch our video fitting the
shirt to the band that describes in detail
exactly what you need to understand and to adjust
fitting the shirt color band, you'll even get a
geometry lesson. Place your needle down, stack the fronts together
so they aligned perfectly. Shoved the entire work under the foot so it butts
up against the needle. Take a stitcher to reverse so you go back off
of the work in, back on and now
you only need to, so maybe an integer
to check your work, make sure it looks like
you want it to look. So just fold everything
up in there. This is just temporary, just
did a quick checker r2. One adjustment may be that the outside band doesn't quite
cover over the stitching. And if that's the case, undo and redo stitch your
first side, do the same thing. Shove the work underneath, Go ahead and stitch
a few stitches on and then reverse
back of the work. And then now you're going to attach the entire band
to the neck line. Notice that I am sewing along
that prior Linus stitching, that's our stitch guide
or stay stitch line. That is the three eighths
inch seam allowance for our inner color band in that stitch line is nestling with the stitch line
along our neck. You can kinda move the
fabric with your fingers. You should feel those to stitch lines sort of Nestle and
grab onto each other. Go until the year center back, just adjust the shirt as
needed and keep on sewing. You'll notice I'm only
sewing about an inch or so. And then I stop and
reposition everything. So I'm twirling the shirt
under me so that it remains flat at the bed just in
front of the needle. Who cares about anywhere else? Just in front of the needle is where I need it to be flat. So only an intuitive time
and I stop at readjust. At this point you
should be leading backup with your prior line of stitching and I just stitch
over that so half inch or so. And then back, I
don't go all the way to the end again because
you don't want it too much of a stack of
extra thread in that area, okay, check your work,
fold everything up. And in one area where you might have a problem as
you might run out of space for your seam allowance. So go ahead and trim as needed maybe with an actual
pair of scissors, not your little nips
with mumps, so lazy. You can also fold that
seam allowance over like a little bookmark and shove
it up into the color band. If you've already sown in
your buttonhole as I have, you might have a little less real estate to work with here. So that is one thing
to be sure that your buttonhole is up
high enough that allows you enough space to get your seam allowance into
the inside of the band. And I'm just doing some
housekeeping here, a little trimming, getting
rid of my whiskers as I can. If you have any other big chunks of fabric that you want to trim, now's the time to do it. Our next step is to top
stitch our outer band. And we do that simply by pushing all of our seam allowances
up into the band, folding the back as needed. And I'm using an all this
kinda stuff them up in there. And then I also
will sort of form that join with my fingers. You can smash the
fabric into submission. You can press the fabric so
there's a little less bulk. You can even hit it
with a hammer or the blunt end of the all to
kind of meld those fibers. And often what will happen, especially with a flannel, is you'll get a big old
blob there off camera switched to an edge stitch foot. I have compensating
or offset foot here is just the kind that
goes with my machine. Most machines come with some
kind of an edge stitch foot. So make sure your needle is in the proper place for
stitching about a 16th of an inch away from
that fold and you are placing the work outside up. So we're about to do a line
of top stitching along the outer color band
and that original fold line that we did way
back in like step number 2. So we have a top stitch at
about three-eighths already. Now we're going to
do a second line of top stitching or right
along that edge. And this top stitching is
doing more than top stitch. It's also nailing down that outer color band to the shirt to get that
accurate top stitch. So it's equally distant from the seam on the inside as
it is from the fold on the outside is your lay the outer color band
fold exactly along the line of stitching that
we did in the prior step and might cover up that line of
stitching by just a thread. So you're just shadowing
that line of stitching. So your job now is to just make these two layers go
at the same time. Notice I only take an inch or two at a
time because there's a curve and I have the bulk of my shirt to the right
because I'm right-handed. I feel like I'm more control
on the right-hand side and also accustomed to sewing that way and the way
my foot is setup, I'm using my all to grip on the fabric and force it
underneath the foot a little bit faster than the band side because
they find that the shirt can get bunched up. So for me it makes sense to force the shirt a little faster, but every machine is
a little different and everybody's fingers
are a little different. So check out how you're
doing at this point. If you have three or four
inches before the end, make sure you're not
going to have excess. That's probably the most common
thing that happens to be a more band than shirt
that is happening to you. Stop on pick your work
to about the center back and then give it
another go in this time, maybe don't hold the shirt back, maybe pull the shirt forward so that the shirt is
matching the band. You'll see I'll do some
finessing here again, this is our we will call
this the money shot. This is it right here. So take your time and
this little area, you may not get it perfect
the first time. That's okay. You can easily unpick that
seem and try it again. So that completes attaching
the shirt to the band. Meet us back here for the next step of getting
your shirt together.
11. Sleeve Placket: In this video, we're going
to show you how to make this adorable sleep packet. You'll create a nice, tidy, pointy tower, even
top stitching. And it'll look great on outside
as well as on the inside. Nice and sturdy. The advantage to
this type of packet, it's a two piece packets. You have a tower piece and
the inside smaller piece. The reason I like to
do to peace packet, it's a little, I think
it's just easier, it's more straightforward,
easier to cut out. And it's a really
great practice for other types of
sleep hot pockets, for instance, a polo shirt or other types of
like a handling. Also, it's fun because you can Guillot more accurate if you're
doing some fussy cutting. And I didn't do
that in this case, but you could do a separate
to be those two pieces. So you could do different
colors for the outside and the smaller internal pocket. Very easy to do.
Number one is you need to get your little
pieces, parts together. So meet me back here and I'll show you the pieces we need. In. The next step is to prepare
your shirt sleeve jacket. Just need to make
a few rectangles. Make it the width of the
finished packet size, which is usually an
inch, times three, so three inches wide, and then the length of
the finished packet size plus about an inch. So determined all this from
the original packet pattern. So the finished with an inch wide because it's a three-eighths
inch seam allowance. And I just use the
three-eighths inch here and found that
that's an engineer. And it is measured
from here to here and added an inch or so just
to have enough length. And the we're gonna do TPS pocket if I didn't
mentioned that already. Peas. The smaller piece is an
inch and a half wide, so half the size again of the finished cut piece
for the top packet. So three inches wide,
half inch wide, and these can be
a 67 inches long, however long really you want. In this video, you
will learn how to apply a two-piece
slave packet. And we'd like this method
because it's simple. You can just cut it rectangles. Also, it's a little easier
to use this method for other shirt opening
applications like a polo shirt, first thing you do is just
get your pieces together. And if you're using a print and you might want
to consider cutting your rectangle out so that it has a cute it all
feature in the front. Grab. Do you have a big
packet and a small pocket? The big pocket is
the part that gets the tower to help you form
the tower in the future. Just so that seem a very narrow, seem like an eighth of an
inch, just an integer, so about an inch or
so from the top. And this is just a
quick securing seem the next step is to
fall the little packet. This is the underplay get folded in half and
you're going to be sewing that to the shirt total, demonstrate that in a minute. So one of the things
that can be really confusing is you want to, so you start the process off from the inside of the shirt. And I always start
with the small pocket. So just fold that
small piece in half and you place it on the
small side of the shirt. We've already cut
the slash line. So the small side of
worth slash line is, is where the small side
of the cutoff goes, put that into the machine, and just go ahead
and start selling at a very small seam allowance. I do about oh, eighth of an inch or so. It's not even the
width of my foot. So to the slash and
it can be helpful to mark this so you can
see so two there. And you're going
to actually use so across a couple of stitches,
you'll see me do that. Turn your work. So a couple of stitches. Now get your other packet. Fold that in half. Place it under the work. So a couple of stitches. Turn your work and so
on down the other side. Let's make sure you haven't
run out of real estate. The next step, let's
check your work and then all you need to
do now is a slate clip. And I just trim
the small portion and flip that around
to the inside. And I usually clip this at
this point if you forget, you'll know it because
you can't really turn it all the way
around to the outside. So here I'm making it just a small clip just to
that stitching line. Now you can turn it all the
way around to the outside, fold the full line over again. And now we're going to
just top stitch that down. So you're basically encasing. This seems a little hard to tell here, but I'm pushing this, see my eyelids to one side and
unfolding over tuned case. Just tops to cut down. Same thing with the next
side is make a little clip. But this time we're going
to open up our pocket. So if it looks funny and if
you can't figure it out, you probably forgot
to open it up. I usually just use
the IRA can just use your fingers like I am and
check your work on the back, make sure that seems
to be nestling nicely. And we just form a little
tower just by folding it. So you can take a minute, see how you like it. You can also hit it
to smash it down. You're going to have
a lot of bulk there. So use a hammer if you need to. Stick it into the machine, make sure you're stitching
the correct side. You don't want to
close the bracket. And the top stitch
or edge stitch. And just make sure your
little tower pieces are still falling
the correct way. There's sort of one way
that it folds nicely and I don't always do
it the correct way. So reverse cut
their little seams going the right
direction so that doesn't quite seem
to fold one way, just flip it unfolded
the other way. This can be a little fuzzy but and this is also
quite a small plaque. And usually a standard packet is a little wider than
this little easier to do is continue top stitching. At this point, we're just
gonna go until that split. And you'll see,
it'll feel actually Canada bump a fabric and just make sure everything's
seated up in there. And you'll feel kinda seems
all coming together to stitch until that
point. Turn Newark. Go back across to your prior line is stitching
to New York again. I just keep twirling it around. Take a couple stitches. Turn your head on back
to the other side, telling me you're stitching
again and then backstitch. You could do a little
tack there too. And that is, it looks nice, sturdy on the inside. Nice and tidy on the outside.
12. Shoulder Seam - Flat Fell: This video is going
to demonstrate how we do a crimp stitch, also called stay stitch plus. And that's to
create this sort of natural cupping formation
on your sleeve, which is going to help
you create the flat fell. So this is done in actually
three passes of has number one you see here is the crimp
stitch or stay stitch plus, you only need a regular
presser foot for this. So I'm going to put on
my regular presser foot. It's a quarter-inch. So if you have a quarter-inch
top stitch foot maybe that will help you get an
accurate quarter-inch. And you're going to
be sort of using one hand behind the foot, in one hand in
front of the foot. And again, this is
just a single layer. Think of it as a stay stitch. I have my pointy
finger shoved up against the very back
of the presser foot, holding that fabric
from going anywhere. So you can see kinda builds
up underneath the machine, underneath the presser foot. With my thumb, I'm
sort of guiding the fabric in and
with my right hand, I'm just making sure that it's going at a steady quarter-inch. I'm not holding the fabric back. I really want to force
more fabric under there. The next step is to attach
your flat file foot. And if you don't have
a flat file foot, you can do this without, but it's really helpful. So what a felling
foot does is it folds fabric up and over. So we're going to be folding the extra quarter inch seam
allowance that we just stay stitch of the sleeve up and over the shoulder
seam of the shirt. So you want your
sleeve right-side up, your shoulder, or your shirt? Right side down and
imagine the backs first. So make sure you have your backs matched or if
you're doing the front side, this happens to be the backside. And I'm taking a couple
of stitches with just folding that quarter-inch
Up and over. The seam allowance
of these are offset. So I had a quarter-inch
sticking out on my sleeve and that's folding
up and over my shirt. And then it's folding. Write out that
stitching line that I just previously stitched. This flat felt foot is
feeding in that quarter inch. It's about I think this foot is if you're having problems
with your flat felt foot, to talk to your machine
dealer or look online, there are lots of different feet that that may fit your machine. You'll see here I'm using an
owl that's just helpful to get that kinda highlight
ball effect of folding the excess seam allowance up
and over my shirts and just helping me feed
it into the foot. Little bit of difficulty in the yolk seem there's a lot
of layers going on there, but it should still go through. If it doesn't, it is possible to take the work out of
the machines sort of unfolded from the flat file
foot and just stitch it regular and then feed
it back in again. You'll see me do that a new second pass because it really does get pretty
bulky in there. You also notice I'm only doing
a few stitches at a time. Just take your time here. This is absolutely the
most complicated seam on the entire shirt. So if you're finding this is
just not working for you, don't worry about doing
a proper flat felt, just stitch right sides
together as usual. And then you can
finish the scene with a surge year. With a surge. You can finish that scene
with a surgery or you can zigzag it and
then tops digit down. So please don't feel
that you're missing out. If you can't do a
proper flat film, it does take a little
bit of practice. And really the best advice
is getting a foot that works and do try some of them out and go all the
way to the end. Then as I mentioned, there's a second pass and this is actually going to
be stitched flat. So the second pass using
the flat file foot, again, you'll see we open up
the work so it's flat. And again, starting from the
same and that you started from before feed in
that quarter inch seam. So that should
have three layers. So it's the sleeve folded
up and over the shirt. So you'll one side of the
sleeve shirt sandwiched in between the other side
of the seam allowance of asleep and then the sleeve itself is not being stitched on. That's off to the right. You're stitching on the shirt. Some pitfalls that can
happen here is you your shirt can kind of
bunch up underneath you. Do you want to make
sure that it's nice and you can even press
it if you wanted to, but it's nice and flat, but there's no excess
shirt, you know, glomming up under that seam. And as I mentioned before, when you get to the bulky
parts now at our yolk, There's a, I don't
even know I lost track probably 10 layers going
on there at this point. So if you do need to remove
the work from the foot, now's the time to do so. And you can just kinda
get over the hump. You can even hand crank
your wheel if you need to. You can also pound
the seam down, which I usually do. I just take a little
hammer and just smash the seam and you'd be amazed
how flat you can get it. Continue on as you notice, also with this seam, I'm just doing a few
inches at a time and I'm spreading that the
work nice and flat sub the only thing that's
getting stitched is at felled seam into the foot and then down and it's
being stitched onto shirt. That's it doesn't
that look beautiful. So you have to log line
to stitching on one side. And then just a nice pretty line of top stitching on the top. The next step is to flat
fell your sightseeing. So we'll see you
here in a minute.
13. Side Seams - Flat Fell: One of the last steps for
building our shirt is to do the flat
felled sightseeing. And this is not necessary if you're not feeling
like a fine fella, you can just sew
right sides together, stitch it and search the
edges if you'd like. The flood felt seam is nice. It gives a really tidy
look on the outside. Everything is encased on the inside and it's
nice and flat. So especially for toddlers
skin and it's very smooth. Surged edge can be
a little rough. So if you are doing
a surge edge, you'd want to stitch
that down as well. But the key for doing a flat felled scene
is to get a flat. Well, when we say fell, that is what a fell
seem looks like. So felling is turning it up. Hemming would turn it down. So this is an M6, I believe that six millimeter. It works pretty well for the site seems you can
get different sizes, whatever came with your machine. If it if you're
having problems with it, try different foot. I know that sounds
crazy, but your machine will have other feet
most likely available. The thing to remember
about the flat felled side seam is we wanna go
down the rabbit hole. So you're going to
start from the shirt, tail him and go up and
over and down to the cost. So get your work
aligned properly. No need to change the seam
allowances or anything. I offset my seam approximately the width of the flat file foot, stick it under my
work with my needle. Let's pass number one, the past number to open up
the work to get back under. Couple stitches, feed it in. Now you don't have to use
the flat file if it's too difficult if you're felling foot is just
not working out. You can just do an
edge stitch here, but my feeling for
it works pretty well on the second pass. A problem area is at the armpit. So if you need to smash that into submission, you can also take
it out of the foot, get over the hump, and
then put it back again. Now here's what we're
going to go down the rabbit holes is shut
everything down there. Make sure there's not anything
underneath your machine. That's where it likes to
get hung up a little bit. Don't panic in that area. It's under the armpit. Seriously, you're
not gonna see it. So if it gets a
little bunched up under there, now worry about it. Just keep on going
down the rabbit hole. Make sure there's
nothing under there. That's it. Okay.
14. Hem how to start rolled hem at button hole placket: The final step is
to do your ham. I just just wanted to show this little treatment
that I do down here. So this is the plaque inside the buttonhole packet and
I've cut mine a little bit longer because I like to do like a little corner here. But you may be wondering, well, how do you start the role ham, if you've got this, you know, do you you don't roll
the plaque into the ham? I do a little split
down the middle, the stick that under my machine. And actually first let
me get that him to start our Rowan sticking
on the machine, put my needle down,
feed it through. And then I start. And that's it. Now show you after this how
I do the little treatment of the miter for the
button pocket. Thank you. Okay. Thought I would just
continue to show you how to do the
rolled him here. I have other videos on this, but I figured I'd show
you with a full shirt. I'll just so in TOC is ISO. So I've think about
this as sort of a cone. And you're going to feed
the raw edge into your, you, into your foot. Kind of like, uh, like imagines kind of going
down to draw a ball. Maybe she's going this way. So you envision
however you need to, to kinda get this cone going. So my left hand is going to arrange your favorite
kind of as I bring me to, my right hand is
helping with that fold. In a very light touch. Now you coming to the side seam, there's a little bit of a curve. Here's what's happening. So the outside curve,
think about it. You need to, again, same thing, this is
longer than this. So I'm going to pull a
little bit on the shirt area here so that this in effect is a little bit
longer in the edge, can kinda catch up with it. And be hard to tell.
But I'm pulling towards me with the
tips of my fingers. Straight line. And again, fuss outside curve
and pulling a little bit on this and lets you manage. And you get to hear it, but think of it, unfold this n. And otherwise just let
it go right during. Hence one doesn't always
turn out the absolute best. So I sometimes will unpick out and just stitch that
with a regular foot. And that is it. Once I hit this with the iron, those ripples should disappear. So that is a way to do a tidy
rolled him on your shirt. Thank you so much.
15. Cuff- Sew Shirt using Slot Method: This video will show you
how to attach the cuff to the shirt using
the slot method. The first thing is
to make sure you, of course, you have
your completed cuff. And then to make sure that you attach i'd of the shirt packet to the button side
of the cuff and also the buttonhole side of the packet to the
buttonhole side of the cup. If you've already put in your button holes
in your button. The shirt basically just get
shoved right up in there. That's why we call
it the slot method. So you also want to
make sure that you have sown your pleats into the shirt. You can do this
while you slot it, but it can be kind of confusing. There's a lot going on. So to just check the length
against the length of the cuff and add or adjust
your fleet as needed. And now just press go. You'll see here we're
just top stitching right along the edge
of that folded cuff. So that's the
outside of the cuff. It's going to the
outside of the shirt. And again, I'm just
checking my work, making sure that the lengths
are going to work out. And if you're really off here, you can put a tiny
little pleat in close to the other opening
of the sleeve plaque. It can be a little fuzzy. Those might be better just to remove your work and put it in a little pleat for you do this. You could also sort of
stretch it as you need. So you might find
that the shirt itself will fit in once you're
in the sewing load. So I use the all the kind of Coke's things together
and just cruise on down. I like our other top
stitching go all the way off the cuff and backstitch, and that is it. And with this method, you're inside of
the colorful look, as beautiful as the
outside of the cuff. Thank you so much. This is
Leah with the way we so.
 Leah Boyan, Chief Sewing Officer