Transcripts
1. Introduction: I love growing ever
since I was a child. I started drawing
13 years ago and kickstarted my art
career than originally. It was a traditional
artists growing life portrait at walking
through it in patho, Thailand. Then ten years ago was the first time that I
learned about digital art. It was a mind-blowing
discovery for me and I started painting on
the computer ever since. Si, improve, I
learned that faces were the most interesting
thing for me to draw. Today. I have
accumulated a lot of experience over the years of
working as a professional. And now I want to pass
on the knowledge and tear my tips and tricks for
painting portraits with you. My style of painting is
called semi realistic, which means is in the middle
of stylized and realistic. In my case, the proportions of the face are
kind of cartoony, but it has the coloring and checking off a more
realistic style. This style is very popular
for Kim illustration. This class is friendly
for beginners. You don't need to worry too
much about drawing skills. You will learn from this class. And this class. I'm going to use
Photoshop for painting. But you could use
other software as well depending on your
personal preferences. Or if you're new to
Photoshop is okay too. Because the basic of how to use Photoshop is also
covered in this class. I'll go over all
the fundamentals that you need to know
when drawing faces. How to paint them in
semi realistic style. And I will show you how I
paint from start to finish. I also have Photoshop files that you can practice
during the class. Last but not least, I also have an assignment for
you and you can paint along with me
using my brush set that I will give you for free
at the end of the class. I know there's a lot of portrait fundamental tutorials out there. And you may know some
techniques already. Still. I hope that you could gain some more knowledge
from this class. So without further ado, let's grab your
pencil and join me. I'm so excited to
have you in my class.
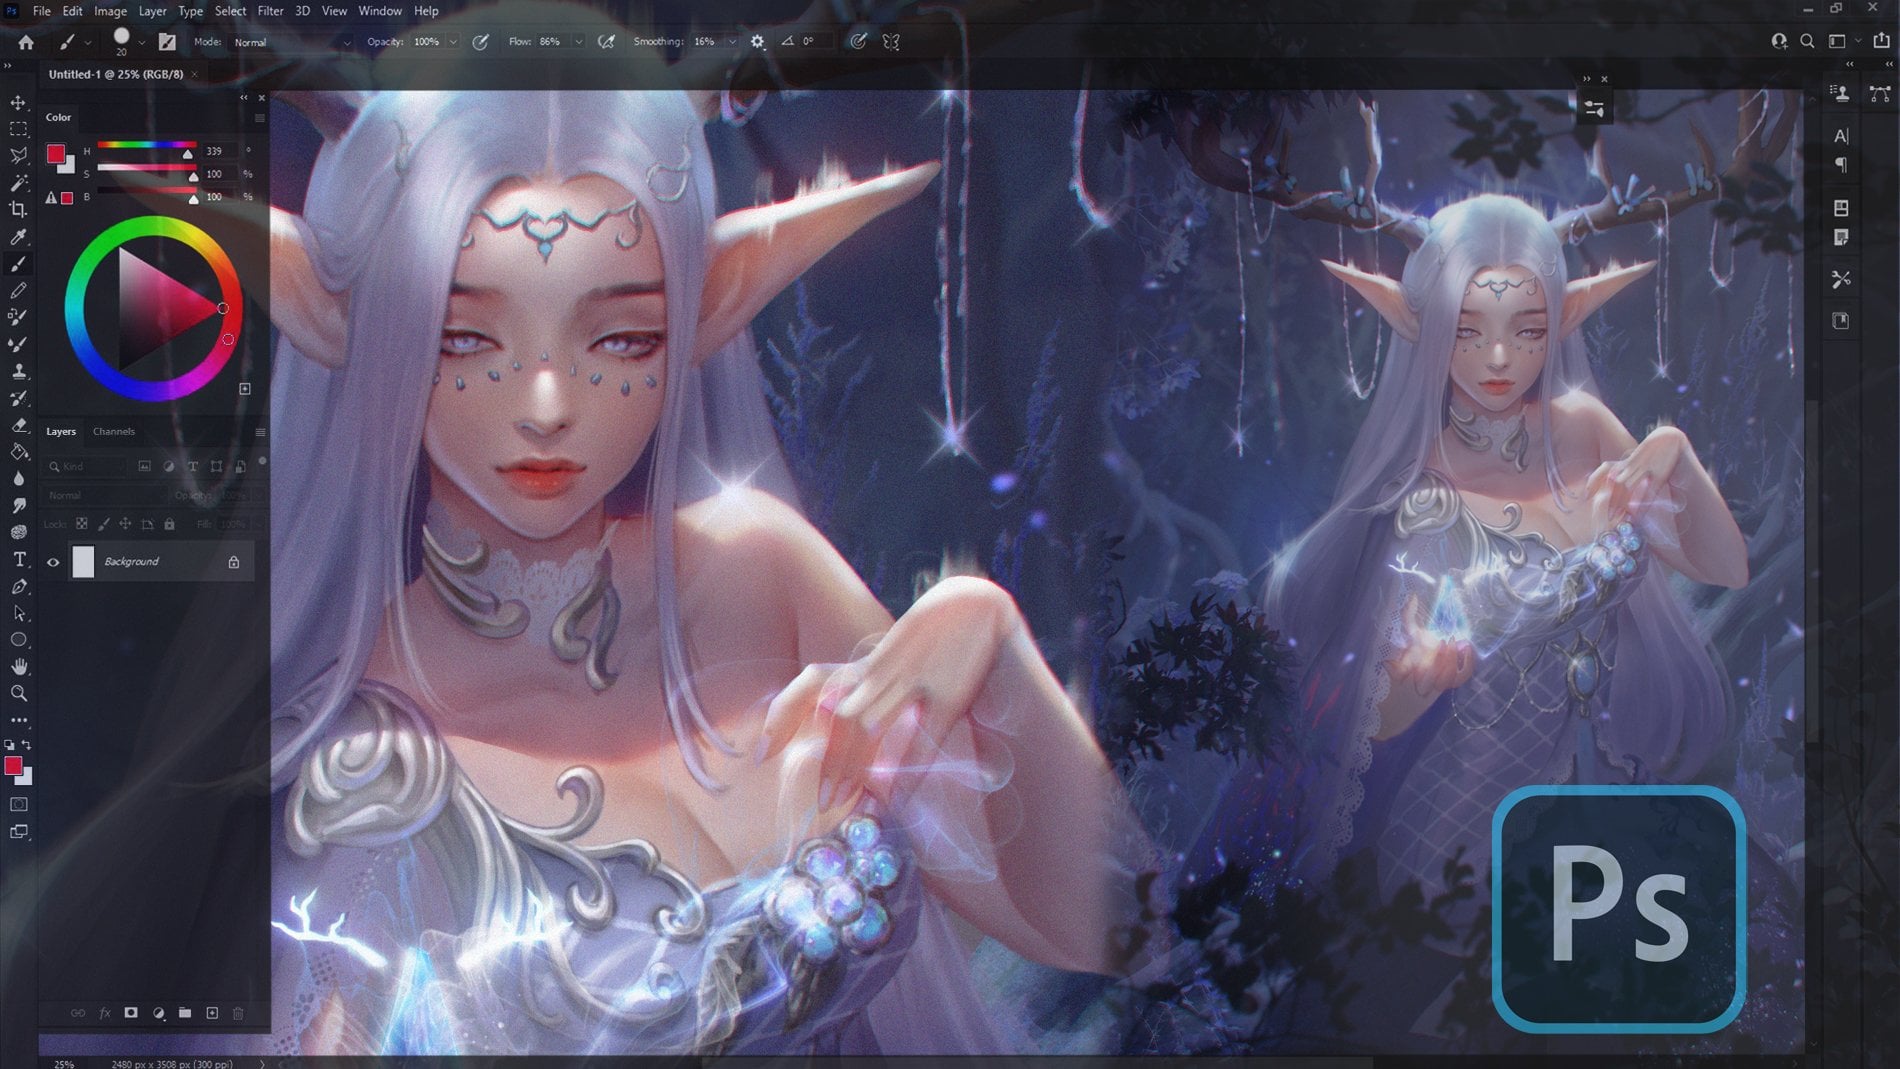
2. Photoshop Basic: This is the default
window or Photoshop. You can adjust according to your personal
preference by going to Window Workspace and click at the windows that you want it
to appear in your workspace. The window that I recommend are layered color and the Navigator, we knows this is the layers
we know how to use it, is to create a new layer
by clicking the plus icon. Then a layer window will pop up. Layer on top. It will also be the layer on the
top of the canvas. You can hide that
layer by clicking on the icon to import brushes. Go to Window Brushes, then click on the
top right corner and click import brushes and select
the brush to download it. Now you can see that the
brush you downloaded is here. For those of you who
are new to Photoshop, I'm going to introduce you a few keyboard shortcuts
that I frequently use. B for choosing a brush
for erasing Tool. Control plus and minus
for some n and Alt. Control M for the curve to control you, for
Hue Saturation. Control J to duplicate
layer Control. C for copy, control, V for paste, l for
the Lasso tool, and I for the eyedropper tool. For those who are
completely new, need an extra bit of help. Don't worry. I'll
give you a picture of all these shortcut keys
in the resources folder.
3. Facial structure: Hi, Welcome to my class. I'm glad to see you here. I will begin my classes
with the facial structure. I start by drawing a circle
to represent the skull, then slightly cut off
both sides of the circle. Now we have a shape that looks kind of like an oval
shape like this. I then draw a cross line in the center of the circle
that I previously drew. I continue by throwing
horizontal lines on the circle. One is on the top corner of the circle that
has been cut off. One is in the center and another one is on
the bottom corner. Now we have this phase
where the forehead is located and displays
for the nose. We are going to draw another
horizontal line for the shin and another
one for the hair. Remember that the proportions of these three spaces
are usually equal. However, for female faces
are more stylized faces. There might be some slightly
different proportions. I draw the head from different angles by
using the same method. I found it very helpful to
do this as an exercise. I do not always use
this technique, but when I have to draw the
face from difficult angles, this method always helps.
4. Adjust the proportion into your style: I use the symmetry feature on
Photoshop for drawing this. It helps me get a
lot faster results when drawing some
things in medical, woman's face are usually
rather than those of men. While male faces will feature more angular shapes that
are more prominent. The point that I am especially
careful with is the neck. I'll be careful not to make
the woman's neck too big. Otherwise, it might
look to mescaline. This guy that I like, usually big eyes,
small nose, and lips. You can discover your
own personal preferences by selecting a facial feature. Then decrease or increase the scale and move it
upwards or downwards.
5. EYE: The eyes are the most
popular feature on the face. Many artists loved pending eyes, including myself.
As our fascinating. They can tell the
story, feeling, or even the personality of
that character by themselves. I think that is the reason why artists love painting eyes. From the curious episode, we learned about the
position of the eyes. They are located near
the second line. When we look from
the front view, eyes will be close to
the top of the ears. The space between both
eyes is equal to one. The structure of the eyes
consists of the eye socket, eyeball, upper lip,
lower lip, tear duct. And people. I started by drawing two circles to
represent the eyeballs. Then I draw the
upper lip and lower it and make sure that it's
been with the eyeballs. I recommend drawing both eyes at the same time as drawing
them individually, usually results in
this kind of mistake. Even for more
animated style eyes. This method is also
very practical for people who are not quite certain about the
angle of the eyes yet. I suggest drawing
the circle and then drawing the cross line along the curve of the circle first, making the center of the cross, the position of the iris. For the eyebrows and eyelashes, I usually draw it in
a triangular shape. Start with two points and
combine it at the end. Same goes for the eyebrows. I draw two lines
and combine them. I felt this method very helpful and it makes my drawings
look more natural. Now for the profile view, I start with another circle and then draw the upper
limit and lower limit. So it sort of looks
like Pac-Man. Then I draw the allergists. Usually when we
open the eye fully, the upper eyelashes would
be pointing forward or upwards and the
lower lid eyelashes will be pointing downwards. This is the slide
view of the skull. I mark the location of the eyeball and then draw
another pigment on it. When you draw eyes, the eyeballs is not perfectly circular. The error is part visually it
looks like a contact lens. So when you look at it from the side view is going
to be like this. But don't worry
too much about it. We're not going to pin a
super realistic portraits. This is just some
extra information about the technical aspects. When you draw a character
with a close eyes. It is the upper eyelid that is the main factor in
clustering the eyes. I always recommend using
photos of real life examples. Try drawing from
different angles. Adapt things into what you like. I personally enjoy learning by using photos for
practice. A lot.
6. How to paint Semi - realistic eye: I begin with painting a head structure by drawing
a circle representing the skull and then drawing across line as I did in
the structure episode. Then I make a new layer
underneath the sketching layer. Hit L for the Lasso tool
to select the area. And finally hit G to put the
color on the selected area. By the way, I don't
recommend using saturated colors for
this kind of painting. Now, I started sketching
eyes by drawing two horizontal oval shapes and then drawing the upper lip, the lower lip along it. I draw the irises and follow
them up with the eyebrows. I make a new layer
underneath the sketch layer. Select the darker skin color, then roughly pinned
on the dark area. Just so you remember, this area is supposed to be darker because it's
a concave area. While this part will be lighter
since it's a convex area. Try to observe the form
of the uptake you draw. Using photo references will
help a lot with practicing. I hit Control M, the curve tool to adjust
the color a bit. I pick a light gray
color for the eyeballs. And you might think the
eyeballs are white and yes, that's right. They are white. But when it comes to painting, using a pure white color for the eyeball is going to make
it look weird and unnatural. I met a new layer on top
of the sketch layer. Choose the airbrush and
pick the color by heating. I am painting over the sketch. I paint over the line art
because my style of painting, which is called semi realistic, usually doesn't
have any line art. Line art is not needed here. I then make another
new layer and set the layer mode to multiply and roughly put
some details on it, such as eyebrows and eyelashes. I made a new layer again
and paint it. The irises. Don't forget to add
the shadow underneath the upper eyelid since the eyeball are
inside the eyelids. So it will cast a shadow
on the eyeball as well. I selected the best color
from the head layer by hitting L and
selecting the eye area, then hit Control J to
duplicate the selected area. And then drag that layer to
the eye layer group before finally hitting Control E to merge all the
layers together. Not at all the layers and merge. I made a new layer, set the layer mode to multiply and started
working on the details. The reason why I made a new layer and then
merge them over and over is because if I'm not satisfied
with the drawing, I can remove it by
deleting the layer. But if I create a new layer, it will take more
time to fix it. And once I'm satisfied
with the painting, I will combine layers again to make it easier to work with. I met a new layer again and began working
on the eyelashes. I go for a triangular shape
to make it look beautiful. And after I'm satisfied
with the result, I merge all the layers again. Then I created a
new layer and set the layer mode to multiply and begin adding details again. Okay? I hit Control M for the curve tool and adjust
the value of the painting. Then make a new layer
and work on details. This time focusing
on the pupils. I start by using the air brush and painting circles
of the irises. Then pick various
colors, such as purple, green, and yellow, and then slightly paint
around the people's. This will give a more interesting
feeling for the eyes. I then make a new layer and
set the layer mode to screen before painting around
the people's area to give it a dimensional look. After I got the result
that I was after I met a new layer and set the
layer mode to overlay, pick an orange color, and gradually paint around
the eyes to make them look more lively before
merging all the layers again. Note that the painting
is almost done. I met a new layer again and begin working
on the highlight. This part is very fun. You'll see that before and
after drawing Highlights, your work will look
pretty different. Don't forget to add
them to your painting.
7. NOSE: From the head structure
that I built, a nose start from the second line and
ends at the third line. The width of the nose will be equal to the width
between both eyes. And the length of the nose will be roughly the
length of the ears. For noses. I won't focus too much about the
name of the anatomy, but I will emphasize the
structure, shape, and form. The tip of the nose
has a round shape, while the nose bridge has the
rounded rectangular shape. With my style painting, I don't paint the details of the nose rings because if you'll make the face
look too realistic, which is not what I am after. The nostrils are in-between
the teeth and the wings. Most of people have some
kind of oval nostrils shape. If we look at it
from the bottom, it could be vertical
or horizontal, but some even have a
perfectly circular shape. Ultimately, it depends on the person you are
trying to draw. In this video, I'm going to practice placing the nose
from different angles. You can download the
image to try it for yourself from the
Resources folder. Always observe and practice. If you are in a situation
where you cannot draw, try to practice
drawing in your head. It might sound a bit crazy, but I do it all the time. Once it was in the middle of studying anatomical
structures. When my friends call me
to go out for dinner, I am an introvert, so I just sit there and
look at my friends talking. And in the meantime, I noticed the nose of one of my
friends and thought, wow, that looks pretty. If I wanted to draw
a nose like this, what should I start with? Then I started to imagine
drawing it in my head. How do I shade it? How do I capture a unique shape?
Things like that.
8. How to paint Semi - realistic nose: This will be the
location of the nose. I will start sketching by
drawing a teardrop shape. And at the end of it is the
location of the nostrils. Rendering the nose is very easy by applying dark color on
the bridge of the nose. In the tip of the nose, it gives the impression that
the nose is protruding. Then draw highlights in the part that are
exposed to the light. And you'll get a nose that
looks three-dimensional. Okay.
9. MOUTH: The mouth is located between the third
and the fourth line. The length of the mouth is close to the link
between the irises. But for my style, I usually draw a charter. As you can see, the upper
lip has three fatty lamps, while the lower lip has to. The horizontal line is
divided between both lips. And usually the upper lip will be pointing out
more than the lower lip. It's more preliminary
rinsing from the side. However, there's
also some people who have the lower lip pointing
out more than the upper limb. When drawing lips.
As a beginner, I suggest drawing the
horizontal oval shape first, going to point to represent the corner of the lips second. And then draw the ellipse
along the oval shape. If you look a bit like an I at the beginning before you
put any details on it. When your subject is smiling, resist the urge to draw every single tooth because
it's going to look weird. Instead, try to
observe the form of the camps and define
it as a simple shape.
10. How to paint Semi - realistic mouth: This is the position
of the mouth. You start by drawing a
horizontal oval shape. Then draw two dots at both ends for the
corners of the mouth before adding a
line in the middle to separate the upper
and lower lips. Then I draw the FET lumps. The lower lip has two lumps. Why the upper lip
has three lumps? And after getting the
shape that I want, I start to paint the lips
by choosing a dove, right? And using an air brush to
paint the entire mouth. Change the sketch color to dark pink to make it
easier to work with. Then slowly panned. It, makes sure that the lips still have the
shape of the fat lumps. I created a new layer and
adjust it to multiply. Then paint the
corner of the mouth and lips to create dimension. Then I created another layer and change the layer
mode to overlay. Choose a light orange
and paint over it before working on details in the corner of
the mouth again. For the highlights, I
create yet another layer. Choose a bright color and paint over it to create a
juiciness on the lips. Finally, I issues another
shade of orange and use Olay mode to paint
all over the mouth to make everything look
bright and beautiful.
11. EAR: One thing that is
often overlooked when drawing a
portrait or the ears, because it's not in
the main focal point. So that's why some
people don't really put a lot of effort
in learning it. The ears are located between the second and the third line
from the front view, with the length of the ears being close to the
length of the nose. From the side view,
the ears located behind the cross line that represents the
center of the skull. The ear has a pretty
complicated structure. It has a concave, convex form and is also
overlapping in some parts. But don't worry, we're not going in depth about the
anatomical stuff. We're just going to focus
on the overall shape. This is the main focal point
in drawing ears for me. I use the colors to help me
remember the shape and form. Which part is concave or convex? Using color is not only
helpful to remember the shape, it also asks you, when you have to draw an ear from different angles as well.
12. How to paint Semi - realistic ear: And I saw the ears. There are as simple as the nose. All you need to focus on is emphasizing the
shape of the ears. Which part is exposed
to the light, and which part is in the shadow? Which part should be dark and
which part should be light? Hi.
13. HAIR: The method that I use for
pending here is fairly simple. I will do the best color
first and then apply a darker color for the shadows
before applying the light, the color for the light area. My trick is to focus on
the overall shading first. The area that is close to
the light will be darker than other areas in order to make it look
smooth and shiny. When we have the big
shape figured out, we can start working
on the minor details. This girl is round and
hair covers the head. The most important thing when
drawing here is that it has to look like a soft object covering the shape of the head. So we have to paint
the light and the shadow in the right spots. Unless you're drawing
a person with very short hair where you
can barely see the shadows. So there's no need to
worry at that point. This is a very important spot because it indicates the
shape of the object. In this case, it does not
define the shape of the hair, but instead tells you about the round shape of
the skull underneath.
14. How to paint Semi - realistic hair: As for the hair, I will
sketch a rough hairstyle and then press L to select the area before pouring
the paint on it. I changed the sketch
layer color to be similar to the hair color
to make it easier to work. But then I marked a part of
the head shadow to create. I mentioned before choosing a bright color and
painting the light part, I created a new layer. Right-click, select the
Create Clipping Mask option and set the layer to multiply, then gradually paint to create the dimensions
of the hair. Hair coloring is a
bit complicated, but the most important part is to make the hair look like
something soft that's covering the hair coloring
can often be stressful. So I'll tell you
that I tend to spend a very long time painting the
hair until I'm satisfied. Therefore, you should
also take your time. Don't rush and be
kind to yourself.
15. PLANES OF THE HEAD: Before we move to the shadow
and the light episode, I want you to understand the
planes of the face first. This is the raft phase plane, and it is very important when it comes to
lighting and shadows. I have collected some images of the first plan for you and place them in the
resources folder in case you wanted to
practice drawing it. I paint the base skin color, applied a darker color at the shadow area and
then blended it. Understanding the nature of the phase plan is critical before applying
lighting and shadows. The resulting image
will look more natural and beautiful if
you get this shape down.
16. Adding plane of the head into the painting: Understanding the
plane of the face will help you understand
how you should paint the light and shadow to make the painting look
complete and unobtrusive. Fortunately, in the case of
semi realistic drawings, you don't have to focus on
details in this area too much. But if you have an
understanding of this theory, it will make your work
faster and more accurate.
17. LIGHT & SHADOW: This is how I added
light and shadow. You can download this file from the Resources folder and
practice along with me. I started by creating a layer on top of
the character layer. Then right-click and choose
Create Clipping Mask. After that, I changed the
layer mode to multiply. Before pouring the paint on it. I adjust the color of the
shadow until I'm satisfied. In this painting,
the light source will be positioned
from above the head. I use an airbrush to gradually erase the
part of the light. When I'm satisfied, I
recreate the ledger, select the clipping mask and shank layer more
to only selected an orange color and
gradually painted on the shadows that are close to the light to make them
look more interesting. I created a new layer and
set it to overlay again. This time, picking a
light purple color and painting slightly
into the shadow part. Afterwards, a shows the
light yellow color. To add beauty of the skin. I create a new layer, change the layer mode
to Linear Dodge, and paint on the hair part
that is exposed to the light. Then I create a new layer without locking it
to the layer below, choosing the hair color
and gradually pin it down. This creates the feeling
that the hair is a little messed up and
it looks more natural. I created a new layer and set
it to Linear Dodge again. Pick a light yellow color
and then pendant on the parts that hit the light to make the
painting stand out.
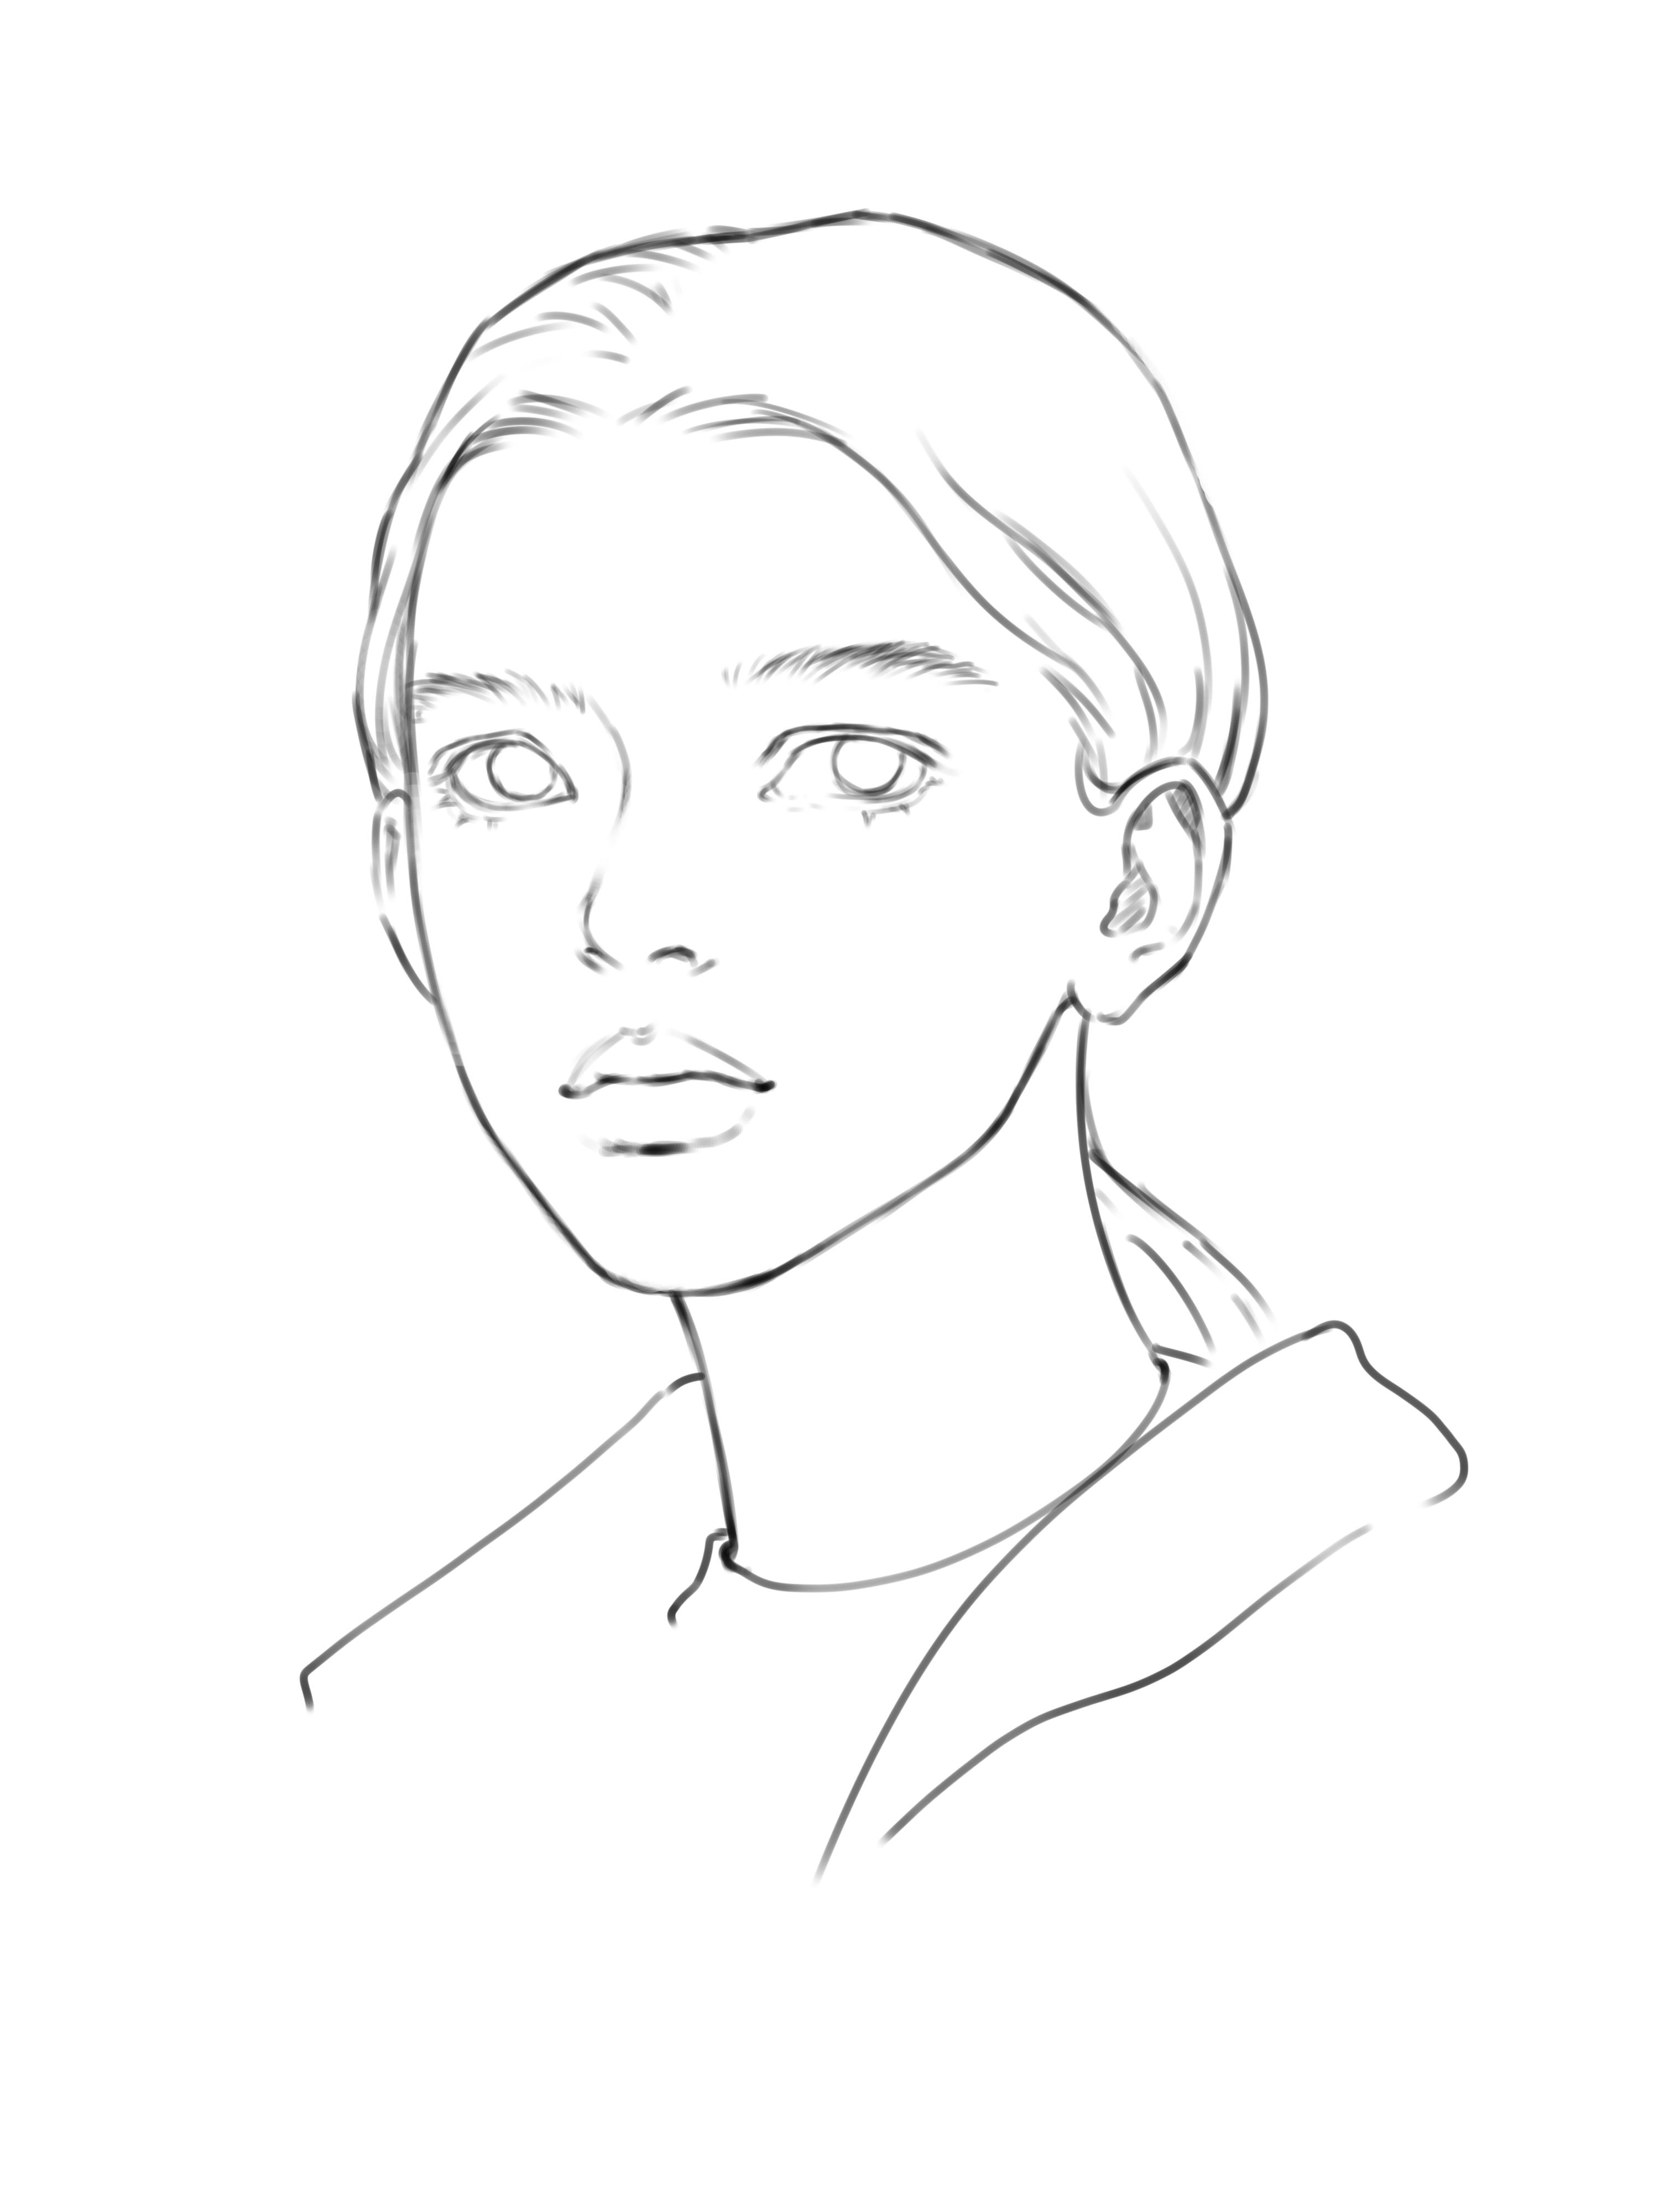
18. Assignment [Sketching]: For today's assignment, I
would like you to paint the following picture using the knowledge you have
learned from this class, you can make it in your
personal semi realistic style. But if you are not sure
about the proportions yet, you can now load the
line art version from the result folder
to try coloring it in. I open Photoshop and
create a new file. Then choose a Canvas that is
3,000 by 4,000 pixels high. To get a page like this, I proceed to drag the original image to
the window next to it, making it easier to observe
and plan accordingly. I will start by making
a new layer by clicking the plus icon and drawing a circle to represent the skull. Then draw cross line, as I said in the
proportions episode. In this picture, her
head is tilted up a bit, so the ears will be a bit
lower than the eyeline. Now that I have
the face outline, I'm going to sketch
the facial features using the technique that I
have taught you in the class. I start by sketching the nose with the
diamond shape and follow along with the
horizontal oval shape of the mouth and the round
shape of the eyes. The rough outline
sketch is done. Now I'm going to continue
by lowering the opacity of the sketch layer and making a new layer
to reschedule again. Starting by growing the eyelids
along the circle shape. I follow them with the eyebrows. After that, I got the tip of the nose around the end
of the diamond shape. As far as the mouth.
I draw two dots for the corner and then draw a
horizontal line along them. Now I put a little bit
more details on the face, such as the Irish, this jaw line, hair and O'clock. After getting the rough sketch, I made some changes to the proportions by
hitting L because he liked the area that
I wanted to change and then hitting
Control T to move them. One thing that I would
like you to do frequently is flipping the canvas in
order to reset your eyes. To do this more quickly, you can set a shortcut by going to Edit keyboard shortcuts. Choose Image, scroll down a little bit and
UC image rotation. Then simply double-click on the flip canvas horizontal
to set up the hotkey. I recommend you flip the Canvas frequently in order
to refresh your eyes. Because when you draw one
picture for a long time, you get used to it and it
becomes harder to see errors. Periodically flipping
the Canvas will give you a clearer
view of what's wrong. So it's good habit to pick up. Now I am making a
clean line art. So you can use this drawing
to practice as well.
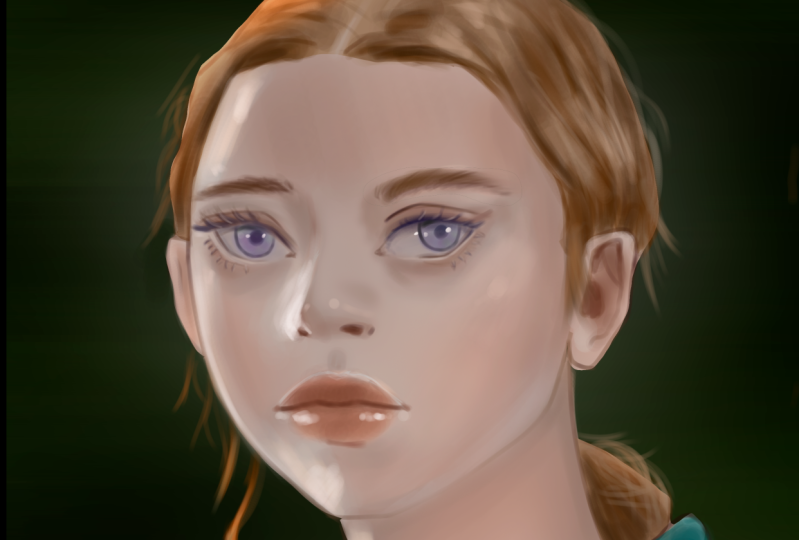
19. Assignment [Coloring]: If you download this
file to practice, you can start painting
with me from here. I paint the local
color and they need a line art layer by hitting L to select the character
area and holding shift to increase
the selected area. After we have the area selected, choose the color and hit
G to put color in it. Then I adjust the color a bit because I don't want to
make it too saturated. I changed the background color to match the original image. And then blow it by
going to Filter Blur, Gaussian Blur to get
the background that is similar to the
original image like this. Then we will make a new layer above the local color
for the hair and cloth. Makes sure to
right-click and choose Create Clipping Mask so that the layer that
we're working on, you stay within the bounds
of the local color layer. After that, I locked
the line art layer and choose the colors that are close to the object
we are painting. E.g. she was a brown
color for the skin, dark brown from the hair, and dark blue for the shirt, depending on what
the local color is and makes the line
art a bit darker. I didn't make a new layer
above the skin layer and set the layer mode to multiply and mark the shadow on the face, as you can see on the reference. An alto multiply layer is made on top of the
clouds and hand layer. I then paint around
the shadow area. After getting the rough shadow, I merge it with the local color of the hair and
the clouds below. Before merging the shadow with the skin layer below as well. I made a new layer and choose a gray color and paint
on the eyeballs. And then choosing
blow for the irises. I make another multiply layer. Choose the orange color, and gradually paint over the face, making it
three-dimensional. Once I'm satisfied
with the result, I start working over
the line art again. Working over the line art
is nothing too complicated. All you have to do, it just picked the color
and paint on it, making sure that the line art
does not appear too much. After that, I made another multiply layer and big neutral colors to
paint on the dark areas, such as eyes, nostrils, the hair that overlap, and the shadow on the clock. Hello.
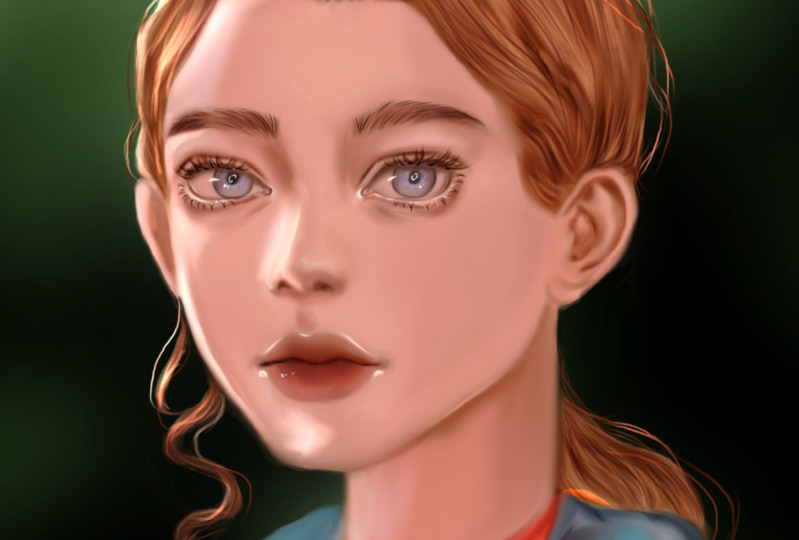
20. Assignment [Polishing]: Now that I am happy
with the result, I merge all the layers again to make it
easier to continue. I work on defining the
face and then making it darker and more lively by
adding a multiply layer, choosing an orange color and slightly paint
all over the face. Then I start working
on the details again. After getting the
result that I want, I'm going to add the
shadow and the light by using the MEP thought that I have taught
you in the class. I start by making the
multiply layer on top, then right-clicking and choose
the Create Clipping Mask. Before putting the shadow in it. I use the eraser tool to erase the area that is going
to be the light. Here, you can use an overlay
or color dodge layer, or whichever you prefer to
make the light stand out. I made some changes to the proportions and then
start working on the details, such as adding some messiness on the hair and putting more
detail on the clock. Hello. Oh, did you see this? Do you know where it
is light is coming from? Yeah. That's right. This is the reflection
from the ticket. So we'll put them in
the painting as well. Alright, That should be
it for the assignment. Not too difficult, right? Then destroys out. If the result is not
what you're hoping for. Because it took me
a very long time to get this form as well. If you have any questions, feel free to ask. And if you have any
artwork to share and wants some feedback
from me, please do.
21. Outro: Congratulations, you have
finished this class. Thank you so much for
watching it until the end. I really hope that you've
gained some knowledge from it, and I would love to see what you have learned
from this class. Thank you so much for joining me and hope to see you
in the next class. Good luck and stay safe. Bye.
 Ariya Abeen, NPye