Transcripts
1. Welcome: In this class, I'm
going to guide you through practical
steps you can take right now to start your journey to becoming
a cinematographer. Hi, my name is Pierz
trovic, a film director, screenwriter and an
academic teacher at Polish National Film School. My filmmaking journey began 20 years ago when I created
my first short film, serving as my own
cinematographer. Drawing from my experience
of being self taught, attending to film school, and working in the
film industry. I've distilled
essential knowledge into this easy to follow class. We'll explore each stage of
film production giving you a comprehensive understanding
of the role and creative contributions of
director of photography. To make things clear, we'll break down the
cinematographer's role according to the stages
of film creation process. We'll start from the
conceptual phase with Moodboard preparation, move on to the creating
of a shotlist or a photo storyboard and then dive into the actual production
and post production. At each stage, I'll
introduce you to various tools and applications
that can assist you. Lastly, I'll show
you where to find relevant information and how to connect with your
local film community. My goal is to equip you with
the knowledge and skills needed to be accepted and
start working on the film set, paving the way for
your creative journey. I'm looking forward to
seeing you in the class.
2. The Cinematographer: Roles, Responsibilities, and Collaborations: Thank you for
enrolling in my class. So let's start with a simple definition
of cinematographer. The cinematographer
on a movie set is a person with a camera. The cinematographer's job
can include planning shots, lighting, and
operating a camera. A cinematographer is also
called the director of photography or DP
or DOP for short. On a large budget film, there may be several
cameras being used at once. The cinematographer is
the person who directs the camera operators as well as oversees the
lighting on a set. Director myself, I view
my cinematographer as my closest associate during
the production of a film. The cinematographer is the
first person with whom you balance the ideas off and discuss the
tone of the film. It's a very important
collaboration and a lot depends on it. During my independent
amateur times, when I was writing, producing, directing, and editing
my films myself. I was the only creator, and I was always
behind the camera. This is how we kind
of all begin, right? While studying at Polish
National Film School, I made student films with many different
cinematography students. I got to know their creative
visions and ambitions, I watched them work
with me and watched other movies that they made
with different directors. I was lucky to find a cinematographer whose
creative style I liked and whose skills were
fluent enough that we could both work on
different kind of stories. You know, Every film has a
different kind of a story and every film needs a
different kind of approach. Me and my
cinematographer Nicolas, we have been working
together ever since. But this kind of collaboration
doesn't always happen. It's also normal for cinematographer to already
be attached to a project. As a professional, you are
expected to work with anyone. Therefore, there is
a very strict set of expectations and duties that cinematographer is
expected to fulfill. Now I'm going to
name some of them. As sigma atographer, you will be expected to collaborate
with the director, take part in the creation of the visual style of the film, help to choose the
locations for filming. Take part in the creation of materials like
storyboard, short lists. You are also going
to be expected to attend technical documentation
on locations of filming. If you're going to be asked, you also have to
attend rehearsals with actors and prepare the list of camera and
lighting equipment. You're also expected
to be the head of the camera and the
lighting team and collaborate with the
production manager to realize the vision within
the budget and on time. As you can see, it's quite a lot to do and a
lot of responsibility. On a normal scale
film production, a lot of money is allocated to the camera and lighting
department proportionately to, you know, other departments in the film like art
design and snography. Now, You creative input in the film depends
on the director. Most will make you a partner in finding the
distinct visual style. But some directors will want to do everything by themselves, and some will leave you with
a total creative freedom. There is no one way to do it. As I said, it depends
on the director, and it's one of those
things you guys need to discuss before beginning
to work together. Now, if you are a beginner
making your first short film, you are probably going
to fulfill most of the filmmakers duties like I used to do when I was making
my first short films. However, it's very useful to
understand the framework and what to do and when to do it to better organize the
work on your film set. Even if you're beginning,
I advise you to reach out to local filmmaker
community and look for people who are as
enthusiastic about making films and are going
to help you with your movie. You can meet another
filmmaker who will agree to be your
cinematographer, for your movie in exchange for you to be his cinematographer
with his project. Or maybe you'll get lucky and find people
who are, you know, enthusiastic about your project and won't expect
anything in return. Maybe you don't have a project, and these people are going to accept you to their
project and their teams. Either way, your work as a cinematographer will have
three stages, preproduction, which is preparation,
production when you are shooting the film
and post production. It's when after the film
is going to be edited, you're going to post process the shots and
make them beautiful. In my opinion, the preparation
is the most important part of the cinematographers work
or any filmmakers work. If it's when the most important
decisions are being made. We are going to start
with this part of the process in the next
lecture. See you there.
3. Script to Screen: Creative Cinematography Prep (Project#1): Let's begin by
understanding that all the visual creative choices are meant to serve the story. This is the most
important concept in this class and should guide your decision making process when you're a cinematographer. You should set aside your personal
preferences and make decisions that enhance
the storytelling. Making the right decisions will come with experience
and intuition. It's the essence of your talent that will
develop over time. Come up with the ideas. You need to watch and
analyze a lot of movies. So let's start with
analyzing right now. Let's look at two
example scenes. One scene will have a very
elaborate camera movement, and the other scene will have a more random handheld camera. Please watch both of
these scenes and try to distinguish which is
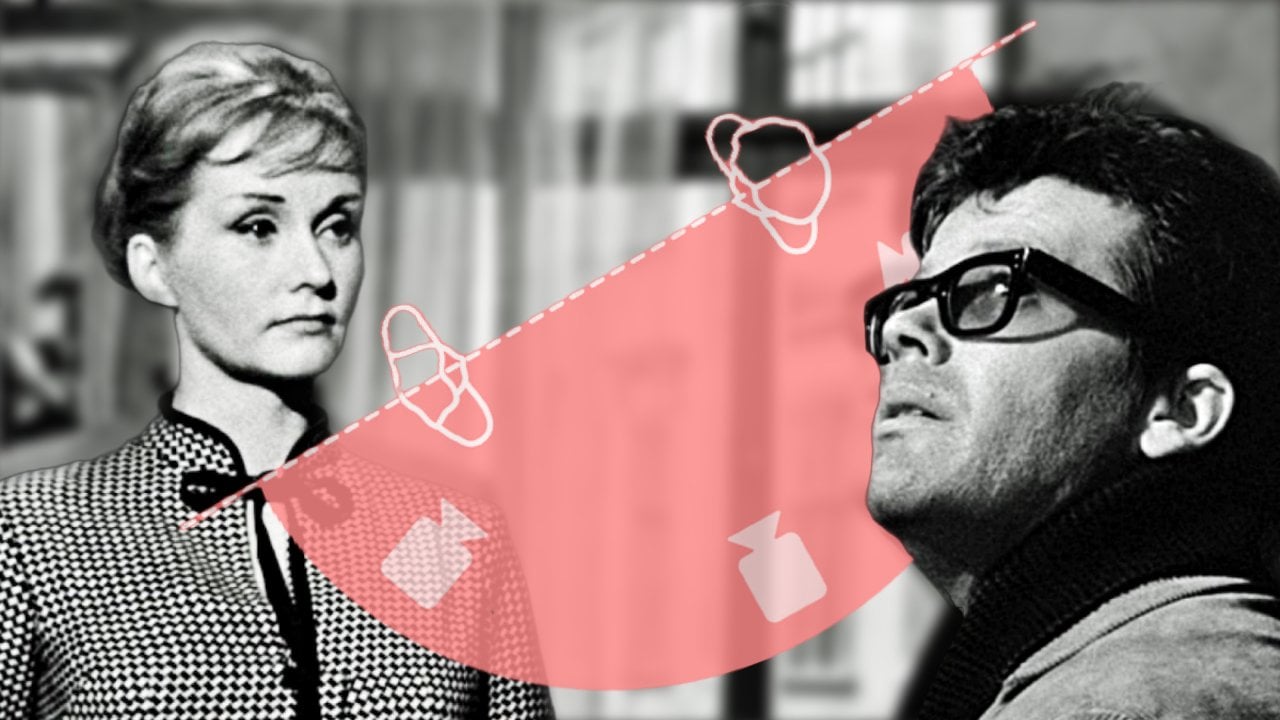
which. Let's watch. Hello, Yan. Hello. B. Why don't you have any church bells? We do not need bells
in our church to wash. I like church bells. Let's put them back again. Okay. Have fun. Now, I hope you like the scenes. And let's begin with a
Alfred Hitchcock's psycho, the camera work is very
elaborate and stylized. The shots are either
on a tripod or when the camera is moving its
smooth motion on a dollly. This is how the director
builds suspense and anticipation that something
horrible is going to happen. From the context of the scenes that we
already seen in the film, We know that the detective is in danger and the
director prolongs the tension by showing him looking around and
coming up the stairs. Now, using this type of sophisticated camera movement
or a camera on a tripod, we get the feel that what's going to happen is inevitable. The man is doomed and we
can't do anything about it. In contrast, breaking the waves by Lars Vanreer uses a camera that is very shaky
and the style of filming is close to a
documentary film, right? As you've probably noticed, the editing was also
rather erratic. They would cut out
parts of the scene and didn't mind disrupting the
unity of action and time. They would just make
jump cuts, right? Now, Why would they do it? It's a multi million
period film with stars, I mean, European acting stars. Why would they film it like that with a shaky
handheld camera? Well, the answer is in
the script of the film. This film is like a fairy tale. We have an innocent and
good but very simple protagonist best who is
facing horrible injustice. In modern cinema, we
have this trend of complicated protagonists who
all have their dark side. Lars andre who wrote
and directed the film, decided that characters in this film are going to
be either good or bad. And since it's a fairy tale happening on a
beautiful rocky island, they had to do anything they
could to give this film a documentary texture if they would use a
stationary camera. This story would be too
sweet and unbearable. With the use of a
documentary camera and realistic acting. Las Montrere was able to
create a very emotional film. If you haven't seen it, I highly recommend watching
breaking the waves. Now, since we spoke about
breaking the waves, now let's talk about
breaking the rules. Let's break the
cinematographic rules. Let's watch a scene from
bringing out the dead. This scene will be
heavily stylized. Uh, the main hero is a paramedic who uses
drugs, and in this scene, the cinematographer used
many different techniques to visualize his state of mind. One of them is
considerate breaking the rules and a big no
no no in cinematography. See if you can spot it. Let's see the scene. Frank. Frank, what are you doing back there? I'm sick, Tom. I need a cure.
Vitamin B cocktail. Followed by an app of blue Case. Drop of adrenaline. It's not as good as beer.
That's all I got. Come on, Frank, there's blood
spilling in the street, SqushFun Watch out? These are hard times. Yeah. Spraying, isn't it? Spray to be trumped. S killing me. Look up in the sky, Frank, foo. Blood's gonna run
tonight. I could feel it. Our mission to save lives. Mission Shop. Ten. In this scene, the
cinematographer Robert Richardson over
exposed the white light. In the places where you
see the over exposition, there is a characteristic glow. This glow is achieved by putting a transparent cloth with a net between lens and a
sector in the camera. In the old days,
cinematographers use stockings, like something
that women wear on their legs and tape them
to the back of the lens. And this is how you can achieve this characteristic glow effect. So as you can see, there is no one right
way of doing things. Different approaches
can serve a purpose, and as a cinematographer, you have to grow on your
own by watching and analyzing movies and
constantly learning. No one, literally,
no one is expecting your framing and pictures
that you do to be pretty. They're supposed
to be purposeful. So let's get back to the
process of making movies. The first thing that you need to do is read the screenplay of the story and figure out what is going to
be your visual style. If you're working
with a director, some of these decisions
might be predetermined. During pre production, you may brainstorm it
with the rest of the art department
sonography department or any other
creative department. It's the best moment to
raise questions like, what is the tone of the film? What is the color palette
that you're going to use? What other films inspire the look of this
particular story? What special effects
are we going to need? Directors and cinematographers often communicate with each other during this phase using
mood boards or loop books. A moodboard is a collection
of pictures from other movies that are going to be referenced for your work. You can show moodboards
to the producers to highlight how you're going to shoot this particular film. One page of a moodboard should show a couple
of photographs next to each other that show a particular
aspect of the film. Let's say that many scenes are going to be
shot in a church. You may have a page with the title church
or just interiors, and then a collection
of steel frames from other movies that capture
this particular mood. If you're thinking about
a particular lighting, you can have a page with the title light and have the references
about lighting only. Your moodboard has to
encapsulate your idea. Usually, DOPs mood
boards contain pages with titles
like interiors, exteriors, lighting, mood
of the City, and so on. Whatever is important in this
particular visual style. In my opinion, nine pictures
on one page is enough. Now, I have a great tool that can help you
prepare your mood board. It's a website that uses AI
to catalog scenes from films. The tool that I sometimes
use is FM AI, S L AI. Now I'm going to read
their definition of who they are
and what they do. Film is the best tool
for econographic search. It's constantly evolving
database of HD screenshots. Over 50,000 HD screenshots provided daily stills
coming from movies, documentaries and soon
from ads and music videos. It's an outstanding
search engine. Each picture is registered
by film director, DOP, actor, and also kind style
topics and release date. It's an artificial
intelligence helping you. Each screenshots gets
a color analysis, AI that detects objects, clothes, characters, et cetera. So, if you have an idea for an interesting
underwater scene. Let's say I want a woman
and I have an idea that the color red will symbolize
something in the scene. I write in the search box, Underwater woman
with a red tint. This is what it shows me. Every example comes with
a palette of colors. You can search by the color, and I can see the title of the original film if you wish to find it and
see the whole thing. There are also other web
pages that do the same thing. If you don't like film AI, you can find other
tools as well. Now, let's end this lecture
with a first class project. First, watch any of the films mentioned in
this glitz, Psycho, breaking the waves or
bringing out the dead, and try to prepare a
moodboard of this film. Two, recognize most
important elements of the visual style of the film and use it as the title
for your panels. Hree When you will be choosing the pictures
for your panels, let's exclude the frames from the actual film that
you have chosen. There are many other films that you can choose stills from. I'm super curious
about your projects. I'll be giving feedback to everyone who decides to submit. See you in the next lecture.
4. Mastering Preparation: Scouting and Planning (Project#2): During the pre
production period, a crucial job of a cinematographer
is to scout locations. The director of photography, DOP will accompany the director, location manager and the
production team like Scouts, as they search for suitable
filming locations. During this
communication process, you may discuss with the
director how you're going to set up the movement of
the actors in the scenes. It's always best to use this
opportunity being there on location to shoot a photo storyboard if you have
time for it, right? A photo storyboard is a
series of pictures that you take on location that show exactly how the
frame is going to look. Of course, during
the documentation, your actors won't
be there for you. You can use whoever
is there as a muzzle. For instance, you can see
the photo storyboard. I did with my cinematographer. Where I play the subject
in the frame, like here. See that? Because this is a
working material where you just want to show your crew what the shots
are going to look like. In this particular example, we were alone on the location, and my DOP Nicolas wanted to imitate the face
of another actor, so he just used his
hand in the frame. Now, after you're going
to make this picture, it's crucial to
number them and add the needed information like which character is in the frame. I repeat it's a
working material, and I don't intend it to be pretty, but rather
understandable. Meaning, If I don't have
access to a location, I try to recreate
it in my house. When I don't have my
cinematographer and I was doing it alone and had no
one to take a picture, I just drew it. Why not? Anything goes. Your mission is to
prepare the material that will help you during
your work on a set. That's it. Your goal here
is to prepare a shot list. You may need to go to the
film in location with the director to prepare
this photo storyboard. It's very important
that you don't spend precious time on set thinking about where to put the camera. You should plan
everything beforehand, and on the day of the shooting, have it printed out
like I have here. And I always bind it
like a book, right? In order in which I'm
going to be shooting this. Other crew members also have this document with them
during the shooting and they know exactly what we
are filming now and what's going to be shot
next so they can prepare. Now, as you can probably see, we use a special view finder app that you download on your phone, and it will imitate the frame of the
particular camera and display a particular lens number like 35 millimeters
or 50 millimeters. There are a number
of tools like that. Unfortunately, most
of them are payware but there is one that you
don't have to pay for. I'll link it in the comment. The application is called
magic Ari viewfinder. Now, another useful
app is shot designer. Apart from making a storyboard
or photos storyboard, this app allows you to create
a top down view of the s. You can even animate how
your actor is going to move. You can combine the power
of a photo story board and incorporate the shots made with viewfinder app with
the top down view. Now, this particular
photos story board was made with my cinematographer's
viewfinder App. By the way, shot designer app has a built in viewfinder mode, but in my opinion, it's not as good as
other dedicated apps. So to give you an example, this is a plan that my scene
and autographer made for a scene in my debut
feature film fate breaker. If you have seen a top down schematic in my other classes, be sure that it was made with
this program, shot design. Additionally, this program lets you add to this schematic, the camera position,
and lighting equipment. The green stuff on the scheme
is lighting equipment. Unfortunately, this
program is also paywre, but you can test
it out for free. In the demo version, you can
create only one project. So this is the main limitation. But within the project, you have all the functionality
of the full version. Now, when you are preparing a short list
or a photo storyboard, it's crucial to be aware
of 180 degree rule. This rule governs where you should put the camera in
relation to the actor. The purpose of this
rule is to minimize potential confusion
for the audience when they are watching a scene. I've created a separate course on the basics of
180 degree rule, as well as another course on the subtleties of
camera placement. I highly recommend watching
both of these classes. They will be of great help
when you're preparing for your shoot and starting to set up the movement
in the scene. Another useful app during the location scouting
is sun seeker. This type of app shows you exactly where the
sun is going to be. It's cinematographer's
job to survey the location for the
natural light or, you know, lack of thereof. A sunk application is going
to help you with that. You can make screenshots
and prepare and be aware of where the sun is going to be when you will
be shooting the scene. Now, you have to remember that when you are
preparing for your film, you will have a limited
period of time. It's great if you can prepare a very thorough shortlist with a top down schematics
and lots of information that will make your work
on a set more organized. But you have to remember that things not always go
according to the plan. More prepared you're going
to be the better for you. However, not always do we have the time to
prepare everything. Sometimes we lose a location and we have to adapt quickly
to another location, and we just don't have the
time to update our materials. However, the work
that you have done on the other location that you have lost is not going
to be forgotten. Some decisions are going to transpire to your new location. So preparing is always good, even if you're not
sure you're going to use this particular location. Okay, so I've given you the basic information how
to prepare for a shoe. Now it's time for our
class project number two. Take one of the
three scenes that you've seen in the
previous lesson and try to recreate a photo storyboard of each shot
that went into the scene. I want you to use your
camera or your view finder up to map out all the
camera angles in the scene. As an example, you can use a link to my other project from another class of mine about
100 degree rule. Good luck.
5. From Vision to Film: Technical Preparation and Production: During the stage of technical
preparation and production. You already have a clear
understanding of the effect you're aiming for and the visual style you
want to achieve. Now it's time to determine the equipment and the crew you'll need to bring
your vision to life. To illustrate this,
I've prepared two examples from two
very different movies. Let's consider the style and consistency throughout
each scene. First, let's look
at the beginning of the Brazilian film, City of God. Yeah, I got for you. B. But. We put a poll. Now, if you analyze every single shot of this
lively opening of the film, you'll notice that there is no consistency in the lenses that were used to shoot this. In fact, the inconsistency is the consistency of the s. Some shots are shot
with very wide lenses. While others are shot with a very long telescopic lenses with a shallow depth of field. You can imagine that the list of camera equipment for this film was quite extensive, right? Now, let's watch a trailer
of a different film, which is on the other
side of the spectrum. This is call me by your name, and the entire film was
shot using only one lens, which is 35 millimeters. It's quite unusual for filmmakers to limit
themselves this way. Mr. Perlman. Thank you so much. Go through. I can
show you around. That'd be great. Thank you. So what do you do around here? Read books, transcribe music. Swim at the river.
Go out at night. Sounds fun. Alright.
Later. Just watch. This is how we'll say goodbye
to us when the time comes. Later. Meanwhile, we'll have to put up with him
for six weeks. Muscles of firm.
Not a straight body in these statues.
They're all curved. Sometimes impossibly curved. And so chant hence their
ageless ambiguity. Changing lenses on the set takes time about 10 minutes and deciding on one single lens for the entire films makes
some things easier. But it also makes other
things really hard. For instance, if you
want to make a close up with the same lens that
you've used for white shots, you will have to physically move the camera
closer to the actor. But what the filmmakers
gained by using only one lens is the
uniformity of the image. You are watching the action
from only one perspective. And 35 millimeter lens. Let's call it geometry
of vision is very close to how human
eye sees reality. I would say that 35 millimeters best mimics the human vision, and this was the main
motivation behind the filmmakers decision to pick this lens for
the entire film. Now, I showed you these two
examples because I wanted to demonstrate how your
vision will dictate the kind of equipment and
crew you're going to need. If the style you have
chosen is raw and documentary like as in
breaking the waves, you won't need sophisticated
equipment and crews. But if you'll choose a very sophisticated
camera movement with a doll or steady cam with
lots of different lenses, your crew will be
larger, is obvious. And you'll also need to hire a grip who is going
to operate the dolly. This kind of decisions always come down to the
idea that you have. Fortunately, in this day and age of small digital cameras, you can imitate this kind of expensive camera movement
with fairly cheap equipment. The most important
thing to note here, that you don't need to buy it. The industry standard is to rent the needed equipment for
particular days of shooting. Some of those renting
places even operate 247, so you can return the equipment
right after you shoot. Apart from the equipment, you also need the
team to operate it. At the beginning of your journey on amateur independent films, you will be doing most
of the stuff yourself. Now, professional DPs
have built teams, they can trust that work on many different
projects and will often work with the
same camera crews and lighting crews
from film to film. They are also going to work with the production team to hire
and fill out the film crew. The primary positions
that interact with DOP the most include
a camera operator. Obviously, also known
as a cameraman, the first and second
camera assistant, also the gaffer for
lighting and the key grip. Now, being a part of
someone else's team is the best way of learning
the cinematographers craft, and this is how you can advance. We've already discussed
your mental preparation and choosing the visual
style of your film. We've also talked about
preparing a photo storyboard and other materials that are going to help you on the set. We've discussed choosing the
right equipment and crew. Now you're ready
to shoot the film, and if you've done
everything correctly, your work on a set should be the execution of what you
have prepared beforehand. As always, some things
are going to change. And when you and your
director see opportunities, you're going to take them to
make the best film possible. Once on the set, the DP directs the camera and
lighting technicians, paying attention to such
cinematography techniques, composition, framing
and exposure. This includes choosing
the camera lens and filters that determine
the ideal depth of field of the shot and
discussing with the director which shot should be a close
up medium shots or is shot. The DP will also instruct the camera operator
as what type of a camera movement
and camera work is necessary at a given shot. Now, as I said before, this whole thing should be
predetermined earlier on, but it's subject
to change during the shooting if you see if another lens would
work better or another camera movement
would work better. A very important thing to
understand is that your plan your preparation shouldn't limit your creativity on the set. Now, when you're filming
during the production, you're going to watch the
materials you've already shot. We call it Dailies and discuss the progress
of your shooting. Dailies refer to raw
unedited footage that was shot that particular
day or the day before. Dailies are reviewed
by the director, DP, and the producer to ensure that everything is going
according to plan, and that you shot everything
that you've needed. I don't want to
talk too much about the production period
because for me, it's the execution of
what was planned before. Obviously, the vision changes, and there is a lot of creative process going
on the film set, but it's mostly
intuition, working, is magic, and it's really
hard to teach about it. And that's why I always
tell my students to try to spend as much time on a film
set as humanly possible. We are going to talk
about ways how you can meet people from
the camera department and get yourself working on the film set in the next
lecture of this course. See you there. Okay.
6. Post-production and Color Grading (Project#3): The role of a cinematographer doesn't end when the shooting
period wraps up, right? You still have to oversee the post production
of the image. The image captured by the camera on the set is
not going to be perfect, which is why you need to
correct it with the help of a colorist in a process
called color grading. This part of a post
processing begins when the film has been properly
edited by the editor. Color grading tweaks the look
of the color of the film. The DP is responsible for
the film color palette. So they advise the colorist on how the color
palette should appear. Color grading is a post
production process, common to filmmaking and
video editing that alters the appearance of the image for presentation in
different environments and also in different devices. So, various attributes
of the image, such as the contrast, the color, the
saturation, the detail, the black levels, the white
point may be enhanced. In today's day and age, color grading is
a digital process happening in a dark studio
and dark environment. Now, ideally, you
know what kind of colors you want in your film before you'll
start shooting it. Some decisions are irreversible. For example, if you're going to use a lot of desaturated light, you won't be able to achieve a high contrast in the shadows. Desaturated light will
flood the whole set. There are still a lot of things that can be done in
the post production, but some things
you just can't do. Now, as an ending to this
lesson for inspiration, you can revisit the
website I mentioned before when I was talking about
making mood boards Flynn AI, and you can search films
just by entering colors, palettes, or other
features of the image. But if you want to start playing around with somebody else's
footage or your own footage, install and use
Da vinci resolve. It's a professional
software that is free to use by non professionals
and film students. Uh, I will link it to the sources on my web page
so you can find it easily. As a project for this class, remember project number two, when I ask you to recreate
a shooting board of one of the three scenes
that you've seen before. Now, I want you to take
the shots that you did for the photo story board and try to color correct it
in DavinciRserve. Or other graphical
editing software that you're maybe familiar with to look similar to the scene that
you were recreating. For example, bringing
out the dead had high contrast and
over exposed whites. Pyco was well a black
and white film. Breaking the waves, had
a sepia greenish and orange tint and was very grainy like a 16
millimeter footage. Now, you need to
find ways to achieve these kind of features in Da vinci resolve by
using its filters. Now, image post processing is a very enjoyable
and rewarding work, and I find it very relaxing. I hope you like it as well. See you in the next
lecture. Okay.
7. 3 ways to Systematically Gather knowledge: Learning cinematography
is an ongoing process. You learn it by making movies, but you also need to understand the basics that will
organize your knowledge. There are many books
that can serve as a textbook for beginning
cinematographers. I'm going to mention only two that I think excel
in this matter. The first one is cinematography
theory and practice, image making for
cinematographers and directors by Blaine Brown. And the other one is the
five Cs of cinematography, motion picture filming
techniques by Joseph V Massel. I believe that textbooks
work best when you read them partially,
but deliberately. For example,
whenever you come up with an idea to use a
certain kind of light, you take the book and read
about it and then just do it. This is how you learn
it practically. I'm not a fan of reading
textbooks from cover to cover. The second thing
that you need to be proactive about is
refining your taste. Let me propose a very
simple and quick exercise. Grab a pen and paper and
take a moment to list three films where
the cinematography made an impression on you. Then go ahead to IMDB webpage. It's a database
of films and find the profiles of these movies
and look for their DOPs. You'll find them
under cast and crew. It's kind of embarrassing
that you have to click so much to read who is
the DOP of the film, on this particular website. But this is how it
is. Anyway, you'll end up with three names
of cinematographers. Now, check their other movies. At least watch the trailers
of the other works. I'm sure that in the
body of their work, you'll find films
that you will want to watch and then
repeat the exercise. That way, you'll
start to develop a taste of what you
like in cinematography. You'll start to remember the names of the
artists you admire and hopefully watch a bunch
of good films in the process. The third thing is that
you need to get to know your local industry
in your country. Most likely, you don't know anyone from the business,
and it's normal. I've been there. We all need
to start somewhere, right? What I would suggest you to do is to start reading
the industry press. Well, I'm from Poland, and our local industry press is a magazine titled
Film and TV camera. In America, it's American
cinematographer. There is also film
and digital times. And in Britain, it's
British cinematographer. It should be rather easy to find your local industry press to see what's going
on in the business. And you need to
proactively look for this kind of knowledge
about your business to network better and
find yourself in the situation where you meet other
cinematographers as well.
8. Honing Your Camera Skills: Cinematography is not
just a conceptual art. It also requires
technical skills, particularly in
camera operation. As a beginner, it's
important to start filming and taking pictures with
whatever equipment you have, even if it's just a
cell phone camera. However, I recommend
investing in a digital camera that
offers a manual mode. This allows you to manually
adjust the lens length, commonly known as Zoom
and focus and choose the ISO and sensitivity and
shutter speed and even, you know, like operate
the focus ring. By manually operating
these factors, you'll gain a deeper
understanding of how they work. Professional cameras like red or Ari operate on the
same principles, but they are more complex and their workflows can be
less user friendly. Now, I own a next
five Sony camera, which I received as an award at the film festival in Mexico. As a director, I
find it useful for documenting rehearsals
and location scouting. You can purchase a
similar camera with a lens for around 200 or $300. Using the manual mode on
a camera of this class, allows you to experiment with different lengths of the lenses and depth of field, right? Now, if you're considering
a larger investment, you might want to look into a full frame sensor camera like Sony Alpha A 73 or
Canon EOS R five. Well, these cameras
are more expensive and you'll need to buy the
lenses separately. However, they offer the same sensor size as
professional cameras. The most common
professional sensor size is 35 millimeters, the same as a single frame of a film in the days
of the celluloid. With a full frame sensor, lens size like 50 millimeters
or 80 millimeters will correspond to
the same lenses used in professional cameras. However, such an investment isn't necessary
at the beginning. Okay, so it's really
nice to begin learning cameras on
a full frame camera, but it's not necessary. This investment isn't
necessary at the beginning. It's perfectly
fine to start with a cheaper manual camera
and upgrade later on. Okay.
9. Build Your Network: The Secret: You might be the most talented cinematographer
in the world. But if nobody knows about it, then nobody's going to
contact you for work. Therefore, you need to get
yourself into a community and an environment that is going to reward your creative
efforts and let you grow. At the beginning, it can be a local group that you
meet on the Internet. There are lots of groups on social media like
Facebook and Instagram. For example, here in Poland, there are several
groups called work in film or work in cinematography, where you can join and try to meet people and introduce
yourself to people. Ultimately, your goal is to find yourself on a
professional film set. Remember when I
told you to follow your local
Cinematographers press, Well, this is how you can find information about
upcoming movie sets. When you find information in the press that the production of a new movie is
going to start, you can write to the producer and let them know that you're available as an assistant to a cinematographer, for example. Unfortunately, most of the time, it will be an unpaid internship. But sometimes they will be
able to pay you something. And if you do a good job, then the crew is
going to contact you to help them on
the next film set. When that happens, the next
film set will be a paid job, and you will be a paid
assistant with experience. Apart from working
on a film set as an assistant and learning
how the film set works, I would still encourage
you to actively pursue your own creative endeavors and make short films or
independent films. If your life
situation allows it, I would recommend going
to a film school. Is an environment which is crafted towards growing
your creativity, giving you tools and community
that you can grow with. You're going to learn a lot on your own mistakes and from
the mistakes of your peers. I myself was a student
of a film school, and now I teach at my
Almar I can attest that the two most important aspects of the film school are that it helps you produce your
first short films and give you the
community that you start your cinematography
journey with In today's era of Internet
and access to information, the film school isn't necessary. You can start your
cinematographer work by going to a films that
starting as an assistant and growing through
all the stages to become the head of the
cinematography department. But film school
helps a lot anyway. Another way of meeting
cinematographers is attending festivals. Now, here in Poland, we have a world famous
festival for cinematography. It's called amar image. It's an international festival. It's one of a kind festival that focuses on cinematography. I'm very proud to
receive a silver award. I mean, my cinematographer won a silver award for the
film normal people, which we made during our
years in the film school. Unfortunately, when it
happened in 2011, I think, I wasn't able to go there, but my cinematographer went there and met many, many people. The jurors were, like, very successful international
cinematographers, and I know that
he benefited from the people that he
met at the festival. So it's a great way to establish connections and meet the guys behind the camera. Many of my
cinematographer friends from the school went to
this particular festival, met older and more
established friends in the business and then became their
assistants on the set. That way, they began working
on professional film sets. Now, I don't know if you have a local film festival that is committed
to cinematography, but I do know for
sure that there are registered communities of cinematographers
in your country. I'm sure they have their gatherings,
parties or premieres. Uh, most of the
time, these will be closed events where an
invitation will be needed. But sometimes there
will be, you know, premieres or bank yet
that you can attend if you are a participant of
some kind of a newsletter. So it's always worth the check. And this topic brings us to the underlying
theme of the class, which is the secret to
becoming a cinematographer. In my opinion, the
secret lies in humility and starting from lower positions on the film set. I have a cinematographer
friend who, despite having
achieved some success with his own work
on two short films, continued to work as an assistant on
professional film set. This individual who was creating brilliant short films
as a cinematographer, was humble enough to serve coffee on a professional
film set to his, you know, senior colleagues, the
lighting department, the grip department, and anyone
else who needed a coffee. And I wish you the same
humility and hard work, not in serving coffee, but in your journey to becoming a successful
cinematographer. Now, I understand that this class contained
a lot of information. You can approach it
step by step and revisit the lessons as needed. All the links to the
sources, software programs, and notes will be attached in a public note somewhere here. This this link will take you to my website,
Cinema explains, where you can also see how this class fits into
the overall curriculum. If you've enjoyed this
class, and I hope you did. I'd appreciate if you
could leave a review. I read every review and
discussion and provide feedback on all the projects
that you guys create, right? It's always
encouraging to see you apply the knowledge you've
gained in the class. I look forward to seeing your projects and
hearing your thoughts. You can also follow me and watch my other classes
on cinematography. If you do, see you
soon. Bye bye.
 Piotr Złotorowicz, Screenwriter & Director