Transcripts
1. Introduction: Seamless Raster Textures: Welcome to Master seamless
textures in affinity. In this class, I am sharing my workflow
with you for creating versatile seamless
raster textures in time saving and
effective ways using handmade pattern automations
and masking techniques, combining vector with
raster in smart ways, all in affinity
designer for the iPad. This is part one of a three
part series of classes, and I'm very excited to show you my pattern design system. Hi, I'm Hannah, a
graphic designer for over 20 years with a
background in web design, ecommerce and textile
related product development. I have a lifelong passion for dressmaking that stayed with
me the whole way through. The past 3.5 years, I've been completely devoted to one craft seamless
pattern design. From the very beginning, I was simply looking
for a way to create seamless patterns
with more ease, intuitively with a live overview as my repeats is unfolding and with the freedom
to use both vector and raster in optimized
ways together. And that search is what
led me to affinity. And eventually to building the workflow I'll be sharing
with you in this class. Now, in this first class, I'll hand you the
essentials of my workflow. How to build a seamless raster texture
from the ground up. First setting up your
square grid automation, drawing your texture,
adding depth with masking, and recoloring raster elements
with full vector control. Now, this class is part one
of a series of three classes. I've built, each one building
on the other to hand you a whole foundational
pattern design system you can integrate into
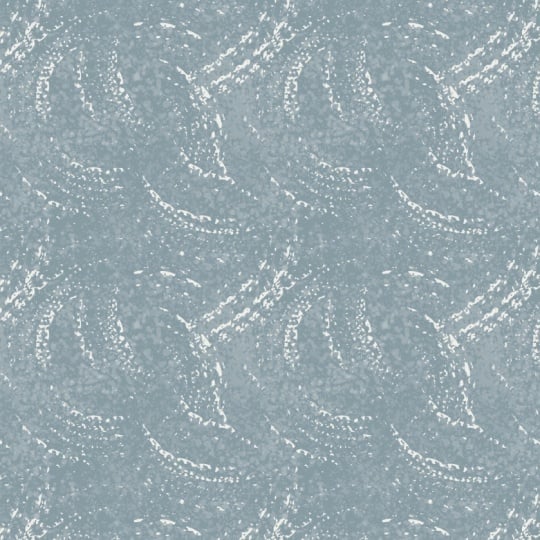
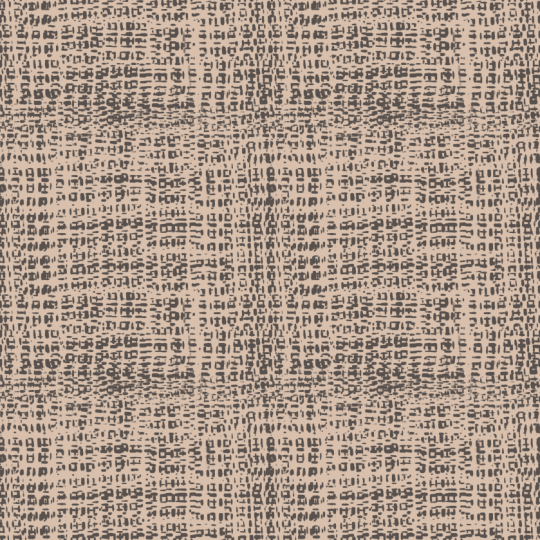
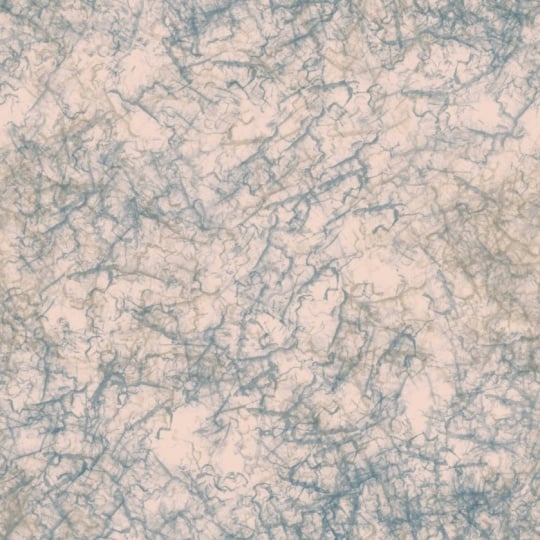
your own workflow. Now, texture right now is having a moment in
pattern design. It's what makes a surface
feel layered and alive, especially in applications
like wallpaper, for example. And that said, the techniques
in this class apply to all seamless raster based
designs, not only textures. Now, this class is for
pattern designers with some digital design
app experience, but it doesn't matter
if you're working normally in affinity
or Procreate, Illustrator, Fresco,
or Photoshop, and no experience with
vectors is needed. What matters is that you want
depth and a real system. So if you are ready to discover what becomes possible when your workflow actually
works for you, welcome. Let's get started. No.
2. Your Class Project: Mm. Now what you need
for this class is an iPad and stylus and
Affinity Designer. Or in the future, there will be Affinity
Version three, and I'm sure that will also work very nicely for this class. Affinity is now free to
download from the app store. If you prefer to work on desktop with Affinity Version two
or the new Version three, you can follow along here, too. The main differences are the interface and
touch interactions. But if you have some
affinity desktop experience already, you should be fine. In the class resources, you'll find two downloads, my curated 2026 color palette, which I'll import in class, so you can follow along and a premade square grid automation as a reference or a backup. That said, I really recommend building the
automation yourself by following the class step by step because once you've
built it from scratch, you understand it
from the inside, and that understanding is what opens everything
up from here. Your project is to
do exactly that. Build your own square
grid automation, then use it to create your
seamless roster texture, drawing, texturizing, and recoloring the full
workflow from beginning to end. And once this foundation
is in place, explore. Try different techniques, recolor in a
direction you didn't expect and see what this workflow can do
in your own hands. When you're done, upload your finished work to
the project gallery. The messy middles are just as welcome as the finished result. That's where we all
learn from each other. Now, let me tell you a bit
more about my approach.
3. My Approach: Structure & Freedom: M. Now, let me tell you
a little bit more about how I actually
work and why. I found the combination I was looking for in
Affinity Designer. I'd spent decades working in the Adobe suit before I built this workflow
there instead, and that wasn't random. Affinity turned out to
be the one place where I could build automation
in the most intuitive way and combine vector and
raster elements in the most optimal way possible.
And it doesn't stop there. Affinity is free to use, and it has everything you
need to work seamlessly alongside programs like
Procreate and the Adobe apps. A lot of pattern designers are making this exact
transition right now. And if that's you, you are
in exactly the right place. That said, I haven't
left Adobe behind. I still use those apps for
the tasks they do best. I tend to use each app for
its own strengths and build cross app workflows that provide the most
creative freedom. Rather than locking
myself into just one. In fact, in class
two of this series, we'll actually get hands on with Illustrator
and Procreate and explore the export options to those apps from affinity. And at the heart of
everything I teach, there is a real love for
craft for hand drawn, precision and the quality that only comes from truly
understanding your tools. My core message is simple. True creative freedom doesn't
come despite structure. It comes from it. When your system is solid, it gets out of the way. And lets the real
creative work flow. And this way of working
inside automation with smart raster and
vector combinations, seamless together is only
the beginning of that story. It builds through
this whole series, and by class three, you'll
really see it come together. Each class builds on the last, going a little deeper, a
little bit more advanced. So from the basics,
step by step, you'll arrive at a design
system that is yours. When you understand from
the inside that you can keep returning to and building
on as your practice grows. And beyond this series,
there is more ahead, advanced automation
techniques and intricate pattern
layout systems, rooted in historical
pattern design. So if you are the kind of
designer who's truly curious, who wants to understand
rather than just execute, you're exactly who I
am building this for. So let's dive into the
first lesson together.
4. Document Setup & Interface Tour: Mm. First, we create a new document, tap new new document, and then I prefer to use the dimensions of
3,600 by 3,600. But if you prefer
other dimensions, you are free, of
course, to choose. I have set my DPI to 72 and create artboard
option I have toggled off. Color settings I've set to SRGB, transparent background
I have toggled on, and let's hit Okay. Now, if you're not yet familiar
with Affinity Designer, then it's nice to know that we have a question
mark in the bottom right. If you tap that, you can see all the names of the
tools that are available. That can come in handy when
you are searching for things. And also you can always
go to the help question mark and then you have Quick Start Guide that you
can go to that's really nice. And in the down
bottom of this page, we have the gestures
for the iPad, and that's really nice, too, because then you can find out
about ways to use your app. So that can come in very handy. There's also a
command controller that you can use
in various ways. So please check that out if you are wondering what you
can do with the app. So let's go back to affinity
and to our new document. Now, what I like to use for pattern design mainly
is the layers panel, the brushes, the symbols panel, and then the transform
tool is also nice to use. And then if you double tap
on the command controller, you also have a quick menu that you can also
customize to your likings. And if you tap on this blue mark in the left upper corner, you can also go to
the Pixel Studio, the Pixel persona, and there you have the opportunity
to work raster based, and designer is vector based. And we are going to
combine those two options, those two studios in a smart
way, and you will see. So that's a quick look
around the interface. Before we dive into automation, there is one more
thing to set up.
5. Importing Your Color Palette: So before we start
building our automation, let's first take a moment to
set up our color palette. That way, everything is
ready to go once we dive in. Now I have curated a
nice color palette with a selection of 2026 colors
from major paint companies, and it's nice at this point
of this glass to import them. And for that, you can go to the color tool panel
and then to swatches. And if you tap on colors, you can choose between various
pantone color palettes. These are all
included in the app. And then, as you can see, I have already curated
a lot of colorways. But yeah, if you want to import the color palette that I have provided or you have
another color palette, you can go to the Hamburger menu and then to import palette. And you can choose to import
it as application palette. So you can use it
across the whole app. And you can also choose to
only use it for this document. And then you have a pop up, and then I have it set here, 2026 trend color mix. Let's tap. And then you
see you have it all here. I have also named all the colors you can hold a little bit
longer on a color, and then you can see, also if you tap
rename, you can see, also the color and also which company created
or curated the color. So this is Pontonas 2026
shifting sand, for example. And it's a combination
of Benjamin Moore, Sherwin Williams, and Pontona. And then there's also two
colors, this mustard gold, and this peachy color
and a lighter one that are my own suggestions that
I've added to this palette. So feel free to just yeah
use it for your own likings. For now, let's choose this
cream ten from Pantona. And that's your
palette locked in. Now we are ready
for the fun part. Let's build our
pattern automation, the solid structure
that will hold our hand drawn textures
perfectly seamless, the foundation that holds
all of my seamless patterns, giving me the space
to enjoy creating.
6. Building the Square Grid Automation: Alright, so we are
now going to build the solid structure that is holding all of your pattern
designs from now on. Well, actually, that's how
I use pattern automation. They are really holding all
of my designs seamless. And I have developed ways
to build automations that allow me to draw freely in various
ways, various layouts. And yeah, I'm very happy to show you the foundations here. So you will also have a base that you can build upon from
your own creative viewpoint, and once you understand the foundations of automating
patterns in Affinity, a whole new pattern design
world will open up for you. So that's why I really
want to make sure you understand that this is the solid structure I'm all
the time talking about, and we're building it here. And also later, I'll share some troubleshooting tips and tricks because along the way, building automations,
I found out that sometimes an
automation can also break, and it's very important for you to keep your
pattern seamless and also without any frustrations or adding extra time to
your design process. We want, of course,
to avoid that. So I also have some nice
troubleshooting guidelines that will save you
stress and time. I had to find out the hard way, and I really want you to
have the shortcut in this. So yeah, make sure to follow this lesson and also the next one about the
troubleshooting. So you will have the solid
structure that will open up all creative freedom in pattern design
for you from here. Okay, let's build it. Now that we have our
color palette imported, it's a nice moment to go
to activate our grid. And for that, we go to the menu here in the top right corner
and say activate the grid. And then we go to grid settings. And what will that activate is this little menu in the top? And you can go to
tap on the menu, and then you can slide and
find a lot of options. And there's various options for creating a nice
grid in Affinity. That's quite
impressive, I think. For now, let's choose standard and a spacing of 200 pixels. Then you can also
adjust the color. I like to take a little
bit darker color so we can see it better when
working with the grid. And then it's also important
to enable the snapping. And you can do that over
here at the magnet icon. If you tap next to
the magnet icon, you can also go to the snapping options.
Let's go over there. And there you can see I
have enabled snap to grid, baseline grid guides and spread. I also have toggled on the alignment for the pixels
and moving by whole pixels. And that is nice when we want to later on export
our seamless style that we avoid having white lines at the
porters, and now hit done. And now let's create a
big rectangle square. And for that, we use
the rectangle tool, and I have just selected
one of the colors, the cream ten and then I
choose the rectangle tool. And now, if you drag a
rectangle and hold one finger, you see it will
change to a square. And you can also toggle in between by touching the screen. It's quite convenient. And so it is a square already. Now let's go to the
transform tool, and then we will go to the dimensions and
lock the aspect ratio. And we'll say 3,600 times three, because we want to make
it three times as big as our canvas. All right. And now you can go to the move
tool, the selection tool, and in the upper menu, you can say Align center
and Align middle. And now this is our background
for our automation. If we go to the Layers panel, we can rename our rectangle to swipe to the left
and say rename. Let's type background. All right. And then we can
also choose to lock it, so it will stay in place nicely. And then we will create another rectangle that will be our guide for our automation. And for that first, we'll create another
layer and a vector layer. And inside of that layer, we will draw a rectangle, and let's choose another color, maybe a fill color, and then we'll just start
at the upper left corner. You see, with the
grid settings on, it's very easy to create a perfectly straight square even without holding the finger. And you see also that
the amount of pixels for the dimensions will
increment with 200 pixels because of our
grid settings of 200 pixels. So that's very handy. We'll see. And then to make sure
it is aligned properly, we can go to the transform tool again
and look at that position. It is zero pixels in the
X and also zero in the Y, and the anchor is at the left upper corner.
So that's over here. So this is important
because this will reflect our seamless style that
if you clip to Canvas, you can see that this
is exactly our tile. Now, let's use a
stroke color for our rectangle because this
will later on be our guide. And so then it will be nice
that we have a stroke color, and I set the width
to 20 points. And then the fill color we
will take away, just swipe up. And when you want to deselect, you can hit the X in
the left bottom corner. And now we have a nice
setup for our automation, and we will move on from here. So this rectangle
that we just drew, we are going to transform
that into a symbol. Let's go to the symbol panel and the Hamburger menu and say
Add symbol from selection. And if you now look
in the layers panel, you'll see that the
rectangle is now a symbol, but it's also a group,
and you can see a orange line in the
left of the icon. If you tap on it, you see the rectangle is
inside of the symbol. So it's like a symbol group. So all the elements that
you add to this group will form one symbol. All right. Now, it's important
when you want to copy this symbol to select
the whole symbol group. And then you can swipe and then two fingers
on the screen. And then you see it
will create a copy. Then you can just hold your
fingers on the screen, and it will make a copy again. And because we have
the grid settings on, you can very easily
copy all these symbols. And if you go to
the layers panel, you see all the symbols here. And in the bottom, you see our center. Now, let's select all of the above symbols
in our layer stack. And you can just easily squeeze with your fingers
and it will be grouped. But you can also go to this icon in the top layer panel and say group. That's
also possible. It's just what you
like. All right. And now we will
rename our elements. The group, it will
be called repeat. And the symbol, let's
call this our tile. Okay. And now you know
that this is our tile, and for a nice organized file, let's place this
above the repeat, and the tile we will open. And then if we now take our
rectangle and, for example, create also a fill
color, you see, the fill color will also be added to all
the other symbols. And that's exactly the
way how symbols work. So when I now would
like to reshape it, then all the other elements
are also reshaped. But the rectangle is our guide. So let's swipe to the
left and call this guide. Oh. Now, with the new IOS, it's a little bit
different because we have now the time and yeah, some elements of
information on top. So everything went a little bit moved a little bit
downwards on the screen. If you have an iPad
that's a bit smaller like mine is 11 inch, then it's not so very easy, but you can swipe a little bit up then you see
what you're dyping. That's just a little
trick I use now. Maybe they will fix it, I hope. Alright, so now this guide, let's swipe up to
get rid of the fill. And now that we have our
grid automation set, let's put it to use and create a placeholder
pattern together.
7. Placeholder Pattern: Testing the Grid: Okay, so now we can just
take the pencil tool, for example, and set the
width to around 250. I've also added some extra
points in the pressure menu. So when you draw a line, it will make a nice
fullness at some points. You can also choose a
different color that you like, and you already see that our automation is
working correctly. Let's go to the node tool or the direct selection tool
and you can tap on the node. And make it nicely flowing
from the various points. Now you can also adjust the width so you have
a nice fluid line. And you can also go to the Stroke Width tool to add
some extra fullness even. I think that's really nice. Let's go to the node tool again and you can adjust
it a little bit. And that's the nice thing about working inside
automation because now when you adjust only
one element in your tile, you see it's just so nice to see the whole repeat already
from your whole pattern. And if you go and tap on the layers panel and toggle off the
visibility of the guide, and also toggle off
the visibility of the grid and de select
everything with the X. Then yeah, you can also go
to the full screen mode. You can enjoy your new pattern. Yeah, I really like to have this overview because it
empowers you immediately, seeing what you are doing
and what you are creating. You can also tap on
the clip to Canvas. And then you see even
here is very small point, and it's all
repeating perfectly. Now you can also go if you go
in a layers panel and take your curve and then
the move tool, you can also move
this element around. If you see clip to Canvas,
you move this around. You'll see you can
also define your tile, and it will all stay
perfectly seamless. And I think that's
very powerful. And in this way, we are
also going to create our hand drawn raster texture. Let's first create a
little pattern tester that we can use to zoom
in and out a little bit more before we
create our texture. And yeah, let's do that. We will use the
gradient tool for that.
8. Building a Live Pattern Tester: Now to create our
little pattern tester inside of our document, let's create another layer, and let's call this tester. All right. And we
will toggle off the clip to Canvas
so we will see a little bit better
what we have. And then with the
layer tester selected, let's go to the rectangle tool and just create a
random rectangle. Doesn't really matter
what's the size. I take quite big size. And then I'll take no stroke and the fill it doesn't
really matter at this point. You can just use the
fill that you like. And now what is a handy
little trick that I want to show you for
creating this pattern tester? Is we are going to first create our pattern tile that is
right inside of our document. So normally, a lot
of people create a tile by going to the Hamburger
menu and then to export. And then you can also export it with various
different extensions, and then you can, for example, go to use the JPEG, and then you can just hit Okay, and then you can use your file folder system
to save your tile. But then if you want to use
it for testing your pattern, you have to import it again. And I want to show you
a smart way how you can import it directly
inside of your document. So for that, we have
just created the layer, and then now we have
toggled off the guide. That's important because we don't want to have
that in our pattern, eventually, and the
repeat we have it set on, so we have the whole tile. Of our design. So this
is what we want to have. And then we go to
the Layers panel and select next to the plus the
icon over there and say, merge visible. Let's do that. And what happened now is that the app created a
raster based tile. So it's in a pixel layer. You see it in the
layers panel over here. And you can take that you
see it is our seamless tile. Now, what we will do with it is we will go first to
the Assets folder, and you can hit
the question mark to see assets, it's over there. And then you can create various
folders for your assets. And with the hamburger menu, you can say, add a category, for example, and then
I have the default, and I have added a sub category. So first, you add a category, then a subcategory,
and I named it tryout. So you see already I
have here some tryouts. But I'll show you
I'll show you, wait. So we'll take added category, and let's call this,
for example, testers. And then we add a subcategory, and let's also rename that. We call this, for
example, straight grids. And then we can hit the
Hamburger menu and say, add acid from selection. And now you see that our seamless style is
in the assets folder. So the one that we've created, we can delete it. You have also a
recycle bin here. In the layers panel at the
top and also at the left, bottom corner, as you see, now we can use that asset
to fill our tester, our rectangle with the pattern. So let's go to the
gradient tool. And then normally you
have solid or linear, elliptical, radio, conical,
and you have Bitmap, and then you get this pop up. But we don't have to use this, so we don't have to
take place from files. You do if you would
have exported this, I like I showed you just now, and you can also take a picture to use for your pattern tester. That's also possible.
But for us, now we have saved our tile
in the assets folder, so we can just tap on it, and then you see there is this dit option and
it says, set as fill. Let's do that. And
now let's just swipe. You see, we have our pattern. If we hold one finger
on the screen, you can see that it
will stay straight. But you can also even rotate it and play around a
little bit with it. And we can also
take the center of these handles to yeah,
define the position. And in this way, it's
really nice because we can also test our pattern, how it would look, um, yeah, from a distance, and I think that's
very powerful feature. Okay, so now that we know
that our automation is working correctly and we
have a nice pattern tester, we can save our
file as a template.
9. Saving the Automation as a Template: Now to save our file as a template that we can
use over and over again, it's nice to first activate our guide so that
we can see immediately, yes, this is the automation that we have here with
the straight grid. And then we can go to the hamburger menu in
the top left corner, and we choose
Export as template. And then you can choose a
name for your template. For example, we can call it
straight grid, 3,600 pixels. And then hit safe. And then you can
assign a folder in your folder stack to use as a template file folder that you can go over and
over again to yeah, to choose your templates. And as you can see, I
have already made a lot of templates for
various applications. Because yeah, you
make it only once. And then, for example, when you would create
a new document, you can tap new. And then you can choose
instead of new document, you can choose New
From template. And then you can just choose
your created template. It will open as an
untitled document. So if you go to the
file overview again, you'll see it is untitled. And then you can hit the
Hamburger menu there. You can save or rename it. And I encourage you to
frequently save your files, not only leave it inside
of the app because all the disk space it's
taken from your iPad. And yeah, eventually, your iPad will be a
little bit more slow. So once in a while, it's good to just take
out some of the projects. And then also when something
would happen with the app, then you will always
have a backup. Yeah, have your file
saved properly. And you can also
swipe to the left. And then you'll
see you can copy, adjust and all these
kind of things. So that's nice.
It's a little bit similar to Procreate
how that works. Now that our automation
is saved as a template, let's talk about pattern
fills in the swatches panel and why I actually
prefer not to use them.
10. Pattern Fills vs. the Swatches Panel: When you have this gradient tool used for testing your pattern, then it will also automatically
create a swatch fill. It's a little bit like a swatch pattern swatch
in Illustrator, but then it's a
raster based swatch. You can also, of course, compare it to Adobe Photoshops feature to have a pattern fill. But then, yeah, it will create
this fill. You can use it. You can add it your
swatches to your palette, but I would not suggest
to do that because you already have your fill in your assets folder
and you can also, of course, export your tile
for use as a pattern fill. So just to keep your app tidy, I would suggest not to use the swatches
panel for your fills. But of course, you are
free to do what you like. And also, it depends on your workflow and how
you use your fills. So yeah, for me, personally, I would suggest to just
go to the pixel layer and throw out pattern fill from the swatches
panel and choose, for example, this grayish color. So that's how I like to
keep my workflow tidy. Up next, we're diving
into something every raster pattern
designer runs into eventually and the
ways how to fix that drawing outside
of the canvas.
11. Drawing Textures Outside the Canvas: So here's a real limitation you'll run into
with raster work. You can't just draw
outside of your canvas. But don't worry. I have a little trick to
work around that, and I'll show you right now. We will go to our straight
grid automation layer, and inside of the tile symbol, we'll create inside
of the design layer, a pixel layer, and hit on a
plus, choose pixel layer. And then we can choose a brush. It's a raster brush. And I like to create
a big texture that we can always
use smaller and so that we have dimensions
that are always big enough to support our patterns or to use as
standalone textures. And for that, I really like the engraving that are
standard inside of the app. As you see, I have also paid for some nice other bundles as well. But for now, because everybody has them, we choose engraving. And then let's go take
the rough racquet. I'll set it to 450 pixels. And here you can
tap the hardness is 80% and the flow is 70. I like to set the hardness 200. And for now, it's
nice to toggle off our curve, our placeholder. And let's just drag a line. And now you'll notice, Hey, my lines are not going
past our canvas. So that's a bit of a problem. How would we do
this? So for that, we need to do just
one adjustment. And let's do that. Now, to be able to paint
across our canvas, that is, of course,
always this case with using raster elements that
you cannot cross the canvas. With vector elements, you can
always go past the canvas, but with Pixel elements, pixel based elements,
you cannot do that. So what's my solution
for this to transcend this technical barrier is to temporarily resize our canvas. And for that, we go to the Hamburger menu
and choose resize. And then it's important to have your resizing
from the center. And it's in pixels, the aspect ratio is looked, and then we just tap on one of the dimensions and let's
make it double its size. So 72 for this. And then if you are
happy with the settings, you can hit the checkmark, and then your Canvas
will be resized. You can check that by
clipping and you see so that makes it possible to go
paint outside of our canvas. And then, of course,
when we want to later export our seamless tile, we have to resize it again
to its original dimensions. That's the only thing
to it. It's quite easy. So let's create another pixel
layer and erase this one. So now that we have
resized our canvas, I like to activate my grids. And also in the grid settings, I like to choose a color that makes the grid
visible, but not too much. Like, for example, if you
would use a dark color, then it's maybe too apparent. But just with a light
color or light difference between the background
color and your grid color, then it can be a nice way to keep track of
the canvas size. And so the opacity of the guide
is lessened a little bit. So you have a nice view of your canvas and still have a proper space to
draw your texture.
12. Drawing a Freehand Seamless Texture: So now we are all set to draw our seamless texture
that will cross our tile dimensions
and make sure you have your paintbrush tool selected with a brush of your choice. Make it quite a large
stroke width so that the appearance
of your brush will define the appearance
of your texture. And what do I mean by that
if you, for example, now, draw a line then you see that the texture is
defined by the brush stroke. If you look at this top menu, you can say 100% Zoom. And then you see that it's quite a large oversized
brush stroke at this moment, if you look at the actual
size, and in that way, the brush stroke really is the appearance of
the texture because it's such a big stroke width. And that can be very nice because then you
can let the brush, in a sense, do the job. So another way to draw the
texture would be to take, for example, a
smaller sized brush, maybe make it like
200 or something, and then you can just do
more of a drawing texture. And in that way, you are
defining the texture by the actions that you take
more in a detailed way. And that's also a way
to draw your texture. So it's really up to you
what you would like. Now you see that there is kind of a bugges bug in
our automation overview, and that is because on the iPad, Affinity Designer
has a little bit of trouble dealing with all these pixels that is
quite a large surface. And to get our overview
back in our automation, I found that if I just go back to the main menu
of Affinity Designer, then Affinity Designer takes
a moment to think about it, and then you see
when you come back, the automation is
completely viewable. So the only thing to take into account is to go
back to the Pixel persona. Once you do this, to go draw
further on your texture. Now, take your time to finish your free hand drawn texture, and then I'll meet
you in the next part of this class to draw a
texture with straight lines.
13. Drawing a Straight-Line Texture: Now that your free hand
texture is finished, let's look at another technique for drawing a seamless texture. Straight lines drawn with
the command controller, giving you a bit more
control and structure. It's a nice variation to
have in your toolkit and a good example of just how many ways there are to
approach texture design. For now, I would love to show you how you can draw
straight lines. With the rough rake brush
and a size of 450 pixels, so activate the grid. Again. At this point, when you go back to the main menu and you
reopen your document, then the grid color
will be by default, gray, and that's not always the color
that you would like. So just take a moment
to recolor it. Then we are good to
go. So take the brush. And then let's draw
some straight lines, and we do that by first
tapping on the screen. Oh, wait. We have a pixel
layer to create here. So tap on the screen lightly, and then with the command
controller holding Shift, you can draw the straight line. So you go back to the middle, tap on the screen and
swipe up, let go again. And in this way, we can very easily draw
some straight lines. Okay, so let's
finish this texture. But before we do that, I want to show you
a little bit more about the command controller. So if you tap on
it, you see four of these options and
you have the commands. You have the outs or option, and you have control,
and you have the shift. And you can use them, press
them like simultaneously, but you can also choose to
individually press them, but you can also hold one finger on the
middle and swipe up. And then you also
see it a little bit then you have a blue rim. And then you see it indicates that the command is activated. So if you would hold the shift all the
time and draw a line, then you see that's not
so really nice because it will then remember
the last point where you left the stroke. So it will now, you see, also make like a connection
with the next one. So that's not what you want, and that's why we use only swiping it
up to shift and back. So we make every
time a fresh start with our straight line. Now to create a little bit of a versatile and not so very
much obvious repeating tile or texture, I think it's nice
to sometimes start, for example, in the
middle with your line. And then at another moment, you start more to the side, and then maybe start
from another side here. And in that way, you
get a nice texture. That is. Nice to look at. That's what we want, don't we? You see the problem is
still that you don't see the whole automation
properly now you see it. So sometimes go back
to the main menu. And yeah, maybe it's a
little bit annoying, but we'll get used
to it, you know? It's just a matter of
taking a moment to, to reset, and that's it. So let's draw some one
more line. Oh, wait. I'll take the command controller first step on the screen, and then we draw our line. Now you see we have a small
stroke that is still empty. But if we draw the
straight line here, then the repeat will
be very obvious. You'll see that this is a little bit too dark compared
to the other parts. If you like that, then of course, you can
leave it like this. But I think a nice
way to go about this is to just select with the move tool the
whole pixel layer. And then we can just squeeze
it a little bit, like this. And then with the pixel
layer still selected, we can draw another line. And I think then that
will be nice like this. Here's also a little bit darker, but yeah, I think that's right. So let's toggle off our kites. And then we can
select our layer, and let's duplicate it. You can double tap on
the command controller. Then you have the quick
menu to duplicate. You see in the layers
panel, it's duplicated. What you also can do is go to the three dots
in the top left corner, and there you can
also say duplicate. And then you can take this handle over here
and just turn it, tap one finger to make smaller
increments of 15 degrees. You can also take the menu in the top of the move tool and say rotate clockwise
or anticlockwise. So it's also 90
degrees if you like. So it's both optional. And then, yeah, I think we have a really cool
textile look texture that is perfectly seamless. Let's for now, resize our canvas again
to its original size, 3,600 and hit the check mark. Then let's go back to
the designer persona. Now that we have resized our canvas and
clipped to Canvas, you can see this is our tile. Now, maybe you would like to take a closer look
at this moment and check your design. So the pixel layer that
we have duplicated, we can also move
that around a bit to define our
texture a bit more. We could also flip
it, for example. So you see now we have a little bit more how you would say, yeah, even less visible. Repeat. So you see when
we had it not mirrored, then we have some parts that are repeating very obviously. But yeah, once you tap three fingers on
the screen, you redo. So now we have it
Mirrored again, flipped. You see, we have less
of the obvious repeat. So just take a look
at your texture and adjust what you would like
to adjust at this point. And if you are happy, you could actually
already export your texture like this
if you would like, if you already are very
happy with your texture, you could also toggle
off the background. So you have a
transparent background, so you get to export this
already as a B&G, for example. Now that we have our first seamless raster texture created, let's move on to some in depth
troubleshooting guidelines together because sometimes your automation can
break unintentionally, of course, and I want
to show you how you can fix that in a very
easy and effective way, so I can save you
some headaches.
14. Troubleshooting a Broken Automation: So now that we have created our first seamless
raster texture, I want to show you some
troubleshooting tips for working inside automations because
sometimes your automation can break unintentionally. Ah. And yeah, I'll show you some nice ways to fix it when that happens
because as you see, this is not seamless anymore. And that's because we have moved our whole symbol, you see? So if we look at
the repeat layer, the repeat group, you can
see we have all the tiles. So when you take an
individual tile, then essentially you
take the whole symbol. So that's the main difference. When you are working
inside of an automation, you have to work
inside of the symbol. So for example, we
take our guide, and if we activate it, I just made it a
little bit bigger width of the stroke so you can see it better
and another color. And so, for example, if we take the guide
in our automation, you see that all
the other guides in the other tiles are
moving along with that. So that's the automation
working properly. You see? And it also goes for
the texture as well. So when we take the texture, you can also move that around, and then all the tiles will
have the same movement. And in that way, our tile, our canvas will stay seamless
no matter what we do. We can just move
this around freely, and it will all be
seamless all the time. You see? But so what I mentioned about designing
inside of the symbol, so inside of the symbol group. So you can see the
symbol is highlighted here with a small
icon of the symbol. So the same one as here. You see? And these groups, these tiles also
have the highlight the orange line and
the symbol icon. So once you take
the whole symbol, just like I showed you before, you take out the whole tile, and then your
automation is broken. Now, once that happens, how to fix that very easily is to temporarily deactivate the
visibility of your design. And only have your
guide visible. And what do I mean by that? Like, for example, if
you have your tile not visible and you have
only your texture, for example, visible,
and you would break your repeat by taking
the whole tile out. If you want to place
that tile back in place, it will be very
difficult because, yeah, you cannot really find
the proper position, and your tile will not be
seamless anymore, your canvas. You see? So a nice way to fix that. Well, let's let's
break it again. So a nice way to fix
that is to deactivate the visibility of
your texture or your design and activate
only your guide. And now, also with
the snapping enabled, then if you take your
whole symbol group that you have placed
out of shape, you can take the whole symbol and then very easily align that. Again, you could also use
the transform panel and you can use the position zero pixels and zero pixels in the center, and once you would look
again at your texture, you see it is all again, fixed properly, and it's all
perfectly seamless again. So in that way, once you spot
there is an irregularity, then sometimes you really don't see it because
it's only maybe just a little bit of maybe only three pixels
or something like that. So once you look at your guide, you see that it is -18
pixels of and so again, you take the whole tile and
you set this back to zero, and then your automation
will be again fixed. And it goes for all the tiles. So for example, if this tile in the upper right corner
would be broken, you could just go and
look at the position. And for example, if it would
be something like this, maybe if the snapping
was not enabled. So then it sometimes
can happen more easily. So if this off like this and
you go check the position, you see it's 3,615 and -3,642, and that indicates that
you have to be close to -3,600 here -3,600, and the position of the X
value will be 3,600. You see? And then it will be
aligned properly again. So that's a nice tip, I think that will save you
some time and frustration once you would have
your automation broken. It doesn't happen
normally, but, you know, sometimes you can
make a mistake, especially in the
beginning when you're just starting out using automation, for example, instead of working with your
texture selected, you could unintentionally
take your whole tile out, especially when you
have your guide. Invisible, then it would
be a possible that you select the whole
tile if you want to move around your texture. Yeah. So now you
know how to fix it. So just go to the guide, tookle off the visibility
of the texture, go to your whole symbol group, select the whole symbol, and just place it back and make sure you
have your snapping enabled and check it also in the dimensions
and the position. And you go to go. Now, let's go and texturize our texture in the
next part of this glass.
15. Texturizing with Layer Masks: In this lesson, we
are heading back to the Pixel Studio,
the Pixel Persona. And I'll show you how to add real depth to your texture
using an opacity mask. And we're going to
texturize our texture. Now, to texturize our texture, we will go back to the Pixel
Persona, the Pixel Studio, and we will use an opacity mask, and maybe you are
already familiar with opacity masks in, for example, Photoshop or Adobe Illustrator
or other design app. I really like the
option to texturize our texture without breaking
the original texture, so we will work
non destructively. To do that, we will go to the
plus in the layers panel, and we will say mask layer. And now this mask layer is
added to our pixel group. And you see it is a white space. And if you double tap on
the command controller, you can see the quick
menu and you see solo. And if you go there, then
you see this is our mask, and it has the dimensions
of our texture. So if we toggle off the repeat
and go to our mask solo, you'll see that is
exactly the dimensions. Of our texture, our pixel layer. So the white parts
are revealing, and if there are black parts, then they will hide the design. And let's view how
that would work. For now, let's choose
also the rough rake, and we will choose a
black color in our brush. And when you now draw a line, you see that it is erasing
parts of our texture. So are texturizing our
texture in this way, and we can also go
to the solo mode. So you see this is our texturizing texture that is erasing parts of our texture. And if you want to go back
to the normal view mode, you can just tap on
another element, and you see we are back. And you can also
see in the layers panel in the mask layer, the added black lines, and they transfer to the lighter lines in our
design, in our texture. And you can also toggle
off and on the visibility. And now you see that is
non destructive because you can still use your
texture in its original way. You can even also toggle
off the visibility of one direction of your texture
and the masked layer. So you have actually three different textures in
one in that sense, because you have the combined one with the texturized part, you have also the combined one. Oh, we have even more
versions without the mask, with the mask and also individually horizontal
and vertically. So a lot of options, and it's all still seamless. So that's, I think, quite
cool and versatile, too. But now I wonder if we can
also draw past our canvas. So first, let's
resize our canvas again to 7,200 pixels just to make sure we can draw
outside of our seamless style. And let's make the stroke
a little bit less white. And let's go back to the mask. Now, if we take a white
color in the brush, then we can reveal parts of
the texture again. You see? So then we will have
the original textures. You can also play
around with this to hide parts and reveal parts. And if you would take
a color, for example, this golden mustard, then it will translate to its
gray scale variant. That's why it's called
an opacity mask because it's like the opacity of a gray between the white and black between
revealing and hiding, actually. So it's a transparency
you are adding. And you can play
around with this, and you can use all the
options that you would like. For me, personally,
I don't like so much to work with the
opacity in a way that it's making gray scale
transparent elements because then you will see also the parts that are
overlapping in your repeat very well
because they are opaque, so you have to make a lot
of adjustments and yeah, for making an effective
and time saving texture, I think it's nice to
keep it all opaque. So only use the black and the whites in our
brush. So let's undo this. And you see we have now, if we take the whites,
for example, Oh. Okay, let's make sure we are
working inside of the mask. It's also good
sometimes to check. So now, if you want to
lessen the texturizing bit, you can just use the white
and go back to the black. So black and white are quick to select because they
are the quick colors, as you see here. So you have the gray
black and white. So we have the black now. And let's check also the solo. Yeah, you see, we have
a little bit bigger. Woo. We have a bigger
place to texturize. But I think it's
nice to work from our normal view because then you can see a little bit better
what we are actually doing. So let's texturize a little bit more and just have
fun playing around. I mean, you can also
make some curvy lines or maybe you like to take another brush for
the texturizing. Make it maybe even bigger and just yeah, do as you please. You can go as wild as you like. For me, I would like to just use the same brush as
I have used for creating the texture and keep
it at the 450 pixels also. So yeah, a little bit of
uniformity in its appearance. And yeah, I like it quite a lot. So it's like kind of
distressed textile. Look texture. And if you are wondering,
sometimes like here, you have the straight line, and if you go texturize it, you see it's not
really disappearing. Now, a powerful feature
about the automation is that you can toggle off
and on the repeat visibility. And then you see that the actual dark line
that we just saw over here is somewhere in the repeat and not in
our center design tile. And so to spot it, we can also go look up, and by the way, if you want to have your menu still visible if you are
working inside of the design, you can just tap
here on the bin, and then it will stay
while we are designing, and that's maybe nice if we
are working with toggling off and on the visibility
of certain elements. So make sure you're
still in the mask layer. And yeah, just go texturize
a little bit more. It's more easy this way. Now we have a full view of
our single design element, and I think that's
quite powerful. And you can, of course,
feel free to toggle off and on the visibility of the repeat to take a look
at the whole design. And I think here we made a
little bit too many scratches. So just play around and take the black and
the white in your brush. You could also use
the erase brush tool, but then you also have to make sure all the time that
you have the right brush. So just to make it a little
bit easier on yourself, you can just use the same
brush to erase parts of the texture and also to
reveal parts of the texture. So just yeah, play around
and do your thing. Alright. Now, I think we are getting somewhere
with our texturizing. Maybe you also did a nice
job texturizing your design. And I'm very curious to see, of course, what
you are creating. So make sure to let me see
it in the projects section. So what you could do now is take your mask and
duplicate your mask, and then you could select it and turn this
around, as well. So let's see the repeat. So now you see
that then you have immediately created stripes
the other way around, and then you can
move that around to see which parts you like. Maybe flip it to get a
little bit other appeal. But I think for now, I
would like to delete this and manually draw some more
lines the other direction, just because I think that would
look a little bit better, I'll toggle on the repeat again. Yeah, all is set. Alright, let's draw
some more lines. I have still the
black in my brush. So as you can see, now we are creating some stripes
in the other direction. Yeah, you can just take
your time and play around. You can also, of course, experiment with other brushes. And yeah, of course, you can also even create
your own brushes. Maybe you have some
nice texture elements that you have painted with analog media that you want to import and
make a brush from. Of course, that's all up to you. I would also love to
show you how you can do that maybe in the next class. Uh, yeah. I think for now
we are getting somewhere. Yeah, I actually quite like it. It's very distressed. And still, it is a bit dark. But in the next
part of this class, I'm going to show you how you can very easily
recolor your texture, not only with the effects, layer effects, like you
have the color overlay, but you have even a nicer way to do this using
another kind of mask. Let's go and check that out. Oh.
16. Recoloring Textures Like Vectors: In this lesson, we
are going to recolor our raster texture like
it were a vector element. So as I just showed you, you can go to the layer
effects and say color overlay, tap on it, and then you'll
have some blending modes. So you can also say
multiply, for example, or other blending modes, and you can recolor it here, which is watches or the colors. But I think it's quite
tedious to do it in this way. It can be done much faster. And I have not yet seen it done before for
seamless raster elements. And I'll show you now. How I do that. For that first, we will toggle off the color
overlay effect, and then we also toggle off the repeat and we
are going to create a vector based shape in the designer studio
and then make sure we are in the design layer. And you see with the
blue lines that are the dimensions of a
single texture design. And we need those dimensions because we have to
create a shape, a rectangle in this case, that is exactly or a
little bit bigger shape than our texture
to encapsulate it. For that, I like to watch the point in one of the lower
corners, for example, here, and then I'll start drawing
the rectangle from the top, and I'll make sure it is big enough that it will
cover the whole design. Then I'll choose a fill
color and no stroke. So let's just choose a
color of our palette. Let's say the brown
one over here. And let's go to
the layers panel. And what we are going
to do is we are going to create a layer mask. So it's a little bit different
than a clipping mask. Most of you know how to
make clipping masks. You would do that
to, for example, take this and clip it like this. But then you see
it's this effect. You would have your texture
inside of your rectangle. And that's not what we want. We will take our
whole texture layer, including the opacite mask
and the two pixel layers. And we'll take the thumbnail. So point with our pencil
on the thumbnail. And instead of making a clipping mask that
would be like this, we would take the
thumbnail and drag it on top of the thumbnail
of the vector shape. And now look what happened. Tad. So when we
toggle off the guide, toggle on the repeat. You see, we have
recolored our texture. Let's take a closer look. So, select the vector shape. It's the rectangle. You see? You could also call it maybe a recolor for now, so you know. And let's go to
the swatches panel and just tap on the switches. And what do you see? Hey,
that's convenient, isn't it? So I really, really
love this because yeah. You can just handle your raster based elements as if it were vector shapes
in sense of recoloring. And I think that is very, very empowering for us
designers to do it like this. So I really, really love this and I hope you will enjoy
this as much as I do. As you can see, I have now chosen the mustard gold
because I like this look. And yeah, if you now look
at the clip to Canvas, you see, we still have
the size of 7,200. Let's resize it back to 3,600. So we can create a pattern tile. Oh, let's hit the checkmark. So we can create a pattern tile that is completely seamless, perfectly seamless from our
design that we can use. And that's it. You've just
seen how you can treat a raster texture like a vector shape and
recolor it in seconds. So now that we have
also texturized our texture and
recolored it, yeah, we can also export
our texture as it is, for example, acid JPEG
and sell it as it is. It's perfectly
seamless. So, yeah, you could also, of course, toggle off the background again, and then you'll have this
nice PNG you can work with. You can also, yeah, create an opacity mask by setting the
background to black, and then the texture
to perfectly white. And if you then export it, it is an opacity
mask you can use in various applications
like Photoshop, Illustrator, Procreate. You can, yeah, use
it as this is. And then I want to tell you a
lot more about my workflow, and this is getting
to this first class, but I've created also a second and third class
for this workflow. And in the next part
of this series, we are going to also layer
textures and also scale them. So here you see a 50% and then also a 25% of
this texture on top. And then you see you get a
very nice layered effect. So yeah, and then next time, I'll also show you how
that you can actually add your whole design that we've created for
the placeholder pattern. Yeah. And I'll talk about layering textures while keeping it all perfectly seamless. And you can imagine
when you start layering textures
inside an automation, that is another approach that we need to
keep it seamless. And that I'll all share
with you in the next class. So I think for now, we are done. We have a very nice texture
that we can already use, and you can now
start to practice and create a nice
library of textures. I see you in the next part of this class where I'll share
some final thoughts with you.
17. Final Thoughts & What's Next: So you made it. And I want to take a moment to actually appreciate
what you've built here. Because it's more than
it might feel like, we set up your document, got familiar with the interface, and build your square grid
automation from scratch. The foundation,
everything else in this class stands
on, and from there, you drew your first
seamless raster texture, freehand and with straight lines using the command controller. You learned how to
troubleshoot your automation, how to add real depth
with layer masking, and how to recolor your whole seamless texture
with just a few taps. That's a complete workflow, one you understand now from
the inside that you can return to again and again
and keep building on. And that's exactly what
we will do in class two. Scaling, layering, and exporting multi layered seamless
textures ready for sale and ready to use
across multiple apps. And in class three, we go
further still creating raster based textural
vector path brushes for even more versatile
seamless texture design. So make sure to
follow me here on Skillshare so you'll be notified when my next
class is launch. And before you go, head over to the project and resource step
and share what you've made. The messy middles are just as welcome as the finished results. And if you have a moment
to leave a review, it helps other pattern
designers find their way here, and it helps me keep building
something worth finding. If you have any questions or you just want to share how it
went, please reach out. I would love to hear from
you and thank you for being here for trusting this process and for doing the real work. I can't wait to see
what you create next and see you in class
two. Happy creating
 Hanne Hova, Surface Pattern Designer - Automation Expert