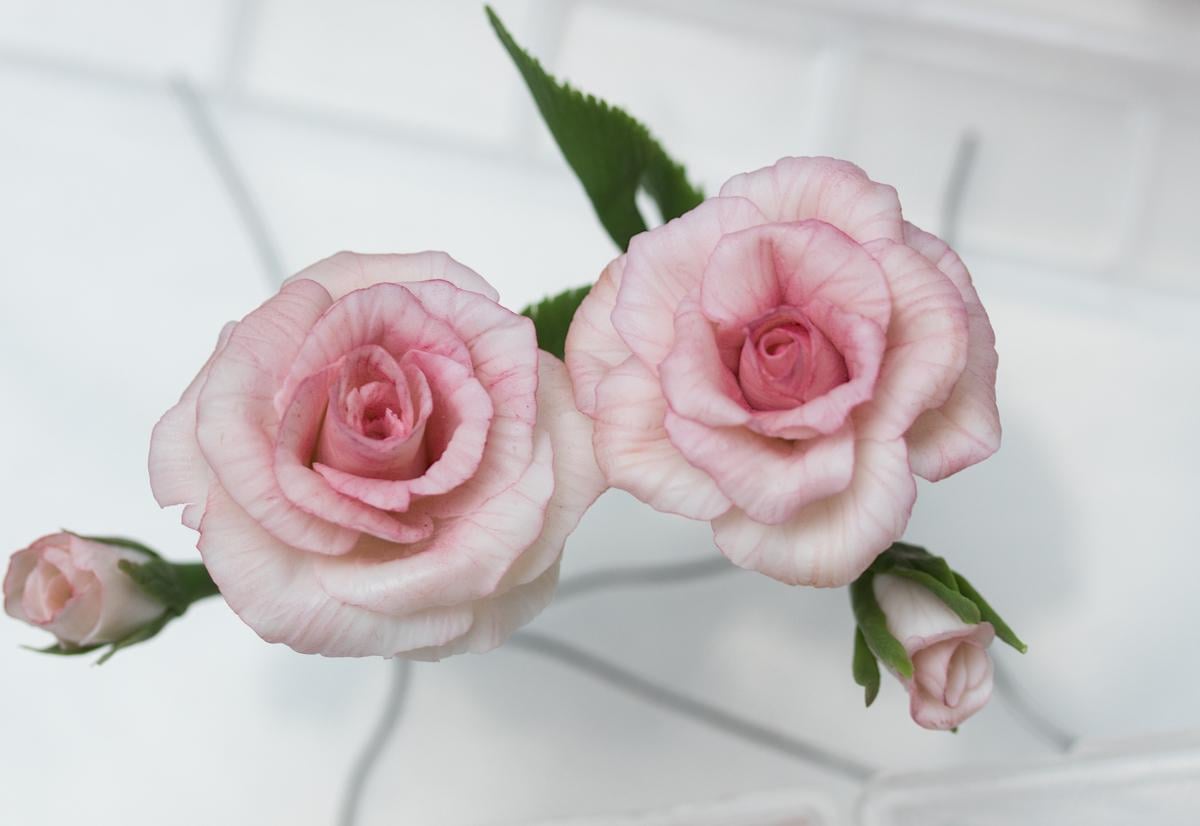
Sculpture : Making Realistic Roses from Polymer Clay
 Stephanie Kilgast, Contemporary artist.
Watch this class and thousands more
Watch this class and thousands more
Lessons in This Class
-
-
1.
Introduction
0:58
-
2.
Materials
1:12
-
3.
Rose Stem
3:19
-
4.
Rose Petals
8:27
-
5.
Rose Leaves
4:02
-
6.
Finishing Touches
3:54
-
7.
Final Words
0:43
-
-
- --
- Beginner level
- Intermediate level
- Advanced level
- All levels
Community Generated
The level is determined by a majority opinion of students who have reviewed this class. The teacher's recommendation is shown until at least 5 student responses are collected.
1,393
Students
2
Projects
About This Class
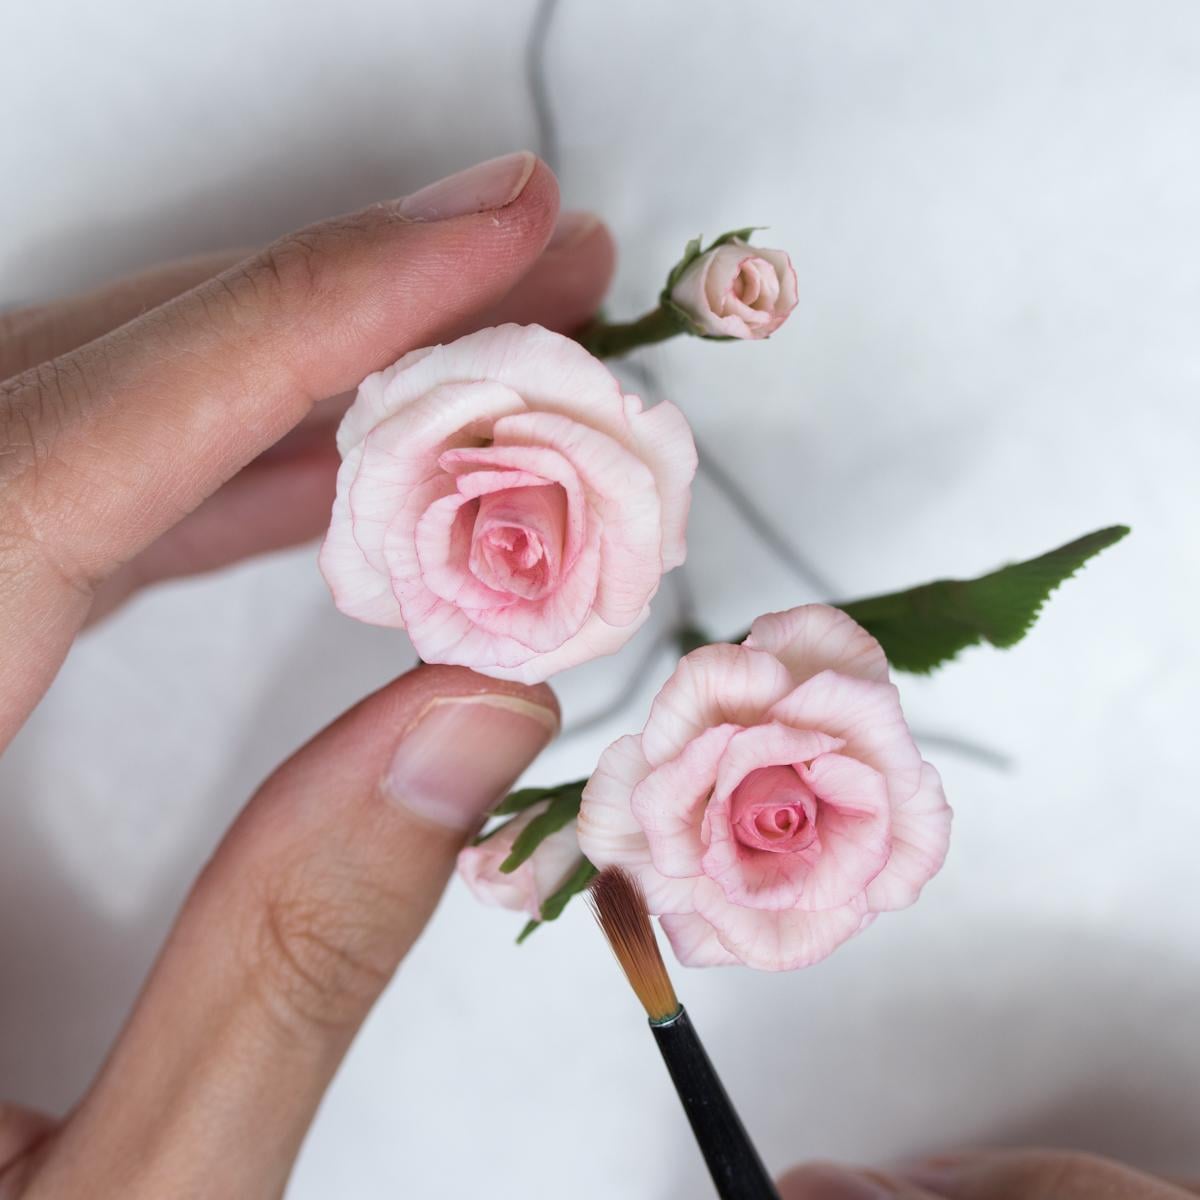
Sculpture : Making Realistic Roses from Polymer Clay
--------------
In this class, I am going to show you a simple technique to create interesting textures in flower sculptures.
I will show you step by step how to create a rose, but the technique can be used for other flowers.
--------------
While this class doesn't need any prior knowledge, I would recommend watching these two basics class first:
- Polymer clay Basics: http://skl.sh/2pc99rI
- Art and Colors, How to Pick and Compose: https://skl.sh/2u66lQk
S U M M A R Y
Introduction
Materials
Making the stem
Making the Petals
Making the Leaves
Finishing Touches
Conclusion
M U S I C
Amarante http://www.youtube.com/AmaranteMusic
Meet Your Teacher

Inspired by natural forms, Stephanie Kilgast's artwork is an ode to nature and its current biodiversity. Plants, mushrooms, insects and other animals encounter in a vibrant swirl of colors under her brush or sculpting tools.
Since 2017, in her series "Discarded Objects", she grows colorful organic sculptures on human-made objects, celebrating the beauty of nature in a dialogue with humanity, questioning the lost balance between human activities and nature.
Her work has a cheerful post apocalyptic feel to it, a reassuring reminder that nature has the capacity to grow back, if we only let it.
She built her reputation and her sculpting skills around hyperrealistic miniature food sculptures. Her work has been exhibited in ... See full profile
Hands-on Class Project
For this class project, I invite you to sculpt your own rose.
You can pick and choose your favorite colors or follow the suggested colors in this class.
If you would like to share your project on social media, don't forget to tag me @petitplat
Please also share your project with the class, as it is very inspiring to other students.
While this class doesn't need any prior knowledge, I would recommend watching these two basics class first:
- Polymer clay Basics: http://skl.sh/2pc99rI
- Art and Colors, How to Pick and Compose: https://skl.sh/2u66lQk
xx


Class Ratings
Why Join Skillshare?
Take award-winning Skillshare Original Classes
Each class has short lessons, hands-on projects
Your membership supports Skillshare teachers
Learn From Anywhere
Take classes on the go with the Skillshare app. Stream or download to watch on the plane, the subway, or wherever you learn best.