Transcripts
1. Introduction to the Seed of Life: The seat of life is a
universal symbol of creation. This ancient geometric figure consists of seven
overlapping circles and is the true
building block for all other complex sacred
geometry formations. In this course, we
will begin with a brief overview of meanings attributed
to the seat of life. Followed by a list of supplies, tips for using your
geometry tools, and step by step instructions
to draw your seat of life, using nothing more than
a compass and paper. We will continue to explore this symbol by connecting
intersections, using free form creativity and nesting and expanding
within the original shape. Your final project
will be to take on your personal creative
mission by creating an illustration using the
medium of your choice. My name is Anna Victoria. I'm a watercolor artist, teacher, and author of
the modern Maker series, which includes my
most recent title, creative drawing symbols,
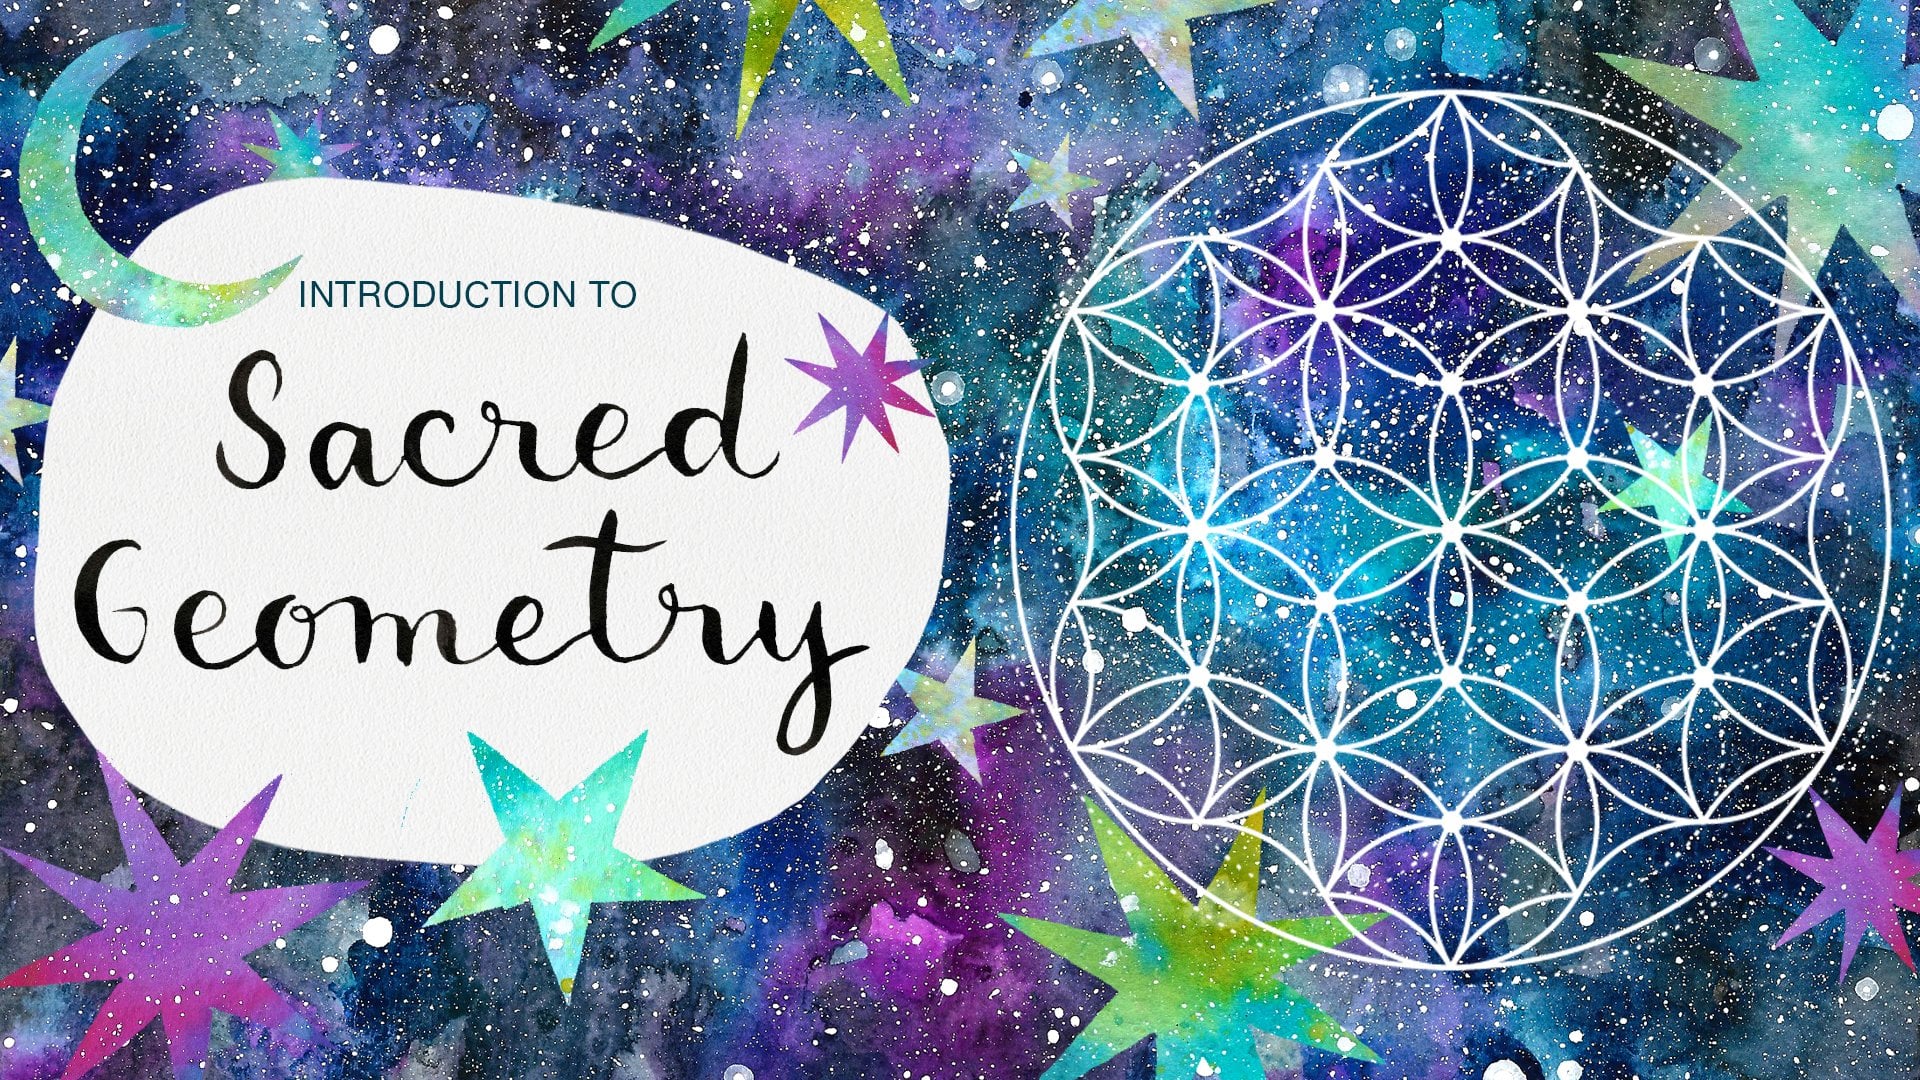
and sacred geometry. Before taking this class, make sure to take
my introduction to sacred geometry course
here on Skillshare. As this topic is part of a
growing geometric system. Now, find a relaxing spot, prepare your art supplies, and open your mind to a
meditative artistic experience.
2. Drawing Instructions and Meaning: Now it's time to actually begin drawing our sacred
geometry shape. The shape is called
the seat of life, and please make sure to go back and watch
my introduction to sacred geometry class
before diving into this one because that's where
I'm going to be explaining all of the
theory behind it, a little bit of context, why the shape is so powerful. And the shape that comes before this is
actually a scapes, which is what we
make in that class. So Please make sure to watch that class to take it and actually
do the exercises, true transformation really does take place not only by
observing these shapes, but actually drawing
them and figuring out how to work them
on your own, okay? So please make sure to
take a look back on that. And what we're going to do
now is draw the seed of life. And the seed of life represents that moment where our geometry grid really sets into motion, and these shapes begin to
take on a larger meaning. So as you know by now, once you've watched my
introduction class, we really do think of our
circle as the source. And it's this one circle
that's the same shape, I mean, the same
radius, same size, and it duplicates it,
replicates itself flawlessly, and we start creating
these intersections of overlapping circles. And in the case of
the seed of life, it's going to create
this beautiful It's like a blooming flower
shape at the center. So once we begin to explore more complex
shapes, if you check out, for example, my book, creative drawing symbols
in sacred geometry, you'll be able to Take a
deeper look into that. And as you continue to
elaborate more on these shapes, you'll understand that
the seat of life is truly at the base
of everything else. So once you get this right, you'll be able to
draw all sorts of sacred geometry shapes right. So that's not to say that this shape isn't super
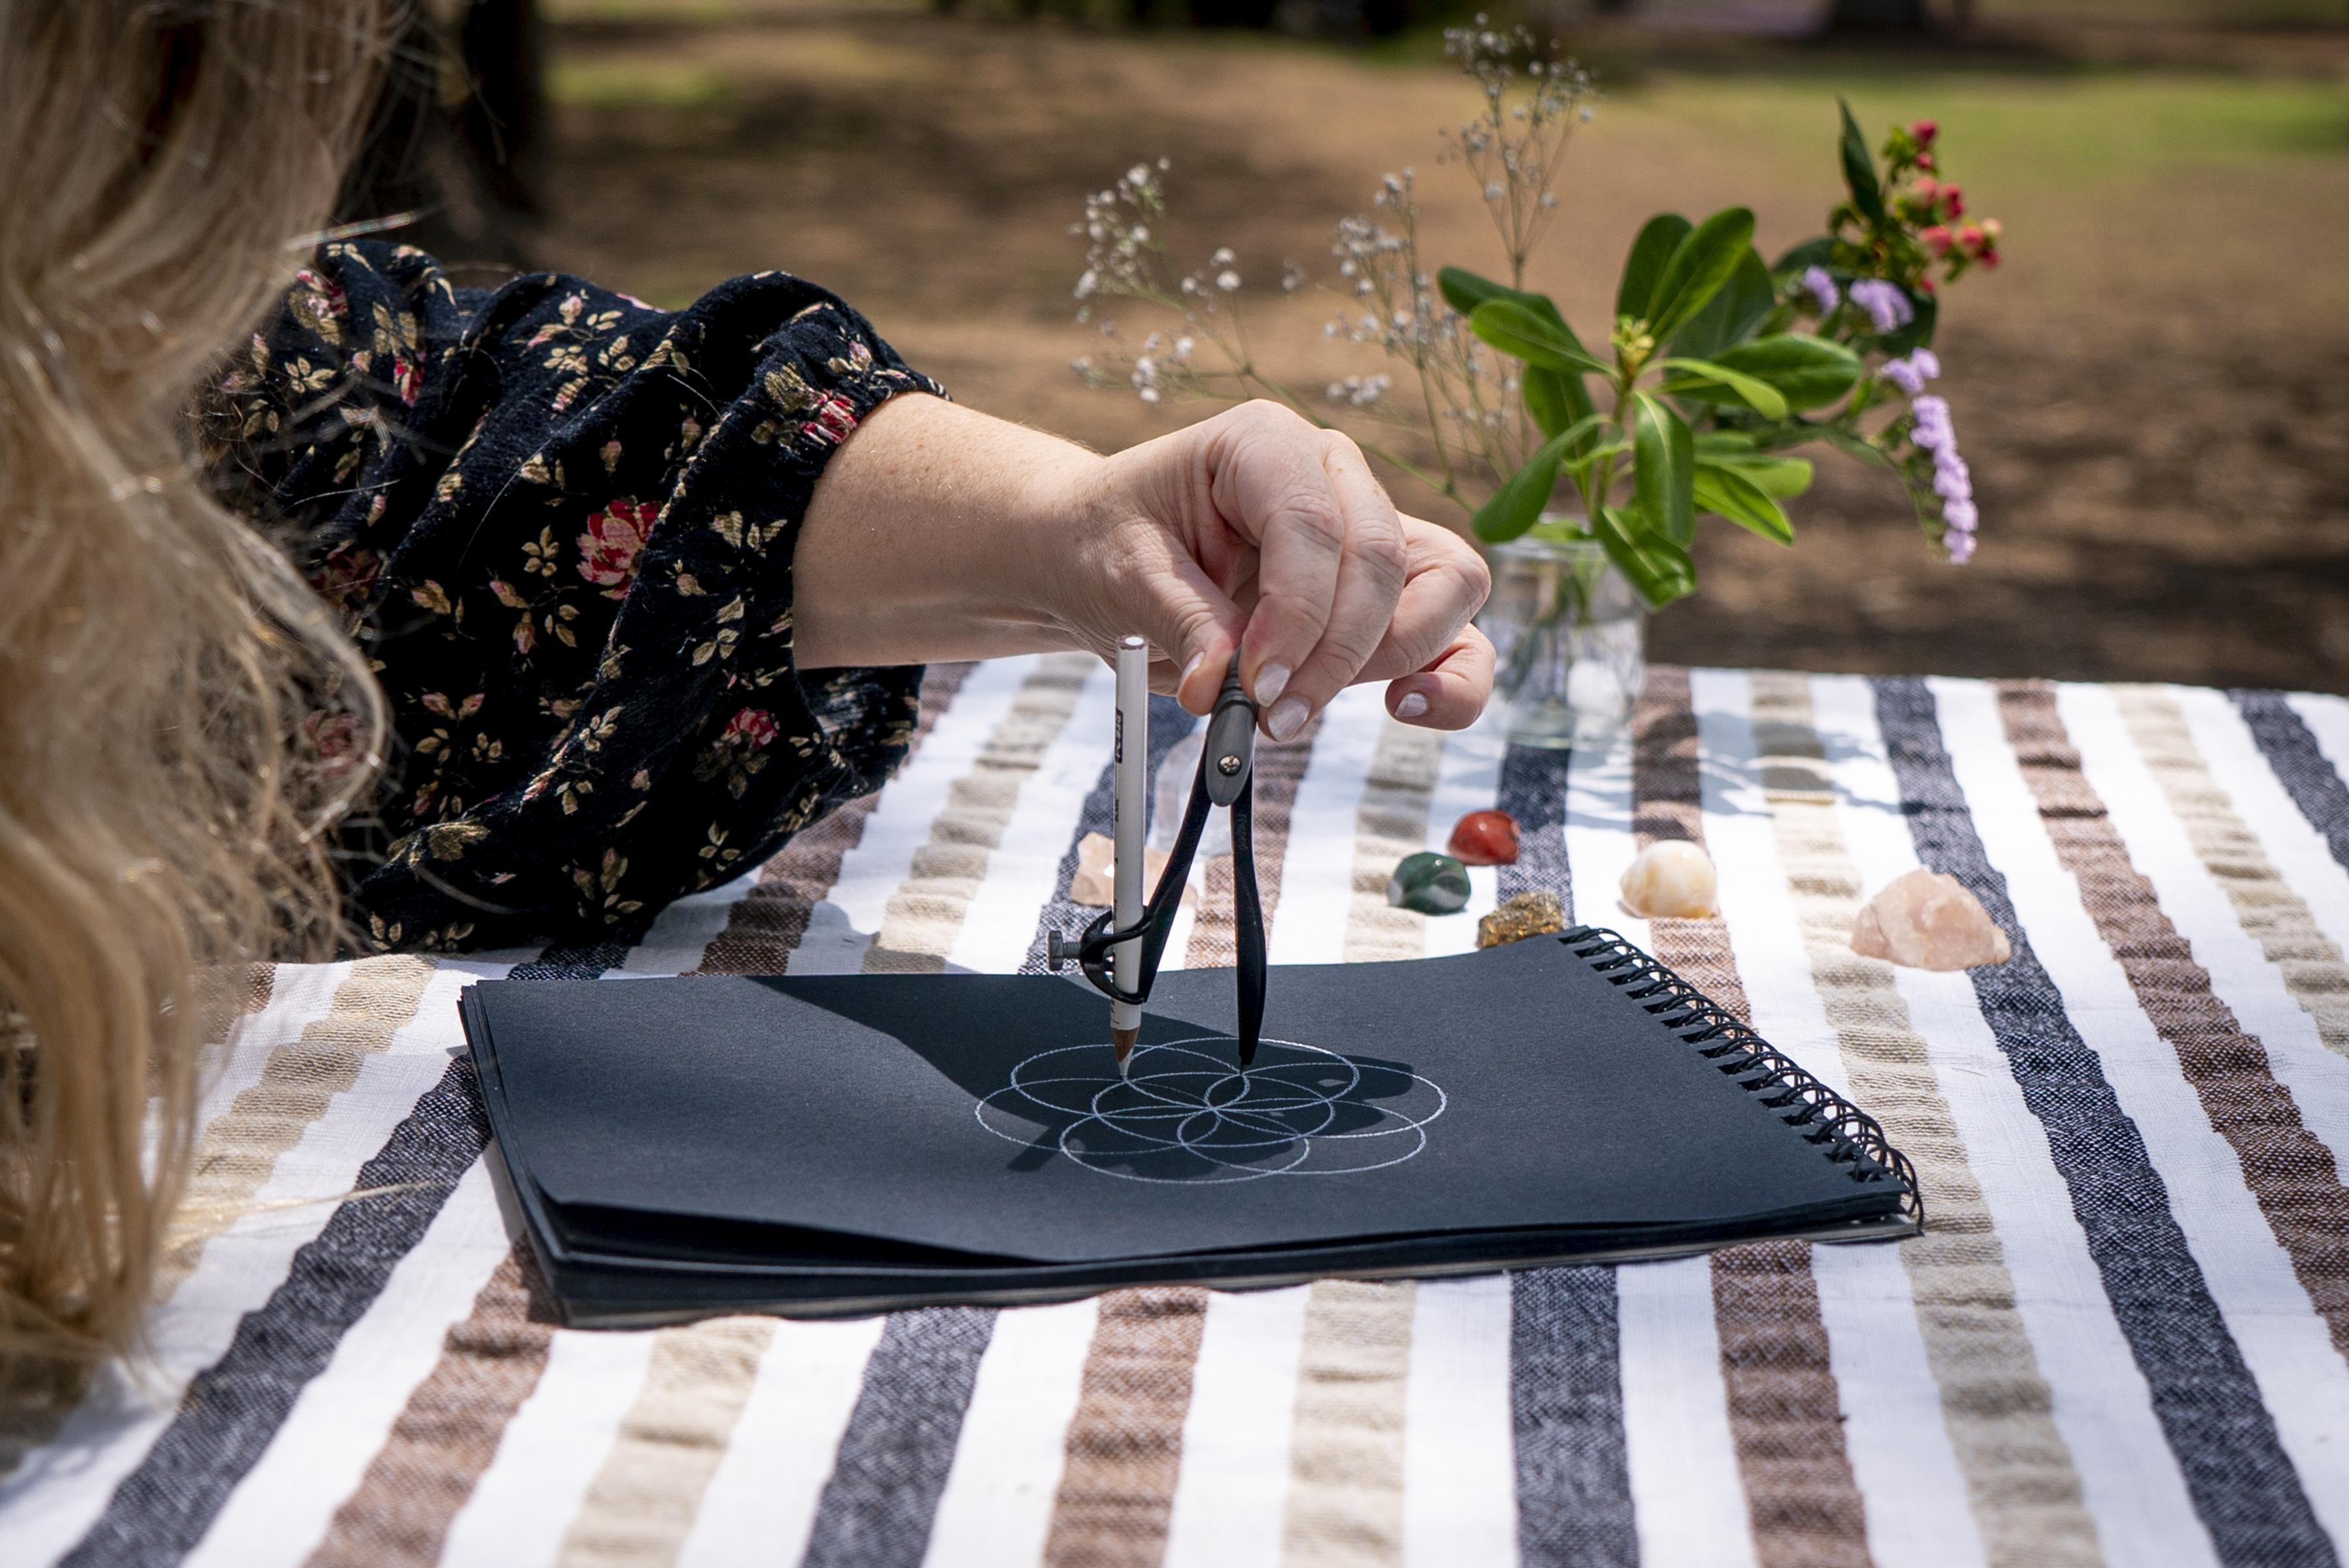
interesting within itself. So to draw a seat of life. First thing I did was, I drew these lines on my page
to find the center point, and you don't have to do this. But I really like being a little bit structured
and organized when I'm drawing geometry so that I know exactly where
my center point is. And then I'm going to be
using this compass here, which has a pen. Usually when I would be
drawing sacred geometry, I would be using a pencil because then I'm
going to be doing a lot of artwork within it. But for teaching purposes, I'll be using this pen so you can actually see what I'm doing. So we have the center
of our page right here. And what we're going to do is actually just begin
drawing these circles. Now, the one trick
here is just make sure that your circle isn't too, isn't too big where the actual shape isn't going
to fit in there. So this is just for reference, this is a pretty
good proportion. I'll actually show you the exact measurements
that I'm using just for just for reference. So this is the
paper that I showed you in the supply section, it's nine by 12 ". So if this paper sheet
of paper is 9 " long, I'm going to use my center, and yeah, this is about an
inch and a half radius. That gives me enough
space to actually create the seat of life. So again, notice
how I'm being like, There we go. Pretty sturdy here. You have to make sure that your needle is really
stuck in there. And don't really worry about
markings on your page. The most important thing is
for you to really make sure that that this needle point
doesn't move around, right? All right, so now we
have our perfect circle. This in sacred geometry, usually the original circle
is called the source, right? So the source begins
to replicate itself. And this basically means that we're going to
start interlocking these circles to create our
sacred geometry shapes. And at this point here, what I'm going to do is you're going to grab the needle again. And since I want
it to be straight, remember these
guides are optional, but I really like to
do it this way so that turns out
symmetrical on your page. So you're going to
place the needle point again, making sure that it's That it's really stuck in there, a good way to measure to know that you've done
it right is that the original center should align with your
drawing tool here. Make sure that that's
really secure, and then we're going
to start going on around and remember, always hold your
compass at the base, never using one of the arms. If you move it
even a slight bit, your entire shape will be
sort of out of balance. Now, here, if you've taken
the introduction class, you will recognize
this shape by now. This is a ssapics this here is the true origin really
of all sacred geometry. And now we're going to
take it one step further. Once you get the hang of this, it all starts to
become very organic. So what we're going to do
is we're going to take the intersection of the two circumferences
here on any side. So we're going to
start out here, and then we're going to continue
to draw circles, right? So, making sure this
needle is very secure there and looping it around. And then always keep your eye on the original
circle in the middle. So it's always this
seems pretty simple, but I have taught this
in person a few times. And I do notice that
sometimes, you know, first timers can get confused, where does the next point go? So you always have
to pay attention to your middle circle and
the newest circle, right? So pinning the needle. Right at that intersection, and we just continue
to loop around here. Okay So at this point, our first petal is
actually formed here. And as you can tell, it's already starting
to be super exact. Precision is super important when we're drawing
sacred geometry. Just a slight hair off and it can really throw
the entire design out. Continuing here. Our
second petal is formed. Again, going back to where
our original circle is, and the newest circle,
that's where I'm going to pin my compass needle. And make sure to never
change the radius here. The aperture must stay the same from beginning to
end for this to work. And then I'm actually going
to flip my paper just so it's easier for me to work here. Again, center and the
newest circle here. You'll see that this is
actually our final circle. So source has replicated itself. And at this point, you
have a seat of life. This is the seat of life. As you can tell, it's
pretty simple to draw, but there is a ton of
meaning behind this. Um, I'm going to wait for just make sure the
ink dries totally. It won't take too long, but I do want to erase these
guidelines just so you can see it in its perfect form, and then I'll tell
you a little bit more about the shape
and what it means. So this simple shape you can already see that
it's quite beautiful. It looks very medolic. There's a lot of room for
artistic interpretation. There's tons that you
can do with this. Even coloring it as is is
really fun within itself. But you know this shape, the seat of life, is super
powerful because it truly is. It's the precursor for
the flower of life. And that's where sacred
geometry starts getting super, super expansive, and there's all different sorts of complex
shapes that fit in here. But before, don't get ahead of yourself and really
enjoy the seed of life. This is a beautiful shape. And there's tons to do with it. And there's also a lot
of meaning behind it. You know, you can take sacred geometry as far as you want to. If you start
investigating physics, mathematics, numerology, you know, symbolism in
different cultures, et cetera, et cetera, you will find all sorts of information related
to the shape. My approach is to keep
it a little bit simple, a little bit more art focused, but I will tell you a few interesting
just facts about it, and especially the number
game kind of related to it. So the seat of life has
one circle in the middle, which is called the
original source, and then it has six
circles around. So that makes seven circles. And when you start
thinking about numbers and how the
number seven is represented in
general life, there's It's no wonder that there's so many metaphors associated
to the seed of life. So if we start thinking, you know, there's seven
days of the week. There's seven energetic points that are called the Calcas. There's seven colors in
the rainbow spectrum. You know, within
Biblical symbolism, there's tons of different associations
to the number seven, including the seven deadly
sins or the days of creation, seven heavens, et, et cetera. There's also seven
continents, the sevens, seven pure notes, the
metals of antiquity, I mean, seven wonders of the HN. And you can go on and
on with a number seven, and if someone, you know, if you have some
personal knowledge, something that you've studied, maybe a little bit more
within the Let's say, spiritual world, you will
also know that there's tons tons to associate
with the number seven. It's a very powerful number. And that's why
this shape is also considered to be so
special and so pure. And then when we start
actually observing it, we can see that
well, number one, there's actually a hexagon that's going to be formed
within this shape. It has six petals. So when
you unite these six points, that's where you
get the hexagon. Therefore, you will
also get the hexagram. Um, you can refer back
to my introduction video for a little bit more on meaning it's actually
a star of David, the six sided six pointed star, and this is a beautiful these petal
formations start to form here, and that also can be seen in snowflakes and
different flowers. There's entire books on
floral formations that fit into the seed of life in different sacred
geometry shapes. So there's a lot that
you can look into here, and for me, as I've
mentioned before, the really kind of a
bewildering part when I started studying
sacred geometry was just how much there
is to look into it. So for me, my approach is keeping it simple enough
so that you don't get caught up in all
of this and just enjoy the creative
transformational process that you'll go through when you're actually
drawing these shapes for yourself because
it really is very different to just
observe them as it is to to begin drawing and having all of these
shapes interlocked perfectly. It's this beautiful sense
of relief and perfection, and then you're just free to begin creating and letting
those juices flow. So I mean, I could go on and on about different meanings
that you can find here. One that I really enjoy is that if you were to draw a
circle around here, and draw lines throughout
all these intersections. The seat of life is also
known to be some sort of interpretation of
time because a clock, like the hands of a clock
would fit perfectly here. Another example with the hexagon is a perfect shape
for honeycombs, and that's how the
honeycomb they're called bees are like
the divine creator, B this hexagon shape fits
perfectly within each other. It turns into this grid. So I mean, there's so much
that you can look into I'm going to try to
keep it as simple as possible because
what I really want you to do is just
explore drawing these shapes. And the first step in this is that you're going
to draw this shape. And in the next lesson, I'm going to teach you
about exploration, about really finding
variations within this shape and how that can
be extremely magical as well.
3. Seed of Life Variations: We're going to begin to
explore within the shape now. I'm going to teach you well, I'm going to
demonstrate actually a few variations.
This is very organic. I'm going to start just playing
around with the shapes, and I want you to do the same. So the really powerful part about specifically
the artistic focus with sacred geometry. Is how beautiful the process can be when you start to just play and explore
within these shapes. As I said before, especially in the
introduction class, sacred geometry really nests and builds and grows within itself. So there's a lot of
different fun things that you can do once you have
your base shapes, right? So I drew out a couple here and I'll do a few more
just to get you going, to get you started, to get
those creative juices flowing. But the true meaning here is that you find these
shapes yourself. So All you need, again, is just a pen, a compass,
maybe a straight edge, and you'll be able to discover
all kinds of fun things within these really pretty
simple shapes, actually. Even before you
start embellishing with paint or colored pencils, we're just in the
drawing phase right now. So the first thing that I'm
going to demonstrate here is, for example, we have We have this I have a
pencil drawing here. You won't be able to
see it that much, but I'm going to
actually draw over it. But it really is helpful
to sometimes trace the shape just with your pencil so that then you can
erase unwanted lines. So, in this case, what
we're going to do is actually I opened up my my compass to this
original radius here. What I'm going to do
right now is trace all the shapes along except
for the inner circle. So we're intentionally
leaving the inner circle out of this artistic interpretation. So I'm just going to go ahead
and trace all of these. Now you have your seat of life
without the inner circle, and it's also a very beautiful
shape just like this. And I'm going to take a
little step further and I'm going to actually create
some rims around here. So what I'm going to do is just slightly open up
my compass a bit more and continue to trace
the exact same circle, but just at a different radius, and I'm going to do
that all around here. There's all different kinds of things that you
could do from this. You could even
continue to create rings and rings and rings
around the same shape. That would be
really interesting. Or you could let's say you could find the center of
your original circle. And we can create a
larger rim around here, like a circle around all
these other circles. We can do that and begins
to look almost like tic like There's all things
that you can do here. I'm just going to open up the radius a little bit more again, similar to this distance
that we have here. You could do this measuring
and being very precise too. Notice how sometimes I find it a little bit easier to even
move the notebook around, especially with larger
circles like this. So at this point,
you can go ahead and erase the original circle that you had here at the center, and you start to
even create these almost like mendoic
shapes, symbols. You could go ahead
and, for example, fill in certain areas. I'll do a quick
marker demonstration here so you can see what
that might look like. This right here is your
exploration phase. So right now, as
I'm drawing this, I'm really doing it on the fly. I didn't think this out before. I did it like this on purpose. So you would see a little bit of the pretty much like the sacred geometry
game is all about. It's about finding shapes
within these shapes. Using your creativity,
letting go. After you created these
perfect mathematical shapes. Now you start using the
other side of your brain, which is considered to be more in tune with
your creativity, playing around with
color, more organic. And right now, for example, what I would do is I start
sketching out these different. This isn't perfect.
I played around. I'm just kind of
messing around a bit. But what comes from this is
ideas for bigger projects. So maybe I sketch this out
and now I figure, Hey, this might look really cool
if I really paid attention to the interlocking
rings and how maybe I can do some shadow work
within these and play around. It's about this
variations exercise is meant to be your
exploration phase. You're just playing
around, you're discovering for yourself
different shapes and different ways to use the
seat of life in this case. So I just had my
markers handy here. I thought, Hey, it
might be cool to start figuring out even
what would this look like with different colors or maybe this is almost
like a rainbow theme. What if I made it
with metallics, and it just starts to
get your brain going. And this is how you start to get all these ideas for
sacred geometry. So that's just a quick little sketch kind of
me working it out, having my seat of
life as a base. And we'll do a couple
of more of these. And again, I don't want to
spoil it too much because the true idea here is for
you to do this for yourself, to think up of
things on your own, to start looking at
the shapes and saying, hey, maybe, what if I erase? What if I add? What if I create more and more
shapes within this shape. And that's the true value
of sacred geometry as an artist is to really do
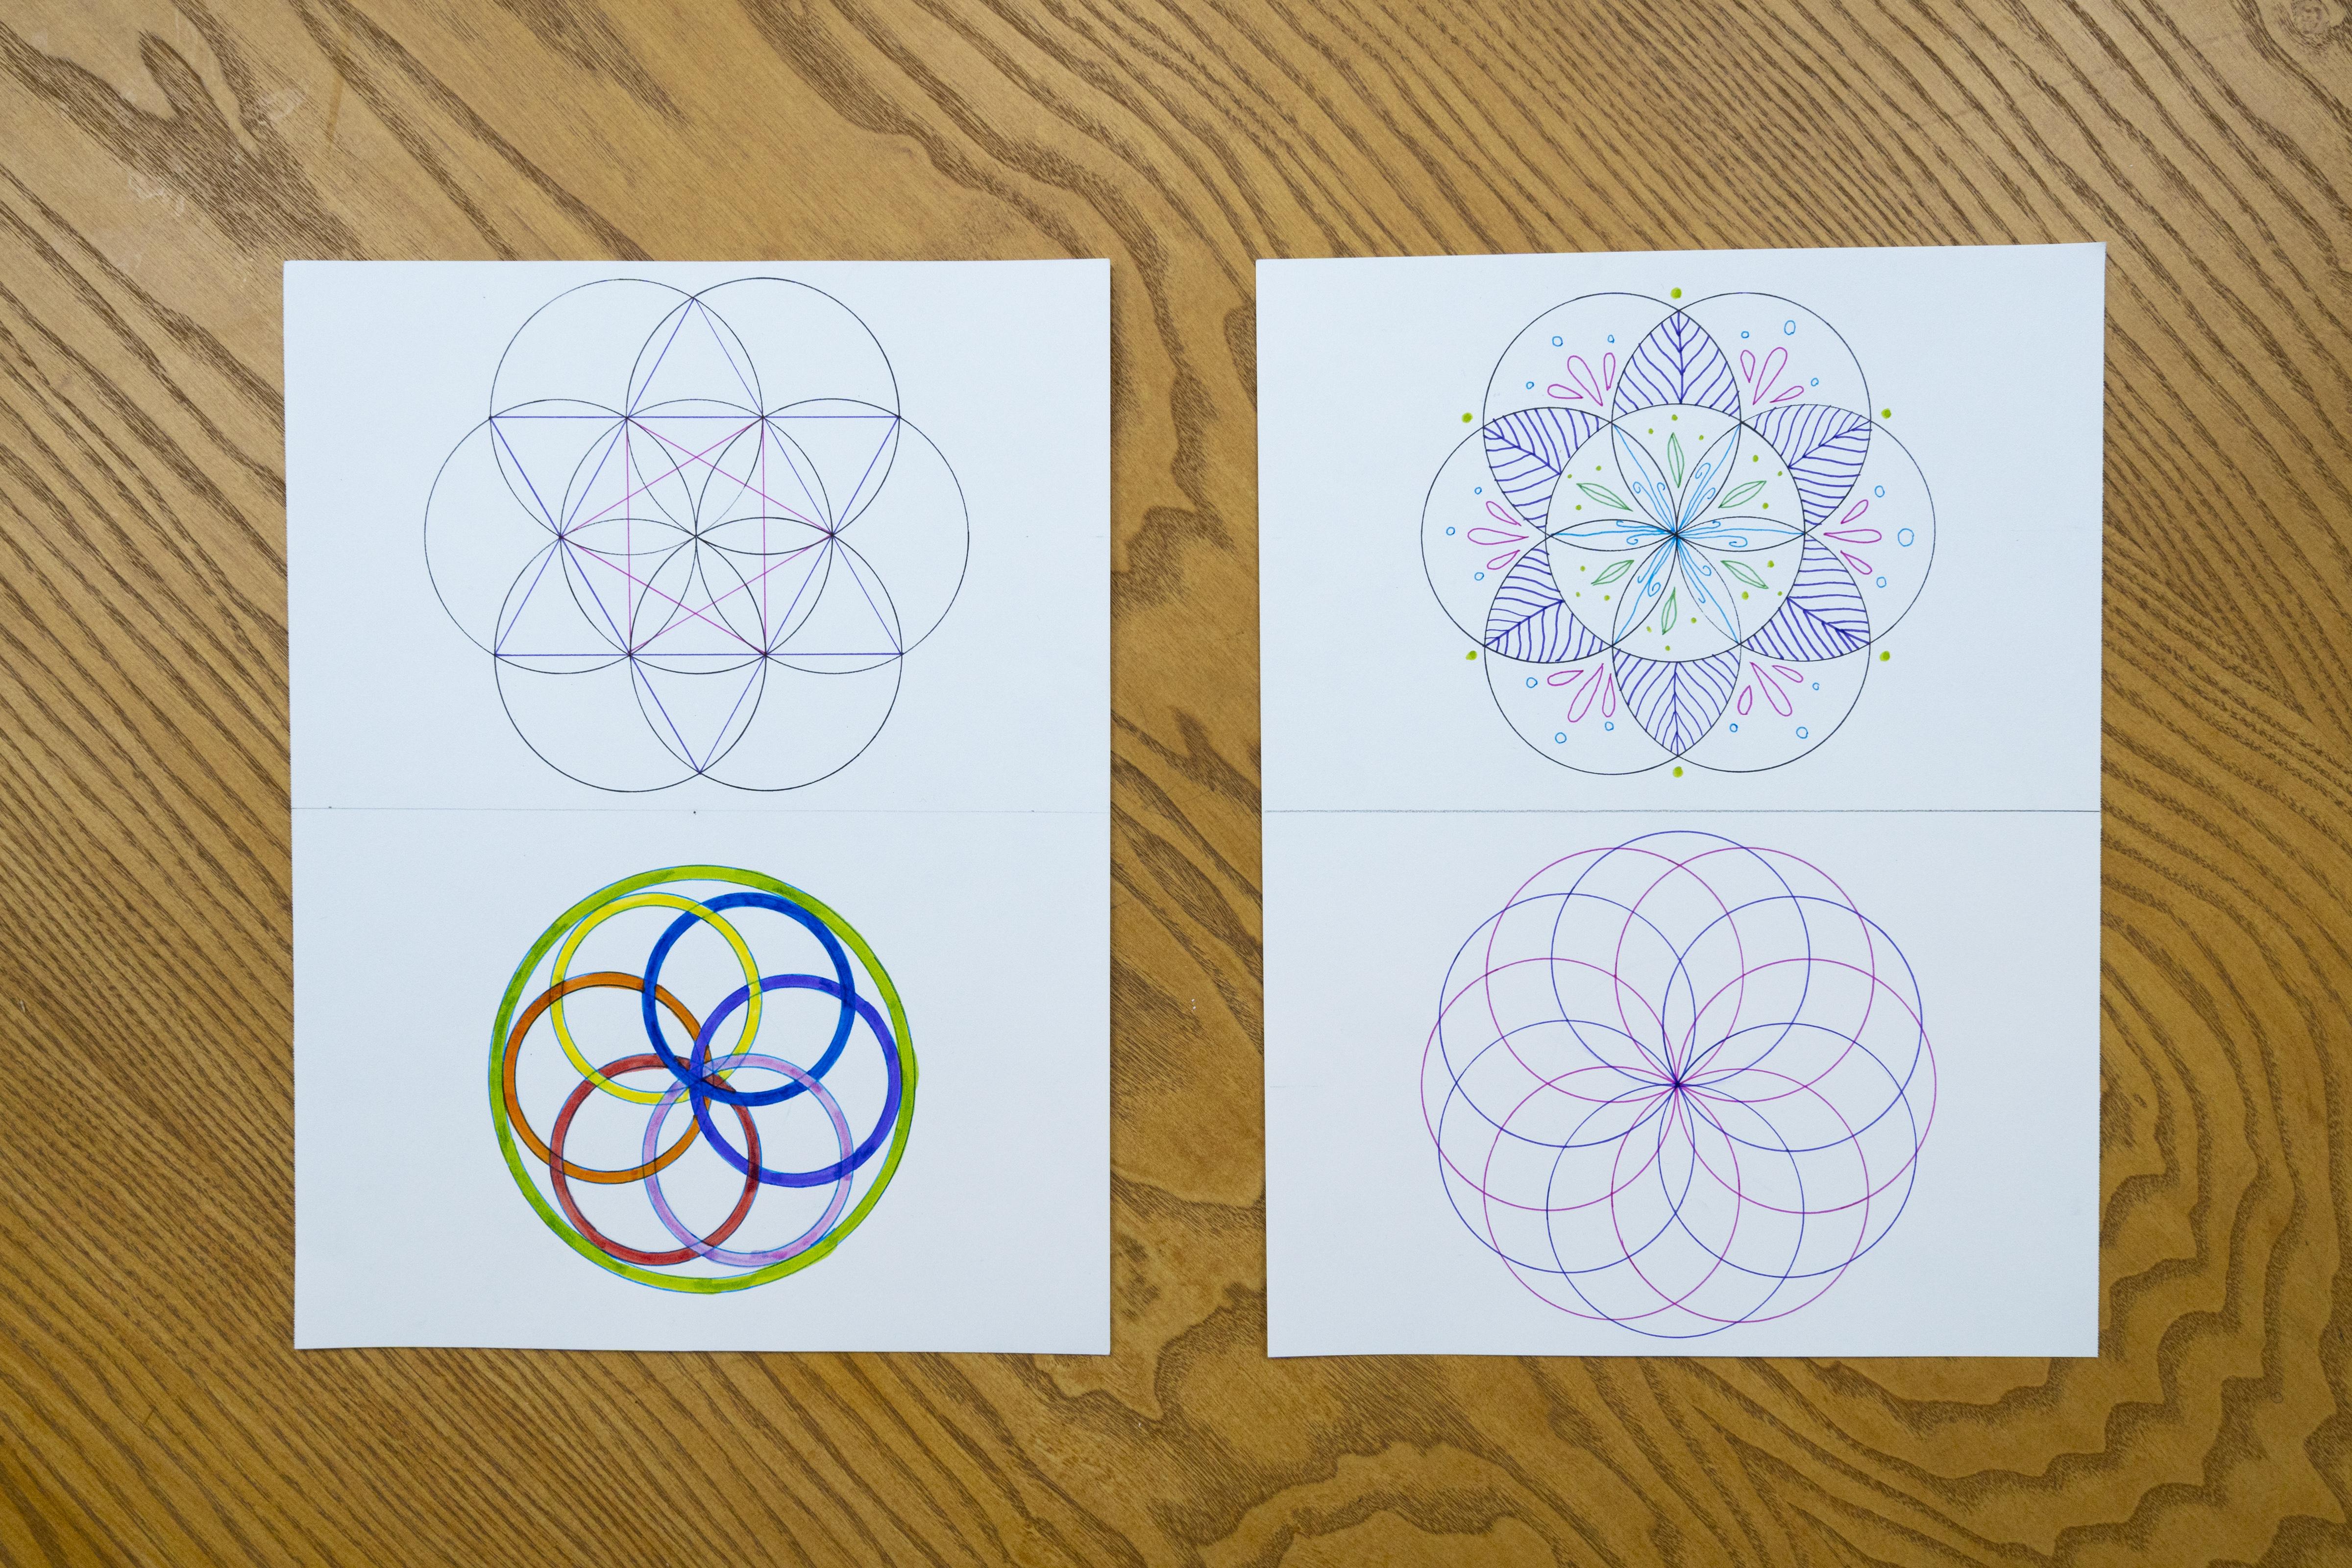
this exploration phase. The next variation that
I'll demonstrate for you is actually it's a hexagram, which is the six pointed star, all you really need to do here is connect the intersections. This is also when your straight edge
can be really useful. And you can actually start to form all different shapes
within the seed of life. Okay. So all it is is connecting the
outer intersections to the one directly
on the other side, where you're going to
form a triangle first. And you'll notice
how perfect it is. It all aligns with all the
intersections already. So here I have that
perfect triangle, and then I'm going to do
the same on this side here. So I talked a bit
about the hexogram In my introduction to
sacred geometry class. And you'll recognize this shape because it is actually
the star of David. This is how it's
formed geometrically. And we have hexogram is made
up of two perfect triangles. One looks towards the heaven. One looks down
towards the Earth. Also interpretation
of male and female. There's a lot of symbolism here. And when you start painting
and drawing these shapes, it becomes really fun because you can decide to block
out certain areas. You can just really play around with all these
different sections. You can play around with color
with texture, et cetera. And then you can
also even create another hexagram within here
within the petal section. I'll just go ahead into that. Maybe I'll use another color to so it doesn't
get too confusing. So as you can see, we have a
hexagram within a hexagram, and it could even
go on for infinity, almost like a pattern
shape if you create a grid of seeds of life. And what's interesting
here is that you can actually even begin
to era lines, let's say you did an entire
grid of a seed of life, but it's all pencil based. And then what you
actually want to do is this six pointed star
as your main shape. Maybe you could erase
some of the guides here. You can really play around
and pick and choose. So the true idea here is that you have your seat
of life as your base. And then that's almost like an embedded grid behind all
of this different artwork, and you can start creating
lines and erasing curves, et cetera, et cetera. There's a lot that you can
play around with here. And let me I'm going
to find I actually have a seat of life grid that I created
here to give you an idea. Again, I don't want
to spoil too much. It's kind of tricky to teach sacred geometry because the idea here is for you to really have this entire exploration
on your own. But I do like to get
you going a little bit and just open up your mind to all the different ideas and ways that you can use this, and it's really a beautiful way to create artwork
that's so meditative. There's much patience to it, but once you get
the shapes right, there's a sense of
ease of satisfaction, and then you can really start
in your artistic process. So here's a little kind of
spoiler of what you can do. But again, what I really
want to do is open your eyes and your mind to
everything that you can use, how you can transform
the seat of life. So for example, here, I have
a full grid that I created, and it's just the
seat of life over and over interlocking
within each other. Again, as I mentioned before, the seat of life is truly You'll start to notice how it's the birthplace of all other
sacred geometry forms. It really does start
with a scapesis, but once we have this
petal in motion, the possibilities are endless. So start to imagine, hey, how cool would it be if you
were to create this shape here six pointed star within
each one of these shapes, and then it would expand and you would get a really cool pattern. And in fact, a lot of
different patterns and different cultures and religions
have this as the base. And then What really changes the whole thing is how the
lines are connected within. Many times this is
used as a back grid, and then this is erased, and then we have all
these hexagrams, you know, or even hexagons as what you actually see in reality, almost
like tile work. Again, this would be the shape for the
honeycomb because if you were to create different
hexagrams within each shape. It would all connect perfectly. So it's so fascinating and so there's just tons to
dive deep into here. So that's another example
of what you can do again. You could erase some
of these lines, stay just with the
stars, play around. Maybe if you're
doing watercolor, you can play around with
some transparencies, which would be really fun. I'll show you a couple of
more different ways that you can embellish your seat
of life before you start doing this for
yourself. All right. Same shape, different variation. For this example,
I'm going to show you something just a
little bit more organic. This would be more related
to I've seen a lot of medalic work done like this or just your personal
way of drawing, like your personal style. For some I'm just going
to erase this guideline, so doesn't disturb us here. So again, we have our
perfect shape here. We have our seat of life, and I encourage you to just start
playing around within it. You can start maybe adding Let's say these obviously look like
petals and leaves, right, which is one of the
most beautiful aspects to sacred geometry in general is how it's so
interconnected with nature. So what I'm going to do
is I'm going to start sketching and just seeing what kind of fun organic
shapes I can find in here, so I'm just going to start
drying out some sort of petal. And you can just sort of
follow along with me here and And you can come up with different
ideas for yourself. But the main thing I'm doing here is just taking
it out of the geometry, perfect symmetrical realm and taking it more into that
organic hand drawn feeling. So this is a really
fun activity if you're doing painting or colored
pencils for example. So I have that first leaf
example and then I'm going to see maybe these
look like petals. Maybe I can do like some sort
of line here in the center and maybe even just
play around like that. You can start maybe just
some drops of water. This part is really fun.
You can just really explore have fun here. So remember the idea here is what you do in one section
you replicate and the rest. I'm going to continue
drawing that just to see what it looks
like in the end. So as you can tell, you
can just play around with this and start
drawing and start tracing. Again, all of this is to
start getting ideas for maybe you can play around and doodle and just do it
for the fun of it. But usually when
I have some sort of sketch like this
that I really like, I'd like to save this
and actually come back to this sketchbook
for reference, Today I feel like painting
this big watercolor painting. Let's look around
and see what I've discovered within my
safer geometry shapes. And for example, this would be one that I could pick
up and say, Okay, so this is a pretty
simple drawing, but maybe I'll make
it more complex. Am I out watercolor layers or do some mixed media in there. And it's a great way to
just get ideas, right? Start. No pressure. You're just sketching right now. So it's all about this
exploration phase. You're just finding all
these different variations, you're playing and actually what your final project
is going to be. You're going to upload
to the project gallery, different variations
that you found, and then you're
going to actually upload a finished piece, an artistic piece medium of your choice, your
creative interpretation. All right, so there's one more fun variation that I'm
going to show you, and it's actually It's actually a 12 petal mandolic shape. And this is also the beginning stages of what's
called a Taurus or vortex. So that comes much later, and you'll be able to check
that all out in my book, creative drawing symbols
and sacred geometry. Again, I don't want to spoil
it too much because the idea here is for you to play around and discover all
this for yourself, but I'm going to
get you going and show you all the different
things that we can start to discover here. So What I'm going to do is you have this
inner circle right here, and to begin drawing this 12
petal manda or vortex shape, what you're going
to do is connect this intersection to
this intersection, the one that's directly
on the other side, and you're going to
make a little marking. So right here, where
your initial circle is. So again, this is going to be a might be a little bit
hard to see on screen, but I do need to
have a B with pencil at this point because I will
be erasing lines later on. So the idea is to mark the center point at each
of these sections here, so you go into the
outer intersections. You make sure this is
completely aligned. And then you just make a
little pencil marking here. So you're going to
do that three times, which gives you six points. And again, it's all about holding your ruler
or your straight edge. So notice how we haven't even
used measurements at all. It's all about finding all
of these divined proportions within the seat of life within your sacred geometry spaces. You compass and you don't
really need a ruler. You can use it the
opposite sides with no inches or centimeters, and that would work
out just fine. So what we're going to do
now is we are actually going to start tracing
these other circles here. What I'm going to go
and do is I'm going to trace over these original
circles that I had here. I'll do that in
one color and then continue the second round
with another color, so it doesn't get too confusing. I'm just going to go ahead
and place this pink pen here, and all I'm going
to do right now is just trace over the original, and I'm going to ignore
the middle circle, y? As I'm continuing to
draw here, again, I'm just tracing over this
original seat of life shape. One of the things
that really comes to mind when drawing
sacred geometry is how much of a meditative
practice this is. It really is about imperfections
While they're okay, you do have to actually
be pretty precise here. You have to work a lot
on not getting ahead of yourself or trying to
draw these circles too fast or really, if you mess it up, it's
okay. Start again. Let go. You have to sort of
be a little bit unattached. So it really is about
having that calmness. And be able to just enjoy
the entire process and really that satisfaction that comes when you've
created a perfect shape. Then again, the other side of our brain will come later
when we start to be able to actually use our
artistic interpretation where we can be a lot more loose but having this as
a grid as a base. I'm just going to grab
a different color Pen right now so you
don't get confused. So it's pretty clear
what I'm doing, and the compass is going to stay at the
exact same aperture. So the length of your radius is going to be exactly the same. We're pretty much
doing another seat of life kind of overlapped
to the seat of life, but this is where
you start to create. Really interesting shape. So I'm just going to
make sure with one of these circles that I've got the same type of
measurement here. Sometimes when you change
a color around the color, the compass can
shift a little bit. So to demonstrate that, I'm going to make
sure that I have. I'm going to my needle is right here where I
did that marking ago, which is the exact center point of this area of
the circumference. Again, I'm just placing
my needle in here, making sure that it's
very firm and secure and going ahead and starting
to circle around like that. And you've noticed by now, sometimes I even prefer
moving the paper. It's a little bit
easier that way. And I'm going to
continue around. So I have my little
markings here. They're very subtle right now
because they're in pencil, which I will eventually erase. So right now they're
just acting as guides. So that was the first circle
and not your circles are going to start to intersect with the original source
circle that was at the middle. So placing the compass
in here securely. And there we go. We start
the whole process again. By this point, what's really cool is that you're
starting to create these beautiful petal shapes. You can see these larger
petals here starting to form. And if you're into florals or this type of
illustration or painting, this is a really fun shape.
We're just continuing. So this can be called
the 12 pedals or it's also a seat of life
over a sat of life. Okay. What you're going to do now is just erase your
original pencil guides. We don't need this guide
in the middle anymore. We don't need the circle that we had that served as our
guide. For a compass. We have this really
cool 12 petal medalla. And as you can see, you can start to extract
all these shapes. You can see that in here, there's a really large petal. Then in here, there's a smaller
one and this can become a really fun game
when you're starting to use your artistic abilities. Remember, the medium
that you choose to use for your final project in this class is totally up to you. You can use colored pencils, you can use watercolors,
you can use guash. You can use metallics
over black paper. You can use just
all different kinds of art supplies or materials, but the true idea is for you
to explore the sat of life. And then you'll start to uncover all these
really amazing shapes. And what I'm going to do in
the next lesson here is to just share with you some
of the artwork that I've created using the seat
of life as my base. And again, really
it's not about you necessarily wanting to paint the same thing that
I did or draw, but it really just serves as inspiration and just
open your eyes to all the possibilities that you can actually create
with these base shapes. So in your project gallery, When you upload your project, you are going to be
uploading your sketches, at least four
different ideas and variations that you found
within the seat of life. It's going to become
this amazing library. You can all inspire each other. We can share, we can grab ideas. You'd be surprised about something one person see
that you never thought of, or just by playing
around what can come up. So I'm just going to show you a few examples of
actual artwork in the next lesson that will
inspire hopefully your amazing. I know it will be
a final project.
4. Project: Your Creative Mission: Now, the fun part, which is your creative mission. What are you going to do with this new sacred
geometry finding that you have once you have this
perfect shape traced out. I just demonstrated a few variations that
you can come up with, and it's time to take that
to the next level and actually create something in your personal artistic style. So again, this is not
a beginner class. If you need help with
different art techniques, please go ahead and I have tons of classes and books and stuff that can really
help you with techniques. And so what I'll do
here is talk you through Just give
out some tips and references to what we traced in this class that can be helpful for you to
connect the dots, right? Like, Oh, that's what
she did back there, or just motivate you
maybe a little to the fun things that
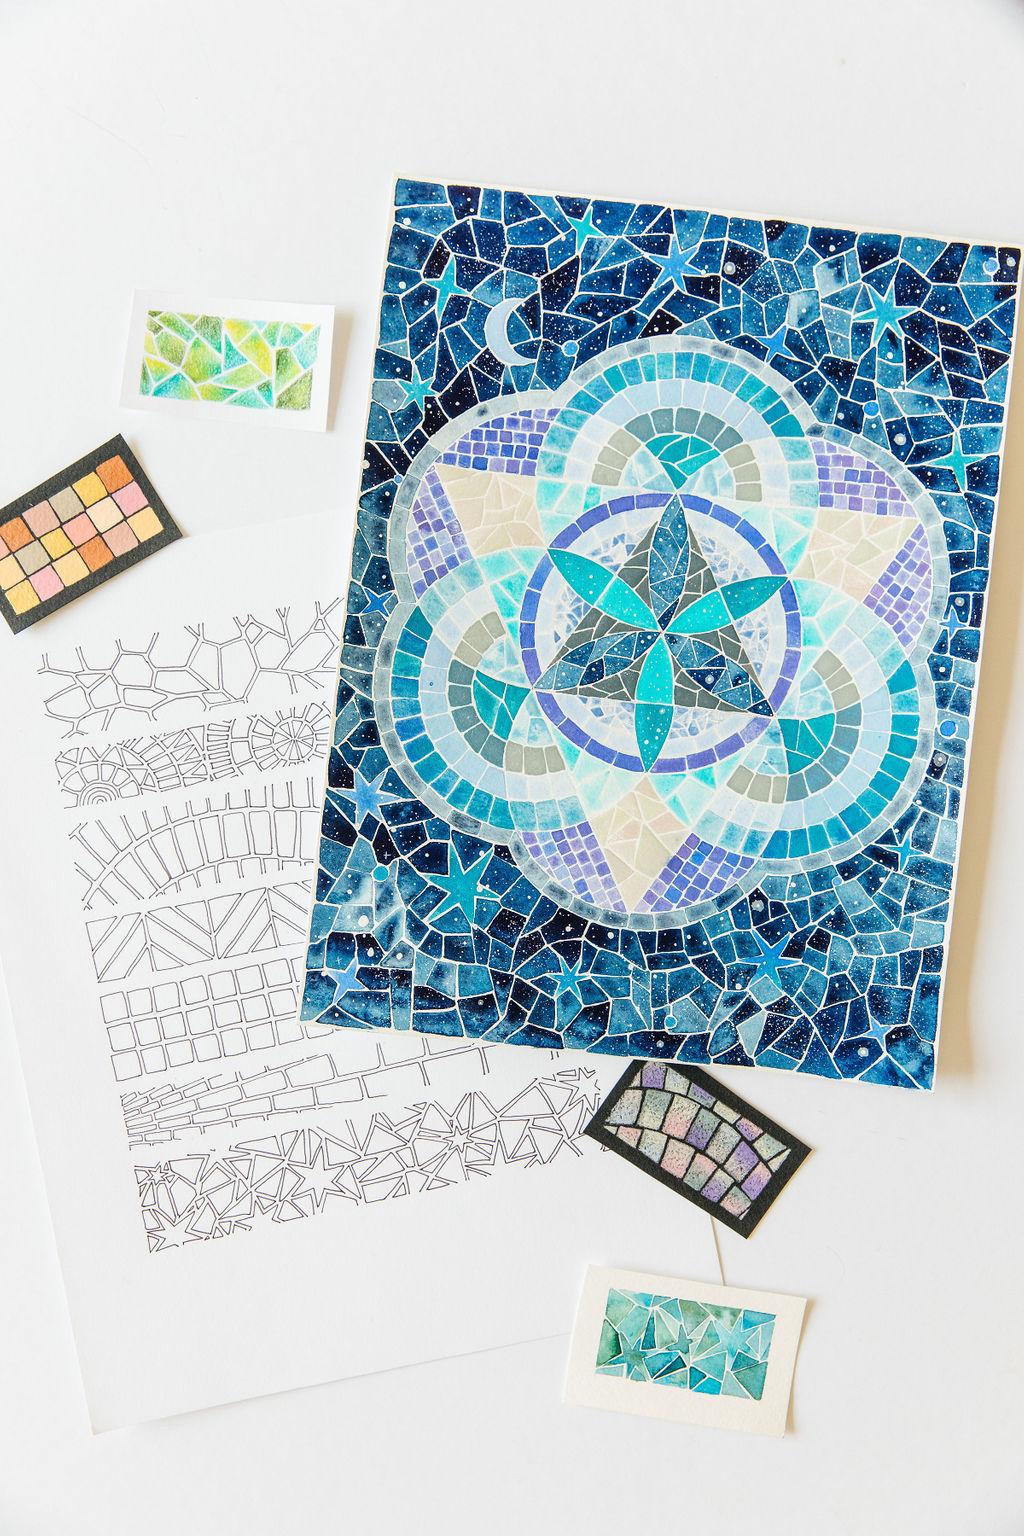
you can start to do with your sacred geometry. So I'm keeping it specific to seat of life paintings here. And right, so I'm going
to start out with this. So I'll I'll do a little bit of referencing if you want
to go back and take another class and for
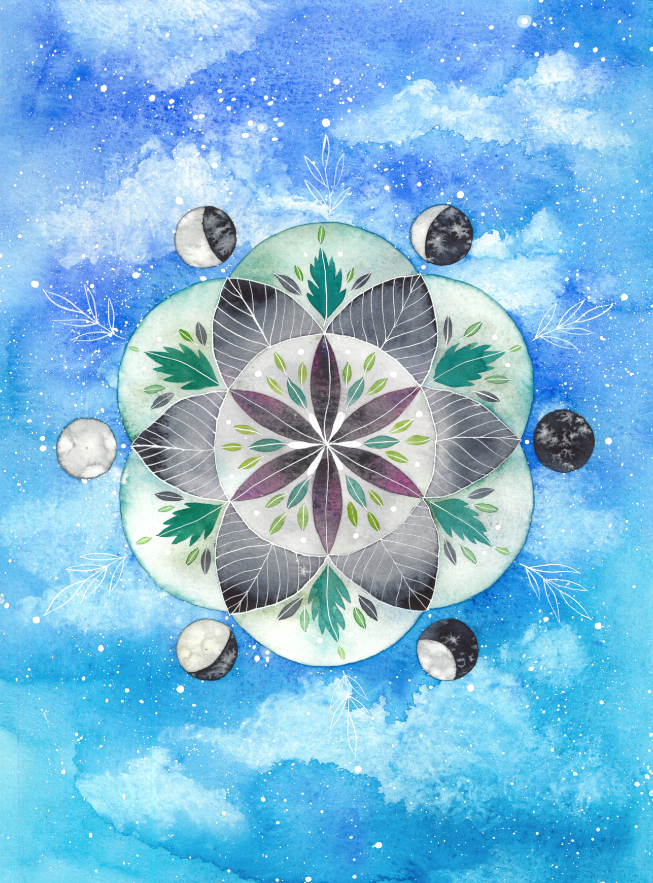
actual painting technique. So this for reference,
this painting here, I think this was
one of the first seeds of life that I did, and I was really
inspired to make it seem like it was
ethereal and floating. And as you can tell, the phases of the moon fit perfectly
around the shape. And this would be in the past lesson where I
demonstrated some variations. This would be an example of
how you can also integrate some more organic drawings into this perfect
geometrical shape, right? So I have these hand drawn leaves and the moons
with some texture here. I used a little bit of salt. All of this kind of
textures you'll find in my very first watercolor class called modern
watercolor techniques. And then this background
here is actually really fun. This is a tutorial from my book, Creative watercolor
and mixed Media, where we lift up clouds
using tissue paper. So I'll give you these
little tips if you want to actually go back
and look at techniques, which, you know, you
might be curious about. And if not, just take
a look at what I've done and really just
use your own style. For me, the more personal
your style is, the better. And what I really want to
see from you is how you interpret each of these
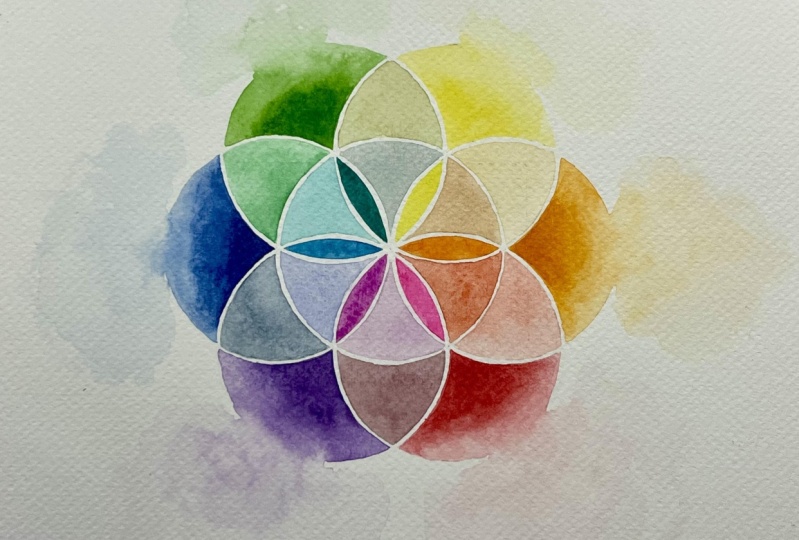
sacred geometry shapes. So specifically now we're
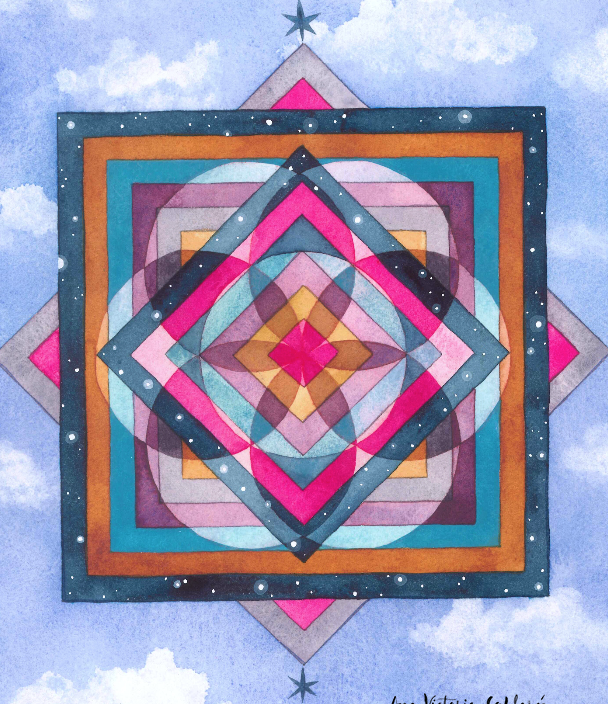
with the sat of life. Here's another little
interpretation here. It's quite simple, but
this was when I was just starting to develop
my interest towards this. You can play around
with color here. I began with very bright
pinks, almost fluorescence, and then started
playing with color, adding a bit of a
rainbow gradient, doing a little bit of
negative space here. Again, I'll reference back. These might come
in handy for you. So for example, if you want to practice this negative space. Again, go back to modern
watercolor techniques. I have that pulse and
precision exercise. It can be really helpful
for you to practice this. And if you go to I'm trying to remember
which class this was. It was watercolor guash and acrylics layering and
blending in different mediums. That's a really cool class that I think not many
of you have taken. And that's where I
teach you how to paint these sort of
like a moon glow rim, which is really cool
with watercolor. We have a couple of
little stars here. So, you know, I'll just
reference a little bit if you need help
with technique. But I thought it was
interesting for you to see all the different
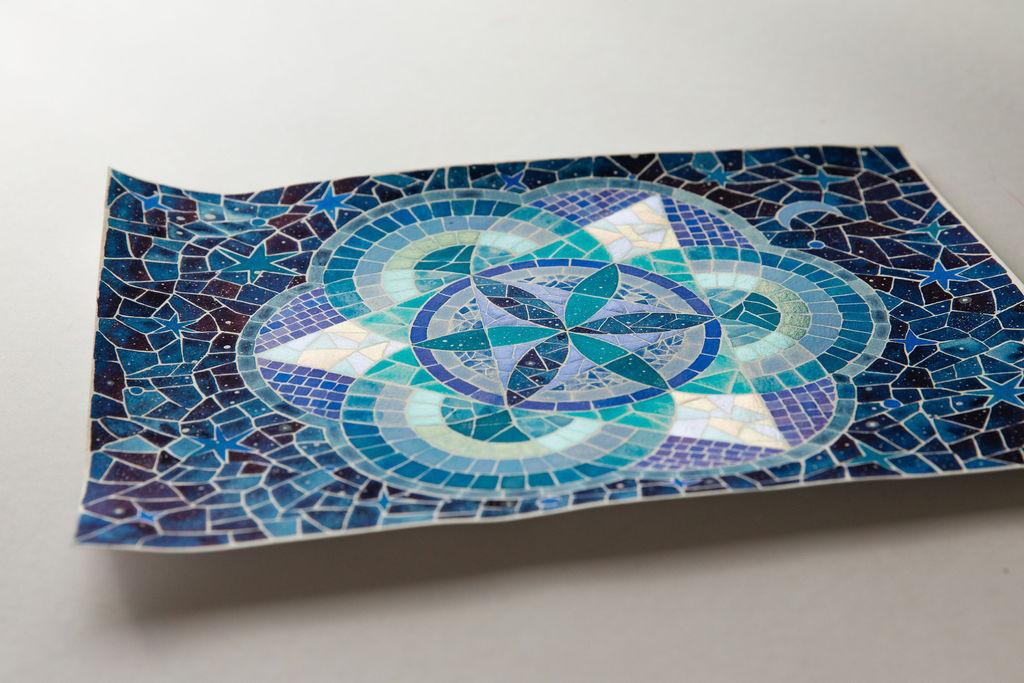
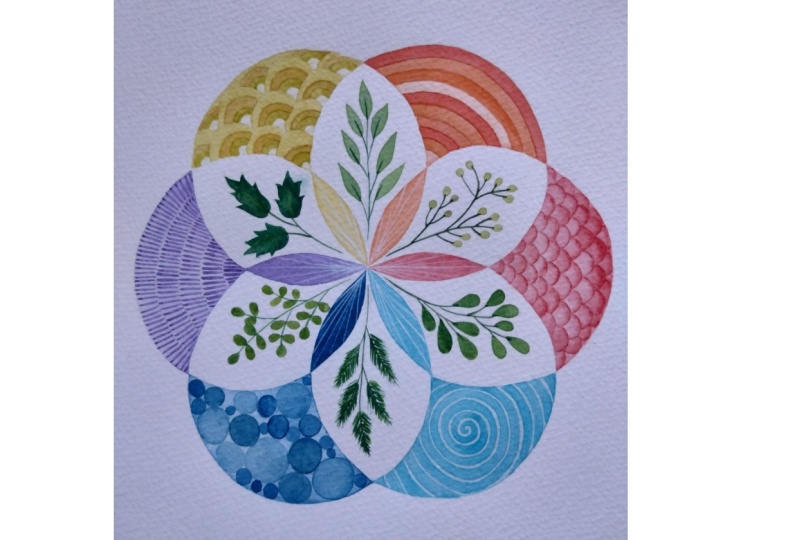
interpretations that could come out of just this simple shape. Then a really fun one here
is if you remember in the past video where I shared how to do the
12 petal mandola. So this is what my artistic interpretation
of that looks like. And in this case, I I used
round watercolor paper. If you don't have round
water color paper, but want to achieve this look, you can just cut
a piece of paper. You know, you can cut it out and then maybe frame it
like this if you like, but I happen to have some fun watercolor paper
that's in a round shape. This is also really cool because so I'll reference
my floral class. I have a really fun just
loose watercolor florals, and what I did there was
paint all around here. I masked these areas here so that I could
be free to paint and then just really simple
watercolor washes in here. Then again, I have some of that organic interpretation here with the leaves, a few details. I think I used a little bit of a color pencil to tad
in some details here. This is a really fun fun one, especially for what I
just taught you with the 12 petal manda that comes
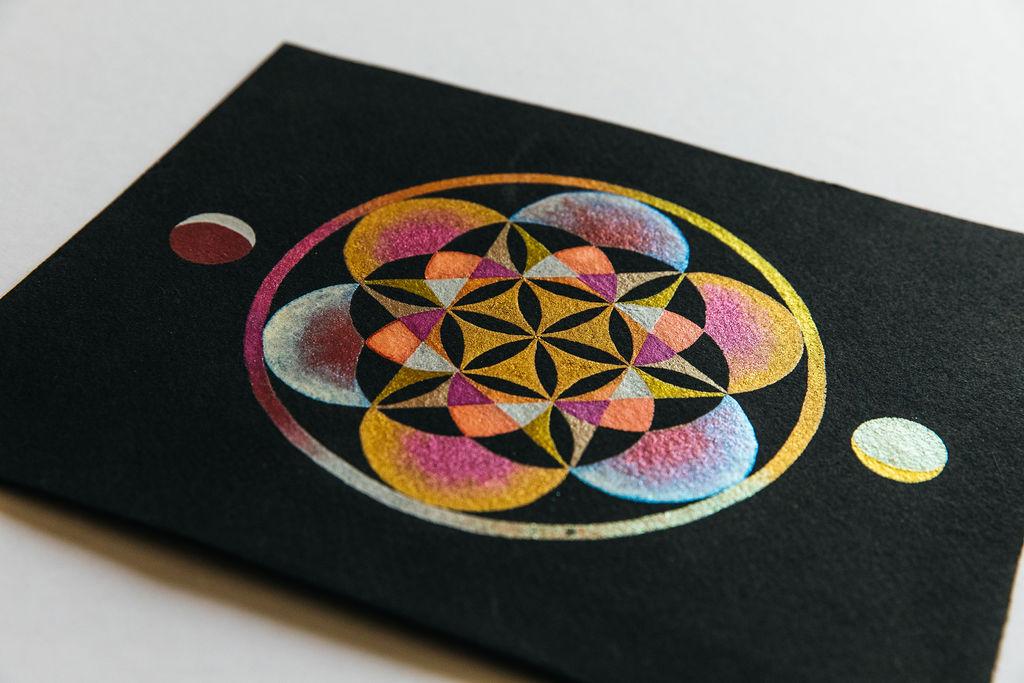
out of the seat of life. Then a couple here.
Using black paper, as I expressed in the
watercolor supply video. Doing sacred geometry on
black paper is really fun because it gives it that really mysterious look to it. And you can see how fun this is. Again, going back to the variations lesson that I just covered in the past video. Here's an example of what you
can use using the hexagram. So it's a six pointed star. And you can really
play around with that. You can, you know, overlap. Again, the phrase is how geometry nests and
grows within itself. So play around with
all these shapes. And here I'm using these really fun metallic
watercolor paints. I think I was using
hydrocolor here. She's pretty much
my go to brand. Again, if you're interested,
I'll reference a bunch of sources just so that
you don't get lost. And remember, you can always ask questions in the
discussion board. But my book, creative watercolor
and mixed media has an entire chapter
on metallics, and I suggest all different
kinds of paints, et cetera. And these are actually
featured in my book, creative drawing symbols
and sacred geometry. So a few tips there. But in reality, all it is
is it's the same shape. It really is. I'm just using black water color
paper in this case with some really
fun metalics here. And in this case, this is black paper that's
meant for drawing. So as you can tell,
this is color pencil. And then I did
actually add just as an experiment a little bit
of metallic paint here, and you can see it's
not the best paper. I always suggest,
really sticking to when you're going
to use watercolor, is actually using watercolor
paper because it can get a little bit wobbly like this. So we have some of those waves. It's okay. I was playing around. I was just experimenting, and this is just colored pencil. Like I demonstrated in
the supplies video. It's Prismacolor. And there's all different types of brands. That's just what I've
been enjoying using. And you can also tell you
start to observe, right? Okay, so I see the
hexagram in here, I see the hexagon also. I see you know, the star, and you can really
play around with it. It's all the exact same shape. There's just a few
variations in here. So black paper is always
a really fun go too. Tons of mystery to it
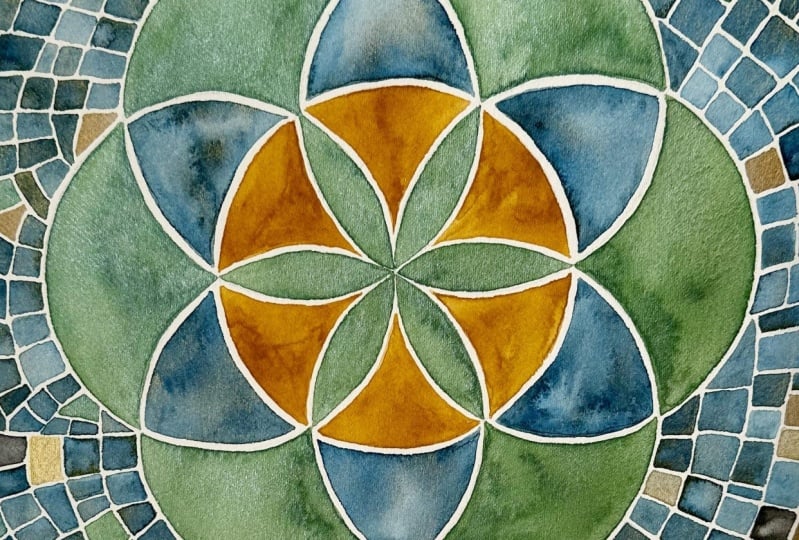
looks very magical. Here's a quick example. I quickly showed you what
a grid would look like. And there's not much to this painting except
the play with color. I kept it more of
like an earthy tone. I'm just using watercolors with different levels of
transparency, a bit of salt. You can learn more about
textures like this in my beginner class modern watercolor techniques
for beginners. So if you're new to using salt, that's where we kind of
dive deep into that, but this is just a very
simple way to go about it, and sometimes simple is just
beautiful as it is, right? And then I have this example. This is more of a
mixed media piece. It's also a seat of life. It has a few variations. You can see that's when
I demonstrated the rims. So there's a few
rims around here, you know, I drew another line and a little bit of shading. There's some collage here. These are actually
watercolor textures that I turned into moons
by cutting them out. And my book, creative
watercolor and mixed media, sort of has some fun activities on collage cutting
out, pressing flowers. So this is all just
personal creative practice that I've been doing
throughout the years. And you can start to you can start to really
involve all of the different mediums and your personal style into sacred geometry, which
is what's really fun. So this is just colored pencil and a few bit of mixed media. A bit of collage, bit
of pressed flowers. So it's really fun. It's so beautiful to be able to
play around like this. And then what I have here is, so these are more
paintings that I would describe as being
my personal style. It's not really I don't consider this too much
of my teacher style. It's more just like art
that I make for myself, but I wanted you to see
how I actually integrate sacred geometry into a lot
of my artwork nowadays. So this is I've been playing a lot with
colored pencils lately, and this is just a prisma color Drawing over some black paper. It's that son Excel that I showed you in the
supplies lesson. And it's a nature scene. There's a moon, there's some insects, there's
these florals, and I've been really
enjoying integrating these sacred geometry shapes
into this type of artwork. So again, I just wanted
to share with you, how it's influenced
my personal artwork and maybe it can yours. So here you can see I divide. It's like a half seed
of life down here, and it's all growing
out from there. Here is a I'll show
you this in a bit. This is a shape at
Mexico, we call. It's called an eye of God, and it's an
interpretation of that. These beautiful figures that
are created with threads. Actually, it's a thread, and it has all kinds of
symbology and It's beautiful. You can Google and you'll
see what I'm talking about. I've always been
fascinated with the shape. And you know, what
I did here was I sort of overlapped
a seat of life. You can see here, I just played a bit with transparencies. And I just thought it was interesting to see
how this would fit with the diamond and
the square shape over it. And again, this is just
like me going into my personal style
and exploring and playing around
with these shapes. But I wanted to share with
you how I've sort of, you know, intertwined it
with my personal style. And again, the background
here is these lifted clouds. You can find this
tutorial in my book, Creative watercolor
and mixed media. We have a full chapter on different skies and stuff,
so that's really fun. So yeah, Google o
if you're curious about all the meaning behind
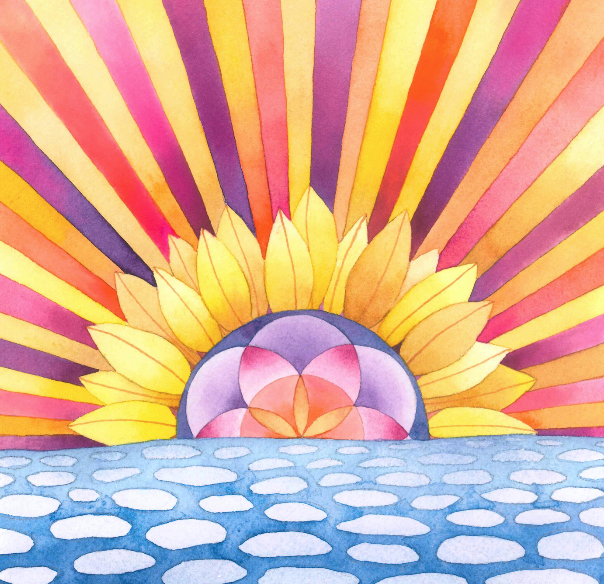
us and how it's created. And lastly, here's just another one
of my personal pieces. And yeah, again, it's artwork
that I create for myself. It's not really something
that I would teach in a class or maybe put in one
of my instructive books. It's really my personal
artwork and what I enjoy painting and just as, like, my personal
artistic growth. So but I thought
it would be worth it to share with
you how You know, I began to integrate
the seed of life as an important
part of, you know, all my personal artwork and here I have it and kind of like
a little rainbow grid here, and it matches this rainbow with bursting rays out and
I have the gem and the eye, and I have all these symbols, and it's pretty much
just water color, a little bit of colored pencil
for details, and some fun. You can see if I flip
the paper around. There's some really fun
metallic paints here. So your creative mission now is to create unique
artwork of your own, using the seat of
life as your base. Again, the medium
is totally free. You can use water colors. You can use guash,
you can use acrylics, markers, pens, colored pencils. You can draw on any medium, any type of paper, whatever it is that you're
interested in doing now. Start out by drawing
the seat of life, make sure you get that right and then do the four
variations, at least, post those variations to the project and then post
your final project two. That means that it's
actually a work of art, like a piece that you've
created mindfully. Maybe it was inspired in
one of your variations, and make sure to actually
add color technique, et, et cetera, to your work. I'm really excited to see
what you come up with. I have in one of my books, there's one of these tutorials, and I've already seen you guys making some beautiful artwork. You know, if you're looking
for painting inspiration, go back to my other
watercolor classes and you'll be able to maybe
mix and match some of that. So I can't wait to
see what you make. Make sure to leave any
question that you might have in the discussion
board. I'm always there. Make sure you leave it there
or not on social media, because it's hard for me
to get to on social media. I'm always available on
the discussion board, and I'm more than
happy to answer any questions or if
you would like to post maybe some interesting
findings that you've found with sacred
geometry or you know, something related to some
more complex subjects. Feel free to share
all that here. You know, this class
is meant to be a space where you can all
learn from each other as well. So I'm excited to see
what you come up with. Make sure to post
your final project and your exploration
interpretations, and I'm excited to
see what you make. Thank you so much for
taking this class with me. I hope you are enjoying your sacred geometry journey.
It's a beautiful one. It's very transformational, meditative and has
so many benefits to you as a person and
as an artist. Okay.
 Ana Victoria Calderón, Artist