Transcripts
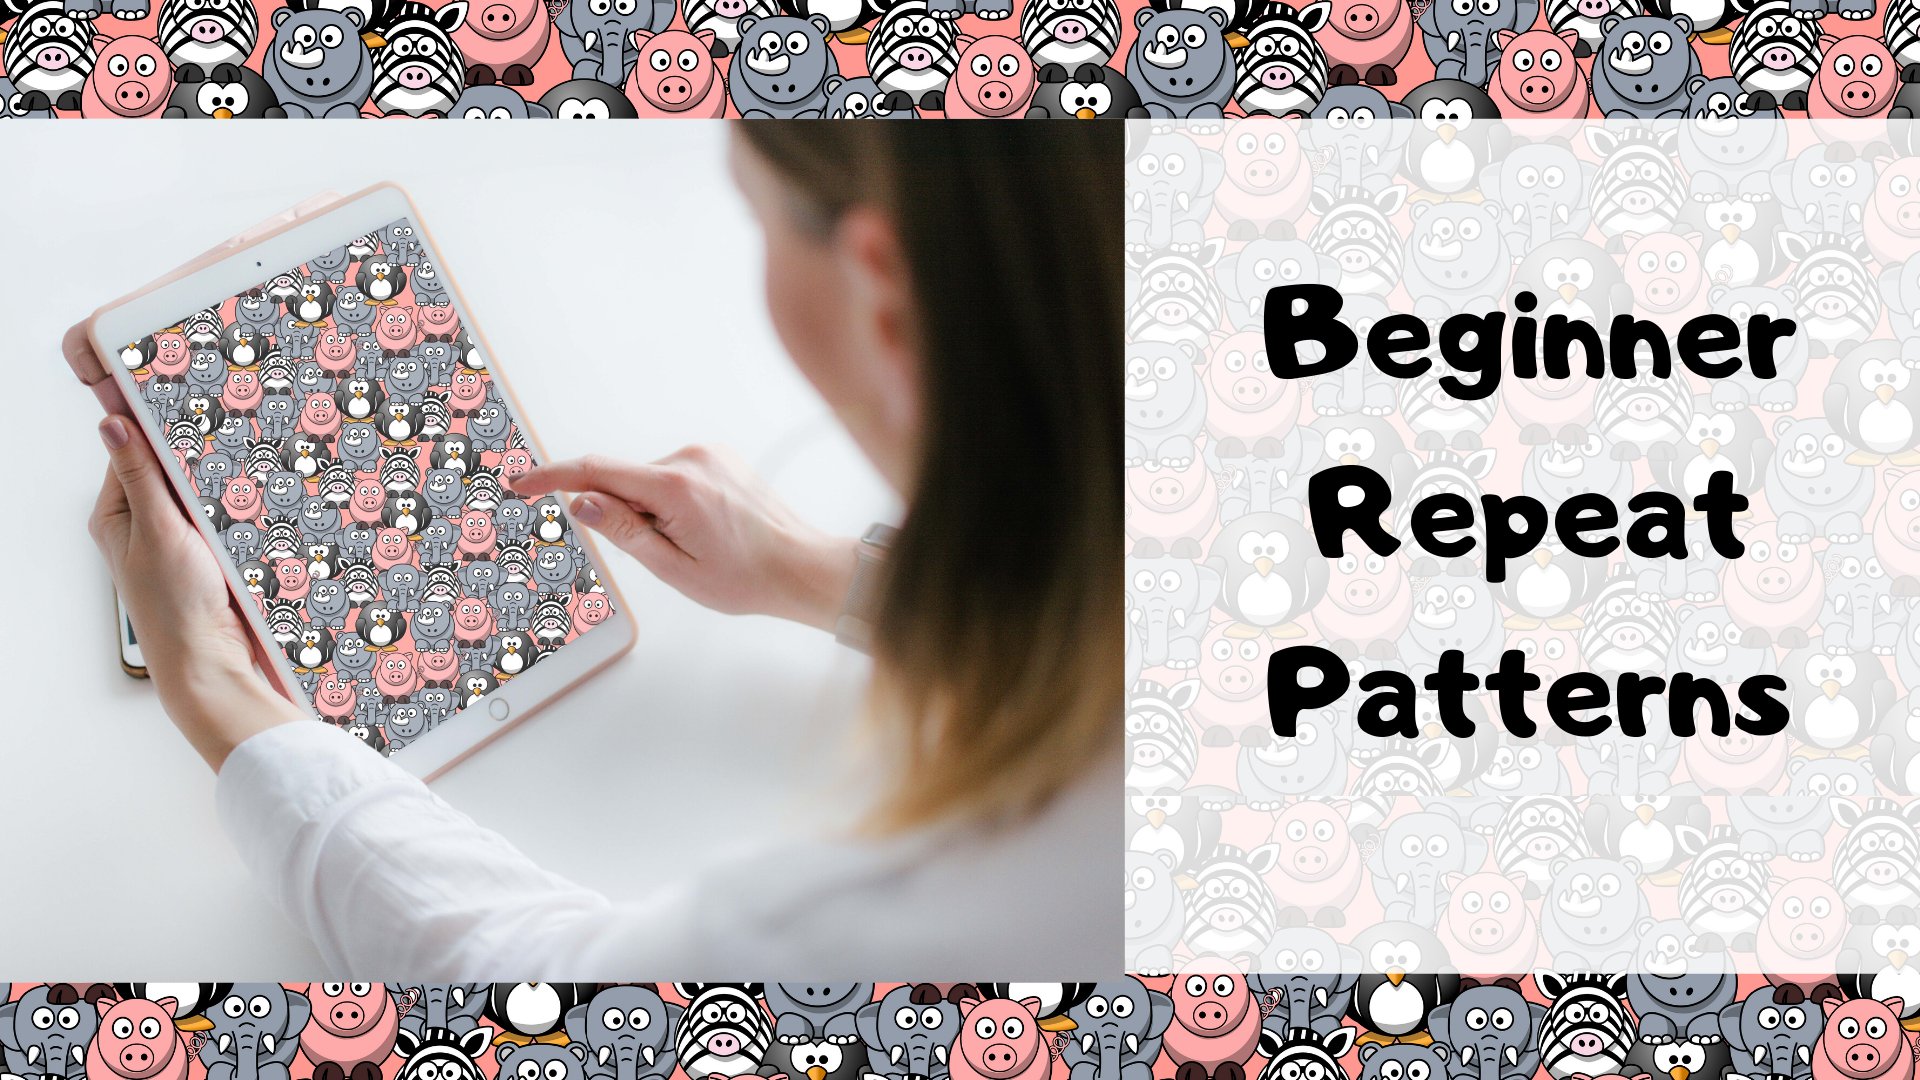
1. Introduction: You want to create a seamless
repeat pattern to upload, to print on demand
websites like Society six, Spoonflower and red bubble, but you don't have Adobe
Photoshop or Illustrator. This class will guide you
through how to create seamless repeat patterns on your iPad using only
one app, Procreate. At the end of this class, you will have to repeat pattern files that
have the resolution required to be
uploaded to print on demand websites
like societies six, Spoonflower, and red bubble. This class will guide you through choosing
a color palette, creating a canvas and procreate drawing the elements you
will use in your pattern, adding texture to your elements. Arranging your elements
for an effective pattern. Creating one tile that can
be repeated seamlessly, making a final seamless pattern with your repeatable tile. Changing the background
color of your design, exporting your final
seamless repeat pattern, scaling mathematically, your pattern to the
appropriate resolution, learning the dimensions required for
print-on-demand sites, society six, Spoonflower
and red bubble. This class is perfect
for beginners who wish to learn how to
create repeat patterns, do not have access to
Photoshop or Illustrator. It is also great for intermediate surface pattern
designers who want to create patterns on
their iPads and then prepare their work for
print on demand websites. At the end of this class, you will have to
seamless repeat patterns ready to be uploaded to
print on demand websites. Imagine having your
handmade designs on fabric, phone cases, pillows, notebooks, anything your heart desires.
2. Lesson 1: Colour Palette: in this lesson, we will use the inspiration of bugs to pick out a color palette for a repeat pattern before we begin that we're going to set up our to canvass sizes that we will be using for this class. So first of all, I'm going to tap the plus come down to the bottom, create custom size and I want 4000 by 4000 pixels. Dp I can be 300. RGB is fine. I'm going to title this skill share Bugs tile Done. And while I am setting up canvas size is I'm actually going to top my gallery. Come back here tap the plus come down to the bottom, create custom size And now I want 8000 by 8000 pixels. RGB is fine and dp i 300 I'm going to call this skill share Bugs repeat now I have my two canvas size is set up The most recent one will open. That is fine. What I want to do now is go into Pinterest and search for me Erica Spools And there I am. East rules top on the spools and Aiken tap on skill share bugs and you can just scroll around here looking for a color palette that you would like to use for your repeat pattern . I think I'm going to come back up here and do this caterpillar. So tap on the caterpillar and top on the three dots download image and we're set to go. I'm gonna come back in to procreate and I'm going to hit the wrench at insert of photo moments, and the most recent one I have is of my caterpillar. Now it's tiny, tiny, tiny, so I'm going to pull on the two corners and open that up nice and big. I'm going to tap on my color dot my color picker tap on the plus. I'm going to title this skill share bucks, it said. Its default done. I'm going to tap my disk. It's a lot easier to see what's going on. If I tap my disk, I'm going to again. Just zoom in some more. Now. The idea is, I'm going to tap and hold this dot and move my pencil around until I'm on a color that I would like to use. And you can see that color fill this color dot up here. If I top that color dot and tap within my skill share Bugs color palette square I have now saved that color. So tap to get out of the men you press and hold the square And again move my pencil around till I found a nice color tap the color picker dot tap in my square I've saved that one. Now I'm going to be looking for about five or six different colors to fill my square here. So I'm just gonna go ahead and do that. I also want to add a pure white and a pure black. So in the white area, double tap tap in my square And I've got white double tap in the black area. I've got a pure black. Now I'd like to do is give myself some variation with these colors that are already here. So I'm going to start with this gold color. If I tap on that tap on value, I can now play with my s for saturation, be for brightness, sliders and change the color. You'll see it change up here in the color picker dot So if I just want something a little lighter there, it's a bit later I put that on the bottom. I'd like to perhaps decrease the saturation. Get a nice light gold. I'm gonna do the same thing with the green, though Perhaps not quite as bright. I would like a nice dark color here. Maybe even make one a bit darker. And I would also like some quite light colors as well. So I might top on this Balu slide brightness up and the saturation down. And that might do one quite light color there. And I have a color palette to use. Now that we have our color palette and are to canvass, sizes are set up. We're ready to build our brush set that we will use to draw our bucks.
3. Lesson 2: Brush Set: Now that we have completed
building our color palette, we're going to move on
and create our brush set. And just before we do that, I just wanted to
let you know that the number of insect species is believed to be
between 610 million. I'm going to tap
on my brush icon and I'm just going to push down. And then the plus comes up. I'm going to tap on the plus. And I'm going to call
this skill share bucks. And I am creating a brush set that I will
use for this class. Now, I'm going to move down
till I find calligraphy. And I'm going to tap
on the mono line. And I'm going to
swipe left duplicate, and it's got a one beside it. I'm now going to scroll
my brush libraries down, tap and hold my monoline one, move it up to Skillshare bugs, let this brush set open
and then place it. I'm also going to duplicate
my mono line, duplicate. And now I see monoline
11 and monoline one. On the mono line 11. I'm going to tap that. I'm under General brush name. I'm going to tap that and
type mono line large. And then I'm going to come
down here to size limit. So I'm going to take my slider.
4. Lesson 3a: Dot Pattern: In this lesson,
we're going to make a very simple dot repeating
pattern in order to learn the steps involved in
creating a seamless pattern. Because we're using
dots or spots. In this lesson, I
thought I would share with you the reason that entomologists think
that lady bugs have such brilliant red coloring and black spots is to warn
their predators so they taste really bad and
that they are a little bit poisonous to be left off here, what we can do, delete. What we have selected here are whatever image you used
for your color palette. So I'm going to tap layers, swipe, left, tap, Clear. I'm going to tap on my gallery. My 4 thousand by
4 thousand Canvas that I had already
set up and create it. Now that I have that open, I'm going to tap on my color
picker and tap on pallets and make sure that your Skillshare bugs
is set at default. You can now tap on
disk and this is a much easier interface
to use for my brushes. I'm going to tap
on my brush icon here and tap mono line large. Make sure that that is selected. And tap to get out of this menu, I now want to go over to the
wrench and tap on Canvas, toggle on drawing guide. And I'm going to tap
edit drawing guide. What I want to select
down here is symmetry. I'm going to tap on this radial
symmetry icon down here, and I want to make sure that assisted drawing is turned off. And now I can tap Done. This is going to help us arrange our dot repeating
pattern for our brushes. As I said, we chose
Monoline large. I'm just going to make
sure that it reads it about 30% and my opacity
is right up at a 100. You can tap your color picker dot and choose any
color that you like. And all we're gonna do
is start in the middle and create some random dots. The drawing guide
that we turned on helps us as we start
from the center here. And it will help
us line our work. As we fill in each
piece of the pie. I'm going to speed up
the video and all I want you to do is keep tapping different colors
and fill in your pattern. The only rule is that you do not touch the edges
or go over the edges. So just keep working out, selecting new colors,
randomly, placing them. We want this to be a
nice random pattern. If you make an error, you can tap with
two fingers and it will undo your last
spot that you put down. At this point, I have filled
my canvas with spots or dots and I have made sure that
none are touching the edge. I did go a bit close. You don't need to, but it is
easier in the long run if you fill as much of your
canvas as possible. So I'm going to tap on
my wrench and I'm going to toggle my drawing guide off. I now need to go to
my Color Picker, grab the black color, tap on my brush, and I'm going to use
the small mono line for this tactic out of my menu. And I'm just going to make
some very small markings, making sure to cross
the entire corner. This is going to help us when we make a repeating pattern. I can now tap on my layers, turn off my background color. And now you can see the
color of the background of your actual Procreate
app through your tile. Now I'm going to
go to the Wrench, tap on Share and tap PNG. I can simply say Save image and it will
save to my camera roll. And we'll start a new canvas. 4 thousand by 4 thousand. We're going to go to
the wrench to add, insert a photo and navigate
to our doc repeating pattern. I want to make sure here that snapping is turned on and I have magnetics and snapping
on and I have my distance and
velocity to maximum. If you can't get to that menu, you can tap your
selection tool again, the arrow and then snapping here is down in the bottom left. And I can tap the arrow
to get out of that tool. I'm gonna go to the
Wrench, tap on Canvas. Toggled drawing guide
on edit drawing guide. I'm going to be on
2D grid and take my grid size all the way
up until it says Max. And then I can tap Done. I'm going to go into
my Layers menu. Swipe, left, duplicate, go back to the
bottom layer, swipe left, duplicate, go to
the bottom layer, swipe left, duplicate
until I have four layers. I'm going to tap on
the first layer. And this is the slide. I'm going to slide each layer into one of the four quadrants, again, working in a
circular fashion. So clockwise, I'm going to tap the Move tool and slide this
and let it snap into place. And I will see my
guides come up, tap the move tool
to get out of this, go to my Layers menu. Tap on my second layer, tap on the move tool,
again, circular fashion. So moving this one, sliding into the top
right-hand corner, making sure it snaps into place. Go to my Layers menu, and I can go to my third layer, tap my move tool,
circular fashion. This goes down into the
bottom right-hand corner and let it snap into place. I can go straight
to my Layers menu. Tap my last layer, tap the Move tool, circular fashion down into
the bottom left-hand corner. And I can let this
snap into place. What I'm now going
to do is go back to my Layers menu and I'm going to pinch and squeeze all
of these together. So now they are one layer. I am going to go to my eraser. And I'm going to make
sure I'm in my bugs. Go to my mono line large tap
to get out of that menu. And I'm just going to
erase the black dot. Now, my job is to fill in
any of the whitespaces, and you'll most
likely see this in a plus or a cross in the
middle of your canvas. So the only rule is to not
touch the edges of the canvas. If I choose my color picker dot, I can choose any
of these randomly. Now, for my brush, I want to make sure that I'm
on the mono line enlarge. My opacity is set to 100%. And I just want to
make sure that these, the size here matches the
dots that I already have. And all I'm going to do
now is just randomly fill up and I can see
that's not big enough, so I'm going to increase
the size a bit. Try that again. Maybe a little bit bigger
here. That's better. So now I'm just going to go
around and randomly fill all of these empty spaces with
all of the different colors, trying to vary the location and the colors that I
am choosing to use. If I don't like something again, I can two-finger tap to undo
or three finger tap to redo. If I want to make space
for another spot, all I can do is make sure
I'm on my main layer. Come to my selection tool, make sure I'm on freehand. Draw around the spot. I would like to move, just tap the Move tool
and it's actually easier now if you turn snapping
and magnetics off. And now I can move
this any old place. I want. Tap the arrow tool to
get out of that menu. So I might actually
move a few here to make space for another spot. There that's better spacing. You can check around and move
any circle that you want. If you feel that the
pattern isn't even. Again, select. And then my move tool. And I might just even
these couple out. Whoops, make sure I'm
on my selection tool. Alright. Once that is
all evenly distributed, you are finished
making your pattern. I'm going to go to
my Layers menu, turn off my background layer. And then I can wrench
share and then share as PNG export and save
image to my camera roll. I'm going to go back
to my gallery and tap untitled artwork to
rename this dots. One block.
5. Lesson 3b: Dot Pattern Continued: I'm going to tap on the plus to add a new canvas and come
down to your repeat pattern, seamless your 8
thousand by 8 thousand. Now we can go to the wrench, add, insert a photo, and it will be the
most recent photo we have on our camera roll. I'm going to fit to Canvas. Then I'm going to tap the arrow tool to get
out of that selection. Come to my layers and I'm
going to swipe left duplicate, come back to the bottom
layer, swipe left, duplicate, come back
to the bottom layer, swipe left and duplicate. We are again going to work
in a clockwise fashion. So I'm going to
tap my layer one, tap my move tool. And I need to make
sure that snapping is on, magnetics is on. And it's easy to, if you tap the wrench here, go to your Canvas. Turn on the drawing guide,
edit drawing guide. Change my grid size to Max, making sure I'm on the
2D grid. Tap Done. Now. Make sure I'm on my top
layer, the Move tool. And now I am going to
squish into each corner. I'm not doing the slide now, I'm doing the squish. So Move tool, squish into
the top left-hand corner. Let it snap into place. I can leave the
selection active, tap my Layers menu, come down to my second layer, tap my arrow or move tool, grab this corner and let it snap into place as I squeeze it into the top right-hand corner. Come to my Layers menu, come down to my next
layer, the arrow tool. Grab my corner node and squish it into the bottom
right-hand corner. So you can see all of the
dots are getting smaller. Come to my Layers menu. Tap my final layer, tap the Move tool, and then squish this into
the bottom left-hand corner. I can then come to
my wrench canvas, turn off my drawing guide, and I have a seamlessly
repeating pattern. I tested that, and that's
what it looks like. It repeats seamlessly. Now we're going to try
changing our background color. So if I come to my layers panel, I can tap on my background layer and then choose any
of these colors. And you can see right away
it fills the background. If I do like this, I can tap on my wrench, Share PNG and export it to my camera roll
by saving the image, you might get an
export unsuccessful. If that's the case, the
file might be too big. So what I do like to
do is go to PNG again. And then I find, if I save to files, then I can go onto my iPad and I've got a folder for patterns. And then I can just
call this dots. One, Done, Save, and then
export is successful. So I can come back
to my layers panel, tap Background Color,
and change this to anything that I want and
just export it each time. So Wrench, Share PNG to
keep my full resolution. Save to files. It's gone onto my iPad patterns. Double-tap. I can
call this dots two. And now I have two repeating patterns with different
background colors for my dots. Now that we understand how to create a seamless
repeating pattern, Let's move on to drawing
our insects so that we can design and build a slightly
more interesting pattern.
6. Lesson 4a: Draw A Fly: in this lesson, we're going to draw the elements or pictures that are pattern will be made up of. I'm going to draw some different types of insects, but you are free to draw what you would like. What is the difference between bugs and insects? From dictionary dot com, we tend to use the word bug loosely for any very small creature with legs. However, a true bug is defined as belonging to the order and nipped Arra. These creatures characteristically have tough four wings and lack teeth, such as beetles. All of this does not mean that you are wrong to call various insects bugs. Because of the common usage of this, meaning it is certainly acceptable. Now we're set to draw and create. Our bugs or insects will draw four insects, technically, three insects and one lepidoptera. We're going to open our canvas, so tap on the plus and I'm going to scroll down and tap skills your bugs tile 4000 by 4000 pixels, and we're going to plan out our colors. So let's go to our color picker dot Make sure we're on disk and we have selected our skill share bugs, color palette So we're going to use the darker colors to create the insects and lighter colors to add texture. And we want to keep at least two lighter colors for texture. So I think what I might do is move over this color I can tap and hold and drag. And I might also use this color top hold and drag. And now I've got my to lighter colors for texture. Over here on the right hand side, we're going to start with the fly going to go to my brush icon, choose Monoline, and then go to my color picker and choose a nice dark color. I might choose to use some of these nice blues in here. All right, tap to get out of my menu, and I'm gonna make sure my brush size is set to 100% and capacity to 100%. I'm gonna start by drawing a circle for the head. And then if I tap and hold it will turn into a shape. I'm going to edit this shape and just make sure it looks a bit more like a circle. Aiken, drag my color picker dot and fill my head. I'm going to pick a new color. You can go with this color here, go over to my layers and add a new layer for the thorax. So this time I'm going to draw a bit more of an awful. And if I tap and hold it will turn into a nice shape. Aiken tapped to edit shape, drag it over a little bit and just fix the rotation a little bit like that tap. Okay, I'm gonna pull over my color picker dot and I want this layer behind, so the thorax is going to go behind the head. So I tap on layers. I'm just gonna drag that layer below, going to add a new layer at the plus. Here I am going to be ready to draw its abdomen, going to choose another color, perhaps this color here, and draw another oval at its shape and fill that shape head over to my layers and drag that be low. I think what I'm actually going to do is ah, swipe right to select all these layers. Tap on the move arrow. Just move it up a little bit. So I've got room for its wings now. I'm going to draw the wings, so I'm on my head layer. Plus to add a new layer. I'm still in my model line and I've chosen a nice gold color and just going to zoom in here straight line. And I want to just stop at the edge of its body there. Nice ovals. And then I can drag to fill, and then I can double check My shape may want this a little more rounded there so you can fix up anything you like with your shapes. And I might tap and hold the eraser and just clean up the edge of this wing. Same with this one here. Now, like all that is turned out, I'm going to tap my layers, Add a new layer and I'm going to move this right down to the bottom. It's going to be its and 10 I and lakes, so I'm going to choose a new color. Maybe this nice, dark color here, and I'm going to change my size of my brush down to about 65%. All of the legs come out of the thorax. So that's the middle section of its body. And I just like to draw some Wigley blinds here, and all insects have six legs. I'm drawing six legs, but a decrease the brush to about 50% and draw a couple of and 10 I. Now I'm ready for some textures. I'm gonna head over to my layers tap on my head. Add a layer above tap, that layer and tap clipping mask and going to go to one of my light colors. And for my brushes, I am going to choose grunge and the size should be 100%. But my opacity is going to come down to 40% and now I could just draw on my head. And now I have some nice texture there, going to go ahead and do that with all of the body parts. So moving onto the thorax, tap new layer, tap my layer tap clipping mask, and now I can simply draw until I've got some nice texture. We'll do the same with my abdomen top abdomen, tap plus for new layer. Tap my new layer clipping mask, and then I can color in whatever the texture I like. And finally, it's wings, so tap on the wing layer. Add new layer, tap new layer tap clipping mask And I'm gonna change my color to the very pale blue and see what that looks like here That just gives it a nice texture. And my fly is done I'm going to top my layers to organize things and swipe right All of the layers for my fly I can then tap group I'm going to close that group tap on the new group Rename Fly And now I've got my fly Done
7. Lesson 4b: Draw A Beetle: Now we are done with the fly, so I'm just going to toggle that off. So I've got a blank canvas once again and we're ready to start the beetle. So I'm going to add a new layer and pick out my colors for my beetle. I might do this in some of these nice, darker colors Over here. I'm gonna choose one for its head. Make sure that you have gone to your brushes, make sure you're on monoline one and that you're at 100% size and 100% opacity. And I'm ready to draw my Beatles. Gonna start with an oval and tap and hold to get my shape at its shape. I just want that a little bit smaller. Their top the color dot Drag to fill layer panel, new layer. And I'm ready for its body. I might make this this really nice dark color here for its body. I want a nice arc if I tap and hold, okay, and then I want a smaller arc for its body and I might just add it that shape here and I can drag. And Phil, I want this sitting behind the head so I can tap my layers and just drag it beneath the head if you need to. You can tap and hold the eraser and fix up anything that you don't like. So I just want this to be a smoother transition here. Smoother transition here. Nine. Right to move on to the wings. I'm gonna go to my layers panel tap for a new layer. This one's going to sit on top. I just want a couple of nice straight lines. So top and hold tap and hold. And then I want some nice arcs here, tap and hold. And for the other wing here tap and hold and Dragon Phil, Dragon Phil, Dragon Phil. And if that won't drag and fill up there it goes. I'm going to toggle back to my body here and top and hold the eraser. I just want to make sure that's not overlapping there and there. What I might dio is make sure my brushes re selected, go to my layers, tap on my wings, and I see that I have put my wings in my head on one layer. So if that happens, I could just add a new layer back to my old layer happy selection tool. Select my head, cotton paste. And that will put my head on a new layer. So what I'd like to do is fix my wings a bit. So I've selected my wings, select my arrow, and I just want to bring these in a bit, which leaves still some more space there that I need Teoh cut off. So I head back to my body tap and hold my eraser and just erase this. These two areas here, I'm going to go back to my layers at a new layer and the legs are gonna go underneath the body, so I will drag that underneath. You go back to my model line and I'm going to set my brush at about 65% there. Choose a new color. I made quite a light color for its legs here. There we go. And I've got again six lakes for my beetle. Decrease my brush size to 50% again or thereabouts. A couple of in 10 I now I'm ready for some texture. Going to top of my layers panel. Begin with the head. Add new layer tap, select clipping mask. I'd like to choose a nice light color and actually think I want something even lighter than this I'm going to tap that pale gold ish color had tapped value and I'm gonna turn the brightness up and decrease the saturation anymore So it's a pretty pale color And add that to my color palette Tap the disc now to choose my brush I'm going to tap my brush here and for this one I'm gonna choose burnt tree I'm gonna make sure brush sizes maximum And my a pass ity is 40% And then I can start coloring my head Top players tap my wings Add new layer Tap on your new layer Tap clipping mask And I can fill in the wings with however much I want here Now for the main part of its body Tep on my body layer, add new layer tap new layer top clipping mask. I want this paler gonna turn down my A pass iti to 10% there and color that in. So it's a lot more subtle and I have my beetle. So now toe organize things. I'm going to put these all in one group. I'm going Teoh, swipe right to Select all of my Beetle layers Group close my group top on new group Rename Beatle talk all that off So I'm ready to draw my ladybug.
8. Lesson 4c: Draw A Ladybug: Now I'm ready to move on and draw my ladybugs. I'm going to go to my layers panel tap for new layer. Make sure my brush is set on monoline. One 100% size, 100% opacity. I'm going to choose this nice, dark gold color, and I'm going to create a circle for the head at it. Shape, turn that end of it more of a circle, Phil and I want to choose a nice dark color for its body. I'm gonna make sure that I'm on a new layer and create just gonna edit this shape a little bit again and fill. Now I'm ready for its wings, players, new layer. And I'm gonna choose, uh, this nice pale color here, and I want to come across the head here. So hold for a nice straight line. Here we go. And then I want a nice us most of a circle here, tap and hold at its shape. And I want to make this center just around. I'm gonna fix up, uh, this little area here, and I'm also on tap and hold on. The eraser and common fixed that little spot. Now I can drag and Phil but I can't see its body. I can tap and hold my eraser. And what I'd like to do is grab a spot in the middle here, income a nice straight line out, and I can move that another one straight line out and hold. And then I'm just going to simply erase the rest of this spot and this is going toe. Let the nice dark body show through the wings. The last thing we need to do is to add its spots on the body here on the wings. I make sure I'm on the wings and I'm gonna choose a darker color. And if I like this color, I can just go to value and just take my brightness slider and slide it a little bit back to my disk. I'm going to go to my large monoline and put the size at 24% there. I could just add some random spots around here. I'm going to go to my layers panel, add a new layer color back to my nice dark color, and I just want to eyes here. I'm still on my round brush my large model line. I'm gonna take this layer and just slide it beneath the head, ready for its lake top on a new layer. Slide this layer beneath. I'm gonna choose a lighter green here, make sure I'm on my brushes, monoline and slide. And make sure I'm about 65% here and draw my six legs. I'm not going to draw any end 10 I for this. I can swipe right for all of my layers. Group close the group top on new group Rename Lady Bug, Open up this group and I'm mostly interested in the main part of its body here. So I'm going to tap that. Select that. I'm going to add a new layer. Tap my new layer, add clipping mask. I'm going to choose my very light color here. Brushes. I'm going to choose flicks. I'm going to make sure that my brush size is maximum my capacity. It's somewhere around 56%. And then I can just add some nice texture to that. And if I wish to add it to the head, I can tap on my head. Add new layer tap clipping mask. I might increase the capacity here and just add some spots to its head and I might do that to its body. To so top my body. Add new layer tap clipping mask. I'm going to decrease the size here, 24% and then I can just add some nice spots and that looks a lot better. So I'm going to go to my layers and just close that group. Toggle off that group.
9. Lesson 4d: Draw A Caterpillar: and now I'm ready for my caterpillar. I'm going to add a new layer here to begin my caterpillar. We're going to be making some very irregular shapes. And for this one, I'm going to stick to my blues. I'm going to go back to my brush, choose monoline. Make sure that it's at 100% size, 100% capacity. I'm going to just draw some irregular shapes and then just fill them in. And then I will just keep adding a new layer. Drag it beneath change colors and again, just on irregular shape here doesn't need to be to exact and fill it and new layer drag beneath. Select a new color drawn a regular shape. Phil, I'm gonna make those a little bit smaller, so I'm gonna select all of these layers. Tap on my arrow, make sure I'm on uniform Magnetics and just decrease this size a little bit. Now I'm ready to add some more parts of its body. I will tap a new layer dragon beneath change my color. A regular shape drag to fill. I've reached the maximum number of layers that I can have. So what I need to do is take two fingers and pinch these all together and then I can continue adding as some mawr layers for the different body parts of my caterpillar Just gonna add I think a couple more here. I'm not going to tap on my layers and pinch all of the's together. Now I've got more layers toe work with. I can add a new layer I'm gonna drag that beneath And it's the spikes on its back and some legs. So I'm gonna choose this gold color and I'm gonna decrease my brush size to about 80%. I'm just going to draw some spikes random overlapping Just to give this beast some interest that I need to add its legs. I'm just going to draw triangles randomly spaced random angles and groups some of them, and a decrease my brush size to about 60% and draw a couple of N 10 I and memory to add some texture going to go to my body layer, Add new layer topped my layer clipping mask. I'm going to choose a nice light blue for this. Go to my brushes tap on rusted DK and I want to make sure my a pastis about 41% and my brush size. So, actually, I might keep that at 100% And just add some texture. If I want, I can also decrease this brush size to 22% and just come along the bottom to make it look a little bit more three d in the top of my layers. Swipe right group closed my group tap on the new group Rename and call this cutter pillar. I've drawn all of my elements. Now I need to export them to share them. So I'm gonna turn off my background color and I have my caterpillar showing I'm going to go to the wrench, share PNG. It will export save image to my camera roll. I can now come to my layers. Toggle off caterpillar check. Ladybug wrench share PNG save image coming to my layers. Talk off. Ladybug on for the beetle wrench Share PNG save image. Come to my layers. Trouble off the beetle. Check the fly wrench. Share PNG save image. Now that we have drawn our elements were going to top on the gallery. I'm going to re title this skill share bugs elements. These are the elements that we will be using to create our repeating pattern. Done. We've got all of our elements drawn. We've shared them to our camera roll and we're ready to move on to the next lesson. Arranging are insects to create.
10. Lesson 5: Create Draft: Now that we have drawn
our insect elements, we're ready to move
on to arranging our insects to create a pattern. In your gallery, click on the Plus to create a new Canvas. Scroll down to
Skillshare bucks tile. We now need to bring
in our drawings, the PNG format for my
iPad's camera roll. So we're going to
build a wrench, add, insert a photo. And then I'm going to add
all of my for insects, but I'm gonna do them
on different layers. So I'm going to go
to my Layers panel at wrench, insert a photo. Add in my beetle. Layers panel, add a new layer. Wrench. Add, insert a photo. Ladybug. Layers, add wrench,
add, insert a photo. And my caterpillar. I'm now going to go to wrench, canvas, drawing guide,
edit drawing guide. And I want to select
Symmetry and radial. Make sure assisted
drawing is off. This is going to make it easier to arrange my elements here. I'm now going to go
into each insect, tap on the move tool, the arrow. And first of all,
I'm going to start just by making them a little bit smaller so I can work with them a
little better here. I want to make sure that they are about the same size
relative to one another. I'm going to keep
doing that until I have all of my insects the
size that I would like. Now I can start in
the middle and start arranging, managing my insects. Now, I need to keep going
to my Layers panel, tapping each new layer, tapping the Move Tool. And I'm just going to move
them around until I'm happy with the arrangement. Now, one thing I can do to
make it more interesting is to flip them vertically
or horizontally. And I can also rotate them. I'm gonna go ahead
and group these. So slide right to
select them all. Group, thumb, close my group. And I can tap, Rename, Enter. I went to slide left
to duplicate this. I can call this second. I'm just going to move
into this now and tap on each insect and
move them around. What I'm going to
keep rotating them, flipping them vertically
and horizontally. To add more interest. It's better when they
look quite random. Not going to make
sure that I haven't put two of the same insects
beside one another. And to add even more interest, I can also change the size. I'm going to continue
closing my groups, duplicating the group, and
I'll continue to rename them. Third, etc. I'm just going to keep opening
this and moving all of my insect elements until I am happy with their placement and I keep flipping vertically
and horizontally, changing the sizes to
add more interest. I'm going to continue
doing this until I have filled up my canvas. I'm going to make sure
that I'm not going over any of the edges. If you run out of layers, what I'm just going to
do is to open one of my groups and I'm
simply going to merge. I can do that once I'm happy
with some of the layers. And that will give me room
to create some more layers. Once we have filled up as much of our canvas as we can from the inside out without going
over the edge of the canvas, we can turn off
the drawing guide. So I'm going to go to
the Wrench Canvas, toggle off my drawing guide. In order to keep a
transparent background, we have to make small marks
on each of the four corners. This is so that the
entire canvas will be selected when we export
and share this image. This is important mathematically
in order to create a tile that will
repeat seamlessly. So I'm going to head on
over to my color picker, black and make sure I'm on my
Skillshare bugs mono line. I'm just going to make
some small black marks on the corners that go right
off the edge of the canvas. Now that we've
arranged our elements, we need to export or save this image are going
to go to layers. I'm going to turn off my
background color so that I have a transparent background. I'm going to go to my wrench, Share PNG, Save Image to make sure that we don't get
confused with all of our campuses and our gallery. We're going to tap
on our gallery. Tap on the name of
the work we just did and title this skill, share draft done. Now that we've created one tile of our elements
arranged on a canvas, it's time to make
a repeatable tile. We will learn how to do
this in the next lesson.
11. Lesson 6: Repeatable Tile: now that we have created one block of our elements arranged in a canvas, it's time to use Photoshopped mix in order to make a repeatable tile. So I'm going to go back into my iPad and opened Photoshopped mix that will tap on the plus tap on image and I should be able to see in my camera roll all of my insects arranged in my pattern. Open that up, as I can see, because I put on the black corners, it has selected the entire canvas. Now I need four exact copies of this layers. I'm just gonna top on the layer duplicate, tap, duplicate, duplicate. Now the idea is to saliva each layer into a different corner. I'm not shrinking it. I'm sliding it and moving it. We're going toe work in a circular fashion clockwise beginning with the top left. Like I'm selected my top layer here and I'm just going to drag this into the top left hand corner. Watching for both my vertical and horizontal guidelines to appear can be a bit finicky, but it's really important at this point that you see both guidelines appear all right. I move on to my second layer, sliding it into the top right hand corner, Making sure I see both vertical and horizontal guides appear. Third layer down. I'm sliding into the bottom right hand corner, watching my vertical and horizontal guides to appear, moving down into the bottom left hand corner, watching for both my vertical and horizontal guides to appear. You should kind of feel it snap into place as well. Now, to make sure that these are all exactly places I want them. I'm going to watch the middle blue dot top each layer and make sure that that dot does not move at all. Export to camera roll and have already said it to PNG. So I'm not losing any of my resolution. When you go back into my iPad, Open up, procreate and I want to add a new canvas plus scroll down to the bottom Skill. Sure, Bugs child 4000 by 4000 pixels. And now I can wrench at in sort of photo the image that I just saved and created in Photoshopped Mix, and there is my image. I'm going to make sure that I'm on my monoline and my eraser tap and hold to make sure you were racing with your current brush, and I'm going to just erase the black mark that I made in the middle. I'm now left with a vertical and horizontal white space. I need to fill this. I am going to wrench at in sort of photo, and I need to go back and insert each one off. My exact don't do them are different layer, so layers panel new layer wrench at insert a photo. I now need my beetle layers, new layer wrench at in sort of photo and grab my ladybug layers. New layer wrench ad in sort of photo. And lastly, but not least, my caterpillar. Now what I need to dio is resize thes, and I'm going to work to fill up this blank space. At this point, I have to make sure that I am not going over the edge of my canvas. Mathematically, I've already made a tile that can be repeated. At this point, all I'm doing is filling in the vertical and horizontal blank spaces that are left from when I created a child that can be repeated. I'm just going to resize move until I'm happy with this composition again. I can rotate flip horizontally and vertically until I am happy with my design, and that's actually a little closer than the arrangement of my other insects. I'm gonna get that a little bit more breathing space there. If I still need mawr elements, I still have some white space is all I'm gonna do is in turn duplicate each insect and find a new place for it to go. I'm trying not to put too insects beside one another. - Now that we have a tile that could be seamless and repeat it in the next s, we're going to test our pattern. But we do need to save this image, going to go to my layers panel, turn off my background wrench, share PNG and again saving as a PNG so that I can maintain my resolution.
12. Lesson 7: Test Pattern: In this lesson, we're going to build our buggy
repeating pattern. Now that we have practiced
with our simple dot pattern, I'm going to come
to my layers panel and I am going to turn
off my background color. I can even come to
my wrench canvas and turn off my
drawing guide as well. And I want to come
back to the Wrench, Share, share image as a PNG. And I am going to save this
image to my camera roll. I can come back to my
gallery and I'm going to tap Untitled Artwork and call
this bugs one block. This is my block that can
be repeated seamlessly. I'm going to come to the plus and come to
the repeat patterns, seamless 8 thousand
by 8 thousand. Then I think to get ready, I'm going to come to the
wrench canvas, drawing guide, edit drawing guide, and
then come to 2D grid and take my grid size to
max and then tap Done. I can then come to
my wrench, add, insert a photo, come to
my most recent photo. And I'm going to fit to Canvas. I can then tap my layers panel. Swipe left, duplicate,
come down to my original layer
one, swipe left. Duplicate, come down to
my original layer one, swipe left and duplicate. Now makes sure that I am
on my top most layer. I'm going to tap on the arrow, tap snapping, make sure magnetics and
snapping are turned on. And again, I like to
have the distance and velocity at max. Now, this is the squish. So I'm going to squish each layer into each
of the four quadrants. Again, I'm working in a
circular fashion, clockwise. So I can grab this
corner node and squish it into the
top left-hand corner. Now, because the
selection is active, if I tap on the screen
somewhere by accident, what I suggest you do is tap, undo and undo until the layer
fills the canvas. Again. If you tap anywhere
around the canvas, it will nudge the
layer and then it will not repeat perfectly. So again, I can grab
my corner node, snap it into place, looking for those
gold guidelines. Make sure I tap exactly
on the Layers menu. Come down to my next layer, tap the arrow tool, the move tool, grab my corner node and squish this into the
top right-hand corner. And I will see the guidelines. Now. Again, let me undo that. And I wanted to show you
again if I tap and hold that, it says width and height at 4 thousand by 4 thousand pixels. I know that each
side is 8 thousand. If I take half of that, it means that it is 4 thousand. I know that this is a thousand. Take half of that. And I know that is 4 thousand. So therefore, I know that this
layer is correctly placed. I'm going to come
to my Layers menu. Come down to my third layer, tap the Move tool, grab my corner node and squish this into the
bottom right-hand corner. And it'll say width and height, 4 thousand pixels each. If you're nervous about
having the selection active, you can tap the arrow to
get out of this selection. Then come to the Layers menu. Tap the fourth and final layer, tap the arrow or move tool, grab my corner node
and this clockwise will squish into the
bottom left-hand corner, width and height, reading 4 thousand by 4 thousand pixels. And I can turn that off. Now if I come to my wrench, come to my canvas, Let's toggle the
drawing guide off. So I've got a nice clean
Canvas and look there, I have a perfectly
seamlessly repeating.
13. Lesson 8: Change Background: The joy now is changing
the background color. So I'm going to come to my layers panel, select
background color. And again, I can just play around with any of these
colors that I have. I quite like this one once
I found one that I like, I can come to the
wrench, Share PNG. Now, your iPad might work. If I save image directly
to my camera roll, sometimes it says Export
unsuccessful, so I'll tap. Okay. And then I find, because this file
is rather large, if I select PNG, this again is maintaining
my resolution. I can save to files
and I can go onto my iPad and I have a
folder called Patterns. I will double-tap
this and then I can call this bugs one, save. And then it will say
export successful. I can come to my
layers panel again. Tap the background color. Let's try this blue. That's a little dark. That's better. So now again, I can
come to the wrench, Share PNG, save to
files patterns. I can tap this, tap the X, and call this bugs to tap Save. And now I have two beautiful seamlessly repeating
bug patterns.
14. Lesson 9: Print On Demand: Now that we have some high resolution PNG files on our iPad, let's take a look at the size requirements for society. Six. Spoon flour and red bubble Here I am Society Six Sellers Guide Scroll down here and I look at the pixel dimensions recreated a work that is 8000 by 8000 pixels. So you can see that you can upload your work and it will fit almost any product on this website. Here I am on red Bubble and if I scroll down to the dimension requirements, I concede e that I am well above most of the requirements here. The files that we created can be uploaded to almost everything on this website as well. Finally, I will go over to spoon flour. This one's a little bit different because thesis eyes is actually need to be a bit smaller . Other than the few largest sizes here, it does explain here. What if my design has a higher DP I than 1 50? When you upload your image, we show you a preview at 150 dp I This means that if you upload a file that is being prepared at 300 pixels per inch. It will appear as double the size in the preview, and it does mention here at the bottom that you can easily change the print dimension of your image by clicking Change dp i or by using the smaller button. Now that we've confirmed dimension requirements and we meet almost all of the's, you can be confident that your artwork meets the criteria set out by these three print on demand websites. You are all set toe upload your designs. Make sure to watch the final lesson in this class. The wrap up.
15. Lesson 10: Wrap Up: Now you have to seamless repeat patterns, dots and insects that you can upload to print on demand sites. Such a society. Six. Red bubble and spoon flour. I can't thank you enough for taking this class with me. I've really enjoyed working through this process with you. Be sure to upload your to repeat patterns to your class project by clicking projects and resources and then create project. I have also added an information page that has the your l's of the websites visited today, including where to find all of the dimension requirements for the print on demand sites. I have also added in a cheat sheet of how to move your tiles to create a seamless repeat pattern. I can't wait to see what you have created.
 Erica Sprules, Science Maven Designs