Transcripts
1. Intro: Hey guys, I'm Mark. In this class I'm going to
teach you how to remove unwanted objects and people from your images using affinity
photo version two. I'm going to use a
desktop version, but you can also follow
this class on your ipad. The process is rather similar. I'm going to show you five
different techniques, then I will give you
a practice file. We can practice all of
those five techniques, how to use them together, when to use which too. By doing that, you
will be able to memorize the whole process and hopefully you will
be able to use those methods on your own
pictures in the future. All right, I will see
you in the first lesson.
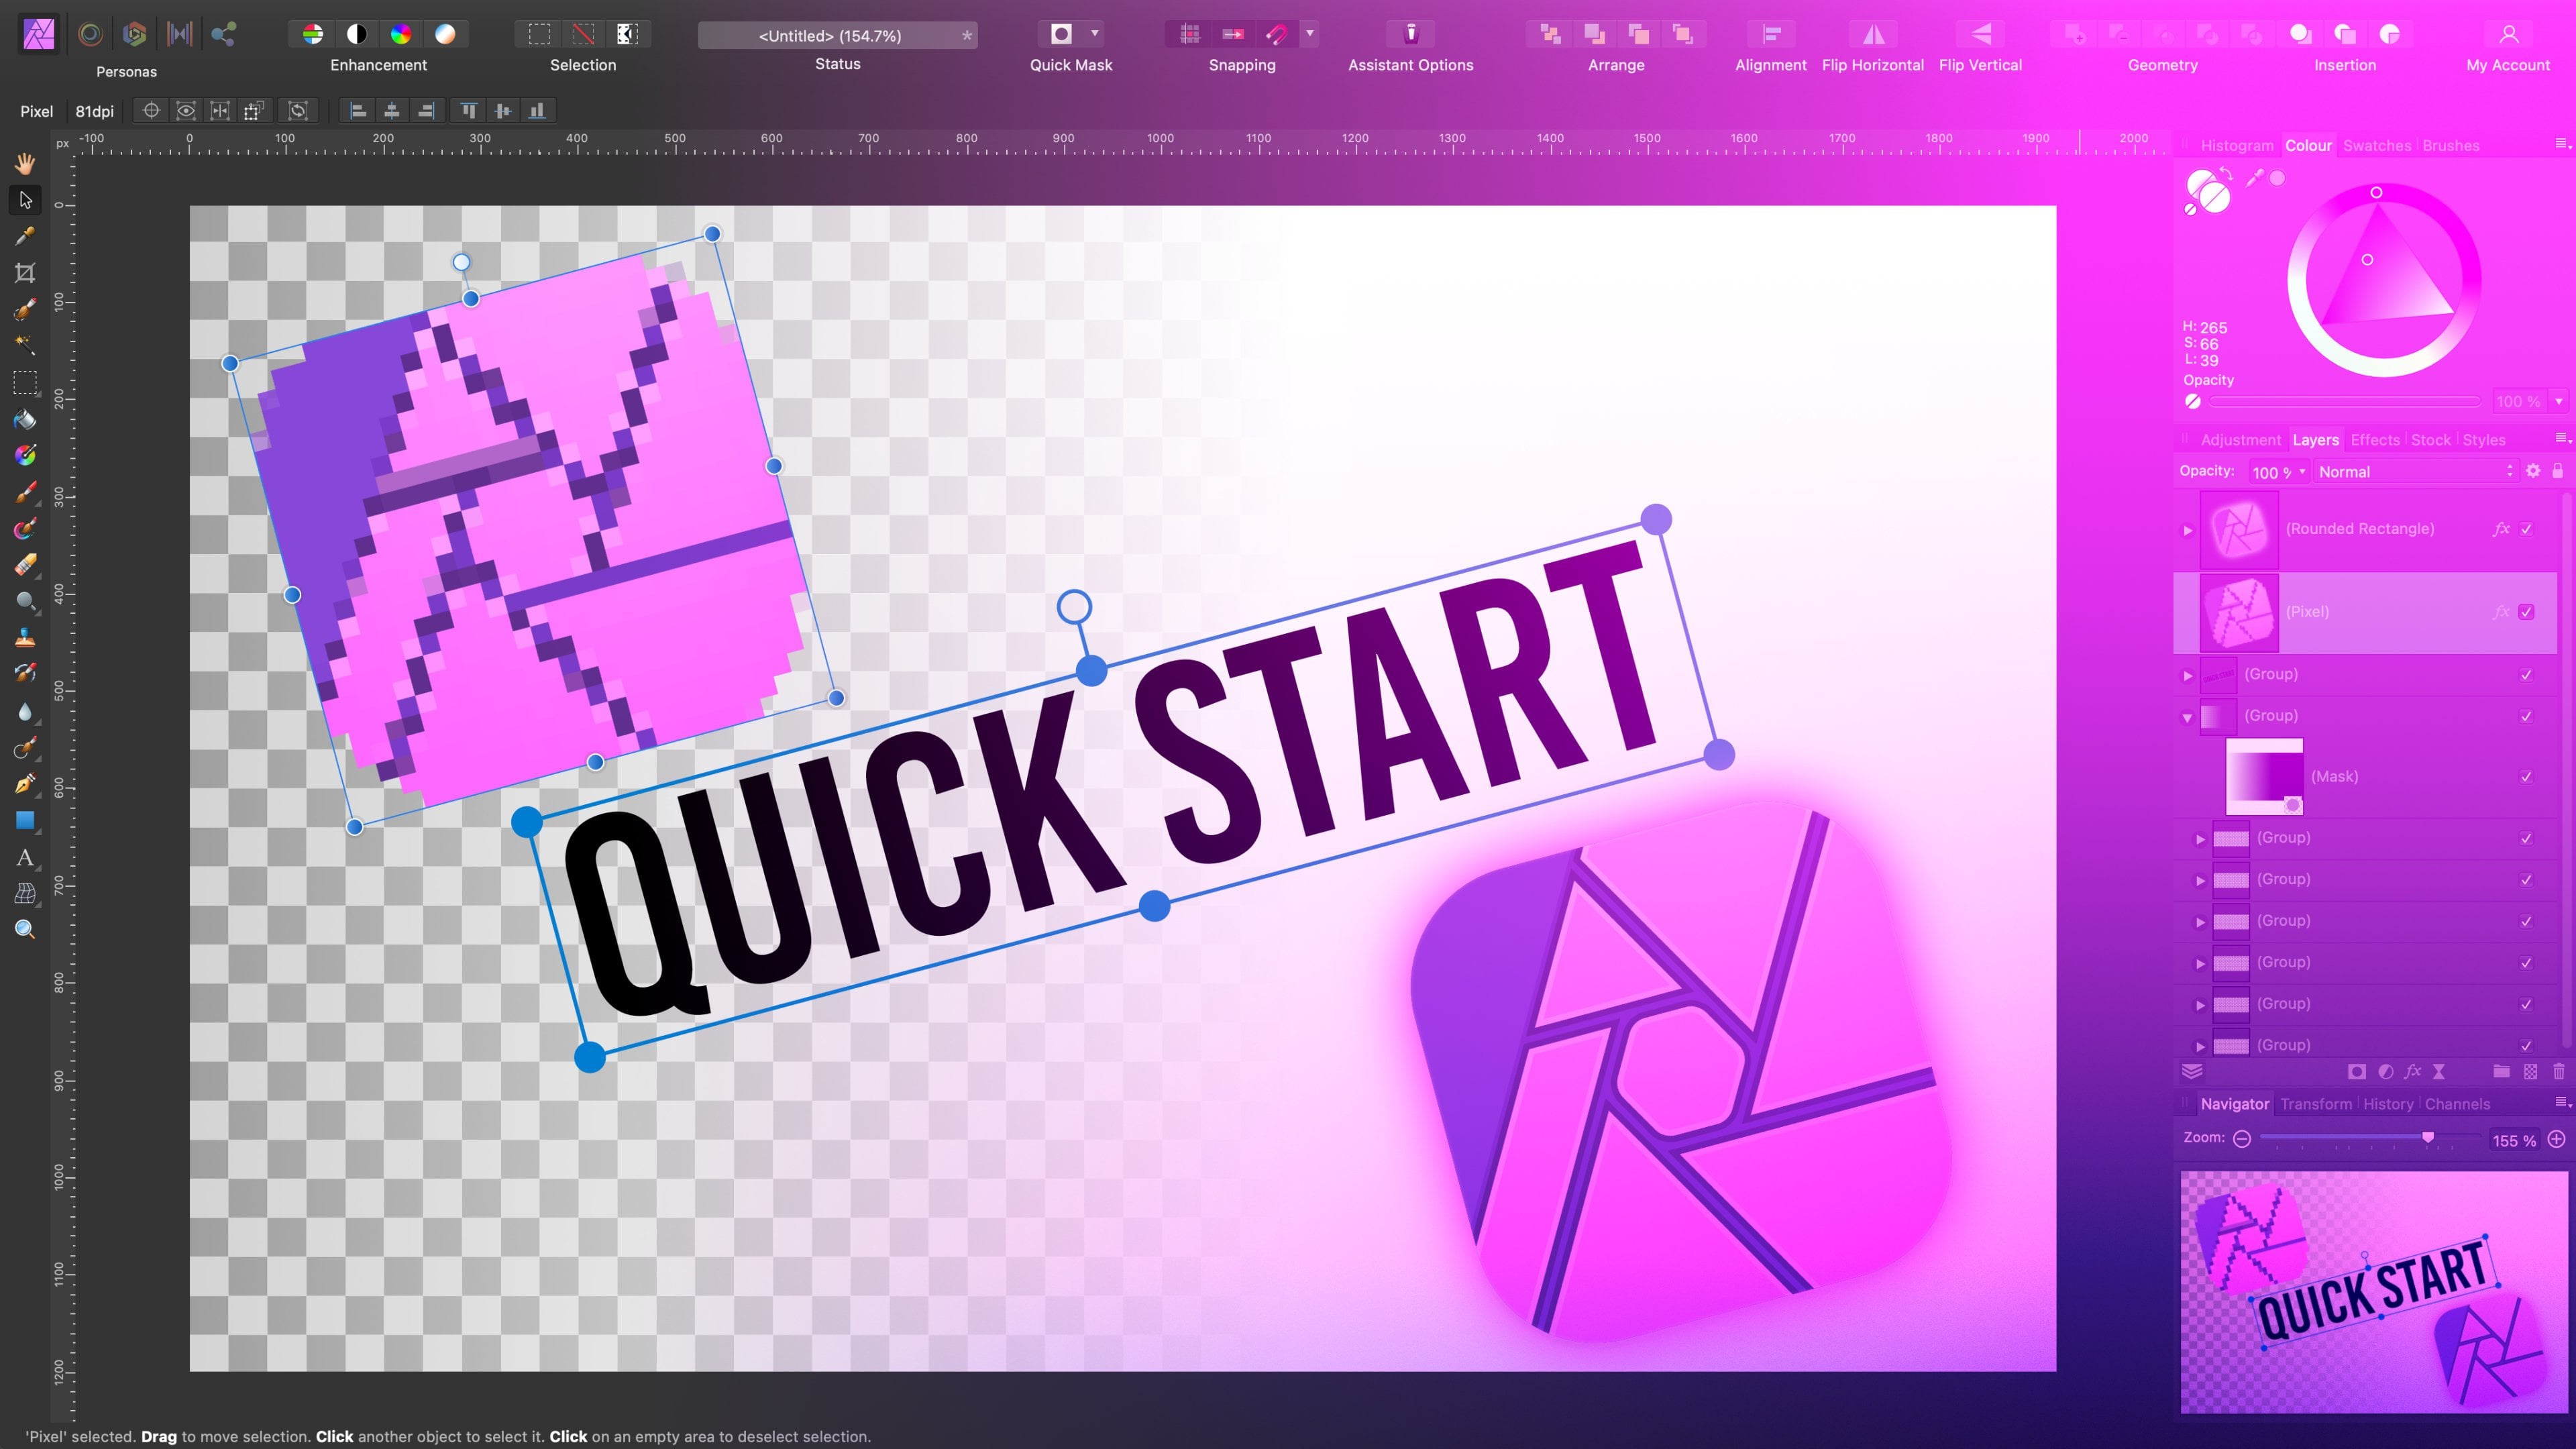
2. Interface: All right, here we are in a photo version two
on the left side, we got our tool panel. Don't worry about it too much. We are not going to memorize
each tool before we start. No, that's not the way when
you try to fix the car, you just pick tools that
you need for that case, it's similar here,
we're going to pick some tools based on what
we need on the art board. All right, our goal is not to memorize all of the
tools from beginning. Keep in mind if your screen
is a bit smaller like mine, at the very end of this list, they will got those two arrows. There are some tools
over here as well. If your tools cannot fit here, you can just click
the arrow below, and then you see more tools. Some tools come with this
little triangle at the corner. In that case, there's more
than one tool on that slot. If I click and hold, I can see that are two
tools in this slot. If you see there's
a different tool on my list, like in this case, if I change this paintbrush
tool to pixel tool, then you will see
pixel tool on my list. Then you searching for
it, in your case you cannot see it and then you
get angry. Don't do that. Just simply press and hold, Maybe the tool is under or
right left side for tools. At the top, we got
our context menu. If I change the tool,
this menu also change, we can control the
tool a bit better. On the right side, we've got
our panels, our studios, All of this can be
modified pretty easily, so I can move around
those studios. I can modify the size
of them at the top, I like to keep my colors
and just below that, I like to keep my layers
navigator. It's over here. I don't really use it that much because I prefer to zoom in and out with keyboard shortcuts. Well, let me show
you those shortcuts. Right now, I prefer to
press Common to zoom in, and then I press Common
Minus to zoom out. It will be Control plus and Control minus on
Windows machine. When you zoom in
really close like that and you don't
want to zoom out, you just want to move, move your camera upon
the camera around. You can press Space Bar, you can drag yourself
around the canvas as well. That's a little quick
recap of our interface. Let's learn about
the first method, how we can erase something from the image in
the next video.
3. Erase: When we think about, when we think about removing
unwanted objects, the casual approach
will be, all right, let's just grab some eraser tool and get rid of that
unwanted object. Let's try this approach. Will it work on the left side? I'm searching for some kind of eraser tool and here it is. When I hold down, I can see
that three different tools, we will cover all of them. The first one is the
base one, a brush to, in that case, I can set up how big it will be using
this slide over here. Very tiny, large. We can also set up opacity, how strong it is. Hardness, hardness give us this blur edge around
that erase thing. If you've got hardness 100, it's like perfect circle
without any blurry edge. All right? If I grab erase
the tool and try to erase this balloon, that's
what I'm getting. I'm getting big
hole in my image. I erase Pi cells and there's
nothing in that spot. In that point, we realize actually we don't want
to erase the object. We want to replace the object with something
similar to the backdrop. Again, maybe the casual
approach will be to pick the color
from the surrounding, use the brush with
that new color, and try to paint
back the backdrop. That actually, that was the old school workflow many,
many years ago. People who actually
use the brush to recreate the background,
fill that hole. But we don't need
to do that anymore. We got some smart tools
that will help us out. Let's undo all of that. Before
I share those smart tools, let's just finish up with
those eraser brushes. The first one, as you see,
simply erasing pixels. The second one is called
background eraser brush. This one is actually more useful if you want
to keep the object. Let's say we want to
keep the balloon here, but we want to
erase the backdrop. Maybe the sky is not nice, we want to replace the sky. Or maybe there's a
green screen around that with this tool. As you can see, the
preview life preview, that's very nice feature
of affinity photo life. Preview of the brush. You need to keep the brush outside if you move it
inside the balloon. Now you are removing
the balloon. Keep the most of the brush, like 70% of the brush outside
touching the backdrop. This way, take a look. Even without selecting
the balloon, the balloon is protected and
erasing on the backdrop. We erase the backdrop very quickly with this
nice eraser tool. As you can see, erase the
brush is not totally useless. Some people avoid it, fire, That's not the proper way. Now you can use erase
the brush in some cases. And there's also the T,
T one flat erase tool. This one will pick
the similar color, he picked the background color, he tried to pick similar colors
like reverse bucket tool, instead of filling the
area of the same color, we removing the similar color. As you can see, that can
be a way of removing but not the object but more like
for removing the backdrop. All right, it's fine to use eraser to
remove the backdrop. Don't use it to remove
the object itself, it will just make a big
hole in your image. There's a better way to do that. Keep in mind eraser tool
is destructive tool. Later on when we are
more advanced user, you'll probably move away
from erasing into masking, but for now you can
stick with eraser. And I actually really like
the background eraser tool. As you can see, we can really quickly
separate object from the back drop like this and if you use the back rop
of the same color, like white backdrop
or green screen, that's even easier than this. All right. That's very quick. Without any selection, without
any hassle. All right. So that's our eraser brush tool, that three version of it. And that's not the best
way of erasing the object, but it's good for erasing
the backdrop itself. All right, so let's move
to the next lesson.
4. Clone: Erasing object is not the case, what else can we do then? Some people may want
to copy a part of existing backdrop and
put it in that place. Let's explore next
tool on our list. Over there there's something
called clone brush tool. If you select that,
as you can see, we can modify the size of pasty, flow and hardness like
with the previous tool. If I try to use it, I'm select my layer one of the image and I click over here, there will be some
error message. You must set a source. All right, this is clone tool. We want a clone.
Something on Mac. I must press Option on
Windows that will be hold. You will see it
here in this prompt by holding option key
and I got little x, I got this cross here and
I can select a source. Now this source will
be used as my clone. As you can see why
moving the clone tool, now the X is next to it. I'm cloning w. X is pointing. We can change the
source multiple times. That's not a problem. Take a look. I
change the source. I think this brush should
be a bit smoother, so hardness to 50%
Make it a bit smaller. And try again this way you can. We're going from the
right to the left. This way you're picking
the color from that area. We don't need to change
the color yourself. We're picking part of
the backdrop like that. All right. Now let's change, let's pick the color here. Let's go from the
left to the right. This way we can C we
are cloning the area that cross is pointing to it. Stick to my rush so I
don't need to change it all the time. All right. We use the clone tool to
create a fake sky over here. Let's make it larger
and very soft, so hardness to zero. I will try to randomize
what we create here. All right, and that's our
result using Clone Tool. As you can see, it's way
better than the eraser tool. There's no empty hole. We create some fake sky
here but it's not perfect. There's a better
tool we can use. But don't forget about existing
of clone tool because in some cases you will need to do it with clone
tool manually like that. All right, let's move to
the next video to learn about another tool we can
use to erase this element.
5. Healing brush: This clone brush tool
is really handy. But I would like to
show you something similar but more powerful. If you go down here, there's a whole group
of healing tools. We call them healing tools because they can
help us to remove some unwanted stuff from your images and heal your
image from the damage. Or simply you don't want that element in your picture and you want to get rid of that. The first one on this list is healing brush tool
and take a look. Same options here.
Size of the brush, opacity, flow, and hardness. We can modify that with
slides at the top. We already know how to do that. Let's just try to use this
brush again. Same warning. We need to set up a source. All right, I'll set
up a source here. What next? It's working in similar manner to the
clone tool as you can see. But in this case we are able
to make strokes as well. But be careful If you
make a stroke and you move into your center, your sample point,
your source point, You will duplicate
what's there as you can see this healing, to try to take a texture from here and blend it
with what's already there. What's already there.
It's actually dark color. We are not getting
a nice result like before because this tool is trying to help us by blending this new texture with the
color that is already there. As you can see, this tool
will be a bit less forceful. That's a good thing in some cases when we want to use that. As you can see, even though
we get rid of the shape, I can still see the original
dark color popping up here. That's not perfect solution. When would you like to
use something like that? If you don't want to
make too strong changes, maybe there's just a little
pimple on someone's face, you want to remove that thing. This will be a better choice
then the clone stamp tool. Right? If you clone. Let's go back to the clone
tool. I just switch tools. Now I'm using clone tool. I will select this
one and take a look. I totally get rid of the
original color that was beneath. If I use the tool, I just show you
healing brush tool, you getting a sample, but it will be blend with
what is already there. All right, if I get
a sample from here, I can still see this
cloud a bit below that, I can see the color
of that cloud. This tool is way softer. It will try to change the texture and blend it with
the original color below. When the normal
clone tool replace everything is very
brutal, forceful tool. This one is a bit
weaker but it's perfect for very little
changes and it's blend nicely. We don't want anybody
to notice that you remove something small from the facial area or
something like that, this will be a better choice. All right, now we know
about two tools that are quite similar with
this one difference. We've got clone tool over here
using the previous video. And there's also healing brush tool that it's
a bit more smarter. It's try to preserve
the original colors. It's not ideal for
removing the balloon here, but in some cases that's
exactly what you want to use. As you can see just
below that there's patch to, how about this guy? Patch tool allow us
to make a selection. I click and make selection
are around the area and now I can move my mouse pushing this
out in certain direction. Then I click on it to confirm this new area and
then it's removed. Take a look. Let's
do it one more time. I will zoom in a bit. I use comment plus, shortcut. It will be control. Plus on Windows, the
patch click and drag, I make a selection of the area. This is rough selection, not a precise selection. Then why I try to
move my mouse around, like pushing out this old image and there's new background
from the area I'm pointing on. In this case it's a sky. So it's really similar. I just tap until the selection disappear and I got new
backdrop here as you can see, if you want to remove object completely and the
backdrop is simple, Patch tool is really,
really nice solution. All right, we got three
more tools here to cover. Let's cover them
in the next video.
6. Blemish Removal Tool: All right, let's continue. As you can see, I have
loaded a new image. Keep in mind if you
open image with a think the photo version two
directly from the desktop, it will be a locked layer. As you can see on
the right side, I got my background and this
layer is locked by default. That's maybe a reason
why you cannot apply any of those effects
I showed you before. We simply need to unlock
this layer before. Some tools also
require this layer to be pick, selected by default. Now this is a image, we can right click on it. And just to be sure we can rasterize this layer in case there's some
embedded image here. All right, now we are
sure that everything will be just fine
with our tools. With layer one selected, we can go back to the left side. As you know, we just discovered this whole healing section. We already try
healing brush tool. Let me just pick this
tool once more and this time we got a bit
different subject. And as I mentioned,
this healing brush tool require me to pick the source. I pick the source here. Nice skin, then I can do some healing without changing
the color of this area. It's not as wide as here, but we get rid of
the texture pimples. That's the power of
healing. Brush tool. Let's move to the next one. Patch tool, I already
show you that we can simply select the area, then you can use
your mouse to push a new texture inside that double click to
confirm and that's it. What's next? Next is blemish removal tool, a perfect tool for this case. We can modify only a size of it. It's a bit different,
There's no opacity, no flow. Keep in mind we can use
the slider for the size, but I can also use a
keyboard shortcut, square brackets to make
any brush, any tool, based on the size of the brush, we can make it smaller and
larger square brackets. Now as you can see, I will be able to relocate
some of the texture around to remove a
blemished heal up. It may remind you a
patch tool a bit. We can say this is the patch
tool in the form of a brush. That will be up definition here. This is more like
a patch tool in form of the brush. Not bad. What's next? Next is the most powerful tool in this group in
painting. Brush tool. Did you ever hear about
Content Aware Feel in Photoshop or in
affinity photo? That's the Content Aware in painting is same
as Content Aware. This is smart tools. The program will try to check out the content
around the brush. The program will see
what's around and we'll try to create
something similar for us by simply click and hold market
with this red color. Don't make it too large
or right smaller strokes. Then the program analyze what is around and try to fill this
area of the same thing. Keep in mind looks
what happened here. I got exact same copy. This pip is exact
same copy of this one because the program look around and see that this
pin pole is around. That must be a nice
content I want, right? That's the downsize
of in painting. You must be aware of that. If it's keep happening, we can refer to tools
we already know about. We can use healing brush
tool because in that case, in the healing brush tool we can specific the source ourself. Then we can get rid of that. So we can specific the source manually in the
healing brush tool. But if you are dealing
with in painting brush tool it will be
generated by computer. We don't have that control
but it's way faster. Just be careful about if
you pick something that is not the intended feel
and start repeating that, then you try again and again
and it's the same result. Just don't panic. Switch
the tool for a moment, use the clone tool
or healing tool. Get rid of that element and go back to in
painting brush tool. As you can see with in
painting brush tool, we can easily remove some unwanted elements
from this picture. Of course, we could
do some separation, the texture and color separation
to be even more specific that's entering the
pro editing territory. And our topic for this class is removing
unwanted objects. Let's just stick with
this approach for now. As you can see, we got interesting results
with just one tool, way better than erasing this and making hole in our image. All right, that's in painting, brush tool, it's in the
healing group over here. That's one of the
most powerful ways of removing unwanted objects
in affinity photo. All right, I will see you in the next video when we will
explore this even further.
7. Inpainting Brush Tool: The next tool is rather similar, it's the same group over here. If you hold your mouth, you will see that next tool
is called in painting. Brush tool in painting is the same thing,
like content aware. You might hear the term before Content aware feel
or in painting feel simply the program will check what is around
the object for us, try to generate similar
color, similar texture. The way we control
this is to the brush, you see it's called
painting brush tool. We got all of the
brush properties like size, hardness, and flow. We can change the size of the brush with the
square brackets. That's what I like to do. Or you can simply use this
slide at the top. All right, let's zoom in a bit. Let's say I want to
remove this guy here. Let's try with all of
the base settings. I adjust the size of the
brush to match this. I will try to paint him. Nothing happens. The
layer is not selected. Let's select the layer. In my case, it's also locked. I'm going to unlock
this layer. Nice. Let's get started. You
see this red color? It's help us indicate which
areas we already cover. Let's do something else. Let's try to remove half of him. I release my mouse button, and here's my result.
It's pretty good. All right, let's continue just a bit more than we need. Just a bit more than we need. You don't need to be
super precise here. Okay, maybe here as well. All right, let's release. It may take a moment here and you can see
I got this artifact, the program look for the texture and decide to
copy the texture from around. Normally that's fine, but sometimes we got very
specific things. Can you see those two dots here? Copy again and again and again. You may look for
stuff like that. Simply be sure you don't have duplicates
close to each other. This way no one will notice
that we remove something. Let's zoom out a bit. Get rid of this guy
over here nicely. We can also use it as before for actually removal
of skin problems. Not nice skin texture
and stuff like that. Let's use that again. In the similar set
up as you can see, it may be a bit of
trials and errors because the program
automatically is checking what's around. For example, he gave
me this hair here, I don't want again and again. In that case, you may flip to different tools We learned
before when we can manually sample the source. All right, this tool is really quick because the
program try to sample for us. But downside of it is it may sample something
we don't want to use. We need to balance that by also switching to other tools
we learn about already. Don't forget there's
something called in painting. Brush tool we can also do
in painting from selection. Let me show you that as well. Let's back to this image. I will just undo a few times. We can go to the original
state I like to do with command come and Z on
my keyboard, just like that. All right, we use it as a brush, but we can also use
it from selection. If I go with some very basic selection
like freehand selection tool, make a very rough
selection around this guy. Just like that. Now I can fill this area with a new
content in painting content. Click at it, at the top, we want to fill it. Then we got some pop up box, we can fill it with color or we can fill it
with in painting. That's what we want to do. We got the preview even
before we click Apply. I got nice preview. That's the second method how we can do in
painting removal. It's really handy for some objects on the
nice simple backdrop, grass, sky, water
like in this case, it's really good with
simple backdrops. With more complex backdrop, you may need to make a
more complex selection. Be more precise. All right, that's a really powerful tool, so don't forget
about in painting. And I will see you
in the next video.
8. Censorship: What if we don't want
to modify the image, but still want to cover
up a person or object? In that case, we can use some censorship
techniques to cover up, make it black, make it blur, so people cannot recognize
the certain person. But we don't need to remove it completely and make
it look very fake. If you plan to sell your car, you want to blur your
license plate maybe. But you don't want to remove it completely because
it will look fake. All right, purpose of this chapter will be to
just cover something up. It will be obviously covered, but that's the goal here. Let's explore some
techniques we can use to send somebody or something out. The very basic
thing we can do is to simply go for the shapes, for the shape tool On the left, we go with the
rectangular shape. Let's say this guy at the right, we want to cover him up. I got my shape on. Let's change the field color to be black. That will be the easiest
solution, right? We already send this guy out just by covering
it with shape. Let's explore another
way to use it. I will just delete my shape first by clicking
the removed layer. All right, I will
duplicate the whole image. Right click, Duplicate. This way I can keep the
original intac below. All right, in this copy I'm going to use
a selection tool. Let's search for
selection tools. Maybe I will use the
rectangular selection tool. Select his facial features, eyes, nose, et
cetera, like that. With the selection on, we're going to search
for filters and we can blur this
area. Gaussian blur. This can be used as the
sensorship method as well. Keep in mind if you
reach 100 pixels, it still not blur enough. You can override it
from your keyboard. 120, that's fine. All right, de select, we blur this guy out, is a bit smoother than using the big black shape on his eyes. All right, what else can we do? We can match those
two techniques. So let's undo. I can actually
put the shape first. The shape will be a great
for us because we can use the shape to make
selection from the shape. Let's give a lipstol
this time. All right. A Liptool. This time we put
the ellipse tool on his face. Then I holding
command or control. Click on the shape in
the layer section. As you can see, the
shape is selected. Switch off this
layer for a moment. Go back to the
layer of the image. Let's explore another
filter we can use. All right, we use
the blur filter before that was fine effect,
but what else can we do? We can distort this area. We can pixelated, you may
recognize this effect, It's really popular
in TV stations. We pixelate this area. We reduce the resolution here. It seems like from the old
video game apply again. Now we cannot recognize
the person anymore, but it's not that obvious. First look at it is not
ugly black box here. We can also turn on this
shape and reduce the opacity. It's just a bit darker. If we want to blend or
match those two techniques, we can do it this way. All right, what if we
the whole image, right? To do that, I will
duplicate the whole image. Now I'm going to
use this pixelate, Pixelate the whole image. Apply. Now I'm going to
add the mask to it. The mask is white. Let's turn this
mask black first. Perfect. Now using the brush, we should be able to uncover areas for the pixelated version. Let's grab a brush tool. Over here we got brush tool, let's check which brush
is activated right now. Let's get the soft one. I will use the
flow, 100 hardness, 50% The color will be white. This time we are in the mask, not in the layer in the mask. And take a look. If I start painting with this white brush, now I will add the pixel
layer to the visible option. So I can pixelize everybody here, right, everybody's sensor. Now I control this
using the brush. We can reverse this easily by changing the brush
color to black. Then we can remove those
pixels and uncover original faces because the
original image is still below. All right, keep in mind, sometimes we don't want to
remove the unwanted object, we simply want to cover it up. We can cover it up with shape, we can blow it,
or we can distort it like with pixels
as I show you. All right, let's move
to the next video.
9. Remove Backdrop: What if we don't want to remove the object
of the picture, we just want to get
rid of the backdrop? In that case, there are several ways we
can approach that. As you can see, this is what we consider
an easy backdrop. In that case, we got a
backdrop with a low texture, it's blur, or it's a simple
color like this one. If you've got
something like that, that's always a bit
easier to remove. Also, crazy headlines
can make this tough. In my case, it should be fine. All right, what can we do? We can select the object, the dog itself, or we
can select the backdrop. It doesn't matter because we always can inverse
the selection. Let me show you.
Let's this time use the actual selection tool is
something called selection. Brush tool here
as the names say, it's a brush tool
so we can control the size of the brush
like we always do. We got little circle. You already know how to
change the size of it. I use the square brackets, but you can also use
the slider at the top. Zoom in a bit. All right. And you know what, I will
do it other way around. I will select the
backdrop this time, not the dog itself. As you can see, it's
quite close to my brush. It's not perfect solution
for what I try to do here. Let's make this brush a bit
bigger, then that's better. You see the selection
start snapping to the contrasting color this way. Very quickly we will manage
to select the whole backdrop. But wait, I can
see trouble here. We select this ear by mistake. Let's now click subtract option. Make this brush a
bit smaller and subtract this ear from
selection like that. You will need to go slow. Not magic button here. Sometimes we need to
add to selection. Sometimes you select too much
and you need to subtract. All right, let's try now
to remove the backdrop. You may think that I
can just hit Delete on my keyboard with the layer
selected and unlocked. That will do, yes. We remove the backdrop, we got this checkerboard texture
indicating transparency. But there's a better
way, let's undo this. Action said, there is
a refined option at the top so we can do the final refinement to the selection and
got better result. If you cannot see refine, be sure a selection tool
is currently active. All right, so we
got this refine. I click on that, it will give us
this additional box for our final refinements. We marks foreground, we can
mark words, background, we can decide about border
with border width is between the foreground and
background, it's 10% here. By default, the
program will try to refine around that border
to give us a cleaner out. We can also change the output. This can be just a
selection as a new layer. A new layer with the mask. Let's try a new layer this time. Apply. Wait, something's wrong. We got a new layer
without a dog. That's opposite what we need. Right, Let's undo. And let's inverse the selection. Before we refine it, we
want to click Select. And then we need to inverse
that, invert pixel selection. Now we are selecting
a do not a backdrop. And that's way better if we plan to use the refined buttons. Let's click on Refine once more. This time the background
is red as it should be. All right, you know what? I got this little
blue color over here. Let me just mark it
as the background. Nice. And that's why we
use this refined mode just before we output our new
object without backdrop. Let's select a new
layer like before. Apply. Here's our dog. In this video, instead
of removing the object, we remove the background
around the object. That's also a useful technique. There's more than one
way of doing that, but I believe selection and refinement is a
really nice approach. All right, I have prepare a special file for you guys with multiple
objects for us to remove. We can practice all of those
tools we just learned about. Don't forget to
download the file and jump into the next
practice video.
10. Extend Backdrop: Let's think about a bit
different scenario. What if we actually
need to extend the backdrop after
selecting crop tool? We decide that we need
some extra space. I pull it outside. He entered to confirm, I end up with this gap here. There's nothing here. Checkerboard indicates
transparency. There are two ways how
we can approach this. One is the old school way, When we make a very tiny
selection at the end, then using the move
to we transform the selection to
stretch this area. Before that, don't forget to
unlock the original picture, then we stretch this
to the very end. In addition, we can pull this
to the right a bit, okay? And now we got the smooth thing. It's not ideal,
it's a bit noisy, but it's way better than just gap or white
color popping out. Okay, that's one way. Keep in mind is only work with
the simple edge like that. We've got gradual colors, so we can pull them and stretch them to fill
this empty gap. Let's undo and try
alternative method. Alternatively, we can
select this whole area, go to eat it at the
top, click Feel. From here we can
fill it with color. But that's not our goal we
want to fill in painting. Painting is also
called Content Aware. Take a look, we got
a descent feel here. What the program will do. It will check what's around
and try to replicate the similar thing.
It's really nice. Only thing we need to be worried about a direct duplicates. Let's zoom in and take a look. This plant is a direct
duplicate of this one. It will be really
easy to spot that. We can fix that maybe
by using a patch tool. If I select this area, I can offset that a bit
just to cover this up, to avoid the direct duplication that will indicate that
we copy the content. All right, let's try this once more on a
different picture, but again it's nothing
too complex on the right. This time I'm going to extend the background on
the right side. Once more I will take
the crop tool and create additional space here. While using the crop
tool is also a good time to actually rotate a bit. If you want to change the angle, you want to make the horizon straight and stuff like that, you can apply a bit of rotation. All right, now we've got
this gap on the right side. As you can see, it's
not a straight line. It would be a bit more
challenging to select, but that should be fine. We can use the
lasso tool instead. This time, let's go with lasso. And the last got three
different modes. Free hand, a magnetic one that will snap to the
contrasting colors. There's also the straight one that will allow you to
create straight lines. In that case, let's use
that straight one again. Our goal is to select
very narrow patch. We've moved to, we will
try to pull it out. But as you can see, it's not the
transformation that we need because it was
not a straight line. It's transforming
in different way. That's one thing to
take in consideration. That's why even though
the picture is tilted, we still need to select a
straight strip of pixels. Actually, there's a
special selection for that, take a look. Column selection will select
a one column of pixels, only it's really
narrow like that. We can use that to make
a very narrow selection. We can adjust how
wide it will be. Let's go with five
pixels this time. With that, I will pull it out. That's the old school method, and as you can see,
it's not ideal. We got duplication of
the same five pixels. So that those lines, how can we improve this? Let's select the
surrounding area. In this case, I will
turn on further. The selection is not that sharp, it's blur at the edge. With this further selection, we will apply a blur
to this whole area. Let's go down to
the layer panel, select the Gaussian blur. Blur this right
side of the image. There's nothing important
here, just the backdrop. Let's blur this a bit. We preserve alpha
because we are, we are touching
edge of the image. Okay. This way we lower
the focus on this area. It's not obvious that
we are the backdrop. All right, so that was
the old school way. Let's try the modern
approach of content aware. Let me just undo
several times here. This, all right? And now we can again, make a selection, go to it. Feel in painting. Remember the good thing is you can click that and
not even apply the effect. Just wait a moment and see the effect before
you can apply. As you can see in painting, it's a bit better. But again, we still need to be careful about
those direct duplicates. We can use the same thing like
patch tool like last time. Select those elements that
are obviously duplicates. Double tap outside to get this new texture
in the place manually. All right, that's it. That's how we can
extend the backdrop. If you've got the big
hole on one side, after you finish
cropping your image, you can try to select that area, go to eat it, and select
feel in painting. Feel. Keep in mind this is not AI enhanced
generative background, just the program looking
around for the colors and objects and try to fill this area of the
similar stuff for you. It's limited. It will not
generate totally new content, like if you've got the sky, it will not generate new clouds. It will only copy the existing
clouds from this image. So keep that in mind. I hope this was helpful and I will see you in the next video.
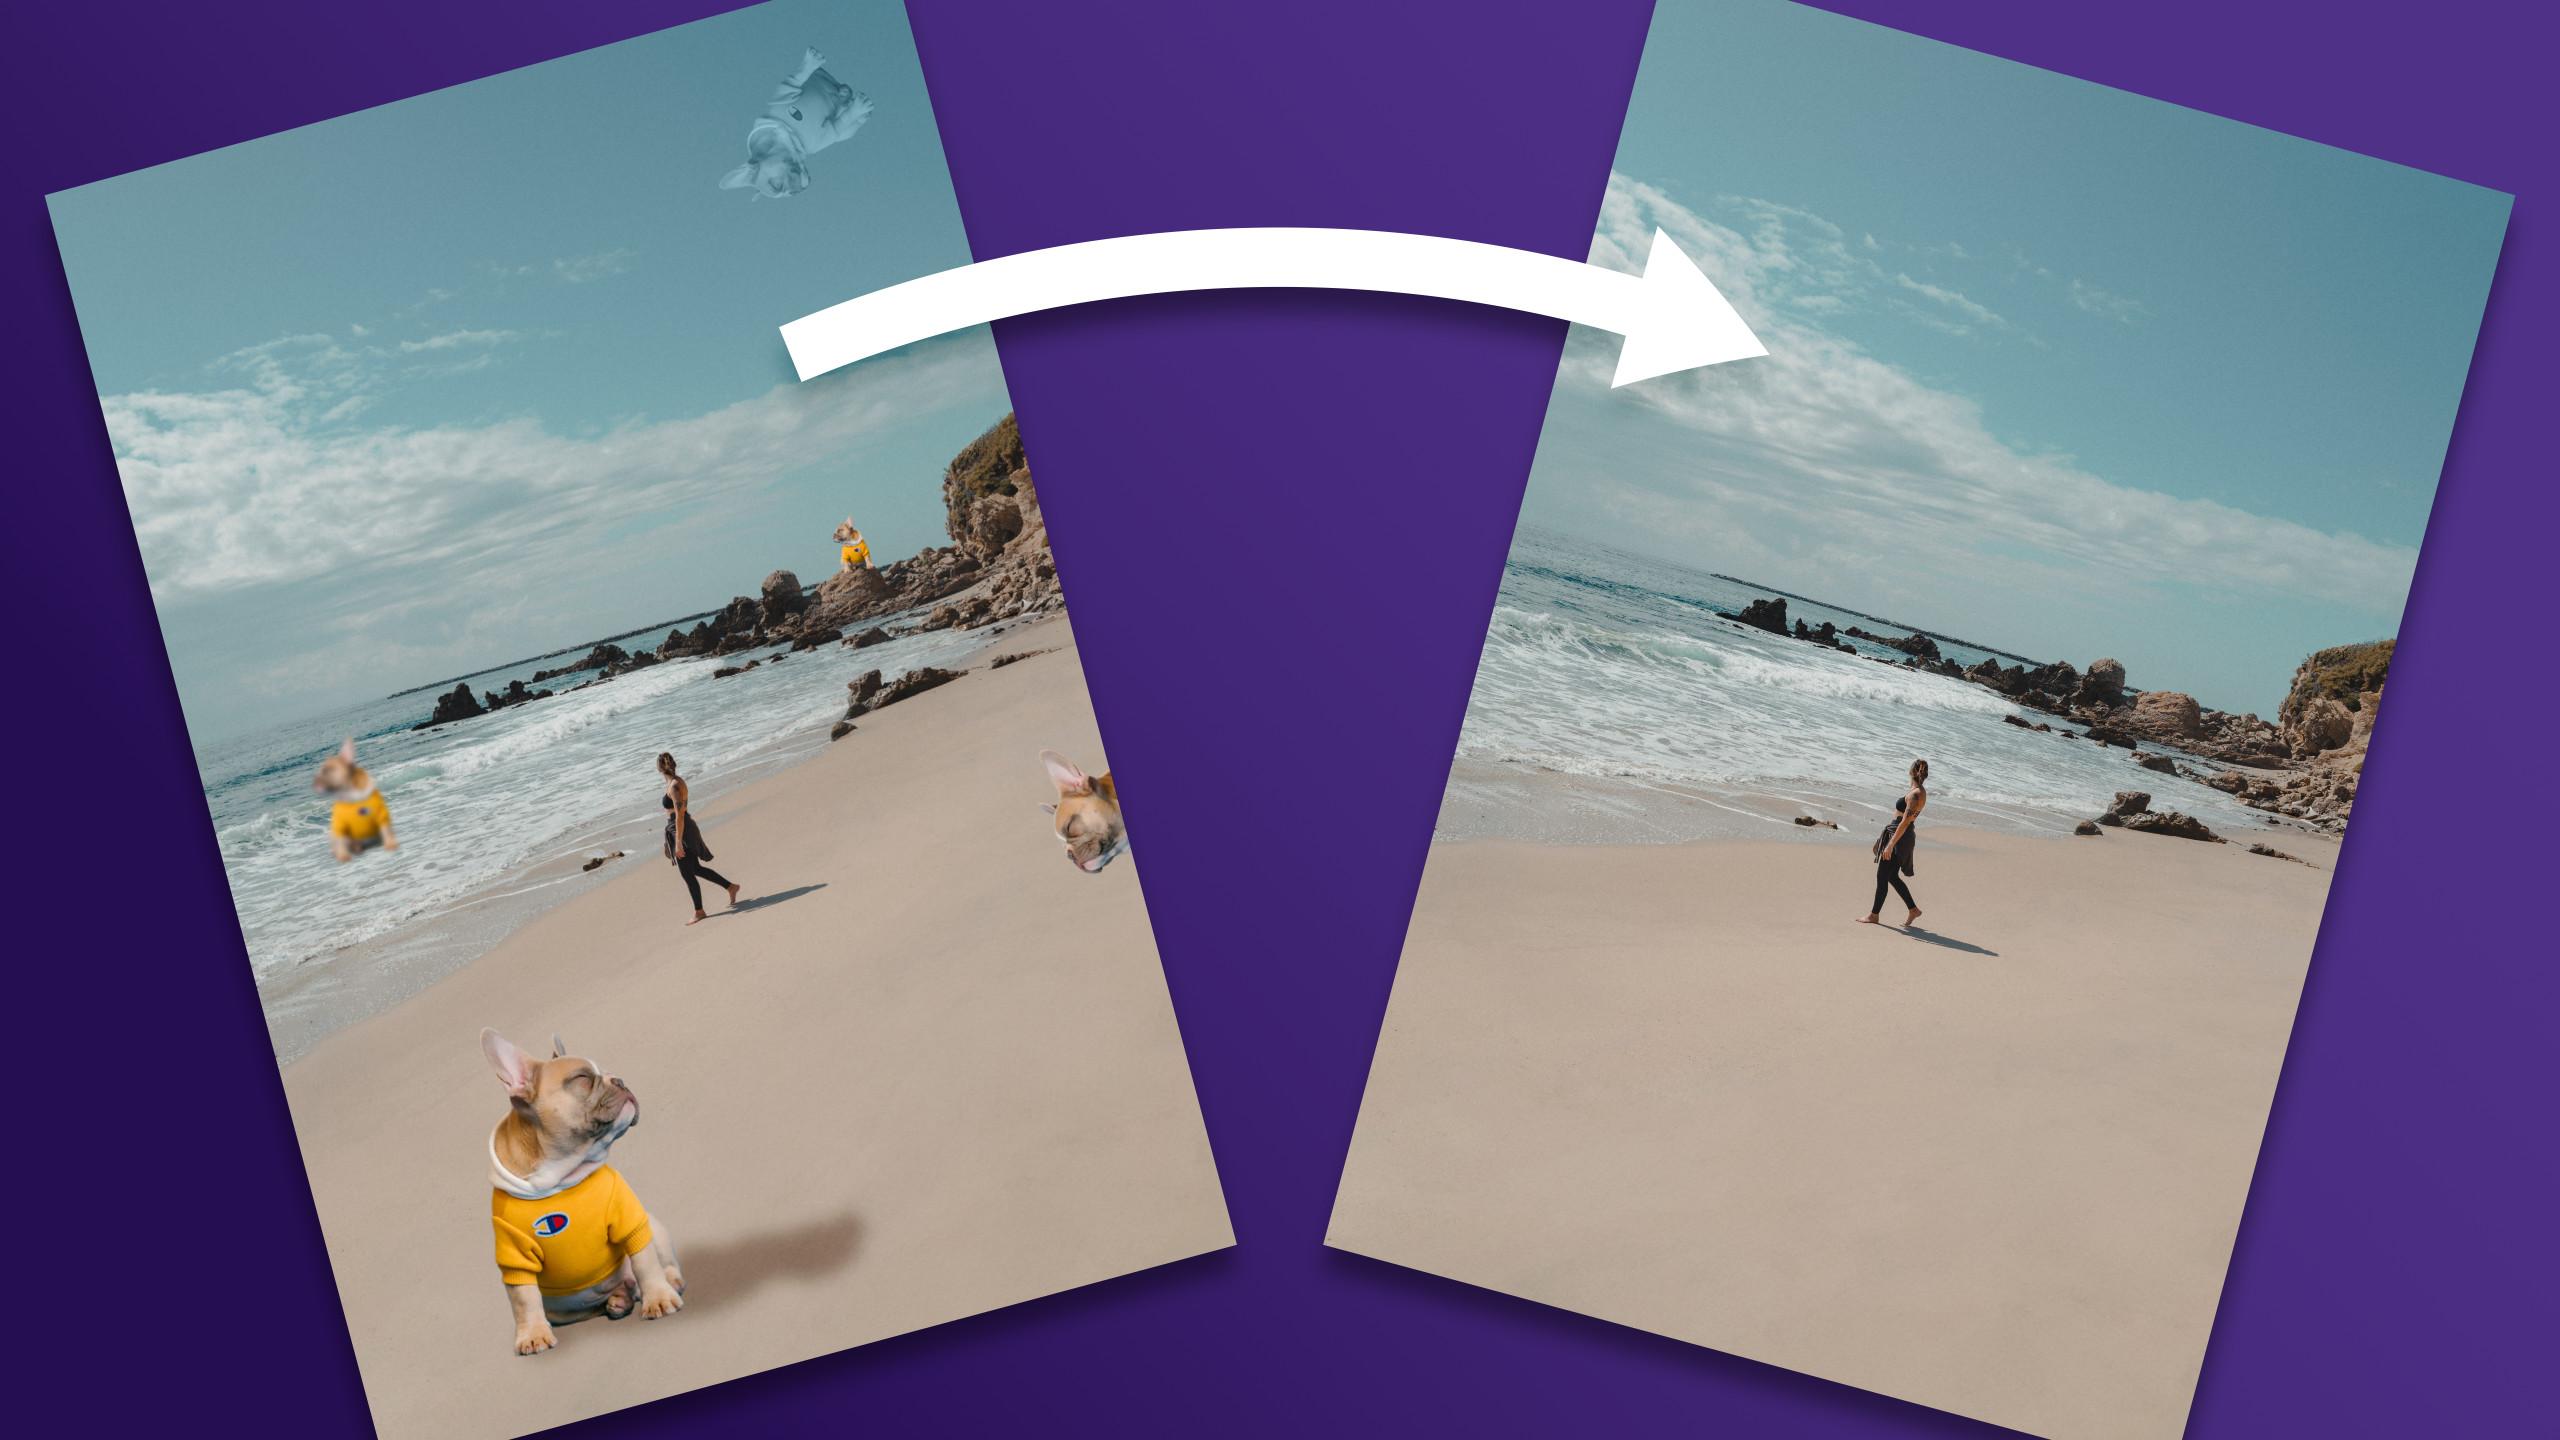
11. Practice: It is time for our project,
our practice time, so please download the file
I have prepared for you, then you can simply track and drop this file into
your affinity photo. Here it is, an image
and you will notice the familiar dog here
from our last video. Seems like he
invited this photo. We got five copies of the
dog in different scenarios. The one at the top, it's a
similar cold in the backdrop. The one over here above
the water, it's blur, one on the edge is a challenging one as it's touching the edge of
the image directly. There's a smaller
one here sitting on the rock and one at front
with a shadow below. We're going to use
everything you have learned so far and try to remove all of them
from this image. Think about this
as our playground, as our practice ground. Our chance to use the tools
we just learned about. I recommend you guys to zoom in nicely. Do
not work like this. We need to see in
the close detail, it's high resolution image, so we can press comment plus. All right, that's better. Let's try to tackle
this guy over here. As you know, we can use
something called Pub tool, let's try that technique. Maybe one way is to
simply select that first. We can select this
with any selection. Tool selection will not bound us to any
solution just yet. All right, that's our selection. Be sure the layer is selected and unlocked
so we can work on it. Now I'm going to try to
fill it with In Painting. Remember that something we
did in the previous videos? So I can click Fill
instead of white color, I will change to In
Painting. How about that? The preview shows us
a very good result. I can apply that. Now I
recommend you guys to disselect. You will not forget
about the selection. You can click select and
disselect at the top. You can say this part is done, but let's just undo now. We will try to approach
this manually as well. Remember the path to over here. This allow us to manually point the texture around the
screen to cover this dog. Just be sure to double
tap, here it is. All right, we are
done with this guy. One finish. Four more to go. I'm going to move down here. You can press a Spacebar to move freely around
your document. Why the space bar is
pressed? You will. Got this hand icon so you
can pull yourself around. Right? What's the
problem with this guy? It's quite large,
that's the first thing. And it's also shadow. That's something we need
to pay attention to while removing objects
from the image. You also need to remove shadows and reflections
of the object. All right, you remove the guy, but you can still
see his reflection in the car, in the mirror. That's not good. Always pay attention to shadows
and reflections. This time I will go in painting
brush, make it larger. I will try to delete him part by part because how
large this area is. All right, now this part, we got the shadow left, so we cannot forget
about this element. I can see some
discoloration over here and also a bit
of yellow color here. Luckily enough, there's sand. The it's really easy
texture to work with. I think we got
pretty good result. Maybe just a bit of random selection
while I'm doing that. And to randomize
the texture a bit. Okay, I think it's good enough. All right, we already get rid of the guy here at the top
and the big one at front. Of course, you can try several different
techniques on one guy. You can always undo and try different techniques
just to practice. We got three more dogs to go, and we're going to finish
that in the next video.
12. Project: Let's continue our
practice project. We already remove the dog here at the top and
the one here in front. Three more to go, let's
tackle the blur one. The B one can be
quite a challenge as we don't have a sharp H, it's harder for program to detect what is an element
we want to remove. Also, sometimes, why filling
this area of texture? The texture will be blurred
to match the original here, original texture that is here. Right now what is of
course a blow element. We need to be careful
with those smart tools. Let's give it a go in
painting brush tool. I like to use it first because in like 80% of
cases, that's good enough. That's my first tool I
always try in painting brush tool. All right. We got all nice red selection around so we know what
is painted already. And when I release the mouse, you will need to wait a
moment for processing. Actually, it's better
than expected. We still got some areas to fix, but it's not bad. This will be a case for
more complex removals. You use one tool
to certain degree and then you switch
to another tool to make it even more realistic. Right now we've got the top
part that is not matching. What can we do here? We can go with
patch and directly select that area and try to find a content that
will match with this area. Let's say that's good
enough. Double tap. Then again, back to in painting
brush and smaller fixes. You can even zoom closer, search for any weird lines
or stuff that's duplicated. We can see clearly that
this copy of it you see here, take a look at this. And that's exactly
the same thing. Now we get rid of this
obvious duplicate. This way we managed to get
rid of the dog in the water. As you can see, we use more
than one tool for that. Right? Let's give it a try. Over here at the edge, there's a certain
thing that can happen. Let's check again. I start with in painting brush. In my case, it's
really nice removal. But the thing about objects, the side of the picture touching the edge of it is
very, very often, they can leak the color in
even we remove the thing, the color may stay in that case. If it's happened to you or
it's happening in the future, you can use the patch tool. This will be way
safer option for us when the image is
touching the side, then we simply move down. Okay, Now we got this effect
that I was talking about. You see this color is leaking because we got the object
touching the edge of it. In that case, very, very often, we need to
manually adjust that. You may remember, this is this brush healing tool that will warn us that you need to make a source manually. That will be perfect
for this case scenario, we simply click with
the option here. This will allow us to get
the source from that area. Unfortunately, we still
getting this ugly color. Even with manual source, it's fading away, but
it's rather slow process. That's the thing that
may happen on the edge. Be aware of that.
Finally, in painting, brush was the solution
here on the edge. Objects may be tricky to remove. They may colors
like you just saw. All right, and we got
the last Dr. remove over here in painting brush here, we may have a problem. Let's check the result. Yes, the top of the
rock is missing. You may already know what
we're going to do about it. We need to find a similar
texture that can fill this gap. I will just select the
area that is missing. I search for the top of the rock from the
nearby rock here. All right, so we've
got a sharp edge here, it's not blurry edge, seems like we just get rid
of something at the top. Nope, we replace this
blurry edge with sharp edge just by borrowing
edge from different rock. All right, let's take a look. There's still some
discoloration here. That's something that we
need to always look for. Okay, let's see that we can
detect our missing objects. Objects we already removed. One was here at the top, one was on the rock, one was in the water, one was at front
with the shadow, and one was on the right. In some cases, if you've got
area where the texture is not sharp and you want to have some additional
blow, you can do that. You can simply use
the blo brush tool. Then you can blur the area. If it's on some backdrop area, the sky will be
never sharp here, that's our backdrop. It's blur. Anyway, we can give additional blur in the
area that we remove the object to give
it extra touch. All right, we use mix of different techniques
to get rid of some objects from this picture. Keep in mind you can load
this image multiple times. Try different approach
to each each object. I try to make them
in different poses, so each will come with
their own challenge. When you are can
simply click file, you can export this image as simple Jpec post in this
class project section. You can even make it smaller. You don't need such
a high resolution. Maybe 3,000 pix as
high, 90 or 85. That will be just
for the quality. Be sure it's JP. Save it on your device and
don't forget to post it. In our project section, we can check out your results. Results of your training. All right guys, there's only
one summary video left, so I will see you there.
13. Summary: Nicely done. During this class, you have learned several
different methods of removing unwanted
objects from images. We start with simple healing
tools and end up with a very nice in painting method using brush and also in painting feel. I hope you are already finished with your
practice project. Don't forget to
share your results in the project section below. If you need to recap
on any of the lessons, feel free to simply
watch them again. I hope I will see you
in the next class. By.
 Mark Krukowski, Kru Mark Tutorials