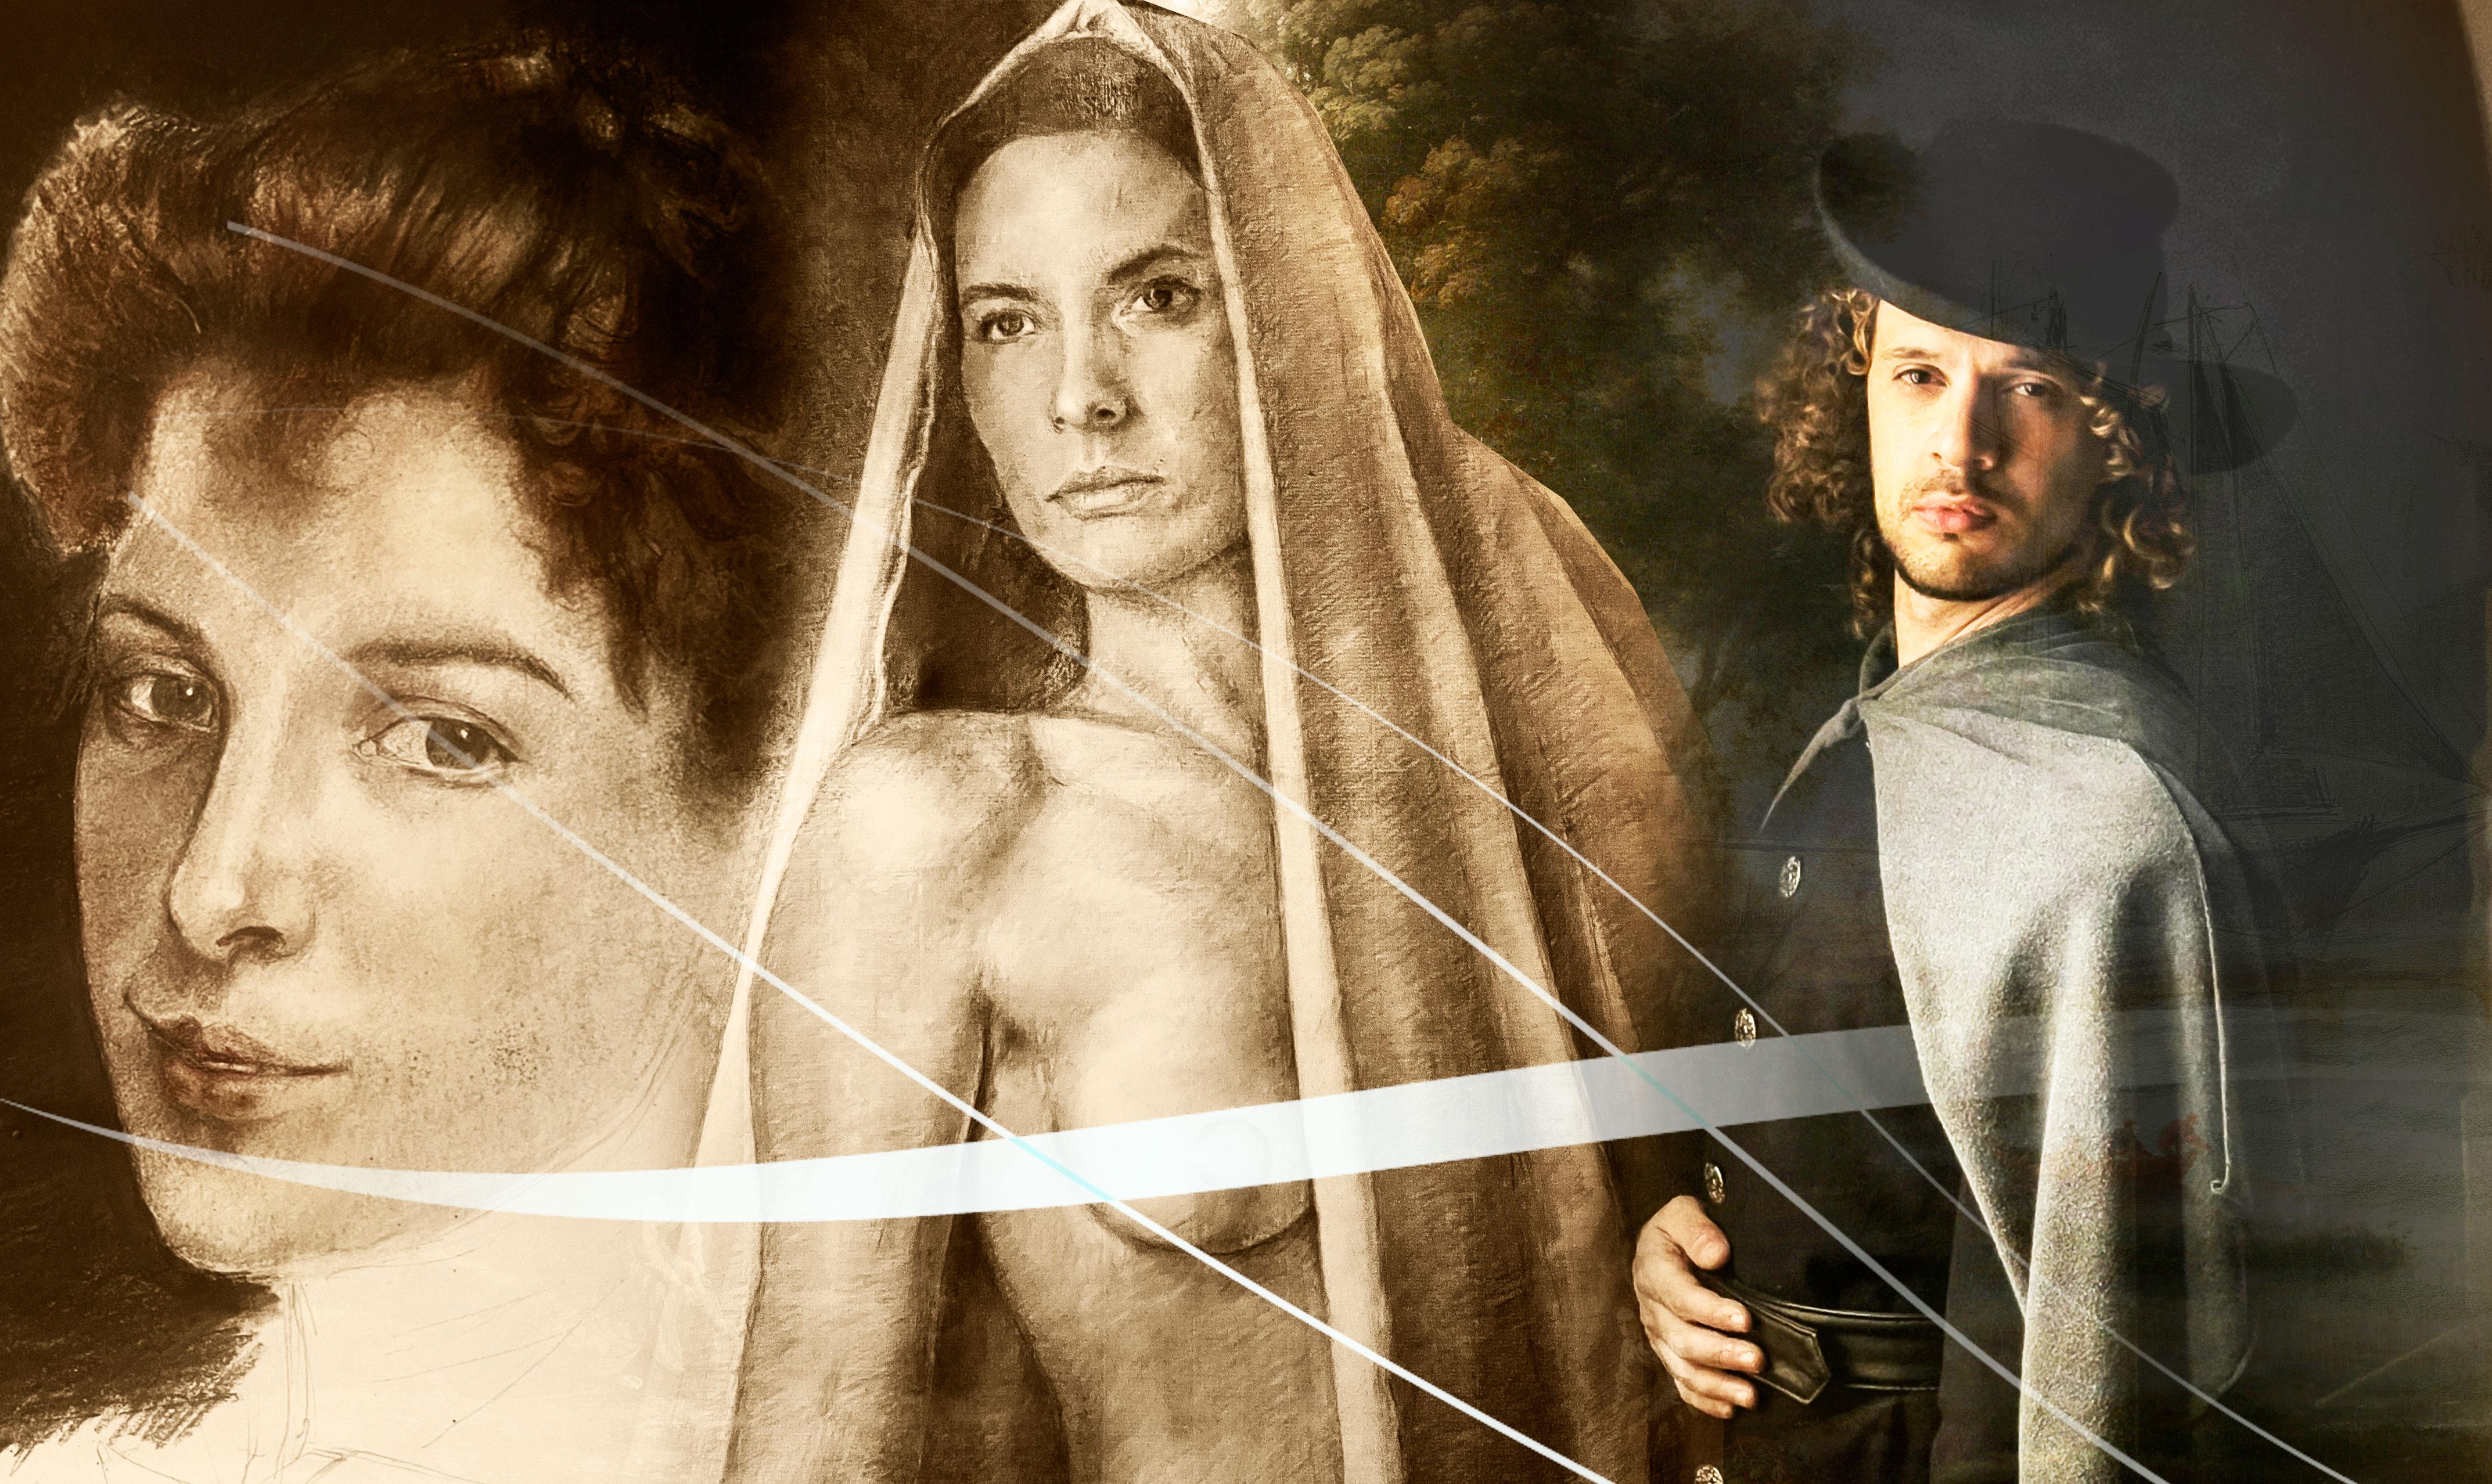
Transcripts
1. INTRODUCTION: Hi, my name is Sylvia bipeds. I was born in 16 85 when a fire away a
line of the New World, when a mountain full of
memories and stories. I became an artist
because I didn't want to see my loved ones die anymore. So I learned to draw
and paint until I was able to mobilize the
memory of my beautiful wife. The portrait is like capturing the sense of his soul
of the human being. It allows us to feel
every single detail, every gesture, every
feature on paper. Discovering the secrets
behind the eyes. In this one rockets
your own course. You will learn to revive people, literally mustering
the technique of Rembrandt than ring himself. For the final project, it will develop a portrait
of the person you love the most using only graphite paper, the light of a window
in a couple of candles. We will begin to learn into
most fundamental aspects of drawing perspective in how
humans site really works. Then we will learn how
to make quick sketches, quick drawings by using
hatch into to it. We will learn a step-by-step
to draw each phase feature when each part of the
general constructions can. From there, we will learn
how to make a self portrait. Then we will create
an amazing portraits step by step up my
beautiful wife. The most interesting thing is that I will help you to
find your own style, your own voice, and it will
help you to become an artist. Don't miss the chance to
travel back in time and really learn the secrets from the masters of the bedrock here. My name is Fabio vapors, and I'll see you in
the first lesson.
2. How to grab a Pencil- The Sword & The Pencil: Hello people, welcome to
this course in Bartok. Draw with value one. I hope you have a great
time whenever you are, since I know that you will
listen to me from the future. So I know you are here
because you want to learn and understand the whole weight of immortalized in
people by drawing. So we must start
at the beginning. How to use the only
instrument you will have to make it to pencil. You wouldn't be surprised
to know that for me, it depends on what's invented
less than 100 years ago. I suppose set for you, it's 400 years ago or so. The most primitive form of debt pencil that
you know today was created in the middle
of the 17th century. In Cambria, England,
the Navy turn soft area began to use graphite because it allowed them to write on
the skin of the sheep. And thus market flocks. Shippers wrap their
rudimentary pencils and trying or sheepskin. But for other refinements, what's required to make
them a nimble tool. Italians ammonia in
Louisiana, bottleneck cut D, inserted graphite into a hollowed-out be
soaps Juniper would. The technique was
perfected by dividing the wooden stick
into 2 bar to drill a groove along its
entire length and then place the graphite to
bar right in the middle. But in any case, the most
important thing at this moment for you is to learn to use
this magnificent tool. To learn to grab it,
to draw whatever you want in debt is exactly what
we are going to see now, you would be surprised to know Harker why you'll learn
to hold a pencil. How many children's were
taught during the Iraq? Because sexually the secrets of the pencil came from the
Asian ways of the soar. The secrets of how
to hold a pencil for drawings or calligraphy
didn't come from Europe, but actually came from
Asia where the masters of the oldest martial
arts were teaching the art of calligraphy
in the way of the sword. At the same time, they discovered that in the same
way as a soar is welded, the technique of calligraphy
could be mastered by discovering the critical
momentum of the pencil. Lines follow the will of
the writer accurately. But let me explain this to you. A sword is made up of
two fundamental parts. The blade in the hilt. The reason what you
are supposed to grip the sore at this point, it's not because of the
weight of the sword, but because it allows the plate swinging
wider and longer. But it turns out that disorder was not always held like this. Sometimes it's inevitable. You had to face soldiers
who are in our memory. And you need to be precise
in the thrust to stop the places where they are merged could not protect the body. So to achieve this, you are supposed to grab the
soar by the point like this, using your other hand in
order to direct it to the correct sport
and lead to soar in the arms articulations. But at the same time, you are supposed to
keep all your strength. In the other hand, that
hand that grabs the soar by the hilt in order to
push it when necessary. So when it comes to drawing the same fundamental,
it's necessary. We're going to grab that
benzyl to draw precise lines. We're supposed to prep
the pencil near the tip using only the necessary
strength to hold the pencil. The rest of the strength
must be in our arm. See if our arm and the
hand we're together. A sword that is where you are supposed to grip the
pencil near the tip with just two fingers to limit
the amount of energy you arm and hand or it spends
in grip independent cell, this type of grip will allow
you to draw precise lines. But on the other hand, as your fingers move
away from the tip, you will be able to
draw a stronger lines with movements to
fill larger spaces. Because the critical momentum will be in the middle
of the pencil, preventing the fingers
phalanges and the wrist from moving in the same way as they
can the soar by the hilt. It allows us to make lung
movements with the pencil. But pay attention to
these grabbing the tip of the pencil with more than
two fingers like this, e.g. in place to match a
strength for the hand, thereby losing that realization. The **** needs to be
moved by the arm. Additionally, moving
the wrist too much will also lead to
fatigue, lack of precision. But there was one last
fundamental that old masters used to master the use of the pencil or pen to perfection. It was necessary to repeat
exercises over and over again, just like in ancient fencing. So in this way, martial
arts masters in Japan, in China assigned calligraphy exercises
to their students. So they would master the necessary discipline
temporary moments in patients that every
single student must haves to
achieve perfection. In the following lessons, I'm going to show you and teach you how we managed to make my
hand goes wherever they want. And in this regard, we are
going to do a series of exercises that are
essential to achieve it. But at the same time, you're going to advance and
more deeper content and lessons from the
fundamentals of drawing. I see you in the next lesson.
3. Materials & Tools: In this class, I'm going to introduce you to the
tools and materials that we are going to use in the three volumes of these
cores in Baroque drawing. The first of them. And most important, it's
gonna be graphite. Of course. This is the material in which
these drawing course is a specialized In that can stop, mentioned in Britain
still the same. This is my preferred brand
of graphite pencils. Brazil designs
graphite pencils have the ability to adhere
to paper much better, showing this striking,
shining gradients. But it's graphite
is of high-quality. This allows you to bluer even the latest tongues
for it this bay Italy, I highly recommend
having a full set of pencils from the lightest
to the darkest shade. It can be from the
tone to age to six B. However, you've only, you
can have a few of them. I recommend having a
to H HB in Essex be. The reason why you may need
a set of pencils is because if we tried to do all the tones with one
single pencil tone, for instance, an HB, cheap the dark tones, we would have to apply too much force on the
paper ruling in it. You will notice
this to the extent that you have two
arrays, incorrect. So there will be
groups in the paper. On the other hand, if we press the good fight against
the paper too much, the graphite will be
embedded in the paper, and these will be
detrimental to bluer it. Here you can see a whole
range of a set of pencils. The most interesting
thing is that I did apply the same force with
each pencil to achieve these different
types of tones. Even the lighter tone, which is harder, I'm
not damaging the paper. Brune cell design
stands out for having high blending capacity without losing quality, integral fight. But there are other kinds of complimentary
graphite pencils that are much more intense. The pure graphite pencil, pencil made entirely
of graphite. In other words, there isn't a wooden structure that
contains graphite inside. On the other hand,
there is a PA, which is a pure graphite mixed with a special
oil made in France. We are going to see
the difference between a traditional nine
tone graphite pencil, purer graphite pencils
in a beer, NWA benzyl. I'm going to start with a
nine B graphite pencil. In each of these three examples, I'm going to apply exactly
the same force on the paper. Now, I'm going to apply
the pure graphite pencil. Pay attention very
well to the tones. Now, I'm going to
apply the PF benzyl. The difference between the
tones is more than evident. But the most surprising
thing is that the pencil is just a two tone. On the other hand, Bureau
graphite is a six B tone, but each intensity is higher than the traditional
nine big fight. There are three. Another important
tools for accompany the graphite in the yard,
the blending materials. The main one is the
blending stump. This tool will allow us to bluer the glorified
and spread it. I see if we were doing
it with our fingers, but with much more precision. The most interesting
thing is that the blending stumps are
usually not that expensive, but it's a very useful
tool to achieve great finishes in the
gradients of our joints. Here in this example, you can see that even
though I'm using my finger to smudge the fwrite, you can still see
the hatch lines. We try to as much a darker
shade like for being, the exact same thing will
happen because the surface of the finger is not hard enough to fool this
spread to go fight. During the three
volumes of the bay. In Baroque drawing, we will use the blending stump in
all possible ways. Another important tool
is the sandpaper, because we are going to
have to make the tip of our pencil sharp as possible. Traditional pencil
sharpeners cannot achieve this effect because strain to do so would break
the pencil tip. However, this
sandpaper can do it. You can find this presentation
specialized in draw it. But you can also use any very fine grain
sand paper cosine, exactly the same effect. Now, we're going to
talk about dry pastels, because in the three volumes, we are going to embellish our graphite drawings with
this kind of parcels. However, it's going
to be in volume two where we're going to take dry
Busters to the next level. Using this technique,
we can make realistic color
trousers like this when there are different
types of dry pastels. The first of them are
the dry pastel pencils, of which brands sell design
is also my preferred brand. Dry pastel pencils allow us to make color drones
in small formats. It's variety of colors and
definition allows us to make details as small as those made with any
graphite pencil. Sandpaper is a must when
use in pastel pencils. But there are also
thrive busters in bars. In these two presentations. Hard dry pastels that are
usually called corrupt vessels. In soft pastels that
are much softer, hard dry pastels usually
come in a square bars whose Hs allow us
to make defined lines, especially for
details and sketches. Soft pastels are perfect
for amazing color mixing, but also to fill larger
spaces with color easily. Here's an example of a work done with soft and
hard drive Busters. Let's now see the difference
between the bust of benzyl, the two kind of pasta bars. Let's start with
the bustle pencil. The pastel pencil is a
very delicate instrument. The tip of the pencil
breaks easily, so it's best to use sandpaper
to sharpen its tip. I'm going to apply
next the hard drive, Buster Bar, Garcia pastel. Notice how hard it is
to trace on the sheet, even though I'm drawing heart. It's quite a hard
kind of pustule. Even lying flat on the paper is difficult
to stain the paper. This parcel was made to mark
lines in making sketches. Even the pastel pencil
is much softer. Let's now move on to
the soft pastel bar. Observe how smoothly
the material expands. Placing it flat on the paper, we can feel larger
spaces with color. Another difference
is that obviously the different hardness S will allow different
types of fluorine. Pastel pencils are
soft to blend. Hard pastel bars are
usually very difficult. On the other hand,
the soft pastel is obviously the
East is to blend, allowing an incredible
mix with other colors. For dry it and hard pastels. There are many
high-quality brands, but my preference is
the Rembrandt brand as the reference artist of this
course in Morocco drone. While the one. Of course, I should
mention that you should have enough sheets of paper in different sizes to put into
practice everything that we will learn in the three volumes of these
scores in Baroque drawing.
4. The First Steps: The Training - First Exercise - BEGINNER LESSON: For this first class, all you need is a large sheet of white paper in an HB or
too big or fight benzyl. I've started this class
by writing my name. You must be wondering
why I did this. Why does this teacher started
a drone class in this way? Perhaps you will not be surprised by the quality
of my handwriting. But what may surprise
you is that this is my handwriting since I
was eight years old. And it must confess that this
was what led me to draw, as I do today. I grew up in a
very small family. We were just my mother and
my two younger brothers. My mother's support
your family by translating books from
Latin into English. That many people did
dad at that time. So she was paid enough for
us to live comfortably. But one day, my mother began to suffer from a strange
disease at her hands. She knew that one
day she would not be able to write anymore in
since I was the oldest, I had to learn to write like hair in order to continue
with the business. She quickly told me her
calligraphy, her handwriting. What I never imagined
is that this would lead me to have a great advantage
when I started drawing. Handwriting is all about
controlling the wrist at will. It's based on our hand
going where we want to. And it's based on
having the ability to repeat lines quickly
in a controlled way. The greatest challenge
of an artist is that our lines go exactly where our mind wants,
because it's normal. The hand is not made
by nature to draw. We have two accustomed
to this task. So that automatic
connection between the brain and the muscles of
the arm and hand is created. The first exercise
we are going to do is learn to draw straight lines. We need our arm to go
right where we want it. We must manage to
draw the lines as straight as possible
without the use of a ruler. A good way to start is to draw a first line with the help
of a roller or a long bar. But then the
following lines that we're going to
draw my speech on, taking care that the distance between the lines
is always the same. Well, we are drawing it
by using only your hand. You should do this exercise
in different formats. That is, you can use a
large format like this to make long bottle aligns
with enough separation. Or you can also use a
much smaller format to make lines with much
smaller distances. You must remember that this
exercise takes a lot of time. You must make lines as
straight as possible. Understanding the distance
between each line. On the other hand, you can vary the distance between each
line to add complexity. Once we have failed, lots of sheets and sheets
of lines and lines, we're going to start
getting the wrist. Use the shapes. We are going to use all the
lines that we had drawn as a guide to do the exercise
that we will do next. We're going to draw a
novel in calligraphy. It was the letter 0, guided by the lines. We're going to make many
ovals, one after another, trying to make
them the same size and repeat the same
distance between them. At the beginning,
it's very difficult. It doesn't have to be perfect. It's simply an exercise
of trying to be perfect. If the paper is wide enough. Try to fill the entire width of the paper with this exercise. You have done this many
times, many separate ovals. We're going to do them again, but in a very fast,
in continuous way. Notice that almost all the
movement is in the arm. This exercise is essential
for us to be able to connect the brain with what
we want the hand to do. Notice that the
shape of the ovals seems to look better when
we dragged him fast. What's, I want to demonstrate
with this is that the decision to draw a
lines must be firm enough. What we're drawing, we must lose the fear of
drawing brown lines. And it seems to be easier to control fear by
drawing lines fast, then by drawing them slowly. Now, we're going to do exactly the same as in the first row, but this time making each
of the ovals quickly. Now we're going to do the same exercise
of the second row, but doing a gradient. That is to say, we will start by breasts
and the benzyl gentle. And then as we advance, we will brass it harder. The more you do this exercise, the more control you will
have of your arm and hand. Therefore, you're hatching
and draw. It will be better. A firm wrist support
or drawing art. You have to learn to block all his movement in
muster his firmness. We're going to continue with this exercise by training and other way into
calligraphy exercise. We had to make the letter I. But you didn't have to. Simply making this type of
vertical arrow is enough. Let's try to do it and
firmly in quickly, respecting certain
distance between them. Now, we will do them in a row. Remember to do it
in very quickly. In these next rule, we are going to make ovals, but much thinner like the first ones we did
in a row and quickly, but this time thinner. Now we're going to
do exactly the same, but making a gradient going from the lightest
tone to the darkest. You must first breast if benzyl
very gentle, then harder. You can see that all these
forms and shapes that are here can be part of the
construction of the drawing. That is why we must
repeat this exercise a lot into different
formats in form, assess largest this one, but also in the smaller
ones to be able to master any challenge when
it comes to drawing. Once you have finished
the exercise, use in all the lands
you build as a guide, you will try to do it
without the lines you must follow and imaginary relaying that guides the
direction of the arm. In the same way, you can use the gradients into different shapes as long as you respect the distance of the rows without the
use and the guidelines. Every shadow and ln of
this drawing is made by a small decisions
that our brain is making in that our
hand must obey. Every shadows we see in a drawing are related to
the will of our mind. Try to put all this
knowledge into practice. And I hope you have enjoyed this first-class of the
delay in Baroque drama.
5. HUMAN SIGHT & Perspective: Hello people. I hope you are doing the exercises very well. Remember to do them grabbing
the pencil like this, just sets I mentioned. The movement of the
arm is very important. You are supposed to
strengthen the arm in order to do this kind of exercises. There is a kind of
physical training in walls and leering into two. In this lesson, we
are going to address something but important
regarding drawing. Most of the problems
related to draw in hath nothing to do with how
to master dependency. It mean how to make it
go wherever we want. Conversely, most of the
problems are related. Our way of seeing things around
with our sense of sight. Everything comes down that we live in a
three-dimensional world. And there are hundreds and
thousands of years behind. Since we are leaving
and surviving, they use insight to move
from one place to another. But the problem is
that we fail to understand that no matter
what we're going to draw, it must be translated into
a two-dimensional word. But don't worry, I'm going
to explain this to you now. Here you can see these
geometric shapes on the table. You can fill the shapes and
the distance between them. It's because our sites contains a fundamental element that
allows us to chip IT. Perspective. Perspective allows
us to know how far or how close things
are around this. And this allows us, of course, to survive in our environment. Obviously, it's something that we even share with animals. After all, we are
also in animals. So we're used to seeing
things like it is. But not only that, but we are used to measure
in the size of things and the distance between them
in a three-dimensional way. And I'm going to
prove it to you in a three-dimensional world for me to reach the shape
in the background, I simply have to reach
it with my sore, e.g. my soar is quite long,
almost a matter. And if you were here with me, you would perceive the same
distance between one form and another from a
three-dimensional point of view. But the truth is that from a two-dimensional point of view, the two forms are
closer than we imagine. Let's try something by using
one hand on the screen. You're going to torture one
shape with one finger and then try to reach the other
shape with another finger. Now, look at the distance
between the two fingers. It's line on the
screen that is flat. If the screen where your
canvas line that joins your finger with
the other would be the distance between one
shape and the other. That is exactly the
fundamental that we must understand when
it comes to drawing. Look at this, I'm going to replicate these two shapes much closer from the
three-dimensional point of view. They are closer. They are next to each other. But from the two-dimensional
point of view with respect to what we're
seeing at the moment. They are farther away. Try doing the same
with your fingers, but must understand this way of seeing things when
it comes to drawing. Because some paper, we
can only draw a line SAP, or down or inclined to represent the three-dimensionality
of our site. Of course, in this
exercise it seems easy to understand because you are watching everything
on the screen. But when we are going to
draw something face-to-face, we must straight to interpret
everything we see as if they were on the screen
when a veil in front of us, where we can do
exactly the same thing we did by touching the screen. So try to see everything
around you putting into practice all this knowledge
at the same time. I see you in the next lesson.
6. The First Steps: Second Exercise: In this second exercise, we are going to apply what we learned in the previous one. But dealing with
irregular lines, we're going to make first I
completely irregular line with the trajectory
that we want. Then we're going to
make a second line that follows the trajectory
of that first line. But at some random points, we are going to break away
from that trajectory. Next, we're going to
make another line. Under the same principle. We are going to follow
the previous line, but in some moments we
disconnect from it. You can play with those
lines to that is, you can make a line that completely follows the
path of the previous one. You can make as many lines as
fit on your sheet of paper. Everything will depend on
the size of your sheet. Perfect. I suppose
that at this moment, you must have practiced
previous exercise a lot. Because what we're going
to do now is apply the same exercise in the spaces that separate these
irregular lines. The idea is that you deal with these irregular shape because the drawings are going to
be completely irregular. So we're going to
start with the ovals, but remember to
trace them quickly. This arm adaptation process with greatly trained your ability to connect the brain
with the hand. You can continue in the next
space below with lines. Remember that these
lines are ovals but smaller, thinner ovals. You face these irregular shapes. The exercise will become more difficult because you
will have to adapt the movement of the arm to each irregular
shape that you made before the training
of the wrist is necessary to achieve this
exercise successfully. Since the shapes are irregular, your wrist will get tired, but you should try to hold on to strengthen those
arms muscles. The next line, you could try making circles farther apart. In the following space, you can use separate lines. In the next space. You can practice any of
the previous forums, but with a gradient. In the last space, you can draw separate circles, remembering to do them quickly. Doing this exercise
in the previous one, you will be able
to greatly improve the strength of the
arm and the wrist. This is strength will
allow you to tackle more complex later exercises. Practice a large over and over again until you do it naturally. A. See you in the next class.
7. The Perspective & Drawing Grid (Special Class of the Third Volume in Advance).: So here we are on our Canvas to learn how
to build a drone grid. The grid is a tool that
will allow us to determine the nature of the
surface on which the elements of our drawing
we know are located. We need the surface to be able to correctly build a distance and sizes between each of the elements of art composition. The first thing we have
to do is determine the point of view from which we are be in
the composition. It doesn't matter. You visit a landscape,
sin or anything. This point of view
is going to be determined mainly by
horizon in a ground line. What do we need a ground line? Because it's the place
where we are standing. I'm going to start
drawing this horizon. Oldies will start also from a vanishing point that this
time will be in the middle, which is the place where everything fades
into the distance. This point could be on
either side of a Ryzen, but let's assume
it's in the middle. From there, we're going to
draw two very important lines that will start from the vanishing point
to the ground line. In order to start
building the grid, these lines must be drawn
from the vanishing point. And if you had made
a ground line low, they must be drawn to the right and left corner, respectively. If you still haven't mastered
making straight lines, you can help yourself
with a ruler, but I highly recommend you practice a large
making straight lines. Here we already have
the first line. Let's draw the other way. Notice how these two
lines have joined the vanishing point with the lower right and
lower left corners. You must remember that all this process is
only to build a grid. You don't have to respect
it completely normal, build it completely
when making drawings. Simply begin to have
this notion of a space. Every time we go to make
it the layout for drawing. Remember that the most
important thing is to have all this
knowledge to be creative. The more knowledge we have, the more tools we will
have to make all drawings, just the weight we want. We're going to make
another line to continue building this grid. This line is going
to travel from the upper left corner of a Ryzen to the lower right
corner of our ground name. You should try to make it
as straight as possible. As I mentioned before, you can help yourself
with a ruler, at least the first few times. Note that my line
is not perfect. I tried to make it
perfect, but it's not. But that doesn't matter. At this point. We're going to proceed to draw the other
one from the other side, exactly the same but
from the other side. But in fact, pay attention to this will make it
much easier because here we already have a
reference point ready to build this grid without
drawing that line. If I draw a line completely
parallel to the horizon that crosses right through
this meeting point of these two lines
that we already made. We will have an excellent
reference point. To build entire greed. Tracing this parallel line, we realized that the line
we wanted to draw from the upper left corner had to grow through
these meeting point. We can try to correct the vanishing point so that it's completely in the center. But that doesn't matter
because these won't prevent us from making
the drawing grid. So we can continue
drawing parallel lines to continue built-in
degree it step-by-step. Now notice how many meat
and points there are. All these meeting
points allow us to draw the rest of the
lines of the grid. You can add these a square. We can make a gain of x to continue generating
reference points. We can add vertical
lines as well. We can draw another x
in the box next to it, in the square next to it. Notice how this
other parallel line is going to generate
all their boxes. I wove. This is a mathematical process. From anywhere we could
continue to build this grid. Demeaning of the grid
is to be able to build an element at
a certain point. In that same element
can be built in another place with
the same proportions, but with the precise deformation that it should have
in the distance. Here we can see an example we could position or
element in this box. I will highlight it for you. In this same box in the
distance has another shape. So everything you
build it within that box must also change
shape in the distance. See the difference
in the squares. I'm going to highlight the second one so you
can see it better. You can practice as
many times as you want. You could have absolutely
the whole paper we degrade. The idea of this exercise is that when you see a
reference landscapes, you can imagine it on
a grid to be able to represent it in the
layout of your drawing. Normally in a landscape, you don't need to
fill the whole paper. But if you are
doing this example, you could try yourself by
extending the grid to the size. First. One of the most important things that this exercise teaches us. Finally understand
the reference point. The reference point is the best center of a
good drawing technique. You can follow this frame
to build a second frame. You can follow the
shadow of an object in this frame to be
the closed shadow. The position than an object
pass in this box could also be a reference point to build another element
in the background. We can keep the Biden the squares to have
many more squares. What allows us stairs? Now we're going to build a
building or a box here in this square object we are going to make
has an irregular shape decreases very useful, especially in urban
landscapes because they're already know the extent of
a building in the distance. And instead, you may notice that the effect of
distance is automatic. If I want to build
a building that is exactly the same size
and the distance. We already know that if the first one takes
two squares in size, mistake do squares
and the distance to build the same building
further in the background. See how this same boxes
are building look even though they are positioned differently in the distance. The most important thing is that these grid not only allows me to see how objects deform with respect to the
surface horizontally. But also vertically. To determine the
vertical perspective, it works exactly the same. We can build vertical
squares connected with the vanishing point to build the progression of the
deformation vertically. Of course, the lines must travel upwards above the horizon
that we had made. We can start from the
same grid that we built below, but upwards. With this technique,
you can build a NAT, anything in the landscape. Barack, this was widely used
in your urban landscapes. Architects and urban engineers
also use this technique. But what is the provenance
of the drone grid? That natural landscapes don't always have the conditions
of human perfection. Many natural landscapes
are highly irregular. On the other hand, degree it
is connected to the point of view of human vision
of how the human ICs, but these laws are
static and could affect the creative
impact of your work. In the Renaissance
in India, Iraq, they distort prospecting
for aesthetic purposes. That deformation of objects
in each painter was a spatial in gave the
artists I special torch. The most interesting
thing is that some Baroque artists on guns
justly deformed degree it in such a way that
their work seems to be seeing throughout 20th century
is cinematographic lens. That is why you should
use this as a tool, but not as aesthetic rule to
make your creative works. Right here is where perfection
lies within imperfection. In that is one of the
secrets of art itself. You can continue playing
with degree it on the right side for
further practice. In this little exercise, I used to drawing
grid from one side of the horizon to show
you how it can work to generate a different
point of view of our landscape that will
not always be straight on. This castle is supposed to
have a reflection over lake. So the castle itself is
evolved a drawing with rice. The reflection is
below the horizon. This gain of exercise
allows us to practice drone the
same element near and far in the distance as
syndicates of the windows and towers of the castle
that are the same size, but that art form
in the distance. Now you know the grid
technique, try to practice. But for now, let's move
on to our creative works.
8. The Hatching: The reason why I prepared the previous exercise
for you is because they wanted to dedicate this class to what I call the
drawing fingerprint. This is the hatching. If there is something that
is going to identify us as artists and give us that non
transferable personal touch. It's going to be hatching. But what is the
region of hatching? What is it so
important in drawing? The best hatching
techniques were not developed into
down dog draw it. In the beginning, most of the drawers had a composite
hatching and blurring. The artists experimented
with the materials. They realized that the lines themselves could show details
about lights and shadows. But it was not until
the invention of the printing press that the best hatching
techniques were developed. The purpose of the grievance was to reproduce ranges in images. In order to achieve this, a piece of metal had to
be carved with a set of lines that represented
that painting or drawing. The nature of the material
prevented to draw one of highly composed
or complex shadows. What resulted in
the development of a better technique of
progressive lines. Those lines we're
supposed to represent all the lines and shadows
that constitute the drawing. Once hundreds of
ingredients began to be reproduced with excellence,
beauty, and quality, this result was transforming and drawing and painting
Hutchinson Stan, I said of lines ordered in a specific way that represent a light or
shadow in a drawer. There are basically two
main types of hatching. The first one is the regular
or traditional hatching, which is composed of progressive
lines that never cross. These lines can be
curved or straight. They can have a
single direction in the whole drawing or
different directions. The other hand, there is
compound or crosshatching, which is formed by lines that intersect to represent
lights and shadows. I personally use the compound or crosshatching because that way I feel more comfortable
withdrawing. Look at destroying of
this shape into distance. However, these two types of hatching can be
combined to provide the drawing more originality in a true fingerprint
that identifies us. A few days ago, I dream about the sheep, sheep from the future. She was not driven by wind. She was a strange. I got up quickly and I did nothing but draw it
using crosshatching. I'm going to complete
the shadows gradients. If a woman drawing, you've seen his throne hatching, I'm going to mix actually the traditional hatch in
with the cross hatching. I'm going to apply
some of the lines we saw in the exercise
we did earlier. So you can see how
useful they are. Here. I'm applying crosshatching. Look how I cross
lines over others in different directions as if
they were graphite layers. In this part, I'm going to apply the kind of
traditional hatching. Although they are
not separate legs, they do follow the
same direction here and applying
exactly the same, but with a darker tone, benzyl. Notice how, even
for small details, I also use a one way Hutcheon. Look how it has started
to apply separate lines. To make the shadow soft leg. See how interesting
the leg is looking. Notice how I combine
crossed in separate lanes. This area of the table. When the lines of the entire
drawing seems to have the same directions degenerate a very pleasant visual effect. But don't forget that you
can combine directions to thereby generating
an amazing finish. We used to this
kind of hatching. You wouldn't even need the
stump blender to diffuse. You can do it gently
with your own fingers, generating a beautiful effect. It's important not
to feel pressure to when trying to
hatch, to feel free, and how to represent the lights and shadows
through alliance in drawings in the
works that we will do in the three volumes of
the beat at the end drawing, I'm going to apply my
personal TO of Hattin. But anything bites you
to develop yours by experiencing and observe in the works of the
Baroque masters. See you next class.
9. Perspective in Irregular Objects: Hello people. In this lesson we
are going to see the perspective in
a regular objects. It's important to know
this before approaching more complex details on the construction of
this phase, e.g. in the head, because the hair itself is an irregular object. But let's pay
attention to these. In a regular object, this cube. It seems easy to understand the cubes perspective because
all its sides are equal. We are aware of that. We
have reference points. We note that in the
front side, e.g. if that side has
a specific size, in order to be able to draw the same side in the distance. I mean the backside, e.g. it's supposed to look
smaller in the distance, is smarter than you
perceive the front side. In a cube. It seems easy to understand perspective because it's a
completely regular objects. But what would happen if we
used an object like this? It's evidenced that the
base of this pyramid, which is at the bottom, is larger than the tip. But the problem is that
from our point of view, the vase that is
in the background looks a smarter
than eat release. When it comes to finding out the precise size of something. That is not easy to
understand because we know that debase is
bigger than the tip. But notice that we can mark the size of the base from
the two-dimensional point of view and compare it
to what it would look like if it were the
other way around. So you can see that if
the vase was in front, it would look even bigger. So when it comes to drawing, the problem arises when
we are in front of a Snapchat that is not a
geometric shape at all. Such as the hair.
Look at this head. It doesn't look like a
regular shape at all. It's not a geometric shape. Even if we tried to break it
down into geometric shapes. And exosphere is hard to fill perspective because the head
is not a sphere at all. So if you can notice it, the back of the head is
figured than the face. So you have pay
close attention to this because in a
perfect sphere, It's difficult to represent those details
observed this fair, regardless of the angle
in which you see it, the sphere will always seem a perfect circle from the
two-dimensional point of view. When many scholars
suggest us to break the head down and
it's fairer is to understand that
all phase features rests on a shape that
resembles as fair. In fact, you can use any geometric shape as a
reference to build a face. For instance, any shape
that you detect, e.g. integer of the face into neck. There are all kinds
of triangles, polygons of different shapes
that help us perceive, relates, and discovered the correct proportions
of the head. The idea is that you can
get to draw anything in parameter view by using
only observation. Until the next lesson.
10. Sketching: When it comes to
drawing, sketches, always seems to be
something beautiful. Because as this
drawing technique is refracted or Magic
erasers in the artists, that makes us think
that we have a kind of power to create
great works quickly. It's important to understand
that the sketch itself shouldn't be taken as the previous step to
our detailed drawing. Many people and even scholars, academics think that
the previous stage to our final drawing
you saw was a sketch. In this is not always the case. It's not always
necessary to create a sketch as initial stage
of a complex doorway. Most of the great
painters used to sketch, to make studies on a work that would begin shortly after that. The sketch for Dann wird, like the script in a play, the sketch allow them to
capture everyday characters. It allowed them towards
your characters in a space in understand
the general shapes of some complex objects
before drawing it in a large format.
What to make? Rembrandt's sketches
really interesting is that they combine brevity would suggest you in that beauty was the result
of simple selection. Emphasizing the
significant features of objects there re stimulating
the viewer's imagination. All the friend brands or
sketches or preferences. But as far as we're concerned, we're going to try to
approach a sketch in discovering the general
shapes of human head. Let's get started. We're going to use a
coarse-grained paper to make the sketches. This old paper requires us to make more precision
in the lines. This is a great training
when it comes to drawing. But before drawing
the first line, we have to know
what is the sketch. Sketches are not
finished drawings. They are quick impressions of the most significant
aspects of an image. An image synthesized
in a drawing that only highlights the
general characteristics. Taking this into account, we must learn to
differentiate what would be a quick drawing from
what would be a sketch, because they are two
different styles, which you see on the screen is a quick drawing of Rembrandt. Although it may have
been created quickly, is not a sketch. But on the other hand, let's now see a real
sketch of Rembrandt. Notice how the lines work to represent the most
general aspects. Pointing out to the
place of the elements in the composition and the
relationship of their forms. But before drawing
the human head, we will begin to understand the sketch through
these geometric shapes. We're going to concentrate
only on shapes, that relationship that
exist between them. And the most general aspects
between lights and shades. We're going to use the closest
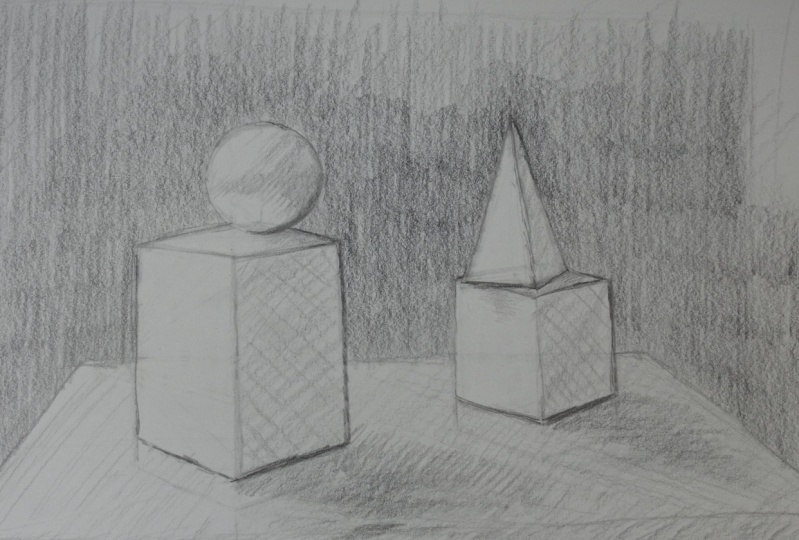
edge of the table to have a reference line to build
the rest of the composition. From there, we will just start building the base of
the parallel pipette. Notice how I draw kind of triangle trying to
discover the size of the vase. But not only this, but I tried to measure the distance between
the parallel pipette spaced the age of the table to determine
its exact position. B, attention to the
diagonal line I'm drawing. This line allows me to know the approximate height and
width of the geometric shape. All these by only using
the angle produce between the lower corner
and the opposite upper one. The human eye is extremely
sensitive to angles. As we use angles to determine the size and shape of objects, we will be able to draw them are currently not only
updates are important, the shape of the
shadows are just as important in your
reference points. Notice how by tracing an angle, I tried to discover the
position of the cube. Turn not to pay too much
attention to currency in the sketches is not
necessary to be exact. The most important
thing is to dare and approximate what could be the size and the distance
between the objects. It's important to know that if we were again to
draw something in the distance that is the same size as something
that is in France. In decomposition,
it will always be smaller in the two-dimensional
representation. This is easy to notice in a
geometric shape like a cube, since it has all
the equal sides, it's necessary that from
time-to-time was stopped drawing to see the image reflecting
deeply on its forms. These will improve our
technique significantly. On the other hand,
you must stress the other side of the table in the background to take
it as a reference point. Now, we're going to put into
practice that technique we learned by tracing the
ovals over and over again. In this way, we will draw that circle that
makes up this fear. In the case of the pyramid
that is on the cube, it should be easier
because IT pyramid itself contains defining
precise angles. Try to pay attention that
the base of the pyramid. It's not perfectly aligned
with the top side of the cube. If there is something
that should be in a sketch, is to Hatch. Hatching can help us
even build shapes, and we're free to apply it in all the ways we saw
in the Hattin lesson. This is Sketchers and that's only work to relate
to the forums, but also to discover the different shades of
shadows that objects have, especially since they are
all the same way at color. Each of the sides of these
geometric shapes have a specific tone that should be represented in the
drawing. In the sketch. It should not be
completely precise, but it should
approximate the tone. It's also important to find similarities between the tones
to have reference points. On the other hand,
notice how I build the shapes of the shadows
cast on the table. By using hatching. You can use cross hatching
or compound hatching, whichever you find a more
suitable for Detroit. Remember that not only should you apply the hatch
to the objects, the dark background should
also be represented in the sketch because it's
a great reference point. You can use your fingers if you want to blue or the
graphite even more. As we move forward with
the light and dark tones, we can correct him perfect
gradient between them. It's important to remember
that the light and shade must also be represented
in lines, e.g. the outlines of the
geometric shapes that may contact with
the dark background. That should be represented
with darker lines. To make it these sketches, you can use one or two pencils. It doesn't matter if
it's a quick sketch. You must remember that the
only way to give volume to a shape like the
sphere is by using the gradient and the lights and the shadows is very useful
to know this because the face itself contains
shapes and volumes that can sometimes only be represented
with light and shadow. Here we have our first
sketch finished. Noticed that even the lights and darks are not that precise. It's a general idea of the shapes in different
shades of light and shadow. I'm going to leave
the EU several images so that you can practice the construction of
these geometric shapes by creating sketches. You can try it like
this example with that cylindrical shape
that is in the background. Or you can make it much simpler with just these two
geometric shapes. But if you want to take this
exercise to the next level, you can try draw on my sword
as you see it on the screen. Now by doing this same exercise, we're going to try to make
a sketch of this female biased together with
the other objects, we simply have to see
the bust as if it were one more object in space. We're not going to concentrate on the features of the face. We simply have to fill
degenerate shape of the bust. We must manage to draw the
bust in the correct place in with the correct size with respect to
the other objects. We're going to store again, tracing the edge of the
table to have it as a guide. And from there we're going to build the base up the burst. If you will realize the
basis of geometric shape, that shape is essential
to discover the size of the bust in its relationship with the other geometric shapes. Notice how I apply
the same technique of angles to build that
little geometric shape. Just building the front
side will suffice. Once we build that
geometric shape, we must start thinking where are the other objects
could be an intern, those same objects will
serve as a reference points to build the bust
in the correct size. To know exactly where
the cylinder is, we must know how many
times the base of the bus feeds into distance between
the vast in the cylinder. To know the height
of the cylinder, we can draw an inclined
line from the base of the cylinder. It stop. To know also the height
and width of the cylinder. We can draw a diagonal line from the base to one of the
corners at the top. Or the channelling from
the base of the bust, I can discover what
exact point is fair, is trying to figure out
how many times the base, which fits in the distance
between the base and despair. Remember to draw the sphere
with the same technique that you use to draw the ovals
in the previous lessons. Those repetitive exercises that need to be done for a long time. Whenever you make a sketch, you are supposed to
start representing the light and shadows directly on the lines in the image. We can see that from
the point of view that we are watching
the conversation, the burst is higher
than the older element. So if we have already
built the other object, we then have important
reference points. Let's try to build a harp first to get more
reference points. Pay attention to these. Either need to trace the general shape of the
vast from a scratch. Just by creating each part
of the bust step-by-step, we can build it perfectly. That is, the shape
of the bust will grow from one part to the other. Notice the angle from the top of the head to the top
of the cylinder. This allows us to know the
final height of the burst. Do not concentrate
on the face features simply mark its most
general characteristics. One of the most
important aspect is to try to position the
features of the face, eyes, nose, mouth
in the right place. But I insist on this. The detailed portrait
with all its features will be addressed in
several later lessons. We can start to fill the
background with hatching to have a good reference
points in terms of tones. Since the background is the darkest part of
the composition. The psychological
factor is important. Now winter diversed is
not a geometric shape. Immediately, our
brain is blocked, but we must try to
take it as if it were another object to
find its shape. The sketches are a great
exercise to train hatching. From the hatch,
we can even build all the shapes of
the composition. Notice how the face features are sympathize to a
few simple lines. They simply indicate where the main elements of
the face are located. There are not too many details, but there is a general
representation of the most significant aspects of the composition so
far this lesson, but we will continue making bust sketches in
the next lesson.
11. Sketching & Quick Drawing: We're going to apply
the same exercise of the sketch with the
same female bust, but in an isolated way. This time, we're going to start directly built into
base of surpassed. From there, we will grow
to bust in its entirety. Pay attention that even though we can see the
front of the base, I'm trying to build a vase
completely to try to feel the surface were divorced is
placed that in this case, that surface is a table. Since I only have the base
of the past as a reference, I'm going to start tracing
the shadow of the bust and the table with hatching to
have more reference points. From there. Notice how I draw a diagonal line that allows me to discover the
dimensions of the table. Remember that we are
sensitive to angles. By using the same strategy, we can discover the size if the biased by drawing diagonals to build polygons that lead me to draw the vast, completely. Pay attention to the
geometric shape that constitutes the woman's torso. I'm not synthetase and the total shape of the
bust in a geometric shape. The country and making
geometric shapes to discover the general shape of
divorced from their own, we can know what the
size of the heart is to use it as a
reference points. Also, in order to create
the rest of the vast, do not forget to
represent the lights and shadows through the
construction lines. By relating the geometric
construction shapes with the contour of the burst, we can know exactly what
the contour is like. Remember also that in
this sketching exercise, the features of the
face does not matter, only build the
shape it correctly. Remember that in the sketches, it's more important to
determine where the mouth, eyes, and nose are located, then to build each of
the features accurately. Later, when we see
the face of theory, we will understand how
important it is to correctly locate the
elements of the face. Do not forget to use hatching to draw the shadows
and inner shapes. Remember that a syntax
sample of this fair, there are shapes and
volumes that can only be represented 3D gradient. One of the main
characteristics of the sketch is that the eraser
is not usually used. Erasing is avoided it because the sketch is supposed
to be created quickly. In dad is precisely the
charm of to sketch. In the same way as in
the previous exercise. We can start to fill
the background to have it as a reference point. Gradients are important. Not only do we need to reference points to
feel the shapes, but also to create a
proper gray scale. The most interesting thing about these sketches is that all
the exercises that you did at the beginning to
master the pencil in the hand are applied in the construction
of these catches. It's the proof of the importance of repeating them. Many times. A foreign advances
in any drawing doesn't matter if it's
a sketch or notch. New ideas arise to improve
gradients and shapes. One of the most important
benefits of the sketch is that it allows us to
eliminate the fear of the line. That fear of the
wrong line is one of the most important limitations
when it comes to drawing. You should do this
exercise constantly. That is, on a daily basis. Perhaps when you are
using some means of transportation and waiting
for someone in any square. There's nothing more interesting
than finding people in everyday life to draw
them in their own nature. Here we have our sketch. Pay attention that the
most important thing is the relationship of
the general shapes. It's a quick impression. The purpose of the
sketch is to try to represent the position
and shape of things. But let's take the next
exercise to the next level. Now, we're gonna do
a quick drawing. The quick drawing,
unlike the sketch, requires the ability
of detailed drawing. But summarizing the process of the synthesized version of what a detailed drawing with me. We're going to use these vast with classic baroque lighting, a subject that we
will address later. Do not worry about the minute
details of this drawing because we will
learn everything in this first volume
of Iraq drawing. At the beginning, the
construction process is very similar to the sketch, only with much more
patients in detail. We're going to take more time
to do this type of drawing. But with enough training,
practice of lines, detailed observation, we can do this kind of drawn
quickly anytime we want. In this kind of drawers, we have to use our
imagination a lot. That is sometimes a meeting
construction lines. But at the same time
trying to imagine them on paper to create the drawing
as if those lines were there. We will understand this
process in detail when we move on to the theory in construction
of the face later on. But it's important to see this kind of
exercise so that you lose your fear of trauma
and lines drawing contours, and trying to face the
challenges of drawing. B attention to this stage, it's crucial to determine
where the eyes, mouth, and nose will be located. Those are the main
features of the face. We must do this process
the same as in the sketch, but this time with
more detail in using fewer construction lines. Pay attention to how I'm using the hatching to mark all
the shadows of the bust. It's necessary to do it to have a map of where the
gradients will be. Once we have marked all
the shadows with hatching, we missed the start adding
graphite in all the marks in all the hatching as
if we were blending it and turning it
into a solid color. At this stage, we
must concentrate on filling each of the shadows
that are on the phase. By n, the shapes, the shadows and
gradients are generating volumes that we must
represent by drawing. Don't worry about
the small details. You straight to put
the shadows in place. As we do the shading, the brain will
automatically have more reference points to finish
building the exact shape. The eyes are one of the most
difficult parts of drawing. And it's something that we
will cover later in detail. But trade to see the shadows
that are inside the eye. In order to understand
the shape itself, we can start to
fill the background to have more reference points. Dark background will make us feel the best
gradients much better. Notice how I'm already
at this stage. We can feel the
shape of the bust. Be attention that the area of the mouth has
practically no lines. It's a set of shadows and lights that give rise to
the shape of the mouth. Unlike the sketch
in a quick drawing, we can erase and even
use the eraser as a mechanism to generate
lights in the drawing. A peculiarity that
the quick drawing and the Sketch have is
that they then have to be exactly the same
as the reference or model they must capture descends and the
main characteristics of the model that
we are portraying. And very, you are
a quick drawing of Michelangelo's David. You can try this
exercise at once, especially using the images that we will see in
the lighting class. But if you don't feel
confidence to do it, don't worry because we
will see the theory of the construction of the
face is step-by-step. Later on. Idea's that you can use the sketch as a preliminary study
for your drawings. I personally do it this way. Rembrandt also did so. But if you want to
make a sketch that evolves into a fully
detailed drawing, you are free to do
so because there is no one single official way to
draw until the next lesson.
12. Baroque illumination - Techniques: Hello again. In this lesson, we're
going to address one of the most important elements
of the Baroque, the lighting. But let me mention
that this is not the only lesson we
will address aspects of lighting because it's something that we will address
it throughout the course. So let's talk about latent. Latent was one of the
fundamentals elements to convey emotions in drawing
and painting during the Iraq. I have seen some
things that happen in many realistic drawings
of your time to future. Many people concentrate on
faithfully drawing something. But even though they
manage to do it very well, the drawings lacks
appeal because the reference image they used west of poor visual quality. Lighting is essential
to check this. You didn't need to work to be completed real for
it to be beautiful. If your work has great lighting, it will be beautiful. So the purpose of these lessons is to teach you the tools so you can design good lighting for that portrait you want
to create so much. This time, I'm going to use my window as a
main light source. I will use also capitalize. So you can use any
light sources you want as long as you follow these
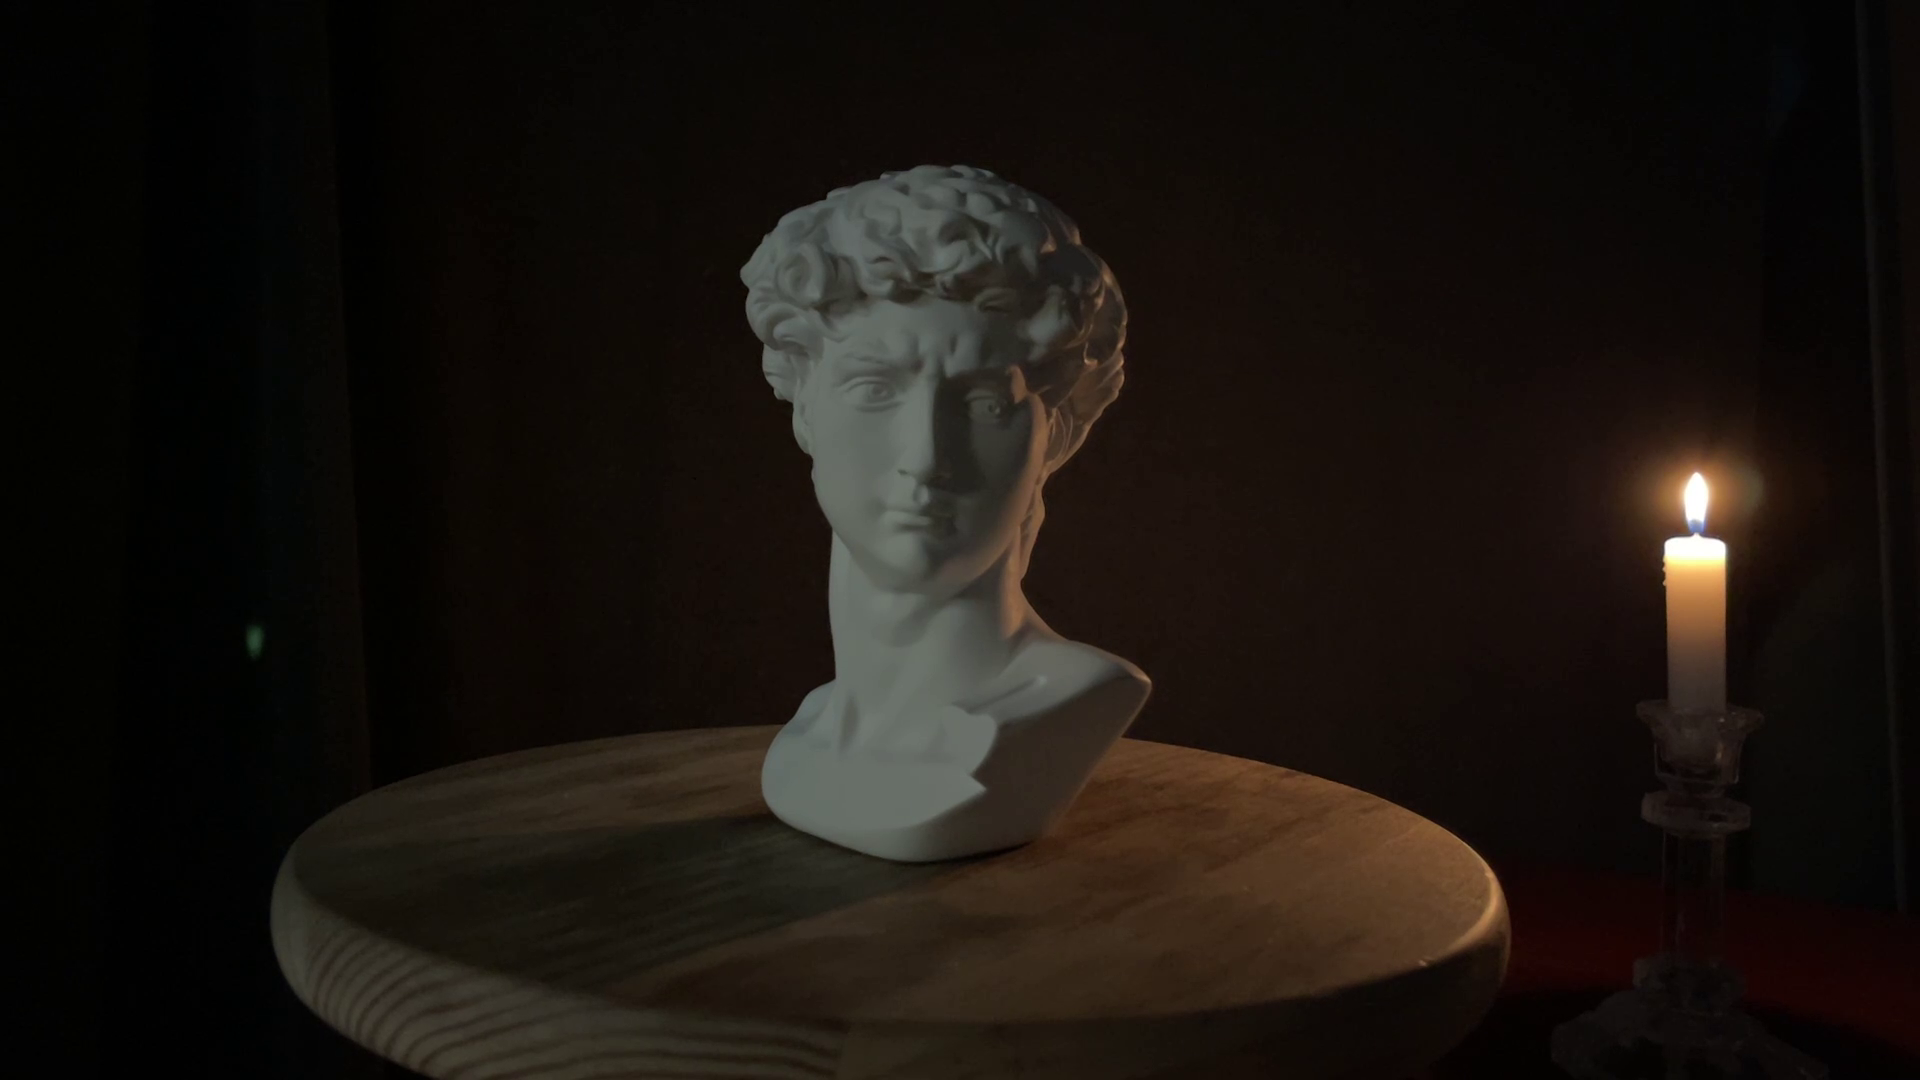
instructions, that's a star, then we're going to start lighting that head
that we have already seen. This is David of Michelangelo. At this moment, it has a general lights
from my window that comes from behind generating
a shadow on the table. But let's say that
it's kind of random. Just to show you what
we're going to work with. Iraq, it was necessary to create an environment
embellished with light that would help us tell something beyond
simply portray. And someone started with
the classic rock lighting. Iraq lighting used to
be set up this way. A main light from the side
and a slightly from above. This allowed to capture a better three-dimensionality of the face without distorting
its nature and beauty. But this lighting had
to be strong enough to reach the shadowed bar
two of the face as well. The light source could be of any nature as soon as it
came from that direction, from one side and
slightly from above. This slide could
also be artificial, using fire tortures
in Chantal ears. Or there are times it
could be natural light like this one that filters
through my window. Natural light was used
in order portraits. But at that time most of
the portraits were in studios because it took
a long time to do them. So they used to light
filter through a window, just like this example. But even using this
natural light, they use to combine
that light with some artificial
source in this way. As you can see on the screen, is slightly from side and from behind to generate an
outlined that in Kansas, the shape of the head generating depth and three-dimensionality
in the portrait. In addition, from a
pictorial point of view, it generates a new
dimension of lights. Another color in nature that rises from the shadow
side of the face, as you can see it. But some painters were
even more dramatic. And when they wanted to create a darker portrait as if it were in the sunset or Twilight. They use to further
filter the main source of light with a cloth or some
kind of stained glass. And it looked just like this. Personally, this is my
favorite type of flight tin because it gives an atmosphere of mystery to the portrait. Notice how important
that bakelite is generate so much
spaciality into place. An interface, we could almost
imagine a person sitting by the window next to a fireplace
watching the sunset. But artificial light was also
used as a main lighting. That is with no
natural light at all. This allowed them
to play even more with the direction
of the main light. Notice how, if I leave the
main light in front of the face loses its charm and the light is
telling nothing. We can change the
place of the light as long as it's mainly
from either side. Here, I'm setting it from the same side as the
background light. You can play with it
to the point that seems most attractive to you. Try to generate your
own lights in touch. You must be careful that delighting you choose
doesn't generate two strong shadows under dyes like that effect
of midday light, that is the worst
lighting of all. Look at this example from this angle with
natural light have filtered from one of the blue squares in my
stained glass window. The idea is that you
can experiment with lighting while selecting the person you
are going to portray. You should try to be
romantic with this. It's not about drawing
and it's still image. It's about drone, something truly valuable for
you and attractive. Therefore, by using
Lightroom Barbara Lee, you will really be able
to take your drawing to the next level to leave Iraq level of scores
until the next lesson.
13. General Scheme: Hello people. When it comes to
drawing the human head, it's necessary that we pay close attention that the
elements that constitute the face in itself are in the correct position and
have the correct size. But why is it so important that the elements of the face
are in the right place? It happens that in reality, despite what we believe, human beings are not so different from each
other than we believe, then a few millimeters of error in the location or size of the facial features can produce a change in the nature
of the phase itself. That is, these small changes can generate a completely
different phase. It's important to take
these into account in biggest much attention as possible when it comes
to throw in the face. It's a process that
requires attention. Patients in quality,
observation time. When drawing a portrait, we had to pay attention to the general structure
of the hair and give a value to the head
with respect to each more general
characteristics. The similarity to the
model that we're using will depend on that correct
notion of the general figure. Although the details of the face are breakfast
fully drawn, if they are plays in
an imprecise context, portrait will not be that good. It will only be a
big approximation. That is to say that
you could have drawn the nose and
mouth very well, but if they are not located correctly and the
precise point of the skull or dry wound will
not resemble the model. Here in this image, you can see some very simple in basic fundamentals which allow us to determine the
proportion The head. Of course, in this example, we are looking at the head
from the front and front side. But it's just an example
to learn a tool that will work in whichever
direction the head is facing. Idea is that you can compare these schemes with the position of the model you are using. Obviously, it will differ
in one way or another because not all models are the same in more than anything, the position will
never be as exact. But it can serve
as a great tool to establish the proportions
of this call. We must be very careful
with the proportions. If we see here in the image this phase that is
divided into squares, the first phase on the left. In this first example, we can focus on the box that contains the
nose, for instance. We can see that it's not
only the nodes but the eye. We realized that it's
a space as a whole. If we know that the box on the right has the
same dimensions, we can then determine the
distance between the nose, the eyes, and the ear area. This relationship of shapes is not only useful to
build the face, but anything that
we want to draw. We could do this same exercise with the other boxes
in the figure. Take a look at this image for a moment and try
to understand it. Was we had this notion of
the general construction. We must go to understand the technique of the
angles in the face. We can build a triangle from the outer edge of the
eyes and the mouth. This triangle, we
allow us to know the exact distance between
those eyes and the mouth. In general terms, it's assumed that one fits between each I, in that the width of the nose is distance between the eyes. Obviously, this is
not always the case. But what is important is that the triangle that we
build from the union of the eyes and the mouth varies depending on the position
and direction of the hat. That is the reason why the technique of angles
is so important. Because we can practically seed withdrawing anything
is set ability. We have to see the
inclination of things that allow us to determine its
correct size withdrawing. So, you know, remember
this triangle from now on, because we are going
to put into practice, especially in the light
portraits that we will do later. Continue looking at these
examples for a moment, a make node affinity. The perspective is another
fundamental sediments to be able to feel the
head, we must solve this. Try to see the head a sacred
where on a flat surface. So we must straight to remember
at least at the moment in which we are contemplating
and observe in the model. Let's try to remember
everything was so concerned in perspective
in the previous lessons. Because at the end of it, all the heads is just
an irregular shape. So we must straight
to translate, is Brighton mentioned
on nature into the two-dimensional
language that we saw in the first lessons. Here. In this examples, we can see how important perspective is for the construction
of the head. Notice how important the
horizontal lines are. Two vanishing points and
the different mission it will have are
extremely important. We must imagine the head inside a kind of
three-dimensional figure. Of course, from
my point of view, this is more useful to build
a face from the imagination. Look at these
examples for a moment and take note of
everything important. We can understand head in a geometric way
from the beginning. From the beginning of its construction in
a general notion, the head hand and avoid shame. It's as if it were to
avoid figures together. This figure is important
in terms of light. It's important to
know how the light is going to affect
these geometric figure. On the other hand, the
phase is composed of different surfaces with
specific characteristics. And in each of these surfaces are the elements of the phase. That is the nose, mouth, and the eyes. Look for a moment and
take note for important. You can practice with a static image photograph
from your time in 2022, where you see the head in different positions and tried to relate it to all the content
you are seen at this moment. Anything that's useful to
be the portrait correctly, as long as we have
the best tools. I highly recommend
memorizing what it mentioned before about the triangle formed by the eyes
and the mouth. Why? Because the inclination
of the head can fail. Even the precision of
the forehead can fail. But the distance
between the nose, the eyes, and the mouth
key now it's fail. In the next exercises, this triangle will
be our best friend, only to build the face, but any element in Detroit. A very important aspect
when it comes to drawing the head is to take into account the
muscles after school. The muscles of the
forehead, e.g. the muscles of the neck, of the jaw, the cheekbones. Although each of us is different
in terms of appearance, we all share the same muscles. So by understanding
the nature of muscles, we can enhance a, a specific facial expression. Try to observe
people around you. There's no more valuable
source of inspiration than everything that surrounds
us until the next lesson.
14. FACE'S FEATURES: Once we have already analyzed the interrogative
structure of the head, It's time to focus
on the elements that make up the face itself. Because the precision
that we have when it comes to build in each
of these features, inevitable war, placing
them in the correct place, will resort in a
verbal portrait. Right there lies the realism and the truth behind a portrait. Where we're going to start, we're going to
start with the eye. The eyes aren't that
fundamental feature interface that's conveys the greatest
amount of emotion. And despite the
fact that there are different ethnic groups with different characteristics
looks nice. There aren't
constant elements in their eyes that if we
recognize them well, will help us build any type of file when
it comes to trauma. In general lines, we have to practice drawing the eyes
in different positions. But this cannot be done in isolation without that context. We could use a model in
different positions to make it. Only then we could have
different points of view. As you can see in the image. The female lie, in particular, has much thicker and longer. Lashes. In the eyebrows are also much more
outlined and thinner. In children, the eyes are
rounder than the eyelids. Try to compare them
with the female lies. But let's focus on the
image below the old man, us, there are numerous
deep wrinkles that extend from the sides. This type of eyes have bags in, eyebrows are, are
much more irregular. It's also important to know what the bars of the eyes
are in general. The eyebrows, eyelashes,
the upper eyelid, the lower eyelid, and
also the tear duct. All these elements will make arise look really attractive. Let's try to see the image for
a moment to understand it. There's Eris can be one of those elements
that list attract attention and a
portrait because they are almost always
covered by hair, head dresses or hots, e.g. but I think that there
is a characteristic that stands out when it
comes to drawing the errors. And in fact, I think it's almost an expressive
characteristic, is the position that these ears may have with respect
to this goal. That is the head at which
those ears are with respect to have a believed that this would be the
main characteristic. Because the viewer
is not going to focus too much in his same, but rather on the relationship
that deposition of the ear has with respect
to the face elements. The nose is one of the most difficult elements to represent because there are many types of noses
in few theories that help us draw different
types of stenosis. In fact, you will find
many theories that we'll speak of the Greek
prototype of nodes, which in fact is not
any Greek prototype. It's a completely symmetrical
type of Greek knows. But when it comes to trauma
and other types of noses, these theories are completely
useless in this sense. There is no other solution, but try to draw as
many different phases as possible so that
we can understand the patterns and
different types of features that can be
presented in our model. One of the biggest
difficulties when drawing the nose is that it
protrudes from the face. And that is why it seems
to have different shapes depending on the
point from which the head is been observed. In general, the nose
has a pyramidal shape, but this shape in some
cases can be wider or higher depending on the
particularities of the model. This bipyramidal
shape is made up of two nasal bones of the septum
and also by cartilage. These details are easy
to see him faces. Look at this example. We're diagnosis in
different positions. And depending on the angle in which we are seeing the nose, the depth looks different. The sites lean
towards the cheeks. And this is essential to understand the
subject of the nose. Node that is based is
triangular in shape. In that is where the oval
shaped no streets open. It's important to always try to recognize the highlights and the most significant
shadows that help us see the real
shape of the nose. The next most
important feature on the list that help us to
represent human expression. It's the lips. On the nibs lives the smile, which is a mechanism
expression itself. So it's as important as the eyes to be precise in the
construction of the lips. Because each stroke,
each line that we make will change the
expression of the face. The idea is that we can
get all the secrets that are hidden in the
expression of a human being. When we are drawing leaves, we must pay attention to draw the line that separates
the leaps very well, in that it's managed
to fit into the semi cylindrical surface of
the maxillary bones. In that they also
follow the rules of perspective that we had mentioned in the
previous classes. In this example, we
can see the leaps from different angles and even
from different ages. But more than anything, the angle that obviously
changes their shapes. Let's pay careful attention to these examples for a moment. One of the fundamentals
principles when it comes to drawing a portrait is to take into
account the direction, quality, and the type of light
that will cover our model. The nature of that
light will help us to highlight some elements, some features of the
face more than others. Not to mention that the type
of light and will help us add emotion to our
model in portrait. So take into account
the use of light. We will be able to make a higher-quality portrait or one that represents a
specific emotion. So let's try to take exquisite
care of the light and even experiment with it to achieve a really attractive portraits. In general, most artists prefer artificial light
to natural light, mainly because drawing or making painting requires a lot of time. Therefore, natural
light is not constant. It varies over time. The other hand, artists can experiment with light in
artificial conditions. The main light objective is shown with clarity
and aesthetics. The main characteristics
of the model to strong light sources that bearing the face
should be a void. Instead, a slightly diffused and softened like sars
is preferable. We must strive to dislike, doesn't generate a strong
shadows under the nose, under the eyes, or any of the features that
make up the face. Lightened, angled
slightly from above and from the side is
often used because it conveniently a centrist
the feature of the face and need to rebuild
this more effectively, the aesthetics of the face, which is the most
important thing. In the image. You can
see the directions, barriers a bit, but it's
the same type of lighting. Let's carefully look at this random portraits and
move on to the next classes.
15. Construction Process: We're ready to start the
first work of debate, at least in Barak drawing
bottom one, a self portrait. You can also try to find a sense of yourself
through throwing. Let's start by looking at
the details that are canvas, which in this case
is this old paper. Why have I chosen
this drawing paper? For three main reasons. First, we can use the color itself as a part of the drawing. E.g. the skin could be of
the histone in our drawing. See the difference with this other paper with
which we will work later. Secondly, it's up paper
with a very coarse-grained. Therefore, we will now be able
to do very small details. This is great because we
had to be very precise and, or drawing, or at least try. This is another more traditional,
finer grained vapor. You can use whatever you
feel comfortable with. The third reason, it's
a very thin paper. That is that it
breaks very quickly, so we will now be able
to erase too much. It's also a very
good for an airline. You can try to free
your imagination, find your own customs for
your own personality. Remembering that the
lighting should come from this side in the slightly
from above or below. Let's start and let's take a good look at the
image of our model. To understand the composition
in its most general view, we had to choose just the part that we are going to portray, which would be the upper part of the torso including the hat. Most barrack portrait
include part of the torture. This was done to give the
portrait more personality. Once we have chosen our image, we must proceed to divide it in our mind in three equal parts. Three equal parts the
size of the head. How many hertz fits in the distance I want to
take for the torso. In this case, it is
up to the strap, but you can do it to the
exact point you want. Everything will depends on
your own taste and style. We already have our three
equal parts on the paper. This allow us to work in a more orderly way
and have overhaul to make a drawing fill the space that we
want in our Canvas. Let's start with the
top word hat will be. To find out the
proportion of the head. We must draw a next that allows us to fill the angle
of its dimensions. From that acts, we
can begin to build a controller that contains the most general
board of the head. We must create a
geometric figure that represents most general shape
of the contour of the head. Let's try to relate
each of the details and shapes was recreate
a part of the head. We must use that same board as a reference point to
build the next detail. Let's try to see
the big triangle that makes up the
cape he's wearing. This great triangle has
some specific angles. That is a reference point
to build it exactly. We can try to do
some small details, but without being too stressed. Just to locate this, it seems on the torso. Remember that everything
is a reference point. Locates in the details. We had a better
overview of the torso. The drawing is an
observation exercise. We'll look carefully
at our modal, see the dimensions of the features and do exact
for secion on the face. We're going to start to place the elements of the face
in the correct position. If we can make the contour
of the eyes even better, we must remember
that in general, the eyes are always
on the same line. Although it's not
a constant rule, it's something that works for us as a good starting point. We are going to proceed to
build a different surfaces that constitute the different
volumes of the face. We must also begin to represent the shadows as if
they were solids. We must do it by building geometric figures that represent
each of those shadows. We must be patient because
it's a long process. As you make more portraits, you will know how to do
these n-type brushes here because you will be able to do it in your mind and
apply the shadows directly. Look at the close it
tails off the paper. Those thin lines and
little hairs are part of the material of
the paper. Into distance. It looks beautiful,
but the paper has grooves that make it difficult to deal with
details of the eyes. We must be precise for ceviche. In the same way as
we mark the shadows and shapes as the face
with geometric figures. We must do it with the
shadows of desert. It doesn't matter if it doesn't seem to make sense at first. They are just our
reference points. As we progress, those
features will be gone to different tones and we will change them for a
specific gradients. Let's try to fill the
movements of the cars. If we're using a life model, we should zoom in
on the marvelous to see the closest
structure of the hair. It's not always possible to
capture this in the distance. And even if our portrait
is not completely close, if we do, those details, look much better in general. Take a look at how the general structure of
ourself portrayed keener. Read, if you've
seen, the drawing, is perfectly located
in the center of our canvas because we've made the correct measurement
at the Kenyan. On the other hand, it's
important to understand that the Aldo we are making
general structure with lines. These lines should
begin to give us information about the
lighting of the drawing. We already know that the light
comes from left to right. So all the lines that are in contact with the light
should be lighter. In the case of hair,
it's more evident. But if we can do it
from the beginning, it would be much better. We must begin to
imagine how each of those tones that are going
to form the face are alike. We must enough information
about the structure of the shadows that we should have no problem
finding the gradient. An important detail of the eyes. Instead, to find exact
size of the pupil, we must be aware of the
shape of the sclera, the white part of the eye. That bar will help
us find the size of the pupil better than
the pupil itself. We are ready to continue
advancing in our drawing. See you in the next class.
16. Shadows : Perfect. Let's start
drawing the shadows. The MR. Star from the
darkest to lightest. We're going to fill
the darkest areas we were fired first. And then we will give details to the transition between
those dark areas, the most illuminated wounds. The direction of the
hatching is important to. If you can see, I'm applying
the graphite on the head in one direction only in order to generate consistency
in the shadow. You can do the same with
old shadows in the drawing. It all depends on the style. I highly recommend that
you start by doing it in one direction and then experiment with
different directions. Notice how the hatching
lines are cross this time. This also allows
for consistency. Crossing the lines that
lost you to fill in those little spaces that are created by the size
of the pencil tip. To fill larger spaces, we should always use
the softest Penzias, those whose stones dark
hair from phi B29, e.g. depends that I'm
using at the moment is a six be pure
graphite pencil. Now, we can begin to draw the intermediate songs
to generate more tones. It's evidenced that we must
shade more dark zones, but we're doing it this way to maintain an order
ecostructure of the drawing. Although the lines
are practically made in the same tone this time, you must remember
that as you practice, you can include differentiate of the shadows within
the same lines. It's advisable to use
different tones of pencils where we are
going to approach the most delicate areas
such as the face. On the other hand, observe
how I had kept direction of the hatching in large
parts of the drawing to give consistency to the
shadows of this work. Notice how important the
line is in this detail. It creates the
depth of the cape, the difference
between the different unfolds you've seen in the
cave over the shoulder. However, it's not a
nice lighter line. So nine that must match
the shadows ingredient that it's pressing in this area. See how each of the folds
has a different tones. You have to represent
it very well to generate
dispensation of them. Practice it a lot
because sometimes the difference
between one told me and another is very small. Look how our characters
costumer, ready, Luke's. It's incredible to
see how outlined in the shadows in the
beginning is so useful. Starting with dessert,
allow us to have a great reference point to address the tones
of the face later. Csf phase is the most
difficult bar of course, but we will take
a lead from now. Remember that the final
shape of our drawing will not be complete until all
the shadows are finished. The shadows themselves
shaved the drawing itself. It's not just aligned theme. Let's take a good
look at the detail of our drawing to then move on
to the shading in the face. It's possible that while we are starting to draw the
shadows on the face, we feel the sensation
that we are moving away from the
original shape of the model. This sensation is common, but it's not until the end of the drawing that we will
now define a aberrations. Remember that when we
are adding the shadows, we must highlight
all the details of each part of the eyes. Sometimes if we are seeing the model in person
without approaching, or if it is an image
from a surgeon distance. We can see the
details of the eyes, but those details of each
bar of the eye are there. We must draw them to generate a sensation
in the distance. Each of the small reflections
and lights inside the eyes are very important. We must be aware of them. On the other hand, understanding
that, for instance, the I on the left must be more illuminated than the one on the right is also
very important. The eyelids itself,
sometimes gas shadows, That's shade half of
the inside of the eye. Learning to have that
sensitivity to detect all those details will
make us better drawers. We already have a
first approximation towards the shadows of the face. We are still far from
the final result, but it's a good start. Tried to stop and separate
from the drawing for a moment. Reflect on the stalls
to correct things in a vocal folds to improve
the quality of our hexane. E.g. see how I haven't added
details to the Harrier jet. You only Mark highlights. On the other hand, we must
continue to suffer in highlights and the shadows of the face to generate
more volume. For now, before moving
on to more face details, Let's move on to
building an element that will help us enhance the
shadows of the face. Bigram, building background with a specific tone will help us to re-interpreting
turns off the face. In a different way of cars. We're going to use a white
shark or white pastels. You could also use another
color that you choose to improve the quality
of the graphite in the cape in generate a creative difference between
the turn off the face. They turn off that background
in data of the search. If we create this difference, we can maintain the same type of lighting in different
parts of the drawing, but we differentiate that provide to generate
different Dexter's. It was something very
common in the barrack, especially to generate
more creative drones and explore possible tones
in future paintings. But we will see all
these in the next class.
17. Shadows & Shading: Perfect. Let's start filling our bag. Bring your graphite. First. We're going to
do it in one direction and then in another direction
to really cover the paper. Remember to use a
dark tone benzyl, a soft pencil to cover much more in not damage
the paper so much. You can also use
liquid or powered graphite to fill
these larger spaces. In the case of liquid graph it, you just have to mix
it with some water. The powder or graphite should simply be
spread on the paper. After filling the background
in different directions, you should find a napkin
where small ketones are spread all the graphite and
achieve a much smoother look. This will generate a
difference between the textures of the character
and the background. You can also do it
with the blender. It may take more time. Now, we're going to apply
the white Boston chalk. We're going to apply as
much as we want without destroying the shadows
that we have a ready-made. Many times people wonder
what is the difference between a shock in the
traditional drawing bustle, there is no difference. The only thing is that
the shock is usually harder and sepia
colors and ranges. We're going to mix
the Busters shock be dignified so it looks
like a single color. We must do it with the
blender and do it carefully and pay close attention to the shadows we have ready-made. If you need to add more
amplified, you can do it. A very important
detail they have added towards drawings up to be
Italian Baroque drawn. It's the fabrics. Fabrics are a surprise and
exercise because they're forms allow us to make different types of
tones in shapes. In most of those stones
are outlined by lines. Observe in detail how
they are built in, how to create their effect. So you can apply it
in your own work. In the hair, you must
have enough patients. If you look closely
at the paper, you can see how the grain
of the paper GameScene, even from distance, e.g. in the head area. That is what I mentioned to you at the beginning
of the drawing, that green prevents making
very small details, but nevertheless, we can try to make them to build an effect that E and the
distance feels like every strand of hair is there. We must strive to
trace each strand of beard hair and try to see
it also as a whole unit. Although the beer is dark. We must also try to represent that delight also
affects the hair. Therefore, the left
side of the face in the urine it must be
more illuminated. The age of the cheeks, that age, that is vision contact
with the hair should be cleaned to add precision to
the contour of the face. If you look carefully
at the drawing, it seems that there is
not so much precision in the details as if they
were small brush strokes. Look at the hair to cheeks, but they are not innocent
graphite stains. As I told you before, the effect of realism will be
noticeable in the distance. This is the magic of Jordan in hatching into something more
than just a photograph. Rembrandt's last works
had this technique. After spending a couple
more hours given details, take a look at the results. Look how the light is
projected near the nose. See how the eye cavity darkens due to the effect
produced by the light. You get defect of the
hair in the distance. Even the skin folds on the
neck can also be seen. Notice the drop of the cape over the shoulder and shadow gas
by each fall of the fabric. We're going to continue with strengthening the dark
part of the face. However, we don't need to
darken dot bar too much. If we add a bit of white shock to the
lightest part of the face, we can create the fact that the dark bar is darker
than it released. And this will add more
resolution to the drawing. There it is. My portrait. If you noticed, unlike
the reference image, I'm not looking at
doing my reflection. I'm looking at somewhere or someone maybe someone
very important to me. It doesn't matter how you
make your reflection. The important thing is
that it can be true. That it reflects how you
would like to see yourself, how you feel, and perhaps how you see yourself
from the inside out.
18. BIO REMBRANDT : Rembrandt harnesses, bomb bring West warrant in
laden Netherland in 1606. His father was submitter,
come fortunately off, enabled to send a Rembrandt
to the towns late in school. At the age of 14,
Rembrandt began to study in the famous
University of labor, initial for a mailer sun. But academic life did
not suit him at all. A few months, he left to
begin an apprenticeship. A subpoena. Laden did not offer much in
the way of artistic talent. And 16, 24. After three years, we'd
have local painter, Rembrandt went to Amsterdam, just showed you
briefly with Peter. He then moved back to Laden, is set up as
independent painter, sharing a workshop
with Jim lives. It was not an easy claim
with which to work. Following the Protestant
Reformation, local churches, no logarithm provide
artists with any commission as
the Catholic Church did in other countries. As a consequence, artists had to concentrate on commissions
from private individuals. Rembrandt quickly began
to make a name for himself as a painter of
historical subjects. Initially, remembrance
did not follow the advice that was
given to junk painters, namely to travel to Italy to show the Italian office hand. Instead, he left that he
could learn everything he needed to form the art available
in his native country. Around 16, 31, Rembrandt
move to Amsterdam, the most prosperous port, another year in crowd. But Moroccans, every
corner of nation. It offered a junk and successful foreign more opportunities
than the sleep later. Rembrandt luck in the
house of an art dealer, coal Hendrik bank holiday. While there, he met his
lenders, John calcium Saskia. They were married in 16, 34. Numerous paintings
and dry winds and suggest the two
were very happily. In 16, Sarah to Sikhs, It's a skit, gave birth. Dare fast song from Barton. After only two weeks, over the next four years
to more children's were born but died within
a couple of minutes. Professionally, Rembrandt went
from strength to strength. The most important
familism organizations in the city commission it paints
as well as sport traits. He produced by rock
story paintings such as Belshazzar, fast. Cash flow was sometimes a prominent remembrance
gas full route and freely. He was a composite buyer of odd and a collector
of all manners of anti quietest prompts and weapons to be
used in paintings. Saskia, his family, accuse him of his wondering
his fortune. But Ramblin was the most
famous artists in the city. What could go wrong? In 16, 39, remembering Saskia, move into an a
grander house next to solve friend
Fung island Varga. He is sketch animals. The people on the street, beggar sacrifices,
women and children. And obviously, Saskia. This painting was influenced by new developments in
Italian art which reach the Netherlands by a prince and by his
more travel colleagues, many of his contemporaries
as a storage to sperm and with the dramatic use of light and developed by Caravaggio. The influence of carbide
is evident in brand. Brand work from the 1630s develop a new way of describing faces with partner
enough light and shadow, rather than simply writing
one side and shading the older shadows around
the EIS officer treats, making it hard to read a precise expression
gives his canvases extraordinary
suppression of leaving thinking mind behind phase. In 16, The fourth
one, a fourth child, was born and lead Saskia
with some will after weird and Rembrandt made barriers dramas of her looking
tired and draining back. In 164 to two, Susskind made a will live in Rembrandt and Titus her fortune. I will do most of Rembrandt's churn would
be lost if it's married. She died shortly after. He still aged only 30, probably from played or to be alone with the
baby to care for. Remembering how to
employ a nurse and to kind of *****
call Georgia Tech. She became his common-law
wife for a short time. But then he took on another several Hendrik stuff
and fell in love with her. Garrett took
Rembrandt to pull on the grounds that he
had promised tomorrow. He charged her with
bowing some Susskind genuinely that she had
left to Titus in her will. After much greater wrangling, Gremlin somehow had care
sent to how self-correction. Meanwhile, he and Hendrick
live happily together, except that the term
itself to Susskind will mean that he couldn't
afford to get married. She appears numerous painting, it may have been more
than for a woman and when not to the last bit of this later
paintings in the US, broad brushstrokes
sometimes applied with the palette now, well, the elite picture
how to smooth finish. Delayed rewards are designed to work only from a distance. In the 1650s, I'm certain was hit with a
massive economic depression. Remembering hadn't even
complete the payment on this house and his creditors began to chase him for money. In July 16, 56 is successfully applied
for excessive binom. Respect to one forum for
a bank can receive which avoided in prison all his goods, including an impressive
collection of paintings where salt
off for a pittance. Rembrandt, Titus and
Hendrick moved across town, too much poorer district where Rembrandt
continued to paint. He had always using
himself as a model. In the last 20
years of his life, he painted self-worth trades
with increasing frequency. In 16, 62, 300 died
after a long illness. Data's was left to
look after his father, consumed with Mountain province, forcing them to so Saskia stuff. But still Rembrandt could
not resist Putin in an offer for a whole Bain
that came up for sale. Titus Marion, 16 68. The Dr. of old friend
descendant for later he died. A Delta T TR was born six months later in 16
69 Rembrandt himself. He was buried in
Western next to Titus and there was no official
noticed about his stamp. The most interesting thing about remembrance career was
this incredible bastion of making portraits more than any other artist rembrandt
consistently represented. Here's some likeness. Throughout his artistic career. Around 80 painted drone
edge self portrayed are known branching and
it started from quick sketches to highly
compose likenesses. The late self portrayed in particular are incredibly
both full and honest. And a desk to remembrance, ability to compete old age in
highly sympathetic lights. Rembrandt's self portrayed at the age of six through tree, painted in the final
year of his life, reveals that he
never lost his ears. Just experiments, even with compositionally familiar
as its own likeness. Rather Ref, shown
that Rembrandt made changes directly on
Canvas as a reward. For instance, we know that the
cat was originally all why painters can enlarge or extending upwards
and to the right. His claps hands were, are generally open inhale a paintbrush to show
an artist at work. Rembrandt was praised
by ill the critics for his scalpel ability to manipulate
the light and shadows, for farcical or
aesthetic effects. His profound understanding of the use of delight
to convey spiritual, intellectual ideas is especially evident in his later works. So most, the most intimate image Rembrandt's produce date
of slayed career and reveal his heightened
sensitivity to expressing insights into
the human character. A woman bathing in a
streaming shows a woman lifting him up your ship in
the exposing her bare Flash, she weighs in a shallow pool
with her gaze gas dung, deeply immersed in thought. The viewers made private
to a contemplative moment. This is a woman
herself has completely unaware that she
has been watched. Descends us. Intimacy is
heighten it with the knowledge that demo for the portrait was
most likely Hendrix stuff. Renaissance scholars had attempt to identify the woman with historical figures such as Susannah or Callisto borsa hmm, where spied upon wild day bath. Wherever this remains
speculative in his later tears, remembering shift this
narrative tactics. Rather than employ multiple
figures to tell the story. He focused on a single
character and explore their contemplative and
introspective distaste. They think that the most
important thing about remembrance work was
incredible ability to catch his human environment. This environment
was telling stories every day and he had the ability to get
those moments forever.
19. Construction Process Part I: Beginning: We're ready to start
our second portrait. This time it will be the
beautiful the earth there. We're going to draw her face, but this time it will
be on the ocher paper. He earns two colors of paper. So you can notice the
difference again. You could experiment
with other colors to maybe make a night
ascendancy in the twilight. Perhaps a portrait in the
middle of the sunset. The truth is, the
color doesn't matter. The most important thing
is who we portray. Its try to do it
with interest in people who had something
to say with their eyes. For those who didn't know. The Mauritania is
unknown at this company. She herself as asks me for this portrait and I was not
ready to turn this down. The first thing
we're going to do is divide our paper into equal parts in the same way as we did in the
South portrayed, but only two parts. We will try to leave
a margin below. So it's not to touch
the edge of the paper. You may want to add a
frame in the future. So you should always do it. In the same way. We must do it above. Leave a proportional margin
to the one we leave below. Once we have our paper to
bite into equal parts, we must see the image
very well to select the upper space of the body that we are going to represent
in the drawing. Remember that it must
be a space that we can divide in the same way
as we divide the paper. I'm going to select from the head to a little
below her breath. At the top, I'm going
to draw the head, let's say the head
down to the neck. In the lower part, the selection we've made of
the torture that includes her breads in part of the army. When we are learning to draw, It's important to always
divide our paper into spaces. Because as we saw in that
they're Oracle class, the exercise where we saw the general structure
of the head. These squares in
which the head is strong allow us to relate
the shapes and spaces. We're going to start at the top. And the first thing
we need to do is figure out what the general
shape of the face is. That geometric figure that
shapes the hip to its canter. It's important to do it from the most general to the details. So we have to take
a good look at Dorothea intro to notice
what the general shape is. I would say that a triangle, fortunately, it's a triangle. It's Beale forms a
triangle that allow us to determine the proportions and
the content that is inside. Here we already have these general figure
which doesn't monitor. If it's not perfect, it allow us to approach the perception of the
shape of Doritos head? We will go towards perfection. You can see that
it's like a pyramid or a figure with a
surgeon triangular shape. Obviously, it's not a triangle, but it does have precise angles that we
are willing to work with. From now on. We
already know that all these space must include the head part of
the veil into neck. Now, we're getting to confirm the inclination of the
lines to proceed to divide internal space into
your metric figures that allow us to see the
different section of the face. For instance, the
space of the forehead, the area of the cheeks. All these to find out the general contour
of the face itself. Once we have these general
viewer and several of the sections that the elements
of the face should be in, such as the line where
the AI should be in the dark space next to the face that eats the
background of the Bale. We had more Jews to position the rest of the elements of
the general composition. But now we must do something
that is even more important. It is to position the
eyes and the mouth, build the triangle that makes up the eyes and
the mouth together. This is more important than
anything in a portrait. There is something that will
make a portrait look real. It's that there are many drawing theorist says that we must build a
three-dimensional sphere, draw the gaze and tilts
up to face correctly. But these will only work if we want to be a repeated
imagine characters. I insist on Dvorak. But especially in
the Renaissance, it was necessary to
make many characters in not all artists had the money
to pay for many models. In a live portrait of
a specific person, this is completely useless. We must have the
sensitivity and techniques that we can draw the face as
if it were any other object. As we make one portrait
after another, we will feel the intuition of the constructive scams and even possible solutions to the challenges of each portrait. For now, the most important
thing is to determine the triangle figure form from the position in which the
eyes and mouth are located. But we will continue
in the next class.
20. Construction Process Part 2: Face Feautures: We're going to continue to
portray in the sense of dura. They're wearing the
construction of the triangular geometric figure that makes up the
eyes and the mouth. We can start by tracing the line where the
mouth is located. This link will allow us to know the angles of inclination. To discover the
position of the eyes. We must see the distance between the mouth
and the edge of the bill to determine the
size of that specific space. It doesn't matter if we make a mistake about how
wide the mouth is. Because we are going to discover it for the position of the eyes. We can use the pencil to verify that disinclination produced
by the angle is correct. You can also use the pencil
and put it horizontally to know the angle of inclination of the eyes with respect
to the horizon. Any tool that help us determine
this can be very useful. From here, we can begin to trace the general cavities that shaped the elements of the face. That is, begin to locate
exactly where the eyes, nose, and even the
shadows themselves. As if they were bar of
the features of the face. As we go along, we can even trace the shape of
the eye if we want to take into account how important the white part of the
eye is the sclera. This will allow us, as we
did in the South portrayed, to determine the final
shape of our gaze. If there is something
that must be IC sat, It's the, it's the very
center of authority as so. Notice how I suggest
with the pencil, the lines that I
use as I referenced the position each element
that I am drawing. It's a constant application of relationship of
shapes and angles. Notice how the nose doesn't even star for an
amine general for your bot from each one of the elements that we are relating to advance
you to draw it. In this case, we can see that the relationship
between the eyes and the nose is correct. Indeed, we have traced the
angles to achieve precision. However, this
precision now allow us to notice that the distance between the nose and the mouth, it's not that right. Therefore, it must be corrected. It doesn't matter. We're in the process
of building. And also our initial
general viewer was an approximation
where sketch, we can modify it. Since the precision generated by the relationship between
the mouth, nose, and eyes. He's the most important
in the boats rate. We are going to remark and trying to understand
emotion behind that. Look what dura TAs Haydn. Maybe she wants to
tell us something. Maybe she's suffering. It doesn't matter what it is. You must be precise
in the forum so as not to allow our drawing to lie, or drawing must tell us
the truth of her case. In every millimeter accounts. In this task. We're going to
continue advancing in the details of our phase
in the next class.
21. Construction process Part 3: First shadows: What are we going to
address in this part? The first shadows of the face. Let's take a closer look at some lag the South
portrayed in these portray, there's no strong
shadows on the face. That is, one side is not much
brighter than the other. In this case, the shadows are soft within the
area of the face, which means that the ranges that we are going to use
must be much softer. However, they must continue relating the shadows
of the areas. We have to correctly interpret the density of the
small shadows on the face related
one to another to have precision in
startled contraction. An example of what
until you is to determine how dark the darkest
parts of the face are. To compare the eye cavity with the darkness that is generated in the halls
of the nose, e.g. remember that all
these ranges will generate the final shape
of the facial features. The shadows will generate the three-dimensionality
of the volume of the face. We can also begin to
fill with graphite, the dark space that
is close to the face. Devoting of the
bill to have it as a reference point of
maximum darkness. We can reach into drawing. We're going to address the
details of their eyes. They are not going to
be the final details. Remember that it's a process. We're going to approach
the quality of the grades that must be
generated inside the eye. This drawing paper is
quite difficult to master. Therefore, it
requires that we had patients because it's almost like a drawing in
an oil companies. Depending on the
color of their eyes, their reflections in the pupil will have different
illuminations. But even when the eyes are dark, sometimes they are
not completely dark, but rather dark brown. Therefore, we have to try to differentiate the
dark tone of the eye. Another dark tone of the traits. The interesting thing about
the veil that Dorothea is wearing is that it's practically
the color of the paper. So we wouldn't have to worry
too much about finding its final term simply by reinforcing the tones we could get to represent it correctly. A guide that we can have is
that the tone of the veil is more or less the tone of light that is at the tip of the nose. We're going to
continue working on this shadows in the next class.
22. Construction Process Part 4: Breast: Since we have partial builds, the face, we're going
to move onto the chest. It's necessary to build the
chest and it shades of gray. To better complete the phase. We need to have the
entire drawing. That is why I haven't
completely finished phase. In fact, you will notice a lot of difference
between how the face looks at this moment in how they will look
in the final finish. We will then move on to building the chairs with the
technique of bundles. Be attention toward
the geometric figures that I'm going to build from the neck to generate by a relation of shapes,
the entire torso. I'm going to build one
shade after another. Moving the benzyl to
point out the angles in lines that suggest where
these shapes come from. Notice how this line
that I draw from the next town or lowest to
discover where the waste is. It's practically
the same exercise that we did on the face. Only it's much more
visible because the body apparently has layers
of small details. Notice how we translate all
the reliefs of the body into small section that
in turn will be divided into more sections
with different tones. Remember that the
shadows are porins, but the shape of the body, we are going to represent them. Understanding them
as the body itself. Although it seems strange, drawing someone Jong is much more difficult than someone old. Because the quality of grace
in arm wrinkled Ruskin, it's much more
difficult to detect. The wrinkles of the elderly are a great help to have
a reference points. Something important
about the torso. Points of light. If you look at the shoulder, the brightest point
of the shoulder is not brighter than
the breast area. In fact, I would dare
to say that the most nominated born in the
entire image of dura, there is the area of the
breast near the nipple. We can now begin to fill our entire torso
with we're fight. Being aware that
the tones that go on the arm must be related to those we did on the phase that we will see all
these in the next class.
23. SHADOWS: TORSO: Perfect. We're going to proceed to feel
the torso with you provide to continue shaping this beautiful
portrait of the earth. Their suggestion that I tell
you when she's sitting using the pencils is that when you are going to apply the
good fight in an area. Although we can
indicate the shadows in its sketches, which
separated lines. When a blind the shadows, it's always convenient to
do it with joint lines. Because if you want to diffuse to hatching with the blender, you will have a much
harder time doing these if ticker fight this applied
with separate lines. Try not to force a light
pencil to make dark shade. It makes no sense. In D will damage the paper. Notice what happens
here under their arm. If you see the reference image, the under arm area should be
darker than the breast area. In turn, the arm area should be darker than the
under arm area. Therefore, the tomb
relationship is wrong. You have to correct it to
get the right relationship. To further increase the range
of tones of the drawing, we can even use the
white child to reach more illuminated tone,
the breast area, so it's not too
dark and the arm so much since that's dark, area behind the arm that
represent the break round of the male has the darkest
shade at the graphite. He said perfect mix between blurring and letting the
hatching show through. That makes a drawing
really appealing. Since we had worked on
the shadows of our torso. We're doing to immediately move on to the favorite next to it. Let's finish building it. We must have star by relating the shapes and dimensions
of the door shut to use them as a reference point and build different
folds of the fabric. We have to try to use
the size of the arm, the breast to know how many
times each of them would fit in the area of the fabric in half the correct proportions. Another important
detail regarding the turn of the fabric, the border next to the torso. The tone of that place should
be the tone of the paper. Everything else
should be darker. That is the reason
why I wanted to use the white shark in
the breast area to differentiate dose
Jew lighted areas in calves, different textures. We can wants to start filling the background
with graphite. Remember that the
background always allow us to highlight
our portrayed. It loads the volumes to have a special sense on the paper. Notice how her work, Luke's, how important it is to fill the background to get the
image out of the paper. This is still work to be done. We must give more details to the face and improve each
relationship of songs. We're also going to
continue working on the fabric and the final
turn of the torso. But we will do all those close
details in the next class.
24. SHADOWS: FABRIC & FACE FEAUTURES: We are going to proceed to get a better resolution
to our drawing. We must start by observing
that we need to make even more details in the eyes to get more
resolution to the face. Reduction, the
construction lines to make it look even more real. All these details in
the eyes, the ears, the parts of the eye, the eyelid, the sclera, bottom and top lead. The iris, famous highlight
them in the face. There is still work to do. It's necessary to
highlight the difference between the illumination of
the right and left side. There is something
important to note. Sometimes it will not be
possible to broach the world. Firstly, because our
reference source with not always be
a static image. And secondly, because sometimes our models could be people
from our daily lives. People we see him some
as traders square. Therefore, although we
can build his face, we must straight to re-enter bread the small
details of the face, the more portrays withdraw
the bed or joules. We will have to solve
these challenges. Main idea is we
can have tools to translate all these shapes
into a possible painting. If we can get volumes, these are small details
in black and white. It will be much easier for us to achieve an
excellent color results. Eyes detail in these colored
drawing, for instance. Also remember that you are working in an all luxury paper. So it will take us a little
longer to get that solution. All papers that
have some kind of textures will be your
best draw with teachers. You can notice here
in the same way as in the South,
portrayed the origin, the lines that form
the texture of the paper was we make
those details of the face. We must finish building the
shadows and textures of the veil to generate more
depth in the entire drawing. Then we are going to
bluer the hatching of the torso to give it a
more sophisticated finish. As you can see here, hatching has almost
the same language throughout the torso. Therefore, we must modify it to generate
different textures. This difference will
make each bar of the skin look different and therefore more
three-dimensional. Pay attention to the edges. Those construction lines
that outline the shapes, dose and should be
thinner so that the drawing has a more
professional finish. In the barrack forums and
objects had already begun to be represented Using Rapid brush
strokes in the drawing. It was also the same. Since many of the
commissions has to be completed as
quickly as possible. Painters should try to
make quick sketches, but at the same time have as
many details as possible. Disability many years later, became an entire artistic
movement. Bresson is. You're also going to
apply the white shock, give it a stronger
lights points and improve the range of
tone of the drawing. This is always a very
beautiful tool and drawing. If you have darker papers, you could try drawing
directly with white pastel pencils and
have beautiful results. You get the difference.
Now. It's incredible what you can already
feel that you can touch the person
on the paper. You cannot imagine
how many times I tried to draw a woman
to try to reach her. It's a wonderful experience. You get the detail as
a bail near to face. That dark inner parts or feel. Look at the features of the
face much better than before. But we're going to continue
working on this drawing so that it looks even
better than what I did now. But we will see these
in the next class.
25. SHADOWS & FINAL FINISH: Following the same line
as in the last class, we are going to continue
giving more details to the entire drawing before moving on to the final finish
with a wide shock. Remember to be very
patient, enjoy the process. At this stage of drawing or a painting is the part where we should feel
at work the most. We have already applied all the graphite
necessary for our work. You could to finish
up the chest. Notice how you can
feel the muscle that connects the
breast to the shoulder, though the same
type of lighting. You can now notice more details
in the face, the cheeks, the detail of the forehead, into better volume of the eyes. We're going to apply our magical
detail, the white shark. You can use it in any
of its presentations. Maybe a white bustle, benzyl, white shark, or maybe
a soft Buster bar. Any of those words the
same as long as you do it creatively and
in precise detail. Try to experiment with the materials down
David's yourself. This is a most legal
fight drawing. But the color of the paper and
those leading white pastel the tails are really worth it. Remember as always, that
perfection is in freezing those moments and people that
we want to have forever.
26. PAPER EXERCISE: In this exercise, we're
going to put into practice what we did in
the chair exercises, but with a more irregular object and in another precision. We're going to use this
origami to practice. You could make
your own design or multiple designs to
practice many times. But the main idea of this exercise is not only to
build the shapes correctly, but to start having
the ability to draw different shades of gray, you must be able to draw as
many grades as possible. In each surface of the origami, we have a specific tone. If you managed to
acquire the ability to differentiate these
domes on paper, the quality of the gradient
you make will be better. We're going to start by building the surface where
our origami lies, the top of the chair. We can start by tracing
the upper edge in front. They're dried to
discover the angle from joining the lower corners
with the upper ones. Once we have our build surveys, we can continue
drawing triangles that allow us to build
the origami base. We had to use as a
reference point, the size of the Scarface. That is, build these
triangles from Dara to find the exact place where
the origami base lies. We could start from
the origami corner closest to the left side, try to figure out the distance between that corner
and the edge. In all sorts writes
a few good rounds at set size of that distance. That is how many times
that measurement fits in the entire width
of the top of the chair. Look at how this triangle lets me know the
shape of that size of the origami in its relationship to the edge of the chair top. Notice how we have already
built a shape of our organic only using this
technique of angles. In fact, if you can notice it, each origami folds is a
triangular geometric figure, which makes our work easier. From here, we're going to start working on
the gray gradient. And where should we start? The first thing we're gonna
do is strike to absurd the image and
discovered which is the darkest and lightest
point of the image, to know which is
the range of tones, what we're going to
apply in the drawing. I would say that the
darkest shade in the image is placed
under the origami, the shadow on the top of the chair produced
by the origami. The other hand,
the brightest side of the origami would
be the left side. The place where the
light is burning. Since the light partially
comes from left to right. Knowing that we
are going to start feeling with graphite
and hatching each of the origami forge with the specific shade that
we think is appropriate. Remember that the lines themselves must contain
the shadows themselves, must make lighter
or darker lines on the '80s with the gradient of them to accompany
the shadows. We must straight to disappear
the lines if we want. It's possible that
in some Darwin's, its aesthetic that we
can see the lines. But we must learn to
blur them and leave them aesthetically to achieve
an artistic finish. Don't worry too much
about the tools. We can use. Anything to enhance
the gradient. Fingers, a napkin. Drown blender. Some people find fingers more useful than professional
splendors themselves. Use the tool you feel
comfortable with. And you didn't need
to spend a lot of silver trying to get tools
from some distant time. It takes to deliver a man's several days on horseback to get
here at supply me. You can continue advancing
your own exercise. The more time you
spend making details, the more real it with me. You can practice
different ways of folding the paper so that you can practice as many
forums as possible. Here, I leave you
another example of another more
finished exercise. We went another type affords. Hello.
27. END: Well, we have reached the end of the first volume
of Iraq. Draw me. I hope you enjoy it very much. And remember to
make the portrait of one of your loved ones. You've seen the window
in some candles. It's an extraordinary
way of drawing. Just like the master
of the barrack. Remember to move forward, there are two more volumes
of a rope drawing. A second volume focus on drawing the female
and male body. But where we will
see also brought up the knowledge we learned
in this first volume. Thus volume is a coarse
focus on drawing the human figure together with landscapes is the
most creative awards. But I highly recommend that you take the first two values. Well, if you like this course, you can leave me a
review if you want. I would really appreciate
it until the next time.
 Baudilio Perez, Take your ideas to the stars