Transcripts
1. Introduction: Hi, I'm Emily. I teach graphite pencil drawing to beginners
and improvers. And in this project, we're going to experiment
with continuous line drawing to draw fun and quirky portraits
from photographs. This project will help improve your observation skills and
your hand eye coordination. But most of all,
it's about loosening up and having a bit of fun. With this method
we're going to use, you definitely won't get an
exact likeness of the photo. That's why it's called
quirky portraits. So don't worry about that. Just be brave, dive in
and see what happens.
2. Materials: For materials, you'll need a dark pencil like
a four B grade, or you could use an ink pen and you'll need some paper.
Let's get started.
3. Warm Up: Continuous Line Drawing: Okay, let's go. So this
one is definitely going to test your ego because we're
going to be drawing faces, but you're not going to
get a realistic result. So we really need to
let that go right now. And we're going to be
practicing getting a connection between
our hand and our eye. We're not going to be
doing any proportion, any measuring like that. We're going to be
drawing continuously. So if you've done some contour drawing or
continuous line drawing, you'll know what
this feels like, but we're going to speed it up and just have a bit
of fun with it. So you might need two
pages for this one. The first one is going
to be a little bit of an experimentation
and some practice, and then we'll draw
some quirky faces. For this exercise, we're going
to be using a dark pencil. So I've got a six B pencil. You could even use an ink
pen if you really want to. But the point of using
a dark pencil is, we're not going to be
rubbing anything out. So whatever line we draw, that's the line that
stays on our page, and we can just keep reworking
and drawing over top. And to practice that and get into that
feeling of, you know, not worrying and just
letting things go, the first thing
we're going to do is simply start doodling. So you're going to
push fairly firmly and just start moving
your hand around, maybe focus in a little
bit and make some shapes. I want to get used to
this feeling of the hand just moving continuously or the pencil moving continuously, not thinking so much
about what we're doing, but just moving. And when we put this into
practice with our faces, we're going to keep
our hand moving, but we're also going to be
observing at the same time, and we're going to try and make a connection between this
moving hand and our eye, our moving eye as it roams over the subjects
edges and contours. You see how nice and
dark that line is. My pencil is starting to get a little bit blunt,
so when it does that, sometimes I'll turn it
around a little bit, just on its tip one
way or the other, and get a sharper line that way. It's almost like
you're sharpening the pencil on the
paper as you go. But you can always stop and
sharpen if you want to. The only problem with
stopping to sharpen your pencil is sometimes
then you get out of that zone and you
might become a little bit self conscious about your
drawing. So there's my doodle. We're going to go
straight into practicing these lovely things, these ears. A little bit less pressure
with ears because they're really weird and
strange looking anyway. You're going to choose a
point to start on the ear. And remember, we're keeping our pencil moving continuously. I'm going to start about here and I'm going to
work my way around this way and come down, and then I'll start,
you know, moving in. And the thing with the
continuous line is we're not taking our pen or
our pencil off the paper, so there might be times where
you're sort of having to double back and redraw, and we'll get something that
looks quite organic and, I think, quite
interesting, as well, and it may not look
exactly like an ear. But what we're aiming
for with this is to capture something of that
ear that we wouldn't get ordinarily if
we're trying to carefully sketch out all the
proportions and everything. And we're also aiming to get our hand moving with our eye
and recording what we see. Even if we record
it wrong sometimes, we're practicing the art of
observation and trying to get our hand and our brain and our eye all
connected together. So starting up there, I'm
just going to start drawing. In terms of practicing
the observational part, the trick is to not be
staring at your paper. So actually, you
can't see my eyes, but I'm actually looking
mostly at the photograph, and then I'm flicking my eye to the drawing just to make sure my hand is
going in the right place. Now, what people tend
to do is the opposite. They'll be staring
at their drawing and flicking their eye
to the photograph. But I want you to think
about trying to spend as much time looking when
your hand is moving, looking at the photograph. And so that might be
all I do for that one. And I know it's
definitely not right. I'm going to miss I think
I've missed a line in here. But I've got the general kind of shape and I've observed all
the different parts of it. Let's move on to another ear. This is still a practice. We've
got one more to practice. I'm going to start at the top again and work my way around, but work in whatever direction, start at whatever point feels
most comfortable for you. Just make sure that pencil is always moving and
you're looking the whole time at that ear and just flicking your
eye to your drawing. The priority is
looking at the ear. The hand is moving as we look,
and every now and again, you're just flicking back to
the drawing just to check that your hand is actually going sort of in the
way that you need to. Maybe when I turn a corner here, I'm very quickly flicking
my eye to my page. Keeping the same kind of
pressure all the time, sliding my hand along the page. Now, if you get to a point and you sort of
can't join it up, then you can definitely draw
from one place to another. It doesn't have to be following
a contour all the time. I'm just working my way around seeing if there's
anything else that I can put in there up here. So if I saw something, you know, over here that I
wanted to put in, I can draw across there, but I want to be looking
as I do that, as well. And obviously, when you do that, you're going
to get, you know, these lines that aren't actually part of the
subject, but that's okay. And I'm probably overdoing
this a little bit now, as I've been talking away. So that's my second year. And, you know, it's not
a realistic, obviously, but can you see
something of the shape that's maybe similar
or, you know, maybe there's something
inside that you might not normally have
actually looked at because there's just
so much happening there.
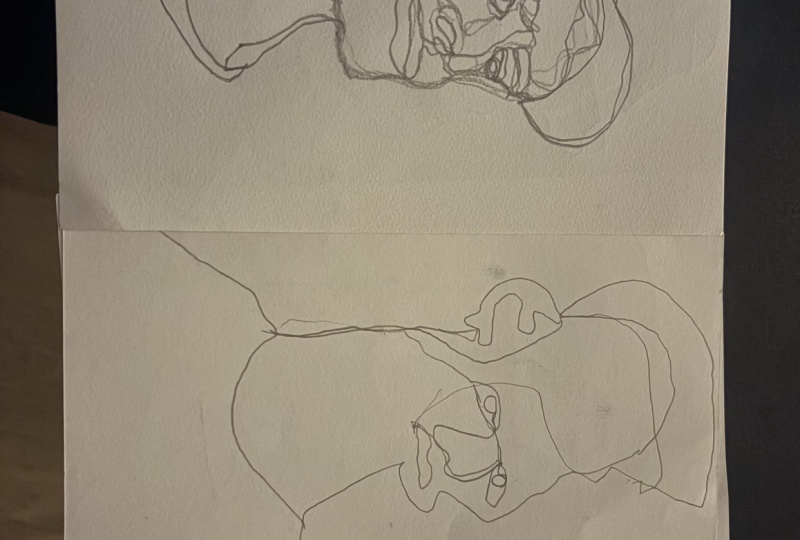
4. Quirky Portrait 1: There's our practice.
Hopefully, you're feeling nice and loose now. We're going to move on to faces. This is going to be
really fun, but you will feel a little bit of
resistance as things don't turn out
exactly like you want them to because we don't
have a lot of control. Remember, we're practicing just pure observation and trying to get our hand moving
nice and freely and connecting with
our brain and our eye. There's no pressure, or there
shouldn't be any pressure. Take that pressure off
yourself to be able to draw. These faces realistically. We're thinking of
it as a doodle, just like this here,
but we're trying to practice observation
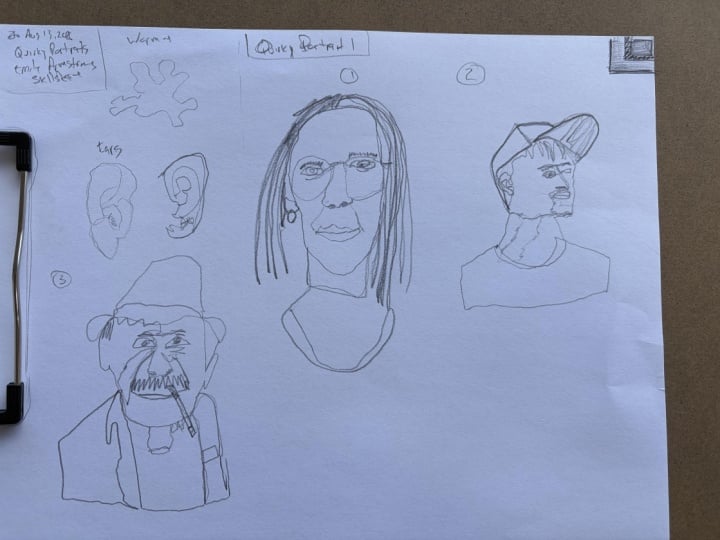
as we do our doodles. So I'm going to change pages. I'm going to do three
faces with you. There are some more faces if you want to practice some
more in your own time, but I'll just do one, two, three, and keep
them quite small. I know we did the ear quite big, but we've got to think
about how we fit these onto our page, if you want to do a
little collection. However, if you feel like you want to go big,
that's fine, too. You can set up a
big piece of paper. It's really fun, and, um, and it feels really
nice, you know, just to kind of, like,
throw the pencil around and move your whole body as
you're drawing, as well. Let's start with this one here. Now, some of these faces
have glasses or hats, and they're a really good place to start because they
kind of give you something something
structural to base your drawing around
or to start with. So I'm going to start in
the middle of the glasses. And I'm just going
to work my way around the glasses
to start with. And I'll show you what
I mean about having to draw lines between things. So, you know, I've
got these glasses in here now, and they're
not the right shape. That's fine. They may be on the right
angle, which is good. But now I've got
to get to the eye, so I'm literally going to draw
straight to the eye there. I'm not stopping and starting. I'm not lifting my
pencil off the paper. Same with the eyebrow. I mean, it could be tempting
when you're doing this, because it is so hard and because we've got
nothing to rely on, it might be tempting
to just draw an eye the way that you
think an eye looks like, but I do want you to
carefully observe. Remember, we're keeping our
eye mostly on the photograph. And I can make some
corrections here if I want to, so just change the
shape of those glasses. Come down here for the nose. How can I join that
up to the mouth? I've got this crease
coming down the side here. I can come across to
the mouth and then put the mouth corner
of the mouth in. And it's probably not even
gonna look like the person. It should look something
like a person. But forgive yourself if it turns out looking kind of
creepy or a little bit ugly, that's totally fine
for this project. And it's actually what
makes them quirky. We've called this one
quirky quirky portraits. O So I started to go up here and that's
totally the wrong angle. I know I'm not going for
something realistic, but I am going for observation, so I've just come back
to that point and then straightened out on the angle that I
want it to be on. You can back up down your lines. You can redraw over
top of your lines. Not to try and make it look
good or make it look perfect, but to try and copy or transcribe what your eye
is seeing with your pencil. In the corner of
the glasses there. And I think that's probably all. If I wanted to, I could maybe put in a little bit
more detail around the eyes. We're not shading, but
I might be able to see, you know, the crease
under the eye there. Maybe I can see some
shapes in the eye, only drawing what I
see, not drawing what I think the eye
should look like. So, this portrait number
one looks kind of creepy, but also kind of interesting. I've got like these sorts of portraits. Now we're
going to move on. I don't think I'm
gonna be able to fit three onto my page. So maybe I'm gonna do one, two, and then I'll do the third
one on another page. And that's just because
of the drawing size that feels more natural to me.
5. Quirky Portrait 2: Let's go with this one. Again, we've got
something structural there to hang things on. We could start with a hat or, you know, maybe that
line of the hat, and then maybe
working into the ear because we've already done
a bit of practice with ear, so I'm going to start
up the top here. Start wherever feels most
comfortable for you. I work my way down. Even drawing this line,
I know it's straight, but I'm running my eye along it, and I'm not drawing
until my eye reaches the point that I want to
draw, if that makes sense. I'm not speeding ahead. I'm not looking
and then drawing. I'm looking or I'm
drawing as I look. It's okay to not get
everything down right first, so I'm exploring this ear. Trying to figure
it out. You know, it's quite small compared
to everything else. So there might be some parts
I put in that aren't right. I might need to add parts
that I sort of missed. Now, I got to think about,
how am I going to get over to the eyes? I'm going to come across
the top of the hair, and then I might actually
come down where I think the nose is going to go and
then work my way backwards. But again, whatever
feels best for you, you could go straight across the face if you want
to draw a line, but draw as you observe that
crossing over the face. So what I mean is as you
draw across the face, you're actually looking
across the face, as well. Maybe you can see some
shapes of shadow. You can definitely
draw those in. Not really any right or
wrong as to what you draw, as long as it's
something that you see. So if you are
watching me do this, sometimes you'll see me drawing
actual parts of the face, and sometimes you'll
see me drawing as I move from one
part to another. So making a connection between one part by
actually drawing, even if there isn't any kind of feature there or isn't any, you know, strong line
there, I'm drawing it. I'm drawing where
my eye is going. And sometimes I'm looking across to see how
things line up as well. So when I just put that
top of the hat in here, I was looking at where that
lined up with the face, you could actually draw that
with the edge of the face. So there's drawing number two. Definitely not
perfect, but there's something there of, you
know, maybe the mouth. Maybe you saw something that
you wouldn't normally see, like I noticed this
plane under the nose. The shape of that nostril I see it's wrong now,
but that's okay. We're going to move
on to one more, and then I'll leave you
to do a few on your own.
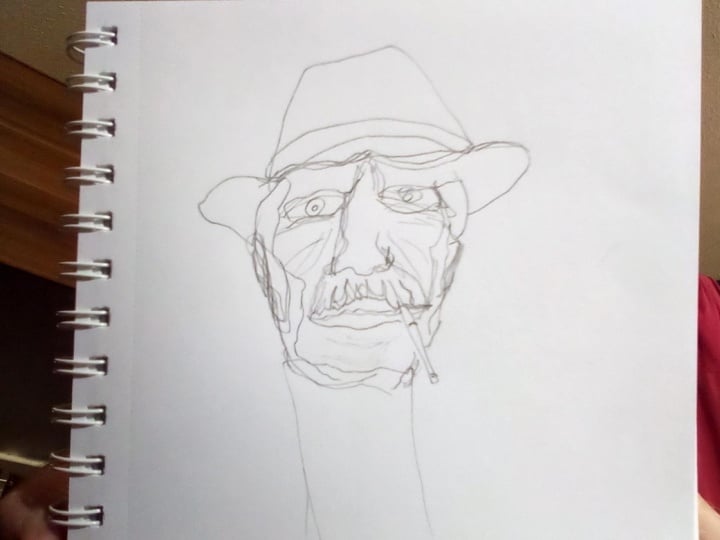
6. Quirky Portrait 3: So this one's an interesting
one. We've got a hat. We've got a face that is nice and sort of craggy
with wrinkles. And we've got that mustache
and the cigarette, as well, which might help us
kind of frame some things. So think about where
you want to start. I think for this one, I
might start with the eyes, and then I can bring the hat up, and if I don't have room
for the hat, that's okay. If I start at the top of
the hat and come down, I might run out of room
for the rest of the face. I'm going to start on
the left eye here. You can stop if you
need to, you know, if you just like, I can't
I can't quite see it. Take a little break, but don't take your pencil off the paper. Just give your eye a little
bit of time to adjust. And as I'm drawing down here from the eye
down to the nose, I'm essentially measuring that even though we're not measuring it the way we normally would, I'm measuring it by drawing that distance as I run my
eye down that distance. I guess, I've got
the nose in here. Mustache is good to give you some structure, hang things on. Your line can be wriggly. It doesn't have to be straight, even if you see a straight line. I can have wobbles in it, and sometimes it actually makes these portraits a little
bit more forgiving because, you know, they look like they're supposed
to be like that. They're supposed to be wriggly, wonky, maybe drawn with the
wrong hand or something. And if I get to
somewhere that doesn't quite line up with something
that I've already done, then this probably does line up, but I was thinking this cheek
might come over too far. Then, you know, you just
redraw redraw over the top. This is a good example where I'm looking across the
drawing as well. I'm thinking about where the
ear lines up with the eye, the top of the ear
lines up with the eye. Putting in some
of the hat there. And, you know, I got to
get back down to the neck, so I'm just going to
work my way down and maybe add in anything
else that I see as I go. Thinking about where
the shoulder is in line with the moustache, the
tip of the moustache. Some of these marks in the neck, it's gonna have to have
a lip at some point. Drawing what I can see, not what I think I should be drawing. Even if I'm drawing
it wrong, I'm drawing I'm having a go
at drawing what I see. Maybe some of these
marks around the eye. I got a shadow of the hat. I'm just going to work my
way down the left side here. I want to get down
to that shoulder, but I'm looking again as
I go drawing over top. Not even necessarily correcting, but just redrawing again
so that I'm not just, you know, dragging my way down. I'm almost measuring
my way down, you know, checking or putting in the
pieces where they should go, rather than just
going, Oh, I want to get down here and
starting down here. Finding the gaps between things. And then just taking
a little look to see if there's anything extra that I want to add that
maybe I've missed. I'm a a little bit of detail
to this moustache here. Just showing those
different pieces of it, segments of it. A few lines under the
ice, what I can see. Maybe some of these
creases on a forehead. So that one was really fun.
I really enjoyed that one. Maybe I need to put a little
bit of a pupil in there. If I could see pupil, I can definitely see a
highlight in this eye. But I've included a
few more photographs that you might like
to draw that have, you know, other
interesting things in them glasses and wrinkles
and that sort of thing. So I hope you enjoyed this one. It's definitely an ego buster. You know, when I look at
this one I quite like, but when I look at this one, there's problems
for me with that because it kind of looks like, you know, I haven't got the right angle and
that sort of thing. But it's still I think it's
still an interesting drawing, and it really got me
used to that face. You know, if I was to
now draw that face in a more realistic
format portrait, I'm a lot more familiar
now with some of those things because all I
was doing was observing. I wasn't trying to get them perfect and laboring over them. I was just practicing using
my eye and my hand together. We did these ones
with a dark pencil, but if you want to take
this even further, you could have a go
with an ink pen, you know, something like this. A nice flowing ink, and there's just even a
little bit more pressure, I think, because
ink is permanent. But you'll get even
stronger result, something that feels
even more intentional, as well, because
you've used ink pen. I'd really like to know how
you felt about this one, about your drawings
and about the process, whether you found it liberating or whether you found
it really difficult. So please let me know
in the comments. I'll see you in
the next project.
 Emily Armstrong, The Pencil Room Online