Transcripts
1. hello and welcome: In this short and beginner
friendly class, I'm going to show
you how to create your first simple
animation in Procreate, and we are doing it by
bringing a super cute, bouncing mushroom to life. Hi, I'm Nici. I'm a Procreate artist with
a big love for colors and playful designs and making art fun and approachable
for everyone. You will learn how to set up the animation
tool in Procreate. How to sketch and
plan your frames. How to create smooth
bouncy movement, and how to export your animation so you can
share it with the world. This class is perfect if you
are brand new to animation, or if you've been
curious about trying Procreate's animation
assist for the first time. By the end, you will have a fun, animated loop and a whole
new skill to play with. So grab your iPad
and your pencil, and let's get started.
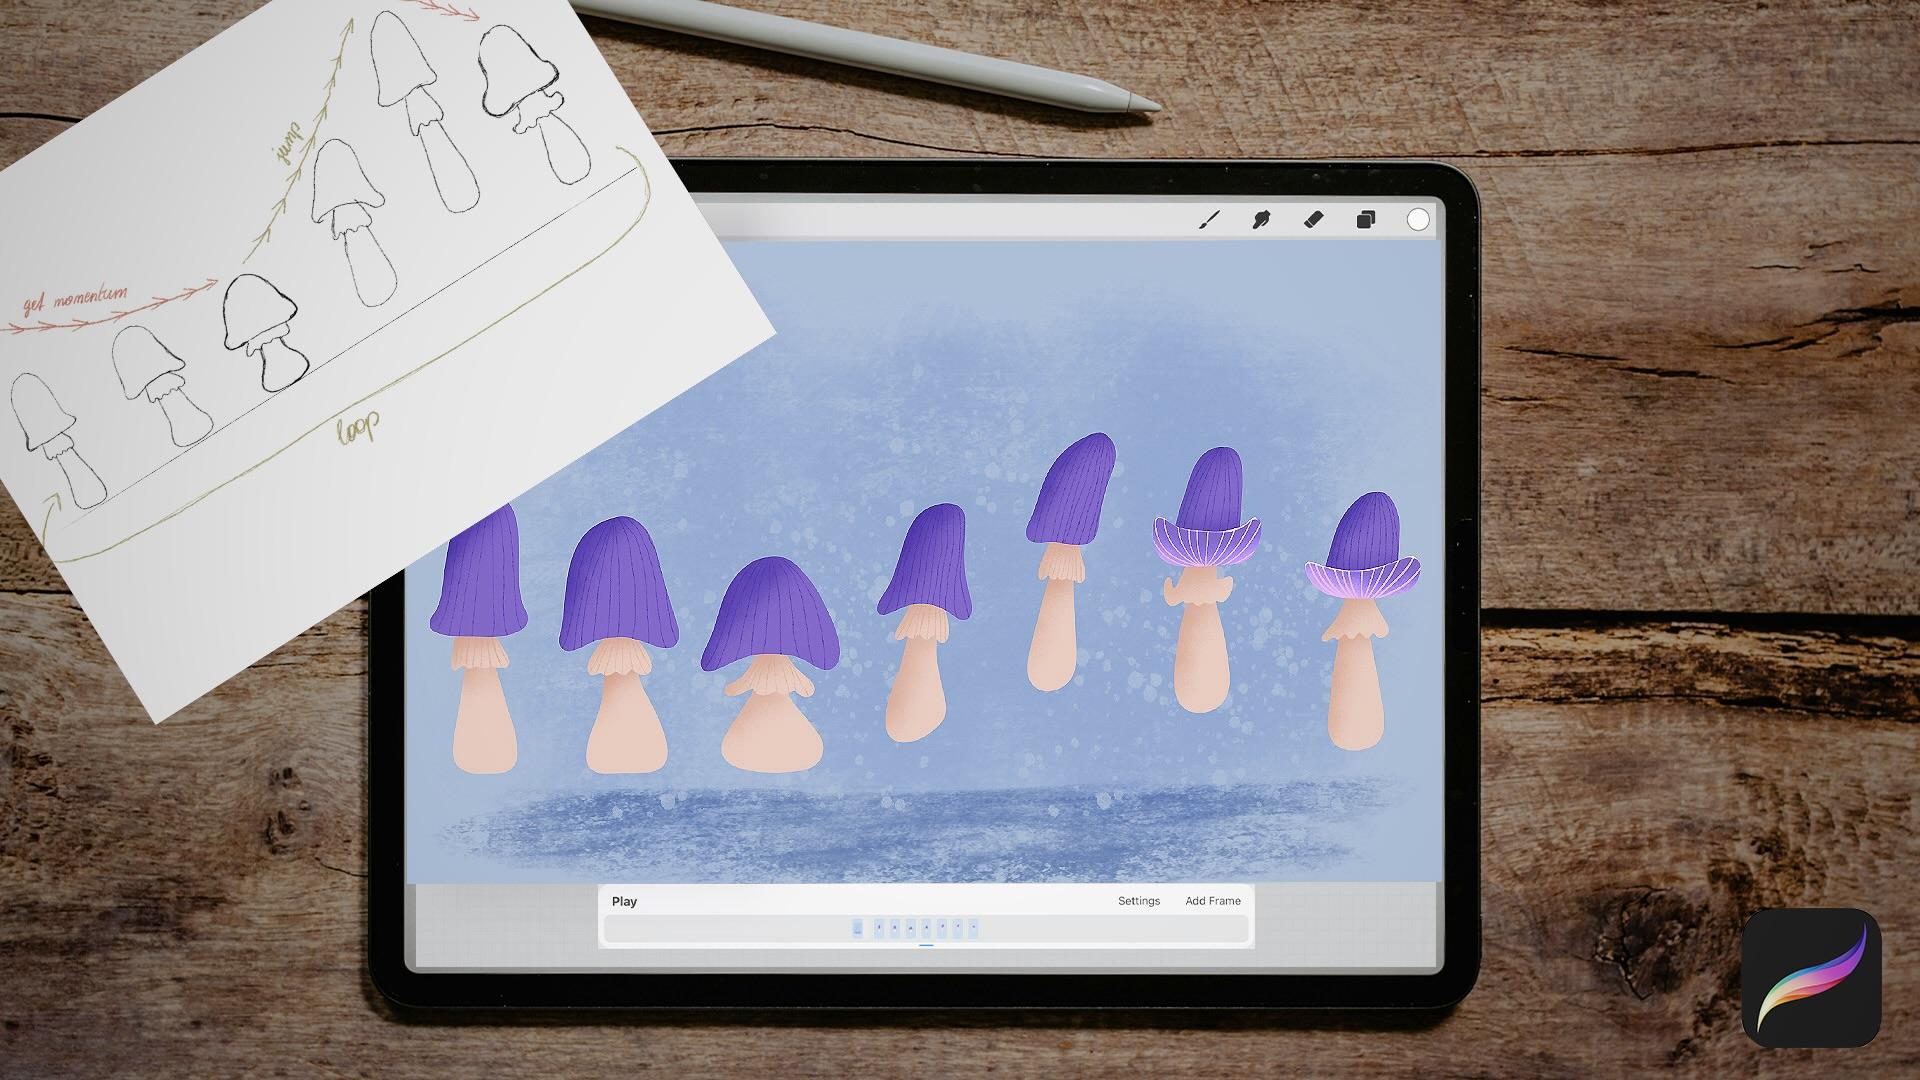
2. planning: Let's make a proper
planning for our animation. At the beginning, there
is a simple mushroom. You can make it in
the shape you prefer. I will draw a mushroom with
a slim cap and longer, but you can also
make it smaller, the cap and thicker. Do it in your preferred way. The first movement
before the mushroom jumps to the high, it
should get some momentum, like a person that jumps up, goes down the knees at first. Let's make the stem a bit
thicker at the bottom, and also the cap a
bit broader and go down a bit and the next
station is the same, but extremer than
the one before. Make the stem a bit broader and also the cap, but shorter. Next station, the mushroom jumps up and it gets a bit stretched. And the next station, the mushroom jumps even higher. Before on the last station, the mushroom goes down again
and the cap goes a bit broader again because
there is maybe some wind that goes under the
cap and blows it up again. And at the end, there is the loop and the whole animation starts
from the beginning. You can find this
reference sheet under the resources tab, so you can use it
for your reference.
3. animation flow: First, let's create a
new canvas and I do this dimension
because I would like to post it later on
Instagram as a reel. But you can choose
whatever size you like. I would like to turn
on the reference and import here our sketch
of the bouncy mushroom. Okay. Let's shift it to the side
and make it a bit smaller. It's only a rough
reference for our sketch. Let's turn on the animation
assist next, turn it on. At the bottom, this
little timeline pops up. Every time you add a new layer, another frame appears
here, sidewise, if you add a frame down here, another layer appears
in the layers menu. Let's start with the sketching. Go to the first layer. For that, I'd like to
choose the 6B pencil, but feel free to use
whatever brush you like, and I choose a pure black. I'd like to concentrate the whole illustration at
the middle of the canvas. Later, when you post
it on Instagram, you have a nice
preview in your feet. First, I'd like to draw a little straight line to act as a guide for
the mushrooms. When you go to the
next frame down here, this little line vanishes a bit, but we want it to stay visible no matter on
which other frame we are. There is a background option
that we can activate. It's only possible for the very first frame and means that it
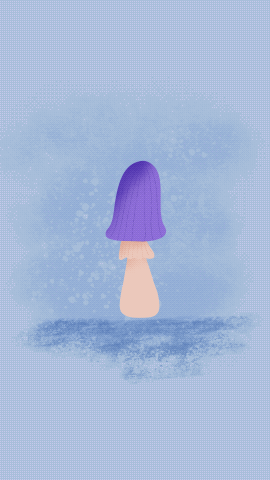
always stays visible, independent from the animation. Now let's sketch a mushroom. Make it playful, make
it in your style. I'd like to have it
a bit slim but long, but you can also
make it a bit more heavy or thicker or
however you like it. I tend to make my
sketches too big, so I'd like to reduce
the size of this a bit, shift it to the
middle of the canvas. I'd like to shift
also this guideline. Now we have it centered in
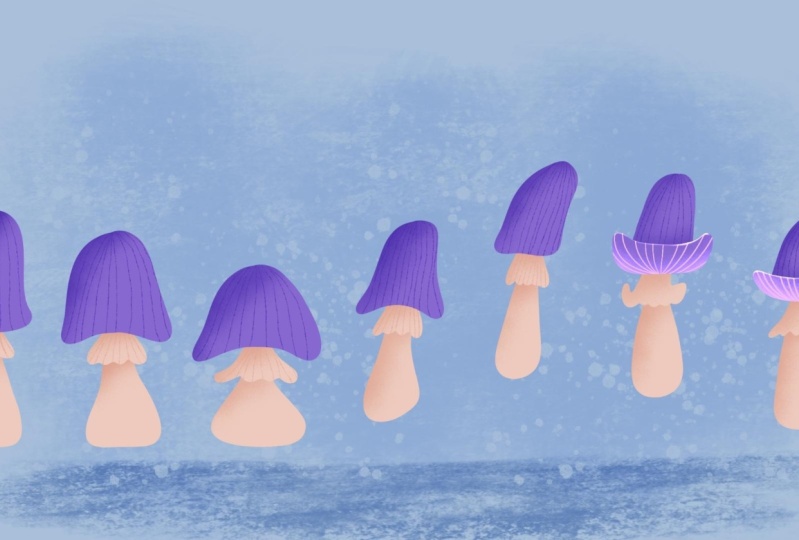
the middle of the canvas. Now let's sketch this
bouncing mushrooms. We need another frame for every movement the
mushroom makes. When you go to the next frame, the opacity of the
mushroom reduces a bit and you can set this
here under settings. Onion skin opacity,
I have it at 60% and I go up a bit with this so you can see
it better on screen. It's good to see the mushroom
from the frame before, so you can see your
movement better, and now we can draw the second mushroom
that goes a bit down. Make it thicker at the bottom. Also this middle part, I don't know how you call this. I don't even know it in German. And the cap is also a bit
compressed and I make it a bit curvy down here to
give it a bit more energy. You can click down here
between the frames so you can see if the movement
is like you wanted it. Let's go to the next frame
and draw the next mushroom. Again, try out if you
like the movement. You can also click here play. It's really fast now and
this is because the frames per second is at 15 and
I'd like to reduce it. The lower this number gets, the slower is the animation. You can play around
with these numbers to get the speed you
would like to have. Let's sketch the rest. And don't forget to go up with your sketch from this
line to imitate the jump. Okay, I think you've got it, so I speed the rest of the
sketching phase up for you. I'd like to draw
this fifth mushroom a bit different from
the original sketch. So I'd like to turn the cap
a bit like Marilyn's dress. Let's check the
animation. Click Play. Oh, I like it, but I think
we have to do some twists. So the cap here, I don't like this edge. I make it a bit rounder. We have a lot of frames
now and it's sometimes difficult to see the difference between the lot of onion skins. So from time to time, I try to reduce the number of onion skins to have a nicer overview
of the animation. Let's do the last one. I also twist the cap here
and make it a bit wonky. Okay, let's check it out. Hm. Something is wrong. I think my stem is too long. Okay, let's correct that. Okay, it's better now. Let's check it once again. Oh, I like it. Meet me in the next video to
illustrate the mushrooms.
4. illustration: We don't need the
reference anymore, so let's turn it off here. You know every time
we add a new layer, another frame pops up down
here in the timeline. But you can group two layers together and the whole
group turns to one frame. This helps us to use more
colors and textures. For now, I'd like to
go to the settings and turn off the
onion skin frames, go down to zero. We only can see this frame in that we are working
at the moment. In the group, the sketch
should be on top. The very top and I
reduce the opacity, it's always on top and we
can illustrate underneath. Let's add other layers and group them with all
the mushroom frames. And for the last
frame, it's the same. We also create the group
with another layer in it. This group is going to
be my background layer and we play with some
textured background here. Let's start with the background. I have provided you with two separate color palettes
and I use the second one. I choose this light blue
for my background color, and then I go to this background layer to
the very bottom group, and here I create some
textures with the darker blue. For that, I choose this
grunge brush under textures. My size for this
brush is 62% and I go slightly over the middle of the canvas to get
this grungy texture. Then I create another layer over this and turn it to multiply. In the brushes library, I go back to the
sketching section and choose this artist's crayon and make some more textures down here underneath
our guided line from the sketch and we don't
need this line anymore, this sketch, so you can turn it off or delete it.
It's up to you. We don't need it anymore. We are done with the background, and now let's go to this first mushrooms
frame and illustrate it. I use for that under
inking, the studio pen, and I outline the stem and this middle part and the cap
on three separate layers. Then later we can create
other layers over them and add some textures
with a clipping mask. I choose this cream
color for the stem and the middle part and play around with some
shadows in between. I'm starting with the stem, so I create another layer over it and activate
the clipping mask. Then I turn it to
multiply because I use the same color than the stem
has and with multiply mode, you can see the texture. Let's try out this artist's
crayon for the shadow. I turn off the sketch. We don't need it anymore. Then let's create another
shadow directly under the cap. I create another layer, make it multiply and clipping mask and add the shadow here. I don't like this
crayon for the shadows. I choose the medium nozzle brush under spray paints
for the shadows. And also on the stem, I clear this layer and make it with my favorite
medium nozzle brush. I add some stripes. And finally, I add some
shadow on the cap. Okay, the first one is done, and it's the same
for all the others. So I show you a quick
time lapse of my process, and I'm sure you can
do it by yourself.
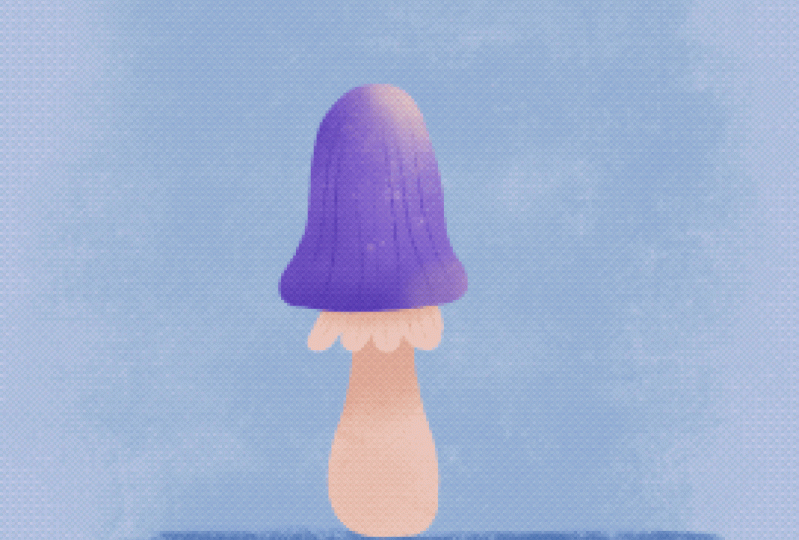
5. final twists: I played around with the
underside of the cap and found out that the Add mode seems to be
the best for that. And I take this and reduce
the opacity to 80%. And also for this mushroom. And I also make some twists on how high the
mushroom is jumping. And finally, I take this flicks brush and make some more textures
on the background. And with the light
pen under luminance, I create a little
stripe on the edge of the cap to add a bit of magic. Okay. And that's my
final animation.
6. share and care: Thank you so much for
watching my class. Please share your animation in the gallery and also if
you like on social media. Please tag me in that case, so I can see it and share
it with my community. To export your animation, please go to share
and Animated gif. And to share in the gallery, you should choose web ready and to share on Instagram
or any social media, you should export it
as Animated MP4. I hope you had fun
and if there is something you need from
me or have any questions, please post them under
the discussion section. And if you liked this class, please give me a kind review. That's golden. See
you next time. Bye.
 Nicole Gabriel, Procreate Artist