Quick Trick: Creating Seamless Patterns in Photoshop
 Vera Rehaag, Freelance Artist
Watch this class and thousands more
Watch this class and thousands more
Lessons in This Class
-
-
1.
Class Trailer
1:06
-
2.
Our Project
1:30
-
3.
Preparation
0:53
-
4.
Using Pattern Preview
1:39
-
5.
The Hard Way
3:38
-
6.
Define Pattern
2:05
-
7.
Last Words
0:22
-
-
- --
- Beginner level
- Intermediate level
- Advanced level
- All levels
Community Generated
The level is determined by a majority opinion of students who have reviewed this class. The teacher's recommendation is shown until at least 5 student responses are collected.
126
Students
3
Projects
About This Class
In this Quick Trick you will learn, how to create Seamless Patterns using Photoshop.
There are two ways to go at this: using Pattern Preview ...and the hard way, making it all by hand. I will show you how to approach both.
- Use your own artwork with repeating elements or intertwining parts. Alternatively I am providing a drawing you can use to tag along.
- Prepare the artwork to be used in Photoshop (if you need help, check out my short class on digitising line art).
- Choose your path: easy or hard, and learn the most important steps to make the pattern repeat seamlessly.
- Learn how to safe the artwork as a Pattern Preset
The seamless patterns can be used to be applied in illustrations, as a simple background for a drawing or photo cut-out, made into end-paper for a book or all-over printed materials.
The steps are easy to follow, and suitable for students, hobbyists and professionals alike. I am providing as much context as possible, and you don't need prior knowledge as long as you are not opening photoshop for the first time today.
You will need:
- Photoshop
- a Graphics Tablet
- your own drawing with repeating or intertwining elements (optional, a drawing to use for the class is provided)
Have fun!
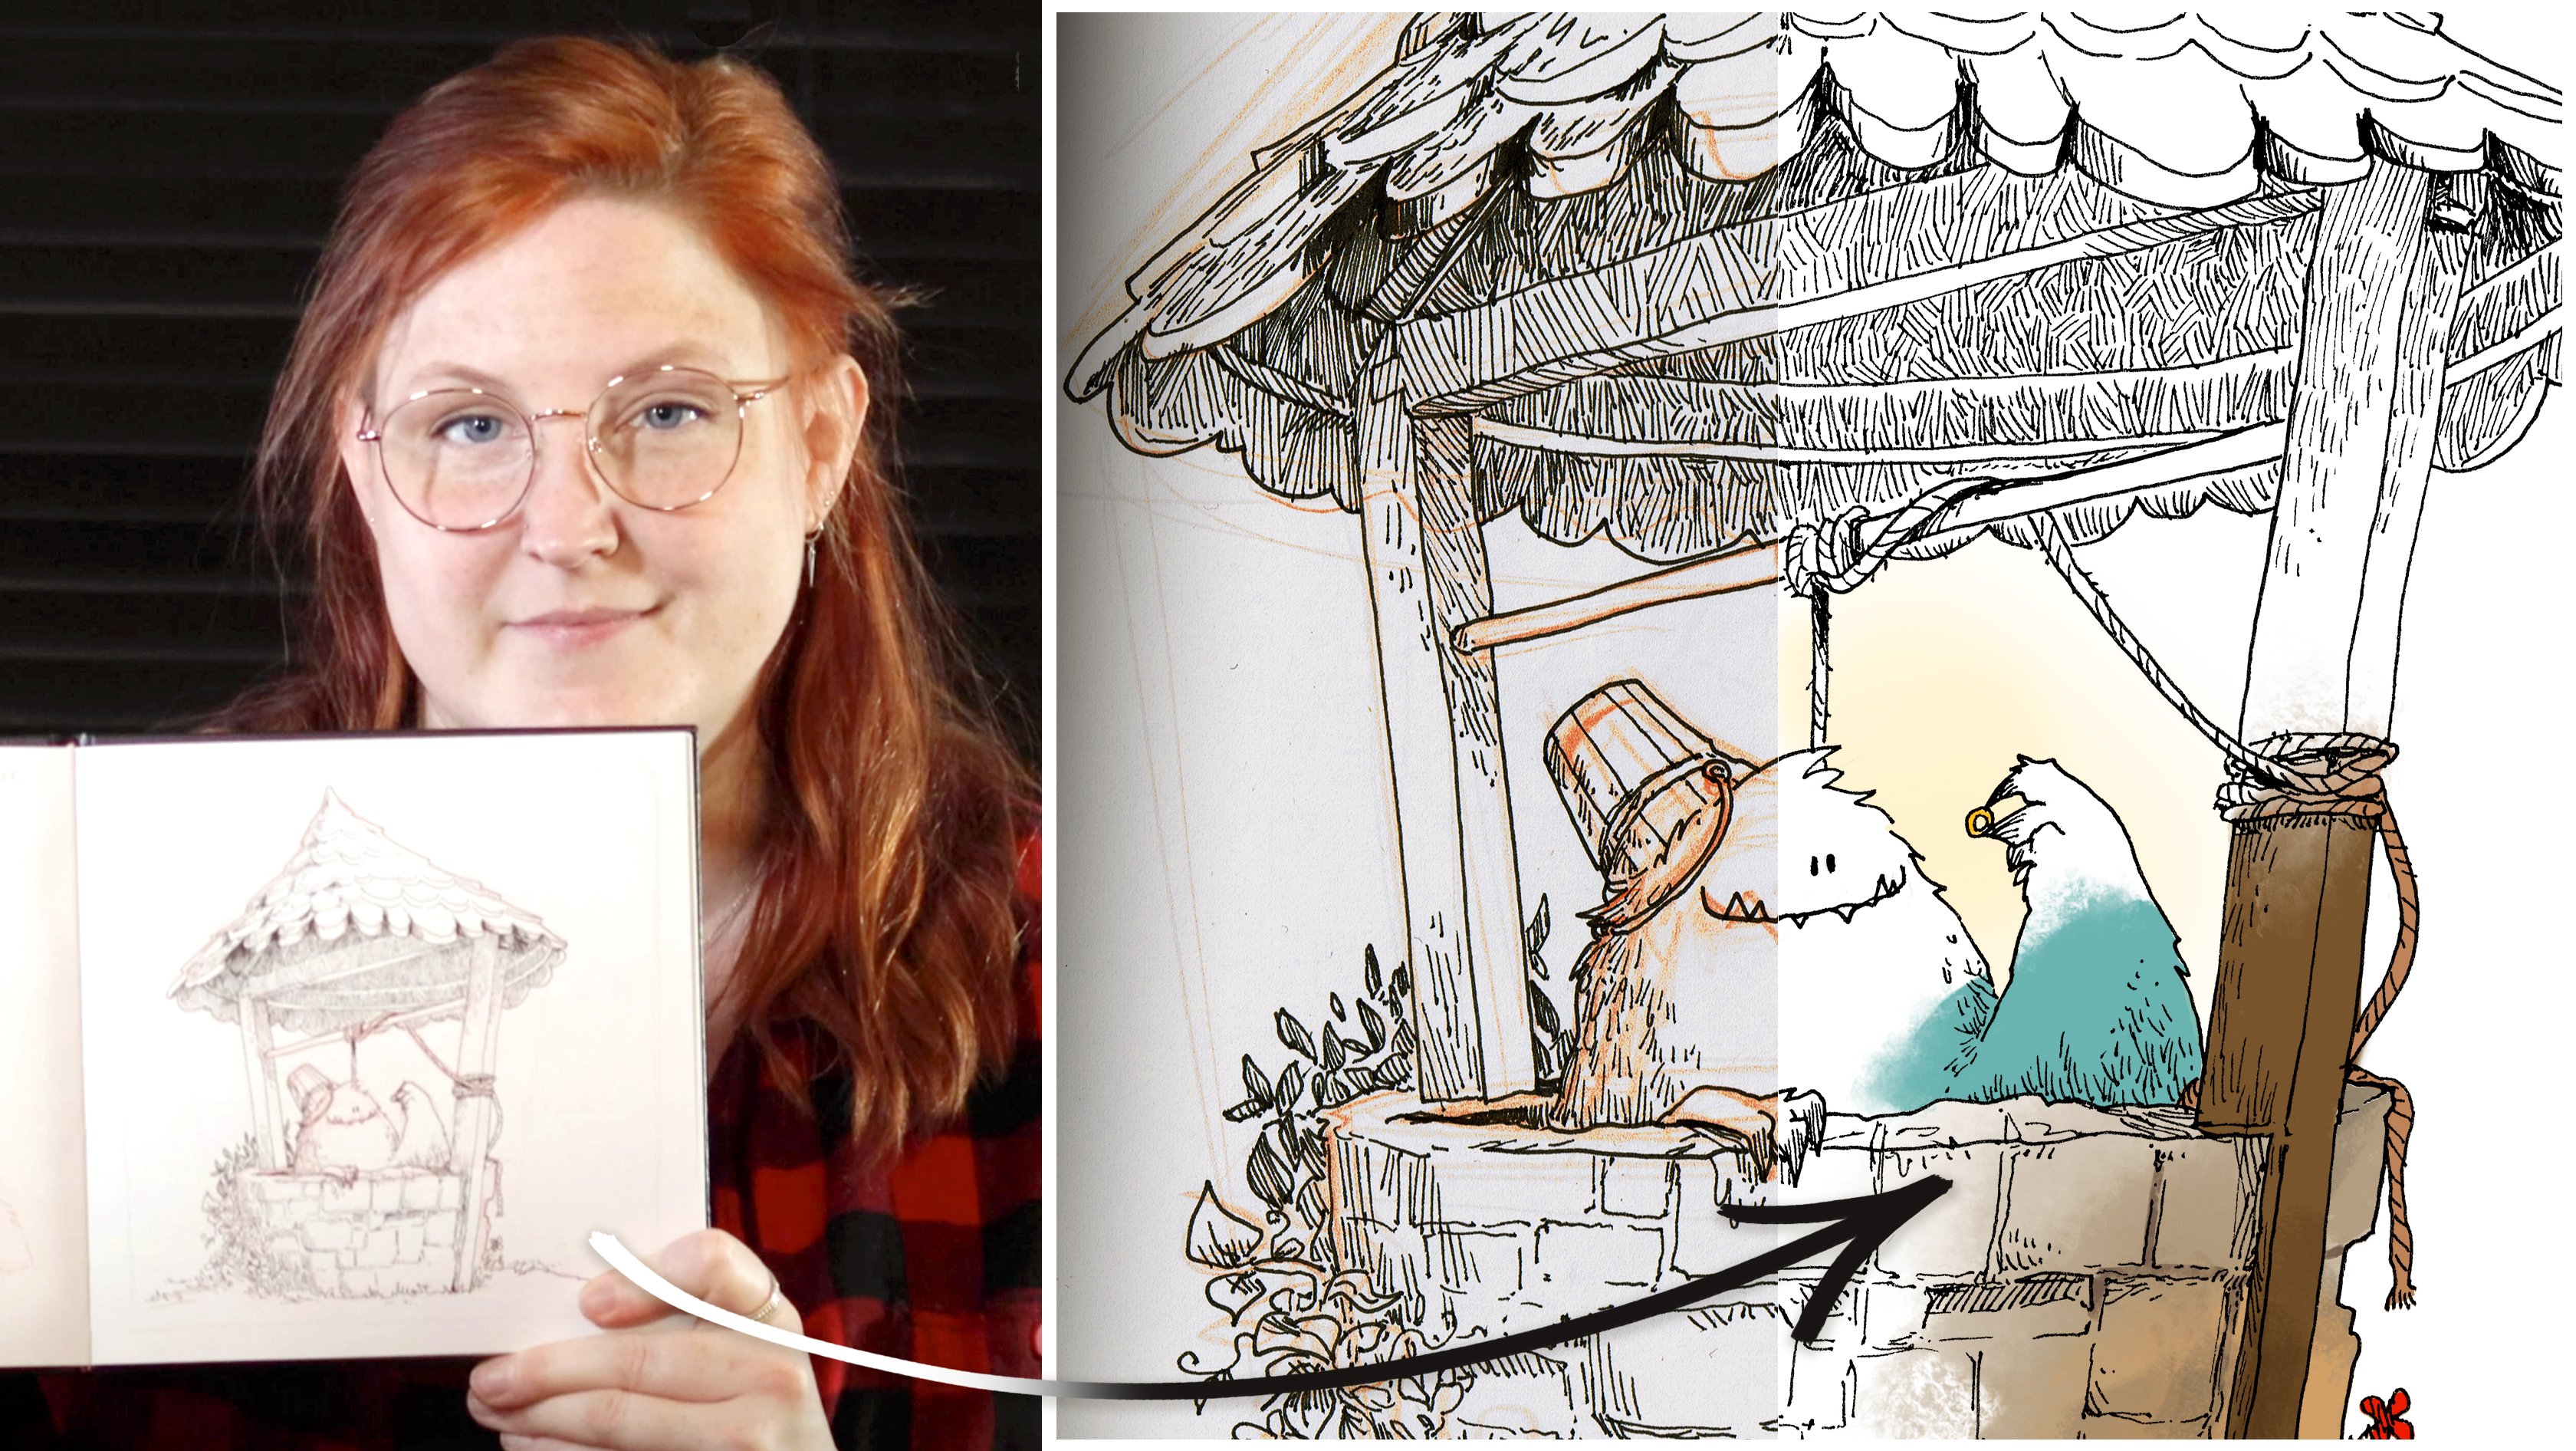
Meet Your Teacher

I'm Vera!
I have been arting ever since I could use fingerpaints.
After studying Communications Design, Illustration and 2D Animation, I eventually became a freelance illustrator and animator and began teaching on Skillshare in 2019. AND I LOVE IT!
As a teacher I want to help you to grow as an artist, inspire you and challenge you.
With my Classes I am doing my best to be both entertaining and informative, and thus make learning fun and easy!
While teaching is the thing I am burning the most for, I also have the great pleasure to call myself an award winning illustrator for children books. My day to day work includes also visual development for games and animated projects, art directing and making personal art pieces.
Much of my private work i... See full profile
Hands-on Class Project
Today we are creating a Seamless Pattern in Photoshop.
For this you will need a Drawing Tablet, Photoshop and a Drawing with repeating or intertwining elements (or you can download mine!).
1. Make sure to have an artwork ready, that lends itself to be turned into a pattern. Here are some examples:
2. If it is a traditional artwork, digitise it and open it in Photoshop. Use a scanner or your phone to take a picture.
3. Clean up and prepare the artwork if needed. Work with a resolution of at least 2000 x 2000 pixel for a good quality. The artwork does not have to be square, just make sure that the shortest side isn't smaller than 2000 px.
You can find some tips on digitising in my class Digitise and Isolate Line Art in Photoshop.
4. If your Photoshop Version is newer than 2020 -> Activate Pattern Preview (View > Pattern Preview) and then go to step 9. - otherwise follow the steps throughout:
5. Copy and Paste elements that you want to repeat. Rotate, scale and mirror them to create variation in the artwork.
Place them either with some space between them, or overlap them in interesting ways.
(If your artwork includes intertwining elements, make sure to connect them somehow or hide open ends underneath others. This is definitely a bit more advanced, but don't be scared.)
6. Any new element that is placed vanishing outside the border of the canvas will need to be completed on the opposing border: Duplicate (CMD/CTRL J) the layer. Draw a selection (M) up to the border, and draw a small mark with the brush tool (B) at the very edge of the canvas.
7. Press V to activate the Select/Move tool. Hold down SHIFT to lock direction vertically/horizontally and drag the element to the opposite border. Nudge it into place with the arrow keys until the mark you made vanishes outside the canvas.
8. Repeat this with any element that you place on and partly outside the borders of the canvas.
9. Once you are happy with the placement of everything, disable any layer you do not want to show up in the pattern (for instance the background color).
10. Copy all to a new canvas and/or resize the artwork itself to a size around 500 px on the smallest side. This way the pattern will repeat nicely, and avoids to only show a few elements. Sizing down from high resolution creates a nice crispy quality. I recommend to do this in a new canvas, so you don't accidentally lose your high resolution work.
11. Go to Edit > Define Pattern... which will open a pop up window. Give your pattern a name so you can find it well :) If you press G for the fill tool, select "Pattern" on the top left from the drop down menu. To the right next to it is another drop down menu, from which you can now select your freshly made pattern.
You can now use your own pattern to fill a fresh new canvas (which should be bigger than 500 px).
Please share your original artwork next to your pattern so we can see the before and after nicely.
This is how that could look like:

Feel free to ask for any clarification that you might need, and I am here to provide feedback and support in any way I can provide!
Enjoy the class, have fun and happy learning to you.


Class Ratings
Why Join Skillshare?
Take award-winning Skillshare Original Classes
Each class has short lessons, hands-on projects
Your membership supports Skillshare teachers
Learn From Anywhere
Take classes on the go with the Skillshare app. Stream or download to watch on the plane, the subway, or wherever you learn best.