Transcripts
1. Introduction Trailer: My name is Emil Sligas. I'm a senior trite
environment artist, and I will be your
instructor in this course. In this course, we will go
over on how to quickly and efficiently design environments
using Unreal Engine five. For this course, we will be
using external assets from the Unreal marketplace
to put together a very cool looking environment
within only a few hours. The goal is not only to
teach you the tools, but also how to do
storytelling in your environment and how to think like an
environment artist. This course will
cover various topics, including an overview where
to find assets I reference, creating a custom landscape
using World Creator, placing various
large scale assets while keeping in mind
storytelling and composition. Foliage setup and painting, placing smaller assets to add to the micro
storytelling and making your environment
feel complete and doing lighting and post effects for large scale environments. And of course, there are
so much more little things scattered around in
this tutorial course. The general takeaway of this
course is that at the end, you will have the
knowledge on how to create exactly what you see here and you can apply this knowledge to almost
any type of environment. As mentioned before,
for this course, we will be using
external assets. This means that the actual
environment is not included in the source files due to me not owning the rights to actually
give you these assets, but I have included various
bits of information, and with almost no time lapses
in this tutorial course, I am sure that you can
follow along and learn from this course no matter
what assets you are using. With a total of more than seven plus hours
of video content, I feel confident that at
the end of this course, you have to know
on how to create various types of
environments in Un Lgend V. This course will also come with out generated
subtitles in English, Chinese, Russian, and Spanish. I hope that you will
enjoy this course, and I hope that it will have
a positive impact on your
2. 01 Doing Our Planning And Gathering Assets: Okay. Welcome to this
tutorial course. So as you might have
noticed in our trailer, we are going to basically
create an environment, and it's all about just very
quickly putting together an environment inside of
nngenFV so that we have, like, a nice image to show or
like a video or something, or even a game environment. So you can almost see it as mostly just level design and little bit of level
art and stuff like that. So this tutorial
will not be focusing on actually creating the
models and everything, just on how to put
it all together into something that
looks nice and also something completely
from scratch without like limited references,
and everything. So over here, I
have this library, I like to call this asset gym, and it is basically,
I like to do this often for every project. It's just like a
general scene that has all of the assets that I have
gathered for this project. Now, what we first of all
going to do is planning. So I have these assets. This is because I, of course, had to first of all, find everything out because
this is a tutorial. I cannot just go in blind, but I try to go in blind
as much as possible. So I do not have an idea
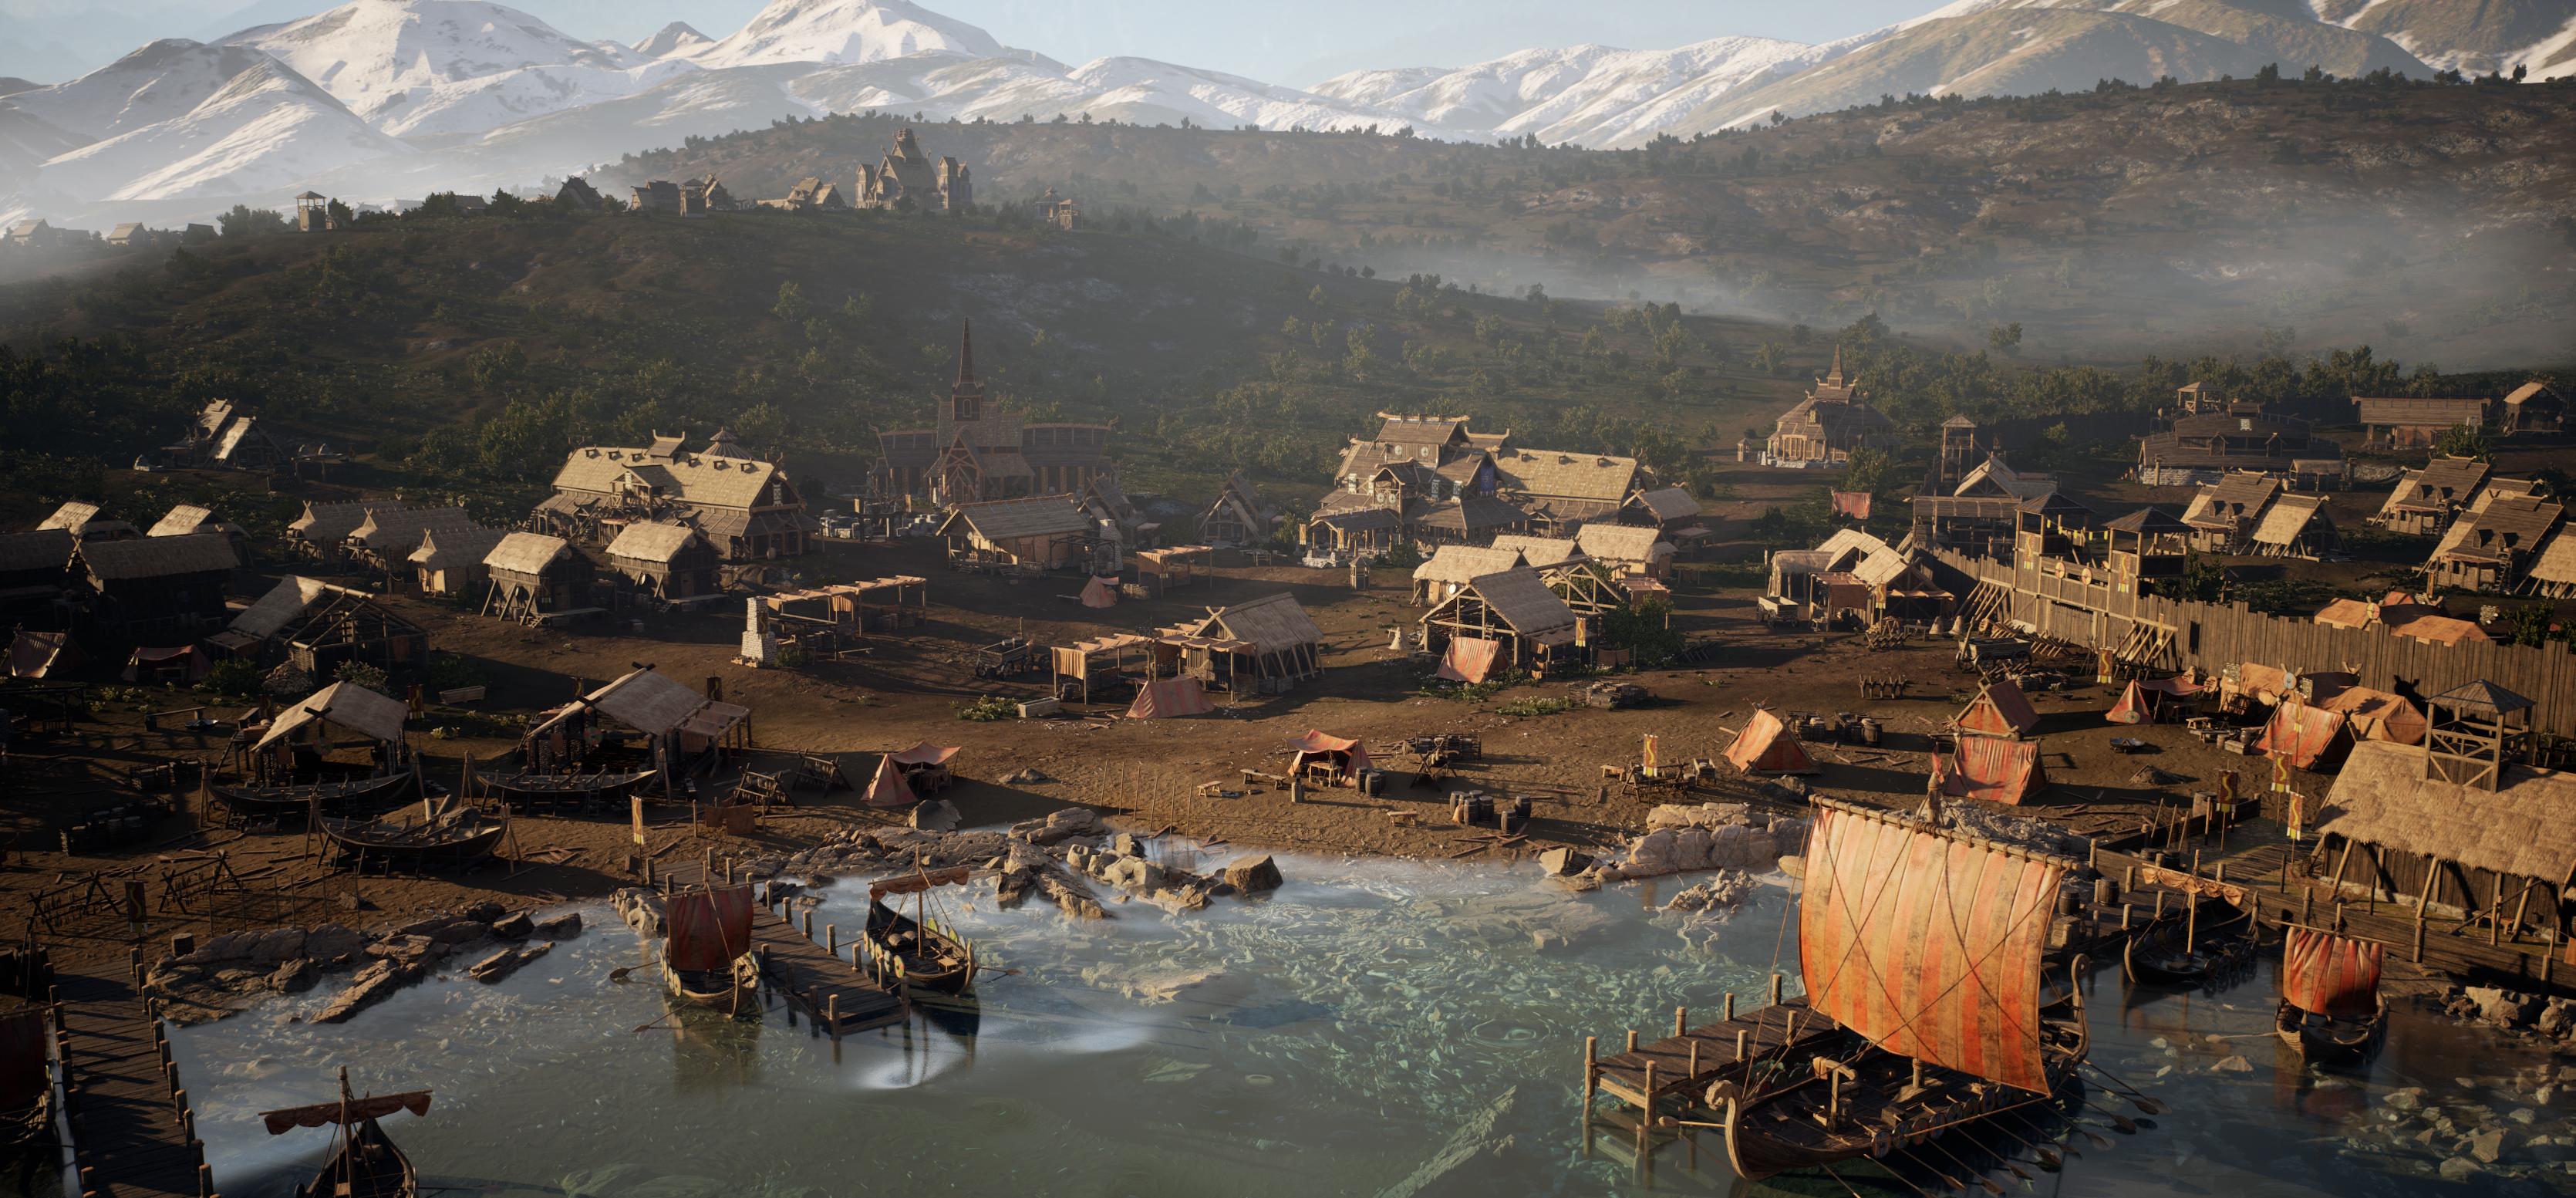
for the environment yet. I only know that it's going to be a nice viking environment, and I will go ahead and I will show you the assets that
I have used for this. Over here, this
image that I got, this is on KitPshTre and it
is the Valhalla or Valhalla, however you want to
pronounce it back over here. So this one, it also gave me quite a nice idea
of something that I wanted to create with
this concept art, also inside of Unreal
engine because, of course, this is
not inside of Unreal. So I wanted to create
a viking village that has, like, a
little bit of, like, military undertones
and then also next to, like, a very large river
or something like that. And I will like those large mountains with foggy background. So we are going to
create something a little bit similar to this, but of course, we are not
just going to copy it. So when I was looking at this, and I started to go
ahead and, like, have an idea, the first
thing that I want to do, and I will go ahead and
do that now is I want to give my environment a story. So right now, it
kind of depends. Often, if you have, for example, a client and they
ask you to make something you already
have the story because they ask
you what to make. But if you are just
going to come up with an idea and just make
it completely from scratch, what I like to do is I like to give like a few
sentence stories. So super easy. I just have a notepad and I often just get a bunch of
reference, I got only two. I got this one and
this one and they both show something similar. They both show mountains, water, and of
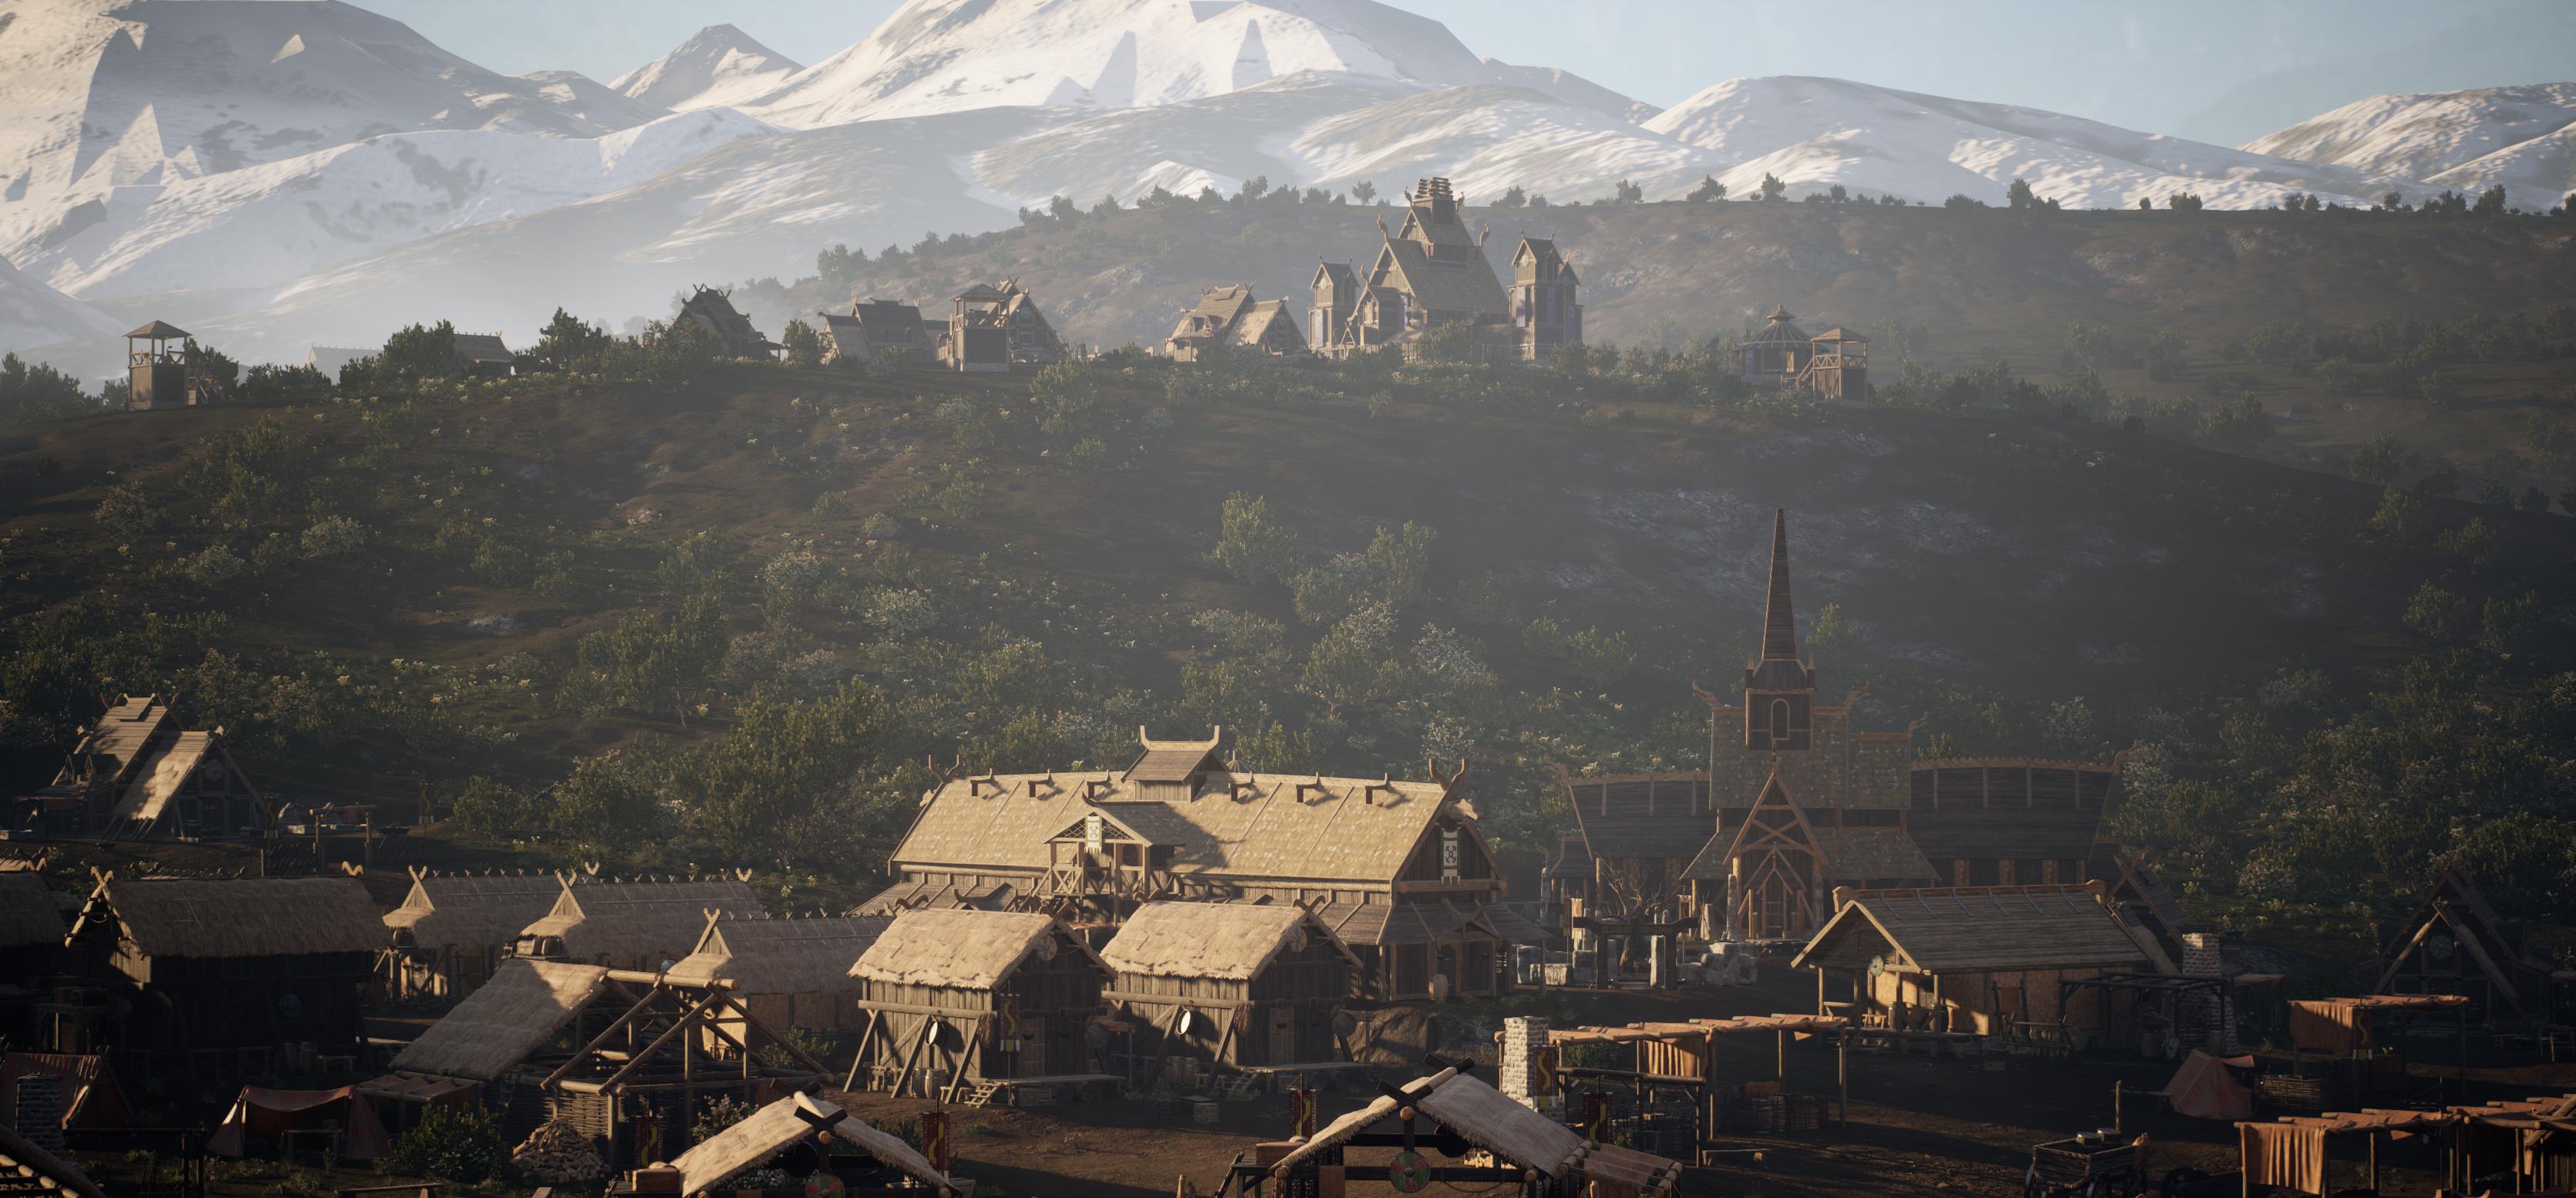
course, the village. Knowing this, and I'm going
to have this over here, I can go ahead and
I can come up with the story. What do
I want to have? I want to have a Viking village with foggy background mountains. In the distance,
there is civilian. I don't know how to write
that. I think like that. Sorry, English is not
my first language. So I want to have a
Viking village with a foggy background in mountains,
and then in a distance, there's a civilian living
area with houses and shops. There is a large lake here, there's a large lake located
in front of the village with fisher boats and piers. I don't know the
English word. Docks. I guess docks I know
what I mean in my head. And then for the
military undertones, on the left, sorry, on the right side, there is
a military training ground, honestly, I'm just
making this up. So I have something in my head, but for the most part, I'm just making this
up as I go along. So it's fun. It's
just telling stories. So on the right
side, there's, like, a military training ground. That is also protecting
the dog slash water. Okay, so we got
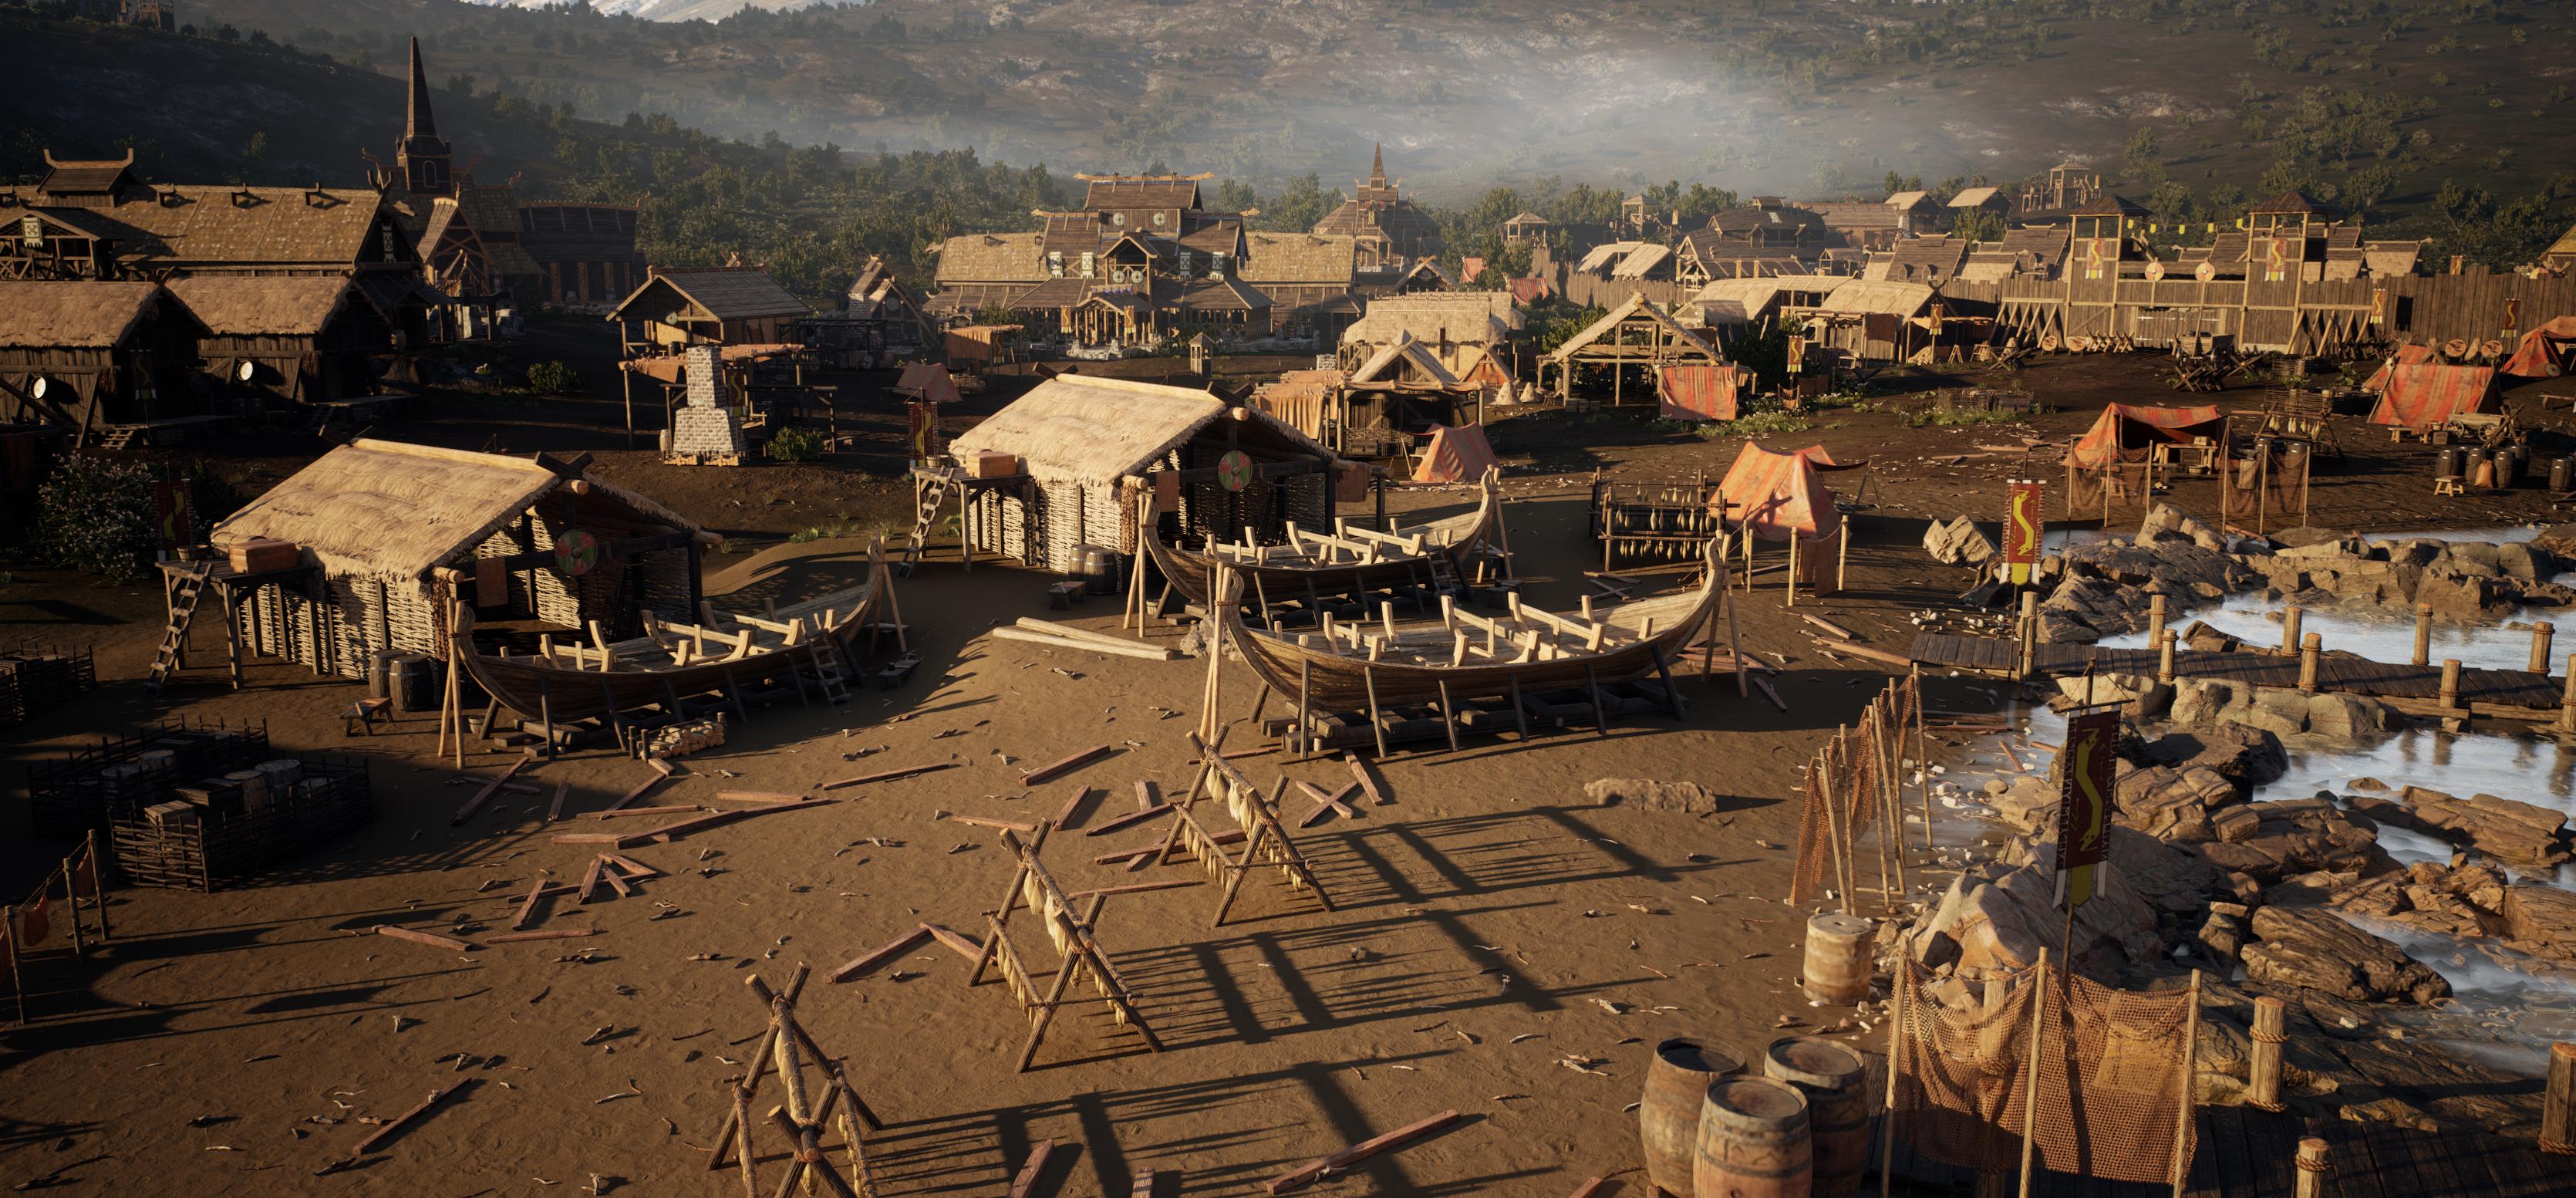
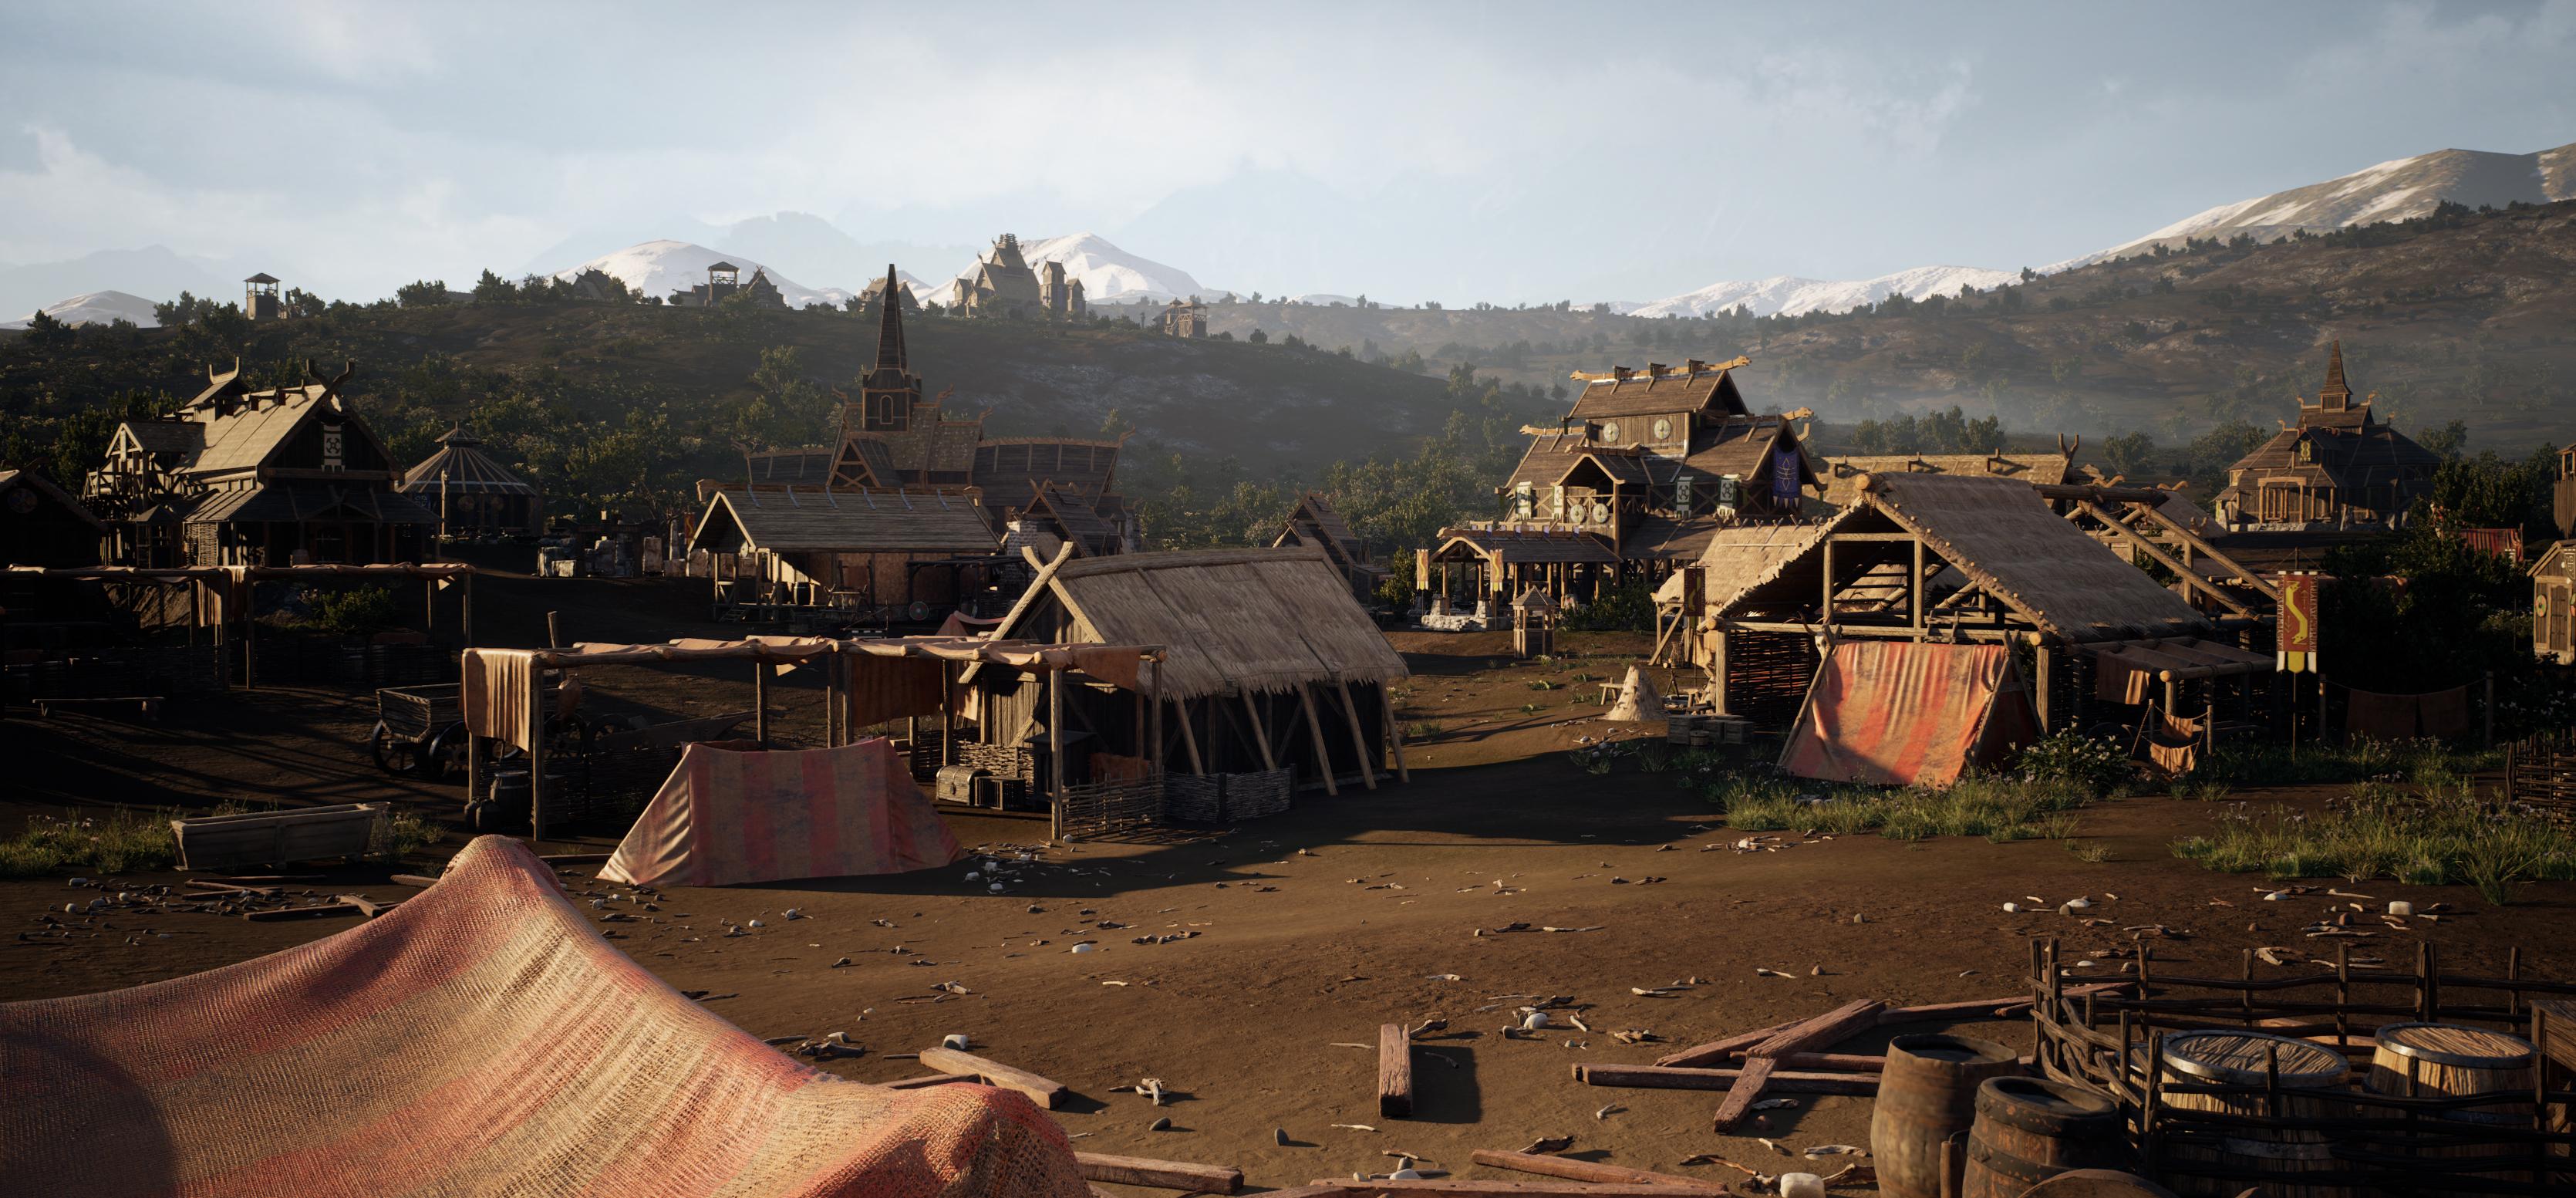
something like that. I think that is pretty good. The village terrain,
so I should say, landscape will be slightly hilly with large
rock structures. Let's have a look,
large rock structures. Yeah, large rock structures randomly located
against the hills. Let's see. Did I
forget anything? So we have the foggy mountains? Yeah, I think that's about it. I think that will give
us a very solid idea. Now, the nice thing
is because we are going to generate terrain, the cool thing about
that is that we cannot really make it up as
we go along here. Coincidentally, I actually
see living quarters here. I did not even notice
that, so that's coincidence that I came
up with the same idea. But yeah, ours is, of course, going to be
a little bit different. I do want to create
a center point, but I do not yet know what the center point
is going to be. Right here, the center
point is this building. Often, most environments
do have a center point and it's really nice because you can build everything
around that. That's something that
I can for example. So basically having this stuff and have a quick look
for a center point. So I don't want to make this a center point because
that's a cliche. Then I'm literally
just copying over the stuff that I already or that has already been made here. So, um, Yeah, I'm just going to do like center point of the village will be on a path. So I'm thinking right now that's the tricky thing
about doing this life. The center point will be
on a village on a path with one side one
side is going to be walls and the
other side buildings leading to a small central Oh, yeah, medium size
central building. Let's keep it to
something like this, because I do realize that
right now it sounds a little bit like we are almost
copying over the concept, but I will make sure that we do change it up a little
bit here and there to, of course, give it
a different feel. But let's say that this is
going to be our story for now. So having the story
what I already did is, as I said before, I already went over and I start looking for, like, the packs that I wanted. Now, first of all,
the most obvious one, which was going to
be our main pack is the Valhalla pack from KidbsTD.
So you can find it here. They have a lot of stuff
if you go to kids. Here, there's some really
cool entire cities, DMZ zones, there is outpost, there is fantasy stuff. There's so much stuff in here. So we went ahead and
went for the Valhalla, and it's basically
just like yeah, like a Viking, fantasy
style, something. And it comes with, like, a lot of different
buildings and assets, as you might have
seen over here. This was by far the
most expensive one, but because it was
a center point, it is definitely
like the one that I was confident spending
the most money on. So, of course, for you, there are so many places
that you can find it, and I will go over that
later on over where you can basically find
all of your assets. Now, I know that they
are going to be hills. All of these rocks
and everything, and a lot of these assets
we can do using mega scans. Also, a lot of the textures
we can do using mega scans. That's really nice because mega scans is completely for free. However, I wanted
to get something special with these hills. So I went ahead and I went
to the Unreal marketplace, and I end up with
the Maui United GMBH scrubs and
bushes over here. And this one, it's a
really nice environment that just has like
a bunch of bushes, small little rocks
and stuff like that. And I think this
will work great. I think this also
gives a nice feel for the style of hills
that I want to go for. I do want to make them a
little bit more grassy. But yeah, something like this
that will look quite nice. Do I will go over how I
find the stuff later on. Next, we needed
some backgrounds. Now, these landscape
backgrounds, if you type them into
reel, they are for free. So they have been for free for a very long time, and
it's really nice. It just give you some very quick easy backgrounds
with, like, nice big mountains and everything so that
our actual terrain, we can just focus
on the hills and then we can just have these
mountains in the background, and then we can have our Fog. And for our Fog, I
went to Gumroad and downloaded this free
fog card blueprint. It says Unwel Engine 4.16, but you can also use it
for Unreel Engine five. So it's completely
free, although I do recommend donating, and it's from Devon Chu. I hope I said it correctly. So these ones basically
allow us to just have some four cards
in the background, which will look quite nice. Now, the last one that I had was the automatic
landscape material. This is because I am not very good at creating
landscape materials myself, and I did not really want
to go ahead and, like, create a landscape
and splat map, which is basically like an RGBA mask that basically
tells you where the grass is, where the rocks is,
all of that stuff. It feels way too complicated when I want to put
something together quickly, but that's the goal
of this tutorial to just put it together quickly. So with this automatic
landscape material, we can basically plug and play. We can plug in our textures. I am going to change
the default textures, and then based upon the
elevation and on our settings, we are able to basically
decide where there are rocks and where there is
ground and stuff like that. So I basically just gathered
all of these things. It is super easy
to go over this. Most of the time when I need to create an
environment like this, I just use the unreal
engine marketplace unless I need something
very specific. Can simply go ahead, and now that Unreal Engine five
has been released, you can go over here into like Unreal Engine five compatible
environments, for example. And then over here, you can
find so much stuff here. You can find like
landscapes here. The real Biomes one are
amazing, by the way. Just a shout out because I've used the back before.
It's really nice. So there is, like, a lot of really, really
high quality stuff in here. And hopefully soon
you will also see Fast Track Studio sitting
in here with our own bags. But yeah, so basically, there's
a lot of stuff in here. If you have already an idea, then you can, of course,
go ahead and do that. Like let's say that you want
to make some grasslands. Or like fields or something. You can go up here. You can
type in like grasslands. And then here you can see,
like a mountain, grassland. See? That looks
nice and realistic. So just like that, you can
very quickly find something. Of course, it will cost money. Everything costs money in
this world, pretty much. But they are often
not very expensive. So it's often like some
really nice stuff in here that you can get to
build your environment. Of course, yeah,
the higher quality, the more money it often costs. But if you do not want
to spend too much money, you can also go to the free, and then you have the free for a month and permanently
free collection. The free for a month
is really nice. It even has some medieval
houses and everything. And every month, Epic Games or real gives out free
packs like this. Also some really nice photogram
tree food and everything. And, of course, you also
have the permanently free, which is great because there's a lot of foliage and everything, also, so here you can
see, like landscape. Oh. Okay, that's a pain. I could have got it for free, and I paid like 30
euros, but that's okay. Like, it all depends on
what you're looking for. So I'm not too
worried about that. Here, you have the
Rural Australia, which is quite a
popular pack that is also really high quality
and really good. But yeah, basically,
so you can also find a lot of stuff in
here completely for free. Now, having that set, the next one would
be mega scans. This one is built
into Unreal Engine. So here we are with
Unreal Engine. Now, F disclaimer, I am still getting used to
the new UY because they updated it a little bit inside of the actual release
of Unreal engine five. But if you go down here, you can find your Quickle bridge, and this one is
basically mega scans. Oh, let me just
Twlet? There we go. And Mega scans, it has literally 16,000 assets for you for
free, not just models. So it has like surfaces,
decals, models. Yeah, I can, for example,
click on this one. And here you can see that I can just download all for free, so many rocks, and here is where we are going to get
most of our rocks. So most people already
heard of this, but, yeah, you can definitely just,
have a look and you can find so much stuff in here. Also, interior spaces, there's just a lot
of stuff in here. Okay, perfect. So now that
you went over everything, as I said, we have a library. I have everything in pot
except for the four cards. I will do those later. The assets are
looking pretty good. We have some small LOD problems, as you can see here where the materials
basically not correct. Also, the way that they did this is they basically placed it into a blueprint and then
built the entire environment. This means that it is a little
bit slow to move around, but we don't need to
move around too much. All those blueprint problems
we will fix later on. So, yeah, we have a
bunch of stuff here. I have no idea yet how I'm going to use it. That's
a fun of things. I'm literally going in blind
because I wanted to show you how it feels just
as like an artist. Like, it just feels
won if I would know exactly how to place every single prop
without any thinking. So over here as you
can see, we also have a bunch of small props. We have all of these bushes and all of these extra foliage, and then we will have
mega scans later on, which I will go over also. The source files are not
included, of course, because all of this stuff
is not owned by me. Well, I do own it, but I'm not allowed to just
give it away. Okay, perfect. Having that done, that was
it for the first chapter. What we are going to do in the next chapter is we
are going to create a brand new scene and
we are going to get started by generating way. Let's go ahead and continue with this in our next chapter.
3. 02 Creating Our Landscape: Okay, so now that we have all of assets and we
have Alva planning, now what we can do is
we can get started by creating our train
or our landscape. Yeah, that's the first thing that
I want to get started with. I like to keep it
quite flexible, unlike, for example,
some projects where you need to have a very
specific looking terrain. We can be quite flexible with
this because nice thing is, when we make it so flexible, here I just bring up
the image. There we go. If we make it flexible, there's very little chance
that we accidentally copy over our concept art because I
do tend to sometimes do that without really noticing that I just accidentally just, like, make a carbon copy of the concept art, which
I do not want to do. I want to get a little
bit of variation in here. So for that, what I'm going to do is let's probably
just get started by creating our very first
new scene over here. So we have our model gym,
so I'm just going to go file and just create
a brand new level, and Ooh, open world. That
one is actually new. Let's just have a quick look.
Actually never saw that. Oh, this one, yeah, yeah. I don't need this one. Sorry. I just want to
have a quick look. So we are just going to go
like a basic. Here we go. Simple basic world. And then what you can do
is you can go file and do a safe current level. And then in whatever
folder you want, I just have a toy
folder and the scene. I'm just going to
call this main, for example, and press save. Now, another thing is, if
you want to go ahead and whenever you load
up Unreal engine, if you want to make sure that this scene gets
loaded up wide away, you can go up here to settings
and project settings. And then if you go
maps and modes, you just want to set the
editor starop map to be main. And this way, whenever you close Unreal, if you
open it up again, it will just load up
this scene again, so you don't need
to go in here and get it. Okay, landscape. Cool. Now, what we're going to do with the
landscape is we are not going to actually create it
inside of unreal engine. Instead, what we will
be using is we will be using a program
called World Creator. World Creator,
it's really cheap, it's really nice to use. Now, you also have
World machine. That's another program
that is often used. However, I feel like
that when I want to create landscapes
very quickly, I like World Creator
more because it gives me a little bit more
visual feedback. It's a little bit easier to use, yeah, it's just nice and quick. Now we are just going
to create a height map. We are not going to
create any type of texture maps or splat maps
or anything like that, if you've ever heard
of those terms. They are basically
specific maps used to dictate where specific textures are located inside of vial gon. For example, where is grass, where is rock and everything, but that all becomes a little bit more complicated than time consuming because it also has to do with your
materials and everything. Instead, what we
are going to do is we have our outer material. So we can go in here
and we can just press this little button over here or you can use a
preset if you want. But I like to just
create like a new scene. Now, I will say I am not a complete expert on Worldcreator,
not even close to it. I just know the basics of it. So we will keep this
nice and simple. Over here, we have
World Creator. There are a few
settings down here. There are stuff like if
you want, for example, a He can show like the height information,
stuff like that. There's some more filters, there's some more bloom and sun. That's just like here's the sun. There's a
bunch of stuff in here. You can even add clouds
and you can even add water over here,
as you can see. So that's all quite nice. Now, we don't really need to do that, or we
don't need to use it. But if you want to
change the settings, you can go up here and
you can change stuff like the sun angle and just
that kind of stuff. I just wanted to show
you that it is in here if you want to go ahead and just
play around with it. Also stuff like your exposure and everything you can kind of, like, play around with. The tab that we want to have is the very
first one over here. Now, if you click on biomes over here and
click on the Global, you already get a few settings. As you can see over here, if
I would change the strength, I can already change the
settings of my environment. Now, what I like to
do is I first of all, like to go ahead and
get a solid base. If we, for example, go
to style down here, we have a few presets. So we have canyon, we
have classics cliffs. So for example,
here, press Canyon, you get the canyon settings, and they are just like changing a few
settings here and there. So we have cliff and the one that we want to
do is we do want to get like something that is in
between hills and mountains. It's a little bit
tricky to explain. So it's something
that's just like, there are hills,
but they are not high enough that there
is no grass on it. Let me say it like
that. By the way, I am using WASD with my rise mouse button
to just fly around. I can go in here.
So this is cliffs. If we go, for example,
here we have the dunes, but I don't really like them. Um, often the one that I like to use for hills is the mountain range or was it the mountain, mountain range over here. So the mountain range,
because as you can see, yes, this looks really
strong and really large. But if you would tone
down the strength, it becomes a lot less strong. So we have
something like this. Now, another thing that I
like to do is I like to set my position up
here to one fourth. What this means is basically the micro noise and everything, it gets higher quality. If I go to one, see? Or if I go to four, it
becomes very low quality. So we just want to go nice
and high quality for now. We are going to go ahead and change these
values later on. Then once that is done, I'm going to
basically just press the randomized button
up here with my seat, and this will give
me a random seat. So first of all, that's kind of like the
site on my mountain height. So if I am over sorry, I sometimes use my scroll wheel
because it's force habit. So if I'm sitting at the
ground level over here, these are actually
really high mountains. So we do want to kind of like tone this down a
little bit like this. There we go. So it's
something to work with. And now, I like to play
around with my seed, and the goal for this
is mostly to find a nice area where we can have a little bit of
water sitting here. And then we have some
hills quite close by. Like, over here, you could, for example, have some waters, and then you have some
hills and stuff like that. Again, it doesn't matter in
which direction we are going. So we can just go ahead
and play around with our seed until we get
something we like. Now, another thing that
you want to play with is under the style. So
you have your scale. Basically, what we
can do with this is we can set this a little bit smaller because our trains
going to be quite big. If we do something like
a low scale of one, our entire train will
just be one massive hill, but we want to have a few hills. Not too many because once again, we are not going to include
the mountains later on. But I do like to go in
here and set my scale maybe to set it to maybe like two. For some reason. Oh, wait, it's frozen because I did I accidentally
made a mistake. Okay. W which gave me some
weird visual feedback. Okay, anyway, so
we've done that. Then I'm going to set
like my scaling down. And then what I can do
is I can go in here and I can yeah, yeah, let's just now try and find
a seat that has, like, some pretty decent flat areas that we can use for our train. Now, we are going to also increase those flat
areas later on. But first of all,
I like to just get something that is interesting. So it might take a second to find exactly
the sat that I want. I'm going to set my scale a
little bit lower, actually. Let's do 1.5. Oh, actually, yeah, like if there's
water around here, that looks quite interesting if we do something like that. Okay, yeah, so that
looks quite interesting. I think something like
this will be nice so that we have some
hills and everything, and we can just have
the house here. It's a little bit difficult
to see the scale, but this is something
that often we can figure out
inside of In real. And of course, if
we want to have the hills to be
bigger or we want to add extra hills and mountains inside of In reel,
we can just do that. Now, right now, if
we fly around here, you can see that
it is quite basic. This is just like a very
basic looking twain. So what I want to
do now is I want to add a few filters
on top of this. So we want to go for grassylands that are
also a little bit rough. For that, what I like to
do is if you go and press this little third button over here, you can
have your filters. Now, the nice thing
is, as I said before, the visual feedback
is really good here. You can add the filter, and then as soon as
you hover over it, you can see that it will actually show you the base
settings of that filter. See? So that's quite nice. So if we go in effect, I often like to
use smooth ridges when we go for, like,
grassy landscapes. Here, you also if
you like craters, you have rugged is also one that's sexy, quite
good for smoothening. And then over here
you have deflated. So yeah, you have a bunch
of stuff, distortion, which is quite
cool, for example, for deserts and stuff
like that, inflat. So yeah, there's a
lot of stuff in here. I tend to use the
smooth what was it? Smooth ridges, sorry. Then what I like to do is,
I like to just tone down the scale or the
strength over here. Also, the length is not. You can also go up here and
turn on fast render and fast render often
makes it a little bit easier to see some stuff. Here you can see that if I tone down the general strength, you can see that it
brings back that noise. I actually don't like
the fast render. It is always very blue, and I still have figured
out how to fix that. Basically, I'm just
going to tone this up, which will make my
mountains a little bit less strong, like this. So it's a little bit softer. And then there was another
one that I like to use. So you can stack them on top of each other, almost
like Photoshop. So you can go and you
can add another filter. And it was believe
it was in ridges. No. Dryocky sharp. Yeah, I think it was Rocky sharp in the dry section over here. And you can turn off your field so that you
can kind of see. You can see that it
kind of just pushes things down a little bit more. Also, if you said
like Willy Stone, you can see that it just adds, like some additional sharpness back, which is what I want. I want to get, a little
bit more of like that rocky feel back again. So it's still grassland, but it's like a
rough grasslands. So let's do something around 25 you can also try and
play around over here with, like, your values, but I tend
to not touch them too much. They are often very subtle. Like if you change a
few of these here, you can see, like, some
very small changes. But as I said
before, often I just generates these strains
quite quickly because there's so much
stuff like foliage and everything going
to be on top of them that it does not matter too much unless you are making
really specific mountains. Got something like
this. Now, having this, I do feel like I want to get some kind of erosion
or something. So here, this kind like the classic erosion stuff that you can see from mountains, and it often happens,
for example, over, I don't know, probably millions of years that there's water
and everything flowing down from the mountains when it is raining and stuff, and that is causing
this erosion. So let's see, we have
ridgets, we have rocky. Oh, Rocky actually looks
quite interesting. Like, the ridges
are quite typical, but the rocky is quite nice
for this specific one. I've actually never
used that one before, but yeah, I quite like it. It's way too strong, Yeah, yeah, that is actually
looking quite interesting. So if we have rocky, we are going to set the
strength down quite a bit because I just want to get, like, a little bit of, like, those directional flows
coming from this. So let's do, like, I don't know, something like 45 maybe a little bit strong,
maybe around 50. It's just like a
nice subtle detail that we can have on top of here. Okay, then roughly around here are going to
be the mountains. What I'm going to do is
I'm actually not going to have I'm not going to remove
any of the mountains. The reason I don't
want to do that, even though we have water
is actually a few reasons. One, I don't yet know exactly which angle I will be looking at and which mountain
I will be using. I think I will be using
this, but I'm not sure. The second one is that when
we start adding our water, the water will actually deform
the terrain automatically. So where we have our lake
and everything, simply, let's say that the
lake is around this area where
there is a mountain, the mountain will
just disappear. So there's no real point
for us to even go in here. There are automatic paint
filters that you can use. I've honestly not used them
too much, but you can go up, I believe here and art
the custom based I recommend just having look at their YouTube channel
from World Creator. So they give out some
really nice stuff. But I've only done it
probably like once, so I don't feel confident
teaching you guys this. And I don't use this
program too often because it's not often needed. It's just this is a
specific project. Also, over here, this could
also be quite nice for water. Anyway, let's say that we
have something that we like. Of course, what
you would want to do is you want to
do a quick save. Yeah, working file
absolute part. And let's make a new
folder that I will call Landscape. And in here. Landscape underscore
01 in case I ever want to add more of
them. Okay, cool. So now that that is done, now what you want to do
is you want to export your height map that
we can use inside of Unreal engine to basically get this exact look inside
of our train in Unreal. We can do this by going to Save. And if you then press art
in your export presets, you want to simply grab
a height map over here. And once we've done that, we
need to click on the height, and then there are few settings. So I like to keep it raw bit
depth of 16 should be fine. I'm just double checking. I always forget if it is the
flip X or flip Y, but okay. So yeah, this looks fine. Export area is 496 by 496. So it looks like that the
defaults are correct. I'm not too sure about
outer normalization. Sometimes it works, sometimes it doesn't will have
a look at that. So let's first of
all, now go ahead and I think we probably just
want to select a folder. Here we go. I just
navigate it to a folder. And then what we can do is
we can go ahead and press Export Selected or export. Export, that was it. For some reason, Export
Selected didn't work. And Did you export? Lo, did I do something wrong? Maybe I had to say, Oh,
it's quite annoying. You have to press
the save button, and then you can
export the ht map, but for some reason, the export is for the other maps.
I keep forgetting that. So actually, press
the save button, and now here you can
actually export your temp. So that one is a bit confusing. Export in general
in this program, it's a little bit iffy, if I say that correctly. We can go ahead and just call this landscape, underscore 01. And now the thing I was talking about is that the
outer normalize, it sometimes pushes our
values down too low. You'll see now it is working. It sometimes pushes our
values down too low, which makes our mountains
not strong enough. Now you can compensate
this inside of unreal engine by changing the
scale, but when doing that, you risk basically you risk way that the painting works of your twain inside of a real I'll show you. It's easier that I show you
than trying to explain. So here we have our default
sea. That's totally fine. I'm going to get rid of my
floor. What else do we have? We have a directional light. We just go to our details. For skylight, yeah. So like this stuff looks all totally fine. I'm not
too worried about that. In our tutorial, I'm no wait. We don't need to do
that for landscape. I was almost ready to
import that texture, but landscapes do not
need to import textures. Instead, what we
can do is we can go down here to landscape mode, and that will bring up
this view over here, as you can see, and it will
create a landscape for us. Next thing that we want
to do is we want to go ahead and turn on
enable added layers. This is something we
need in case that we want to add some
extra mountains using blueprints and also for some other type of
procedural foliage, which we won't be using
in this tutorial, but just turn it on. It's good. And go to Import File and then it will ask you for a temp file for which you can just go down here and you can go ahead and you can navigate and click on
your Landscape 01. Height Map resolution
is going to be 40 96 by 40 96, as you remember. Now, as you can see, it's quite a difficult
visual feedback, but as you can see over here, it is a little bit strong, and this is where you could go into your scale and set this 250 to tone down your mountains. The risky thing for that
is if you set this to 50 and you then later on want to
paint on top of your train, like paint height on
top of your train, it sometimes does
not work correctly. So personally, I
rather do this stuff inside of World Creator. Now, before I go
to World Creator, I just want to 255 quartz. It looks like that it already
set all of the settings correctly based upon
our pm resolution. I'm not really used to doing
that because I think that's new for EulgenFVw it just
does that kind of stuff. So it should already be
fine from what I can see, but we will know soon enough. Now, let's go back into World
Creator, and then in here, what we can do is we can try and turn off
the autonrmalize. And play around with the
settings. It's a bit tricky. So try to first of all, get it close to
what we had before, which was something like this. And then what we're doing is
we are basically just, like, trying to tone down
the intensity, and then you can
press save again, and then you can just
over wide the landscape. And when you've overwitten it, you should be able to go back in here, click on the
height map again, just open up the landscape,
and then it should give us and maybe we need to reset it because
it did not update. There we go. Here, it should
give us a lower effect. Like this is way too soft, so I need to where's
my height map. Okay, weird. I don't know where my height map went.
Let's try this again. So it's a little bit too soft, so I just need to kind of, like, play around with it until I find
something that I like, let's try and exput this again. For some reason, that's annoying that it keeps
removing my height map. I honestly don't know
why it does that. It seems a bit unlogical. So but we can go ahead and we can just keep playing
around with this. Wow, it's really not working
the way I wanted to. Height map. Okay, so
these are the values. I need to keep in mind these
values and see if I can get because I think
that out to normalize, that's the out to normalize, it does not or it also
increases the strength. Okay, I think we are
getting close to what I had before,
something like this. So minus I think actually
this one can just be zero. And then this one
will become stronger. So if we tone this
down, it's t 85. And the annoying thing is that I know that this will go away as soon and I don't
know why it does that because it didn't
do that the first time. But let's go ahead and
just replace this again. And now let's do this
and go 14 96 by 14 96. It is giving me a
really strange result. Is it that strong? Hight map. Sorry, this always is a
bit of back and forth. So 85, for some reason,
is very strong. So let's tone this down,
set this one to -19. And if it doesn't
work after this, I will just go ahead
and I will just off camera play around
to the settings because there's no point in you seeing me go back
and forth like this. I just need to have
a look at this. Okay, this actually might work. So let's just give
this a try and else, I will just change the
settings later on. By the way, if you
want to fly faster, you can use your scroll
wheel by zooming in or you can go up
here and you can set your camera speed a
little bit faster. So anyway, added
layers is turned on. We have our correct
height map resolution, material we can add later on. That's no problem. And then pretty much
what you can do is you can go ahead and
you can press Import. And then it will import this height map and it
will set it on our train. And hopefully it will give
us the details that we want. Looks like that if you
just tone this down, there's a fog in here. Let's go back to select. Expand your height fog.
Let's just turn it off. There we go. So
here is our Twain. Yeah, that's actually a
pretty decent looking see, you can see all of the
little details that are in here that we
are on top of it. So that is looking pretty good, actually. I quite like that. Now, it looks like that
our train is not properly mapped to our shape over
here, as you can see. So that sometimes happens when the resolution is different from this train
compared to the rest. That's one oversight
that I do want to fix. And the way that
we can fix that is by simply deleting
our landscape. Going back into the
landscape editor, and it will have the same
height map and everything, and we just need to 1 second.
Let me move this down here. We just need to set the
height map resolution, the same in the
overall resolution because right now you can
see that it is bigger, which calls those
extra extending. Now, it will not
actually accept 40 96, but if you just type
in 40 96 over here, you can see that it
switches to 40 81. This is because it's
just like the way that the resolution pieces
are divided on a train. It cannot exactly
hit this number. But the 481 is fine
because it just means that it will cut off
like a tiny bit of our train, but this is so far
out you will never notice because even
in a video game, you would never really get to, like, the actual point of
the train unless you have, different landscapes
and stuff like that. At which point you
would just export the resolution like specifics. Anyway, we have that done. Now we can go at it,
we can press Input again, and that
should do the trick. So let's go ahead and input
our landscape over here and give it a second to load in. There we go. So yeah, here
we have our landscape. And this is just a
normal landscape. So you can still go in here
with your sculpt and I know, like your brush is bigger. And you can see that I can still sculpt in here,
just like normal. I can do whatever I want. I can use blueprints. I
can flatten stuff. I can smoothen I can even add even more erosion if I want
in these areas over here. But yeah, so basically. Now that this is
done, I think this is a good point to end
this specific chapter. So let's go back to select. In our next chapter, what we're going to
do is we are going to find a nice location where we are going to
build our environment, place down our center building, and then start with the
water and maybe also way adding our
materials or not rain. So let's go ahead and continue with this
in the next chapter.
4. 03 Placing Our Hero Building And Water: Okay, so we left off with our landscape over here, which is
looking pretty good. So now what we're going to do is we are going to basically, first of all, let's
go into our gym, our model gym over here. Yeah, let's save this. And I'm
just going to quickly copy over all my models into this gym just so that I can
easily use them. So I want to, first of all,
find my center building, and after I've done that, Whoa, that's a fast camera. Yeah, after I've done that, what I will do is I will go ahead and start finding a location. I'm going to grab my cube and just throw it
into the models folder because I just want to grab all of this
stuff in one go. But I do not want to grab
the foliage because we will be painting the foliage
using the foliage system. So contras. The nice thing is that you can just
go to another scene. Don't know why it
takes so long to load, but okay. Here we go. And by the way,
yeah, let's get a bit off the exponential
height fog for now, that's way too strong
and do a Contrave. Okay, this might take a second because there are a lot
of models over here. And this will also give us a
sense of, like, the scale, because this is this should
be the correct scale of a human player that
you can see over here. And what I'm going to do now is, although that's
yeah, yeah, okay. That is correct scale. It's
Wi small, but it is correct. So I'm going to, I don't know, place it somewhere over here. It's really slow
because there are so many models in this
because of the blueprints. So we are talking about more
than 1,000 models, probably. So I'm just going to
go ahead and just move this over here just
so that I have, like, a reference that I can use without meaning to
switch back and forth, because I don't like to
look at the thumbnails. I like to just go in here
and just find something. So what are we going to do? Let's have a think about this. I'm going to let's see. I feel like this would be
quite a nice centerpiece. And then we are going to have buildings next to it, maybe. I'm just having a look around. A lot of this is
just thinking work. It's just about thinking
how we are going to use stuff and
things like that. I will use this one and maybe
I will also use let's see, this one and maybe I
can combine it with something because it is
almost like a kid Bash. Let's do these two over here. It might be easier if I do B and E. If I go into my kid Bash, actors we should have number
B and number E. Okay. Let's keep that in mind. And now what we're
going to do is we are going to go ahead and start by looking for a final location. So I want something
that is sort of flat enough that I can still properly place buildings
here and there, but it does have an
interesting landscape. So I like to often just go around and just fly
around at, like, a low level, and just to see if I can find
a nice location. Like, something
down in this area was quite nice because what we can do is we can almost
have the center point here, and then we have the villages sitting over here
on these areas. And that's why I quite
liked this idea, and then we can have
another stuff here. Of course, we can
adjust our rain, we can flatten it
and everything. But I do like to always go in and have
another look and make sure if I do not
accidentally miss out on a really nice looking location or
something like that, just by settling
on the first one. But I don't really see
anything that really catches my eye except
for this area over here. Okay, so let's say that this was going to be the area we wanted, and then the center point, if we just grab this one, here, it's like, it's
really, really small. So it's going to be
something like this, and then we have
our mountains here. Okay. Ah, let's have a look. I am going to go on my terrain, and I think I'm going to set
my scaling to, like, 80. As I said before, I could
be very careful for this, but I just want to see
how it looks with, like, I think a scaling
of 80 will be better. And then I'm going to set my Oh, actually, I'm just going to
leave my location at 100. And the reason I want
to leave it there is because I believe if you
set your location to zero, it doesn't work as well
when you want to, like, tone stuff down when you want
to push your height map in. Let me say it like that. So
we got something like this, and then over here, and let's move this a little bit
further back. Let's see. Is this going to
be a center point? So over here we have
the military stuff. Over here, we have
the center point, and then we have buildings
sitting in here. Do I want to rotate
my center point? I often like to keep the
default rotation if possible, because it just
makes things a lot easier. But yeah,
I quite like it. Like, if it is pointing
towards the camera, so let's say that the camera
would be around here, it would probably
not be as nice. So we would have like
this one over here, and then we would have some
smaller buildings that are that feels very far away. Now I look at it.
We can do that, but then it might be better to make this
a little bit closer. This is important, by the way. You might think, like, why are you spending so
much time on this? It's because it is important because once we
have placed this, we cannot really just, like, go in and completely
change everything around. So this looks nice. So we have, like, space for our larger
buildings also here. Now let's say that we
have this building, and let's say that we
have a problem like this where the twain is
not exactly perfect, as you can see over here. What we can do is we can
simply go into our landscape, and then we can go to
our flatten over here. Now, for the flatten, you can pick a range by
pressing the flatten target, clicking on the picker, and
pick a range over here. And then normally I do this in new layer, but
let's just have a look. Here, we see. Okay, so it does also work in
this case here. You can see that we can
properly flatten this out. Once we start adding our water, these layers become important because then they start
interacting with each other. So let's say we have a
flattened target here, what I like to do is I
like to then flatten it, and then sometimes I like
to also just press smooth and if the flatten was a
little bit too strong, we can just, like, smooth this out over here, stuff like that. For some reason, using the
landscape tools is very slow. I don't know why. It
doesn't normally have that. By the way, the
snapping over here, I turn it off so that I can properly place this down here. Yeah, this looks quite nice. So it's like a communal
area, something like that. So we got something like this, and then I wanted to also
maybe get a number B. And let's see, it
looks like that it's pretty much the
same on both sides. And I wanted to kind of, like, see if we can maybe
combine this in some way, because that might
look quite fun. So let's have a look over here. So if we have this one, I guess it would make sense to give
it a little bit of space so people can walk
behind it. I know. I feel like I just wanted to
give it a bigger feeling. I guess we can try to, like, scale it up a little bit. Be careful about this
because, of course, if you scale it up too much, it will look unlogical. But I'm mostly looking at, like, for a pretty image. I'm not so much looking
for pure logics. It's mostly just going to
be about the pretty image. And then, again, you can
go to your landscape, go to the flatten, grab
your target to, like, a location that is correct, and then we can just go
ahead and we can just quickly flatten this out. And this is what
I mean over here that this would be
beneficial if you just quickly smooth it out like that or like that,
and over here also. Okay, so let's say
that now we have our center targets over here
that is looking pretty good. Now the next thing I want
to do is I probably want to go ahead and create a
camera angle based on this. So if we have let's see. So there will be a
river over here. So I want to give it a little
bit of space so that I can see the military stuff
that I want to do here, and I can see the village
that I want to do here. So I'm just trying to
get a nice camera angle, maybe like a slight top
view, something like this. Of course, we can just
change it later on. So having this, I
can go down here, create camera here and
create a camera actor. Then when you go to
perspective to camera actor, we have over here
our camera actor. Now, for the height and width, you can do 1920 by 1080, or if you want to go
for the movie field, you can set your aspect
ratio a little bit down over here and give it some of those
black bars, even. So just give it
like a long view. Yeah, you can also
just go up here. You can find a bunch
of different views. So I think the
Longview, I don't know. Yeah, I feel like long
view does look quite nice. So let's go ahead
and go for, like, a 2.15 in the aspect ratio. Now you can also work
with your field of view, which can be quite nice. I like to always zoom in my field of view and then
place my camera further back. It will just give me that nice close up field
that we often get. So let's say not
seven, 70 over here, and then just push my camera back and you
can just move around, and then you will be
able to use your camera. So let's do something
like this, for example. That looks quite nice. Yeah.
Yeah, I quite like that. Maybe move this one a little bit further like
that. There we go. Especially if you go up
here and for some reason, my screen percentage is 97. Let's for fun set this to
200 and then you can see, you get this really
nice and sharp look. Okay, perfect. We got this one. Let's go ahead and set this
back to 100 over here, and that is looking pretty good. So we can go ahead and
we can save our scene. Now, if you want,
you can already apply your tray material. After saving, it will
take a second to update. Sometimes you just need to
wiggle around your camera and then Okay, that's weird. Normally, there we go. Okay. Yeah, the shadows.
It's unrealized five. It still has some
problems here and there, but they are quite
small problems. Anyway, we can go to our
landscape, and if you want, we can already add our
landscape material just to get a feel for it. Although I first of all,
often just do, like, the water, which is what we
will be doing after this. But for now just
for the fun of it, it's going to your landscape
materials, auto materials. And if you just grab your
auto material instance over here, let's grab this one. It on here. Now, your train
will turn black right now. See? What you need to do is you need to
go to your landscape, and sorry if I say train. It's because when I first
started as an artist, I used Unity, and
unity is trained. But anyway, you want
to go to your paint, and then down here, you
simply need to enter. By clicking on here, you need to enter your
outdoor materials. So you click on here and you
can do that for all of them, because else they do not
register. And there we go. So now we get like a rock,
and then later on we can, of course, change our materials. We can play around
with our slopes, all of that fancy stuff. For now, we just want to
get these sand layers and stuff like that. There we go, see. So we
got already like a base. But as you can see, it
does not look very good. Having this because I like to often switch around between
grayscale and the rest, but I don't like to have
my buildings grayscale. Like you can go up
here and just go for, like, diesel lighting
to make it grayscale. But what I like to do is, I like to right click in
whatever fold you want, create a quick material. And just call it gray. And if I just go and
open it up in here, all I'm going to do is I'm
going to right click and add something called a
constant three vector. And with this constant
three vector, just set the color to be a little bit gray in the constant. Then right click
and convert this to parameter and call it color. Converting it to
parameter allows us to change it inside
of the engine. Then I also want to
press S and click one, which will add a
scalar parameter. It's just a value. Call
it roughness and set this to be like 0.7 and throw
this into your roughness. So this is how to
create a super, super basic plane material. Now, what you can do
after that after it has saved is you can go
outside of landscape mode. Right click and just create a material instance
and just press Enter, and then you can
quickly, for example, swap this out with your train, and then it will quickly
turn your train into gray. Which point if you open up your material instance
as I showed you, you can now set the color. So we can go for a little
bit of a darker color. Because it is a train,
we do need to press Okay before we can
really showcase it, and we can also set our
roughness if we wanted to. Okay, awesome. So we now
got this stuff ready to go. I think I'm going
to go a little bit further away like this. And now what we can
do is we can get started by setting up our water. So for water, what I want
to do is I want to go, first of all, into
Edit and plug ins. And then if you type in Water, there are actual
plug ins over here. That is literally called Water. Mm. The extras is new. But basically, this
is the built in system water system for real that you can use,
and it is really nice. So we can press yes, and
then we do need to restart, so I'm just going to pass the video and restart my engine. Okay. Engine has restarted. Now, in the bottom, you will see that it is preparing
the shaders. This might take a while. But Wild is doing this, so the water systems
are pretty much drag and drop, so they're
really nice. You can find them
going down here. So normally I can just
type in Water Yeah. So you can find them
if you type in water. Just start typing when
you are in this menu. I believe let's see
where are they? They are like, in
a specific place, but I've got without typing, if I can find them,
to be honest. Or maybe they are just yeah, they're probably just
like in the classes. So you can probably
find them in here, but this is such an
overwhelming place. So, yeah, we would just be
pressing just typing in water. However, I will pass the video again until the
shaders are done, which can take a
while because this is quite a heavy system to use. Okay. So the shaders
are done generating. So where did we leave off? Because there were
like 4,000 shaders. We want to go in here, and we are going to go
for, like, a lake, so we want to just
type in water, and then you will have
a bunch of components. So you have islands,
lakes, oceans, rivers. Now, remember how I said
that you had to turn on added layers for your train.
This is one of the reasons. This would not work if we
don't have those turned on. So what we can do is we can
simply click and drag on the lake and place it in here and then
see the magic happen. So it might take a second to
generate because over here, it's once again, preparing
shades and everything. But once it has generated, it should be a little
bit quicker to use. This will be like
the default lake, and it is just like a simple spline system that you can use. It has a really nice
material on it. However, the material
is super blue. So we are, of course, going
to, like, balance that out. Once again, it looks like
that it will take a while. Now, normally at this point, I would already just go
ahead and get started by um changing this stuff around
just like creating my lake. And also, I'm not planning
on looking towards the back. I'm only planning on
looking forward over here. So that's something that we can keep in mind that I don't really care about how that the
lake looks from the back. Okay, I guess I will have
to pause the video again because it's once again
doing all these shaders. It's quite an expensive
thing to use, but oh, well, Okay. So all of the shaders are done. Now, as you can see, we have a problem because
there is no water. So if we go down
here, there is water. So this is the first I
guess I can call the bug. It's something that does not
happen in relation four. But off camera already had, like, a look like, why
is this happening? Because as you can see, the terrain deformation
definitely is working. And then I realized
that if we move this up or if we place a new
one, it is correct. So, for some reason, there
seems to be some kind of weird limitation
here as you can see. Now there is nice water. So for some reason, there seems to be some weird
limitation with our terrain. So what we can do
is we can roughly, guess where the
water stops working. Here, it is really
like around here. And then we can probably just, like, change our rain around. So if I go ahead and yeah, delete our lake, let's grab
our landscape or landscape. And let's see. So we
need to go higher, or at least I hope that
that is the problem. If that is not the problem, then it becomes a lot more difficult. Let's say that we set
this to like 400. Oh, 400 is like nothing. In that case, let's
say it's like 2000. And Okay, let's do 5,000. I'm basically just
trying to figure out why it is not working and I like to keep this in because I'm sure that many other people will also have this problem. So now what I can
do is I can just do my water body lake and
I can enter it here. And then I can have
a look and see if the problem is where
the problem is laying. So okay, over here,
now we have this, and I can see that it
is giving me some, let's say, interesting
looking problems. And these problems
when we go higher, they do not exist. I'm also in uncharted
territory over here. So over here, you can see that this one is also
it's like at minus. If I set to zero, it seems that the zero point
for this lake is way higher. But if the zero point for this lake is here,
theoretically, should I not be able
to just simply move this entire terrain up it's
way too much, I believe. Yeah, it's way too much
that I moved it up. 5,000. Let's say 10,000. I'm just going off with an idea. So there seems to be some
kind of weird correspondence between the actual lake and how everything is
working and the rest. So 14,000 maybe. I'm just trying to
balance it out, and then I will just push
those things up here, see? That's really weird. 12,000. 11,000. Mm. Okay, so this has
become a problem that I might need to fix off camera because I'm
not completely sure why it is behaving like
this specifically. Okay, so I might have
found a workaround. So as you have seen when we actually activated this
plugin, it's experimental. As far as I know,
this plugin has not even been updated
for quite a while, which I don't understand why
because it's really nice. But it's something that
we need to keep in mind. So there are easily, like bugs and everything that
can occur, stuff like this. Although this one, I must say is like really strange, as
you can see over here. Like if I move it up or down, it seems to have this
really strange anyway, the way that we can or the way
that I found a way to sort of work around with this is
by going down into the rain, and then here we have
a curve setting. So we have our depth and
we have our ramp width. And if I set my width really high to something like 8,000, it has a really soft fall off, as you can see, but
that's not too bad. But as you can see over here, it kind of it pushes it down and causes those spikes
to basically go away. And now, as you can see, if I do need to move this down
a little bit for my train, you can see that
it does mean that the twain has this
really strong fall off. So my hope is, and I will just do some testing if we go
to our landscape mode. Now, here you have your water. I believe that we
cannot actually change the twin of our water,
but we can try. Go to smooth and click on the water layer, and
smooth this out. Does that work? Yes, no, maybe set tool strength higher. I don't feel like it works. If you also don't
feel like it works, you can right, click on
the layer, press Create. And if you want, you can also
write, click and rename, call this top underscore edits. I do like to write this
correctly. There we go. Why is that not working? For some reason, it
does not like me. Okay. Anyway, that's probably
another small problem. So basically, now
if we smooth it, here you can see that because
this is a layer on top, it will overwt our
water over here. So this is kind of
like the workaround that I found to use for this. I know it's really
messy because inside of Unreal Engine four,
this works perfectly. Like, we don't need
to do this stuff. It's just the water.
You place the water. It works. I have created
entire rivers and lakes. I've created so much
stuff with this tool. However, this is my first
time using it in Unreal five, and I guess that it is
causing some extra problems, maybe because it is new. But anyway, having this now, what we can do is we can
go ahead and first of all, grab our buildings
over here and place those up because that was still a problem that we had to fix. So we have our
buildings over here. As far as I can
see, the location has not changed, so that's fine. And now over here
we have our water. And I guess what you can do
is you can go in the rams. So the channel depth means
how deep the water goes. She can see over
here it's not very deep because of the width. And then the width is
basically like the fall of it. And right now we
said this to 8,000. If I go, for example,
6,000 yeah, here, see? So it seems to be some
kind of weird fall of What I think is happening
personally is, I think, because trains no longer have tesselation inside of n engine, at least not the way
that they used to, I feel like the
tool can no longer properly tesselate the
edges and fade them out. That's what I'm thinking, but
honestly, I would not know. Anyway, I'm going to
set this to 8,000, and then what you
can do is you can go ahead and you can
grab, for example, a point, and then you can
start by placing your river or your whatever it is called. Lake by placing a point here, then we can place a point, for example, let's
say, over here, and we are going
to make this feel a lot more organic later on. Now what you can do is if you go ahead and you can hold Alt. So if we just go over
here and then on a point, if you hold Alt and drag, you can basically create
another extra point and that should push this out. Now, I do know that
the lake system, if we make it too large,
it starts to complain. It starts to bring out a lot
of arrows, but we will see. So over here, you can see that I just want to create this lake, and right now, I'm just
going to cut straight through the entire
mountain, but don't worry. I'm going to try and see if
we can balance this all out. But yeah. So it's something that we have
unforeseen problems. So we do need to kind
of work with this. So over here we have our lake, and I'm not going to make
it too big because I know that I'm not going to
be able to look behind it. I'm just going to make it
over here. So, let's see. So we have our lake over here, and then we are going to, like, say, push it down
around this mountain. Over here, and maybe
it would be nice to then over here because
there are multiple mountains. We can kind of
just flow it over. And once again, you can also
rotate these points to make the curvature a little bit nicer or something like that.
Like, I can go over here. I can set my curvature
a little bit stronger, and then maybe if I go over here and another one using Alt, see, we can just keep
playing around with this. Now, the more that you
play around with it, the slower it will become. So do keep that in mind. But let's say that I have a
lake like this. There we go. That looks pretty
basic, pretty easy. So we got this lake over here. This is probably like
for my test editing, so I can fix that later on. And now with my lake, there's a few things
that I want to do. First of all, maybe
I can move this up. It probably won't work. No, that's too bad. So the lake, it kind of
just cuts through here, so we do need to do
some manual editing. This is where normally it will deform really nicely,
but this time, it is not doing that because probably our editing problems
or something like that. I don't know if I set
my curvature ramp. The problem is, if I set
it higher to 15,000, it can start to break
my mountains over here. But it looks like right now, it's just everything is behaving
a little bit strangely. So anyway, let's set
this to around 8,000. That's fine. We can
just keep that. We have our channel depth, and that's basically
if we set this lower, this will just become less deep, but we want to have
ships in here. So if I set this, for example, to 200, you can see that now, here, see, you can
see that you can look through and you
can see the depth. I'm going to go for
probably like 800 because I actually want to
have ships laying on here, and I just want to
have it like a nice. Here, see, you can
look under it. I want to have this nice
and deep like that. Okay, now, this
looks really smooth. It looks really
basic, not very nice. That's what we're
going to work on now, and we are a little bit over time in this chapter,
but it will be fine. If you scroll down, that's me. Let's do this over here to
your water height settings, and then we have our
fall off settings, and we have our
effects over here. Now a file of settings, we can most likely play around with the edge
off set and that will make some
changes over here. If I set this to what was it? Was it lower or higher? Here or see it will
increase the edge so. This was the one where I was
actually worried about, C, because it just
pushes out the edges, but not exactly the way I want. So I guess 500 is still fine. I just need to do
some manual editing. The width, try if
I set this to 248. I like to just play around
with these settings. Doesn't do anything. Okay? Sometimes it does
something, sometimes not. File of angle, let's play
around with like a lower angle. Okay, so a lower angle
does seem to kind of like Uh oh. Did I crash? No. Oh. Yeah, okay, so that's what happens
when we set a lower angle. Let's set this back to 45. Now, at least you know
all the settings. It's just me messing
around with things. So I do apologize if you
don't like me doing that, but I'm just playing around. Anyway, the one
that we really want to work on is the curl noise. So the curl noise allows us to turn this thing into
something really organic. However, with the
bugs that we have, I am a little bit
worried, but we will see. So as soon as I set the curl amount like a
little bit higher, what you can see is
that it will start adding noise to the
curvature, see? And this noise, don't worry
about this selecting, that's something that we can
fix inside of our material. But yeah, with this noise, we cannot play around
to the tiling. If I set this, for example, 2.2. And then make my
tiling. I I set it to like 100, you will
see what happens. You can get like, Okay,
see, this is what I mean. Like, I don't think we can
go very strongly with this. Luckily, we don't have to, but I am quite
disappointed at how bad this plugin is working because normally it works totally fine. But anyway, so over here, we have already a bit
more of an organic shape, and then we have the
second curl noise. And if we set this
one, for example, smaller and very
softly to like 0.1, it will just add like
little bits of micro noise. So if I set this
maybe to like 150, like something really
strong, no, 100. I'm just trying Honestly, I'm just trying
to avoid the box. It's really tricky. But as you can see over here, it will just create
some micro noise. So 80 maybe. Come on, something that will get rid of all of
those problems. Okay, it looks like that. Damn. 50? Yeah, it looks like this we
cannot go higher than 50. There are still
some problems here and there that we
can hopefully fix. So that is very disappointing, but oh, well, we
can live with it. The goal is that now if I
look in my camera angle over here, which I need to move up. I'm going to, let's see. Let's move this a little
bit further away. So if this was going to
be our camera angle, I'm going to just play around a little bit
more and just place my, you can see that it's
a lot slower now that we have other girl
noise settings. Okay. Sorry about that. So
unreal crashed, unfortunately. It's unreal I sur five. It can happen, even though
it has literally been released like a week ago from
the time of recording this. So anyway, what I'm going to
do is hopefully this time it doesn't crash if I move
this forward a little bit. There we go. This
time, it does not. Then if I just go
into my camera actor, yeah, that's pretty nice so we can see a little
bit of water. Then later on we
will, of course, also have camera
actors that are just showcasing a little bit more
of what we have. Let's see. Am I happy with this?
Actually, I do want to show a little bit more water
because I want to be able to showcase the
docks and everything. So let's see if that is going
to be the center point, I'm going to probably move it around here and
maybe if I can then uh I almost want to
place one here and then hold alt and then
create another one that is kind of like a little
bit like this. And then hopefully we
can kind just create a nice little docking area that is then being pushed
further out so that we can hopefully see it a
little bit towards the side. Oh, over here, I
need to do a lot of adjustments to get
this to look good. Okay, let's try
something like that, because it has already crashed, I'm just going to
save my scene again. Okay, so yeah, we got
these areas over here. Now, I think we got
something pretty decent. We got like our docking
areas and stuff like that. So I think that should work. For some reason, something
feels different. I don't know if it's because the terrain has been adjusted a little bit to the
water, but oh well. So anyway, we got this
stuff over here done now. That is looking pretty good. Now, last thing
that I'm going to do and that you can
also do is you can already just play
around with a train or a train with the
material a little bit. So if you have over here
your water body lake, if you go down to the
water body component, and then you have
your water material, you can click on here, and then you can navigate to
your water material. Now, if you want, you can just edit this
material right away, but if you have, for example, multiple different
types of lakes, you want to create a duplicate. I'm just going to
go ahead and I'm going to just edit
it right away, so I can double click on it, and you get a lot of settings. Now, most of these settings
you can pretty much ignore. So there's a lot
of detail normals and simulations and
stuff like that. The one that I want to work
on is if we go down here data so we want to
have the water albedo. We want to have the absorption
scattering and water area, Watertopacity mask input. I think for now, that is it. So I can't explain to you
exactly what they do. I will just show you. So the
water opacity mask input, it works with the edge. If I said this to -50. Okay, that's maybe
not a lot, -400. Okay, I guess I guess
because of the 8,000 slope, it doesn't actually
work this time. Maybe if I do ten.
Normally, does it just gives us a
better flow. Here. When I do ten, you can see it. So I guess -50 is more than
enough because of our slope, it doesn't actually
do anything else. Next, we have our absorption. We have our
scattering over here, and then we have the water area. These are not RGB colors. It's not like well,
maybe the scattering is. The scattering, you can maybe play around with, but
it doesn't do much. But this one, it's
not an RGB color. You actually need to
be quite careful. So because of the Alpha, if I set this to like five
or three, it becomes darker. So it displays how fast
the water becomes darker. And then the other ones, display as far as I can
remember the color. So if I set this two, for
example, five, that's fine. Here, I I set to five, no, 20. Here see. So this one
does like the fall off. Oh, no, yeah, sorry,
so it's not the color. It just does like
various parameters. 15, let's do ten. And then this one
is 150 if I do 100, this one is for looks
like this darkness. Yeah, okay, so that one
is for this darkness. So if you do 150, let's do 120. And then this one, 350 is probably for,
like, the lightness. So it's like a gradient thing. If I do 400, it probably
makes the ends lighter. Yeah, here, so 200, 300. Okay. Now, there is also, like, of course,
the actual color, and I kind of forgot
where this is located in here because
there are so many settings. Let's see. So this
one is not the color. Let me just pass the video. I completely forgot where
the actual color is located. Okay, I found it. So yes, the color is actually
located in here. Once you've set those settings, you are able to
change the color, but the thing is
that for this color, if we go we want to go for
like a dark bluish color. Sandra. You need to press Okay. Okay, so yeah, you can
actually not set it to dark. Press okay. See, it's
super sensitive. Let's undo this. It
is really sensitive. Like, I need to just
very carefully Play one. There you see, and
then it does work. So it is really tricky
to change the color. For some reason, you cannot
adjust these settings. You can only play
around in here. There we go. And then we
can get some kind of color. And then we should also be
able to adjust the opacity. So let's say that we
have a color like this, and then we can play around
with the actual values, maybe a little bit darker. Yeah, I think
something like this, like a bluish color.
And then let's see. So we have paste. If
I set this to one, it becomes darker, see? So it's messy on
how to edit this, but it does sort of work. And then we have this
one, which is 300. And if I set that one, see, lower, then it goes into, like, a more greenish color. Oh, that's quite
nice. That's to 250. It's 250, and this
one is now 200, and this one is around 100. I'm just going to leave it to this for now. That
should be fine. Also, for the wave
amount and everything, there are areas in here. So also we have our water roughness and
specular, by the way. If you set this one lower
to like zero or 0.1, it will make the water not
as reflective, you see? And then you have your fennel. If I set this to,
for example, 0.5, you can see that
in the distance, it also does not make
your water as reflective. It's just in case you want it. I'm going to set my
fennel maybe to like 0.2, because we have
quite a dull looking or like a foggy looking area, so I don't want to have
like super perfect, shiny. And then we also have a simulation scale if I set this to 1,000,
no, that's not the one. Oh, there's so many
settings here. There are settings
in here that you can use for, like, your waves. I don't know if this is the
one, if I set this to 0.3. It does do something, but not exactly what
I'm looking for. Distance, water scale
that's just like the scale of your water
waves in the distance. If I said this to, for
example, 2000, here see. You can see that that
changes that one. But the one that I'm looking at is I wanted to see for like if I can make the water less or more calm. Let me
say it like that. And let's see what a distance
maybe it's this one. Sorry, I know that
I am the teacher, but this is something that
simply every artist will probably forget about until you have used this
many, many times. Fluid displacement multiplier. No, those are not the
ones. That's a tricky one. I'm not exactly sure which
one is causing the wave. So that's something that I might just go ahead and have a
look off camera again. Okay. So I found the problem. So in your material, you can find the distant waves. However, these actual
waves over here, you need to go to
your water body lake. And then if you go down
to wave and then go to wave source and then
wa water wave assets, and then navigate
to this asset by pressing this button
and then opening it up, yes, it's a whole thing. And then in here, you can
change some settings. For example, the
number of waves, which is the one that I wanted, which is the same as scale. I I set this 12,
for example, six, the waves will be way bigger, which will also make them
feel a little bit calmer.
5. 04 Fixing Landscape And Placing Our Core Buildings: Okay, so we now got our water working with
a little bit of effort. But yeah, that's
looking pretty good. So now what we're going
to do is we are just going to improve our
rain a little bit. So what I want to do is
over here in these areas, I just want to make it
almost like a beach. So the rain is
like quite nicely, softly flowing over from
one side to the outside. However, with these
cliffs over here, we don't necessarily
need to get rid of them. We just need to make
them look a little bit more realistic, so to speak, because right now, yeah, they don't look good. So that's something
that we can work on. Okay, so we have a
top edits over here. I'm just going to actually
delete it because I can remember that we
did some editing on it, and I'm just going
to move this here. And now what I want
to do is I just want to once again,
right click Create, right click Rename, and
let's do Water on the score. Fix or something like that. There we go. Now, for these areas over here,
that should be quite easy. We can just go into our smooth and like our brush is
a little bit bigger, and we can just nicely smooth these areas out so here we go, see, so that instantly it flows
over a little bit better. Also in these areas. Now in these areas, it might be cool. So let's maybe smooth them
out a little bit more, but it might be nice to
let's do some erosion. Maybe that can work.
And let's set the tool strain 0.5 so that
it's not too strong. I just want to see when
I do some erosion, if that will make everything look a little
bit more realistic. You know what, yeah,
it actually does. I think if we combine this with some rocks, and by the way, you can not really see them in any other areas except here, I think that can actually look quite nice and interesting. Also over here, we
need to combine them because sometimes
the water just does not really like to
extend completely out. It's it's something
that happens. So we can just fill it up
with some rocks instead of trying so many things
to just get it to work. And then over here,
I'm just going to nicely go over into, like, the smooth areas again. And at this point,
it's up to you, like what you want to do. I'm just going to because
you cannot see it, so I'm just going to, like,
increase my brush size, and I'm just going
to very quickly go along this entire area. Because of course,
when doing this, the water itself will not dt. We are editing the rain, but we are not editing
the water around it, and that's something that we do need to be a
little bit careful of because it means that it
will not always look as good. Over here, you can
see that now I'm just playing around
with my erosion to get like some cliffs or
something like that. This is actually extra bad, what I see here. So
that's interesting. I'll see if I can
maybe somehow fix that because I'm not used
to looking that bad. So my brush size a
little bit smaller over here because I
just do not want to break these etges that
we have down here. There we go. We can just
make this feel a little bit more logical
and interesting. And then hopefully when we
have our train on here, it will have rocks and everything for which we can
then include some extra rocks from mega scans just
to build things up and make them
all look very nice. Its almost feels a little
bit like clay sculpting, like it doesn't actually
look too much like erosion, but Yeah, it looks pretty good. Okay, so over here, these areas, if I do sculpting. Okay, so if I sculpt, we are able to kind
of cover those up. So what if I set my tool
strength to like 0.1, and then I'm just
going to, like, here see carefully,
just sculpt over it. I don't know exactly why it is doing this, but at this point, I'm not really surprised
anymore by the strange type of bugs because we have clearly seen that the water
system is not working as well as it normally
did in Unreal engine four. Which is very
unfortunate because I actually use the system
a lot in Wheel four. So I do hope that they
will very quickly fix these type of systems
and everything like that. But anyway, for now, what we can do is we can just kind of, like, fade along here. And honestly, these areas here, I don't really care,
then over here, I do want to maybe give a
little bit of here see? There we go. So yeah, I'm
mostly just improvising right now with the
water just because it is not doing what it is
supposed to be doing. Anyway, that's pretty cool. So oh, actually, one more
thing here and here. There we go. Especially
in these areas you do not want to have
super sharp cutoffs. Okay. So that is now done. That's looking pretty good
if we go to our main camera. Yeah, I can work with that. So we got our main
building over here. Now, what I want to do is
I want to get started by just placing our mountains. This is because what I
always do is I always go from large assets to small
assets in terms of placement. Now, of course, our mountains
are the largest ones. After that, we will
do the buildings, then we will do the
rocks, and then we will just continue on
with smaller assets. But now we are really going to get started with the bulk of it, which is going to be placing
all of these assets. So for this, I have, if I go to my content browser. So whenever there's water, there's a lot of engine content that you can just minimize, here we have our photo
real backgrounds. And if we go into our maps, we can click on
the overview map. The photo real
backgrounds are awesome, so it's so easy to just get something interesting
looking very quickly. Over here, you have
modular pieces, but the ones that I'm interested in is like some of
these where they are pretty much like included
across the entire area. Now, this one actually
looks really nice because it has greenery, and then it switches over into, like, snow, sorry, snow, I mean. That's quite nice or this one. This one might
actually be nicer, but I just want
to kind of, like, have a look around and
see whatever we have. So okay, yeah. So definitely, let's do this one
and do we maybe need some larger mountain
pieces in here also? Let's have a look, increase the amount of mountains that we have and
how big they are. I'm just going to select
as usion control. Then I'm going to go up here. Modular background,
spring and winter. Let's go for winter because
these will be quite high up. I'm going to see um it is quite interesting how
they created these pieces. Do this one. Let's do this one, and maybe this one over here. Press contras and now we can go ahead and go into our
tutorial and scene and main give that a
second to load up. Here we go. And let's do
a Control V over here. And let's immediately just
throw this into a folder. When you have it
selected, it will automatically place it into the folder and just call
it like BG for background. So we have our background,
and then we have our models. Okay, awesome. So
for our background, we are going to get started with our square background over here for which why
is this so large? That's okay. Is there an ocean or
something in here? Lake. Okay. The reason this is strange is
because normally, it does not actually
add all of this water, but I guess it is fine. I'm not going to really
bother. I cannot select it. So maybe it's just like
a reflection thing. That can also be it. But
honestly, I don't know. Anyway, it doesn't matter. I keep getting sected. We are going to select
our backgrounds, and we are just going to
scale them up big time. Like we want to basically have
the empty area over here. There we go, see? And just have our mountains over here and maybe push it down a little
bit more like this. And then that is looking
pretty good. I don't know. It's going to my
camera actor now. Yeah, Seesaw we already
get those mountain ranges, although they are not yet
exactly how I want them to be. Just make sure that we push our terrain down over here.
Let's now going here. And what I want to
do is I'm going to go to Window viewports, and I'm going to quickly
create a second viewport. And with this viewpoard, I just want to basically
my perspective mode. Find my pivot point over here
and I'm going to rotate it while having snapping turned on so that now when
looking in this view, you can see that I'm
rotating this by 90 degrees, and now you can see
that I can basically see whatever I like. So 180. Here this is 180. And this is, I just
basically seeing whatever mountain ranges I prefer And actually, it's fine if you
don't go by decreases of 90 and just go for something
a little bit different. Let's do something like
maybe something like this. Yeah, let's do something
like this over here. And now I can close
that second view part. Did I actually not move it? I'm feeling like I literally
just did not move it. Okay. But anyway, so now that
we have these pieces done, we are going to grab those
additional pieces that I had, and I'm going to get started by, let's move this one over here. Oh, and make sure that you do not accidentally scale
them into the minus. It sets to like ten, but you need to scale
them into the plus. So what I can do with this is I can temporarily move
these out of the way. I can grab this one and
then in my camera actor, I can scale this
one up to basically create additional mountains so that they are exactly the
way that I want them to be. This way, I have a
little bit more control over the placement of them. Yeah, I can make an
even bigger one. But then for this one, I do like a nice mountain
range going towards the back and I can just push this out and maybe turn
off a snap rotation. Here. It's just all
about the camerngle. So now you can see that even
though I am rotating this, you won't really notice as much. So we got this one, and now we have the
last one over here, for which I'm going
to let's see, let's scale it up. And let's place this maybe somewhere over
here and let's see if we can maybe do I
think I like this, but then of course,
I need to fill up this empty space over here. Let's do something like this. I don't need the
massive mountains. I just want to get a hilly area with these mountains in here. Although it would be
interesting just to see if I press contra D and if, for example, push this down to see how large
I can make them feel. Okay, here. So then also the resolution and
everything would not work. Okay, so let's do
something like this. And then the last
thing I need to do is I just need to go in here. And let's say I,
for example, grab, let's do this one so
that's contra D rotate it, you basically want to just
push this in front of it so that it does not show
all of that clipping. And I'm just going
to scale this up a little bit like this
that I can move it down. And then I'm going to
duplicate this again and maybe also place
another one here, so that from a distance, when we have all of our
fork and everything going on, let's move this one down. Yeah, this one also. To be honest, I don't
really like this one. I think it has too many
of these black peaks. So let's just use this one. And let's see if I can maybe, maybe I can push this
down with its own. It's twice something like that. Just trying to find
interesting look. There we go. Yeah. So something like that's working quite well. So we got this nice background,
and you can, of course, imagine if it's, like,
really foggy and everything, then it will look quite nice. So at this point, let's go
ahead and save our scene. And this is starting
to look pretty good. So we got, like, our
center point over here, although it is quite
small at this point, the environment's
going to be a little bit larger scale
than I expected. But it would not matter
too much in terms of time because most of
the larger scales are, like in the background. So we got this stuff
over here done. Now what I want to
do is I'm probably, first of all, going to
place my buildings. Yes, and then I will
work on the terrain. It's probably easier
if I Oh, too fast. It's probably easier if I, first of all, work
on my buildings. So, if this is the center point, we can kind of just, like,
make everything from here. And I almost want to create
like a cluster effect. So we have, like, small
clusters of buildings here and there that are
just scattered around. Now for this, we can
have a quick look and go to our models, which are at this point, really far down over
here, but that's fine. I just want to basically
have a look around and just see what kind of stuff I have to get
some inspiration. Yeah, we definitely need
to fix this kind of stuff where the ODs
are not correct. Although, to be
honest, I can probably even just turn off the
LODs at one point. Okay, so we got like so let's do central buildings
that are being then surrounded by
other buildings. And over here we have
that's also interesting. Sorry, I mean, central building surrounded by smaller buildings. Yeah, and I'll see how it goes. So knowing that, I just
need to quickly go in here and if you can just select one of these
buildings over here, just press F, and then you
are Mute in these areas. So I'm going to make
my content browser at this point, a
little bit bigger. And I'm going to go
ahead and navigate to my Kit Bash three D and
my actors over here. And if you want, you can go to your settings and you
can set your view, not your view type, your
thumbnail size over here to, for example, medium or large. In this case, I like
large because I need to really be able to see
what I'm doing over here. So let's first of
all, get started with the central
buildings that we are going to be placing if
I have look over here. So we have this one, and sometimes it might be
nice for you to always have a second view boot over here with your camera angle so that you can see
what you're doing. If it is slow, you
can always go in and or you can set this
to unlit mode over here, but that might not be
the best one right now, or you can go down to
your screen percentage and set it to 50, which will make it
feel very blurry, but it's just for distance. Knowing that, we can have look. I have my village over there. Next, what I want to
do is I want to have like I'm just placing, like, the core buildings, and then we can place
everything around it. So I'm going to have
a little church thing sitting over here
because as you can see, from a distance, it
looks quite nice having almost like a church
style building over there. Next over here, what we're
going to do is, let's see. So we had, like, what is this? No, this is like a
civilian building. We have this one over here. So I can also move this one probably around this location because it is quite
nice that we have, these extra piece already. We do need to extend this down a little bit more,
but we can do that. That's no problem. So
let's get started. And I will also fix the
placement and everything. The reason I want to do
this one is because it is a little bit of
a foreground area. So as you can see
over here, at least, then we have
something interesting to look at on the foreground. And you can kind of,
like, just choose. Like, I probably want to
have it somewhere along here. There we go. Let's just get started
with something like this. Now, for our military base, let's see what can
we use so as I said, I wanted to have
an area of, like, walls sitting around here, almost as if this is
like the military base. So let's say that the entrance would be I want to still
have the entrance visible. So I'm just looking on my
second screen right now. And I'm going to have probably the entrance sitting
roughly around here. So here we go. So like, that would be something
like the entrance. And let's see, what is this one. This one is just like a nice civilian building, that's fine. And this one is a
little bit like bigger. So maybe we can use this
one as like a center point. Although I just want
to make extra sure that because maybe there's some more interesting
stuff going on. And yeah, I feel like military. Like in these times, they would put a lot of pride
into the military, so maybe they want to go
for something that's no, it's outside of my view.
That's a tricky thing. Like we already have
this one over here, so maybe I can push this
on a little bit further, but I want to have something that's not too far
outside of you. That looks more like a church. I will add that one over there. Yeah. Okay. So let's do
the military building over here and let's rotate it a little bit so that it is
facing the camera almost. So as you can see, I'm just very slowly starting with
the core buildings, and then I will
take it from there and start adding more
and more buildings. But right now it
is important that we just get a
storytelling over here. So the storytelling over here is that we have our central
building over here. This site over here is
going to be military based. Over here, it's
going to be the town like the church and everything. And then over here,
it's going to be the Fisher town based. So all of the fishes and
everything like that. And then there will
also be some buildings just sitting around here. So now that we have done this, what we'll be doing
in next chapter is we will really start
focusing on placing our buildings and just getting a general feel
for the environment, placing clusters around of different buildings
and stuff like that. So let's go ahead and continue with this in our next chapter.
6. 05 Placing Our Buildings On The Right Side: Okay, so let's go
ahead and continue. So what we're going to now
is we are just going to place all of our core
buildings over here. And let's just start from
the right to the left. So we're going to start with
all of the military stuff. And I'm hoping that we do have some actual walls and stuff
like that. So let's see. We have it does not look a lot like a wall,
but I guess it is something. And yeah, once again, don't worry about the twain being
sunken in and everything. That's something that
we are going to fix. So 1 second, I just need
to see what is this. This like a larger walkway
or something like that. I can see that there's
a lot of fencing. I think the problem is that
I have this one way around. Yeah, there we go. So
that was the problem. So let me just quickly go
to this view. Let's see. I'm going to move it a
little bit over here. Yeah, okay, because we
do have fencing and stuff like that that we can use. But to be honest, I don't know. The reason is
because the concept at also happens to have, all of these fencing
here, but, of course, we are going to have a
lot more stuff behind it. So I guess then it
is fine to use it. I'm going to have Let's see. Actually, I'm going to do
this via my second screen, which I have here. One entrance is going to
be a little bit more here. Another entrance is
going to be probably here and then we will
guide a wall between it. Over here and then
over here we will have the fence going outside of the screen or
something like that. Yeah, I think that can
work. So let's have a look. Is this walkway something
that I can use? It is like a bridge. So probably not
unless I will make some kind of like a river
going somewhere here. So that's something for a
later date to think about. So first of all, I want to create a wall
because, of course, it seems to be one that is quite specific that we need in order to place our
buildings correctly. But I'm currently just mostly having a look at guard towers and
everything like that. So here I can find
a guard tower. And it's nice to place these
first because they will kind of, like, guide everything. Yeah, let's do like Let's
do something like this. And at this point,
I will just have a pretty basic wall that will
just go outside of here, or maybe it will
just kind of like end here or something
like that. We'll see. So for these guard towels, I do like to often
move them down. When moving them
down, it will make everything feel a
little bit more organic because it
does mean that, of course, we need to push our walls and everything
up a little bit. But I'll show you what
I mean right now. So let's see where
are the walls. I they should be here somewhere. I have seen them before. No, that's strange.
Oh, here we are. I thought it was a gate,
but it is actually a fence. So here we have our
fence for which I can probably in this direction. And this is generally the goal. So what we can do is we can place a fence here but place like a little bit higher, that we still keep some of
those mountains in here. I'm also going to
rotate it a little bit. Of course, there will come
a time where I will do a quick time maps
for Wi small props because else it will
take very long because I can spend a few hours on
this if I really wanted to. But of course, I
won't do that because the Gulf tutorials to get
something very quick, but it does still
mean that we need to have something that looks
good and that takes time. May you can see that I keep moving them up a
little bit like this. And then we have arrived
at the guard tower and there's no problem
to, for example, then move the tower a little
bit more Like over here. There we go. And
then we have fence. And if we would go
to our camerngle, you can see that the fence
just kind of goes over here. The reason I still make
stuff outside is because I know that I will most likely have a few extra camerangles, maybe like a high angle
like this or maybe like a close up angle like
this and stuff like that. And when doing that, it's
just nice that I know that I have a few extra fences and
everything placed around. But going beyond this point, it will probably be over gill. So that's where I will
probably leave the fence. And what I want to do because unlike a game environment
where you can look around, we are only creating it
for specific angles, and that's mostly for
tutorial because there's no difference between this
and a game environment, except the game environment
you need to place more. But basically,
what I'm saying is that I will just kind of, like, stop placing
these pieces when I know that they are
very far off the camera. And then if for some reason, I can still see them when I actually decide on my
camera angles and videos, then I will, of course, just
like, add more of them. Okay, so unfortunately,
I crashed. I feel like that
is happening a lot more with the final
version of In engine five compared to the
pre alpha versions or the Beta versions
or anything like that. So that is quite interesting. But anyway, what I'm
going to do so I basically had to replace this entire fence
because once again, I crashed and I lost that
work, but I've now placed it. I do feel like it
looks very flat, but that's something
that we will work on a little bit later. As like a safeguard
because this is the second crash already in
this project, while normally, I do not have a crash
for hours on end, I am going to go to my a
project settings over here. So it looks like I was
in the wrong window. It looks very similar. But if you go to edit and edit the preferences instead
of project settings, the window looks
pretty much the same, but in here, there are
different settings. So we just want to go in
general, loading and saving. And then in here, we can go ahead and
frequency in minutes. For the outer save, I'm going to set that back to 5 minutes. Might be a little bit annoying, but at least then
this will work. And yeah, you can save time by not saving content, but
honestly, it's fine. So let's just go ahead
and leave it to this. Anyway, if we go back
to our camera reactor, we now have our wall over
here, so that's fine. I just want to go ahead and I want to continue on my wall. As I said before, it
is looking very flat. That is something that I do
want to work on a little bit more later to see if I
can make it interesting. B, of course, on
this side, the wall looks a lot more
interesting, as you can see, but it would not be very logical because the water line is here. So if we go for storytelling, it would not be super
logical to have the actual wall facing
the other direction. I guess you can do that. So you can block this off, but then you would
also be a yeah, there can also be people
going into, like, the water and everything, and this is like
your military base. So that's why I decided to
place the wall this way, because the military base
like a protected area where civilians cannot go or something like that,
and it's mostly there. I know that I'm looking
at it from, like, a really modern standpoint, while, of course,
these are like, Vikings and
everything like that, but that's just my
reasoning for it. And I can always flip it around if I decide to change my mind. But anyway, for now, I'm
just kind of trying to, like, build this fence down, as you can see over here, even though it is floating still. I I like that. And then I can place my
watch tower over here. And now we can see
that the terrain is really starting to ramp up, so that's something that I do
want to work on a bit more. At this point, I will
just probably do, like, a straight shot up until, let's see, if this is
the main building, then I will probably just
make it go around here. So if you want, you can use those watch towers
to kind of guide your way. So we will have, for example, one watch tower going
roughly over here. And as I said before, I
do have my reference, but for the most part, I am also just making
this up as I go along. I'll do another one that's
slightly sideways over here. And Twain Willy becomes
heavy at this point, but that's something
that luckily we can just add it later on. And then the last
one will be here and then it will just
go beyond our screen. So then we will have the
same thing as over there. Worst case, we can
just close it off. But for now, that
should be fine. Maybe move it forward a
little bit like that. Okay. So I am going to place
these balls in between here. I will just pass the
video because it will take a little while for me to
actually place these balls, and there's nothing
interesting here. I'm just trying to follow along with the train and not too much. So here you can see that I'm
not pushing it up too much, but I still want to at the end, will give the impression
that there is a lot of height elevation
within the train. We can do, like the
last one over here, move it up, and then
just go ahead and push your car tower
back a little bit. Like this. Do not do this because that would
not look logical. That's why I'm going for
something like this. Okay, so let me just quickly
pass the video until this is done. Okay, here we go. As you can see, I
place my fence, and if we have a quick
look at the camera angle, you can see that it just kind
of goes beyond this point. Okay, so that is already
that blocked off. Now what we can do
is we can start to finally place most of
our buildings here. So if I have a look, so
this is the main building. By the way, if you press
this button over here, you can cycle between
wordspace and sorry, world direction and
local direction your object direction
for your pivot point, which is always nice
if you want to, like, rotate some stuff around. Okay, so we have this
main building over here. Now it is mostly going to
be a matter of just placing some interesting
military style buildings here that also make a
little bit of sense. So you would be like, no, like a training area, like a barracks area, arches and then stuff like that. So I don't know if I can. Yeah, it's probably easier
for me to just drag them in and have a look compared to
trying to, like, find them. So this is, like,
a farming area. So over here, Yeah, here. So this is like a military area. So what we can do is
we can, for example, where's my Oh, yeah,
wait, I crashed, so I need to have my
second viewpot again, setting to the camera
and you set it to 50 to make it a little bit faster because I do want
to have a look, and I feel like maybe have one of these
buildings over here. It's almost like a restock
area or something like that. Against the wall. I think that would look quite
nice and let's make it a, a little bit lower over
here. What else do we have? We have like This can be
like a Blacksmith area for the we can have a little bit Let's have all of the areas
or all of the houses that are not so much about
combat in this area. So that can be this one. And I feel like that would not be something
that will be in Milte. This one is to build
our ships for which we can I would make sense to have that one outside
of the wall, actually. M so you cannot see it here, which is a bit of a shame. But if we place it over here, I'm looking on my camera. If we place over here, it just becomes a little bit too busy. But yeah, if we place it
there, we cannot see it. So I guess in this case, what I will do is I
will place one here, and the rest I will
place on the right side of the environment
a little bit later. For now, let's leave it
until something like this. Okay. What are you? You are a generic house. That's something that I
will leave for civilians. I feel like something like this could be interesting
for maybe, like, the military
barracks to have Oh, no, wait, actually, that's a
little bit too over the top. Yeah, this one feels
like a military bark. So we got those. Now, over here, we just want to have something so
people are staying. I know that you cannot
actually see these buildings, which is why we can be a
little bit more flexible. But let's have, for example, one here, and then just have, another one sitting next to it. I feel like they
would just build these buildings against each other like this, pretty much. I don't want to do too
many because, of course, you can see that they
are very similar. Now, if we go back over
here, so let's see. So we got our main building. Is that the entrance?
No, the entrance is mostly to the site, I guess. I want to see if there's maybe because it feels very empty still in these areas over here. So I was hoping that there is, like, that is
interesting. That's one. I don't know where I can I can maybe fit that here.
Let's do that. Let's have like one of these And I'll push
it up up until, like, this point.
And again here. Yeah, I think that
looks interesting. And sometimes you can, if you want to
cheat a little bit, by placing a fence here and then just placing
it back a little bit, and then moving it up. There we go. You often won't really notice that
kind of stuff. Or, of course, if you
make the pieces yourself, you can just go ahead
and you can make a bunch of custom pieces or smaller pieces so that
it is easier to place. Let me just move this
here and this here. Okay. So we got that one. Let's see. Yeah, I feel like something
like this could work. So I guess we will just
do like some barracks. I was hoping that we have
some places where you have arches and everything
that are twining, but I guess I can make
those ones customly myself. Oh, yeah, and that's
one of those buildings. So seeing this, let's make this. I feel like it would be fun if the buildings are placed in a little bit of,
like, a weird way. So not like how we would
do it in modern times, but rather they
would just kind of, like, be built here. And once they are built, they would not really be changed. So what we can do is
we can, for example, have two over here. Like this. And then another two
that are further along, and then we have just something sitting in here that we can use, I don't know, maybe not so
much a training ground, but just like a ground
for relaxation. And I feel like it would even
be fun if we change this up a little bit and make it less perfect in
terms of placement, just to make it seem like
they did not exactly have the measurement
tools that we have nowadays to perfectly place all of these buildings
against each other. I don't know. Was this something
that we can use in here? Nah, that feels a little bit too big and a little
bit too depressing. So yeah, we can have
some over here. And then in this area,
I do want to have, like, a training ground. So for the training ground, it will probably just be
mostly smaller assets. But let me just place, for example, like one
building over here. Almost as if there's another supply depot here where people can get their
supplies and stuff like that. Yeah, let's place one over here. Okay. And the nice thing is, I can see on that concept
art because the concept uses these assets that there are a lot of tents
and stuff like that. So I was hoping that
maybe I can find that. Yeah, here we have
some arch stuff, so that's something that we
are also going to work on. But as I said before, we
are going to start with large and then go down
to smaller areas. I don't actually see tanks. Maybe the concept artist
just made those himself. Yeah, even if I type in tent
Okay, that's unfortunate. It looks like that I cannot find those specific
assets, but that's fine. So anyway, we have now
these assets over here. And if we go into our camera, it does look quite interesting. So here we can just have
some training grounds. I do feel like having
something in the back, but we can once again just do, like, something with, like, arches and training and
that kind of stuff. Now, having this one, what I want to do now
is I want to yeah, let's work on this
building over here, but I think it is a good
time to end this chapter. So in next chapter, what
we'll do is we will start working on this area with
these few buildings. And once we've done them,
we will do the top area, and then we will work on this area because I
want to do, like, a Fishertown style area, but I don't know yet exactly
what I will be placing. So let's go ahead
and Sava scene, and let's continue with
this in our next chapter.
7. 06 Placing Our Buildings In The Center: Okay, so let's go ahead and focus on this area,
as I said before. And for this, I feel like this is going to
be a little bit of, like, the front town or, like, the trading market
or something like that. And then the actual town will be around this area over here. So for that, I do
want to get like, a little bit more
basic buildings, and maybe we can
do something with, like, larger buildings,
but I'm not sure. Like, this one looks very large, but I don't know if it would, I hear that completely
overshadows everything. So I'm not going to do that one. That would be a
little bit overkill. We have, like a little church over here that would be nice. Like, I feel like they would be quite religious or
something like that. So a little church over here. But then there will be buildings that are sitting in front of it. And for those, I want to get
like buildings that feel like not so much farming
here, this kind of stuff. I know that we have already used this one over there,
but that's fine. It's mostly just buildings that, I don't know I would say. The people sell stuff from them, so stores, but also like
live in, stuff like that. So let's have a look. Let's do, like, one building here. And maybe it would be nice if we pack it quite closely together. And this one, I don't
want to use it. I just wanted to
have a look at it. Oh, here, for this one, they actually, yeah, they
start making the building. That would be nice work on
if I do something with that. So maybe we can do, like I'm just looking at my
reference or my reference, my second view over
here where I want to move this building to make it feel a little bit more logical, because if I feel like
around this place, they would have already
finished building it. So maybe it's
actually something a little bit more
towards the outside. Yeah, maybe something
like over here, they start to build
another house. Let's see, what is this one. These ones, I'm not sure. These ones maybe I will
place them over here. But right now because
they also have grass, it's a little bit tricky. Maybe the military had like
another supply depot over here or whatever you want
to make of this building, so we can place like
another one here. We can also do some
custom buildings later on because
these are blueprints, meaning that if I go and
click on my static mesh, I am able to, for example, remove elements and
stuff like that, but it's a little
bit unpredictable, which is why I'm
not yet going to. And here are also the
tents, by the way. So those are like
things I might addi it. Oh, yeah, Blacksmith. Blacksmith is good. Let's go ahead and what you can see is I'm not actually
using my rotation snapping. I'm doing that on purpose
to almost give it like the feel that these buildings are not perfectly placed
and stuff like that. So they probably would
have wanted to place them quite close
together or quite even, but I do want to see if I can get a little bit more
like an interesting look. See? So here we have
some buildings. And then I also
need to figure out, in which direction I
want to go with this. H. I'm just already going to place this one
mostly because of guidance. So I'm going to place
this one, and let's see, this is another little store. So what we can do is if there will be a part that
is going over here, the parts will
probably go down here. I will go down up here
and it will go here. So it's like and maybe go here. So the parts will all
just go in this area. But I figured that
they would just build the buildings or the part around the buildings rather
than the other way around in these times. Let's see. I feel like this would be too
perfect. I don't know. It takes a second to, like, really figure out a good way
to place all of this stuff. I feel like, Oh, if I don't
like something interesting, it would just feel like
too perfect of it. Look, so maybe I don't want to extend the
buildings out too much. I don't want to make this,
like, a massive town. It doesn't feel like
that would make sense. Let's have like let's
place this one over here. It's mostly just like
sitting in the back. Yeah, that feels like a
little bit more organic, having these buildings
randomly scattered around like this or something Yeah, I can see this being
a civilian building, but this one feels more
like a farm land building, so it feels more
like it's something that be placed roughly a here. So I'm just looking at my screen Those will
probably come there. But what we can also do, of course, Oh, nice. Actually, this one, that's
what I was looking for, that kind of stuff to
be placed over here. It's two there, and then one
of them needs to be in view. So I'm just having a look on my second viewpoint
where I can actually have them roughly in the view. Let's do here. Like that. Okay. Anyway, I keep getting
distracted, but that's fine. So yeah, this
building over here, I guess it would not
make too much sense because there's
an entrance here. So what I will do is
I will just place this one probably a little
bit closer like this. Next, what I can do is we
have this one over here. I can duplicate it. But for this version, what I'm going to do is I'm going to click on
my static mesh. And then if I go in
here, I should be able. Yes, you can edit it
in the blueprint, but hopefully I can also go down here and
turn off the visible. It's a little bit more expensive by doing this
because technically, even though it is visible
if it is invisible, it will, of course, still,
I'm just checking here, see? At least now we
don't have to edit the entire blueprint,
so it is gone, but it will still be in memory, which basically means that we will still pay for
the expense of it, but it's not like
the worst thing. But anyway, doing this, and be careful to then go back
to your main blueprint. We can just very quickly
add some extra changes. What I can also do is I can also go in here and on this one. To invisible. There we go. There we go. So now we just
have another extra piece. Let me just save my
scene because I felt like it was slowing
down a little bit. And see now slowly
we are starting to get something out of this. So yeah, there is
going to be like just a general place over here, and I feel like having
a few buildings here, maybe we want to have a shine
shrinee can't pronounce it. Just like something
What is this? Yeah, that feels like
something interesting. So let's say we have a little bit further
away because you would think like a church area, they don't want to, like, overcrowded with
buildings and everything, so they would just have a little bit more spacing in between it. So I'm just trying to
keep thinking of, like, different stories that we can tell with this kind of stuff. This is also a nice
building for me to place. Let's see. Gonna
place one over here. So there will be
like church area. Maybe we will have
some kind of, like, stores or just like low level
assets sitting over there. And then these assets over
here are going to be here, so let's give it
a bit of spacing. Place this one down, so this is going to be really
like the fissure area. So that's something that we are going to work on a
little bit later. Now, over here, we had
stone this one over here, like the stone
shrine or whatever it is called or just graveyard
something like that. I feel like that would
be quite fitting. It feels too empty. I'm going to have
I'm just trying to keep thinking of,
like, different places. So it's good that we
have empty spacing here, and then we'll have the
docks and the stones here. That's fine. Same over here. Over here, we will
have a small spacing that will link to this building. So these two buildings are
going to be linked together, and it will just be like
a clutter of buildings. But then I feel
like that this is, you know, it's too thin. I want to get something there. I know that if we have
some buildings here, so maybe move this one
a little bit closer. Let's see is there
anything else we can use. I don't see anything
specifically. So we could still use this one, but where are you? There you are. Well, I'm going to just going to scale it down a little
bit and maybe place it, like, sideways a bit. So that is fine, but then I want to have, another
building here. Maybe we can go for, like, a larger building in this area. So what is this one?
This is just Oh, that's Oh, that's
the same as those. Okay. Um, maybe, farming
areas will be over there. So I think let's do so
we have the church. We already use this one for, like, the center point, so we can do that. Maybe this. Yeah, I feel like
that could work. If we place one of
these over here. And set it like a
little bit higher. So this is like its own little town or
something like that. And then at that point,
these buildings start. So we got this
one. That is fine, although these actually
also look like arches. So I might just
actually want to also place one of these
buildings somewhere here. But I forgot which one this was. It's a bit difficult to
see from. A distance. No, that's like the honey stuff. Blacksmith. Ah, S No,
that's not the one. Sorry. What are you called? You are called D two. I can, of course,
just go here and find in a browser to asset like that. That's
something you can also do. Yeah, I would not have been
able to probably find that. So we got this one over here, and let's make this one
like they made it straight. So there are like
the living quarters, and then we have
these ones over here, and they just kind of
like place it here. And then over here,
there's just like a large trading ground. So I will work on the
trade materials for that. But anyway, so we got this
stuff over here also done. Now I will focus a little bit on the farming area because
I do like that one. I want to use it,
this one over here. But I feel like that it would not be too
close to the sea. To be honest, it's a little bit tricky because you would not technically grow these
plants next to the sea, but maybe we can do something. Actually, maybe we can splace it over here in
the far distance. Like that or maybe two
next to each other, and you probably barely will
be able to see them here. But there are like now some
farming areas over there. I feel like that's probably the best because it would
not be too logical to have a farming area
literally next to a lake or the sea or something. If it is a river, then it
would make sense because, of course, the rivers they
can kind of flow there. We could swi river,
but once again, I'm worried that then just
the rain starts to mess up, so that's something to think
about a little bit later. Now, all of these
place over here. I do not want to have large
buildings in these ones. I just want to get, like,
small compact buildings so we can have like this one, sitting over here
and just kind of like further back, maybe. Then let's see, we have, that's the large shipping stuff. What we can do is we can
have this one over here, which is under construction. And then I remember that we also have a building
under construction. What I can do is I can
also almost make it like, Oh, yeah, they are
creating another building. And let's see if I
would be in this area, would I make the
building aligned to the water or would I make the building aligned
to the town? I guess I'll just go for
whatever composition is nicest. So if we have this
one over here. Um, I'm just having a
look on my second screen. I can actually also show
you what I'm looking at. I'm just looking
at this. Et's make this go a little
bit further back. Yeah, I feel like these
ones are actually better to be placed around here. Because it is a slightly
bigger building, but it is still doable. So we got this one over here. The Blacksmith is
like over there. I don't need to have
another one of those. I can use this one
that we edited. And I don't know, this is actually a tricky area, and now it seems easy. But just to think of something
interesting without making everything too crowded is
actually quite tricky. Maybe we can do something with, like, the age of the buildings. Like they would not
break buildings down. But this is like a new style building almost because it has,
like, better walls, and it is just being placed
with the big buildings while these ones are just like old shacks or whatever
it is called. And that we can use there. So let's do another
one over here, rotate it around to give it a little bit more variation
and push it up a little bit. Okay, let's have a look
at the camerangle. So we got this stuff. I want the buildings to actually almost go
outside of view. I feel like that would be nicer if we do
something like that. So we almost want to just have them go up until this area. So we need to have
buildings that we can use over and over again. These buildings would
not make too much sense because even though this
is going to be grassland, it is so close to the water, and if it happens
to be salt water, green grass would not
grow as easily like that. So it's that kind of small stuff that I am thinking about. Don't know if I maybe
want. Nah, let's leave the military stuff. Let's do another one
here, another one. L over here, and maybe
even another one here, and then I can, for example, just make some changes. So with this one, I can go into my static mesh. I can, for example,
click on these type of meshes and let's say that we get rid of that piece over there and maybe we also
want to get rid of this one. Something like that. Now we have already a slightly
different building. And someone's like, Yeah,
this is a fisher town. They are just living here. Am I fine with it going straight or do I want to go
with the curve? And it's more like just, like, it's not so much being
built by the town. These ones, they are more
built by people themselves. Let's do something
like that, maybe. Yeah, I think something
like that is fine. And then over here,
I do want to also, like, get something interesting. I'm just having a think about
what I can get for these. Maybe I can get one of these, which actually have the
bees and everything. Yeah, I can see from my
second view that it would be nice to have this one
roughly sitting over here. And I don't know. Maybe
like another blacksmith. At this point, there
will also be fog and everything to kind
of block the view. So that might be better like that they
started improving this area. So let's see. So yeah, you are into town. You balk past the shipping
stuff and they are building the ships
and maybe I can have, another one over here. And then for this one, I
can let's have a look. I can maybe, like, get
rid of this stuff. And this stuff over here,
and this one over here. Let me guess this is
just an entire piece. Yeah, okay. So that's
an entire piece. So maybe it's best to just keep that one because
else you would not really know that this is like a shipping construction area. But, you do want to twin and get a little
bit of variation. I'm also going to place
this one a little bit closer so that for
our camera angle, it feels like it is quite
closely packed together. I think that will look a bit nicer if we do
something like that. So over here, we have that one. I'm going to have this
sitting next to it. And this one might not
make too much sense, but it does look nice to
have a longer building here. Maybe I can find a building that does make a
little bit more sense. This just like the
military shipping. Yeah, maybe it's just like another important building
sitting in between here that takes care of all the repairs or
whatever for the ships. And I don't know. It's just outside of you, so
it's nice because it just shows like a larger building
sitting just outside of you. If we go to our
camera angle see. Actually, no, I don't
like that, to be honest. No, I don't it might, it might look nice over
here in these areas. But in these areas, I just
want to get something a little bit lower and a
little bit longer. It's way too large. Yeah, maybe like
one building like over here, and I don't know. Maybe like another one,
a bit further along. Let's do something like this. So this buildings over here, and then this building,
they just start to, like, already build it over there because they
want to extend it down, something in
that direction. So we have this one. That's
already sitting over here. Yeah, that's looking
nice. So all of a sudden like an isolated building
just sitting there. And then over here in the
back, we have some buildings and now what we can do
is we can focus on this. So we got this area there's going to be
the piers over here. Now, over here, I
don't know yet. I want to get some kind of like a shopping or like a fish
market, something like that. I just don't know if I
have enough assets for it. So that's something I will need to do like a custom built on, which will take much longer than just
placing the building. So that's something we are
going to have a look at. Over here, yes, we
have our military and we also have
those military ships. Here they are building
the ships and I know, maybe I feel like there's something that needs
to be in this area. I have this house
under construction. Maybe I can make it a
little bit smaller. And if I have a look, if I place it like this, and then maybe I just remove
a bunch of pieces from it. Oh, A, I don't know I don't know why I'm doing it
like that because I literally have a second
viewbard so I can just have a look and I just want to have this
sitting next to the view. So let's do something like this, and then let's go
into our blueprint, and let's just hide a
bunch of this stuff. So we can get rid of all
of this stuff over here. I just want to hide it
because it's so unique that we will know right
away if it is used. You can also or you
should be able to multi select, then turn them off. There we go. Also, you
should also be able to Oh, I don't know why why I did that. You should be able
to, like, move pieces around also inside
of the blueprint. That should be no problem.
So having that one done. You'll see that fills up that empty space just
like a little bit, and then we can probably just
build some stuff around it. And, of course, over here, we will have the
piers and everything. So it's starting to
look quite nice. We already have a building
sitting over here. I feel like our center
building is being a little bit clouded
by this one. So maybe push this one
further back over here, and then we have this one, and if I just pass H to hide it. Okay, so it is good
to have it there. But it almost feels
like that also becomes the center bit. So maybe change our
camera a little bit. But I don't know yet. That's something that
we are going to work on a little bit later
with composition. So first of all, we are going
to do the base buildings, and now we are going
to start working more and more on the
composition to get something interesting
because right now it does feel
like they are just a little bit like a bunch of different buildings scattered
all over the place. It's not yet what I like, but
it's a good starting point. And that's what happens when we just try to make up
stuff as we go along. So let's go ahead and finish off this chapter, and
in the next chapter, we will go ahead and continue on just working on this area, and then we will start
working on the top.
8. 07 Placing The Rest Of Our Buildings: Okay, so let's go
ahead and continue. Now, what I want to do is
right now in this area, I feel like there's too much
different stuff going on. So first of all, let's go
ahead and go over here. And this is also
quite important. Like, I want to add variation, but I don't want to just have so many different buildings, and I only realize that
after really looking at it. First of all, what I will do is, I'm actually going to
move this one over here and I'm going to
move it a little bit closer because I feel like that, as you can see over here, that might look a
little bit better. It is sometimes nice if I just go into my
camera angle and just ty it from this angle over here. Also I'm going to later on make something that I
cannot see through it. We got these pieces
over here, that's fine. Now, what I'm going to do
is I'm going to actually replace These ones over here, we just like these
buildings over here. I'm going to minimize the
variation a little bit more. We got this one and actually, let's do these two
buildings over here. I'm also going to have let's say this one maybe rotated
and maybe placed over here. Let's move it a
little bit forward. Let's move it down. Okay. Just going to
have a look and see. I feel like this one would be better if we actually place it like this so that there's not too much stuff going on with the small stuff
sitting up here. Okay, so we got that
one. And then over here, we have this specific
building that is fine. And then I'm just going to
have another one sitting. So I'm just having a look at my reference to see if I
can get some inspiration. Because, of course,
this reference, it's not really a town. It's just a few small
houses here and there, and they are way
more spread out, but I want to have
something a little bit more in, like, a dense area. So I'm going to go for say, two of them here, probably. One And two. Okay, so we got that stuff. Now what I want to do
is, let's have a look. For this one, that's the same
as this one, right? Yes. So that's the same as this one. So I'm going to delete this, and I'm actually going to use this one because it's a little bit easier or a little
bit less crowded. So this one is going to be over here so that
they're still like a part. So there's place for
a part, but it will be a little bit closer
together and everything. And then this version over
here, this is a tricky one. I feel like that if
I do it like this, it feels too modern. That's something
that we would do in the modern day and age. But I guess I should
also just make sure that everything looks
interesting and looks good. So maybe this better
if I do it this way. Yeah, there might be some
silent moments where I'm just thinking about stuff
that I can do. I feel like something
like that should work, that is starting
to look already a little bit more uniform
and more interesting. Maybe move these ones
a little bit forward. And then, yeah, yeah, I think something
like this will work. And then over here, we will
just once again just have some low level assets like
Fisher towns and everything. And then over here
also. So that's good. So we got these ones. We got
this stuff going over here. I'm happy with that.
We got this one, so we will have parts
sitting down there. I'm going to have probably
one more building. Over here. And then place this one
a little bit forward. Yeah, okay, so that looks
a lot more interesting. Okay, so we got that
stuff also done. We got, like the
backside building. Over here, it's
fine to just have nothing there to also have
a little bit of spacing. But okay, so I quite like that. I think that looks quite nice. This one over here, I'm going to move a little
bit further back. So I'm now just trying to
work on my composition. So when I have a look at this, I will be looking mostly. I kind of depends
which direction I go. So over here there will
be stuff going on. So I will mostly be
looking at this, so we get a little bit of, like, a golden spiral effect. And it just kind of
depends in which way that you want to look
for the golden spiral. So this is going to be
like our center point, but we have, all of
these extra bits and pieces sitting over here. So you would probably
just be looking at, like, the central area when you first
look at this environment. And then here. So once you've seen
your central area, you will look over here and like your churches
and everything, and then you will look
down here and you will look into the
military area. So that's like, kind of the flow that we want to get
when looking at things. So we got this stuff over here. That's pretty good.
I think I'm going to leave the buildings
as they are right now. And then over here, I also want to go ahead and
so we have our church, and I just want to make
it like a small town that is kind of like scattered
around in certain areas. So that would be what
that would look like. Maybe I can also actually have one large building sitting like, very far in the back over here. Um, see, that might be tricky
because on camera view, it just shows like a point, so that will take way
too much like the look. I don't know, maybe, but if
we place like way further. Nah, that does not make sense. Let's not do, like,
a larger building like that, but we can try maybe, like, a smaller building
or something like that. See if we have yeah, so we can do a smaller
building over here. Now we have our farms. I can just duplicate
it and I can have another farm sitting out here. And at this point, this is
so far away from the camera, it doesn't need to be perfect. We can just place like a
bunch of buildings here, and as long as they look
a little bit similar, it should be totally fine. Well, don't go for, like,
ships or something like that. But now we can go for here
we have a building here, and then we can have
another one just sitting here and maybe another
one sitting here. And let's double check the twain and push the
stuff down and everything. Oh, that's going to
be a lot of work to basically make the
train fit everything. Then we can have a
Blacksmith over here. Maybe like a church tingi over here, which
you can barely see. You can only see like
little tips of it. And that's what I
want. I want to just basically be able to see, like, the tips of
these buildings. So we got this one over here. Let's go ahead and duplicate it. Let's rotate it around. Here we go. So we
got those pieces. I just go to place this
one over here also. And I'm just doing
this completely random because what I'm
looking at right now is mostly just what it
looks like from a distance. So you can see that if I now
look at it from a distance, you can see that we just
get a few small buildings, and I'm just trying
to basically fill in these gaps in places that
I think would be good. I can't completely fill
in the gap over there, but maybe I can do,
like Another one. Yeah, over here, that
looks pretty good, and then let's delete this one. So, let's have, like,
something like this. So it's just going to be like a few buildings scattered around. Maybe this is like the
old town, so to speak. This one would be in, like, a special location if we
do something like that. So maybe like over
here, honestly, at this point, you can't
really see it anymore. So, maybe something like that
looks quite nice. Oh, okay. And over here, I'm just going
to because I think that's pretty much all of the
buildings that we have. I guess we can have,
like the militaries, maybe also just sitting
here and or located. But if we do that, it would not merely make sense to
have them over there. It would make more sense to have them just
outside of town because they would not want
to annoy the civilians or, like, be in the dead center of, like, the city town. This is more like
a place where over here, you can nicely walk. You can just go to your church. You can just admire
whatever this thing is. Let's make it a bit smaller. You can go to the blacksmith,
that kind of stuff. That's what I'm after. This one I don't feel
like it would be. Correct. This one also not. I need to have
something in here, but I don't think there is much let's make it like
a larger building. Maybe that will
work. Here we go. So it's just like a larger
building like this. I know that this is more
like a military building, but honestly, from this
distance, you will never see. And this is not really
the town that I will be spending a lot of attention to. It's more like
something that yeah, you can see maybe like over
here from this distance. But for the rest, that
is looking pretty good. So we got, like, a nice little town
sitting here in the back. Maybe push this one
back a little bit. So, yeah, that's
looking quite nice. Now, one thing that I would feel like on a village this high up is we have like these
garts over here that are like individual
Oh, no, wait. Sorry, that's a
well. Yeah, well, is also like, something that
you can place over here. But I can't remember
that we all said like, gart and else I will just rip
it off from something else. Okay, looks like that we do not have the guard towers I
wanted, but that's okay. So what I can do is I can
have like this one over here. And then what I'm going to do is I'm just going to go
into the blueprint, and I know that it is a
little bit time consuming. But let's go ahead and just turn off a few of these areas. That's too bad, so it looks like this one on the weight,
yes, I can select it. Nice. Let's turn these off also. This one I need to keep. This one I can get rid of Okay, there we go. That
should do the trick. So we now got this
guard tower over here for which we can
place, for example, one over here, and it's just to keep civilians safe and
just looking over the area. It doesn't need a while. So I feel like let's just
say that this is in peacetime like
there aren't a lot of enemies around
and everything, but I do want to just have the guard towers so that they have, people standing here and just protecting everyone, as
you can see, like that. And it just shows
like these little on cameras but just show like these little dots
here and there. I feel like this one might actually be a little
bit too visible. So let's push it a
little bit further back. Which is ironic
because, of course, the guard tower would be
visible because else it wouldn't be able to just show everything or see everything. But okay, I think
this is pretty solid. Let me just have a
quick think about it and also have a look. So over here, yeah, here. So even they also like a
little town, of course, my town is a little bit bigger, and they really went for, like, the militarized zone
over here with, like, having all of the walls, sitting
all the way across here, and then just having all the
focus on the actual Yeah, on the actual ships and everything and it's
not so much fishing. It's all military, which
is not what I want. And then they have,
like, the main building. So I think something like
this is looking pretty good. I'm just going to sometimes hide a building purely to
see what it does. Which is often quite
nice just to see if it adds more value or not. But this is looking pretty
decent, to be honest. Yeah, you'll see, not
having this building. This building really fits there. This building also really fits. Yeah, I do want to have
these pieces over here. I think I'm going to leave
it at this right now. Yeah, I think that is fine
if we just start with this. So what we're going to do
now is we probably just want to go ahead and work
on the train a little bit, and that will be the
end of this chapter, just making sure that all of our buildings are not
floating and stuff like that. And once we have done that what we will do is we
will probably start working on already like
the train textures first and just getting
the actual train done, and then we will start
working on our rocks and just like a peer and everything and
take it from there. So for our train, we pretty
much to go into landscape, make sure let's do a new one. Let's do a right click. Sorry, my keyboard
shortcut is in the way. Create, right, click Rename. And just call building flat or whatever,
something like that. And now we will mostly be using our flatten tool
where we basically find a location like this and we pick our
flattened target. Let's first of all, make a brush size also
quite a bit smaller. And then what we can
do is we can just go ahead and we go
flatten this area. You can see over here.
And then later on we will do a pass where we will just move the buildings
a little bit. And of course, we will also do some smoothening if needed. So that's the
general idea for it. So you go here, you pick your flattened target and then
you just smooth this out, and then later on we will just smooth out the train
to make it feel like they nicely flattened
out all of this area. I think it is best
if we actually also just continue on
this area over here. Like they just made this
entire area fairly flat, and then maybe over here,
we can do another one. Because I don't want to
have too much elevation between buildings that
are close together, that would feel a
little bit strange. Like, over here, you can already see that it's quite extreme, but I guess over here, that's fine. There we go. And you can see that I
have my tool strength quite low so that I can
just have a proper look. So something like
that, over here, we can do the same like this. And then although tents, they would probably not actually flatten the ground for they
would just place them on top. But in our case, we don't have that luxury
unless we would want to spend a lot of time just fixing the tents and everything. But yeah, let's say that you would have
something like that, you would then go back
to your select mode. And for these areas, you would just tone
it down a little bit, same over here, tone
it down a little bit. And basically just flatten or place your buildings
based upon how they are currently located. Don't worry about LLD,
that kind of stuff. Those are small
problems. Like, we can fix that a lot later. There you go. And now they do
actually look a lot better. So we got that stuff done. So now what I will do is I will just go ahead and kick
in the time naps, and then we will just flatten
all of these buildings and place them all together because that is a little bit
overkill to do in real time. So let's go ahead and
kick in the T naps. No.
9. 08 Adding Our Terrain Material And Textures: Okay, so we are starting to get quite an interesting
looking village over here, if you just ignore
all of that stuff. So yeah, that is
looking quite fun. So as you can see in the times, if you have watched it
from the previous video, I just went ahead and
I just made sure that the train was pretty good
for, like, all of them. And now what we can
finally do is we can start by adding our
train material. And for that, we are
also going to, like, import some materials and do some train painting and
all that kind of stuff. So just a disclaimer, I have not used this
material before. I wanted to go in blind to
show you the reality of creating environments and be one of those guys that
just immediately like, perfectly knows
exactly where to place everything and the perfect
composition because I feel like that would not
really teach you anything except for how to play
stuff inside of reel. So Stack studios, landscape
materials, outto material. I believe this is the one. I do hope that with the
auto material, I can still, paint in custom
stuff, but we will see. So we have the au material
instance over here, and I think we can just probably use this
one if you want, which you can is
in your tutorial, let's make a folder
called materials. And then if you go into
your out material, you can just click and drag the instance over to your materials folder and
then just press copy here. And then it will
make a nice copy. So we can go ahead
and we can click on our train and now we can just swap out
this material again. And we already did
here, as you can see. Yeah, so it looks bad, but that's something that
we're going to work on. We already went ahead and
we went into landscape and already assigned all of
our materials over here. Now, the thing that I oh, sorry, it's slow because it's trying
to update the shaders. So yeah, right now, this would
not be very interesting. So there's a bunch of stuff
that we need to work on. First of all, I just want to make sure that if
I, for example, click on the dirt, this layer has no layer. You must assign
layer information. Oh, it's none Okay,
that's Oh, wait. It's because of
layer one or not. No, okay. Fair enough. I swear that I already
assigned this. So you just want to
go down here because all of these layer infos,
it already created that. You create that when you
create the actual material. And that's just like something where you
just press the plus and then you just add
like a random layer info. So it's nothing too special, but we will not go over it. I can see like a
little bug over here, I think, where it is
not able to properly. So that's just like
one of those things with unreal here. You see? You can see that it's not
able to properly add anyway, so I want to click on dirt, and I just want to make
sure that if I paint in dirt, Okay, perfect. So we can do custom
painting, totally fine. Okay, so what I want to do now is let's just go
ahead and first of all, dive a little bit
into our material. And there's probably some slope options and
stuff like that. And after that, we
are going to grab some custom textures because these textures are
not very nice. To be honest, no offense
to the creator of it, but yeah, it looks a bit flat. So auto foliage, we do not
have auto foliage on here. I already had a look
at it and it's broken, but we can just do manual painting. That's
no problem for this. Oo material over here. So we have some blending, and then it looks
like that we just have a bunch of dirt metallic, it has a little bit of,
let's see, distance. Okay, so it does not have
a height map, I believe, because the height mapo nuts
work in real engine five. So these all look
pretty much the same, and it looks like
all you need to do is swap out the materials, and then you can play around
with your roughness value. So that seems quite easy. Sand snow. Okay, yeah, so it's straightforward
material. Nothing too special. That would
mean that if I go in here and I said this a little
bit stronger for example. Okay, so that will
change the angle. So if I set this to,
for example, ten, it will show more rock, and if I set this
to like 20 again, it will show less rock. Then we have this
one. Let's see. Oh, yeah, you need to release if you want to be
able to update it. So this one really
focuses on the angle. That would be good for this
kind of stuff. You'll see. So it looks like it focuses
mostly on the angle, but that's not the
one that I want. I want, there we go. This is the one that
I want. Here see. So you can see that
the blend sharpness and the angle of our grass, let's set the
sharpness back to 20. But I want to just see if I can work on the
angle of the grass to get a little bit more dirt
exposed around the tops. So -12? No, minus eight. Wow, that's really
sensitive. Minus nine? Yeah, I guess minus nine works. And then for these pieces, I want to start by adding some extra rock for which
I need to go in here. Yeah, let's do like -8.5. So we get little pieces of rock, and how does that look
over here? Yeah, okay. See, so we got a little bit of rock being exposed
in these areas. That is looking pretty good. Yeah, I can live with that, so we got some rock, and then of course, we have
our background. So we also need kind of like
matches with the background, but of course, we
don't have really interesting lighting right now. That's something that we're
also going to work on. For now, I believe that
the lighting is fine. I don't think I need to do an
entire lighting pass first. Let's see, have a
background, models. I'm just going to art
all of this stuff. Which we have over here? Let's go add is to our model, so to make it a
little bit cleaner. Let's see. We have our
directional light. I don't know where it is.
It's all the way over there. It might be easier if I just temporarily move it closer
here so that I can see it, and then the rest I
don't really care about. So the reason I want to do the directional light over
here is I just want to change, like, a few very quick values. So they change the position
of the light color. It is now down here. And what I'm going
to do is, I'm just going to give this a little bit. I think I want to go for
like a sunset later on, not now, but just like later on. For some reason, it's
really sensitive with, like, the moving, see? That's interesting. But
I do want to already get the color in here a
little bit so that I know how my materials
need to look. Next, if you press G, you can go into game mode, and then we can
kind of see this. So we can, for example, go and already, like, rotate our sun
around to maybe get like let's do like 0.3 or point Oh, sorry,
that's a sort angle. That's force of habit because they change the intensity
down here again. Four, five, six, four. Yeah. Let's do five. And then I'm just
trying to see if I can get some
interesting shadows. Pushes back down a little bit. Something like this could
be quite interesting, actually. Something
in this direction. Maybe let's set the intensity
to, like, three, four, 3.5 and let's set the light
color for now to be a little bit less orange because
it's a little bit tricky to see with the
rest of my models. Yeah. Okay, let's do
something like this for now. We also have our skylight. And if I said that,
for example, to zero, yeah, it becomes really dark. It uses real time capture,
which I guess is fine. So let's do 0.5. 0.7 maybe. And then another one
that I wanted to do is for our reflections. We just want to go down here, and we need to add a
light. Where are you? Visual effects?
Yeah. Visual effects and sphere reflection capture. And this will basically
make sure that all of our reflections and
everything are correct. So what we can do is
we can push this down here and just set this value
to be like really high, so we are going to go for like 20,000 something like that, see? Just for now, it's
just going to be a W willy high value,
something like that. And that should do
the trick for now. So we already get some more interesting lighting and everything. Okay. Awesome. Now, if we have a look
at our train, yeah, we are going to go
for grassy plains that have a little bit of dirt, and then it will also
have some rock in here. So we need to have a
proper dirt texture. No way, two different dirt textures that are quite similar. We need to have two different grass textures that
are quite similar, a rock texture, and
then a sand texture, and we don't need
to snow texture. So this is where
Mexicans comes in. We can save scene give
that a second to save. Takes a bit longer than it did in Unreal legend before, but, okay, go down here and let's grab our Quickle
bridge over here. And I probably need to log in. Yes, so let me just
quickly log in. Okay, so I'm logged in. And now, as you
can see over here, we can go ahead and we can
find the surfaces we want. Also, the Tundra
is actually really interesting because it's roughly
what we are looking for. So let's keep this in mind
that we have these pieces. I can see like mossy
ground in here, but maybe it's best if
I go ahead and yeah, I probably want to
just go to home, then go to surfaces. And then in here, we
need to get started with a two dirts. And dirt colors are
going to be yeah, so we want to probably go for ground or soil. Let's do soil. And then in here, we can just try and find something
that's quite similar, but not too intense. So we got, like, some salt covered rocks that
could be interesting. Let's do and when I say intense, not something like too
specific or too light. And also, of course, don't
do something that's, like, a forest stuff in there because it would not really make
sense since we have pretty much no trees in
this area. Soil ground. And also nothing with tire tracks and everything,
of course. Okay, here we have, like, some mossy rocky ground
mossy rocky grounds. And I feel like that
might actually work. Only for the dirt parts, it might be that bit tricky. So let's keep those
ones in mind. Because here we also have
some more intense dirt, like you can see,
dry rocky ground. That one might actually work
better. Now I look at it. So dry, rocky ground, and then we also have dry grass. So maybe those two over
here, trampled, loose soil. It has a bit of tire
tracks in there, so that might not
be the best one. But yeah, there are so
many choices in here. So we will need to have a look, but let's go ahead and Yeah. Let's try these two first. So when you have decided which one you want,
I want to have, for example, the dry rocky ground. You can set the quality. Now, I'm just going to
go for medium quality, which is probably
going to be like two K resolution, uh or not. Yeah, this one is high quality four k resolution
highest quality is like eight K resolution. But honestly, two K is fine, maybe high quality just
for the fun of it, and then we can go ahead
and press Download. Same over here, just go
ahead and press Download. And once those are
done downloading, which it's surprisingly
slow, but okay. I will just pass the video. Once it is done downloading, then you can just go
ahead and press art and then it will input
it to the engine. Okay. So now we can just
go ahead and press art, and then it will add
these materials, and then we can go in here
and we can do the same. So those are now added. Now at this point, I will
just already show you how to work with this so we can go ahead and
we can close this down. Now, this material,
it looks like that it is using the roughness, height, and ambient
occlusion into one map. We don't have height
because real engine five, we don't have an AO map also. So maybe what we can do is we can hopefully just plug in the roughness and
be done with it. I'm not sure how
the AO will work, so we will kind of,
like, have a look. But here we have a
dry rocky ground. So all you need to do is you
need to just go in here. And it looks like
it is just using the same for the distance and
for the vast. That's fine. And metallic being
white is also fine. So although white is one, you would think
metallic is zero, or did they just
turn it? In here? Oh, yeah, here, so they
turn it off in here. Even though it's using
a white texture, they sell it to black. But anyway, let's go ahead
and have a look, for example, where there is some
ground or some soil, and I can go in here and
I can just track this in. And now you can see
it's already updating. I have some shadow
problems over here, which for some reason,
are not yet updated. But here, that's already
starting to do something. So we have these pieces, and then this one
uses the roughness in the second let me just check. Embclusion is in the red channel and the green channel
is roughness. We can probably swap that
around if I use this one. We can probably go
ahead and just find the original and hopefully, it's not too complicated. All I need to do is I just need to cycle back to where we have our actual texture maps. Let's see. We go here. You swap out the embitoclusion, then you swap out your
layers, which is fine. Then over here, you turn
this into your outer ground. And if I just double
click on that, the outer ground goes in here, and this is where I
found my materials. And, so it has it has one
for every single thing. So out of ground rock, pretty much, I think all I need to do is I just
need to open them up. And 1 second. I'm just checking what
we had for mega scans. A is the red channel, and roughness is
the green channel. So if I going here, A
O is the red channel, roughness is the green channel. 1 second. Let me just
You know that because I feel like something
went wrong. Oh, no. Okay. Red channel green channel. So that should have
swapped around. Yeah, I want to save
it. That's fine. And now over here,
we pretty much just need to do that for all of them. So green channel is going
to be roughness and the AO channel m
is it just Okay, so this time, there's
nothing in between the AO. So that's nice and handy that they did that. So there we go. So we can also go ahead
and save this one. And now I'm just going
to open them all up and I'm just going
to change this around. So yeah, you can just alter
the material to your liking. So here we have dirt,
one, dirt, two, grass, grass, two, which I
already edited, send one. And then, I guess,
no, I will also do. For some reason, it opened up in a different window, but okay. So roughness, AO, and then I will just later on save them
all at the same time. So roughness. Oh, it would be nice if the material creator
ever sees this, to give options to just make a switch or to at least follow the mega scans because so many people
use mega scans. Nowadays, it's just nice if you follow the mega scan outputs. But okay, so we have roughness again and then ambient
eclusion in here. And then the last one
roughness ambient seclusion. Okay, at this
point, what you can do is you can pretty
much close this and then just press
yes on everything, and then it will
immediately save. Although I could have just
also saved the main engine, but it's too late now
because I already pressed save on here. Hey, so we are going to
swap out these materials, probably balance them
out a little bit, and then we will also
rely a lot on foliage and rocks to make everything fit together a
little bit better. Not to mention, of course, we will have lighting
and stuff like that, but that will come
a little bit later. So yeah, we can also save
our master material, give the second to update. And while it is updating, I can just re open my Oh, hello, my material instant. It's preparing shaders. Is it not working yet? Yes, no. Did I do something wrong? 1 second. Physical material
needs to be built. Just go ahead and
build our levels. A? So the reason that it is dark is that we have a
few arrows over here. So with our height
map over here, we just want the
right click and then break Link two so that we break these links because we no longer need the height map since we don't have those
from mega scans. And I'm just going to
also nuke out all of this stuff that I do
not need Tesilation. I don't trust ambient occlusion, so I'm just also going
to get rid of that one. And then I believe that probably the next
problem that we have is, or it has to do with
our world position offset, but I don't think so, as you can see, so it is see, you can see that there
is a texture here. I think the problem is
that now, of course, they still use the old maps, and maybe the old maps have something in there that
is causing the problem. So what I want to do
is temporarily just apply our dirt map to
all of this stuff. And we can do that easily by
going into our Mega scan, and let's just use the grassy. And then if we just
select this one, you just want to go into
your material and just press this button over here and it
will automatically apply it. And I'm hoping that
that fixes it. And if that doesn't fix it, I will need to have
a look because it's not like we did anything really special with this. You see? Feel then it is most likely that there's
something going on with our displacement. Just for the fun of it,
I'm going to get rid of this normal slot just
to see what happens because I can see that it is not it's going from a
specific slot to the normal. So if we go see. Yeah, you learn to recognize that
kind of stuff in a while. So also some shadow proms, but I will go ahead and
see if I can fix so soon. So yeah, so now we
don't have a normal. So it looks like that it uses the world position offset,
but I don't want it. I just want to use my normal. Can I not do that? Is this for some reason plugging
in our normal into. No, it looks like it's
plugging it into, like, just a normal slot. The world position offset. The reason that I noticed
that so quickly is because this one is a little bit buggy inside of Unreal
engine five lately. And also with rate racing, it's also often
buggy. There we go. So now we have our
normal back. So it is strange that it
gave us that problem, but okay, so we have
our normal now, so hopefully that will
just fix everything. It is looking pretty decent. What we're going to do
now is we are probably just going to gather
the rest of our assets. This shadow problem over here, it is most likely a problem
that has to do with our far shadow maps or
something like that, and it's something that we
will fix a little bit later. So I know that we are a
little bit over time, but I will go ahead and just still do this in this chapter where
we go to surfaces. And now we want to
go for grass and I quite like having something
like a mossy grass. So soil. No, it's probably underground. Mossy forest ground. No, that's not exactly
what I want, but, I get that it is
like mossy ground, but it's not the ones that I specifically want, I believe. Yeah. Where are you? There should be like grass here. Gravel. Oh, yeah, here, grass. Interesting that I use a dead
grass thumbnail for grass. But again, dried. Let's do wild. So let's go in here and let's see if we can find like here.
That's more what I want. So just some not to
light mossy grass, and I want it to be, this
is all like really small, so I'm not super
happy about quality. Mm, this one, mossy grass. If we use this one
together with, like, patchy wild grass,
maybe that can work. Let's just have a quick look
because there's down here, there's, like, really
intense grass, also, clover patches, dried
grass, forest ground. Let's try this. Where are you? I think it was this
one, wild mossy grass. No way, these two. Okay, I'm going to go ahead and I'm
going to download this one. I'm going to download this one. I'm going to also
then go in here, and I want to
download. Let's see. We have our Wildcrass
and this Wildcrass. Let's also do this one
and this one because I'm not completely
sure if we want to go for something
super intense or not. That's always a tricky
thing with grass. Grass is not always. Well, it's just a
tricky thing to make look good inside
of a game engine, but of course, we
will have actual grass foliage on top of it, which will kind of like
compensate for it. Unfortunately, we
cannot use grass that is specifically made to go on terrains because
then we would have, like, no palms with, like, the masking, but we are just going to do it by hand
and should be fine. Like, nothing too special. So I out saving
while doing this. I would just pass the
video until all of this is done. Okay. So they downloaded, and I
also already ordered them. So now I'm quite curious to see how this is going to look. So I'm just going to
basically drag those on here. So first of all,
we have also DRT, which is one that I
completely forgot. So let me just for that one, I wanted to use the dry grass. I'm just dragging it
on my other screen. I'm sure that you by now
know what I'm doing. Yeah, I know that shadow problem is a little
bit annoying, but that's something
I want to fix when we actually work
on our lighting. So here we have our d two. And now, what I'm
going to do is I'm going to go down and we have our grass one and grass two. And I'm quite curious. Does that one only use,
that's interesting. So use only one grass. Yeah, I'm quite curious to see
how this is going to look. We have our mossy grass over
here and our patchy grass. Let's start with the mossy
grass. Drag that one in here. And then I also want
to just drag in my patchy grass to the next one, and let's just quickly
also add our norm maps and our roughness maps. And then we can just
have a good look and see if this is
what we want or not. Yeah, that is
actually quite nice. Of course, it's a little bit everything is just a
little bit yellowish, which is what we
need to work on. But I feel like in general, this is looking quite
realistic except for the rock. But just for the sake of, of course, making sure that
it looks the best we can. I'm also going to art wild grass over here. So I'm just looking
on my other screen. Okay, so that's this one, so No, you know what? I think I like the
patchy grass more. So let me just do
this so that we have our Mossy grass over here. Okay, cool. So we have mossy
grass, patchy grass, rock. Oh, that's interesting. So they actually add moss on
top of the rocks. I guess for the
moss, we can just go for maybe like a wild grass or something
like that for now. And let's go in
here, quicks bridge, and then we just want to
get something that's rocks, and mega scent is really
good with rocks often. So let's go ahead and find rock. And let's scroll down and
just have a look in here. Mossy rock. Yeah,
that feels actually. Yeah, you know what? That
might actually just work. So let's just do this
one. And let's see. So we have that one, and
then we also have sand. So let me just wait until
this is done downloading. Okay, download it and added. And now we also want to
have something with sand. And we don't want to go
for, like, beach sand. We just want to
go for just like, Well, here we have sand, but
that's more like desert. So let's go for soil. Over here. And then if we then
go for, like, Sandy, maybe we can find
something dry, trampled. Oh, that can actually work.
Yeah, let's do that one. Like, it's a little bit dark. It has a little bit of foot movement and
everything in there. I can see a tiny bit of, like, tire tracks or, like, bicycle tracks, but
it's not too bad. So I feel like that we can get away with
something like this. So this is the last one. It's going to look pretty cool. And then we will end this chapter once we've
added these pieces. And then in the next chapter, we are just going to probably
start by placing our parts, doing like a foliage pass. Yeah, here, this is
also quite interesting. It's not perfect. I do
want to work on it. So then we will do a No, wait, we are going to work
on our docking over here. But I might just want
to quickly do like a lighting pass before
we do that stuff because right now it I don't like
looking at something that looks really mare and right
now it is looking a bit. Okay, so here we have our
rock which is looking, it's looking fine to me. We can balance it out
a little bit later. And then we will have
our dry grassy ground, dry trembles. Here we go. This is our sand. There we go. And then we will have
our sand over here, for which we cannot
really see it, but if we would go
and close this down, save our scene,
Can, you can do it. And then, for example,
go to landscape, and then if we go
to paint, for now, I will just use a classic paint, but we are going to
use like pas later on. So if I go for just
like the sand material, like a smaller brush size over here and like a lower brush ff, you can see that
when I paint it, we just get some send,
and for some reason, it's really light here,
but I will fix that. But, yeah, that's interesting. I don't know why it
is so light, but that's something that
we can also work on. Okay. Awesome. So that
stuff is working. That's totally fine. Having that done in the next chapter, let's go ahead and
let's first of all, do a quick lighting pass. And after we've done
that, we can get started and just placing all of our docks and our rocks
and everything, which is again, quite
an intensive task. But I feel like from a distance, except for that the
lighting is really ****. It is looking quite nice. So we got, these nice mountains, and everything kind of feels
like it flows over, see? Like, yes, these ones are a little bit lighter,
but it's not that bad. And I quite like
that. Okay. Awesome. So let's go ahead
and continue with this in our next chapter.
10. 09 Doing Our First Lighting Pass: Okay, so we are now
going to started by working on our lighting because what we have is quite
interesting here. If I see this mountain the rocks and everything, it looks nice, but the lighting over
here, it just kind of ruins everything and it just
doesn't look very nice. So there's a few
things I'm going to do because this is going to
be our first lighting path, and I'm going to change
things up a little bit. I'm going to get rid of
my directional light. I'm going to get rid of my
sky atmosphere, my skylight, my sky sphere, and also my volumetric cloud so that now we just have a clean slate. We have no lighting
in here whatsoever. Now there's another
thing that I want to do. In your skylight, you can
try real time lighting, but personally, I don't
really like that. So what I'm instead
going to do is I'm going to go
to polyhaven.com, and here you can
get free CR maps. So with this, I can get
a little bit more real life lighting that's
not dependent on whatever I'm doing
inside of unreal engine. Now, I want to go
for a actually, I really like the type of lighting that
we have over here, only I want to make it a
little bit more sunny, this one is really
blue and green. So I do want to have
an overcast that just shows some sun almost like it is morning or
something like that, and the sun is rising. So I think something
like that would be nice. Now, what we can
do is we can go, for example, over
here to outdoor, and then we have sunset sunrise, but we also have pay cloudy. So let's just look sunset
sunrise and we want to have something that
has a little bit of clouds in there and, of course, also a little bit
of greenery would be nice. I want to try and avoid actual
buildings and everything. Those will sometimes look
a little bit strange. We do that, so, yeah, we want
to try and go for, like, some landscapes or maybe just like some sand that
you can see over here. Let's middle click on this
one so that I open it up. Mill click on this one. Ge there another one. I'm just downloading
a few so that I can actually try
it out all out. This one might actually be
interesting because it has, like, some water and
everything in it. And now let's say
that we also go for example to like Pahl Cloudy. We can also go in here
and then we can maybe find although sometimes
they are overlapping, so you will see the same
ones like over here. So Pali cloudy, do we have, like overcast or
something like that? Oh, you would think there
would be an overcast. Oh, yeah, here, here we go. Overcast. Okay,
let's have a look. So let's also do
this one over here, and let's lastly do this one. Yeah, so five is fine. So the nice thing is that
they are completely free, and you can just download them. You don't even need an account, so you can just go ahead
and you can press Download, and we are just going
to go for like four K, and then we'll download our HR and just drag them into
whatever folder you want. Just like an outside folder, I just called the folder HRI
and I just drag it in here. And I can just go
ahead and do this. So download this one, this one, this
one, and this one. And then we can
give the try to see which one will work best. Okay, perfect. So we have that one done. Oh, one last thing is that I actually want
to use a custom sky. I never really like the
skies that come with unreal, which are just like
these volumetric clouds. They look really basic. So I already had this
pack for very long. It's called the map
painting Skybox pack. I will, of course, go ahead in our source files or whatever. I will add this pack also. So in this pack, it just has some really
nice looking skies that are like the strong
overcast mountains, and it looks a
little bit dramatic, and I feel like for the type of fantasy that we are going to do, dramatic would probably
look quite cool here, see? So again, get some really
interesting skies. So I also added this
to our project. And now if I go
into my tutorial, I can right click New folder, HRI and then simply drag in all of your
dot HR maps in here, and then it will
import just like that. So let's go ahead and get
started with skylight first. So over here, skylight, and then we will
use this HCR map. So as you can see right here, skylight it does something, but the wheel magic
happens when we do the HR. This is why I'm using
it. Real time capture. It is nice in some situations. However, for a
quick environment, I often go for HCR maps because one thing is but
the real time capture, you need specific requirements like you need a sky atmosphere, you need volumetric clouds,
all that kind of stuff. And then it still depends
on all of your lighting. So that's why I like this because it's a plug
and play option. Pretty much, let me
just quickly do a save. Now, what I'm going to do is, oh, there we go. I'm going to move my
skylight roughly over here. That's no pm. And then we just want to go ahead and
go for source type, SLS specified cube map. And now if we bike
one in, there you go. This is what you
will see. Now, of course, this one
is not very nice, so we kind of need
to just go into our camerangle and
just play around with our looks and see if there is one that
we like that looks nice. Harbor. They do all
feel very green. This one looks okay? Of course, we are
also going to, like, tone down the
strength of it quite a bit. So that's another thing. Just to keep in mind.
So probably Kloppenheim 04 or Start Hill. And basically, what
you can then do is you can go to your source
cube map angle and you can rotate it around. As
you can see over here. Now, another thing that I'm a little bit worried about is that my water does not look
very good in this mode. But that is something that we
can fix a little bit later. I'm also going to
set the mobility to move ball over here, and we can even turn on rate raising later on if we
really want to have our water and then just only use reflections for the rate
racing and lumen for the rest. But yeah, so source angle. Source angle doesn't
do much in this case. I'm going to set my intensity a little bit down at this point. So first of all, let's set the cube map
resolution to, like, 1024 to make it nice
and high resolution. And intensity, maybe like
0.5 or something like that. This is just a base. Please
remember that we are going to now probably
even lower like 0.2. We are going to add all of our sun and
everything after this. Maybe like 0.1 even. So that's twice 0.1, and then just do another bit of rotation with my cube map. Yeah, it looks like
that at this point, it doesn't matter too much. You can now also just quickly try different ones just to see how they behave with
like a lower Oh, actually, yeah, that's quite interesting with a
lower intensity. So Stuttn art or Kloppenheim 01. I think I might actually
go for Cloppenheim 01. It might seem strange right now because it doesn't
look as amazing, but once we have the
rest of our lighting, it might actually
look quite nice. So we got that one also done. Now what I want to do
is let's first of all, fix the skybox
because just having a black skybox like this
does not look very nice. For this, as I said before, I downloaded a few skyboxes
which I can find over here. And first of all,
in the Skybox pack, I have the skybox mesh, which I'm going to drag in. I'm going to set it
to probably 000. Yeah, that's fine. And
then I just set the scale. You can press this log button to change the scale of every axis at the same time and you set it to like 8,000 or
something like that. So that it is very large. And then what we are going
to do is, first of all, let's art the material
because I cannot see it yet. Let's go into materials,
Skybox in here, if we drag one Okay,
yeah, there we go. Also, we have some
post effect problems. That's why it is causing all of this darkness
and everything. But basically, so we now
have a skybox over here, and we can also just change the skybox to see
which one we like. In this case, it
doesn't do much yet because of our post effects and also because our skybox is not super visible, but
it is good to have. So Skybox 03 actually
looks quite nice, maybe. 03 or 01. Also, what you can do is
you can literally just grab your skybox mesh and just rotate it to Vox andmple get some more interesting
placement and everything. So now that that one is
done, that's looking okay. Yeah. You can go into
your skybox material, and we can in here, like the base multiply here. If I set this to two
or a little bit lower. And then the base
power here, see, I can increase the contrast
and everything a little bit. So I set the base power to
one and the base multiplied to 1.5 for now just to make
it a little bit stronger. And yeah, I can also see like
a few problems over here. To seem to be like lighting
problems, I guess. Or is it because my
skybox is not big enough? Let's set this to like
10,000 just in case. Now, my skybox is big enough. I think it is just like a light is not hitting those areas, which is something that
I do need to work on. Probably with my sphere
reflection capture over here. Let's set that one a
little bit bigger. 50,000 or something like that. I lost where I am. Okay,
we need to go even 99999. And that's interesting.
Anyway, that's something that I will
fix a little bit later. So it's probably just like
a random shadow prom. But the reason I
don't want to fix it now is because I don't even have any lights renting in here
yet. So we got this one. Now, the next thing that I
want to add, by the way, we can start by just adding the skylight and light box or the skybox into
our lighting folder. The next one that I
want to add is probably a post effects because
I want to just balance out our automatic
Mw, brain freeze. I kind of forgot what it was
called automatic exposure. That's it. So we can add a
post process volume over here. And this one we'll do
all the post effect. Posteffx as it says in the name, there are effects that
are being added on top of the camera
after everything else, after all of the lighting and everything has been rendered. Now, the first
thing that you want to do is you want
to scroll all the way down and turn
on infinite extent. This means that
the post effect is always active no
matter where you are. Then you want to
scroll all the way up. Just go into exposure
and turn on exposure, compensation, and the min
brightness and max brightness. And I like to often set
this one to 0.5 by 0.5, and then use my exposure
compensation to set this, for example, to three to
kind of balance it out, or maybe like 3.5,
something like this. Now, when you see when I look
at the sky and look back, there's no more darkening
going on that we had before. Okay, so now it would probably be good if we actually get in some lighting shadows
and everything. First of all, we want
to go to our skylight. And if we just go down here, I'm going to scroll
all the way down. And in my distant
field emblet clusion, let's set this to multiply, and I'm just going to set the max distance
up a little bit. Lumen the distant
field embletolusion, does not always show up, but basically what it does is it will add some better
shadows from a distance, but we are also going to use
our normal light for this. I'd just like to
quickly go through this setting over here to make sure that
everything is correct. So we got that one done. Now, let's grab our ight, so light directional light. And here you can
see that that will actually make a very
large difference. So our directional light. Let's first of all,
set this to movable. Next, what I'm going to do is I'm going to set my intensity. It's going to be like a
little bit of an overcast. So maybe only set it to like two we probably even
need to go a lot lower. Now, our water is
looking really bad. I have a feeling the
reason our water is bad is because it must have something assigned in here that shows which light it is using. But it's something that I will
quickly check off camera. I have a feeling that
that is the case. I don't feel like it is just because we now use an HRI map. But anyway, what we're
going to do is we have our directional light
over here, scroll up. It's going to a light color, and I'm just going to set the color to be like a little bit. Actually, you know what
you can also do is you can also use
temperature over here. And temperatures
are a little bit more acurd where
you can see that if I tone this down, it
works at the temperature. Although it's surprising
how strong it reacts on my terrain and how little it reacts on
the actual buildings, that might just be the
materials of the buildings. So I'm going to go
for a temperature that's a little bit warmer. So maybe like 4,500,
something like that. Next, what I want to do is
I want to go up here to my trans from Gizmo so
that I can do a bit more of a specific rotation and I just keep switching between these
depending on the axis. And I'm just trying to
get an interesting look. Also, one thing that
you can do is you can temporarily set this Wi high to 15 and then set the indirect lighting intensity on the way, you can
just leave that one. And then you can just have a better look
at how the shadows look. And for example, over here, the reason I'm rotating it here is because now the shadows get card up a little bit
more like these areas, and that might look a
little bit interesting. And then if I set
this back to like 22, yeah, let's do two over here. Also, you have your source
angle and your soft angle. This will soften
out your shadows. However, from a large distance
like we have over here, it often does not do too much because they are very,
very large shadows. But what I can do is
I can start with, for example, a
lighting like this. And it's just our
first lighting paths. Like we are probably
going to change a lot of it. But I think
I quite like this. I have a little bit of
sun sitting over here. The sun gets caught up
with these buildings, and then we can see a
little bit of like a glare coming from these
roof bits over here. And we just have
a nice little sun shining on our military base. So that's looking quite nice. Now, next to this, I'm going to go ahead and
probably go down here. We do have our light shafts. Yeah, we can use light shafts. For now we are just
going to turn them on, but we're not going to
do anything because we need volumetric fork
for those to work. Now our cascaded
shadow maps over here. I always like to go ahead and if I want to go
for high quality, I like to push the
dynamic shadows to eight, and you just need to type it in, and I don't know if you can
see the difference a lot. Basically, for like the
very far distant shadows, it gives you slightly
better quality, but it looks like right now, I can't really see
too much of it. Distant field shadows gonna
push that one all the way up, and we should also
have far shadows, or are they not in here? Let's see, distant field
shadows, cascade shadows. Normally, there's
also far shadow. Maybe they changed it. I just want to quickly go
to my project settings. Go down here to rendering, and I just want to quickly
check all of my settings. So if you scroll down, the
reflections is lumen so we can later on just
try rate racing, even though it is
deprecated, but we'll see. And yeah, so if you
want you can set this a little bit higher
already, like that. And then you can see
that it did make a small change, one, 28. Yeah. Well, I saw the
change happening. But anyway, this is not
what I'm all about. I think because of our
virtual shadow maps, we do not have far shadow. That's probably the
reason for that. But yeah, Tress looking fine. Sulfur rate raised,
forward render. Okay? You can swi
and just for fun, have a look and see if I set my reflections to rate raised. Oh, to be honest,
Lumen looks better. Although on no weight, actually, I need to turn
on the rate racing. So right now, I set
it to rate race, but I have not actually
turned on the rate racing. I'm going to leave that one
for the second lighting pass. I feel like right now, I do not probably
want to do that. So I think the next
thing that we want to add is probably our
expansire height fog, which will actually change
a lot on our environment. So directional light, you
can go into lighting. Oh, I thought I had this sphere
flexion capture in here. So let's go down here visual effects and
expand your height for. And then what you
can see, is Oh, normally, it already makes a
big difference very quickly. I guess, in this case, our
train is a lot higher, so we need to go
ahead and we need to play around with this. So, I just Ooh, that
is interesting. I hope that that is so
it is work. No way. That's not it. This
is the sun rays. See? But it is not working
the way I want it to. Let me just quickly turn
off our light shafts. Let's go into our
experience Shell height fog because this is
quite interesting. So we have our volumetric
fog over here. So, okay, so that one does work, which will just give us, like an overall
fogginess over here. But then we also want to have a lot like really
strong distance fog. And that is what I'm a
little bit curious about. Fork in scattering color. They change stuff
around a little bit, so that might be Oh,
yeah, here, see. So if I said it to white,
so I think they just changed the color by default
to black for some reason. This is the first
time using it in a newly released version. In the pre alpha
version, it's not like this. So let's see. Okay, so now we have some
for far lo off over here, so that will show the distance. And then I have my
volumetric fork over here that I turn on. Yeah. Okay, now it
starts to behave a little bit more than
what I'm used to. I'm going to make this like
the tiniest bit orange, and I'm going to tone down the base for a little
bit over here. And then if I go
into my volumetric for going to set the
view distance up. And let's see,
scattering distribution. This one does not
seem to do a lot, but that's probably because
we tone it down at the top. You can also increase your four by going down into example
directional light. And here you have your
volumetric scattering intensity. And if you set this, for
example, to like ten, normally, it makes a change. This time, it's not doing anything that I want to do,
which is a bit strange. But just have a look, so maybe they have overwritten it because there
was a new setting here, where are you? This one. No. That's curious. Then it must be because
of our density over here. Yeah, that must be it. So the fork density it seems like because our
environment is so large, we need to have it so low
that in order for us to get here C now our volumetric
fork is working a little bit. I'm just trying to
find a good balance. It's always a bit tricky
to find this balance, but if we set our density a little
bit higher and then maybe set our color
a little bit down, maybe we can then find
now if we also go into our volumetric form
and just give it the tiniest bit of
orange color over here, just tone this down again. There we go. So we got
that one also done. See, we got the background,
and then we will, of course, make it
look very misty. So seeing this, let's see. What else am I going to do? Because right now
everything just feels a little bit too light. That's another thing
that I want to work on. So now that we have our
exponential Hedwog, we might also need to
go into our skylight and kind of like balance
things out over here. So if we set this
one even lower. So if we would set this to zero. Okay, so then it
has that effect. So let's do 0.05. Three, HR maps are often a lot more sensitive. So let's do 0.04, and now it's mostly just
going to be a little bit of balancing here and there
to get it to work nicely. So let's get started by going
into directional light, and we have a volumetric
scattering intensity. And that one, now it
is working. So 20. Let's do ten. Yeah, I think
around ten looks nice. So here, this is starting to look quite nice where we have the glare and everything
going up here. When I look around,
I just want to make sure that there's
no real problems. So of course, with such
a flat environment, it still does not
look as amazing, but up close, it is starting to kind of have those elements
that we are looking for. Now, mostly for the distance, that's another thing
that I want to work on. Exponential height fog
should also have a fall off, but it should also
have a start distance that we should be
able to work with. So let's see. So the height fall off, I'm going to set a
little bit higher. And then if I set my density
a little bit closer, but then use my start
distance maybe too. Or cut off distance. No, that's not the one.
Sets back to zero. Normally, your start
distance does. Work with this. So I
don't know why this time maybe it needs
to go 15,000. Oh, yeah, there we
go. So it just needs to go way higher than
the normal value. 50,000. Oh, but that's tricky. So yes, technically, it works, but it is also removing our volumetric for, which
is not what I want. So that's a little
bit unfortunate. In that case, I'm just going
to tone this back down, and I'm just going to
set this to like 0.00. Two, maybe three. No, it's really
sensitive. T one. Okay, I think we will
have to go with two. And next to this, I'm going to set probably
like this for a little bit stronger and then go back into my volumetric
fork and let's tone this one down just a little bit so that our houses at
the front are not as foggy. But yeah, something like
this looks pretty decent. I just want to get a glare, like a mist in the background, something like that for
background mountains and stuff. Now, you can also try and
go into your skylight, and over here you have your
volumetric scattering. And if you set that
one to zero or ten, normally Delca does something. Not this. It might seem strange that every time
I change the value, it says, Oh, it doesn't
work, it does work. It all depends on your settings. There are so many
settings linked together. That don't worry if
something doesn't work. Sometimes you just don't meet the requirements for that
setting to properly show up. Same over here, like the
indict lighting intensity, often with lumen, what
it would do is it would boost out a
lot more lighting. So I can set this like 100,
but nothing happens now. But that might be just because we are looking
from distance. I can, for example, and
this could still not work, but we can SY go over here. And if I set this
one, for example, to 100, Okay, the
skylights too intense. Let's try direction light. I just want to see
if I can show you. Here you'll see 100. In this on our normal light, you can see that now it
meets the requirements, and it basically just increases the light bouncing
that is going around. So if we go up here, you can see that that does not
look very nice, but here, this one,
and if, for example, the ten, here you'll see, we can get the light bouncing
around a little bit more, which for a strong sun
would be quite nice. So let's say we set
it to around five. And just like that, you can just keep playing around with things. Now, without the foliage, yes, we are missing a lot
of stuff out here. This is looking quite nice, what I have right now, I think. Let's go into my post effects
quickly. Exposure is fine. You can also if you want to
play around with your bloom, and that's what
just do the blow up or you can set it
to completely zero. So right now, we have 0.6
with like a threshold. I'm probably going
to set it to 0.3, just to tone it down
a little bit more. And then exposure is fine,
chromatic aberration. If you want you can
set it like super low, what this will do is, as you can see over here,
if I set this higher, it will give that effect
that you often have around your if you ever shot with the DSLR
camera on the outside, it will have this
slight warming effect. So if we set it to like 0.05, which is a very low intensity, it will add the tiniest bit of realism to it, so to speak. Image effects. We
have vignetting. We can set that one a
little bit stronger, maybe 0.7, that will just create dark outlines
around our camera. Again, it has to
do with our lens. Now, our color grading
is something that we are going to actually
do inside of Photoshop. But what we can already do is we can already go to shadows, turn on Gamma and move your color slider the
tiniest bit towards blue. This will give our shadows
a slightly bluish tone. Almost as if it
gets from Sky here. See if I said it really strong,
you can see what it does. So it will give our shadows
like a slight bluish tone, which often translates more like almost like a
slight cinematic tone. So that's looking fine. You can also play with your
Gamma if you want to make your shadows darker or
a little bit lighter, but I think I'm fine with this. It's doing global. Maybe in our global Gamma, I'm just going to
Nah, you know what? I'm not going to do that.
I wanted to maybe, like, tone things down a little
bit, but I think it's better to do that
using our lighting. For example, our
directional light, setting the intensity
to 11.5 Let's do 1.7. And then we can
also go into, like, a skylight and set this one
even lower if we want to. But then it becomes almost dark, so it's not really too
useful to set it even lower. Let's do 0.03, for example. And of course, you can go into your post effects
exposure, and in here, you can also set your exposure
compensation to maybe, make your environment
a lot darker. But let's start with this
for now and then rely on our color grading to later
on push everything down, but we are not going
to work on that now. That will be for the
second lighting pass. Global mation lumen is fine. Let's push all of the details. Let's set us to four, there
are a lot of new settings. So lumen quality,
I want to set two. So let's set the lumen
quality to two and let's set the lumen detail to
A two over here. View distance that should be maybe this is causing
the problems here. If I said all the way up, yeah, that might be causing those
problems that we have. Well, thanks to the fog,
you cannot really see them, but I feel like that fixed
the problems a little bit. So we have that one
final gather quality. You can also set to
two if you want, but I'm just going
to leave the one for now because there's
almost no difference. Reflections. My
lumen reflections, I need to set the
quality higher, and I feel like that I will have a look off camera
because our water right now, it has just completely broken. It does not have any throw
or anything anymore. So that has to do
with reflections. That is something
I'm pretty sure of. What I will do is I
will off camera see if there is like a setting
that accidentally got messed up when we
remove the lighting, or if for some reason, I just need to use rate rays reflections or
something like that. But that second option would be really strange because
it worked before. It might just have to
do with our GR map. Now, for the rest, you can even send to screen
space and just for fun. For the rest, I
think that is fine. Embclusion wouldn't really do much because we now
have lumen, see? So it doesn't really do much, just like a base. So I think we are
pretty much good for our post effects over here. You can ask for film
grain if you want. That has been improved, and that's looking quite nice. But let's do that later on for, like, a final screenshots. Okay, awesome. Now, we are
way over time at this point, but at least we now have a basic lighting setup
so that we can properly work on our train and everything and
on our environment. So in the next chapter, what I will do is I will
have had a look at the water and see if I can
improve it. I better hope so. And after that, what we will
do is we will start with probably working on just doing some basic train
painting over here with, like, our colors, just
because, for example, now we have grass all of a
sudden, just sitting here. And we just want to, like, create some pathways
and stuff like that. And then we can start working
more on these areas over here with the piers and like the rocks and all
that kind of stuff. As you can see, from a
distance, if, for example, go over here and in
places where you cannot really see
all of the errors, it is starting to look
quite nice in terms of, like, a lighting and everything. Also, this one is something that I will just off camera quickly, also fix the rain painting for. So let's go ahead and continue with this in our next chapter.
11. 10 Painting Our Terrain Textures Part1: Okay, what we're going to do in this chapter is I'm going to fix a few things on the water
and then and the lighting, then what we're going to do
is we are going to work a little bit more like the terrain
painting and everything. Now, one thing I want to do. I already of course,
had a quick look offline on this on how to
best improve the water, one thing I like to do is
in your water materials, your water material lake, if you go down to
your water body, you can find it in here. You just want to go ahead
and I end up setting the absorption of three
and the scattering of 0.1. That will give me a
little bit more citrus, you can see over here. Now the reason everything
looks so green is mostly because there's
green grass under it. I also did something very
important off camera, and that is that I
turned on rate racing. The reason I did that off
camera is because it can take half an hour before you actually finish generating
all of your shaders. So what you want to do if
you want to turn it on, and it will be only
for reflection. So we will only be using rate
racing for the reflections. You can go to rendering. And then if you go ahead
and scroll down, over here, you can just turn on
support hardware, rate racing, as
you can see here. And I also turned on
rate race skylight. So when you turn these two on, it will ask you to restart
the engine just keep in mind, it will take you
like half an hour or something to redo
all of the shaders. But once you've done that, if we have a look, if you go to your post
effects over here, scroll all the way down
to reflections and set your reflections
mode from lumen to standalone atrist you can see that we get a
much nicer water. And then, of course, we
do want to play around a little bit more like the values. But the very last thing
that I want to do is that surprisingly
the sky atmosphere, if you go down here,
visual effects and grab a sky atmosphere. Even though we have a HCR map, for some reason, it has a
massive impact on the quality. I'm actually not used to this, so that's quite surprising
that it was doing this. But if I click on it, see, you can see that the fog and the shadows and everything and
also the water effects, they all become
quite a bit better, so I can turn it off on off on. I probably in the latest
versions of unreal, or I might have never noticed, but that's interesting
because I've created dozens of environments. But maybe in the latest
version of in real, it has a little bit more
involvement than I'm used to. But this is quite nice
here. You can see that that actually makes a
really big difference. The only thing is
that now everything is a little bit too yellow, but that's something
that we can also fix. So between this, we can also
go in here and you can see that for your absorption
in your water material, if I set this to
for example to one, you can see that it
becomes a little bit bluer and if
I set it to ten, it becomes more citru. But if I set my scattering
to, for example, 0.5, you can see that
it becomes duller. So if I do, for example, 0.05
to make it more citru and then try to play around with my absortion then
set this to for example to five or even three. Now what you get is you get that the water becomes
a little bit more blue. And the goal is now when we paint our train and scent over here that it
hopefully changes. One last thing we want
to do before we do that, and that is that we go into
our directional light, and we are going to make our temperature a
little bit lower to compensate for this
new orange effect that we get from our sky atmosphere. So here, if I go, for example, temperature and just
move it up here or see, you can see that you can get
some more natural color, and give it a second to, like, updates when you move your slider because it always
needs like a little second. But yeah, you can
see that definitely it's making quite a change. So let's say 50550700, maybe? Let's try 5,700 for now, and then I think that we
have something quite solid. Also, really nice with rate
raise reflections is this. Here, where you can
see that literally, it just re traces all of
the boats and everything, and that stuff is really nice. But anyway, that's
looking pretty good. I think we got a good
first lighting pass, and then we can
just go ahead and continue on when we have our actual full
environment to create another lighting
pass because with such a bare bones environment, it's always difficult to really get the
lighting you want. So, what am I going to do now? We are going to do a little
bit of terrain painting. However, for this, we
need a grunge map. The reason we need a grunge map is because we are going to, um If we just use, the soft brush, it just
does not look very nice. Also, I need to see
why this is happening, but that's something I
can work on later on. It's probably just
like the two dirts being slightly different
in colors or I don't know. It's probably something in
that direction. So tutorial. Let's make fool car
textures in this fold card grunches over here. So now, something that
we need is we need some grunge maps so that we can paint in a little bit more
interesting shapes in here. For this, I'm going
to do a tiny bit of substance designer work, but I will include
in the source files a simple like these crunch
maps that we are creating. This is going to be super basic. All we need is we need to go to noises if you are
following along with this, and you want to find an
interesting crunch map. Let's say crunch map 001, for example, over here
and let it load in. Then what you want
to do is you want to set your brush pattern down. This will give us a bit
more of an organic ending, and then we want to set a
balance down so that we get this effect so that we do not have too much white in here. And yeah, you can
just play around with your brush pattern
and everything. Once you've done that, all
you need to do is you need to press space bar and
type in output. And then over here,
you can set the name, grunge underscore 01, and just copy the name also into
the label, and that's it. So now I can, for example,
duplicate my output. Let's say three times,
call this one grunge 02 or sorry, grunge two. What 02. There we go. It for some reason, it
decided to change it. And then we can do
this one grunge 03. Here we go. And
then, for example, let's say we grab grunge map, 013, brush pattern it, play around with our
balance a little bit. There we go and drag that
one into the second slot. Let's say that we also maybe
do something very generic, let's do maybe
like a Clouds two. And our Cloud two does not have the same settings as
these crunch maps, but you can still
get the same effect. Basically, all you
want to do is you want to press space and maybe add a levels or you can
use a hist Crum scan, which is another node
to push it down. And then if you
blend this together, along with, for example, here, let's grab
crunch map 01 again. Contra C Contra V. If you blend this
together and then set your balance all the way up and your brush
pattern down a bit, you can actually just blend this and set this
one to be subtract. Sorry. Art subtract. No, multiply. Multiply. That's the one. So you can set this to multiply. And now you can see that
still give us this effect. Now, personally, I
don't really like this. Like, I want to add a
bit more stuff to this. For example, I can go
into my levels and, like, push some of these things
out and in a little bit. I can go into my grind map and press space and art like a blur, high quality gray scald just to blur out the edges a little
bit, as you can see here. But that's a little
bit too over the top, and it's not what
disutoral is about. So it's more just for me to get it to look
a little bit nicer. And let's just plug this one into this note ground 030201. Now, what I'm going to do is I have a folder into
my source files. I will first of all, just
save this note over here. And then to export
it, all I need to do is click on the Train grunge, right click Export
outputs as Bitmap, and it will export it in whatever folder
you have saved it. I like to turn on this setting, which means that whenever
we make a change, it will again export, and then we can just export. And now inside of in real, we can simply drag this
tree in. Here we go. Okay. So now if we would go to our landscape
mode, go to paint, and what you can see now is that if we set our brush
type, for example, to an Alpha brush, we can drag in one
of our crunch maps, and now you can
see that now this crunch map is being used here. So you can imagine that
if I said, for example, my brushes a bit bigger, my tool strength to
like I don't know, 0.2. Ootate means that
whenever we drag, it will automatically
rotate, as you can see. That's quite nice
to out variation. And then 1 second. Let me just move this down here. Let's say that we grab dirt one, Dirt two looks really
shiny and drag it. And now you can see
that over here, that feels a lot more organic.
It feels a lot nicer. I do feel like, for some
reason, there is this. I feel like that maybe they
use like some kind of like a grunge map in here to art variation, but
we can kind of see. So if we go up a little
bit further away, let's say here where
we cannot really see anything, I just
want to have a look. So it takes a second whenever you paint in a
new texture. So let's see. We have our rock, and
it looks like our rock. Yeah, we do need to definitely
go for a tool strength, maybe, let's say, 0.7,
a little bit bigger. 1 second. It's
preparing shaders. That's why it's so slow again. So let's see. So we have
our rock over here. Okay. Then what we can do is we have our dirt
sitting next to it. Once again, it takes
a second to update. And now what we
can do is later on we can just first of all, balance out our
settings a little bit. For example, this dirt over
here looks really shiny, although it might
just be an error in our material in our Tom nail. Next, we have the
next one. Once again, it's really slow butoka. No way, there's definitely like a problem going on over here. I will say the landscape tools feel slower
InheelgenFive release. Like, I love nel engine five, but it feels like
some things have changed and not so
much for the better. But anyway, so we
have grass one, which I want to drag down here, which does not really do much. Then we have grass two, for which I can just also go
ahead and drag it down here. I think it's mostly like
they're preparing shaders. Yeah, that's probably
it. So that's interesting to see
how that interacts. So I will probably just go
ahead and pass the video until all of my shaders are prepared because
this is taking too long. Okay. So here we go. This is what we have right now in terms of our
landscape materials. Now, what I can do
is I can go ahead and go outside of
landscape mode. I can go ahead and go
into my material and do a little bit of balancing before we start
with our painting. So it's mostly just checking out the settings and seeing how everything works. I'm going to get
started with the rock because that's the
first one I painted. Sand, snow, where are you?
It's rock all the way up. No, dirt, dirt too, grass. Especially, like the
grass. Like, there seems to be no difference
between the two grasses, which is a little
bit of a shame. Okay, here, rock.
So we have moss. I'm quite interested
to see if I enable that what that looks
like, but it Oh. Okay, that's not
really. Never mind. That's not something I want. Then we have our rock colour
tint, and in this one, I can go ahead and I can
tone down my rock color. And it's still
preparing my shaders. That's why it's taking a second. She can see. Well, you probably can see. It's
all the way down here. Come on. Update. Okay, it's updated. So as I said before, I was going in here
and you do need to press Okay before you
can see the changes. So I'm just toning down the
rock tint a little bit. That's a bit too much.
Still want to be able to make it
visible over here. Now, next to this, let's see. We have a rock that's a moss tiling normal
strength of a rock. See if we set to two, I think one is actually fine. It's a distance environment.
I don't really need much. Roughness of a rock, one, zero, it's subtle,
but I can see it. I think I will set to 0.2, but it's quite difficult to see. The tiling of our rock
is right now 0.25, and the tiling of our
rock far is 0.15. Let's see if I do 0.3, and then it should go, here see. So from a distance,
it will change the tiling amount that is fine. It's mostly also those
areas over there. Okay, so I don't, there is not too much interesting
stuff on it for the rest. The next one is
going to be dirt. So we have dirt one
and we have dirt two. However, in our painting, we only have one dirt, it seems. Now, wait, we do have two.
Okay. Sorry, fair enough. So dirt one must be
this one, in that case. I feel like here, there
is this shine through, which I'm not
really happy about. In terms of the colors, I feel like we can
go into, like, a color tint and
maybe tone it down. And whenever you want to, like,
offset your colors a bit, you can just if, for example, the dirt is brown, you can, for example,
set your color a little bit towards blue, and then it will
offset a little bit. But be careful with
this because else it looks not as nice. Here's a tone down. And I
definitely want to fix, whatever is going on over here. So let's have a look. First of all, we can see if those spotches are
actually in our dirt, but I don't think so
because I can see it by changing our dirt tiling. So if I would set
this, for example, to five, no, one. Oh, wow. I saw
something happening, but I think that you
cannot even see it, to be honest. Dirt tiling far. Yeah, there is something
going on here. There is definitely
something going on. I feel like maybe it has
to do with these pieces. I'm not completely sure
No. Oh, okay, here we go. So here something is happening. Tile, it's probably
like some kind of overlay to add
variation to our dirt. That's what I think it is. Here, see if I set this zero. It does almost nothing. Power. If I set the
power, let's do one. No, that's way too strong. As I said before, I'm learning
this shader in real time. So zero, zero and zero. Does this now become
the normal dirt? I just want to see
how it 0.50 Okay, so it does become
normal dirt now. So if I do 0.5, I can actually
see the dirt happening. 0.3, let's do 0.7. And now what I want to do is
I want to have a quick look and see if this dirt, this might just be because
of our train painting. So if I just quickly
go into my landscape, because I can remember I painted this with like
a lower tool strength. Let's set that tool strength
temporarily to like Oops. That's probably the
wrong one. That's sand. Let's select dirt. Yeah, so now we actually
have the dirt that we want. I appreciate having the
variation in here in our shader, but maybe I can give a
little bit of variation. I don't want to
give it too much. Okay, so it seems
like the first one does not actually do
much in variation. Maybe it's like the second one. Yeah, this is an interesting
effect. Ah, here we go. Okay, so it adds some lightness. That is actually quite
nice. Let's do 0.8. And let's set this
quite low to 0.4, to give it some
general lightness. Yeah, I think that's quite nice. So now what I'm going to do
is for the dirt 01 tint, I'm going to copy
the SRGB value. I'm going to go in here,
paste the same SRGB value. And now I just want to go
in and 0.5, 1.50, 0.05. I'm just going to
basically replicate the exact same settings
that we have over here. You could copy them, but you can only copy one
setting at the time. So what I can do is zero point.
Actually, you know what? One might actually be nice
for the normal strength. 1.5. Okay, so that is
where is my metallic? 10 nodes not my metallic. I think it's my specular dirt. Yeah, here 0.05 for some reason, this one is set to
here, there we go. So you see now it
blends a lot better. That's more what I
was looking for. Roughness, I'm going
to set back to one. And actually, over
here, I'm going to also set my roughness
to one because I want to rely mostly on
my general texture, 0.70 0.3, 0.7, 0.3. The distance blending
power is fine. And then I want to set
this power to zero. And then I want to set this one, the L two, 0.8, 0.02, 0.8. 0.0, I'm going to make this
one a little bit lower. 0.4 or maybe 0.2. Okay. So that's dirt number two. That is looking fine. Now we have our two grasses. For some reason, even though
I painted in the grass, it seems like it does not
actually do anything. It could be because of
our outer material, but let's just have a look. So if we go in here, we now have our tool strength to one. I can go grass one. And then this one is grass
too over here. Let's go back. So now we are sure that there
is different grass in here, and I think it just has to do with again,
those power tools. So if we go down here, we can turn on these bits. For the grass, I'm probably
just going to set this all to zero, zero, zero, zero. Okay, so this is
our actual grass. And what I want to do
is now maybe, like, add a little bit of
power because it does break up the tiling a little
bit. So let's do 0.6. And then if we go, let's see, our normal strength
can just be one, our grass tiling can be one up close.
That's a tricky thing. So photo grumsy grass often
shows a little bit of tiling, but we can actually blend two grasses together to
get a difference in that. So 0.1 and then 0.5
maybe for far distance. So yeah, I feel like that
that should look fine. Here, you can see the
tiing a little bit, so that's something that
we can just splotch on randomly to add
more variation. Next, we have actually, maybe make it a bit
lighter? Can we do that? Or, is the grassin the grassins already
completely bright. Then we can make it a bit lighter just in
our base color by going into our grass diffuse and setting
the brightness to, for example, 1.3 and give
that a second to update. See, a little bit brighter. Okay, so grass 01 check. Grass 02. We also
want to go ahead and just set this one also to one, 0.5, roughness of one. Yeah, I wonder, actually, what a roughness of zero
is 0.7, also for this one. So yeah, we can just add some extra changes to this
and stuff like that. Now we have a power, this power is also going away. Still looks exactly the same. Patchy wild grass, and
this one is mossy grass. It is different, so it's
interesting that it looks pretty much exactly the same. But what we can do
with this one is we can again, set up power, but let's set up
tiling even lower. Set the power to around 0.5. So just play around
with it a little bit. Now, as I said before, so I'm a little bit disappointed
that it feels like here, like the grass is not
it feels like yeah, it's pretty much using the same grass, which is interesting. I guess it only uses
grass two as like a far. It does not use grass
two as like a close up, which is a little
bit unfortunate, but I guess it's not that bad. It does mean that
from a far distance, which actually, yeah,
this is actually fine. But for far distance, I do want to go in
and go to this one. And what did we do 1.2? In terms of, like, we
need to balance it out, so it does need to blend in
together and not be too dark. There we go. Let's do 1.4. So that's also fine. And now we have our dirt or our sand for which that's
the rock. Ah, here we go. Sand in which we can
also once again. I'm sorry that this
is taking a little bit longer than expected,
but that's just how it goes. I'm going to set my power
to zero on all of these. I'm going to set my nor
map strength to just one, and I'm going to set
my tiling to one oh, wow, norm map strength,
let's do 0.3. And it's too far tiling, 0.5. So let's see. So up close, it looks like this, far away. It looks way too strong. Maybe far away to
1.5 or far away. I'm surprised that it looks
this strong, actually. I could, of course, lower down the norm map of the
faraway settings, but all that stuff is like
it's really tedious to do. Yeah, I quite like this. So it seems like
it's a far away one. For some reason, it
looks very strong. Now, something that we can do is we can be very
sneaky and just add like a different norm map in here so that you won't
really notice it. I know it's not the
best way to do it, but it is something a way to do it. Let me
say it like that. Let's see. We have
our tiling over here. Looks like this one. Yeah, this one doesn't really do much, so I'm just
going to leave it. Okay, so I think that
is pretty much good. Now, I do realize that we pretty much have
not done anything yet. So let's just go ahead to
split this up into two parts. We have now polished
all of our materials, which you can already see
happening over here that everything looks a little
bit more uniform and nicer. So now let's go
ahead and actually start painting our train
in the next chapter.
12. 11 Painting Our Terrain Textures Part2: Okay, so we left off by balancing out all of
our textures over here. So now let's go
ahead and actually do some texture painting. And I'm going to get started
probably with the water. So we are going to
grab our landscape. Once again, it might be a
little bit slow at first, but let's start with
just grabbing our sand. And because the water needs to be pretty
much completely send, I want to start with like
a tool strength of one, but I can set my brush size, like, quite a bit larger. And just around here, we are
just going to paint in sand. Now, I feeling it will need to recalculate shaders or not. Yeah, there we go. So
preparing the shaders, which means that I will pass the video until
that one is done. Here we go. So that's done. And now I should be able to do, like, some quite
smooth painting. So I'm going to go ahead
and really give this, like, a beach look that
we have over here. Let's quickly do that. Let's be a little bit more
careful around these areas, and then we will just blend this in a little bit
better later on. But for now, let's just do this. And honestly, I'm not going
to paint this too far. You can paint this
as far as you want, but I'm just going
to do whatever the camera sees. Over here. So now you can see that also where you like
changes the color of the water and
everything a little bit more. So that's quite cool. And then over here, we
can also have this, and then we start to
get like our cliffs and everything like that.
All that fancy stuff. So But let's just go ahead and mostly focus on painting under the water
and stuff like that. And sometimes just quickly go to our camera over here,
as you can see. Okay, so that's
looking pretty good. Now what I'm going to do is I'm going to set my tool strength probably to 0.3 or something, and I'm going to set my brush
size a little bit lower, now we are going to just create a fade from our sand to grass, going from sand to grass is always quite tricky
to get right. And probably we
will also not get perfect because this is just going to be a quick environment. And there are ways we can break it up with foliage and everything
like that and grass. So that's something that
we can also do a bit. But yeah, it's a difficult
one to really properly, properly blend together perfectly and
everything like that. But for now, it should be fine if we just
do something like this. And basically the idea
is that, first of all, we are now just kind of like
blending this out so that the sand has blown away and it's kind of like
everywhere, stuff like that. You can see over here. And
then what we can do is we can set our tool strength
even lower to 20.15. And then in here, we
can, for example, just do like some
randomness to make the grass around here feel
more dusty pretty much. Here we go, see, so we are
making it feel more dusty, and that we also add some
extra variation to our grass, just by doing some
very quick clicking like this here and there. Then also, of
course, we are going to have dirt and
everything later on. But you can see that these
Alphas, they work quite well. So now we start to get more
of a beachy send over here. Now the next one is that
we are probably going to switch over to dirt one.
Let's do that one first. And let's see if we can maybe
make this even more because they are going to be like
partways and everything here. So I'm just going to see
if I can now also replace that send I have in between here a little
bit more with dirt. I feel like we need to set my
tool strength to maybe like 0.3. Here we go. So then it becomes less
sandy and more like dirty. Just in these areas,
we definitely also want to have
a bit more dirt. So let's say we have
something like this. What I like to do is I
first like to go for, like, an overall view,
and then slowly, I will move into
doing more unique, like, pathways and
everything like that. But as you can see
over here, this is already starting to
look quite good. Now, we can also, of
course, for example, use grass 02 over here with
a tool string of maybe 0.7. Let's set a brush
that's quite large. And now what you can do
with this one is you can, if you want, once the shaders
are done, calculating. Here we go. And
this will just add some overall variation
to our grass, as you can see, to
break things up a little bit, which
is quite nice. So that is another way
that we can use it. Now the reason that it is calculating shade is quite
often is because this is split up or a train
is split up into multiple different pieces
for optimization purposes. Now, I'm not going to
go too far outside of these pieces over here because
Else will be quite slow. And I'm mostly just
going to focus my grass on some of these areas
just to have like oh, wow, a lot of stuff going on. Just to have some areas that
are just like here, see? Just have some different
spots in here, which will feel a
little bit nicer. And also, like over here,
we can do the same. But that's about the extent, because beyond this point, for me, you won't really be
able to see much difference. But as you can see over
here, that already makes quite a big difference,
if I say so myself. So we have that stuff done. Now, what I'm going
to do is I'm going to do some overall dirt. So let's grab a dirt one. And 0.7, that's fine. I'm just going to make my
brush is a bit smaller. And what I'm going to do
is in these locations, I want to get more
dirt because this is pathways where
people walk a lot, so there would not be perfect grass and everything like that. So what we can do is we can art just like some general
dirt in these areas. And then what we're going to do is we are going to break up that dirt with a
different dirt again. And again, there's
going to be a Wow, that's really weird that
that still happens. I feel like it's an
elevation thing maybe. But basically, because
there's going to be like shops and
everything here, this also like an area
where we just want to start by creating a little bit more
dirt and stuff like that. And then we will have grass and everything around
these areas also. But so in between, you
can have some grass. It's more like they
would not, like, cut the grass or something
like this in these times. It's mostly just wherever there's a lot of
walking and everything. Naturally, the grass all
starts to kind of fade away, and that's something
that I want to work on. We can always add more
grass back later on. So for now, I'm really just
focusing on getting Like, sort of, like, really rough
looking parts like this. And the parts would
not really go onto the sand because
sand is so soft, it would just blow over
and stuff like that. So keep in mind how
that materials work. Like grass, if you stand
on it, a lot of times, it just becomes soggy
and it kind of, like, just breaks away. However, sand,
especially beach sand, it will only show some
slight footprints, and that's about it. So what we can do is over here, you can see that we get,
almost like a dirt spill out, and then it just
kind of like flows over into the rest
and stuff like that. And we just kind
of work away from here and just keep painting in more and more to get
something interesting. And then over here, I
feel like that this area, because it's like
a training ground, it would have quite a bit of dirt and everything and much less sand
and stuff like that. So we can kind of, like, work on this by adding a
little bit more. And then over here, people are just walking towards
their villages. So it's mostly just and feel free to also make these parts a little
bit incorrect. I don't know. In
these times, they are like horses and everything. So maybe you can do
some stuff with that, where the parts are just not as perfect and they
are kind of just scattered around
with just people randomly walking in different
directions and, like, maybe have some spots of
grass here and there, and here they are, like,
walking from their homes to, like, the guard towers,
which by the way, I will need to work on
that look over there, but we can probably
just swap out the material later
on over here, see. So we can just do some guard
tower stuff and we can, for example, say, like, Okay, there's a pathway over
here to these houses, and maybe there's
another pathway that's going over here because they walked into there
with multiple directions. And then at this point,
you can't really see anything because it's
outside of the camera view, but just for the sake of things, I will make it feel
a little bit nicer. And now I can also, for example, say that I want to
like a part over here. And I am making the parts quite big right now because I'm not really in the mood to change
the size of my brush, but I am going to just
later on polish it up with a little bit more
grass and stuff like that. But you can see that just
doing something like this, and maybe now if we
swap to the dirt too. And honestly, up there,
we don't need parts. I don't never going
to see that anyway. So that would just
be wasted time. Anyway, dirt two over here, let's go ahead and set the
tool strength back to 0.4. And give that a second
again to load because the first paint is
always the longest. Okay. Here we go. I'm just going to cancel
the outer saves so that I can first of all, just
continue on this. Now I'm just going to
once again on this dirt, wherever they are
really large spots, I'm going to paint in
this little bit of different dirt to give it a
little bit more variation. Or maybe it can be like
some of the dirt is wet, some of the dirt has
already dried by the sun. Doesn't really matter.
I just need variation. Having just like a
plain dirt color, it never really looks good. So that's why I'm just
painting this in over here. Maybe let's go to 0.2 and start by just painting this out to blend it a little bit better
and stuff like that. So this is like the tricky
stuff where it looks nice, this blending over here because it is using tools for the
blending and everything. But we oh, that's a really shiny grass surface. That's something
I will fix there. But whenever you need to do it around actually hand
painted buildings, then it becomes always
a little bit trickier. Also, it's really
strong in terms of, like, my normal maps. So that's something
I can also work on. Baa, in general,
this one will be most likely more dirt than grass switching over into
the beach sand. So that's mostly what
I'm doing right now. I'm just trying to get a
fairly decent transition that we have over here. And same over here.
Just try and get a logical transition
between the two. I think I will make it a
little bit lighter also in just a sac But yeah, so in general, that's
the general idea of it. And now, if we go
into our camera one, you can see that this
is already starting to look a lot more interesting, especially when we have
a lot more props here. So that is all
looking pretty good. Now, what I will do
is I will go in here. I will still use
dirt one at like 0.7 value that is a
little bit smaller. And I'm first of
all, going to kind of create another pathway over
here, just like a so one. Like that. And I don't know. I feel like this would be
like a hike to go up here. So maybe I do, like, a
small pathway around here, but I want to make it so subtle that you
can barely see it. So it's just like something to make it feel a little bit
more interesting. Like that. Let's see if from a distance, it's not a here. So you can barely see it,
but that's totally fine. And maybe have, another
pathway that is kind of like going from these
directions over here. You can also play
around with that and just get like a pathway towards the sea
or something like that. Or, like, towards the
cliffs over here. It feels like a
nice place to live, to be honest, looking at this. Like, it seems like a
really calm place to be. So yeah, so we got a little pathway there,
that kind of stuff. I'm sure that you know
what I mean by now. I'm gonna paint in a little bit more sand
over here in these areas. And now I want to quickly fix the really
strong dirt normal. But I have a feeling
it's not going to, for some reason, give
me control over that. Oh, no, wait, it is. It's
just using the wrong dirt. There we go. Perfect. Okay.
So we got that one also done. Yeah, that's actually
looking pretty nice. That's a really solid base. Once we get some foliage
in here and everything, it will all tie it in together. So, what we're going to do in next chapter is we
are going to start, first of all, working
on the waterfront. That means lots of rocks, lots of piers where
you can go inside a little bit more like
what she over here, like these kind of things,
more boats and everything, something to make
it feel less flat. After we've done that, we
will probably start working, probably start working
on the marketplace, and then we will finally do a little bit of foliage painting. But yeah, so let's go ahead and continue on
with the next chapter.
13. 12 Creating Our Water Front Part1: Okay. So what we're going
to do now is we are going to start working
on the peer and everything and like all
of the rocks and stuff, like I've already
said like ten times. So for this, I first of all, want to just, place
the main stuff down, which is going to be the
peer and I hope I said, I hope that it's the correct
English word for it. At least that's what it
is inside in Dutch also, so that makes it
a bit confusing. But people that don't
know I'm Dutch. So that's why I'm saying that. Anyway, so let's go down here. So this one is a bridge. That's not the one that we
need, although it is cool, but, you know, we
just don't need it. We have lots of fish
stuff and everything, so that's good, so we can
have, stands and stuff. I'm just curious. So, it's tin. Fair enough. Else we
could have also maybe, like, made something
interesting with that. So where is the pier? It should be here somewhere, you would expect.
Really, nothing. That is very surprising if
there is littly nothing. Of course, we can
just rip it off here, but I would have
expected there to be just like a chunk of it. Okay, that is unfortunate, but that means that we are just going to rip
it off from this one. I hope that it
doesn't take too long to take this stuff off. So if I have this, let's go ahead and go
inside of our mesh, and now I just need
to, I need to hide it. That is quite annoying,
to be honest. Instead, what we can do
is we can try and have a look and if we sorry, I just meant to go right click Browse to asset because
LSAT will be very lengthy. So let's just go at right click
and duplicate this asset. And I'm just going to
call it Peer over here. And now I can go
ahead and delete this one and then I can
open up this blueprint, and hopefully I can
just delete it instead of hiding everything because if I need to hide everything, that will just become
very expensive. So now the goal is
that I can just go in here and I can just
simply press delete. And I really hope Oh, okay, thank God, that
it was not one piece. That was my worry, that it was just like one massive
chunk of mesh. But luckily, that's
not the case. So I can now just go in here
and I can click this and I believe does that
still work if you hold contro Alt? Okay,
it doesn't work. There used to be a way, but I've never used it
inside of a blueprint view that you can do like a multi select. But it does
not really matter. It doesn't take too long for
me to delete this stuff. I'm also going to
delete these pieces because I don't want them. And yeah, this is going to be like a duplication,
so that is all fine. Oh, it looks like
it is one piece. I'm going to reset
this to 000 over here. And then I want to
set this forward. And the reason I'm
doing that is so that my pivot point will
be at the very end, and that makes it a
bit easier to use. So let's go ahead and save this, and let's hope that this works the way that
I want it to work. So if I now go ahead
and just load this in, I will need to do some
small adjustments, but it looks like that it
is working totally fine. So I can just go in here. And pretty much once
you've placed one, it's just a matter of just
moving it forward over here. And for these ones, because we want to have
them sticking down. We could also probably just
do like a duplication. And it's a bit tricky to see. But roughly around here just
so that from a distance, it looks a bit more interesting. There you go. Now you
can see that we have a peer that is working
pretty decently. Now, what I'm going to do
is maybe also over here, maybe I can do some
small rotations to make them feel a little bit more organic,
something like that. Once we've done
that, we can pretty much delete duplicate
one of these. Let's go into this view.
Let's press duplicate. Let's see. I'm going
to have one here. I feel I feel like it
might be unlogical or not. For some reason, it feels unlogical to have
another one here, but maybe that's just me. So what if we do two over here? So we have one small one
and then two over there, and then here we have
just a docking area. I think that, that might
look nice if we do that. So let's have one over wait,
let's start with this one. Let's have one over here. And then let's go ahead and
just go in and properly place this one that the kind
is aligned to the sand. And now we can duplicate another one to make
it a bit longer. Okay. And then I want to
have another one that is going outside of the
camera like this. Okay. Yeah, you know
what that can work. That does not look too bad. It's just cool that
the water over here is going up and down like that. So that is pretty good. Maybe, maybe make
this one bit smaller. I don't know, do you also want
to make this one smaller? No, let's keep this one big. Make this one a little bit smaller and this one
a little bit longer. And I think something
like that should work. And then just for
the sake of it, we can also already just play some boats just to see
what it looks like. Here we go. Here's the boats. Of course, do make
sure that it's, like, slightly in the
water, but not too much. So we can have a large boat over here because this seems
like a military thing. And if we just go from the side, it would be nice
if it's actually facing forward over here. Yeah, so like a large boat here, and then we will have the
smaller boats over here. Why do we want to have
maybe one large boat also sitting on this side to maybe make an
interesting view. I'm just having a look and
see because it is blocking, but sometimes blocking
specific areas behind it to get rid of these really
flat areas would be nice. But now I think you
know what? I think I'm going to go for
the smaller boats. So for that one, once again, I am going to duplicate small underscore boat because
they are a lot smaller, and I don't think they are
just scaled down, are they? Here or see? No, they are definitely like
different props. I don't understand why
not just add those props, but, like, as a separate thing. That feels a bit strange. I'm going to delete
this one and this one, and I'm just going to basically
delete everything else. I know it's a bit slow, but Oh, well, does
not matter too much. Okay. So we got this boat, which it's not
completely one thing. So these extra bits.
Yeah, you know what? I'm just going to secretly get rid of them even
though there is some stuff floating
that I cannot get rid of. I think this is fine. And where is my center
point? It's around here. It's difficult to see. Yeah. Okay, so it's over there. So if I said this one to zero, this one to zero,
this one to zero. And this one to
zero, there we go. Okay. So we can go a and
we can save this one. And hopefully that will do the triick that if I go in here, I have my small boat, I can just line it up. And then I can have one over here, maybe like
another one here. And I don't want to go too close because I want to have a lot
of rocks and everything. So that's why Oh, so that's why there
was the second one because that one is
slightly different again. That should be no problem. What I can do is
I can once again, I know that I keep doing this, but let's once again
duplicate this. We only to prepare this
once, and then it is fine. Where are you? Where are you? There you are. Duplicate
small boat on a score 02. Open it up. Go in here. And the LODs and everything, all that stuff we will
just fix later on. That's such a smart
thing to fix. Honestly, what you can even
do is you can even just turn them off if you are
taking a screenshots. Like, I can do that at
least to save time. If you want to actually
have an interactive thing that you're flying
around and stuff, yes, okay, then you will
need to fix the LDs. But it looks like it's just like some small problems with how the materials
are sorted out. And it's a common
problem with LDs. Let's do zero, zero,
zero, zero, save. I'm going to replace you with this one as if it
is ready to sail out. We will also do like a pass where we do a lot
of small props. However, this pass I will not do in real time because that would simply
take far too long. So we got this one. Now
I'm going to duplicate it, and we'll have one last one sitting that is maybe
sitting around here. I think then we have
a pretty solid base already for which we can
place our rocks around. Of course, logically,
it would be the other way around
in real life, that the rocks are
already there and you would just build
everything around it. But we don't really have
that luxury right now, so just going to place this one. There we go, see? So that's way starting to look a
little bit more interesting. I'm going to save my scene, and now for our rocks, we are going to collect a
bunch of different rocks. For this, we are going
to use mega scans. So there are a few ones
that I want to show you, and then I will just off camera collect or make
a large collection. But basically, if you
go to Tri D assets, you can go ahead and
you can go to nature. And then we have embarkment. Those are actually quite nice. And then we have the rocks. So in the embarkment, we can get these almost like
floor pieces over here, although, maybe it
was not embarkment. Maybe it was in
rocks. Let's see. Okay, yeah, so it
might be in rocks. Oh, yeah, in scatter. But anyway, so we have beach and scatter are the ones that
I'm mostly focused on. Let's go to the beach, and it's nice because we are
literally creating a beach. So we are going to go for you, these type of,
like, smooth rocks that you can often see here. And like these ni Well, these formations look
a little bit strange, so I don't want to. I love these ones, these
nordic rocks over here. They are really good. So those are the ones
that we are going to get these flat areas because we can very quickly just
cover a large area. Also, stuff like this is quite good where it's a
little bit separate. These ones you also want to get. They are basically
just like stone beds. We can have those on the
bottom of the river, and those often also
look quite nice. So yeah, just try
focusing on, like, the nordic beach style
rocks and try to find, like, slightly smooth
rocks and stuff like that. So let's say that I will
go ahead and just for the sake of this tutoril even though you probably
know how to do it. Let's say I grab this one. I'm just going to use medium
quality for this stuff. I can just go ahead
and encompass art, and then it will
art at one because I already downloaded it before. And let's say I also
have for example, like this one I quite like. Oh, I can remember that. I already used that one before. So these Mt are good, but I will like this one. So let's just go
ahead and download this one also for
medium quality. And then, of course, I will
just go over and I will just get like a bunch of
different rocks in here. Because we are not making
the exact same environment, I will leave it up to you to
create whatever you want. But what we can do
is we can go ahead and we can add this one. And now if we go in here. So this is basically I will, of course, do this in the
next chapter, probably. Yeah, let's do this
in next chapter. But just to show this
is what you will get. You will get these large
rock formations over here, which are great to just
have sitting at the bottom. So as you can see over
here, if I just kind of like rotate this around. And the reason I'm showing you now is that you can kind of, like, know what kind of
rocks you need to search. So I can just have this
nicely sitting in here, and then I can grab these larger rocks that
we have over here. I will need to balance
out the colors a little bit, but I
can, for example, have these just like pushing in here and
sometimes I like to switch my pivot point mode like this and just kind of
like blend them in together. As you can see over
here, then you can very quickly start by creating like nice looking rock beds and
everything like that. And this is where it
really shines to have the water just going under it. So in the next chapter,
what I will do is I will have all of my rocks
collected and imported, and then we are going to have a little bit of like a real
time piece of rock placement, and then we are going to have a time lapse piece
of rock placement, and then we will just
go ahead and continue. So let's go ahead
and continue with this in the next chapter.
14. 13 Creating Our Water Front Part2: Okay, so let's go
ahead and continue. So we got all of our rocks and boulders and everything right
now, and what I will do is, let's use this area to give you an idea of how we are
going to set dress this. And then I will just kick in the time laps and just do it. I think I will only do this
one for the camera view, maybe a little bit outside, but this will take a lot of
work if I need to do it, like, far outside of the ranges. Also, this is
floating. So that's one of those smart things
that I need to fix. But anyway, let's go
ahead and go in here. So yeah, you can kind of see it in the Cozartach where there
are like quite big rocks, and then they kind of fade out into smaller rocks
and stuff like that. Now, on top of that,
what I want to do is I also want to get a bit more of like a
rocky ground around it. So let's first of all, place our big rocks, and then
we can take it from there. So, let's see. So we have, like, some bits of
ground over here. Now we have, like,
some larger rocks. And I just want to have a look. Oh, I quite like this one. So what I'm going to do
is let's grab this one. And this can kind of
just be over here. And later on, we
are also going to scatter around some rocks using foliage
painting, actually. But for now, we just
want to kind of, like, make sure that this fits. So we have one of those, and
this is quite a large one, but this is one that
I will probably end up placing
somewhere along here where it's just a bit
out of view because it's not the most perfect one to use. But anyway, we are not
working on that area. And see. So yeah,
this one will fit. So try to find rocks that feel like they
naturally fit together. Like, stuff like this will fit. And sometimes you can
also just duplicate it, rotate it around a bit and like, change the scaling
and everything. And then you can often even use the same rocks
right next to each other without it feeling like they are the exact same rocks sitting
right next to each other. So over here we have these
are a little bit darker, so that's something that
we are going to later on balance out a little bit. But for now, I'm
just trying to get, like, a larger underground. So not do that one. Oh, yeah, white, that's the
one that I already used. That's also the one
that I already used. It's a bit hard to see
from our pictures. So let's use this one over here. Place it maybe like down here. So now we are slowly we
got these larger rocks, and we are slowly going
to start by fading those out into other areas. So this is quite a nice rock
that can kind of, like, block off, and I don't know, Yeah, let's leave it like this. So this can just kind of
block off pear like that. Now, what you can also
have at this point is you can have these rocky ground.
So I got two of them. I also got this one over here. And we do need to definitely
work a little bit more on the material and just do
some very slight balancing. But what you can
see is if I just move this and I just rotate
it and place it just below, something like
somewhere over here. It's fine if there's, like, little bits of
stone still in it. You do want to try
and kind of have then this stone sitting above it so that we do not have
any weird clipping going on in that area. And then we have another one, which is this one over here. So we can, like, play
around with both of them and kind of
fade this one out. And just by rotating it, you can kind of fade
it out just like that. And then under the grass
or under the water, you will not really
be able to note that. So you can even, like,
grab another one and just move like that far
down like this, that it almost looks like everything is
kind of like fading out a bit like you can
see over here, see? So, stuff like that. Now, another thing that
we can do is we can grab maybe some
individual rocks, and I will just place the rocks, and then I will balance them
out a little bit later. So let's say I grab another one that is kind of
sitting over here. And let's see, maybe maybe I can reuse one of these and
just move them down here. Yeah, I do want to ty and
see if I can block this off. I do want to get a little
bit more rocks that are just sitting almost on top of each
other. That would be nice. Let's see. We have this one. Now if I just grab, for example, another boulder and rotate it
a bit and maybe like that, I can place it and
just switch between your two types of pivot point. Yeah, I can have
another one over here, and we will have some smaller
rocks also using this. So let's say that we have
another one over here. And then what I want to
do is at this point, I want to keep this quite open. So I do not need to have, like, the same rocks everywhere. So I want to keep it quite open, but I can ty and maybe, like, use one of these and
kind of just here, just stick it down
there like that. And then sometimes I need
to go underwater so that I can properly
select these bits, and then we can
just, for example, only use some of these
stones over here. There we go. That
feels quite natural. And now around here,
we would want to have, for example, some stones
that we can scatter around, and maybe it would be nice
if we see if is there anything else that I can already that's one we already used. Oh, yeah, this one I
actually quite like. So for example, what we can do is we can use another
one like this. Maybe like scaled up and down. These rocks are very flexible
when it comes to scaling. And try to just like a little bit more
organic stuff in here or organic placements
so that it's not like one perfect line of rocks, but the rocks are
actually just like in various locations a
little bit like that. And as you can see, that
is looking pretty cool. So for the scattering
around in these areas, what I like to do is
let's save seen Aman. And then if we just go ahead and go quickly back
to Quixaw Bridge, we can find some
scattering rocks. So nature rock. And I believe there's
literally here scatter. It's literally called scatter. And then in here,
we can just find like these small rocks. And we almost want to get
like a collection of rocks. But Small stones
pack, I'm not sure. Rounded cobble pack,
cobble and wood pack. Let's it's tricky or
some sharper ones. Now, it is next to the beach. So let's download the
rounded cobble pack. And let's do also the
cobble and wood pack. Let's get these two. And then what we're
going to do is we are actually going to use
foliage painting, which will be the
first instance of me showing you how to
do foliage painting. So let's add these to very
quickly just like some of the smaller rocks in certain locations or stones
or whatever you want to call. In this case, it will be around here to kind of blend
everything out. So if you go ahead and here
we have our cobble pack, we can go to selection
mode and go to foliage. And now what you
want to do is you want to go ahead
and go to select. Grab all of your
rocks and just drag them in here. Very easy. Cobble and wood peck, same over here, grab all of the static meshes and
drag them in here. Now, these meshes, they are
already ready for painting. Unfortunately, because
I am working on a 1920 by 1080 screen
right now for recording, it's a bit tricky to see this. But basically, what
you want to do is you have the scale,
and first of all, what we are going to do is
we are going to go to paint, set our brush size very small, and our density very
small to like 0.1. And then we are
just going to click one and see what the
scaling is like. Here see so you can
see some scattering. I'm going to go
ahead and I'm going to make my scaling a
little bit bigger. So with everything
still selected, so everything is selected,
I'm going to set my scaling to 1.5 by 2.5. And what this will
do is it will just randomly change the
scaling a little bit. Next, we have a placement. We can align to the
normal. That is fine. That just means
that it aligns to our twain. Random pitch angle. We can set to, for
example, like, yeah, technically, you can do 90, and what that will do
is it will just do some random rotations
and stuff like that. So now if I would paint again, you can see that
this happens, and this was the only thing
that I was worried about. So we sometimes want
to kind of, like, remove some of
those stone pieces. Or what we can do, of course, is you can so it's
really annoying. You can simply go in
here and you can select your stone pieces or your wood pieces. Those
are the only ones. Go down here and then set the random pitch
angle back to zero or and just turn off
random jar, for example. And now if you paint
because everything's active, here you see? So now we can see
that we start to paint some pretty
decent looking rocks. Now you can use your paint
density to add more or less. So if I set this to
for example 0.2, and you can turn
off static meshes. And what that will do is
it will make sure that it doesn't paint this
on top of the rocks. And now you can see
that if I paint, I get some of these
rocks in here. Another thing that
I want to do is, I probably want to sink them into the ground a little bit, the stones, most likely. So what I can do is I can
select all of my stones, except for the boot over here. And then I need to go
in and where are you? Ground. There is a setting here, but I cannot seem to
find it for a second. Oh, yeah, also, by the way,
turn on fact distance fields. Where is the sinking setting? I guess. No, no, it's probably not the height. I doubt it would be the height. Oh, wait, here, Z offset. Of course, I'm thinking
about sinking. So Z offset. If I set this I'm not sure which direction I need to go.
Let me just quickly check. So if I do ten, Okay,
ten is floating. So if I do let's do minus
two and maximum minus five. Is it now under? Yeah,
that's too much. So let's do zero and minus two. Yeah, there we go. Now
they are a little bit more inside of our mesh. So
let's try it again. So now if we just paint in
here and you can just do, a little bit of an
uneven painting, we are, first of all, doing this one, which does not have a lot of stones, you can see over here. So just arts like something. And then what we can do is
we can set this quite high, which will be quite expensive, but this is more
like a just like it's interesting environment
rather than an environment where we need to have perfect 60 FPS or
something like that. And then I will
just out like a few more in some of these
areas over here. And let's have a look at
our camera angle. Here see. So it's just like
some small stones, but if you get a
little bit closer, they start to look what you like a little bit
more interesting. And you can hold shift to
basically remove some if you want to get rid of
some specific stones. So that's looking quite nice. Also, over here, you
can do the same. If you ever need to have, some kind of fading,
you can do this, you can see, and that
will just kind of, like, fade out all of these rocky
areas just like that. So that is the general
concept for this. What I will do now
is I will go ahead and do this pretty
much over here, over there, a little
bit more over here, and then I will probably
stop it around this point. And I will also
probably in here, also add a few of them. But I'll see how far that we go. So for now, let's save a scene, and let's kick in the
time laps where I will be working on these stones. M
15. 14 Adding Smaller Buildings And Tents: Okay, so I am done
placing after rocks, and I think it is
looking pretty solid. So yeah, and I also left, like, a little bit open here almost
as if that people can just, like, relax near the water
and stuff like that. But just in general, I think it is starting to look quite good. We got something really
interesting going on here. Now, what I want to do is
if I have a look over here, I want to have a little bit of, like, something to
fill up the space in this area and to fill up the space in the
central area over here. I want it to be quite low. And yeah, so just going to be like stars
and fishing stuff, and maybe also like
a little bit here. So if we go ahead
and have a look and I hope that I can do it
with these assets and else, I might need to actually
get a few more. And that's actually,
yeah, let's start with actually this one,
but we will see. So I can also, for example, use a few of these pieces to already extend some stuff
out here and there, just by mostly placing
this kind of stuff here, and then maybe placing
another one around here. So that will already,
extend it out. Then if we just scroll down, we have let's do something here. Let's say, because we got
a little table over here, and I remember that we had
a lot of fishing items. And well, of course,
we have also crates. Although the crates
and everything, those are really small assets. So I will not be
spending a lot of time on placing because I want
to do that in a time lap, since, else, it would
simply take far too long. It looks like that they don't have any collision generated, actually, which is a little bit unfortunate because
that would have made stuff a bit easier. But that's the thing when you
don't make assets yourself, you don't have a lot
of control over this. But what we can do is we can, for example, do stuff like this, where we have like one of
these fishing pols over here, maybe rotate it a bit and
move it up a little bit. And you can do the
same over here where we have another two, for example, here, and
just like a bunch of them. Like, it's a fishing
town. We can kind of just afford placing,
like, a lot of them. Without it feeling strange, like, why would
there be so many? It's because a lot of fish, it's a big village to support, and I assume that fish and everything is like
the main thing. So let's see, we have some
fishing nets over here, but they are hanging on a pole, which means that we can maybe place them somewhere over here. Almost as if they are just like there for storage or
something like that. Maybe, have another
one over here. We can do, like, small
stuff like that. Let's see what else do
we have? I don't know. Can we do something
with, like, these walls? I don't think there's something
super interesting there. Another one that I can
remember that we have. Oh, yeah, here. So we
have some clothing lines. Maybe we can do
something with that. But the one that I
can remember was, yeah, like these small pieces
we also need to work on. A Yeah, this kind of
stuff, it's peanuts. It's really small stuff. I don't care too much about it. The one that I was trying to find was that we
have a fireplace, but I seem to have
forgotten where it is. And else what we can
also do is we can also use our blueprints and
just grab stuff from there. Oh, here it is, finally. So what we can do is we can
have, for example, like, a nice fireplace
sitting over here. Maybe there are
like some kind of, like, benches that
I can use on this. M one of these. And I know, maybe they're doing like
some metalw or something like that
with these benches. So it's just like a bunch of stuff, small stuff like that. And then if we go to
our camera actor, here, it's already starting to look a little bit
more interesting. But yeah, we do need something a little bit more substantial. So this is nice having,
like, small props like that. Now, I will say that even
though we have limited props, I have already spent
more than 300 euros just on getting all of these
assets for the cutoil. So I'm a little bit reluctant to just keep spending
more and more money. While, yes, it would look cool, but it would not add
a massive benefit per se to this at oil. So instead, what I'm going
to do is I'm just going to basically figure
out like a plan. So stuff that we can rip
off from other pieces. Not that one. Let's do.
Okay, so from this one, we can rip off the tents. Now, and basically,
I just want to save a lot of time
by just grabbing, like, random pieces like this. So, for example, this one,
I can browse to assets. So yeah, let's do that. Let's just go ahead and start
grabbing random pieces. So for example,
we have this one. We can right, click browse to asset and do the same
thing as with our boats. Just right click and
duplicate and just call it like tent underscore small. And maybe we can also Oh. Oops. Maybe we can also
do, like, a large one. So let's say that we have just like a camping
site sitting outside. Roughly over here. And
then it will later on if I just move this let's move this
a little bit lower. It's going to landscape, sculpt, flatten, and let's pick roughly
the ground around here. It is not Oh, wait. The reason it's not
working is because we need to use the building flat
layer if we want to properly paint twain
or sculpt twain. So let's go ahead
and go in here. I'm just going to,
first of all, extend this out a little bit more. And then I'm just going
to use my Smooth tool to basically soften out this a little bit like that. Okay, so yeah, small
stuff like that. So we have that one that's built already do art a
little bit more props, and then I'm going to
open up my tensmll go to my Viewboard and
basically, let's do this. Let's first of all, delete a large tent and all
of these small assets, but leave both of these
tents left, sorry. For some reason I almost
spoke Dutch to you. So we got like these
two tents over here, and let's just also oh, no, wait, we cannot remove
the skull. That's fine. So I'm going to save this. And then I'm going to
duplicate it again and call this tent small
underscore 02. I should have called
the first 101. And the reason I
want to do this is because it is much easier for me to now delete one, save and then over here, delete the other one instead of needing to again
delete everything. So here we go. So we
can also save these. And then I just want to
if I delete this one, I want to have quick look at
how my placement is working. Yeah, I don't really like
that, so let's go in here. I believe this one we can
just reset the placement. Oh, sorry, let's
only reset it on the X and the Y axis and save. For this one, it's a
little bit more annoying to reset the placement because of all the stuff
that is inside of here. So if I just move it, okay? I find it surprisingly annoying. I assume that we
can go to the top. Yeah, I feel like
for some reason, you can barely see where
the center point is. I find that a little bit strange because normally
that's never the case, but now here, see, because of how the grid
moves, you just cannot see. But anyway, we now
have these ones done. And what we can do now
is we can, for example, start by placing these tents around and we can even do like almost like there was storage and everything
going on over here. And maybe then there's
also a sleeping quarters or sleeping quarters,
just a tent. And just like that, we can start by adding a bunch more stuff, which is looking quite nice. And we can also do,
another one here, maybe another tent around here. And I'm just basically looking
at it from a distance. This one, I'm actually
going to probably have the tent roughly around here. Yeah, I think we
are getting close. And then there
will be a bunch of small assets that we will place, but that's something that
will happen a little bit later because that would be a little bit overkill
to do right now. But it's just going to
basically be placing all of those little bits of, like, I don't know, like fire pits and
stuff like that. Here, like random
things like that, just to add a bunch of stuff. You can also go ahead
and maybe, like, over here, have some of these arch things and
just something fun. Just some small stuff like
that should be totally fine. And later on we are
even going to go in super small and,
like, have a mug, which unfortunately because
there's no collision, we need to hand place like that. Okay, so another thing
that we can have here is just some fabric
and clothing lines. I feel like that would
make a lot of sense to have those kind of pieces. It's also nice with the
lumen that it just gives off like this slight orange
glow that we have. But just in general, I feel
like this would make sense if we have that because people might have been
swimming and stuff like that. Let me just rotate one of these. There we go. So that's another
thing that we can add. This is just like a floor that's not I thought
it was a bench. Yeah. So firewood does
not really add too much. You can have, maybe
some firewood here. But let's just have a look and see how that the beach
looks right now. Okay, so there is
now a little bit more interesting stuff
going on on the beach. So now let's just continue
on by just ripping off stuff that has already
been created for us. And if we just have a
look, so let's start with this one because I think
that was quite nice. If we right click
browse to Asset. Didn't mean to open
it up. Sorry. I just meant to duplicate it and call this one storage
under score 01, for example. And now we can open it up.
It's going to our viewpot. Yeah, so we mostly just want
to have that back stuff. So everything else we
can kind of just remove. I hope that that
stuff is not linked. Yes, that's nice. It's not linked to anything
very specific, which means I can just go
ahead and delete this. And then all I need
to do is down here, grab all of these meshes and let's this time
go into our top view, move them over here and save. Okay, so that's another one
that we can use. Oh, wait. I want to actually
make a change to this. Let's go ahead and grab. Yeah, we can do that. Grab this fence
and duplicate it. Rotated turn on snap rotation up here, rotated 90 degrees. I actually wanted
to only have one, but honestly this is
fine. So there we go. Save. And now we have a
little bit of storage, which we can also
do something with. So you can always just
go in here and, like, have bits of storage
or something like that that is just scattered
around for people to use. And then later on if you
want to change your storage, but you do not want to
duplicate the entire blueprint, you can always just go in
here and you can always just ex go to the top and just add some extra barrels and stuff like that in here to
make it feel more unique. See? There we go. So let's have a look. Yeah.
See? Even like small, stuff like that
works quite nicely. Then over here,
what we're going to do is we're mostly just having, like, I don't know. Maybe like some more
stones and everything. But for the rest, it will
just be small assets. So having that done just
double checking my work. I think I'm going to have one
extra, like, fishing stuff. Where are you? Where are you? Come on. Here, let's have a bit more fishing
stuff over here. And now I'm will just focusing
on this specific angle. Like a bit of
firewood over there. The alphas, we can already not see because we
are so far away, but it's fine to just
be able to even see, like, a little bit of
some random stuff here. Okay, so for our
stars over here, am I guess we can grab a
little bit from this one. And we can grab these
type of styles and just use those. 1 second. Having a look and see what
else that we can find. Just something that
will make it feel like a market or something like that. Yeah, here, this kind of
stuff that should be fine. I don't want to
spend too much time putting together
entire new models, like I did with the fence, so that was a very quick one. But I do want to get something. So let's browse the
asset over here. Right click duplicate,
Style underscore 01. And then we can just go
ahead and we can open it. I don't know. Do we want to maybe
keep the little house? It does look interesting to have Yeah, let's do two of them. Let's have one with
the little house and one without. Here we go. So we got this stuff, so we
can just go to our top view, select all of our
meshes over here and just move this
more into the center. Save duplicate and just
call this Style 02. Open it up. This time, get rid of the back, get rid of these extra
bits and pieces. We can just add some manual
placement for those. Here we go. Once again, we can select all of
this, go to our top view. Just make sure it's in the
center for easy placement. Okay, so that's Style 02, and we already have those
over here. Let's see. What else do we want? It seems to be pretty much the same star. So I don't think we
could really do that. So let's move on to this one. Browse asset and go to Viewport. Oh, didn't mean to do that. I meant to first of
all, duplicate it. Stall underscore 03, and let's just leave
it at that for now, and then we can just see
what we will do with this. So stall number 03 will mostly just have this
stuff over here deleted. Let's see. So let's delete this. And yeah, let's make it almost
like a permanent stall. So we have the smoke
and everything. Don't know if I
maybe, like, want to rotate this and place
this one over here, almost like it's blowing air. And I just sometimes
get rid of, like, some of these pieces or
change them up a little bit. Since we are here,
anyway, we can just as well do that kind of stuff. Oh, let's keep that
one. And let's go ahead and save this. Okay, cool. So we got a few pieces here. So what we can do is we
can have s01. Let's see. So there is a walkway,
there's a walkway. So let's have star 01 over here. Style 02 over, like here. Let's do other let's see. Let's do another one
that's over here, star 03, and then maybe another
star 02 that is sitting around this point. Let's go ahead and just even get another
one, but this time, just rotate it
around just to give it some slight
variation around here. And I'm just having a
look at my camera angle. So okay, so we got this style. So what I want to do
is I actually want to swap these two around. So because right now it's
blocking too much of my view. So I'm going to have a
permanent style here. I'm going to have, another one that is
just kind of, like, floating around here
and it pushes down. We also let's push it down. We can always fix the train
a little bit later on. Right now, the focus
is on actually getting something
that looks good. Gonna have this one
and maybe also have another one sitting around here. I'm just making it up as
I go along, basically. But as long as from a distance, see, from distance, it
starts to look quite nice. We have a few styles over here, and maybe we can now add another one of a permanent
one sitting around here. I know that, of course,
people with keen eyes will notice that these are the same stars over
and over again, but I'm not too
worried about it. Like, not many people
will really realize that, or even if they do realize it, it's not like they
would really care. Let me say it like that. So I'm just going to
flatten this out. And I'm making this
flat out quite large. And then I will smooth
it. So same over here. Let's go ahead and just flatten all of this out over here. And then let's go
to smooth and just nicely smooth all of this out to make it
feel a little bit less. Also, over here, I'm also
doing some smooth Yeah, just, like, say, let's be careful that we
don't overdo it. But I definitely do want to, like, yeah, make it
something like that. Wow, there are some serious shadow problems still
here and there, and we still have like
this problem over here, but I will have a bug fixing chapter a little bit later on. So don't
worry about that. We will sort out all of
those special things. Over here, we can have a
little bit more storage if we want here and there.
So, stuff like that. We can have, for example, for the weather,
they place like a few of these tents or
something like that. Let's see, what else can we do? Maybe there's another tent
just sitting around here. And just like that, we are
starting to get already, like a much nicer
view over here. Last thing is, I feel
like that we could use something around
here, so that's too big. Yeah, something like
that might work nicely. Okay, I just place
those over there, and then what I will do is I
will go in here and I will, for example, just like, move it around because even though it might look
nice from a distance, it still needs to be
somewhat logical. So that's what I'm
doing right now. I'm just trying to make this
well, somewhat logical. And then later on
we will have fruit and stuff like that
just sitting in here. This one I can rotate
like a little bit sometimes over here.
So let's have a look. Yeah, see, so we got a bunch of stuff going
on here and there. That's actually
looking quite nice. Maybe have a few more tents over here just to fill
up this empty space. So what I'm trying to
get is I'm trying to get a nice contrast between
dense space and empty space. So right now this
is our dens space, and it's looking quite nice. Like, there's a lot
of stuff going on. It feels quite alive. I feel like maybe
like over here, I want to see,
let's do over here. I want to go ahead and just add some random
tents or something. At this point, I
don't really care. I just need something in those points to
fill up the space. I don't really like that one. Let's go ahead and
maybe do you know, let's now go a
little bit closer. Let's try and see if I can do
a makeshift something here, and then push this one,
for example, further back. And then this one, again, also here and just make
it feel a little bit more logical. Yeah, there we go. So that already feels
a little bit better. Maybe have a little bit of
storage placed over here. And just like that, we can very easily get some
interesting stuff. Maybe it would be nice to have
another stall that is kind of just a little bit smaller and sitting
against over here. I don't know, for some reason, I feel like this would look nice. And we are already
23 minutes in, so you can see how much
time that goes into just getting a few assets
in here like this. But yeah, I quite like this. I think for now, I'm going
to leave it at this, and then we will
have the small prop pass later on that will, of course, kind of, like, tie everything together where
we'll have like small bits of flags and all
that kind of stuff. Now, at this point, what I'm going to do
in the next chapter is probably foliage. So the foliage is going to
be an interesting one to see if it is even visible
from this distance. But we are going to do foliage. And when I say foliage,
I also mean debris, like sticks, stones,
all that kind of stuff. And at one point, we will also create a
few more camera angles because it might be nice to
create like an I don't know, like camngle like
this or something, just to get or maybe,
like, over here. See? Just to get
some more interest. So let's go ahead and
continue to our next chapter where we will start
working on our foliage.
16. 15 Placing Our Foliage: Okay, so what we're
going to be working on in this chapter is
going to be our foliage, so we are going to place
all of our foliage, mostly unlike the grassy
areas that we have over here. Now, Unreal engine does have something called
procedural foliage. Procedural foliage is quite
nice because what you can do with it is basically you
have, like, a volume, and you can automatically
place foliage specifically on, for example, grass or dirt or
whatever material you have. Unfortunately, for
that, you need to adjust the
landscape material, and personally, I'm
still learning about it. So I'm not really confident to teach you on how to do that yet. So instead, what we
are going to do is we are going to just do a
little bit of manual work. It doesn't take
that much longer. And I can also see that we have some really big roughness
differences over here. But let's go ahead and
we will have, like, a polishing phase quite
close after this, probably like two chapters
or something after this, in which we will do
a lot of stuff like changing stone collars and
just fixing small problems. So if we go ahead and we go
to our foliage over here, we've already pretty much gone over how to use it
with our stones, although it is again, really annoying that I don't
have enough space, but okay. So we are going to
let's see what we have. If you go to your, well, if you use this one, the
scrubs and then the foliage, and then we have a Buscher here. Now, these ones are different. They are static mesh foliage. This is important because
compared to the meshes, these ones have already been set up with all
of your settings. If, for example,
you want to save the stones with all of the
settings that you set, you would right click and you can save it as a foliage type. Then you get these
type of foliages. So if I drag this one
on here, like that. Let's actually, so the
stones are deactivated. These ones we can, for
example, activate. But now you should
see that there are some settings
over here, here, see, scaling and everything they already have some settings. So that's looking pretty good. So first of all, just have a quick paint for
this and see how it looks. It might be that it has
some settings on here that let me just quickly check because it's very difficult to see
with all of this stuff. So if we go down,
advanced? Ah, here. So advanced inclusion.
Ah, there we go. So this stuff over here, this is because
these foliage pieces are set up with
procedural foliage. So all I need to do for this one in order to basically allow it to be painted elsewhere,
is just delete it. Because right now all it is
saying is I only want to be painting on a landscape
material called swap. However, we of course don't have that landscape material
because we are using this foliage
for something else. So let me just quickly
go in here and just delete that. Over here. And now, if we go ahead
and go into paint, paint density is 0.1. Oh, that's Okay,
so it is working, but it's a little bit too dense. 0.01, for example. You see? So now we have
some nice foliage going on. Okay, so we got this type
of foliage over here. Now, I will need to lower down the density
quite a bit for this. So if we just go ahead and go in here and let's lower down all
of the densities by half. So if this one says 100, let's just do 50
because here you can see that there are
slightly different densities, and it's quite nice to have
that variation 25 5,100, 100. And that will
basically just half the amount of foliage that will spawn within our field. So we got that one done. Let's go ahead and do
a quick save already. Now the next one, if we have a look at this,
so we have our shrubs. Next, what I want
to do is I want to get our grass probably. So let's go to Quickle Bridge. And let's have a look.
So tree plants, grass. Here we have some wild grass. Yeah, that looks pretty good. So let's go ahead and
also add this one. So we got some grass, and I feel like that a field like
this would have some flowers. So let's also go in here,
flowering plants, probably. And let's see what do we have? Oh, these little white flowers. They actually look quite
nice. Let's do those. So let's also download
the S Campion. Just try to get a little
bit of color in there. If everything is only green, it is sometimes a
little bit boring. So it's just nice
if you just get like bits and pieces
of color in here. So what we can do is
we can add those. And then we will
probably just first do like a swap pass
and then we will do like actual grass pass where we will also paint in the grass.
So having these pieces. What I'm going to do is I'm going to go ahead
and go back to my paint, make my brush a bit bigger. And we basically just
want to try and get a nice balance that
if I paint like this, that we do not have
too much foliage over here because I don't want to make
it too overwhelming. So my paint density
is already to 0.1. Now, if I go back in here, so I should not need to
change the radius, I believe. Actually, yeah. So you can change the radius, which is the minimum distance between different
types of foliage. I guess that we can do that. Normally, I just want
to do this one because this one just defines in, like, a large area
how much we need. So that's why I just
want to, first of all, try this one because I
prefer using it that way. I don't know if what I
said made any sense. It basically means this one
will add more organicness to our foliage placement
within our painting. This one will just control how much of the
foliage you want. That's why I want to use
this one. There we go. That's what I meant. So 25. Let's try and go one lower, 50. Well, we cannot really
divide 25, so let's just do, like I don't know, just go for, like, 13 25. 50 50. I know this takes a
second to set up, but once we have it set up, it will go very quickly
with the painting. So now we can go paint. Okay, so it's starting
to get there. So that's pretty good. 0.005. Can we do that? Yeah, I think we're starting to get at quite a nice level. So let's say that we just do a test. Let's say
that over here. We just kind of like want to randomly scatter
around some bushes, and then we will have grass
and everything later on. Now, this is very far away. So although what I will do
for my final screenshots is I will just set the LODs of my foliage so that
they look like this, but then from a distance, something that we do
need to keep in mind is that the small bits of
grass and everything, we probably won't see
from this distance. But next to that, I just want to make this quite a lush looking environment. Just like it has quite a nice amount of foliage
and everything in here. And then maybe a little bit
less around these areas. And then later on what I'm also going to do
is I'm going to do another pase with denser
foliage that in some areas, I will just make the
foliage extra dense. And that's generally the
idea for this kind of stuff. So I like to do
this quite quickly. And then I will have
a quick look off camera not off camera. I mean, with our camera to
see what it looks like. And yeah, the further you get away and like outside of the
range of our main camera, the quicker you can do
just like a bit of this. This one is mostly just in
case that you can see it. Same over here. I
will now just go ahead and in these areas. And here I'm just
doing a bit of this. Just doing some random
painting and just like, avoid the town a little bit. Here we can do a bit
more. There we go. And at that point, you won't really be able to
see it anymore, so just paint this in. These cliffs are quite fun. They remind me of the Well, they're really small but they remind me a little
bit of like the UK, like the white cliffs of Dov
or whatever it is called. But then, like a
small version of it. So yeah, we get
something like this. I definitely do not like
the LODsy the last lots, which are the billboards. Those look a little bit strong, but that's something that we
can work on in a little bit. So over here we have
something like that. See and we very
quickly are able to create a lot of life in our environment. So we got something
like this over here. Let's also go a little bit
more in here and paint that. And now let's have a
look at our main camera. Here, see, so yeah, definitely, the lighting is something
we need to fix. Like in these areas, it's good. But it seems like when
the light hits it, I think it is just a
subsurface scattering, probably something like that
that is causing these pums. But anyway, so we
got something that is already looking
pretty decent. I'm going to do a little
bit more here and here. And now what I will
do is I will set my density to, for example, 0.2. And then in some
specific locations. Oh, sorry, 0.05 first. It's just, like, a little
bit more foliage over here. Like the field. Okay, now 0.02. And then in some locations, I just want to get pockets
of more density as if these are places where
humans did not really do a lot. And that will just add a
little bit more variation. And then we will fix
the whiteness or the lightness of them because right now that
doesn't look very nice. And I probably I'm not
going to use trees. I feel like this is not really the right moment to use
trees in these areas. So there we go. Okay, so we
got something like that. Yeah, it looks like that
I do need to have it, like in the far distance. So let's use 0.05. And let's literally just go, like the far distance, and you can at this
point, like, set your brush eyes to be
a little bit bigger. And it's mostly just
that you can kind of see hopefully the silhouette of them just sitting here
on the mountaintops. So I'm now mostly
just doing some very, very quick painting
because at this point, they will be so optimized
that they probably also won't be that big of an expense. It will be some expense,
but, of course, we are not so much going
for a game environment, but rather for, like,
just a pretty image. And then this kind
of stuff is okay to. Yeah, if it was a
game environment, I would probably optimize this a lot more and stuff like that, but then it would also probably not look as
good. So let's see. Now that I have it
in the distance, I see. Yeah, that's
what I want it. Like that little silhouette
where you can see, like, a few bits and pieces
here and there, and it looks like that we
can actually look really far away into the distance here. So I just want to
also work over here. There we go, see?
That looks nice. Okay. So we got this one. Now before we go
on with the grass, I just wanted to fix that
strange problem over here, and I've never actually
used this speck before, so bear with me. But what I think is
happening is if we open up our meshes and if we don't go like bushes,
and let's have a look. So if I open one and
then go to my LLD. We have LD zero, one, two, and three. This is the one where
the problems hit. And I believe if I have a look, I guess it is this
material over here. Difficult to see. But let's
see, screen space, color. That's one might be
causing the problems. Although honestly, I would think that
there's like a billboard. What you can also do just to make sure that it works fine. You can always go in here
and let's say that we go to IT LOD and set it fixed at one. Okay, so it looks like Is
this not the billboard? Then it must be subsurface. You can also check, by the way, you can go to visualizers L Oh, it looks like it
does not include the foliage in the visualizers. That's a little bit awkward. Okay, what I'm going
to do at this point, so you set it back to normal is I am going to have a quick
look off camera because this is a problem that
might take a little bit of searching before I
find the solution to it. And I will just tell you how
I found it because yeah, I don't want to really bother you with this kind of stuff. Oh, okay, so I found
the problem actually like 30 seconds after I
already passed the video. So I simply went in and
got the LOD material. So those are the ones
that were at fault. And then all I did
was I just wented to the subsurface color and I
said it darker, here you see? Light. Dark. Now, another thing that I will do later on is I have a little list
of console commands. And if I, for example,
paste one of them in here, which is foliage dot LD
distance scale three, what you will see is that it
will push the foliage out. So now you can see
that it looks a lot nicer because we have, that LLD. But of course, that makes my
scene a little bit slower. And that's why for now, I will just set it like this. Anyway, so that one
is also working. Now what we can do is we can
continue on with our grass, and our grass is mostly
going to be like in these areas because
there is a point, probably around like this
point where it's no point for us placing it since you
cannot really see it anymore. But we will use this,
of course, as our test. So it looks like it has already added the
grass and the foliage. It does it automatically
from unreal. What I'm going to do is all of these really thin grass bits
I'm going to get rid of because they do not add
enough value to my scene. So, click and just press remove, makes it easier
for me to select. So we just want to basically
get like a few big plans. And then over here,
I'm also kind of just getting rid of some of
them because else we have so many different meshes on our screen that it will become a little bit
too overwhelming. But let's say that we
have something like this. We can, click and activate. And now if we just go to paint, set is lower, and
let's, even lower. Let's have a look.
So if I paint. Oh, sorry, it's still
having the bushes, so you just want to the shrubs, let's go ahead and right
click and deactivate those. Do not remove them, of course. So now if we paint. Okay, so this is what we get. So we get some really
bright flowers, and we get some
small bits of grass. That's no problem. That's
something that we are now going to, of course, fix. So what I'm going to do is let's start by just turning
off the flowers. And just in our grass over here, I'm going to first of all, set my density to like let's 0.4. And then I want to select
my grass and set the scale, and I'm going to set these
quite big because once, first of all, I want to see them a little bit more
at the distance. And second of all,
you would think that they would not mow the grass
or something like that. So I want to maybe go for like two to three in terms
of the scaling. And now if I, for
example, paint, you see, we get
something much larger. Now, what I'm going to do
is I'm going to set by density to 0.2, probably. And 0.1 maybe. Yeah, I think 0.1 is a good one. And then what I'm going
to do is I'm going to go down here and let's set a random pitch angle to maybe like five or let's
do maybe like ten. And what it will do
is it will just add some slight rotations as
you can see, to our grass. You can see it over C. So one
is sticking a bit that way, one is sticking a
bit the other way. So we got that stuff also done. That is
looking pretty good. Now the last thing
that I will do is I will quickly go
into my mega scan, three plants, wild grass, open up the material. And just balance out the
colors a little bit. So if we go in here, we
have our color overlay, and let's see let's make
that a little bit darker. And that's actually
pretty close. If we just make it a bit darker, maybe give it like a slightly yellowish tone Now,
you know what? Actually, no, I'm
not going to that. I'm going to keep it
white. There we go. Okay. And now what we can do is we can go in
and, for example, temporarily
deactivate the grass, grab our flowers,
activate those. It's really annoying
for me to see. That's why I love
working in the fokecrem because then all of this
stuff, it's easier. 2-3, also for you guys, and a pitch angle of, let's say, ten again. And now for this one, when I paint, I probably want to go much lower in terms
like the amount. So 0.05, for example. Okay. So we have a few flowers
and now if we go in here, open up the material and
balance that one out also. So I don't know if it is
the translucency strength. Let's set that one to Oh, no, wai, sorry,
that one is fine. I was thinking about
subsurface strength. Let's set the color overlay.
Okay, looks like it. We just need to make this
really dark and then it does fit in quite well. Okay, so we have already
balanced those out over here. Now, at this point,
if you want to paint and the grass and the
flowers at the same time, what I would do is I
would simply now go in here and do the same
thing with our density, and or we can use our radius
actually for this one. Let's set our density,
first of all, to like 20 and our
radius to maybe like 50. And let's have a look. So now
if I activate everything, go to my paint and set this
back to 0.2 or sorry, 0.1. Let's get rid of this
one, and let's paint. Perfect. See? So now
we have a radius, which means that we don't
have too many flowers, and that is looking nice.
So we got these pieces. Now what we can do is we
can go ahead and just, like, paint this
and we can actually make this quite large in
terms of like a brush scale. And I will first of all,
once I've painted this, see if it is even visible, it looks like it is visible
from quite a distance. So this might look quite nice. It's a massive
amount of foliage. Like here we are placing thousands and thousands
of foliage bits, but that's why I'm not going
to place too many of them. If you often do this inside of your actual shader in
your landscape material, then it will be a lot more optimized because
it is camera based, which means that it
will only pop in at, like, a specific
distance and stuff. But what I can do is
I can go in here. And let's for now, paint it like this and just
have a quick look. Yeah, I feel like if
I would, for example, go to select mode
and I would set my screen space at 2000 or 200. Yeah, here, see, so you get, like, the grassy fields. Uh, I don't know. Is that look? I'm not
sure if it is too big. That's what I'm
wondering if it is too if the fields No, actually. Yeah, yeah, it's a
little bit too big, but that's good because now I can show you
another technique. So they are a
little bit too big. What we can do is we can
go into our foliage. We can select our flowers and our grass and
everything like that. And then what you want
to do is we want to go down here and I'm going
to set my scaling from 1.5 to 2.5. So bitsmall. And now you might think, Yeah, okay, but my foliage
is not updating. This is because
what you can now do is you can go ahead
and press reapply. And in the reapply, oh, yeah, you need to go ahead and just turn on your scaling
and your scale X. And now, if you click
on it, you can see. It's a bit difficult because
it's a small screen, but you can see
that it's updating. So it's updating with
the new settings. So what we can do
with this is we can just do like a massive brush. Go over here because we only
have our grass activated, it will have updated all of our grass in one go pretty much. And now you can see here, see, a little bit more
subtle. That's nicer. And once we've done that, we
can go back to our paint. It looks like that we want to place this one a bit
more than I expected. So I will place the dense
areas on the flat part, and then where the hills are
starting to really show, that's where I'm going to
go for, like, less dense. So I'm going to go in here. And this one I want to
have quite dense because it's quite a flat area.
And you know what? I'm just going to
carefully, like, paint in between our bits
and pieces over here, and over here, at
this point, you can't really see it anymore. Here we have another one
that's a little bit flat, and then in these areas,
I'm going to make it, as I said before,
a little bit less. So we have this, and
now I'm going to set my paint density to 0.05, and then maybe my brush
size a little bit bigger. And then in these areas, I'm just going to, you can see, paint in some slightly less dense grass and
bits and pieces. And where there's rock, I will just kind of, like,
try and avoid it, and it's all just in the name of adding some more
variation, pretty much. And for the very distance, I'm not going to place grass. Like you should not
be able to really see that grass anyway because you will just see
the train material. At this point, what
I will do is I will actually make my
brush size smaller. I'm going to hold
shift and paint this one over here out because
this is more like sandy. So let's paint this out a
little bit, a bit further back. And now let's paint it in
with less density over here, and you can see this
as like fading out. So here you can see that we
are adding less and less. And then at this point,
I can set this to 0.02. And I can just kind of
like scatter it around. And then later, what I
will do is I will probably just place like a few extra
bushes here and there. But yeah, so now we
are going to go into the town and into the town, I do want to actually
have dense grass because you can see
it quite clearly. But on the outskirts of town, I want to first of all, kind of blend it in here. So now we are going to go
probably for 0.07 ish. Now, let's do 0.1. 0.1 seems a bit more logical. And then mostly place it
like a lot more precise. So sometimes I just
change my precise, and I'm mostly just
placing this around all of our pathways and stuff like
that and extend this out. You can see when
I'm painting right now that it is starting to
get a little bit slower. So that's something we
need to be careful. You can go up here and
you can show the FBS. And the FPS, we are still
sitting at around 30 FPS. I also I don't have
the settings correct. So I will give you some
settings which you can use to make sure that
your FPS stays in, like, a pretty decent area. But it's okay. So I'm
targeting probably like 24 FPS for something like this because I'm going
to go way more intense. But even if it is 30 FPS, like a game, many
games run on 30 FPS. So you can see that now if I would because I'm
still doing, of course, my optimizations or not
doing my optimizations, if I would optimize this, we can easily get it to
quite a nice area. Go to go to 0.02 for a moment. And over here, I'm going to Also paint this out over here. And if we just quickly
go to our camera angle, I'm literally painting in a place where you cannot see it. Okay, fair enough. Let's go 0.1 again. Here we have just patches
of grass, same over here. Here there's training grounds, so there will be a lot
less grass because a lot of people are walking on top of it and
stuff like that. These areas I will have grass. I also need to just make
sure that we don't have the screen space or screen space subsurface
and stuff like that. But we can hopefully get
something quite interesting. And yeah, it is already different than our
concept because yeah, you can see little
bits of grass here, but we are really going
to go like a grassy land. So it is just kind of, like, covered in
grass and stuff. And then later on, I will also balance it out based
upon the camera. So I will add more or
less grass based upon our specific camera
angle because that is going to be like
our hero shot, of course. I'm going to set my density on my price size a
little bit bigger. We are now already
sitting at over 10,000 instances of
every single grass bit. So what I can do is
I can also change the LODs and everything on the grass to make them
a little bit motimize. I will show you that little
trick in just a second. It's just going into
your grass mesh and basically telling the LLD to
only show LLD two or three, for example, so that it does not even bother
showing the first one. But it should not matter too much because as
you can see over here, it pretty much uses the
billboard everywhere right now, and that makes sense because
we are far distance away. It goes 0.02. And just give it small bits and pieces
of grass here and there, like a very here, see. So just little bits of grass
in some of these areas. Oh, wow, we are already at
30 minutes for this chapter. Time flies when
you're having fun. But yeah, so we can
see like we are getting some nice
results out of this. And now let's go
ahead and go into a cambngle and then
we can have look. So yeah, little bits of grass
here and there is fine. And then we have the really
grassy lens in the back. I quite like that.
The last thing I'm going to do is as promised, I'm going to go in here,
set this one to like 0.1, or even higher 0.2, and just like, give it
a little bit more grass in some of these areas over here to kind of show that there's just a little bit more
dense foliage going on. Where people are
not walking a lot. Oh, and I forgot to
do it over here. So it's back to 0.1. For some reason,
always a smaller brush is slower than a larger. But, okay, so that is
looking pretty nice. We got small stuff like that. If you want, if we have close up shots later on, we are
going to, for example, the specific close up shots like place some branches
and stuff like that, just to make it feel
even more organic. Let's go 0.02, and I'm
just going to give, like, a few bits of grass because I feel like else this all
looks a little bit too flat. So in some of these
areas, I will just, like, place a few blades of
grass that are just like leftover even after all the walking on top of
them and stuff like that. And I feel like that
might work a bit better. But then, over
here, these fields, I'm just going to hold shift, and I really want to
make sure that there is not a lot of grass
going on over there. I still have no idea why
this is happening, but okay. So let's do something like that. And since I'm here, I can just smell quickly go
to my landscape, paint, grab my dirt layer, and grab the Alpha. And I just want to see if I paint in over here
if it is still showing that white stuff. It is. Curious. Let's go sculpt,
smooth, building flat. Okay, those were my tryouts, but now I don't know exactly
why it is doing this. That is very strange,
although from distance, you don't really
notice too much. But anyway, so let's have a
look at our camera actor. Let's save all of our
pieces and look at that. That is quite a big difference
that we have over here. Yeah, I quite like that. I think the last thing that
I'm going to do, I know that we are
way over time, but it is good if we just finish this all off in one
go. Let's go to paint. Let's first of all, deactivate
all of the grass, right, click deactivate, and just
activate some of the shrubs. Then go into your paint, and just sometimes like a
small brush at 0.1 density, I'm going to
sometimes just have. Okay, so 0.05 density. I'm going to
sometimes just click once here and there to add, like a few extra shrubs in the town as if they just
kind of like left it there. And I think that
will also look a bit nicer and just bring a little bit of these forward
because they are such nice, high quality, so it would be
a shame if we don't do that. Yeah, probably they probably
wouldn't have it there, but a few here. You know, like a nice
big one over there. See? So just Kind of hoping for, like, a large one here? Oh, no, I had it. There we go. Like a nice large one.
Okay. Maybe another one over here. Over here. Yeah, that's cool. Like
a few large ones again. And just kind of,
like, go around and in some locations just
place an extra one. Nothing too special, but it will look
hopefully quite nice. Just to have that
subtle difference. And also, over
here, I did promise to place a few even though we cannot
see it, you never know. There we go. And let's maybe, like, reduce a few of them. There we go. It's too much. Yeah. So, and, of course, I'm doing this quite quickly
because it's tutorial, but you can spend a
lot of time on this. Joe Just keep going and
going and going to, like, more stuff and make
it more interesting. But here, you can see, like, wherever there is no
foliage in these areas, it really makes the
building stand out. Then we still have, like, bits and spots of grass, and then, later on, we will
have a polish wherei, for example, as you can
see here. Over here. Well, I'll do that later on where we are just
going to remove some of those grass bits that do not really look as
nice and maybe, like, art little bits of grass. But I think we are
starting to get like a really nice
looking environment. Just for the fun of it, I
can show you if we do, like, a full on render,
how we would do it. So I have a few more settings that I will not be
using right now, but if you go into your
console command and actually, I will make a document that will be in
your source files that is called Console commands. And these are some console
commands that you can use to very quickly improve
the look of your scene. So for example, we have
the R tone mapper, and if I paste that one in, and you can also art this in
your default engine ENI INI. But here, if I do
this one, you can see that there's like
slide sharpening. Now what I can also
do is I can also set the R MIP LOD bias to one. O minus one, sorry. Okay, that one
doesn't do too much. So these are just like
a set list of, like, to increase static mesh LD bias, which will increase
the LD meshes. Then we have our
foliage LD distance, which is a big one. You see? So now we have our
foliage sitting there, distant field, eight bit, but I think that one
is already true, so we don't really need
to do much about it. And yeah, so now I
have increased that. So now you can see that we are
running close like 30 FPS. And then if I would go in here and set my script since to 200, then you will see the fill
quality. There we go. But now, of course,
it will run at 15 FBS because we are rendering
double the resolution. But as you can see, that is starting to look like a really
nice looking environment. So let's go ahead and quickly
go down to this over here. And let's go ahead
and continue on in the next chapter where we will do a pass where I'm just
going to place like a bunch of small assets
on top of here and there, just to make this all look a
little bit more interesting, but this will mostly
be time laps. So let's go ahead there and
continue to our next chapter.
17. 16 Placing Small Assets: Okay, so this
chapter will mostly be just like a simple
time laps chapter, and it's mostly because we are
just going to place props. So I just wanted to do, like, a small little
area, let's say, like over here just to add
a little bit of interest, and that's pretty much it. So let's go ahead
and go in here in our actors and
here we just have, like, a bunch of stuff
that we can use. And it's, honestly,
it's just like I am going to Alsax
actually get more props, but it's just placing some interesting props around that you can use, for example, like little tables,
little chairs, chairs, all that kind of stuff. Here, maybe, like, some crates. Unfortunately, there's no collision
because normally it would just place it on top of
it, but that's fine. It's because this pack was not completely made
for wheel engine, and it's more like just
like a generic pack. But yeah, so it's just like
adding some small stuff here and there
that will just add a little bit more
interest to our scene, especially from a distance. And that's honestly
pretty much it. Sometimes you can
also, for example, like some extra gates
or something or gates, fences or whatever they
are called, like this. And just, for example,
duplicate them. And honestly, from
this distance, you can kind of just
move them like this. And that should also be
fine, that kind of stuff. So, yeah, it's
nothing too special. I'm not going to do
too much work on it because I know that I probably will not get
super close to it. However, after this chapter, we will have a police
chapter in which we will also place our final
camera angles. And when we do that, then
of course, we can again, do some dressing specifically
based upon those areas. But for now, that
is not too special. So yeah, for now, we're going to just like things like placing flags and
everything like that. In some of these
areas just to show, which country it is or
whatever, something like that. Like here, another
one. So quite easy. Now, one last thing that I
wanted to show you before I kick in the T
labs is that we are going to go and
most of this I will also do the timelaps
because this is just really time
consuming stuff, but it's literally
just placing stuff. If we go to our treed
assets over here, we have, like, a lot of
stuff also including props, and that's
kind of what we want. So we have props, and then
we have like wheel sapery. Be careful, like
what age you go for. What's this one? Or it's
just some random spikes. But, yeah, so do be a little bit careful
like which one you get. But, for example,
you can go over here and get wooden wheels, for example, and then it's just a simple matter
of downloading those. Also, if you go to historical, you might be able
to, for example, go to medieval and in here, there are sometimes also
like some extra stuff. So here, like storage, see? So now we get these really nice medieval storage containers and wood buckets and stuff like that that
we are going to get. So what I will basically do is I will kick in the time labs, and I will do, like, a
collection like this. In terms of storytelling
for these kind of assets, we don't have enough assets to do like proper storytelling. So most of it is just going to be like some random
placements like storages. And this is like
the furthest extent from storytelling that
we're going to have. But as you can see, it's already actually
need to move it up. As you can see, I did
not even design this. It has already been designed. So just keep that in mind. And if we have a
look at our camera, what I will do if I
press G is I want to have a little bit
more storytelling around this area
with the military, a little bit more story
around the center over here, and a little bit more
storytelling around here. But that's about
it. And maybe place some small assets
around this area and around this area just to break it up and maybe also
like a few over here. But for the rest, I'm
not going to really spend any time placing
props that I cannot see. And that's just simply
a time save in my case. So that is probably about it. So let's go ahead and let's
kick in the time laps, and then we can get started by placing all of our final props. So and I
18. 17 Polishing Our Environment Part1: Okay, so we just
finished placing, like, a bunch of small
pops and everything, and it does make quite a
nice and big difference. So what I'm going to do in
this chapter or maybe it will turn into two
chapters I don't know yet. We are going to do the final
polish on our environment. But honestly, I don't think
there's too much polish. From what I can see over here, I'm going to actually
grab my notes with me. So we got, like,
the planning, which happens to just be a story. And I like to write down,
so I like to just have a solid look at my environment and see what I
want to work with. So let's make this bit bigger. I want to um in remove
grass in some spots. Okay. Add fog carts, play
with lighting, angle, and for Density. Let's see. Maybe try to get more lighting highlights
on back village. So over here, I can see
a little bit of lights, but I'm going to try
and see if I can maybe get a little bit
more highlights here, even if it means
faking the lighting. So that's another one
that I want to do. So yeah, we got this stuff. I already like some branches and even some larger wood pieces over here to make
everything feel a little bit more interesting. So, yeah, we got
that stuff done, art or actually do post effects pass in which we will also do
the color grading, which is actually quite
an important one. Although I quite like the
colors that we have right now, so I won't do too much of it. Play with water. That's just me seeing if I want to play
around with, like, the see truness of the water and the color and
everything just to see if I can get something
a bit interesting, maybe play around a little
bit more like the roughness. And let's see, is
there anything else? Don't want to go too overboard
because if I want to, I can just keep going
and going and going. Add a few more shrubs
to back mountain. And that's the mountain
that I can see over here. It looks a little bit flat. But for res I really like the silhouete so that's
looking really good. Okay, so I got that one done. Yeah, we got this stuff.
Oh, yeah, of course. Add camera angles, and also
polish based on camera. Angles. So that one just means that I'm going to add
a few more camerangles, and then based upon
those camerangles, I might want to like
a few more assets here and there or
fix some stuff up. So we have that stuff over here. Okay, perfect. That
is our planning. Let's get started
with the first one. So with the grass,
I'm talking about, I don't like these
few bits over here, and I have the power this time, so I can to change it. So I'm just going to contra a select everything and
then just hold shift, and I'm just going
to in some places, and might even be
better if we do it based on a camera
view here, see? Like some of these
places, I'm just kind of like removing the
grass a little bit. Just to also make
room for, like, a walkway and stuff
like that. Let's see. Yeah, let's do also like
a little bit over here. Oh, yeah, and I'm
also going to, like, play with terrain
texture normals. That's another one
I want to play with to see if I can maybe make the normals a little bit
more interesting because the rain does feel a
little bit flat right now. But yeah, if I want to really make the
train like intense, like it's scent
and everything, I would need to do a
lot more work on it, but that would be
a bit overkill. Like, I'm talking,
like, fill on, like displacement and even more foliage that
is highly specific, but then it can take me like 2 hours to
just do the train. So for now, that's just
not really worth it. So we got that one. Now,
remove the fog cards. I already showed you
in the beginning of the tutorial where
I got these cards, but you can also
find it into, like, your source files and into the description
and everything. So if I go in here, I have imported them already, and this one is quite easy. So let's say that I have this and let's
say that over here, I want to like extra foggy area, like there is just
low hanging clouds. I can drag in my blueprint in the underscore FX folder if you have also
downloaded this. And now with this one, give it a second to
prepare the shaders. I don't know which side. Okay. This is the side. Here you can see that now we have
something like this. What we can do is we
can set the plane a scale, X and Y scale, and you should be able to
see some movement in here, maybe if I tone this down. Yeah, it's very sub, but there is also some
movement going on. And my idea is that we use these ones, and
I sometimes do this. And then, for
example, I use them to add some additional
low hanging clouds. So let's say that
I duplicate this, rotate it and
duplicate it again. And sometimes I just, like, move them around a
little bit. Here we go. See now we get, like, almost like a cut off between
the two hills. So there's, like, this
cutoff where we can see this hill and where
we can see the rest. Now, I just want to see if I can maybe play around with
these a little bit more. If you rotate them sideways, they will look a little bit more like just like ground for, and that's more
what I wanted to. And then I messed up
with my placement. I'm also going to, like,
clean up this project, but I will do it
off camera because it's just placing models. There you are. Okay,
so we got this one. So what I can do is
I'm also going to move this up and then I'm going to
move it a bit further away. And then for this one,
I'm just going to set my intensity, a
little bit bigger, and maybe also my Y X
is a little bit bigger. There we go. So actually, let's move it down
a little bit more. Yeah, let's do
something like this. So we got that one, and yeah,
that's looking quite nice. It just adds a little bit extra. And of course, with
this technique, you can also do much
more extreme stuff, like you can see over
here where you have, these wi tick fogart
and everything. But I want to kind of, like,
have this quite subtle. So yeah, we got this one. I think I will have one last
one that is quite subtle. If I just duplicate it, that's going to be on the very
edge over here where there is these farm areas. And then this one, I'm going
to tone down the density. So it's just going to
be a little bit of Oh, from this angle, I need to
turn on the density again. Like this, maybe,
let's try and, like, move this around a
little bit. Let's see. Maybe tone down intensity
a little bit more. Just something very subtle. Okay, so that's another
one that I wanted to show you that you
can do this kind of stuff. So that's pretty cool. So let's go ahead
and also close that. Next one is play with
the lighting angles and the fork density. Now, at this point,
what I will just very quickly do to make my life
a little bit easier is, let's just select all
of this stuff and then scroll up again and
everything that is not a model, you just want to hold
control and deselect. So here sky atmosphere. Oh, that's annoying that it
pushes everything down again. Landscape, really, that must be a bug because it
does not normally do that. That when you select or
deselect something that it literally just pushes you
down the entire list. But hopefully, that's
about it. I think it is. Yeah, there we go.
And what I can do is I can just quickly
drag this into models. Say for these one, you just drag them into the models over here. And then we have our sky
atmosphere and the four cards. I also count those as lighting. So let's just go ahead and add those to lighting,
and there we go. Now it's a little
bit easier to work. Okay, exponential height for. We have our far off. Let's see. This is the current f off 0.03. I want to probably tone
it down a little bit. Oh, it is very sensitive. 0.0 try 0.0 or 0.1, I mean. Yes, yes, no, yes. Ah, yes, but I want to grab another one of these cards and push
them a lot lower. Uh, I only I feel like the
transition is not nice, so let's now push grab another one and then move this
one more towards the back. It is really strong, but I'm mostly just focusing
on these angles. There we go. Now it
kind of goes into the back. That's pretty good. Now we have this one, and I'm just going
to duplicate it. Move it forward a little bit, move it down a little
bit. There we go. So that one just
kind of goes off to the side. Do I like that one? You can sometimes also select
it and just turn it on and and then you can kind of, like, have a guess about
if you like it or not. I'm going to make
fog cart 08 and 04 less intense like it is
fading out towards the side. And I'm going to make
fog card 06 and 05. Also a lot less intense. Okay. So we got those done, and we got all of that
fancy stuff done. Did I forget anything? No, volumetric folk is fine
to have how we have it now. I think we actually did a
pretty good job like alighting. I just want to for fun. So what you can do is if you want
to play around with it, but you are worried about doing, you can always just
go to rotation, right click and press Copy. And now you can just basically
do whatever you want. Here, see, and just slowly
rotate your light around and see what looks the
most interesting. Here, for example,
because this is, for example, also, quite
an interesting look. So it's nice like this.
I think this scene will work well with
like a daytime scene. So now I'm getting a little bit more light
on the back side. But now I feel like the light here at the front is a
little bit too strong. And like this, it
is way too strong. But I'm just rotating around. So this is like quite
a cool lighting angle, but I feel like too many
buildings are in the sun. So I think the lighting angle that we had was pretty good, but maybe try and get it also to show up a
little bit more on our mountain and also catch
the lighting in the back. So let's see. So this is
roughly what we had before. So carefully, I think I
think that's the one. Yes, because now we can see the light is
catching this village, but the light is also
sketching the roof, and this is still lit over
here. So that's pretty good. Now, are soft angles already doing something?
No, not really. So it looks like
we are too far of a distance away from
it for them to show. Soft angles just means the
softness of your shadows, but they seem to
be already fine. Temperature I'm fine with, like we have post
effects later on. Let's see, intensity, 1.7, say 211.5, 1.7, let's so
1.5 in our intensity. The volumetric
scattering, by the way, you can probably will
see it's working. If I set it to 50, see how that volumetric fog that we have, becomes
more intense. If I set it to one, see, it becomes wait, let me
just press G over here. That's always the annoying thing that you need to
press G like this, and then it will go away. So this is one. Five, ten. I think I'm going to
set this to five. It's very, very subtle,
but it is there. So let's set this let's
set this to seven. And I think at that point, yeah, I'm probably not going to
bother with light shafts, because those are
mostly just when you are actually looking
directly into the sun anyway. Cascade shadow maps, they are mostly just like the long
distance shadow maps. However, right now they
work in conjunction with the virtual shadows that Unule engine five has
been released with. So we don't need to
do too much of it. You probably won't even see many of the settings if I
have a look. Yeah, see. So that's more I
like Unule engine four heavy systems
that you have there. We don't need to cast shadows on clouds because we don't
have any volumetric clouds. So that's also looking good. Skylight, you are
already fine, I think. Yeah, 0.03 if it set this
to zero, 0.01, 0.05. Yeah, so 0.03 is already
like the sweet spot. Maybe Zo pXO 25. Then, no. I'm gonna go pencio three. But yeah, anyway, so that
is also already fine. Perfect. So we can now go
ahead and check that one off. So this is pretty much our
final lighting quality. Now what I want to
do is oh, yeah, I get light highlights on
the back files also done. So the post effect pass. Ooh, that's going to
be an interesting one. What we're going to do? When I say post effect pass, I'm mostly talking
about color grading. And after the color grading, we will truly have our final lighting setup for
this environment. What you want to do
is, first of all, it's going to Oops, post effect pass, I
messed something up, so accidentally moved a window. There we go. Okay, in
our post process volume, bloom exposure, we already
did all of these things. We already did the vignetting. Then maybe let's make that
a little bit stronger 0.75, just because for some reason, stronger vignetting
on a scene like this gives more of like
a fantasy feel to it. And now this is the color
grania we want to work on. And here's the color lute. So this is what we're
going to create. However, before we do that, I just want to
quickly double check that trace reflections is Yeah, all that stuff seems to be fine. Okay, it looks like that that is the only thing
that we need to do. Color grading lute. That's going to be a fun one. Now, what that basically
means is that we are going to go into Photoshop with an image that
we have right here, and then we are simply
going to adjust the colors inside a
Photoshop and using a Lute, which is basically like an RGB
color information channel, we can then basically get those colors or
those color changes back into Unreal Engine five. Sorry, I started to
startter a little bit. So what we are going to do
is we need to go down here. High resolution screenshot. Also, before you do that,
always just press save because high resolution
screenshot takes a lot of memory from your scene, and that might make
it a bit slower. We don't need something
too strong right now. We can just set
this to like two, and then all we need to
do is just press capture. And then if you quickly click
on this pop up over here, it will open up your
screenshot. So see? Now, this screenshot, of course, it looks a little bit
blurry, not too nice. That's because we don't
actually have that high of a screenshot that we've taken,
but that does not matter. I just need to be able
to see this scene. So having this, what we
can do now is we can go ahead and open up
Photoshop here we go. So that's open up
with our image. Now if we go and go to
Google and just type in Unreal engine color
Lookup table or Lute and then you will get
to this documentation page. But of course, I will add
this one to a folder. This will explain exactly
what it is and how to use it, but what we are going
to do is we are just going to go down
here to this note, and this is basically a clean
lute which, in general, means that it does not have
any color grading on it, which means that we can just push our color
grading on this one. So you just want to right
click and press Save Images. And there will be a folder
called LUT inside of your source files for which
we have this one in here. Next, all you need to
do is you need to go to Voteshop and quickly just
add this lute on here. I also actually like
to go ahead and set my image mode to
16 bits over here. So image mode and then 16 bits, just because I feel like having a high range
often works better. And now what I want to do is, this is the latest technique. So I've used many
different techniques. You can use Lightroom. I've used DaVinci Resolve for
more complex scenes. But I found that the quickest
way to do this one is to, first of all, hold Control
and click on your RGB table. Go down here and
add a solid color. The reason I want to do
that is just so that I have a quick mask
that I can use. Then what I do is I select these two and
just turn off that mask, right click and
press merge layers so that they become one image. And then I like to
go to filter and then camera raw
filter over here, and that gives me
just like a bunch of settings similar to
light room very quickly. And then based upon that, we can, of course,
do some balancing. Now, I don't think there's too much balancing
that we need to do. We cannot really follow this one because we are making
our own thing. So if you have this,
you can go in here. And let's say that we, for example, want to
change the temperature. Not everything will
work with this. So it's only overall colors. You cannot, for
example, start painting in specific colors
in specific places. That would not work. And also things like sharpness and
everything does not work. It's just the color information. So I can go to my
temperature, for example, and I can, for example, make it feel like a colder
day or a warmer day. I'm going to make
this a tiny bit colder to around minus two. Next, we have our exposure. So we can, for example, make
things a little bit darker. We have a contrast to make everything like a little
bit more contrasty. We can set our shadows to make our shadows very
dark or very light, for which I'm going
to go for maybe making my shadows like a little bit darker, maybe
like minus two. Whites are often just like your highlights
that you can use. So you can make the fog
blow out a little bit more. I quite like having that
around like plus 20. Texture clarity and dehaze, we have nothing because they
won't actually translate, even if we use them, vibrant. You can use the vibrance
to, for example, add a little bit more color, but I'm going to leave that seeing this what
I want to do is, so I'm going to set my do I want to set my
saturation a little bit more? A, or shall I just use vibrant? Yeah, yeah, let's use my vibrant to around plus 15,
something in that range. But then if we go down to not
color grading, Color mixer. And here what we can do is we can adjust the
individual colors. So for example, I
can go to green, and I can actually make
it more yellowish, or what I can do is I can
give it, more of saturation. So you can see that we get,
like, a greener environment. See? It's quite subtle, but we can do stuff like that. Now, I was more interested
in yellow because my yellow, I want to just see if I can play around with my saturation here. See a little bit to make the sunlight a little
bit more tone down. I can, of course, also do this by just changing
the temperature, but since I'm here, anyway, it is sometimes
just nice to just quickly play around with this. And maybe like orange over here. We can also just like tone the saturation of
our orange down just because we have a
lot of orange elements that are a little bit
too over the top. And let's see. So yeah, we got our green. Now our blue. Oh, yeah, blue as ocean. So we can here I want
to make the ocean, like super intense
and stuff like that. But we can also, like
some general changes. So I'm going to set my u
a little bit higher and my saturation, a
little bit more. I'm probably going
to go back into basic and probably set my
temperature back to zero. Oh, damn. I accidentally
press Enter. Do not press Enter
because then you get this effect.
But that's okay. We can just go to
filter camera again and just the settings that we already changed just
don't change them. All of this information
will be stored. So we can now just go ahead
and continue on where we left off and just keep
playing around with it. Shadow Color, I actually like to do that
inside of the engine. That gives me more flexibility. So let's see, right now, we have this our stronger blue. I wanted to see if I maybe
needed to do something. No, because the stronger blue
is like willy in the air, so that is fine. We have a red. Okay, so our red is willy
sitting in those areas. I'm going to maybe
make it a little bit stronger plus five maybe. We have a orange and
our yellow now still. And I think what
I'm going to do is maybe want to take down the
luminance a little bit, which makes them a
little bit more intense. But it also makes them
like a little bit darker so very little, like minus one, minus
three, something like that. And I think that
pretty much does. Yeah, all of these
like the effects don't work. Optics don't work. Color grading does work, but I don't like the
menu that we have. The curves do work, you see. So if you want, you
can use the curves to, for example, maybe, tone
things down a little bit more. Oh, yeah, yeah, I
quite like that. So it's starting to feel
a lot more realistic. And then what we can do is
we can just press Okay. And now, if you want,
you can go in Oh, no, wait, actually, we can
do this in the engine. I wanted to show
you the difference, but let's just do this
in the engine. Why not? So we can now go ahead
and hold Control and select this mask so that
it will select this one. And then if you go to Image, well, first of all,
you can do a save as. So let's do a save as. And let's just call
this Lute underscore 01, just like a backup. And now what you want
to do is so you want to select your color lute, go to image and crop
so that is all that is left and then do save a copy. And this time, save
it as a PNG file. That's quite important.
Lut underscore 01, and then just go
ahead and press Save. Okay? And if you
want at that point, you can just press
Control Z to go back to your original image. Now, if we go ahead and we
go inside of our engine, we can go to Tutil textures make a new folder called
Lute, for example. And then if you just
import Lute 01 like this, now, it would not work yet. This is because you
need to open it up and you need to define
it to be a Lute 01. You can do this in
the texture group, scroll down and find
a color lookup table. And now you can see that
it has the full range. So if you save,
what we can do now is now you can see
the magic happening, turn on your lute intensity and your grading and then if
you drag this in Boom. There we go. So now you
can see the difference. So if I go ahead and
turn this on off, you can see before, after. Before, after. It is
subtle, but it is there. And because as I said before, I was already quite
happy with, like, what I had so far with lighting. Now, at this point, what
I'm going to is I'm going to make my window
a little bit bigger, go to my color, post
process volume, go to the shadows and remember how we already did
this a little bit. So I want to just see
if I can playgrounds. And I think I'm going to make my shadows like a
tiny bit more blue. This is more like
going off feeling. So it's up to you to
decide what you want. And also, even with color lute, you can now also balance
things out like this. I think I'm quite
happy with this. I don't think I actually
changed too much, but it's salts key. And next, I'm going to go
to Global and my contrast, and I'm probably my contrast
to be a little bit less. So like a tiny bit,
0.95, for example, just like toning
down a tiny bit, and I think that's
looking quite nice. Yeah. So let's say that we
have our post effect pass. Now, for our water,
that is another one. Oh, we are way over time. Let's split this up
into two chapters. In the next chapter,
what we'll do is we will finish off all
of our polishing, and that will probably also be the very final
chapter because then we are pretty much done
with our environment, and I will show you, of course, how to create some really nice,
high quality screenshots. So let's go ahead and continue with this in the next chapter.
19. 18 Polishing Our Environment Part2: Okay, so let's continue
with the final chapter. So I was going to
click on the water and go down to the second one and then
just find our material. And all I really wanted to
do is just see if maybe I can play around with the water and just
see what I can get. That's basically it. One
of the things that I was thinking about is maybe like the roughness,
because it's, like, super shiny right now
thanks to the rate raising, but maybe we want to make
it a little bit less shiny. Which in this case, Oh, that does not
give a nice effect. Never mind. If I said, Okay, so zero is
super shiny, so 0.1. And let's try a specular. Okay, a specular just makes it. Yeah, it does make
it less shining, but it's not exactly what I'm
looking for, to be honest. So specular let's do around 0.8. And then we have a
finel roughness, for which let's just
keep this at like well, it was 0.2, let's to 0.3. So what you can see over
here, these artifacts, that is the rate racing, which happens when
your water roughness is a little bit lower. So I'm going to set it
probably back to 0.5 or not. Now, let's keep 0.1. It's a balance.
That's basically it. So the next one was
that I wanted to go into over here my absorption, and let's play around with that. So ten. Okay, so ten makes it, that does feel more realistic. But it's like a balance.
Do we want to have it like realistic or do we just want
to have it like stand out? So one, ten. So let's do like 54 to five. Maybe the scattering, if I
said this to do 0.2, no zero. One. Okay, so that does
reduce the trou 1,110.3. 0.2. And then if I go now
back in here and push this down to three, I
think we got it. So I basically just tone
down the blueness a little bit and the seerueness
a little bit. I think yeah, I think that looks quite
nice. Let's save scene. Now, next one, add a few more
shrubs in the B mountains. Easy. That's just like
some foliage stuff. So I can just go in here and we're talking about
these mountains over here. Foliage, select
everything and just Oh, my thing is in wait. Deactivate and then just
only select the shrubs. Activate 0.05 in terms
of the pain density, and then I just go in here. Just make that 0.005. And just like in some
of these places, I'm just going to
add a few more in here just so that it fits a bit better
with the environment. How is that? Perfect.
Awesome. Okay. That is also done. Next one, art camera Angles. There we go. Okay, so we are going to decide
our final camera angles, and these will be
used for, like, final screenshots
and stuff like that. I'm going to go ahead and let's make a new folder
called cameras. Plug in our first camera
over here, saving our scene. And there we go. Just out of curiosity,
I wonder what the FB. Oh, yeah, the FPS, I'm going
to show you that, actually. Sorry, because I keep
forgetting that. Go to your project settings. And what you want to do is
you want to go down to Engine and is it in here or was it
Where are you platforms? I can't just type FBS. It was on this one or Oh, yeah. No. No, that's not the one. Maybe it's in the editor
tools. Editor preferences. Although I don't think so. It would be strange
if it is in here, so it's called general settings. That's the one that
I'm looking for, unless they changed it from Unreal Agent four to
Unreal Agent five again. But, general settings. Frame rate. Okay. I typed FBS but turns out
it's frame rate. What you can do here is you
can do a smooth frame rate, and what you can say is I want
to have frame rate sitting between let's say
24 FPS and 100 FPS. Then it will smoothly
fluctuate between that, which will give you often
slightly better effect. You can do a fixed frame rate, but often I find out that that
doesn't actually do much. You can tell it to
be fixed at 30, but it does not dynamically optimize your scene so
that it always hits 30. So doing this one at a minimum frame rate
of 35, that's fine. I'm curious. I think we
are sitting at around 25 actually. Oh, no, here. Yeah, 35, 37. So here, we actually have a surprisingly optimize
scene. That's interesting. Although probably
when I would go in and change my console commands, give me 1 second. I'm just we can also because I want to do that anyway so that we
can have a look. So the foliage one, the foliage LD
Okay. Fair enough. Awesome. So that's nice. So I've seen this
running quite quickly. So I just turned on the foliage console command so that I don't have
those billboards. It will make it a bit easier
for me to look at stuff. I'm going to press contra di on my camera. Go to Camera two. Set the movement speed
a little bit lower. And I'm just going to basically try and find another interesting
angle that I can use. I want to get some low angles, but I'm not sure if this is
the best low angle I can use. If I do this, you don't see that we never actually
finished the gate. To this one. It's
to another one. And you can also play around with your field of
view if you want. I tend to often just like, kind of leave it,
but it is up to you. I don't want to go too
close because, of course, I did not spend a lot
of effort into that. So I'm just trying
to find, like, some kind of interesting angles, something to show
of the environment. And I don't need
a lot of angles, but you can, of course, just spend a lot
more time on this. But I do want to get, something that's a little bit interesting. Let's do This one, and I strategically place the tent over here because it gives me
a foreground object, but it also hides a bit
of, like, the train, and then over here, I can
just, improve the train a bit. Let's do this one, and then the last one
that I want to do, I want to do something
a little bit more artistic, if I say so myself. For that, what I'm
going to do is I'm just going to, like, go here and then, like, play around with my FPS to
get like a distance view. Yeah, something like that. Just get something interesting. You can see this view, because literally the entire
viomes interview, yeah, it becomes a little bit trickier for my FBS to handle. But that's fine. So our
first view, of course, it's already Oh, let me just quickly save my
scene because I had, like, a performance drop. Which can happen. Of
course, in engine, your level also runs
even slower than it does in outside of the engine. So this scene we
already worked on now the next one because we
now have the camera angles, and then we need to polish
based upon the camerangles. This one, I'm going to just place like some
extra basic stuff. So let's say, like
some barrels or let's try to do some
mega scans because they are often a little
bit higher quality. Oh, yeah, another one. Um, polish rock colors, I will just add it to my list because as you
might have noticed, I'm forgetful when it
comes to that kind of stuff because I need to change some of the
rock colours still. So what I can do is you see, like in some of these locations. I just want to go in. And what you can also
do is you can always, if you want to
swap out a barrel, just simply drag in a
different static mesh, and then it will swap it out. I was actually hoping that the scaling would stay the same, but I guess it did
not like that. So let's see. So that was
Camerangle that was number two. So here, we got, like, a few extra barrels
here and there. We got some wood,
but yeah, like, in general, I guess
this is fine. Maybe we do like another hoops. So I can't move like that. Maybe we can do like
another one of these. That kind of place
that over here. And then, of course, in
your camerngles do twice, make sure that
none of the assets are floating into the air. That is fine from a
distance. But, yeah. So here we have like, Okay, so shipping yard and we can see, part of the village, and that stuff is
interesting and good. Now we have this one.
And for this one, what I'm going to do is
I probably want to have over here one of these. So let's just browse to asset. And I want to have
this kind of just sitting in front of the camera. Okay, like that. Next, what I'm going to do
is I'm just going to go in and grab like I don't know. Maybe I'll like one of these
pieces. Place these here. One of these. Maybe like
another barrel over here. So that gives us some
foreground props over here to look at that are quite
nice and high quality. Next, what we're going to
do is we are going to do a little bit of foliage
painting here and there. So let's go into our foliage. First of all, let's save sin. For some reason, I'm starting to get a little bit paranoid by accidentally losing my
progress or something. And let's maybe try and
do like one swap here. I, Come on. Is this too small. It's 2.1. Oh, I quite like having
like one with flowers. Or nuts. No, I don't like that. I want to have If I do this, it's probably better to go
like a bit further back. So we do like one
here. No, come on. Maybe like a small one here. Yeah. Okay, see? That looks
already, like a bit better. And then maybe have another one. Come on. There we
go. Over there. Okay. So that is
it for those ones, and now I can deactivate them. I wanted to grab some
of the grass, activate, paint 0.2, and make my brush
size a little bit bigger. I just wanted to
increase the grass amounts in some of these areas. You see, to get a little
bit more interest. So this is super specific, but I do want to keep
looking at, like, other came wrangles and
making sure that it does not look silly all of a
sudden on other camerangos. But this is actually
blending quite nicely. So we got, like,
bits of grass here. And now what I want to do
is if we now deactivate, I'm now going to grab some of
these larger what are they? Like wood boards.
Maybe it's like 0.4. There we go. So we have,
something like that. Basically, what I'm just doing is for this very specific angle, I'm just adding
more and more stuff to make it look a little
bit more interesting. Yeah, let's actually
just grab all of these, activate those also. And let's see how that looks. Maybe, reduce a few
over here and there. And like, add a few
and just kind of, like, try and get something that looks a
little bit interesting. Some of these areas. I think something
like that will work. Let's have a quick look now. Other angles, Yeah, that's
looking pretty good. And then the last one, we don't really
need to do anything on it because we already
got a pretty good view. So we can save this. So polish based on
camera angles done. Last two, play with
the train texturmals, which was mostly just counting
for this one over here. Sorry, landscape texturmals,
whatever you want to call it. And then we just need to
go ahead and just fix some of these rock
colors which are way too dark to be added here. So what I'm going to do
is we have our dirt. I'm going to set that norm
map strength probably to one. It would be nice
if they had like a far normal map
strength, but okay. I think I mostly just want to
focus on, like, the scent. So patchy, mossy. Okay, so here is so
for the far one, we end up using this one. If I now use this one, that actually does look a
little bit better. How does that look? For some reason, now
it does look good. Like in the beginning, it
did not look good at all, but for some reason now, it seems to be totally fine to have stronger send over here. Maybe because we have
more assets to break it up. Let's see. So another one that I then
want to just double check because I think I replaced
another one in here. Oh, not dry grassy, dry. Okay. No, so I did not do that. That's fine. So if we go also Cammarango tree. Yeah,
actually, you know what? I just wanted to fix the scent, and it seems like that scent
is doing what I want to. The dirt normal is fine. Maybe the grass normals
can be a little bit stronger, maybe like 1.5. But I don't think it will
make much of a difference. Yeah, you know what? I'm just
going to leave it at that. And then finally,
the very last one before we create our portfolio
pictures is a simple one. Over here, we have these rocks, but of course, it does not
really fit with the colors. So you just want to
click on the rock, find the material, open it up, and it looks like for this one, the actual bido is really dark. So even if the bido
tint does not work, which it does not, you
might actually just go into the texture and set the brightness, for
example, to two. Oh, and two actually happens
to look to look fine. Like I'm fine with,
like, the color. If you want, you
can go in here and set the color to be a
little bit more yellowish. See? Let's just copy this SRGB. So we got that one. And
now if we go in here, I can, for example, do the same. I can set this one to two. Don't know which one
this actually is, but we can then go to our
Beto tint pace in the SRGB. I can go in here and find this one which once
again, brightness two. Albedo tint. There we go. And I think this is
like the last one. So another one brightness two. See? So it's not perfect, but it's just like
such a quick change that people won't
really notice too much. And then for this one, it looks like that we went a little bit too overboard with,
like, the yellowish. So let's just tone that
down a little bit. But let's have a look. I think this one I missed. Yeah, so let's also
do this one, too. Albedo tint. Okay. And
did I do this one? No, I think this is
the very last one that I missed. Okay. Yeah, see, now, when we
look at it directly, they are a little bit darker, but they fit a lot better. So that's looking quite nice. Don't know if I may also
want to have, like, a screenshot that shows
off like the rocks, but I guess that
they are not like the most important
pieces to use. So yeah, you can take as many
screenshots as you want. Awesome. Okay. So what we are going to do now
is, first of all, safe. And for your console
commands, as I said before, I have this document
included for you guys with all the
console commands. Now, most of these are
already turned on. Like, these three are already
turned on automatically. This one is fine. This
one is already fine. This one will not do much. So we have our
foliage, LOD distance, and we have a tone
mapper that are the ones that we really
need to focus on. There were LOD problems
on our actual buildings. It kind of depends for
you if you want to fix it I'm not going to right now because I don't really see them, and I can always go down to
IT LLD and fix it at zero. But even here, I can see
almost no difference. Fix it at zero just
means that it will use LD zero everywhere, like
the highest quality. I don't know if you will
see a difference in FBS, because unreal gi five is
pretty good at handling high densities of geometry. Yeah, you'll see, so
there's almost no impact. This is not such a large
geometry intensive level anyway. Anyway, what I'm
going to do when I want to create my screenshots, I always like to
go ahead and get started by making my window
a little bit bigger. Now, I am currently recording in ten ATP that does
make a difference. So normally I record in four K or make screenshots
in four K. And then, of course, the multiplier
works differently. But anyway, first of all, RT Mapp I'm going to
paste it in here. That will add a
bit of sharpening. And then the foliage LD
distance I already have done, but just in case I
will add it again. And that we'll do the LD
distance or foliage further away so that we don't
have those billboards at the front over here. Now, if you have
a look over here, you can see that
everything is actually it almost feels a
little bit too sharp. So I'm going to set my tone
mapper to 0.3, probably. Then what I like to do is I like to set my
screen percentage to 100 or 100, 200. Now, this will
dramatically slow down our scene to the point that sometimes
unreal even crashes. But as you can see it will
literally be rendering this view a double
the resolution so you can get a
much nicer result. And then finally, for
your final screenshots, I like to go into my high
resolution screenshot. And at this point,
I am going to do one extra save because
this is the risky one. When it says multiplier, it means that it will
multiply the resolution of this specific view over here. So if I set this
to two, whatever this resolution is of this
view, it will double it. Because we already have
this rendered at 200, I will already be doubled. So what I can do is
I can press capture, make sure that
everything is fine. So you can see that
now everything freezes and we can just see it crashed. Now, why did it
crash? Two things. One, UnlgFive is a
little bit buggy, but the second and most
important one is that I went above the
performance of my computer. As I said, it's very sensitive. I'm having a 30
90 graphics card, and you can see
that even for me, this one is quite strong. However, normally
it can handle it. It's just a little bit
buggy because UnlegiFV. So then what you can do is you can just go ahead or
you can try again, or you can just lower
it down the multiplier. A way that you can lower down the multiplier
while still getting high enough resolution is simply making your view really large. So if it would actually load in, I'll just pass the video. Here we go. So of course, because I'm looking for
the highest quality, what I can now do is I
can also go in here. And I do want to try
and see the black bars. So I'm now just making my view even larger until I Oh, wait. The reason I don't
see the black bars is because I'm not
in my camera actor. There we go. So now
what you can see, it will not actually
render the black bars. I will just render what
the camera can see. So I already added
my console commands. Now what I can try to
do is, for example, set the screen percentage
to 150, little bit lower. And then I can go to my
high resolution screenshot, start with one and
press capture. Now you can see that that one was super fast because it will literally just capture
this resolution. It doesn't need to do much. What we can do is we can right click and press
properties on the image, and we can see that it
is only 1,600 pixels. I like to go for four K. So I'm going to go to
two. Capture Okay, so it still didn't crash. Now we are hitting at
four K. Yeah, three K, three to four K.
What I like to do now is just because I'm not in moot to twin
and set it up again, and I know that I only
need this resolution. I'm now just going to capture
all of my camera angles simply by switching to
them, press capture. And because of the tone
mapper that we have, the difference 100-50%
and 200% is not that big. So we can go in here. And also number four, like that. And now if I go in, you will be able to see
screenshot one here, nice and high resolution, two, three, and four. And of course, at this
point, what you can do. Oh, by the way, how are the
if I set the LD at zero, Okay, so it looks like
the mountains are just not very high quality. Was there a difference 0-1? Oh, Auto I don't see much. Now, another one
that you can do or you can try and hire
your screen percentage, or you can go in here for fun. And here, oh, yeah, here see. I already says large
multiplies may cause your graphics card
driver to crash. Let's leave it at
two, but this time, what I'm going to
do is I'm setting my screen percentage 200, and I will see sometimes even after restarting
with the same settings, it will all of a sudden work. So now, it's crashed last time. Does it crash this time?
No, see, it's willy random. Sometimes it crashes,
sometimes it doesn't. Maybe it's because
they are background programs or something like that, but I can now go in here and
I can Ty and capture these, which means that this will
become five K resolution probably five or six K
something in that direction, which means that we have
more than enough resolution in our images to do
whatever we want. So you can go ahead and
capture all of this. Here we go. And the last one,
hopefully without crashing. You can see how slow that MPC is running right
now because of this. But yeah, here, you
can literally see the little leaves of the
silhouetin the back, so that's why I like to
push my screen resolution. Gonna set it back to 100. Go back to our original
view. And there we go. Now we have this one. See, that's a lot
more sharper already. That's looking nice. I like it. I think it's
a very solid result, especially for,
like, a tutorial, and it looks like the
final resolution end up being Okay, that's weird. I expected it to be much higher. Maybe it kept. Maybe
it kept at like this. On no wait because
screen resolution does not increase image. Sorry, the screen
resolution is artificial. It does not actually increase
the image resolution. I completely forgot about that. Anyway, that was my
last mistake for this tutorial because I'm
going to finish this tutorial. Oh, that's pretty much it. Now, I think it was really fun, and I hope that this tutorial
was useful to you guys. We went over quite
a bit of stuff. So we did, especially
like the landscape, creating and the water. Now, there were a few
problems here and there, but I think it is
good that I showed you how to fix these
bugs instead of just magically having them all fixed and then you not
being able to continue. For the rest, it was
a lot talking about storytelling about what
is like the time zone, how do the people live. Now, because of the
limited assets, we cannot do an insane
amount of storytelling. For example, I've worked
on games that have like 16 to 20,000 assets. When you have a
library like that, compared to like 200, yes, then you can do
much more storytelling, but then it will also
take much longer. So we really went for, like, a story where we just divided everything up in
like four places, having a military
base on the right, central market on the center, on the left, we have just
a fishery and everything. And then in the
very back, we have, like, the nice village. And it's quite nice that
you can actually see the path going to
it and everything. We went over foliage
placement, bug fixing, polishing, lighting, post
effects, all that fancy stuff. And I just hope that you enjoy just toil that
is useful to you. And I hope that you are enjoying Un ReliFV
as much as I do. Sure, there are a few crashes, but remember, at the
time of recording this, it has only been
released one week ago, even though the pre offers were already available for
a very long time. So do be flexible with it. Set your out to save a
little bit lower, and, of course, just keep in
mind to keep saving. So that's about it for
this Tutorial course. I want to thank you for
watching FastTrack tutorials, and I hope to see you next time. And, of course, if you liked
it, leave a good review. If you didn't like
it, please feel free to contact me and
see what we can do. So I will see you all later.
 FastTrackTutorials, Premium 3D Art Education