Transcripts
1. Charming & Marketable: Why Bows Belong in Your Portfolio: Hey, friends. I'm so
glad you're here. Let's draw some
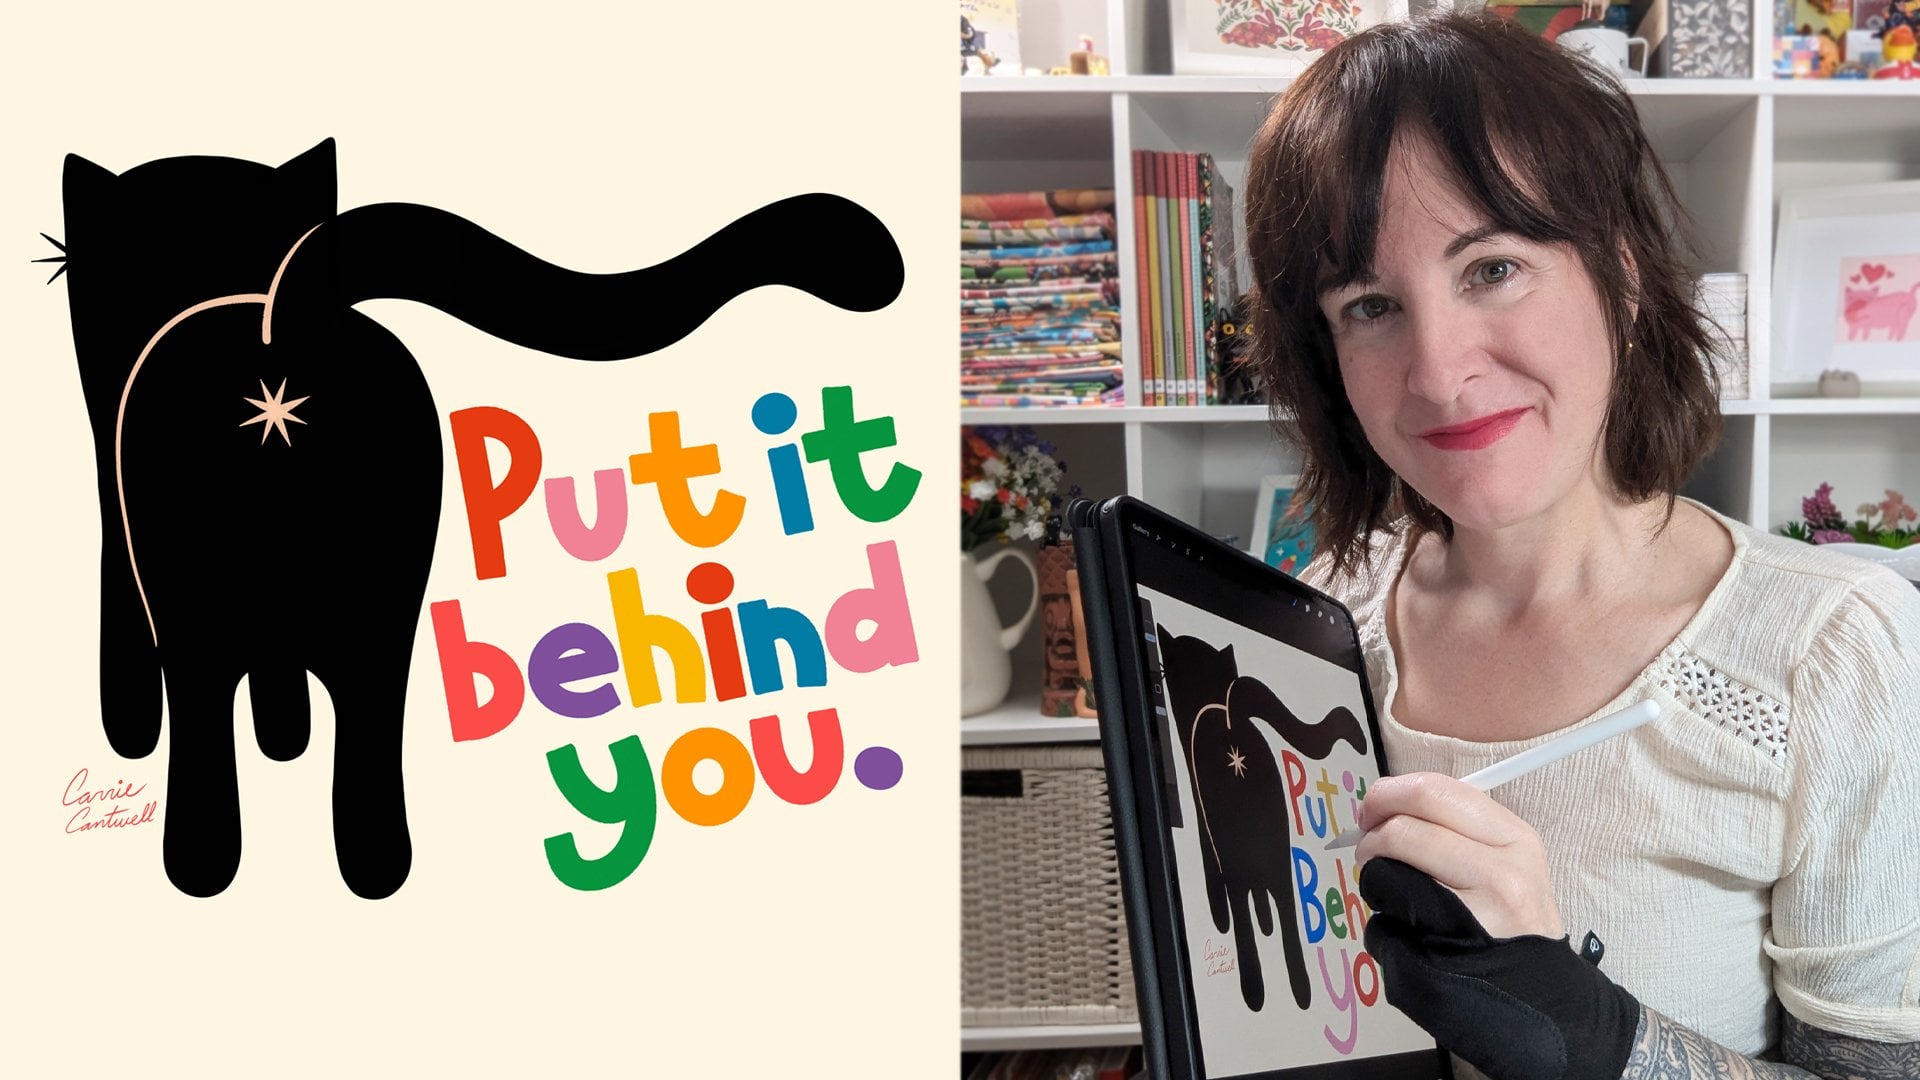
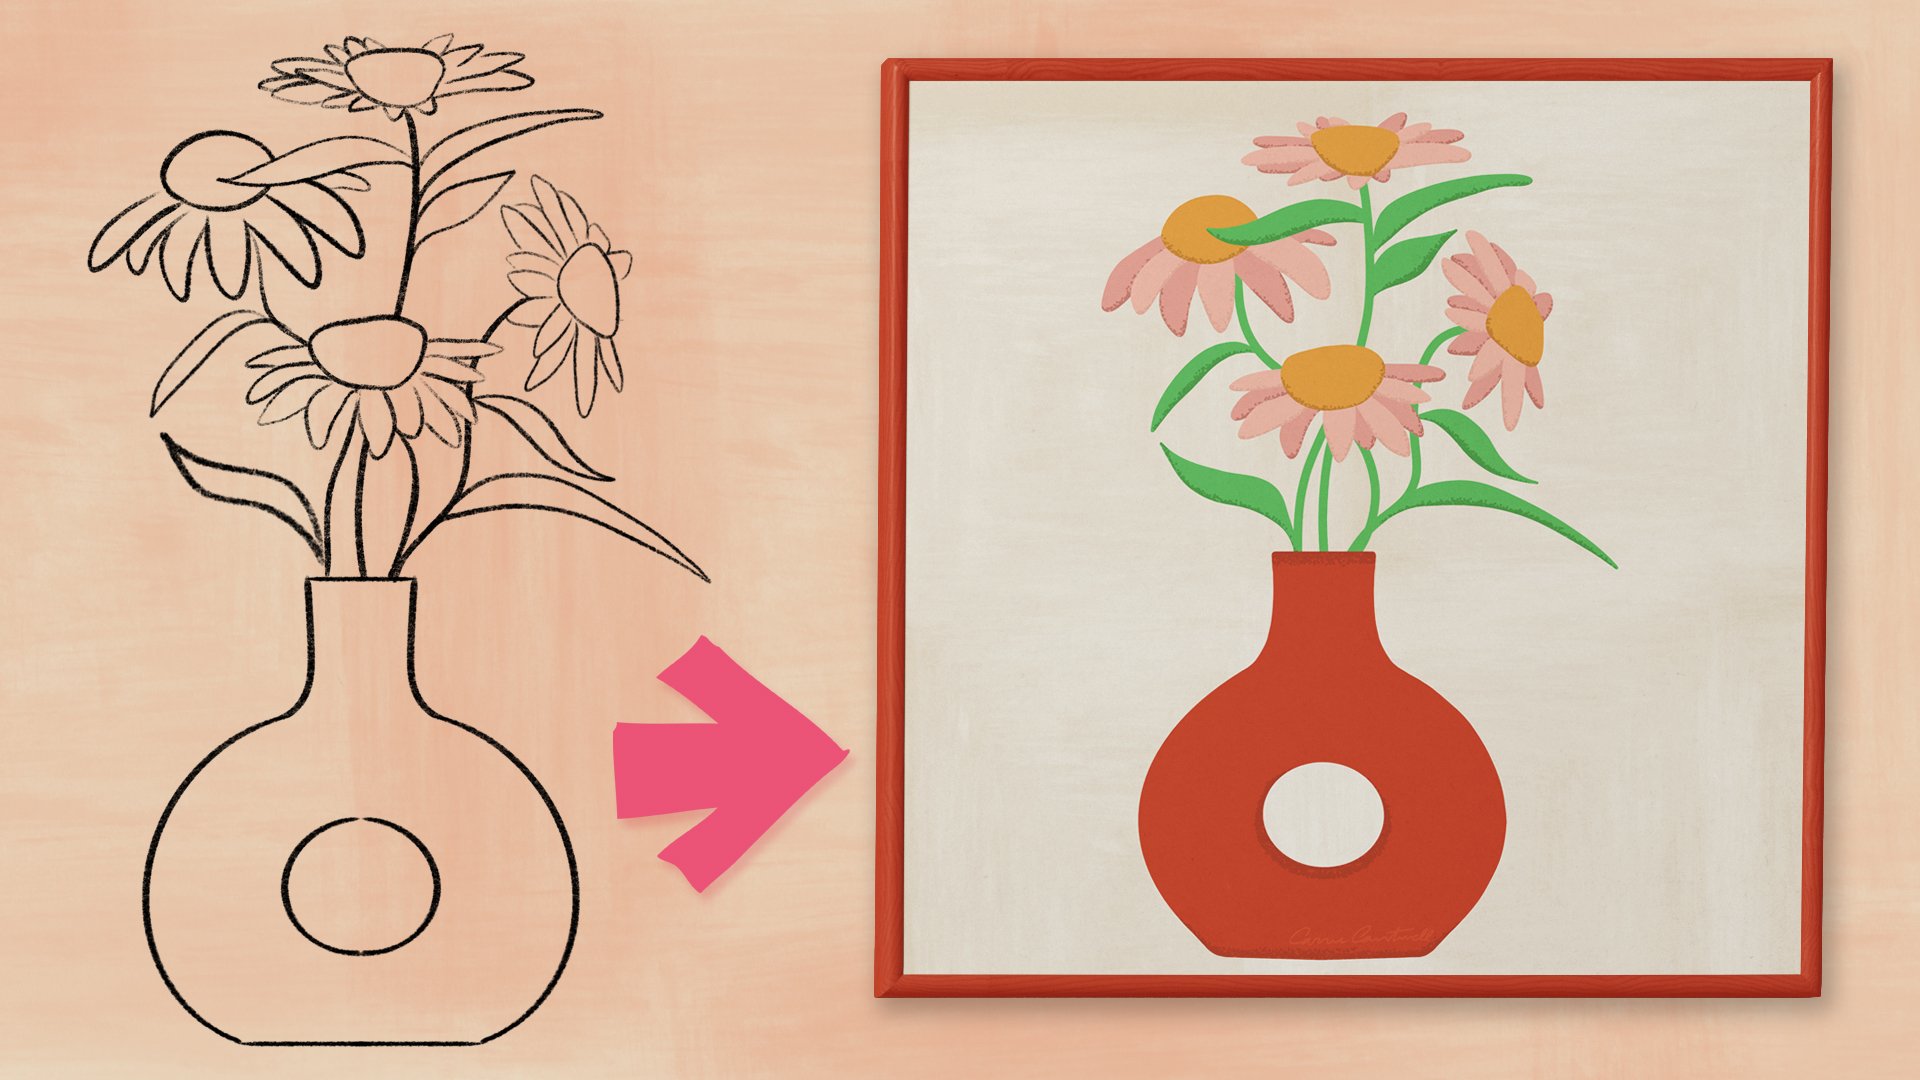
adorable bows together. I'm Carrie Cantwell, and
I am an illustrator, a surface designer,
and an educator. You might have seen some of my art in stores
like Pottery Barn, Michaels, and Urban Outfitters. And, believe it or not, it all started with drawings just like the ones we're
about to make today. In fact, one of my Bow illustrations
landed me right in Target. That's the magic of creating
cute on trend motifs. They don't just make
your art more fun. They make it more marketable. In this class, I'll show you how to add bows to everything. We will draw bows on
animals, on portraits, and even on a simple box, instantly turning it
into a sweet gift. You'll also learn how to create standalone bows that are
trendy, licensable art motifs. In this class, I
will also explain how to draw a Bow
and Bo anatomy. This class ties directly into my other Skillshare class
five essential elements of a pitch perfect portfolio
for art licensing. If you've taken that one, this is your next step. We're going to make artwork
that is irresistibly cute and ready for
licensing opportunities. You can find the class
by just visiting my Skillshare profile page and scrolling down to
where it says classes. All you need for this
class is an iPad, an Apple Pencil, and
the Procreate App. This class is excellent
for beginners. As long as you have
a basic familiarity with the Procreate app, you'll be able to
follow along just fine. So are you ready? Grab your iPad and let's put a bow on it.
2. Building Beauty: The Simple Anatomy of a Bow: Before we start drawing, let's take a look at what
actually makes a bow a bow. Every bow has three main parts. The knot, that's the center that ties everything
together, the loops, those big rounded shapes that
give the bow its fullness, and the tails, those ribbon ends that hang down or
trail off to the side. And sometimes bows have a wrap. That's the part of the ribbon that ties it around an object, whether that's an animal's neck, a gift box, or anything, really. When you understand these parts, you can play with proportions, add texture,
dimension, and depth, and make your bow feel
natural in any illustration, whether it's tied
around a bunny's neck, in someone's hair or just
sitting pretty by itself. Alright, now that we know
what makes up a bow, let's start adding
one to a drawing.
3. Elegant Accent: Dress Up a Swan with a Bow: Alright, so I have a really super simple
swan drawing here. I'm choosing to
draw a bow around this swan's neck because swans have these beautiful,
long, graceful necks. And there's also all
this negative space that is next to the swans. So we can really
draw a super big, really bold bow, and it's
going to show up really well. So the first part of the bow that I want to draw is the wrap. So I've created a new layer so I can have my bow on
a separate layer, and I'm just going
to start sketching. So when I go to draw the wrap, I'm not going to draw it as
a straight line like this. I can, but it kind of makes
it feel a little bit stiff. And the thing with bows is they're made of flexible fabric. You know, they're
like soft ribbon. So let's give it a little
bit of a loose feel. Maybe it's just kind of loosely tied around the swan's neck. So now we have a really simple, subtle hint of the wrap. So basically, what we're
doing now is we're saying that there is this bow and it is tied around
the swan's neck, and this is the part of the ribbon where it goes
around the swan's neck. Now, I'm going to
make a new layer, and I am going to
go ahead and draw one of my loops. Now,
here's the thing. So normally you would draw I
usually draw the knot first. But in this case, and this is one thing that
you want to consider. Every time you draw a
bow onto something, the knot may be hidden. So because this is kind of, you know, tied around the
swan's neck like this, I'm going to pretend
that the knot is behind the swan's neck
where we can't see it, which means we don't
really need to draw it. What we can draw,
though, is the loops. So you're still implying
that there is a bow here, but the knot part is hidden. And I'm putting these on a separate layer so that I can
then erase the parts that, you know, I don't really that don't make sense
to this drawing. So I'm just going to go
ahead and start back here and I'm going to go ahead
and draw a nice big loop. Perfect. And you see now
we've got all this awesome, like, space here, this negative space behind and on
top of the swan. So we can really fill
it in and kind of make this a little bit more of an
interesting illustration. I am going to give this
same loop a little bit of, you know, a little bit of depth. So there are a couple of
ways you can do that. One way I love to is I
kind of add this, like, you know, little hidden
this little piece here, where it's basically
kind of saying, like, this is the underneath
part of the bow, but you can also just add another line and kind
of make it loose, and you can even kind of
make it just disappear. You know, and get it thicker and thinner and just make it
disappear behind this one. Don't worry, we're
going to erase the stuff that's
behind this one. Now I'm going to create a
new layer for another loop, and I'm going to
make this loop a little bit smaller
and it's going to go behind this existing loop. I'm going to move
my layer behind it, behind the layer that
the original loop is on, and I'm just going to
draw another loop, and I'm just going to do that. Now we have this giant bow. It's really dramatic
and super cute. And it is kind of
disappearing behind the swan. Now, the reason that this,
you know, part here, the part that I started from is behind the swan is because
that's where the knot is, and that's where the loops
would be coming out of. So I'm going to hide my layer
with my first loop on it, and then with this second loop, I'm going to add I'm going to give it
basically some depth. So I'm just kind of Oops, I'm just kind of
drawing part of it here where it just
kind of disappears. And actually, you
know I'm going to do, I'm going to do this. And then I'm just going to
have it disappear back there. Perfect. So the loop is really, you know, it kind of gives it
like this dimensional feel. I'm going to do one
more because I want to keep that same curve. There we go. So this
curve that's right here, you know, see how it kind
of curves like that. So what I'm doing is I am curving this inner part
of the bow right here, similarly to how the
bottom part curves. So it really feels like harmonious and it
really feels natural. So don't go too crazy. You don't have to
worry about being exact. I mean, this is a sketch. But, you know, this is
kind of to help you get the idea of how this bow
would be structured. Now, I'm going to add
back the original loop. Now, one thing that I
always do when I'm drawing is I will draw each
element in a layer, and then I will erase the parts that should not be
showing because obviously, you know, these are
kind of overlapping. So I definitely am going
to want to erase the oops, any parts that are, you know, on the swan because
these would be hidden. They'd be behind the swan. And then I'm going
to go to my next layer and I'm going
to do the same thing. Okay. And now, because
the second loop that I drew is behind the
first loop that I drew, the top one, I'm
going to want to hide the parts of the one
that's underneath it. So I'm just going to
go in and I'm going to erase the parts of
the underneath bow. So let's see here. Where is that located? I think it's in here.
Yeah, there we go. We have this bottom part
of the bow right here, this bottom loop let's have
that be in front of the swan. I think that would
be super cute. So in order to do that, that's why I have my swan
on a separate layer. So I'm just going to erase the part of the
swan that overlaps, so that then it really is kind of going in
front of the swan. And now we've got this
super cute, you know, dramatic bow and it's
going basically, you know, the loop, one of the big loops is going
in front of the swan. If instead, if you
wanted to erase, you know, the bow part, you could absolutely do that, and you would just
want to erase anywhere where that bow is
overlapping the swan's body. So basically, the loop part would also be behind the swan. Either one is fine
as long as you pay attention to where
things would be in space. Personally, I actually
really prefer it where the swan is in the back
and kind of hidden. So I'm going to go
back and redo that. And I like it where, you know, the swan is basically
behind the bow. So the bow is so huge
that it's literally, you know, like draping
over the wing of the swan. And I've got a little piece
right here. There we go. Now, the knot is really, truly, like, it's
back here somewhere. It's hidden because it's what's tying these two loops together. So it's okay that
we don't see that. You don't always have
to have that loop. Another thing is that we
want to add some tails. So I'm going to
create a new layer, and we want to think about, if this is a ribbon, where would these tails
be coming from, and then where would
these tails end up? So the reason we're
drawing it on a separate layer is we might
want to play around with, Okay, if the knot, let's say the knot
is back here, right? Let's say it's invisible. In fact, I'm going to draw yeah. So let's say that's the
knot, and, you know, maybe the swan is, you know, swimming
in this direction. So the loops of the
bow are kind of, you know, trailing behind
the swan like that, right? So, you know, just
use your imagination. So I drew a placeholder
knot there, but that is going to be erased. So I'm going to do a new layer. And now I can just think about, okay, where would
these tails be? Where would they be starting? Where would they
be coming out of? Okay, so now I want
to draw my tails. Now, the tails are really just the loose ends
of these loops. Basically the way it
works is, you know, you tie these loops and then
they go into this knot, and then the loose ends of
them kind of trail out. So I'm going to think
about if I have this, you know, loop right here, I'm going to on a new layer, draw where I feel
like would make sense for a tail to
be trailing out, kind of coming out of
that of where Oops. Of where that bow is,
of where that loop is. And now I'm going to
create a new layer, and I just need one more tail, and that is going to be
a tail that is kind of coming out of this bottom loop. So I'm going to start
at the beginning. Actually, I'm going
to do it like here. And actually, here, let's
do this. There we go. And then I'm going to
start the other part of it on the other side of that loop. So now you can kind of see
where this would make sense because it's all coming
out of this knot here. The knot is where all of those
ribbons are coming out of. So I can delete the knot now. I don't need that anymore. And then I can start
cleaning this up and erasing any parts that are overlapping
where they shouldn't be. So the first thing I
want to do is get rid of anywhere that it is
overlapping the neck of the swan, because that would
not make much sense. And I think I want
to have both of these tails be in
front of the swan. I just think it's so cute, and I think that's
going to make a really good for, you know,
illustration. But I don't want them in
front of these loops. So I'm going to go
through and erase everywhere the tails are where they overlap
with these loops. I'm just kind of going
and erasing them there. Now we have our tails, and those are coming
out of where they, you know, very naturally
would be coming out of. And because I want them
in front of the swan, I can then go and
delete the parts of the swan that are
overlapping the tails. So now we've got our swan, and our swan is wearing
a really pretty bow. One thing that you
know, this is a sketch. So, of course, it's kind of hard to see with all
these lines here. But one thing that I
like to do, you know, when you're coloring in your
illustrations is make sure that your bow is a different
color than whatever you are, you know, whatever it's
being tied around. So if I want to do, you
know, like, let's say, a pink bow on this swan, and I'm going to change
my background color, so it's easier to see. Let's do a slightly lighter
one than this. There we go. Um, but yeah, and then when
you're coloring it in, just think about, okay, this right here, see this pink part that
I'm drawing right now. This is the top loop. So I'm just doing
one piece at a time, and that is the top
part of the loop, then you can go and do the one that is the
lower loop that is behind the top one
and color that in. And you do want to make
sure that, you know, all of your loops and your tails and your not and your wrap
are all the same color. Now, if you're going
to do shading, you know, like if
you're going to have a darker part of the
bow, that's fine. But you don't want
to do, you know, you're not a
different color than your tails and your tails a different color than
your loops because you're trying to give
this the illusion of being This is all
one ribbon, right? This is all connected.
It's all one piece. And if you do it a very
vastly different color, then what it's tied around, that will really help it not
only, you know, make sense, like, you know, logically, but also it'll help
it really stand out. So now we can really see here where the beginning of our
bow is, where the front is. And, you know, if you want to, you can always go
back and, you know, erase different parts of Bos, if you feel like, you
know, maybe it's a little bit too cluttered,
you can go in. I'm going to go in, and I can just kind of oops
redraw this part here. And I'm just going to kind
of have this disappear here. There we go. So you
can still you know, you can go back and retool this, but you just want to think about where would this be in space? Where would this, you know, connect? Where
would this attach? And then, you know, when you're coloring this in, if you decide to use
color, you know, just make sure that your
swan is a different color, whatever you're drawing, is a different color than your bow. So I'm going to do
this a little quicker. But, you know, when I'm
coloring in my swan now, doing it a little messy, it's really obvious, you know, like, where and this is
underneath the layer. So I have off white layer under the layer that I
just created pink on. See, now it's like
really obvious, like that this bow
is on this swan and, you know, I wouldn't do, like, a white or even
another off white bow. You can, but the problem is you risk it
getting kind of lost. And the point of drawing
bows is that they're cute, you know? They're like, awesome. They make any illustration instantly charming,
instantly cute. It kind of instantly
gives it that, like, kind of girly
coquettish feel. And it also kind of takes
anything and gives it like, you know, a trendy,
youthful appeal. I'm kind of doing a
little messy job here. Anyway, you can get the idea, you know,
and then of course, if you want to color
in the swans beak, I forget what color
swans beaks are. But anyway, so yeah. So now you can kind of see this bow and you can
see the parts of it, and it makes sense, and it's loose and it's
cute and it's fun, and it's all kind of emanating from that knot that's hidden. And, you know, this
is a really great way to add some charm and, you know, some interest to some of your illustrations if you feel like maybe they
need a little judging.
4. Playful Pop: Add a Chunky Bow Headband to A Portrait: So I have two super
simple sketches of women, and I want to think about adding bows to each
of their hair. And I'm going to do them
in two different ways. I'm going to give this woman
here a headband with a bow. And then this woman here,
I want to almost imagine, like, a bow where it's like, loosely kind of tying
her hair together into, you know, almost like a knot
at the bottom with a bow. I have a new layer, and I'm just going to start with this woman over
here on the left. And with the new layer, the first thing that
I want to think about is with the bow, if she had, like, a headband and it was kind of
going through her hair, like, how would
that work exactly? She could be maybe,
like, let's say she's a flapper and she
has a headband on, and it has a bow, like a decorative bow on it. So I want to think
about the wrap and, like, how it would
curve with her head. And do you see, like, you know, she's kind of looking
to the side here, so that side of her
face is foreshortened. So we want to make sure we do that when we are
drawing our wrap. So if I just kind of
start with, like, the wrap here, and I want
to have it kind of, like, disappearing into, like, kind of away into the side of her face
where it's foreshortened. And, you know, when I
draw stuff like this, sometimes it just
takes me a few tries, and I'm going to I'm going to lower my
stabilization a tiny bit here. So because we're on a new layer, I'm just going to think about,
okay, I'm going to draw. I can always erase it later. But I'm going to
draw this where it basically kind of
disappears into space, and I'm going to do this, and you can kind of see how it just kind of disappeared over here on the
side of her head. So that would be like, maybe a wrap, like a ribbon
that goes around her hair. And you even could, if you wanted to, and let me
duplicate this layer here. I could even take
her hair, and, like, maybe I should make
it where her hair is, like, kind of coming
out of this wrap here. So let's do like this, and then we have the wrap, and then her hair is kind of,
like, coming out like that. So maybe I don't know. I'd probably do it a little
looser, but regardless, however you want to
do stuff like this, you just want to
think about, like, how would this behave? How would this be? If this was, like, a ribbon that was wrapped
around her hair, and, like, you know, her
hair is kind of curly. It's got some, like, loose, like, you know, looseness to it, but it's got some volume. So you want to just
think about, like, you know, if this was
giving her some volume, if her hair has volume
and this bow is kind of raining it in here, you would want the hair
to be coming out of the sides of the
ribbon right here. And that's kind of, you
know, part of the bow. Then let's say, she's
a flapper, right? So I want to give her I'm
going to create a new layer. I'm going to give her a
bow right on the top of her head because that's, that's a very
flapper thing to do, have a big decorative bow. So the first thing
that I want to think about drawing is the knot. We may not see the knot, but I'm still starting this bow drawing with
the knot as structure. So let's say, I'm going
to do it like here, I'm going to do it even
more like a rounded piece. Let's do it real small. I want it again, I want it overlapping these
pieces right here, see? So that basically, this
is the knot, but, like, this part of the ribbon here
is coming out of the knot. We want to think about
doing our bow where it is naturally going to be
coming out of the knot, and on top of the ribbon that wraps around
her head, that's the wrap. So let's do one of the loops. I'm just going to do
it, and it's going to be kind of foreshortened. So see how, like this side of her face is way shorter
than like this side. So I'm doing my
loop shorter here, but then I'm going
to do it bigger on this side, and
it's coming out. But do you see now
how it kind of, like, goes with the curve
of her face a little bit? That might be a
little too extreme. I'm going to do it a
little bit more subtly. And let's do like this. Okay. And then I'm
going to do that. Okay. So that kind of
makes sense, right? So as you can see, and I'll take her away
so you can see it. These loops, I'll hide this too. These loops right here are coming out of this
knot right here. So let me put her back
and put her little, you know, wrap part
of the bow back. And now, this is
what I do often. I'm going to erase the parts
that don't make sense. So you would not see these lines of the wrap when the bow is in
front of it, right? So I'm going to erase those immediately because I
want to as I'm drawing, I want to make sure
that this makes sense. Like, if this is hidden, would that be like that?
Would that look like that? So I'm just going
to go ahead and erase all of the wrap and
I guess while I'm at it, I might as well erase
this little piece here. Anything that's, like, should not be in front of this bow. And now we have a bow. She has a bow in her hair, and she has it kind of
wrapping around her hair. And it's like, kind of loosely her hair is kind of loosely
coming out of it right here. So, you know, it kind
of makes sense, right? And then when you go to color
something like this in, I'm going to do this
really quickly. But, like, let's
say you're doing, you know, let's say
she had a pink bow, you just want to make sure that, you know, her bow is
a different color. Here I go again with
the pink bow, but, you know, I can't help it. But you just want to make sure that no matter what
her hair color is, obviously, you know, it's not super common to have
bright pink hair like this. You could. But if you're
drawing a flapper, she probably doesn't
have pink hair. Maybe, you know, let's say we want to give her,
like, brown hair. So you just want to make
sure that your colors, if you're doing color, are different enough so that and this needs
to be under here. Let me move this down. You just want to make sure
that your colors that are right next to the bow that
you're using as essentially, like an accent on something
are different enough. That it's really obvious that
this person has this bow. You don't want it to get,
like, lost in her hair. Now she has a bow in her hair. How cool is that? Now,
in this instance, I honestly don't
think I would add tails because we already
have these, like, accents in her hair, and we're kind of just keeping this, like, sort of simple. So I'm going to leave that. So we have the loops.
Those are right here. We have our not. That's right here.
We have our wrap. That's one side and the other, and it kind of, you
know, as you can see, goes around her head in kind of the same way that
her face is pointing. And we don't have tails, but that is okay because maybe
maybe they're not there, maybe they're tucked under. Maybe they're kind of just in her hair. You know what I mean? Or maybe this is like this is a headband and that's
like a clip, right? So it doesn't have tails. And now let's go ahead and draw this woman over here
on the right hand side, where her hair is kind of loosely being held
back by a bow.
5. Dreamy Details: Add a Wispy Ribbon to A Portrait: Okay, so let's draw a bow on this woman over here on
the right hand side. So her bow is going to be
almost more like a ribbon. It's going to be kind of tying her hair into a ribbon,
kind of gathering it. So what I want to do is
think about, you know, if her hair is kind of coming down like this or, you know, maybe even like this, like, how would this bow how would
this ribbon be in her hair? What would it look like? So, I am going to create a new layer, and I have my
sketching pencil on. I'm going to kind of draw
her hair kind of coming down loosely maybe where it
would fall on her shoulder, just to give myself a
little bit of a guide. And then I'm going to even
create another new layer, and then we're going to
start drawing the ribbon. So this is going to be
a thin wispy ribbon. So because her hair is kind of long and loose,
and this is kind of, like, loosely holding her hair back, I think a long thin, like, wispy ribbon would
be really pretty. So I'm going to start
by drawing the wrap, and if it's a thin ribbon, I want to draw a thin wrap. So I'm just going to I'm going to kind of
curve it a little bit, so it feels a little bit
organic. And perfect. So now we have a
little, you know, kind of loose thin ribbon wrap that is tying her hair together, but we still have
to draw the loops, and we also have
to draw the knot. Well, maybe and some tails. So I'm going to create
another new layer and let's think about, okay, if we were drawing
a bow on her hair, imagine if it was,
you know, kind of, I'm going to draw
a little sketch like study here on the side. So if I were to draw
a knot like this, I'm going to have
it hanging down. Imagine if, like, you know, there is a loose,
like, long ribbon. That one might be
a little too long. Just kind of coming
out of the knot. So basically, this ribbon this loop is coming out
of that knot right there. So if we were to and let's
give it some dimension, right? So I am going to
make it like this. Perfect. So now you can kind of see where we have
a loop that is, like, loosely hanging down, which makes sense
because, you know, her hair is kind of
going this direction. And it's coming out of this
it's coming out of this knot. And I'm going to
create a new layer, and let's do one behind it. Actually, I'm going to
move the new layer I just created behind the
part that I just drew. Imagine if there was,
like, another, you know, loose, like, ribbon piece, like loop coming
out right there. So it's coming out of
the knot right here. And, you know, we might hide this knot behind her hair.
I'm not really sure yet. But basically, you know, you can kind of see how,
if you had tied this bow, this is the knot, and then this loop comes
out of this side, and this loop comes
out of this side. And we're gonna worry
about the tails after. So, I am going to give this, and I don't know
if this is going to work really well,
but let's try. A really loose. I'm just drawing kind of
slowly here. There we go. So here, this loop
is like a tendril. That's kind of hanging
out and you can kind of follow it all the
way around like this. And same thing with this.
This is like a tendril. It's just kind of loosely
draping out of this knot. And actually, I
kind of like that. I think that works
pretty well for her. It might be a little too long, but I can just move
her up a little bit. You know, this is a sketch. So I can just kind of I'm
going to draw around her here. I'm just going to move
her up a tiny bit so that we have a lot
of room to play with. And when I sketch, I mean, I do a lot of adjusting in my initial sketches
before I ever really start filling in color and make sure that the structure of
everything looks good. Also, I think I'm going to get rid of
this like, right here. So let's see where did I draw that? I think
I do it right there. Okay. So I am just
going to create a new layer and I'm going to just kind of stop
this right here, and then I can get rid of
that other part of her hair. Okay. So now we have
a decent amount of room to play with, you know, this might even be
a little bit long, so I'm going to shrink
this piece right here. And so if I want to shrink this to be just slightly not as long, I can do it if I have my
little selection tool here. I can use uniform, but I can also use freeform.
So let me show you. So if I wanted this
to be just shorter, I can get to my selection tool and click on Freeform
here at the bottom, and then I can just kind of shorten the
length a little bit. Actually, I kind of like that. So yeah, and it doesn't
look like super wonky. So yeah, so I think this
actually works pretty well. Now, imagine, though, like, when we were drawing the swan, remember how the knot part was, like, behind what
you were seeing? Maybe we don't want to
see the whole knot. So here's what I'm going to do. I'm going to duplicate
each of these layers. I'm going to hide the original. And I'm going to move all of these with this new ribbon
that we drew together. And the reason I'm duplicating these is
because I might want to go back and
make some changes. So I don't want to
lose my original. This is like a non destructive
editing technique. Okay. And I'm just going
to merge my two loops. There we go. Okay. And
my kt. There we go. Now, we can kind of
play around with, like, where would this be? Would this be maybe behind here? Would you would her
hair be in front of it? I kind of like I think
that looks pretty cool. So I'm going to
duplicate this again. What if we were to erase this part of the knot right here and everything that
goes behind her hair? I'm going to lower my opacity. I'm going to go to my eraser, and I'm just going to
erase everything that is behind this wrap. So let's see here. I'm going to up the opacity. And actually, you know what? I kind of like it
better where the knot is what you see
instead of the wrap. I kind of like that. So
I'm going to go back. I'm going to up my opacity. I'm going to move this
over a little bit, do a little tooling, retooling. I'm going to let's
just play around here. I'm going to move
it a little back. And perfect. Okay, that's pretty awesome. So, honestly, you know what? I think what I might do is I'm going to
get rid of the knot. This is all up to your
personal preference, but I'm just going to get
rid of the knot part. Now, granted, that is on the
same layer, but it's okay. It's kind of I'm doing
it where basically the knot is behind her
hair behind this wrap, and the ribbon is just
kind of coming out of it. So I'm going to connect this. And then this is kind of
connected here and perfect. And I think if this were to
connect like this, Awesome. So her hair, imagine, is going to be coming
out kind of like here. But now you can imagine the knot part is back
there behind the wrap. So I kind of like it better
with the knot hidden. The knot is a little blobby, and this wrap is real
thin and delicate. So I'm kind of trying
to keep with that feel. Now, I can also add
some tails to this. So I'm going to add a new layer, and I'm just going to
draw a couple of tails. Where would those tails
be coming out of? Maybe one would be
coming out of here. And I'm just going to kind of have it trail off down here. Oops. And then I'm going to have another tail
kind of coming off here, and then let's do I'm going to hide this layer
so it's not so confusing. And then another tail here. Awesome. So you see where, like, the tails are kind
of it's implied that they're kind of coming out
of this wrap right here. So now what I can
do is the tails would be behind the ribbon
because they don't have to be, but I feel like it makes more
sense because the ribbon, the loop part, it's better to have the
tails behind the loop, mostly because the loop is kind of like the
star of the show. The tails are usually like, you know, not as decorative. So I am going to lower
my opacity on the tails. And, oh yeah, we're getting
a little confusing here. So let me try one more thing. So do you see how like this, the actual loops are
a little transparent? I'm going to duplicate
it, and now it's darker. So it doesn't really matter, but all I want to do is see now it's easier
to see the contrast. And to help me a little
bit with drawing, I'm actually going to change the color of the tails to blue. Sometimes I will do this
where I'm like, Okay, I need to see a difference
between what I'm erasing, what I'm drawing,
especially when you have, like, lines like this. But that's a little trick I use sometimes because we can always
change it back to black. This is just a sketch. So this
is not the final you know, this is like our structure. Okay, so now I can
erase everywhere the tails are where they
are in front of the loops. So I'm just going
to go through and get rid of all of that. And yeah, this is
part of the loop. And I'm just going to oops I don't want to erase that because that is right here, this is like this right here is the negative space in between
the loops of the bow. So I don't want to get
rid of that because the tail would show through
there because it's behind it. But I do want to erase
it here and here. And, you know, it doesn't have to be perfect,
but, you know, just so you can kind of
tell, okay, what goes where. Now I'm going to up
my opacity again. I can get rid of my I'm going to actually
just hide my duplicate, make sure that opacity is up. And then I'm going to
change this back to black. Here's another little
procreate tip. If you want to go to black,
go to your disc here when you go to color and just double click
somewhere around black, and it'll put you at pure black. So I'm going to go back
and change this to black. Okay. Awesome. So we have our tails, and we have our loops. And, you know, the knot
is, like, back here. And so that's hidden,
but it's there. It's kind of on the
other side of her. And then we have our wrap. So we have all of the
parts of the bow. Now, I am going to give her
some hair underneath this. I'm going to create a new layer. Make sure that her hair is
just coming out of the wrap. And I may it is a
little hard to see, but once I color it in, you're going to be
able to see it. Okay. So now what we want to do is I want
to color this bow. I'm going to do blue this time, and I want to color
her hair brown so that you can see the difference. So I'm going to go to the bottom of all these illustrations, and I'm going to
create a new layer, and then I'm going to
pick a nice, like, light blue and I'm going
to hide elements of this. Yeah, let's do the wrap first. Okay. And so we want to
have the wrap be blue. So there's our wrap, right? Now we want to do the loops. So here are the loops. And I'm going to stay
on this same layer. We can use a new layer, but it's all going to be the same color anyway.
And you know what? I'm going to hide her hair right now and the
tails. Let's see. Those are the tails.
There's her hair. Okay. So right now all I'm
focusing on is the loops. So I'm just going to
follow it around. Like, here is the loop and
it goes around like this. Oops, and then it kind of
comes out from behind. So like, right here, do you see this is like
the negative space. And by filling in, you know, blocking out this
color like this, we can also see if there's any weird overlaps where
maybe the tails are, you know, not showing through here or maybe they are and
they're supposed to be. And then I'm going to
do this other loop, and I'm just following
it around, you know, with long wispy loops
like this on a bow. You just want to kind
of follow it around. It's a thread. It's a string. So just follow it like this. And now we can kind
of easily see. Okay, so there's the wrap. I'm going to just do this
just so there's no confusion. Okay. So there's our wrap, and then there's our loops. So now let's put the tails in, and I'm going to stay
on the same layer. And, oh, yeah. Do
you guys see this? So Look, see right here. That is where the
tail part is missing. We want to connect
this and this. So you see now where the tail
is kind of behind there, and then we want to erase it where the loop is
in front of it. But we do need
that tail in this, you know, negative space
between the loops right there. Okay, I'm going to
go back to my blue and I'm going to go back
to my sketching pencil, and I'm just going to fill in the tail, where the blue is. This is just color
blocking, you know, to give you a little idea of structure and to help
you keep track of, like, what goes where, you know, if your drawings
are more simple, you may not need to do all this. But it's better to at least have an idea of where things
would be in space. We have one tail right here. We have one tail right here. We have our loop right here and then our
other loop right here, and then we have our
wrap, and then of course, the knot is back there hidden. So now we can do let's
do her hair color. So now I have her
hair down here. Her hair would also be
behind all of this. So I'm going to go
through and erase everywhere her hair
overlaps with the loop, the loops, and the tails because those are going
to be I'm going to have those in front of her hair. Okay. Awesome. I think
that is all of it. Now if we were to go, I'm going to go
underneath the blue, and I'm going to give
her some brown hair too. And now we can just kind of
color block in, you know, maybe an idea of, like, where her hair would be. And so you can kind
of get the idea that her hair is
being held back, tied back with the with the bow. And then I can do this,
you know, and then I can, of course, continue up and
finish filling in her hair. I guess I'll do that
really quickly. So basically, you know, blocking stuff out like this where you give
yourself, you know, like, everything is kind of laid out in a
structure with a sketch, and these need to be under here. Let's do this. Oh, yeah, they need to be
under everything. So let's move these
way down here, and then I'm going
to move this way under even the
sketch of the woman. Okay, then what
we're going to do is I'm going to finish
filling in her hair, and I'm going to give her
some more hair like maybe down here and you can
play around with it. But basically, now we have an illustration of
a woman who has her hair kind of loosely
tied back with a bow. And it's flowing, and it
kind of matches the style. But it's a very
different type of bow, but it still, you know,
kind of has this, like, wispy soft quality, and it really, you know, goes with the illustration. And I think, you know, adding
bows to portraits like this can really give them
some charm and, you know, really add some
marketability and trendiness to maybe what would otherwise be a
really simple drawing. It also gives it this, like, kind of charming feminine feel. Okay.
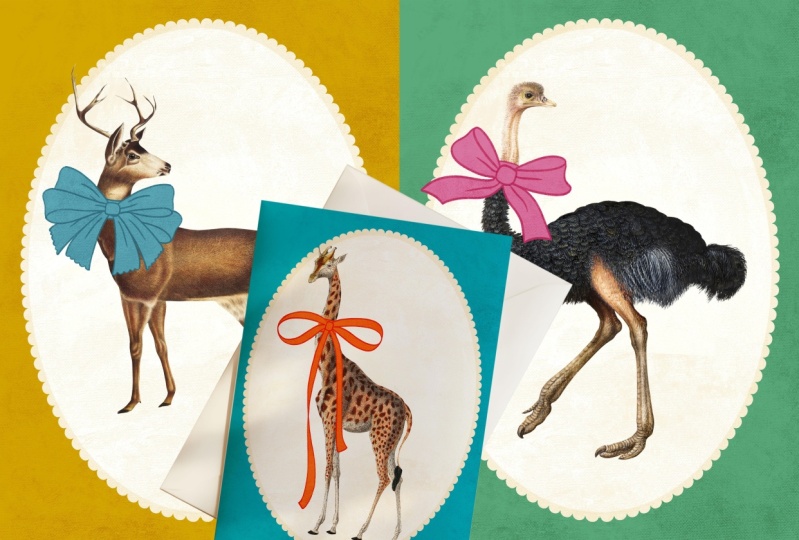
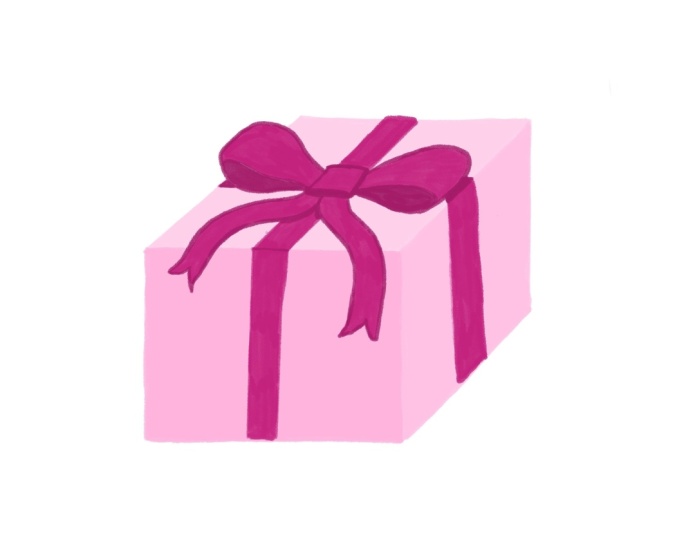
6. Wrapped with Love: Turn a Simple Box into a Gift: So let's draw an object
that has a bow on it. Now, when I think of an
object with a bow on it, the first thing that I think of, which I'm guessing you
probably are thinking of too, is a gift. Even if you have a simple box, if you add a bow to it, it immediately
looks like a gift. You can even make anything
look like a gift, really, if you add a bow to it. So I'm just going to
draw a very simple box. I'm just going to draw a square and once I'm done with that, I'm going to give this
box some dimension. The reason that I'm giving
this box dimension is you can totally draw
a bow on this square. But we're going to play around with how this bow
would behave in space when it is on a
three dimensional box. I'm going to give it a pretty
decent amount of depth. And let's do this. I'm just going to
carry this over here, and then I'm going to do that. Okay. So now we have
a very basic box, and we want to think
about putting a bow, somewhere here, basically
on the top of the box, so it really looks like a gift. Now the first and most
important part for me when I think about drawing something like this
is to think about the wrap. That's the part where the
actual ribbon is connected, is attached to this
box, things like that. See where it's like, you know, on the box, I'm
going to show you. Let's create a new layer. And I want to think
about if I were tying a ribbon around this
box to make it a gift, I would want it to hold
the box together, right? So that means that
there would be a ribbon that is going through the center of
the box right here, and then that ribbon is going to go through the center
of the box up here. So you can kind of see now
how it's being continued. It's wrapping all the
way around the box. Now, you're not seeing it, but it's kind of
implied that it is wrapping around where you
can't see it behind the box. And I want to think about, okay, so we have a ribbon that's
tied around this box. Now we want a bow on it because that's what's
really going to make it look like a gift. Just having the
ribbon around it, it really just kind of looks
almost like a racing stripe. It doesn't really resemble much. So I'm going to
create a new layer, and we have all this space
up here to play with. So the first thing
that I want to do and I might end
up erasing it. It might be hidden, but I'm still going to draw
it so that I have it as a guide is
think about my knot. So knots can come
in all kinds of shapes and sizes and
things like that. I end up very often
drawing my knots kind of like a rounded square
or a rounded rectangle. I don't know why, but that's just what I picture when
I think about a bow. But you can draw it
however you want. I do want to make sure
that it is overlapping these parts of the
ribbon because it is basically what is keeping, you know, what what this
ribbon here is coming out of. So it needs to overlap that. And I'm putting it
sort of centered on the top so that it
makes sense, right? Because you wouldn't you could. I mean, you could have
a gift where it's, you know, like right here
where the ribbon is. But typically, when
I think of a gift, I think of the ribbon,
the bow being on the top. Okay, I'm going to
create a new layer, and now we want to
think about our loops. So I always start with
a knot almost always. And then I go from
there to the loops. Now, we can make these loops huge. We can make them small. I'm going to make them
like medium size, and I'm going to kind of just make them a little bit loose. And let's do. This actually, I'm going
to do there we go. I'm keeping the bottom
part right here, straight. See how this is straight. But I'm curving up this part. It doesn't really matter, but to me that feels
the most natural. And you see where right here, it looks like it's really
coming out of the knot. So that's important because you can break all kinds of rules and you can create
really abstract, you know, wacky illustrations, but you do want to keep
in mind that stuff has to sort of make sense so that
it's somewhat recognizable. Okay, I'm going to create a
new layer for the other loop. I always have a new layer for every little piece of something
when I'm doing a sketch. You can always merge them later when you want to start
doing coloring and stuff. I'm going to do
another loop here, and it's going to kind
of hang over the edge, and it's going to
be a little bit, maybe a little less
flat on the bottom. That's okay. But now we've
got our loops, right? So the first thing that I want to do is I want this to make sense
as I'm drawing it. So I'm going to
erase, first of all, the part of the ribbon, the wrap, where it
goes behind the bow. So now we can see
right there that, it's coming out of it,
but it is not you know, the bottom part is
not overlapping it. And then I'm going to go to my original box and I'm
just going to erase the box that is where
it overlaps with the bow because the bow is
going to be front and center, that's going to be
taking over the box. Now, one thing that I love to do and you may have
seen me do this in my other illustrations
and some of my examples is sometimes when you're
drawing a bow, you can do, you know, like, your
loops like this, and then you can do
them really thin and loose and, you know, kind of have them connect like just pieces that are like this, like really wispy, you know, things that like, basically, very soft and delicate. But I also love drawing really big bold shapes
and chunky stuff. So one thing that I like to
do where this, you know, to kind of keep this
bow from looking too flat and boring is I'll give it these little elements on the bottom that will give it some dimension without having to make it all loose and wispy. So I'm going to
create a new layer and I'm going to show
you what I mean. So you may have noticed this, but if you go like
this on the edge here, and then you have to make it, I try at least to
make my edge of my little dimension here connect with this
intersection right here, this instantly just gave
this bow dimension. So now you can kind
of see this is, like, the top of the
bow, like, right here. And this is kind of like the
underneath part of the bow. It's like, this is
the back of the bow. And then this is the front
of the bow, right here. And then this is kind of like, you know, the edge of the bow. And then that is, like,
the underneath part. And it's really simple. But just by doing this, this really gives
it like you know, a really cool three
dimensional feel, and it's super simple. But let me show you
again how I drew that. So it's very important
to kind of keep it at, you know, start it at
this little corner here. And you want it to
kind of loop out. And sometimes it takes me a
couple tries to get it right. So you want it to
kind of curve a little bit with the shape
of the bow and then, you know, it's basically kind
of disappearing into space, but it's stopping,
like, right here. So now let's do the
one on the left. I'm going to start right
here in this little corner, and I'm just going to slowly loop it up and then I'm
going to curve it down. So do you see now how this space right here is like the
underneath part of the bow. And honestly, like
this right here, I feel like is maybe too curvy because you see how this line right here is kind of straight. So I am going to because
this is on a separate layer, I'm going to erase this, and I kind of want this to
be consistent, right? So I'm going to kind of
imitate this right here, this left side, and I'm going to do something
similar on the right. So I'm going to start here, and then I Oops. And then I'm just going to curve it up like that.
Much simpler, right? You can even give it
a little like point. And, you know, just
play around with it. I mean, that's the joy of having these kinds of things
on separate layers. You can always play around
and adjust things as needed. You know? And I almost feel
like this is too short. So like I said, sometimes
I just will draw things multiple times until they just kind of
look right to me. So now we have a gift. This is a box with a bow on it. So we have a new layer
and let's just try. So if we had a tail that let's say was coming out
of this knot here, I'm going to try to
kind of help it curve a little bit with the
shape of the box. And let's do this.
Actually, you know what? I'm going to do it even simpler. I'm doing a little
too curvy stuff, so Okay, let's do this. Cool. And let's see what
happens when I erase it. I want to see if it makes sense. Sometimes I'll do
this, and I'll just erase the parts that you
really shouldn't be seeing. Do you see where
I'm erasing this? So that would definitely
be behind the bow. And I would say that it would also probably be behind
this piece of the ribbon, because the ribbon
is kind of on top, but you could very easily try just erasing
that part of the ribbon. So, honestly, you know what? I think that kind of makes more sense by erasing
that part of the box. So the tail is, like, really, you know, it's behind the
loops and the knot, but it is in front of the box. And then I'm going to erase
this part of the box here and then we have
one of our tails. I think that actually
looks pretty cool. I'm going to create
one more layer and then I'm going to
add another tail. Let's angle it a
little bit like this because it's laying
on top of the box. Now, you don't have to go crazy trying to make this
super realistic, but you just want to
think about space and how things work in space. And now I'm going to erase
the parts of this bow of this tail where they are
behind the other tail, and then I'm going to go back
to my original ribbon and I'm going to erase that
so that it is consistent. I'm going to go back to the box, and I'm going to erase
that part of the box. Now we've got, you
know, a pretty cool, loose, little gift here with
a bow on the top of it. But one thing that, you know, I think would really help, and, you know, my proportions
are a little off, but that's okay is, again, you don't have to color your
illustrations in at all, but even if you
don't color them in, you want to think
about, you know, how obvious is it when you have all these parts
and then you have the main motif how
obvious is it that, like, this is the knot, right? And then, like,
these are the loops. And then, like,
what is this here? I mean, it's pretty obvious. And now I'm going to
color in this gift. So I chose, like, a blue. I'm just going to, you know, color this box in first, and then we want
to make sure that the bow is a different
color so that it is obvious what
parts of this are the bow and what parts
of this are the box. So you really have to kind
of go through and look at, like, where is this ribbon? Where is this bow in space? Where is this box? And, you know, even if
you're not doing color, you can play around
with shading, but you just want to
think about, you know, what you can do to give this just a little bit of realism. So even if it's super
abstract and cute, it still feels like, you know, it's relatable. And I'm going to do I have my
little color palettes here. I'm going to do another
pink bow because I love pink, and it's so fun. So Okay. And then I'm going to show
you guys another trick. So I'm going to do this
little bow here is pink. And here's what I want to do. The ribbon and the bow. See these tails here. So these tails right
here are also all, you know, basically loose versions of this that I'm
coloring in right now. It's basically, you
know, think about it. You wrap a ribbon around a box, you tie it in a bow, and
then you've got extra. You've got these little pieces
that are, like, hanging. So that's why you want
it to be the same color. But whether if you don't
do linework and you want to add some
dimension or even if you do and you just want
to add some dimension, one thing that I like to do is I'm going to even
add some shading, just a tiny bit. I'm going to create a new
layer above my pink color, and there is a new
Procreate blending mode that's called shade. I haven't played around
with it too much. The one that I've
always used and I'm probably just going to stick
with for now is multiply. But I invite you to try shade. I did play around with it
and it looked pretty cool. But if you do that,
if you create a new layer and use the same
color and you do multiply, and then you take your area that should be a
little bit darker. This part right here, this dark pink part would
be in shadow because it's underneath these
loops. See what I'm saying? So, you know, that
is a really quick, kind of, maybe a little
disproportionate, but still, you know, easy way to draw a bow on something like an angular
object like a gift, and you're immediately
making it look like a gift, and you're immediately kind of making it make
sense in space. But it just gives
that, you know, this box, like, a little
bit of extra charm.
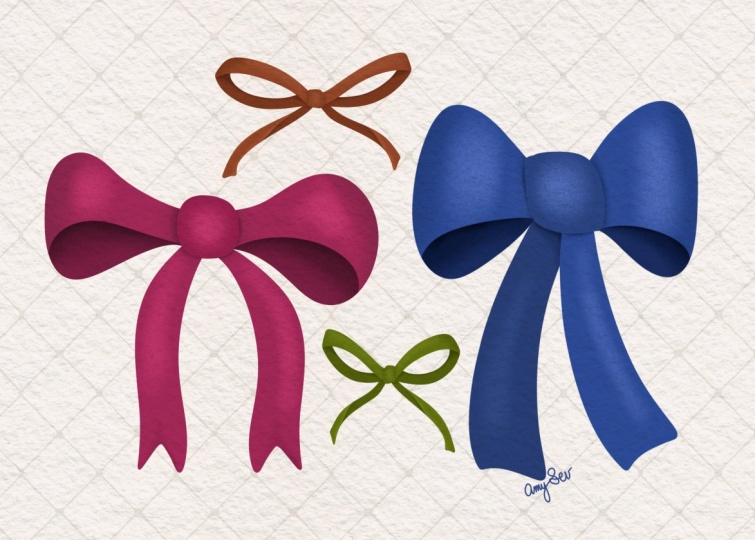
7. Sweet Statement: Draw Standalone Bows That Shine: Now I'm going to draw
three standalone bows, and I'm going to fill them in with color so you
can follow along. A L And here you have it. I have three very
different styles of bows in different colors, and they all look really
great as standalone pieces. So they don't have to
be applied to anything. They can just be the
stars of the show.
8. Tie It All Together: Share & Grow Your Marketable Art: You just learned
how to draw cute, trendy bows and how to use them to instantly level up
your illustrations. Now it's your turn. For the class project, please share one of your illustrations
that includes a bow. Whether it's tied around
an animal sitting in someone's hair or featured
in a spotlight all its own, bows add that extra a factor
that art directors love. I always check the gallery
and leave feedback. I love seeing your
creative interpretations of the class project. One thing you can think
about doing is adding a bow to some of your older
artwork to give it a fresh, modern and marketable twist. If you haven't already, be sure to check out my other Skillshare class
five essential elements of a pitch perfect portfolio
for art licensing. It's the perfect next
step to help you showcase your new Bu
artwork in a drool worthy, professional portfolio,
just like I did. You can find the class
by just visiting my Skillshare profile page and scrolling down to
where it says classes. I would love to stay connected. My Instagram is
Carrie Cantwell Art, and you can also find me on
my website at cantwell.com. And don't forget to
follow me on Skillshare. So you will be
among the first to know when my next class drops. I would be so grateful
if you could leave me a review for this
class on Skillshare. Skillshare reviews not
only help me as a teacher, they also help other Skillshare
students find my class. Thank you again for drawing
Bows with me today, and I will see you
next time. Bye.
 Carrie Cantwell, Illustrator | Surface Designer | Teacher