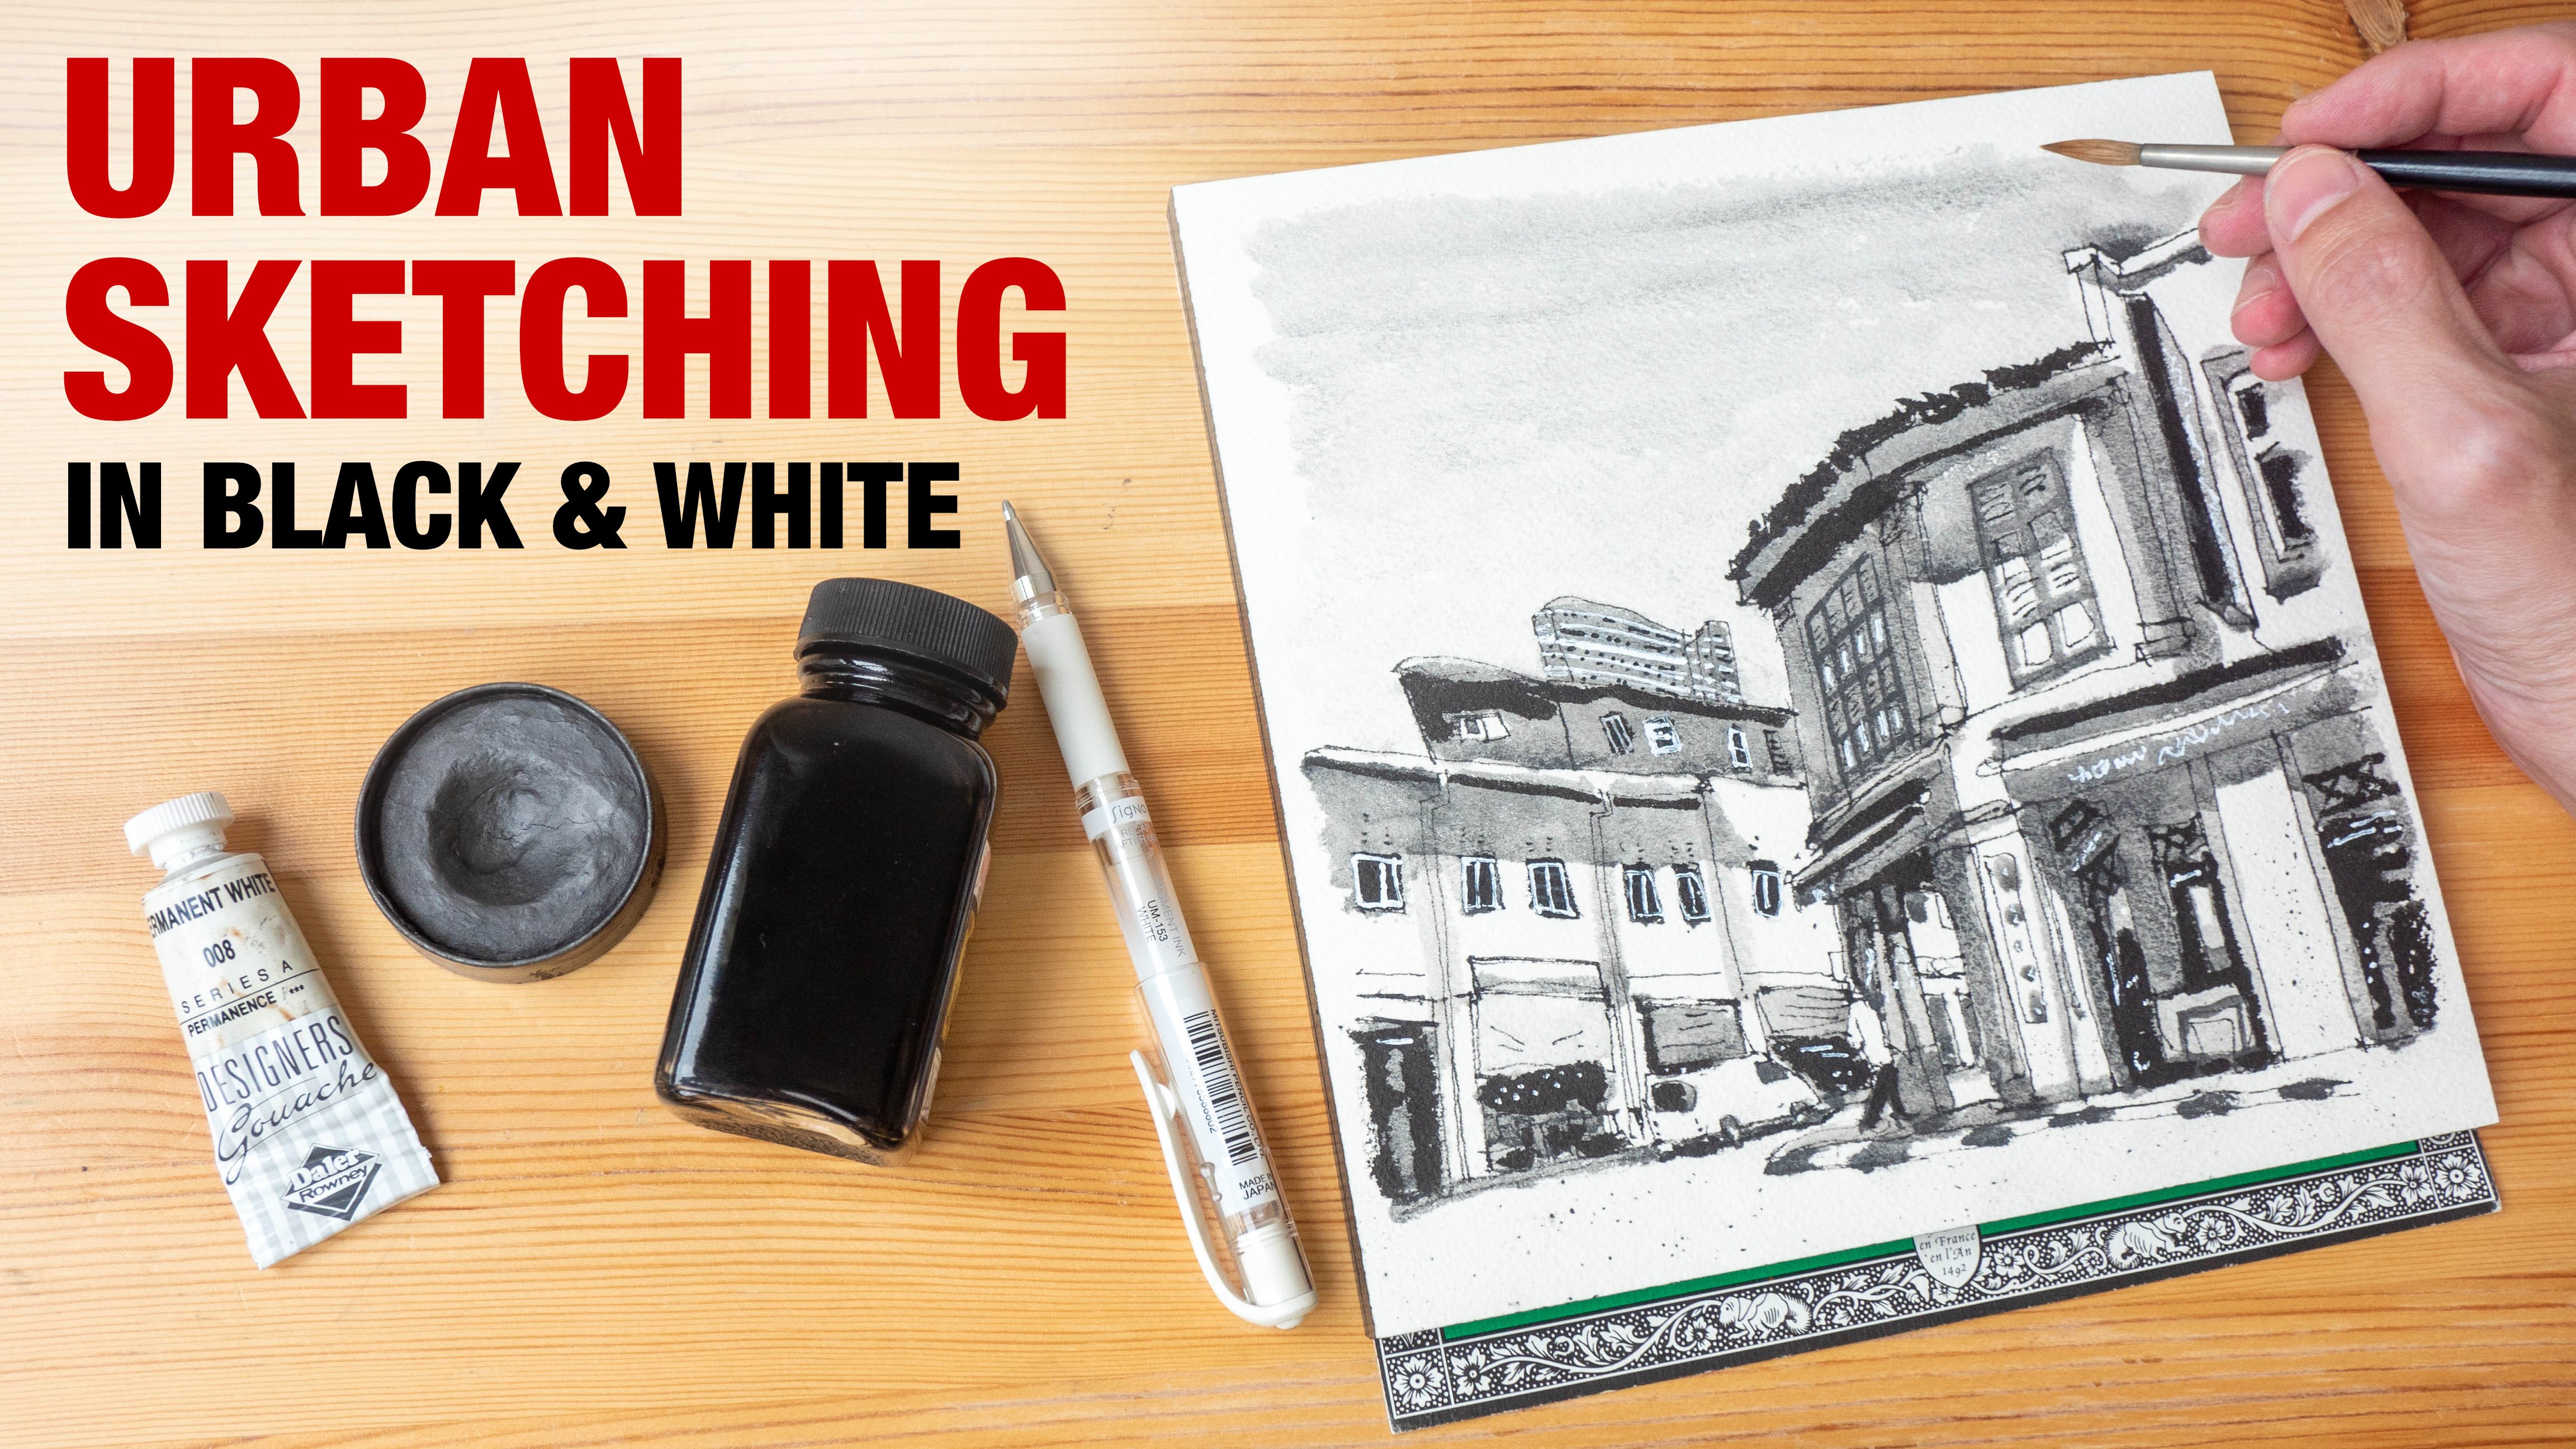
Transcripts
1. Intro: Hello, and welcome to another
urban sketching course. My name is To. And in this course,
I'm going to teach you the fundamental
techniques of using proportion alignment
and measuring angles to help you
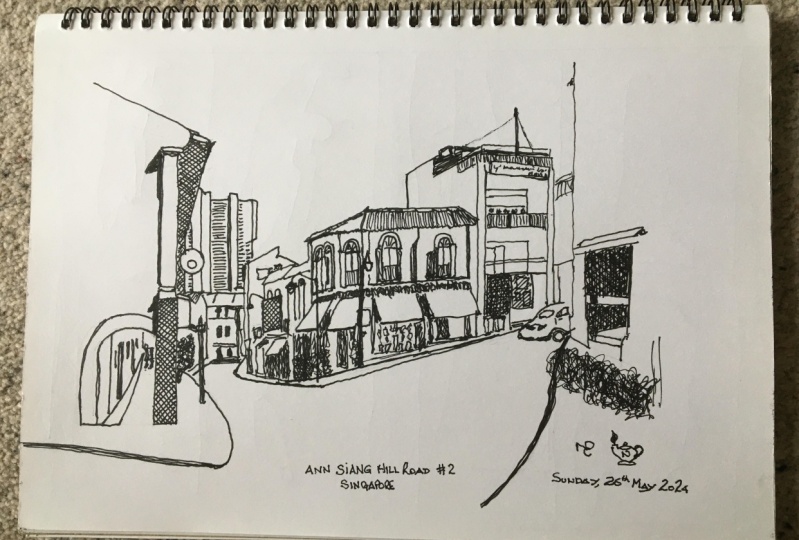
draw more accurately. Welcome to sang Hill, which is a neighborhood that is quite near to Chinatown
here in Singapore. And this place is popular with tourists as well
as photographers. This place has
beautiful shop houses, and today's weather
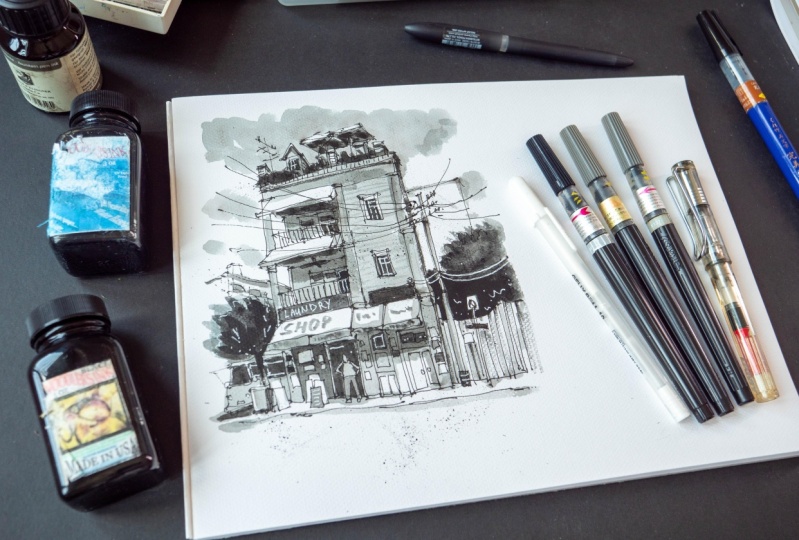
is wonderful. The tools you'll need
for this course is just pen and paper, and it will be useful to
have a pencil as well. Before we head over
to the first lesson, I have a favor to ask of you. If you find this course useful, do leave it a review so that other students can
discover this course, and feel free to upload your projects online or
send me your sketches so that I can have a
look and give you some ideas or critics
on how you can improve.
2. How to Practice: In this lesson, I want to show you how to practice
while you are sketching. The first few lines
that you place on the paper are very important. So make sure you
draw those lines, the shape, or the
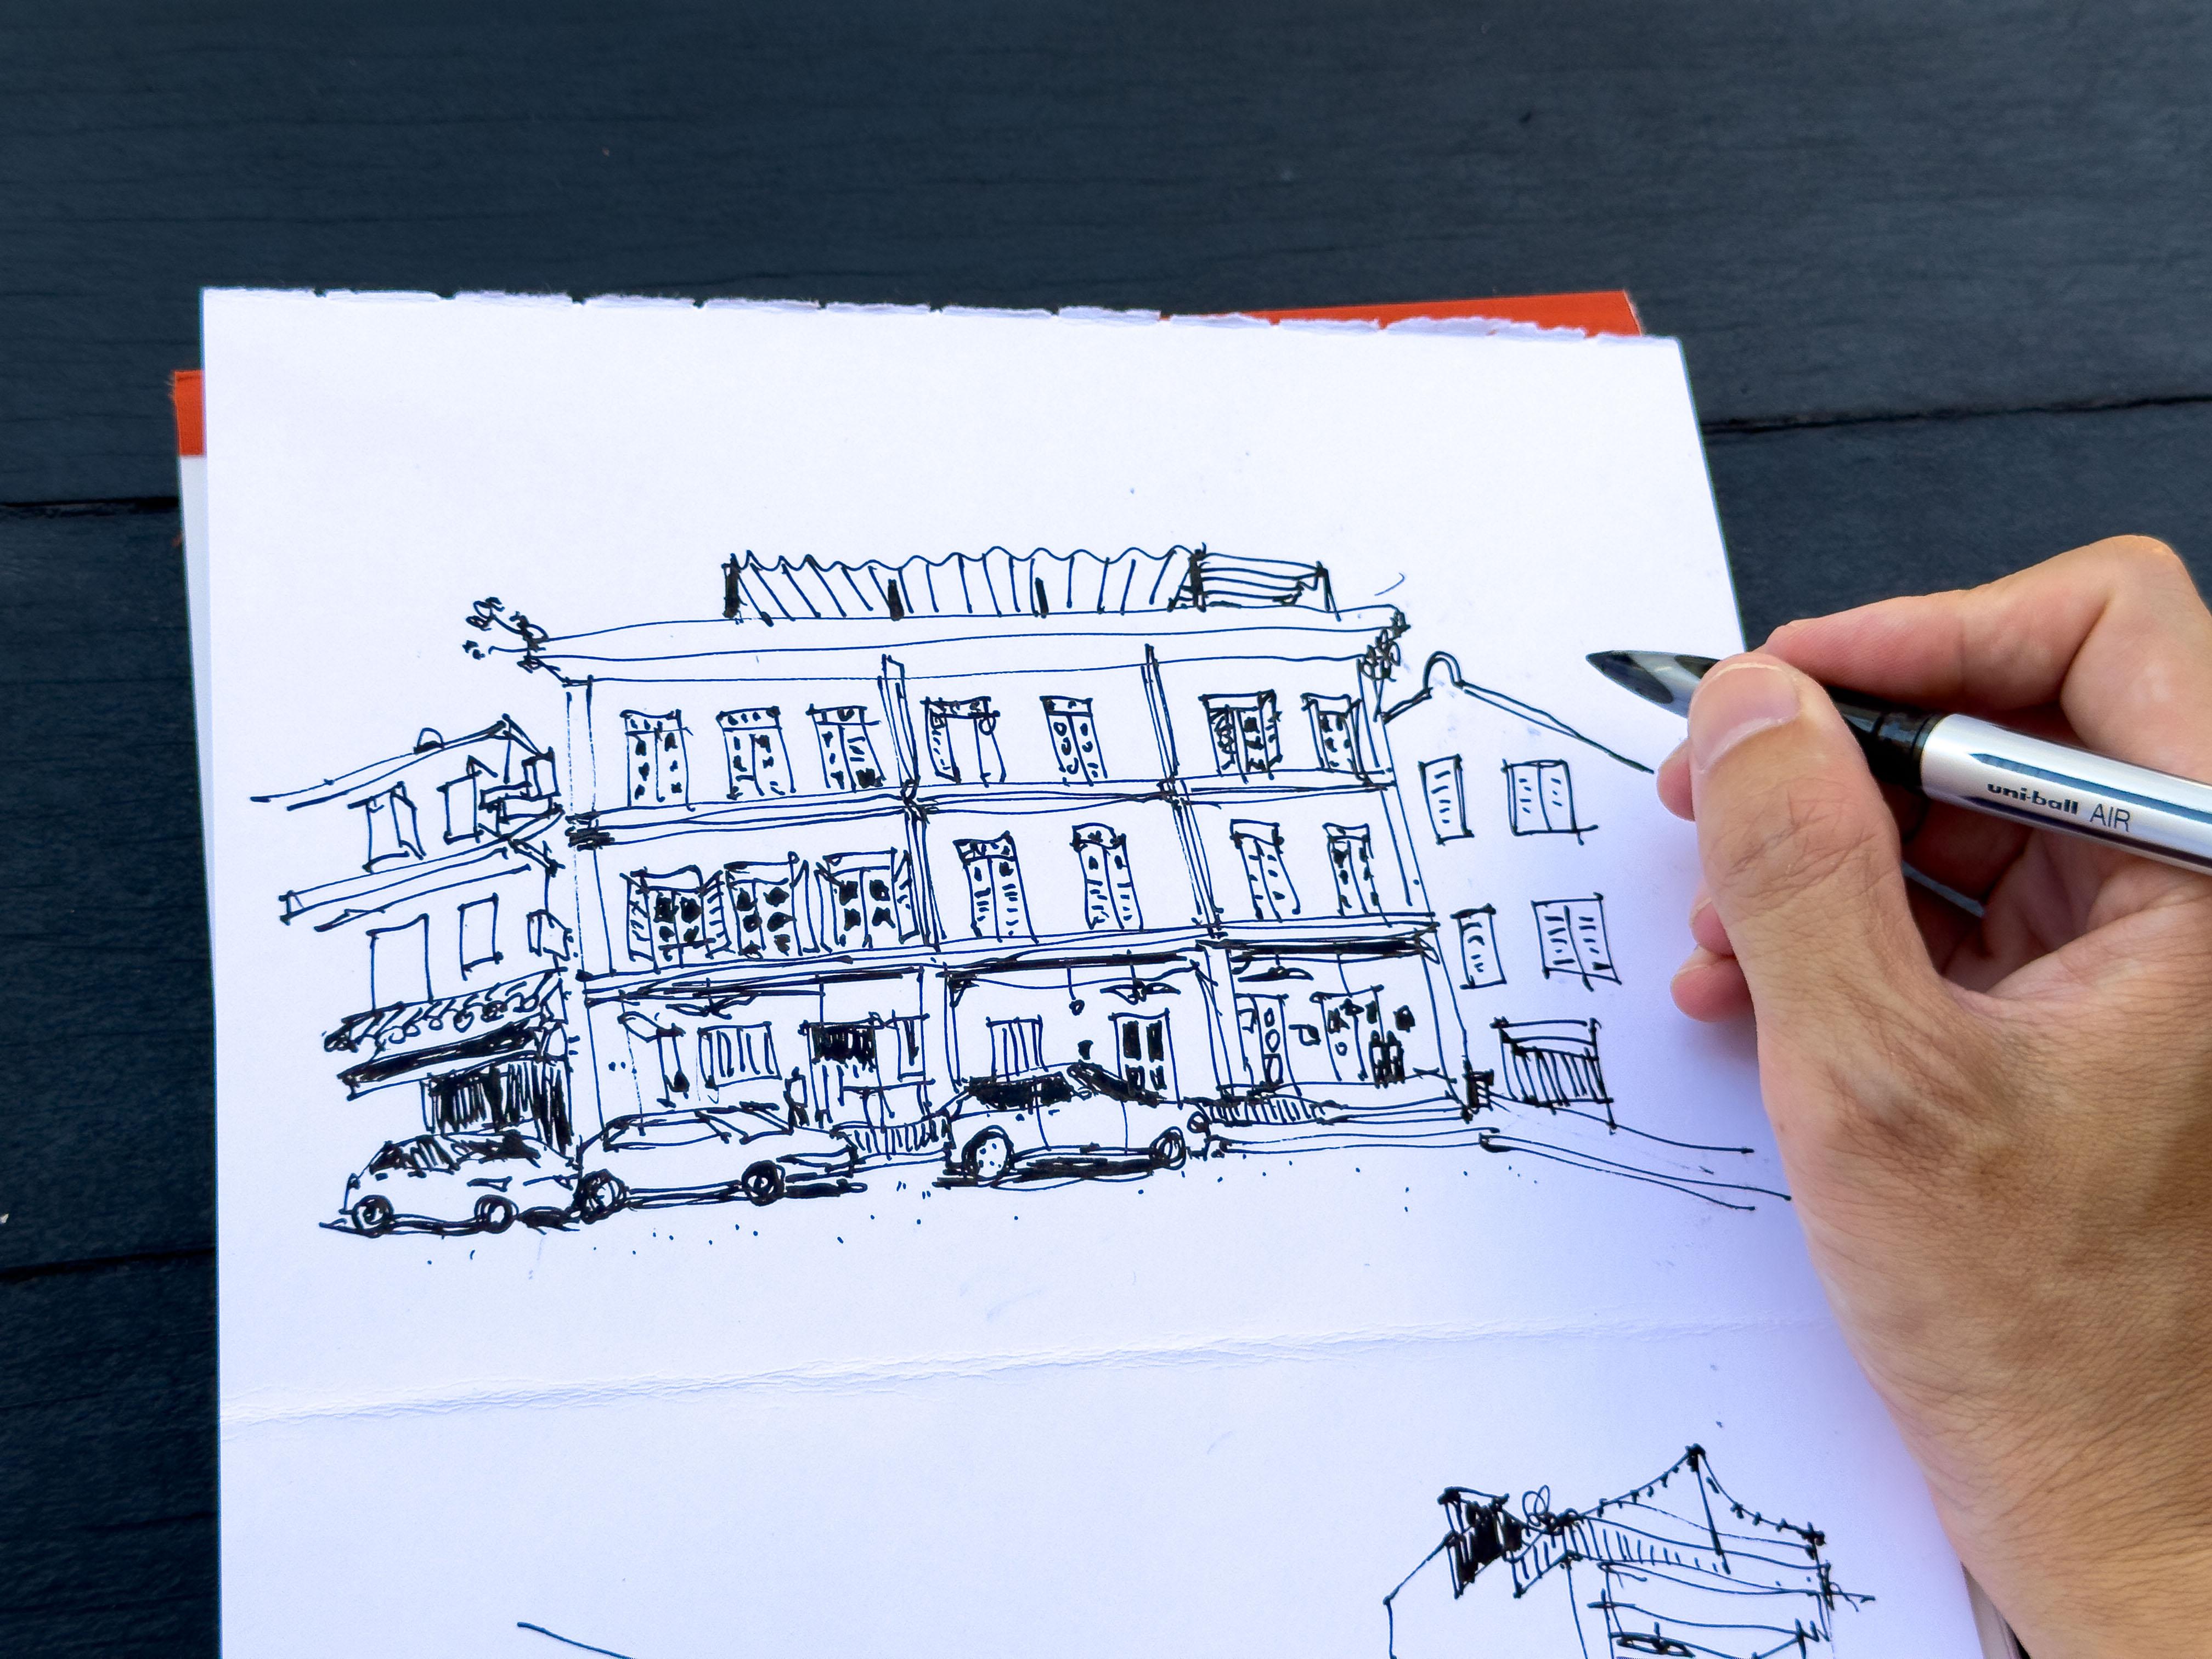
perspective accurately. For example, this can be
a three story building. This is the height. When
we draw the windows, the windows will be affected by the perspective
of this building. See this angle line
that I'm drawing? This is affected by this angle line of the
building. All right? And if you draw this angle wrong, if you draw it like this, if you draw it like this, When you draw the windows
or the details, you can see this
angle is now affected by the shape of the
building, right? So when you're practicing, it's very important to draw
the big shapes accurately first before you draw
the details, all right? The details do not matter. In this case, I can
draw circles for the windows and draw
squiggly lines. It doesn't really
matter. What matters is you draw the shape, right?
3. Understanding Proportion & Alignment pt1: Lesson, I want to talk
about proportion, which is how you
can draw things at the correct size and with
the right proportions. For the first exercise, we are going to draw this
building from the front so that we don't have to
worry about perspective. Before I start, I want to
take some measurements. First, I want to measure the individual floors and also
the width of the building. To measure, just stretch out
your arm, lock your elbow. It is very important to lock your elbow and use your
pen or pencil to measure. So the bottom of the pen, the pointy end of the pen
to where my toumb is, that is considered one unit. So that is the height
of the first floor. And if I move my pen up, make sure you still
lock your elbows, you can see that the
second floor is slightly shorter than the first floor, and the third floor is also slightly shorter
than the first floor. Now, these two floors, the
second and third floor seems to be of the same height. Now, it may be tempting to stretch your arm like this and use your
fingers to measure, but this is not accurate
because your fingers can move, whereas if you have
your Tumb on the pen, your time is not going to move. This is the more accurate way of measuring instead of
just using your hand. Now, some of the sceams that you draw or buildings that
you draw may be too big. Sometimes I may also like to use my sketchbook
or paper to measure. So you can see that
with my sketch pad out, I can measure two units here
and one unit for the height. So this width is almost the
same height as the building. This is almost like the square. Okay. So let's double
check again. Okay. Okay. This is also not
that accurate because notice if I turn the sketch
pad, the size changes. So let me just hold it this way. Okay. So this is
considered one unit, and this is one unit. The end of this pillar to
the end of this pillar is the same as this from
the top to the bottom. Now that we have the
measurements, we can sketch. Sometimes I like to
use my finger to mark out the width
for the subject. In this case, the building
the width is this, and we know that the
height of the building is shorter than the width. So this is the rectangular space that I want to use
for this sketch. And this is the squarish
area that I talked about. So I'm going to
start the sketch by drawing the longer line first. Yeah. So whenever I draw, I try to visualize how much
space the subject is going to take because if you
if for example, if you want to draw the
building taller like this, then the wave will
also have to be tall longer in this case. So if you make the height
of the building shorter, the wave will also be shorter. So that's proportion. So before I start, I usually visualize how much space
it's going to take. So this is pretty much the
space that I want to use. If you have a pencil, it would be good to mark of
the space with the pencil. I'm using a pen
today to save time. I want to start by drawing
the longest line first, which is the top of the roof. There are angled lines
due to perspective. This is the protruding
part of the roof here hoops. This is too thick. Anyway, I'm not
being that precise with the perspective
or proportion. I just need to create
the illusion of the proportion as accurately
as I can, of course. Okay. This looks fine, and now we can divide the building
into three floors. Remember floor number two and
three are equal height and the ground floor is
I'll say taller. I'm going to place
a little dot here. This is one, two, no,
maybe somewhere here. I'm just going to
draw this across like this and make sure this height is the
same as this height. Okay. And now, this is I'll say this is maybe
four parts and six parts. So I'm going to draw this here. I need to move this line, this pillar a bit more
to the right side. Because remember,
this is a square. Okay, so this looks okay to me. And this will be half. Does this look right to me? I'm not too sure.
Okay. Right now, you can see that this, this is quite close
to the width of this. I think it looks fine. It's not too wrong.
It's not too wrong. There is a vehicle parked here, and we shall draw the
vehicle later on. So make sure you get the
big shape right first. Make sure you get the
divisions right first. This is very accurate.
Sorry. Very important. This is very important to get right at the
start of your sketch. If you get this wrong, all the things that
you draw later on, it's not going to be accurate. Okay. So let's draw the
building on the left side. There is a roof
that is coming up from here that is aligned
to this line here. So this comes down at
an angle at an angle, there is a smaller roof
up here, which is, I would say aligned to the
lower half of this height. So as you draw or in this
case, as I'm drawing. I'm actually always
trying to align things that I am about to draw with things that I
have already drawn. So that is how you draw
with proper proportion. So we have a line here
comes down here line here, there are some windows here. For the windows here, we don't need to draw them with details. We just need to
suggest the windows. Okay. Okay. So let's draw the little
sign square signboard that comes up from
this part here. It is above the bottom here. Yeah. So I'm aligning this
signboard to this height here. We have some roof here. By the way, if you spot
any mistakes that I make proportion mistakes or details that mistakes for
details. That is great. Because if you can
spot mistakes, you actually know what
I'm talking about. So for this window, make sure it aligns to the
bottom of this window. So windows are usually
aligned top down perfectly. So this is window aligned
directly beneath this window. Okay. I will not
draw the details here because this is not
the important building. I just want to
suggest the details. There is another sign here that is attached
to the side of the building to the pillar here. So I'm suggesting that. Okay. Next, we can
draw the windows. There are three windows here, two windows here, and
two windows here. The window stretches almost
all the way to the top. Before I draw, I visualize how much space the
windows will be. This one, two, and three. Okay. I think I drew the
windows a bit too wide. For the windows here, some are actually open, some are closed, but the
most important thing here is to make sure the
windows are one window apart. This is the width
of one window and the other window will
be one window away. This is the open window I
drew the window too tall. So the window is supposed
to look like this. Call vertical window, cut it at the top for the
horizontal rectangle, cut it down in the half, and then you can
draw the details. All right. So again,
throw the big shapes, divide the building
and then throw the little shapes and then keep cutting the little shapes into smaller and
smaller sections. As you draw the window, make sure the top of the window is aligned so that there
is this alignment. Make sure the windows are
also aligned top down. All right. So when
you're drawing, trying to look for patterns. With perspective, there
will always be pattern. For the awning at the top, there is this vertical pole that is aligned to the
top of this window. Let me just draw a few
more details first. This vertical pole here. This vertical pole is
shorter than the window, but it's aligned to the
middle of this window. So make sure you
get the alignment. And this diagonal line, the end here will align
to this line here. So make sure you get
that alignment, right. And the pointing will end here and the point here
above the window here. So this is the angle, and now I can draw the details. This line here is perfectly vertical because the venting point
is somewhere here. So once you have this angle, which is vertical
and this angle, you can draw all the
other angles in between. Just keep dividing. See
what I'm doing here. I'm drawing the line here this angle between
these two lines, and I'm just dividing like this. We have a vertical pole here, another one here,
another one here. And we have another owning here. This awning hole for
this owning is here, a aligned to the edge
of the window here. And it's like this. And
this is horizontal details.
4. Understanding Proportion & Alignment pt2: Next we have this building
on the right side. We need to draw
the pillar first. This building here, this point here will align to the
mid point of this height, and this will come
up at an angle. There will be this semicircle
thing and this point, I will say this point
here is to the left. It's aligned almost
beneath this point here and there are
some plants here. It's good to have some plants
in your sketch so that your scene can look more
organic and natural, and it's good to add people
in your sketch as well. I can see some ink smoges doesn't matter because
it's just a sketch. So this angle is a mirror
image of this angle, so I'm just going to draw it. Now I can draw the windows. Oops Make sure the windows
are aligned vertically. This window is
quite tall as well. Oops. Okay. I will add a little
window panes later on. When drawing the windows,
make sure they align vertically as well
as horizontally. Details can be added later on. So right now you
can see the sketch is slowly coming to life. I need to add more
horizontal lines. Now, there are actually
some water pipes that come down from the top that
goes all the way down. I should have left the
space white so that the vertical pipes can overlap the horizontal
lines beneath. Right now it's as you
can see, it's not clear. It's not clear whether the
pilar is above the pipes or the pipes are above
the horizontal lines. So if you were to draft this
up with pencil very quickly, these are some of the mistakes
you can avoid making. But the thing is
when drawing pen, it is your bottom
make mistakes. Okay. Let's draw the black windows
for this building here. The bottom of the black
window is here, midway here. The top right point is here a align to this point
and also this point. Make sure this is an angle line. It's not horizontal. And make sure this ops. Yeah. When drawing, I have
a lot of oops movement. Make sure this window, this double window is one double window away
from this window. And for this window
at the bottom, make sure it's line
to this window. Okay. And now we can
draw the pillars. So once you keep dividing, you will have smaller
and smaller shapes. So for example, now that
I have this space here. I can draw the door here. The right edge of the door is
aligned to the window here. And this door is one door
away from the other door. I think there is a
pillar here ops. There is a fan here.
There's a light here. I can divide the door
into half and draw a little details
for the letterbox, there is this angle slope here, which comes down at
an angle like this. There is a window here. The line here will align to the bottom here to the
middle of this window. And this line will
align to the middle of this window like this. Yeah. So you can see my
sketching style is very, I'll say loose, very wobbly. It's not very precise, but yet this building
is still recognizable. And that is how important are getting the right
proportion of shapes is. The details are not
that important, but getting the
shape is important. Getting the shape
accurate is important. Okay. So we have a vehicle
here. I would say the vehicle. The roof of the
vehicle is probably aligned to the mid
height of the door. So the height is here. This is the windscreen, the front here the
windows here down. The wheel is in front
of the windscreen. Comes down at an angle down the wheel here
intersects this pillar. I mean, it's below
this pillar here. And we have this. Okay. We can draw some shadows on the ground. Now, my vehicle is
not that accurate. But the point is, if
you draw vehicles, if you have more
practice with vehicles, you will be able to
know where the wheels are in relation to where
the windscreen is, where the second wheel is and the general shape
of the vehicle. All that will come
with practice. And so you will be able to
draw vehicles more easily. But when you're drawing
from observation, drawing from a proportion, you need to make sure
that the vehicle, the vehicles size and shape is in relation to things that
you have already driven. So for example, the
height of this vehicle should not extend beyond
the midpoint of the door, and the front of the
vehicle should not extend beyond this
section of the building. There is another vehicle here. The height of this
second vehicle, the roof should align
to this vehicle, it comes down at an
angle leng Okay. So as you draw, focus
on what you see. And when you're
looking at your paper, you are just checking, right? So as you draw, focus
on what you see. So in this case, the wheel is below the windscreen
here at the corner. And the other wheel is here aligned to the bottom
of this pillar here. And sometimes it really helps to not think about
what you are drawing. For example, if
you're drawing a car, don't think about
yourself drawing as car. So what I think is I'm
drawing a circle here, which is below the pillar here, and the circle happens
to be the wheel. I'm adding shadows here. I'm drawing the curb here, which is aligned to the
bottom of the vehicle. There is a corridor here. There are two windows, one door. You can align to
the you can align the window here to
the window above. Sometimes if I'm too
tight, you know, use my artistic license
to just draw how I feel. This ce is going to look. All right. There
is a table here. The top of the table is actually slightly lower
than the roof of the car. So here I've drawn it aligned
to the roof of the car, which is which is not
accurate but it looks okay. All right? So accuracy
is not like everything. Although if you can draw
everything very accurately, it is quite impressive. Okay. This is the other vehicle. So the wheel here is aligned to the corner
of this window, and the other wheel
is aligned to the other corner
of the windscreen. Same thing, I want
to add some shadows. I may want to make the
windows darker as well. There is an awning here. I want to add or suggest some shifts here to
suggest dolls and dos. Okay, this looks fine. But if you look very closely, you can clearly tell that
this vehicle doesn't look like a car.
Okay, but it's okay. Part of the fun of sketching is just, you know, you have fun. By the way, if you want to color certain things very quickly, make it gray or black, you can use gray markers. But make sure the ink is dry
before you use gray markers. Okay, so now I am just adding
details to the sketch. This sketch, believe it or
not is almost complete. It is actually not easy
to teach on location. I find that when I'm
drawing on location, I'm usually like more loose. But if I'm drawing at home, I can I can afford to be more patient because when
drawing out here, it's kind of hot. Thankfully, to weather
is actually not too bad. Okay. So let's draw
the door here. This door is aligned directly
beneath this window. So as I'm drawing, I'm always
thinking about alignment. If you can get your
alignment accurate, your proportion is
going to look accurate. Okay, we have a lamp here, lettern box here, a fan here. I see some plants here. Okay, we have some curb here. This curb goes down at an
angle because it's a slope. There are some steps here. There is a person standing here. The height of the person is
half the height of the door. So notice what I'm saying. The height of the person is half of the door.
That's the proportion. So I can draw the person here standing in front of the door. And it's good to add
people in the scene. So I'm going to have some
people here as well. Yeah. So when drawing people especially if they
are walking by very fast, look at where their head is. Where's the top of the head? Is the top of the head
aligned to the vehicle? If so draw the head aligned to the vehicle and then draw
the body below the head. Once you know where the head is, you can draw other body parts. Okay. So now I just need
to add more detail. And you can see this sketch
is slowly coming to life. And even though
it's really wonky, there is this, I'll say three
dimensional field to it. I'm just adding a little
details vertical lines to suggest vertical space. It will be good if I
have some markers. Oh. There is this
trash bin here. So the height of the trash bin is half the height
of this window. So as you draw the trash bin, make sure it's half the height. So again, think of the
portion when drawing. There's a window here,
sorry, fan here. Above the window. So
when drawing the fan, make sure it's above the window. There's a lamp here that
goes down into the door, other details here,
details here. Yeah. So this
sketch is complete. So now I just have
to add details. Take a look at the scrappy
details that I'm drawing here. Sometimes I can add
horizontal lines. Sometimes I can draw a square. Sometimes it's just
some squiggly shapes. And it's not important. It's not important because you have already drawn the
big shapes accurately. So all these little details, they are not that important. All right. They are
not that important. Okay. So it's the big shapes
that is important. For example, if you drew
this section too narrow, then all the windows are
going to be more narrow. Yeah. Okay, this
sketch is almost done. Plans plants here. We have people in the
scene that is great. That's a little
texture on the ground. Okay. So door handles. I may want to maybe black
out this part here and here. So these are just details. These are not important. Okay. So let's see if
there are any mistakes. I can see the spacing
here is a bit off. So the windows are
one window apart, but this space here, it should be the space of
one window. All right. So there's a measurement
is a bit off of it. But if your measurement is
off slightly, it's okay. And this is how my sketch looks when compared
to the scene. One very important thing I
forgot to mention earlier is when you're using the reference photo
for practice purposes. The diag lines for the buildings are
going to look tilted, and that's due to
camera distortion. But when I'm actually drawing
this in the real world, the vertical lines are
perfectly vertical. So when sketching on location, you should pay special
attention to alignment and proportion so as to make your
sketch look more accurate.
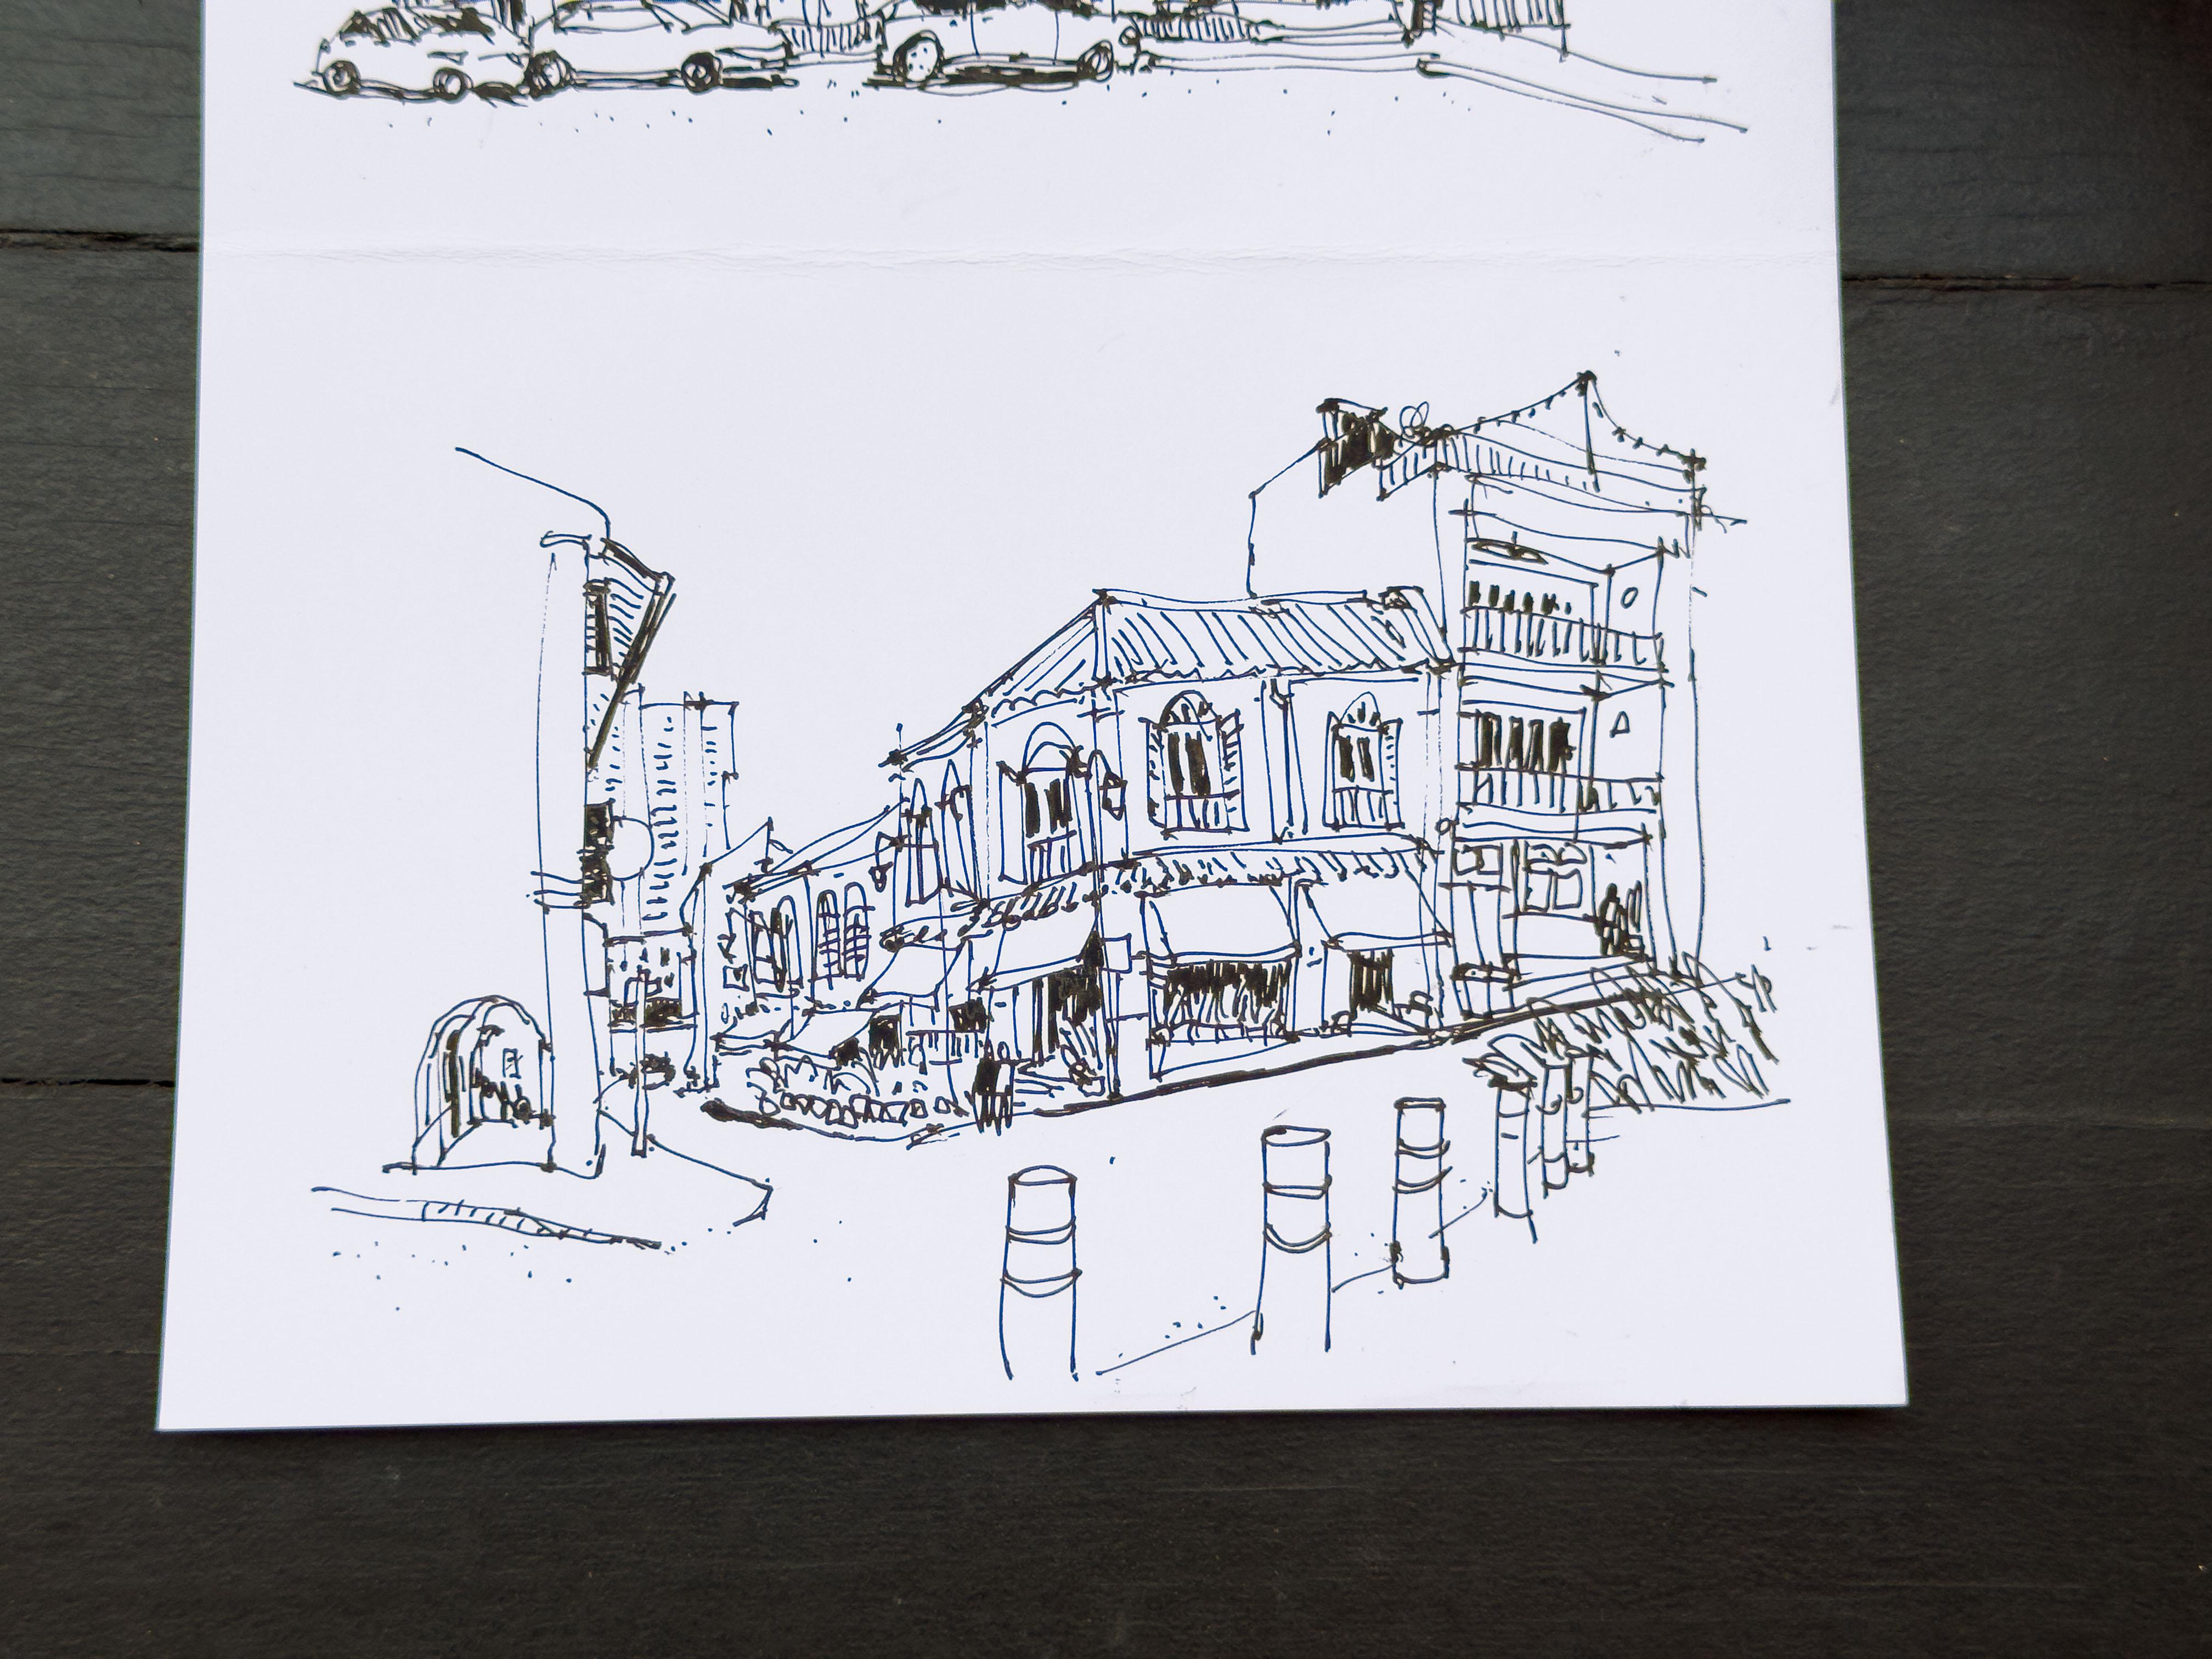
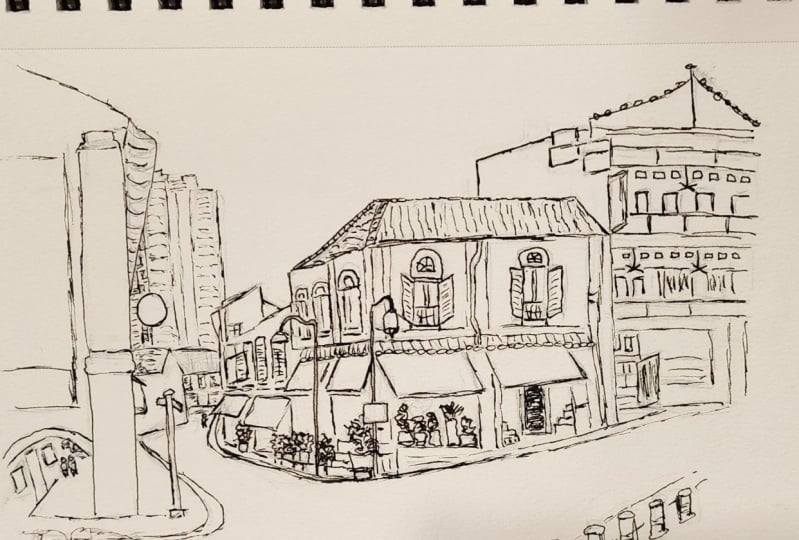
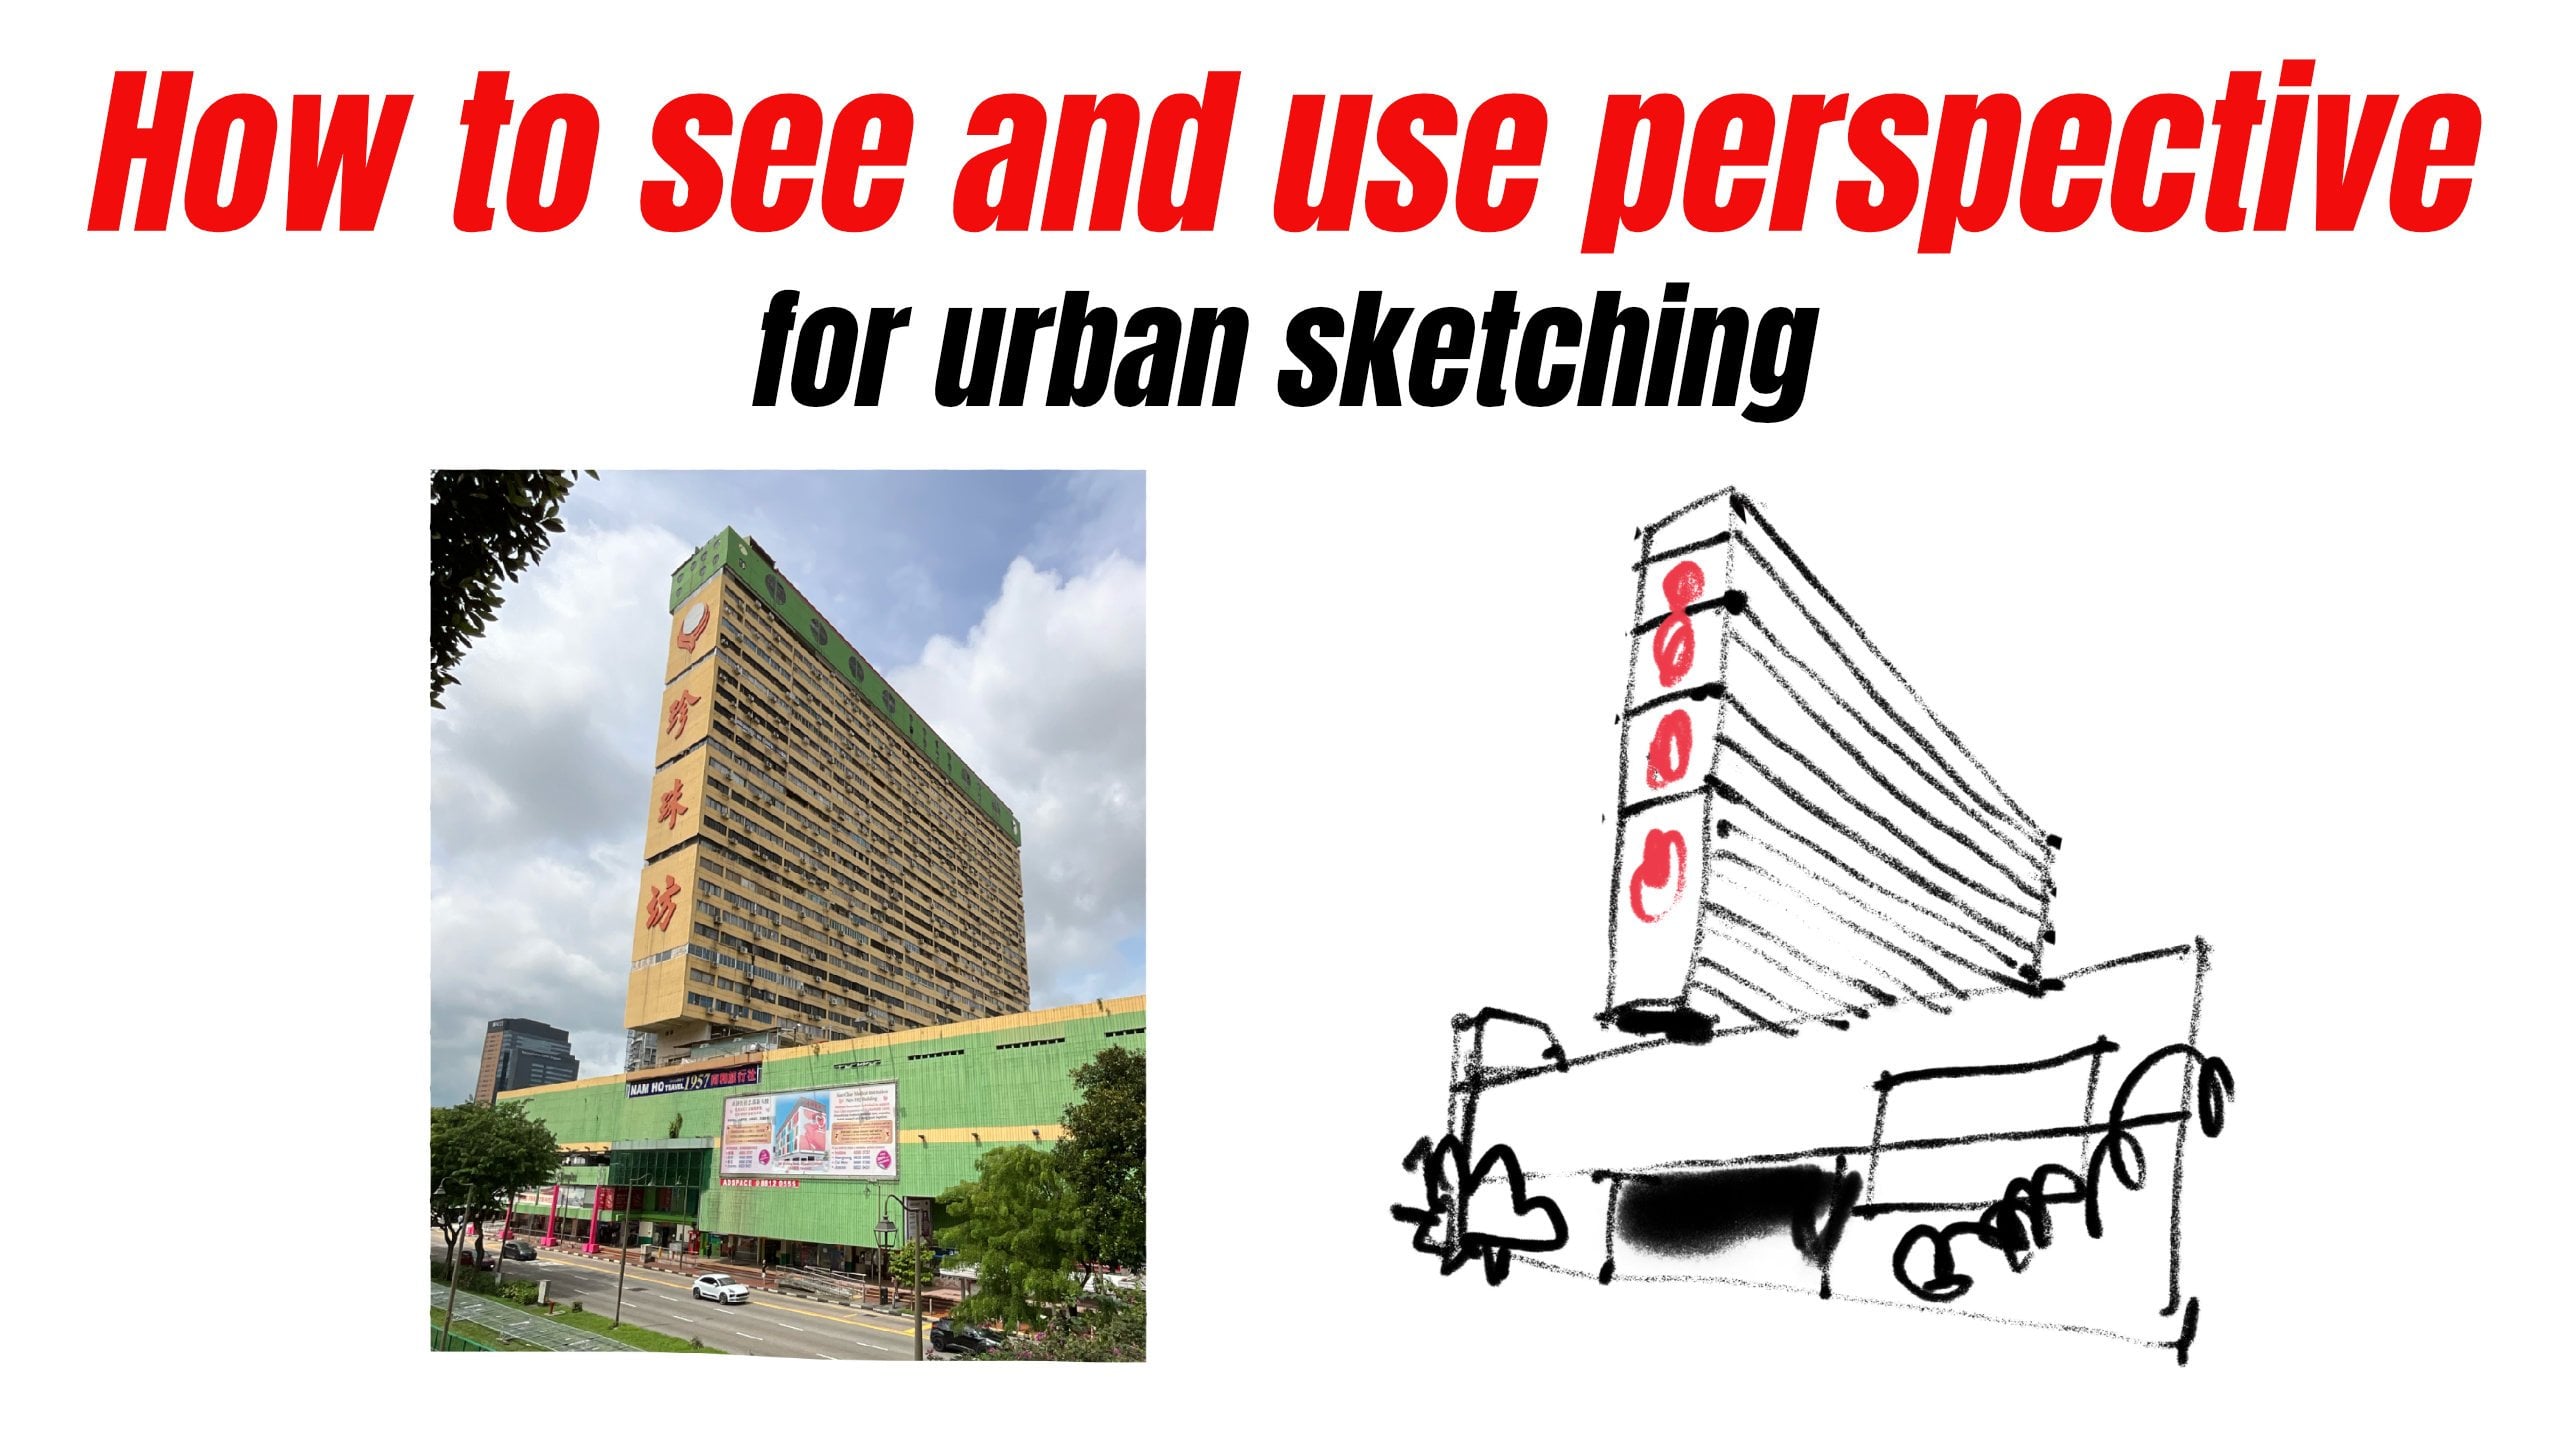
5. Measuring Angles pt1: For the next exercise, we are going to
draw this building, which is very challenging to sketch because it's
located on a slope. There is a slope coming from the right side going
down in this direction, and there is a slope
that goes down in this direction because you can see this wood
that goes down. So there is this angle here. There is the
horizontal line here. This line looks horizontal. And there is also perspective. You can see the
compressed building here because this is the
side of the building, and this is the front, and we have more compression here because this is the
side of the building. So this is also quite a
challenging scene to sketch. And I like the tall buildings in the background because with the tall buildings in
the background, it gives you an idea to how
short this shop houses car. And we can also see people
walking on the street. When you have people
in the scene, they will also give
you a sense of skill. When you have people
that is very small, there you can see how tall
the building is compared to people who are that shot. This is the view that I'm
sketching from and it's not the best view
because I really wanted the tall building
in the background to be a stand alone building between this building
and this building. But I cannot go to sketch under the sun or
I'll get dehydrated. Lesson, I'm going to teach
you how to measure angle. Once again, hold your pen or pencil in your hand,
stretch your arm, lock your elbows, and align your pen or pencil
to lines that you see. You can see the roof
here. It's horizontal. This roof is also horizontal. Awning is almost horizontal. This roof looks
like put slightly. So when you compare the
angles to other elements, you can see the differences
with certain angles. So earlier on, I thought
this was horizontal, but when compared
to the awning here, the awning looks
horizontal and the roof looks slightly touted and
this looks horizontal. So it looks like there is some slope angle line here
and there is this angle here. So when you are drawing, Make sure you
remember this angle. Do not draw this horizontally, and do not draw this
horizontally as well. Even though it looks like
you should I guess you can. You can use artistic license
to draw some of the angles, but for slopes, important lines are make sure
you draw them accurately. This line here is
definitely at an angle. Sometimes I like to think
of the clock phase. 3:00 will be like this, 2:00 will be like this. This is almost 3:00. And we have this
angle here as well. This is also not horizontal. Make sure you draw the
angle. Remember the angle. Remember the angle, measure
and remember the angle, and we have this
angle here as well. This looks like horizontal. This comes out,
and then the angle goes up and then we have
this angle here like this, which is almost one to two m. Also remember the
alignment techniques. So when I draw this in, if I'm going to draw this in, I will draw the
largest element first, which is going to be
this building here. I'm going to align this
building here, the roof here. This is going to be two thirds of this height of the building. Okay. And also, when you draw
the tall building there, make sure to align top here the top here to the
top of the building. See how they align
almost horizontally. And this roof here will
align to this point here, the black line here or
slightly below that. Yeah. So when you're drawing, always be thinking about
alignment and proportion. Speaking of
proportion, I need to measure the width
of this building. So the width of this building
I would say is maybe one pen white And if
this is one pen wide, you can see the side of the
building, it's much smaller. So This is one pen, and this is maybe
just 20% or 15% of the width of this building. So when you draw
this whole thing, make sure you get portion right. This part here should be much, much smaller compared
to this area here. The easiest way to measure angles is to use the
clock phase method. This is 12:00, 1:00, 2:00, 3:00, four, five, six, all those angles in between, you should more or less
know what that angle or time is because we are all very familiar
with the clock phase. Right? Let's sketch.
I'm going to visualize how much space I need for
the scene, and in this case, I will want to draw a
bit smaller than usual because this is quite
a complicated scene. First thing I want to do is maybe draw the
biggest element first. In this case, it would be the
building on the left side. Once you can fit the
biggest element in, you should be able to fit all the other elements which
are going to be smaller. This is going to
be a quick sketch. So this is going to be the
height of the building. I have already measured
the width of the building. The width of this building here is going to be the same as
the height of this building. Let me just draw
the height here. This is the pillar, and this is the building here on the
second floor will be here. It's not exactly at the
middle, which is here. It's the lower here. And there is this protrusion
that comes up here, which takes up about maybe
two feet of the height here. And there is this corridor
here which starts here. There is the angle roof here. So the angle rope will end
here at this midpoint here. So this is how I can
use this midpoint here. Just connect the line like this. I can see some open windows. Let me just draw the lines here. So you can see me
drawing the details. But I'm only drawing
the details because I have already drawn
the big shape here, which is this pillar here. So now I can draw some
little details first. For this corridor. I need to make sure there is this edge here where
the steps are. This is quite
challenging to sketch. I will say this is maybe here, two fifth of the height
of the corridor. And there's an angle
line here and we have more curves here. And we can see
some people there, so two people, which are
actually quite small. They are seated on
chairs outside this cap. Yeah. So yeah, I think
it looks okay so far. Let's draw the road here. Remember, this is this, this looks like it sloping, but I've drawn this horizontal. So this is wrong.
But it looks okay. Okay. Another wrong angle. You can see this angle
went down too much. There are some
diagonal lines here, so we will want to measure the diagonal
line in this case, it looks like 1:30
P.M. Maybe 45 degrees. Yeah. So it looks okay. We have some windows,
maybe more windows. I'm just using vertical lines
to suggest the windows. And there are some little
details in the background. I'm going to try to
draw with ten lines. I was still caught
up with the details, so let's move on to
the main sketch again. So there is a street sign here. The top of the street
sign will be here aligned to this part here and goes
down all the way here. So we know the start of
the height and the bottom, and we can just join the
height and the bottom. So this is one quick
way to make sure you start and end at
the correct areas. For the angle line here, the slope that goes down, alignment, the road or
the curb intersects here, which is aligned
to this line here. And the angle, I would
say it's maybe 10:00 P.M. So it's like this.
It's not 45 degrees. It's going to be here. Yeah. I think it
looks all right. There's a little curve here
where this part slopes down. You can see this curve becomes thinner to ground level here. Okay. Next, we can
draw the other rope. It's going to be here. It's between this point and this point and the
slope is coming down. I'm going to place a point here and I'm going to
connect the lines like this. Yeah. Yeah. So this angle, I think I got it right. And then it comes and goes up. So it's going to go up all
the way to this point here. Yeah. So I'm aligning
there is a building here. I'm trying to align
this to here. So sometimes you can place like dots on your sketch just to
mark out the important areas. Maybe I shouldn't
draw that far yet. Maybe I should expand the
sketch from left to right. Okay. So I'm going to
draw the roof here. I'm going to place a few lines. This is the roof. Just slightly below this This is the one with
the little circles, and we have the awning. Another awning here. I'm not lying here. So sometimes I like to place little details to help
me know where I am. I may not even draw the
main structure first. Sometimes I may draw
the big ships first, but sometimes I like to
place little elements first. So let's try and draw
the big ships now. The top of this building
will go here line here and there will
be a slope here. So the roofs are like this. Well, this is incredibly
challenging to sketch. The top. Okay. So
this line here. This height here
should end here. We have an angle here. It ends here because
this point should be lower than this
intersection here. We have a building
behind like this. So again, this is really great to use pencil to mark
out the composition. This building here we go
down all the way here. It should not end
where the slope is because there is
another curve here. And we have people
standing here. Let me just use a little dots to represent people
standing here. I can see an angle line
here that goes all the way up comes back in and
we have a building here. We have a signboard here. Okay. Let's continue to
draw the big ships. Again, one too caught up we're
drawing the little please. So this is the roof. This line here looks
almost horizontal. We have an angle here
angle line there. This line almost horizontal.
This one as well. Okay. The place where I sit
at a lot of foot traffic. So I want to draw this
up really quickly. So let's draw the slope. Let's draw this
all the way down. And let's draw the slope. Okay. So now we have the slope. We have the pillar. We we can divide the building
into different sections. This is the other roof. The line just above the roof. This line is almost horizontal. Now, it would
really be easier to just use a pencil first
because with a pencil, if your sketch looks off, you will know how to correct
it with pen later on. Okay. So far, it's pretty good
except for this part here, this roof here should be much lower compared to
this roof here. I think it's it's fine. It's not too inaccurate. And we have the tall building in the background I'm going to draw with really
thin lines if possible. I really rough ones. Yeah. So this tall building in the background
is not going to have that much details
because it's so far away. So I'm sketching this
really loosely and there are shop houses
in front as well. So this horizontal one
that I just drew is actually the
horizontal roof there. I'm going to divide
this shop house into different sections. This area that I'm blacking
out is the ground floor unit, and we have windows here, windows here, windows here. Yeah. And I can draw horizontal lines to suggest windows for the tall
in the background.
6. Measuring Angles pt2: Once again, I'm to caught
up with the details. Okay. Let's draw this tall building
here on the right side. So the balcony for this building is going to
align with the roof here. This will be angled
because of perspective. And this is the back
of this tall building. It's going to align here
in the mid section here. I can draw the lines here
just to suggest details. Okay. For this balcony will come down, C, go up and calm down. So you have to measure
the angles as well. It's about say maybe 45 degrees maybe 2:00 2:00 P.M. Yeah. Well, there are so many
little details here. It looks like a rooftop bar. You have some puns. The tall hole here that
is hanging some lights. Good some grills. Okay, for this building
on the right side, I'm just not going to
give it that much detail because they highlight this
building in the center. But I need to, you know, divide this into three floors. So this is the second floor. And this is the sorry this is the third floor,
this is the second floor. And for the second floor, this part here is
actually higher than this so this is higher
than the roof here. Okay. And there is a pillar here, which is exactly in the
middle between this and this. So this is proportion. There is a water pipe there. I may want to draw
the water pipe. Yeah. Okay, that's the peeler. I can add a little
details to the pillar. The, the window is
this shape and size. There should be ample space between the pillar
and the window. That's the semicircle
design at the top. Once you adjoined the shape, we can divide the window into
smaller and smaller shapes. And you can also add on details. Same thing here. Make sure that windows
align at the top, books, and make
sure in this case, the windows have
space correct space between the left and right. Okay, let's draw, there
is a lamp post here. So let's draw the
lamp post here. The lamp post is aligned
to the window here. It's in the middle
of the window here. And it goes down here all the
way to where the Kirk is. And the noisy van that
is parked in front of the house of the
building is gone. There is another
lamppost here just intersecting this
awning here comes out. Toes down. Okay. We see some windows, which I'm going to represent
as vertical rectangles, the circle, the
semicircle at the top. We have another window
here, which is open, the semicircle, another window. Yeah. Draw the big
shapes and keep cutting the shapes down to
smaller and smaller pieces. Okay. The most important
lines here are this line, this angle line, this angled line,
this angled line, and this angle line and the horizontal
lines for the roof. We have some plans plants
make sure the pots are small because they look small
relative to other things. And there are so
many pot plants. The wooden planks that the pots are on are
also at an angle. So make sure you draw
those draw the plank, the wooden plank at an angle. And I can see a lot
of people walking past the height of
the head is here, which is midpoint between
this and the ground. So that's the he and we have the body and that looks right. I mean, the proportions
right compared to the to the shape
to the size here. Okay. I can see some steps
steps are challenging, man. But don't worry. We'll just break down the
shapes are smaller, smaller. Yeah. So there is an
angle here angle here. This angle is affected
by perspective. So this is the pillar. There are some detail here, and the steps look
horizontal to me. No, they are not horizontal. They're actually tilted in
this direction like this. So make sure you
measure the angle. And when you draw, make sure you are a bit more precise, right? So this is not horizontal and this looks I'll
say good enough. We have some plants here
to block the steps. It's difficult for me to
see like the shop behind, but there are black
windows so I'm blacking out certain areas here. There are some bars here, hand rails behind the lamppost. There's a pillar here here and it seems like some
black thing here. Okay, this looks pretty good. So after I've drawn
the big shapes, I've just well, added more
details within those shapes. So now the sketch is
starting to come alive. And I'm blocking out the black areas just to
create areas of contrast. There is a vehicle here, but I've already drawn
the lines here. So if I draw the car here, it's going to look too messy, so I'm just going to
leave this as it is. Now, I will want to draw
some of the fans here. There are some vertical
bolets to draw the bullets, I'm going to see where they are, there's one here, here, here. Notice I'm placing
the lines. Yeah. I'm trying to place the
lines as accurately as I can and trying to
provide the correct spacing. So once I place all
those little details, I can complete the drawing. And make sure you draw the lines here with a little curve because
they are curved. Depending on of course,
whether they are curves. Okay. So we have
some plans here. There is a tall building here, but I'm not sure if I
should draw because the vertical line coincides with the vertical line of this building in the background. So if I draw this
tall building here, it's not going to be
very clear whether the tall building is in front
or behind this building. Yeah. So that is some things
you should think about get I I actually have no intention to draw
all the details here, but I feel like you know what? Why not? Why not? Since since the sketch
is almost complete. Okay. Another part of plan here, there was the person here. Okay. The height of
the person is here. Same thing, the height is here, the body is here. Yeah. And last thing I want to do
is just add some details, maybe just lock out
this black area here. Just to make this I mean, just to provide
some contrast here because down here is just, you know, line, but I want
some black shapes as well. But at this stage,
the sketch is done. So let's see if we if we
measure the angles correctly. Yeah. Is it looks right to me. So the angle here for the road. It's actually curving like this, so M is not that
accurate, but it's okay. Because the most
important thing really is the angle of this road. Does this look like
the slope to you? I think it does. Maybe I
can add some vehicles here. Yeah. So when you add
vehicles to the scene, it's going to make the sketch we make this look like a road. Okay. And it looks like
some streaky line, so this is not very good. It's okay. Let's
Let's just stop. If you don't know what else
to add in your sketch, that is the stage
where you should stop sketching or stop
adding more details. Okay. I love this sketch. I just love sketching
on location. It's just so fun
and challenging. So that is how my sketch
looks compared to the scene. I feel like the
horizontal line of my roof on this part here it's tilting in
the wrong direction. So it looks horizontal, but it should actually tit
down due to the perspective, so it should actually
down in this direction. Even though it
looks horizontally, I should probably make
it tied down a bit more. In this lesson, you see me draw the details first occasionally, and that's because I'm quite
experienced with sketching, so I know where the details
are going to be and the proportion of the details in relation to the main buildings. But for beginners,
it would be good to create some
drafting lines first, draw the big shapes first
before you draw the details.
7. Outro: Come to the end
of the course and I hope this course is useful. If you guys have any questions, feel free to contact me and do upload your
projects or send me your sketches so that
I can have a look and give you some pointers
on how to improve. If you have time, do check out my other urban sketching
courses as well. See you guys in the
next course. Bye.
 Teoh Yi Chie, Sketcher, watercolour lover