Transcripts
1. Introduction: Always wanted to record great sounding audio
without breaking the bank? Hi. My name is Santi, and I've been a voiceover artist for five years and have gotten to understand how to get great sounding audio from anything. In this course, we'll talk about how to record good audio, what equipment you'll need. We'll also be talking about
how to record and how to edit your audio to make it
sound as good as possible. Do you want to start making
audio that sounds truly professional and makes you stand out amongst other
content creators? Well, then this course
is just right for you. Let's get into the first lesson.
2. Class Project: 00 the class project. The class project for
this course is simple. All you need to do is set up a recording space, record, edit, and export a sample
of audio using the techniques that you'll
learn in this course. You can share your
class project and get feedback on it by going to the Projects and
Resources tab under this course and then going
to the M Projects tab. You can upload your
project there, and I will try my
very best to provide feedback on every piece
of audio that I hear. I look forward to seeing what kind of content
you're creating and making sure that
we're all creating the best audio that we can.
3. Lesson 1: The Recording Environment: Lesson one, the environment. When recording audio, very few people pay attention
to one of the most, if not the most important
parts of making good audio. The environment.
Environment shapes the way that your
audio sounds like, and it is either
going to provide a really easy editing
job for us in the future or a really difficult and stressworthy
editing job later on. One of the most
important factors in recording is
the lack of noise. For example, if I'm
quiet right now, You'll hear very little noise. And that is because I've
optimized the environment to provide the best
sounding audio possible. Here are a few tips that you
can use to make sure that your audio is free of noise and sounds as high
quality as possible. Tip number one,
close your windows. Windows let in every single
noise from the outside. Doing something as simple
as closing your window will prevent all sorts of
outside noise like cars, sirens, ambulances, and people
to leak into your audio. Yes, it won't stop
really loud noises, but even the small ones can make a huge difference if picked
up by your microphone. We want to avoid all sounds
other than your voice. To do this, we need to make sure that our windows are closed. If you have an open window in
your room, try closing it. It may disturb your ventilation, but it is worthy if you want
to get really good audio. Tip number two record in a
room that has furniture. You may be wondering
what furniture has to do with good
audio quality. And when we look
into what furniture is and how it
absorbs sound waves, we'll be able to understand why it really does make a
difference in our recording. When we speak, we produce waves. And if those waves aren't
absorbed by anything, they'll bounce around,
creating what we know as echo, a room that has furniture, especially cloth like
curtains, mattresses, or sheets, will
absorb the sound and prevent it from bouncing around and creating a lot of echo. That is the reason why you see cathedrals having a lot of echo. They barely have anything to prevent the sound waves
from bouncing around, and since they have
such ample space, they'll reverberate
and you'll hear the echo that you know and love. But in this case, we
don't love it because we want to avoid as much
echo as possible. That is why you should record in a room that has furniture
like your bedroom. Just try to make sure that it is also a closed space because open spaces can also be prone
to other leaking of noises. Tip number three,
consider If you live in a particularly windy or in an
area that is prone to rain, you might want to
delay recording audio until a time where it is quiet. Rain is a true hassle to
edit out in post production. So you can do yourself
a favor and just avoid recording in
the rain whatsoever. The audio that you get
might still be good, but you will always be able to hear the rain
in the background. Try and postpone your recording for a time where
it doesn't rain. Tip number four, make
sure that your house or apartment or wherever it is that you're recording is quiet. This may sound a little obvious. But often parents that
have kids or people who live in college dorms have a really difficult time
editing out noises that are produced because of factors
outside of their control. You can do yourself
another favor by recording in an environment
that is already quiet. If you live with
people, make sure that they know that
you're recording. That way, you'll be able
to make it so much easier on yourself when you're editing
noise in post production. These are just a few things that you can do
to make sure that your audio is optimized to
be as good as it can be. The next lesson,
we'll be talking about what you need and how you can use this equipment to
get the best audio possible.
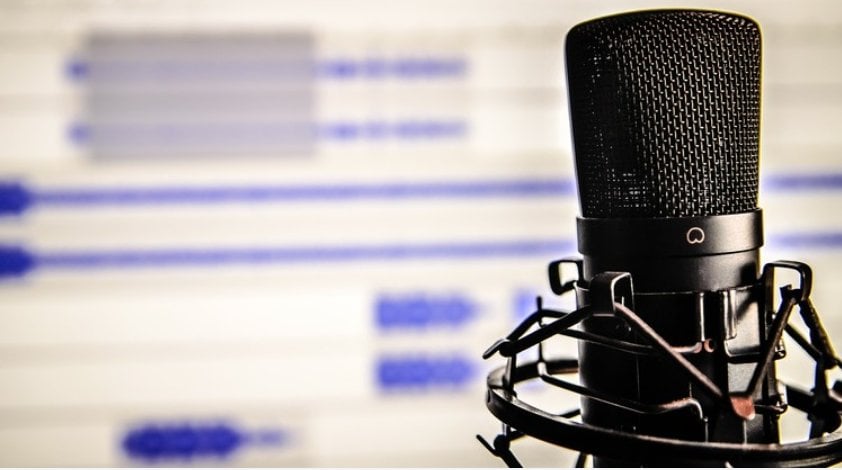
4. Lesson 2: Your Microphone (or Phone): Listen to what you'll need. If you're listening to
this course right now, you have an electronic device, meaning that you are capable of recording a really
good sounding audio. You can't start off
with a cell phone like I'm going to teach
you in this course. However, if you have a USB or an ExcelR microphone
like this one, and your audio will
sound a little better. I would also recommend getting something known as a pop filter, like this one that
I'm ho or like this one that you
can see sitting on top of my microphone. The reason why we
use pop filters is because when we
pronounce sounds like P, G, or B, our mouth
releases gusts of wind. Our microphones diaphragm
picks up on those gusts of wind and they correlate to
spikes on your audio chart. If you're recording
audio on a program, you'll be able to see these spikes when
you pronounce sounds like P F or B really loudly. These sounds are
called plosives, and you can feel them by putting your hand up to your mouth
and pronouncing the sentence, Tyla bought purple frocks. You'll feel the wind
go to your hand, and that is why we use pop
filters when we record. A pop filter is usually
comprised by one or more meshes. The reason why pop
filters use meshes is so when you say
these plosive noises, the meshes will
divert the wind and make it miss the
microphone's diaphragm. Grab a pop filter like this one and repeat the sentence
that we had already said. Tyla bought purple frocks. Will no longer feel the
wind hit your hand. The reason is that
the microphones mesh absorbs the wind and
disperses it instead of keeping it contained in
a straight line that will directly affect your
microphone to audio quality. Pop filters are
ridiculously inexpensive, and you can pick ones like
this or the ones that go over your microphone
like this one for a couple of dollar. However, if you're on
a really tight budget, you can use something
as cheap as a sock and put that
over your microphone. We'll do something similar
to what a pop filter does. I don't guarantee
that you'll get results as good as an
actual pop filter. But using a sack can be a good
alternative if you already ordered a pot filter
and it hasn't arrived or if you're on
a really tight budget. Right now, I'm going to put
up an audio test of me using a pop filter of me using a sack and of me not using
a pop filter at all. To see if you can notice the difference of
what it sounds like. Note that the audio
that I'm about to play has gone through
post production, so it may sound a little better
than it actually is raw. This is an audio sample
using a plug and play USB microphone with a
professional pop filter. Tyla bought Purple Frock. This is a sample audio using a USB plug and play microphone, but using a sock instead
of a pop filter. Tyla bought Purple Frock. This is an audio sample using a USB plug and play microphone, but this time not
using any pop filter. Tyler bought Purple Frock. So after hearing that,
you can probably notice the huge difference that you'll get from
using a pop filter. So I highly recommend spending a couple of dollar
and getting it. Now that we know the equipment
that we're going to use, let's go on and see
how we can configure that equipment to make
our audio sound good.
5. Lesson 3: Optimizing your Microphone: Now that we have
everything that we need, let's figure out
how we can optimize our equipment to make it
sound as good as possible. When you record any
piece of audio, you want to start off by leaving 10 seconds of empty audio. I will show you what
you're going to use this blank space for when
we go into post production. But what you need
to know now is that leaving 10 seconds of
blank space before you record your audio is going to be extremely helpful in the
post production process. What it's going to do
is help us remove some of that noise that you hear
in the background later on. So when you click record, leave 10 seconds of blank space between when you record and when you first
start speaking. That way later on,
we can better remove that noise and make our audio
sound more professional. If you're using a cell
phone to record audio, place your pop filter over the
bottom part of your phone. That is where the best
audio gets picked up, and then you can
record your audio interview style like this. If you have a tripod
for your cell phone, you can also use that to
record more stabilized audio and prevent you picking up noises from moving
your microphone cell phones do have a
built in pop filter. However, I would still recommend getting one as an add on. If you have a USB
or XLR microphone, the most important
first step is to identify where your
audio is picked up from. Some microphones only record from the front side, like mine. Some microphones only
record from the top side, like the sure SM
seven B that you see in a lot of podcaster setup, and other microphones
record from all sides like a setting in
the Blue Yeti microphone. It is really important that you know which side your
microphone records audio would recommend
conducting some tests in whatever software you're using to record to make sure that you're speaking in
the right direction. Because if you speak in the completely
opposite direction, your microphone is not
going to pick up anything, and your audio is going to sound incredibly weird and distorted. To get the best results, you want to speak in the direction that your microphone picks
up audio from directly. That way, your vocals will
hit the diaphragm right on instead of having to
do a weird loop around. Also, if you're recording
on a microphone, you want to make sure that
it is six to 9 " away from can do this by sticking
out your thumb and your pinky finger
and using this as a way to determine
if your mouth is the right distance away
from the microphone. In this case, we can
see that mine is. It all depends on style, but usually it is
recommended that your mouth is six to 9 " away
from the microphone. If you're using a cell
phone to record audio, you want to make sure that
you have an application that records audio directly
onto your cell phone. On iPhone, we have
the voice memo app, which records audio directly
onto our native storage. However, if you're on Android, you also have a
native recording app. However, for both
of these phones, you can also download
third party apps on the App store that may allow you to get better audio
from your cell phone. Before we start recording,
I would recommend that we go back to Lesson
one and rewatch it, to make sure that
our environment is optimized and we get the best
results from our recording. Let's go to Lesson four, where we'll learn
about the software that we're going to
be using if we have a microphone and what
you're going to do with that software if you're
recording on an iPhone.
6. Lesson 4: Software Basics (Audacity): Five software. This lesson is going
to be a little short as it doesn't have
much explaining to do. For this course, we're
going to be using the 100% free recording
software known as audacity. This will allow us to
import audio if we're using a cell phone or
record it natively on the software if you're using an external
microphone like the one I'm using and the one
that you can see in the computer monitor to my left. If you're recording
audio on a cell phone, you'll first record it in the voice memo app and then
import it onto your computer. If you're using a
USB microphone, what you'll need to
do is make sure that your mic is selected by
going to audio setup. Recording device and
choosing your microphone. Now that we know what software
we're going to be using, let's go on to the next lesson, where we'll hop into audacity
and see what we can do to our already recorded audio
to make sure that it sounds as crisp and as
professional as possible.
7. Lesson 5: Audio Editing Basics in Audacity: Lesson five, adding
effects and E Q. So we're in audacity right now, and I have pre recorded
a sample audio. And as you can see, I follow
the directions I gave you by recording 10 seconds of blank space that
we're going to use, and I'm going to
show you how to use those 10 seconds of
blank space right now. So we see that we have this
audio track right here, and how you manipulate the
audio in audacity is by using the menu that you see on the top hand of the screen. You know where it says,
file, dit, select view, transport tracks,
generate effect, analyze, tools, help and window. This is Audacity's menu,
and if we click effect, you'll see all the variety of effects that we're going to
be using in this course. These are all the effects
that Audacity offers, and we're going to be
using some of them to make our audio sound as
good as possible. So the first step is
removing the noise. I repeat the first step is removing the noise
from our audio. And the way we're going to
do this is by seeing where, as I told you to record 10
seconds of blank space, we're going to see where
the blank space ends. In this case, it's
right about here. And then we're going
to left click. So left click on your mouse
and hold it down and then drag it all the way to
when the audio begins. Until you have something
that looks like this. Once you've selected
in audacity, you can move your
cursor freely again. So now that we have the
blank space selected, we're going to go to effect. Then we're going to
go to where it says noise removal and repair. Next, we're going to
go to the side menu and click noise reduction. Let's click on noise reduction. You're going to want to keep these exact same settings
that I have right here. If your audacity has different
settings for some reason, change them to the ones
that you see on screen now. Now, instead of clicking, we're going to click
Get noise Profile. I repeat, we're going to
click Get Noise profile. As you can see, select
a few seconds of noise. So Audacity knows
what to filter out. Then click Get Noise profile. That is why we selected the 10 seconds of blank
space first because it tells audacity what the noise is and how to filter it out
throughout your audio. So we're going to click
Get noise profile. Boom. We're done. Now, what we're
going to do is we're going to click Command A, or if you're on
windows, Control A, this is going to select
your entire audio track. So now we're going to go back to the noise removal menu
by going to effect. Noise removal and
repair, noise reduction. And now we're actually
going to click. What this is going to do
is going to filter out the entire noise because audacity just
sampled this bit of noise right here when we left
our microphone recording, and it heard what kind of noise was being picked
up by the microphone. In this next step, it just
completely removed that from the entire piece
of audio automatically, which is amazing for us. Now, let's add some effects to our voice to make
it sound better. We're going to do
this by making sure that our audio is
already selected. We want to make sure that all
of our audio is selected. Now we're going to go to
effect EQ and filters, and we're going to click
on Filter curve EQ. Again, EQ and filters,
Filter curve EQ. Going to see a menu like this. We're not going to mess with it automatically
because if you can, you can drag these
and you can move them around and you can manipulate your audio
on a decibel basis. But we're going to
use the presets because it's a lot easier, and we don't run the risk of completely ruining our audio. The first preset that
we're going to do is increase the base of our audio. If you're a man, this will
make your voice sound more deep and it will bring out
the base tones in your voice, which is something
that male voice over artists usually want
to do to their audio. If you're a woman, you
might want to skip this step as it will make your voice sound
a little deeper, but if that's what
you're going for, and if you're reading something
scary or if your content centers more a dark
and mysterious voice. You might want to still add base to your voice if you're a woman. The way we're going
to add base is by clicking presets and settings, factory presets, and then we're
going to click here where it says base boost.
Let's click on that. And now we have
this preset that by default adds base to your audio. Let's click Apply.
As you can see, the waves in our audio changed because we
just manipulated them. Let's go to effect once again. Q and filters, filter curve Q, but this time, let's
add more treble. The reason why we're adding
base and treble is because we want the mid tones of the audio to not be
highlighted as much. Usually what makes good audio
is a balance between base, treble and mid tones. And by enhancing the
base and the treble, we're making sure that the
mid tones stay balanced, because usually
microphones only pick up on base and treble or base or treble and leave the mid tones as the most
loud part of the audio. And we want to make sure that
the mid tones are balanced. So let's go to
presets and settings, factory presets, treble boost. And that's going to give you
the automatic treble boost. If you don't know what your
audio is going to sound like, and you want to
make sure that it sounds proper with
these presets, you can click Preview, and what it's going
to do is play your audio and allow you to hear what it would sound
like with the effect. But since we're applying
these automatically, I'm not going to do the preview, but if you want to make sure
that your audio sounds good, you can click Preview and
then do it. So let's apply. Now we see that the lower parts of the
audio were boosted. Those are the treble parts
that were previously hidden and overshadowed by
the base and mid tones. Now, let's go to effect. EQ and filters. Filter curveQ one last time. Now we're going to do the
effect that I think is the most underrated one in
a hidden gem that will make your audio
sound that much better. Let's go to presets
and settings, factory presets, and let's
click Low roll off for speech. This will make your voice, and it will cut it off
when it's supposed to, and it will make sure
that it sounds crisp. Let's click low roll
off for speech, and let's apply There
we go. Perfect. Now there's only a
couple of steps missing. You can see that our audio has high points like it
does at the beginning, but it also has low points, like we can see right here. If we want to record
a good audio, we want to make sure
that it is all balanced. The way we balance our
audio is through a tool called the Compressor.
We're going to go. We're going to make sure
that our audio is selected by clicking Command
A or Control A, and then going to effect. Now we're going to make
sure we go to volume and compression
click Compressor. These are other
settings that I use. I like my audio to have
a radio like feel, which is why the ratio
is really high up. If you don't want your
audio to sound like mine, where it's more of a
punchy radio feel, then turn down the ratio to
something like three or 5/1. But I like it to sound
punchy and radio like, so I'm going to
keep it like that. Other than that, your setting should be exactly
the same as mine. The only thing you
really want to manipulate is the ratio if you want to make
your voice sound less or more radio like. I like the radio feel, so
I keep it really high. Once you've adjusted your
preferred ratio level, and you've made sure
that the threshold, the noise for the
attack time and the release time are
all the same as mine. Then you also want to make
sure that you deselect, compress based on peaks, and that you have selected makeup gain for zero
dB after compressing. That's all you want to do,
and then you can click Apply. Can see this has made
our audio much louder. But we can also see that
it added some noise over here in the boosting
of the audio. Don't worry. We're going to fix that.
We don't want our audio to sound like it has too
much noise in it. Let's go ahead and once again, select our audio by clicking
Control or Command A. We want to go back
to the effects tab, and we want to go to
volume and compression and click this time, normalize. You want to make sure
that you have negative one decibels just like that, and you want to make
sure that all of the settings are exactly the
same as how I have them. Now you want to click Apply. This is just going
to make sure that our compressed audio isn't too peak based and doesn't
have as many peaks, and it still sounds good
to the average listener. Now, we still have these little
bits of noise right here, and here is how you fix them. Once again, select your
entire audio, go to effect, go to noise removal and repair, and click noise gate. These are the settings
that you want to have when you go
into noise gate. Noise gate setting,
all it does is remove noises that are
below this threshold. So you want to make
sure to adjust it according to what
your audio needs. But generally, you can use negative 20 as a
good starting base and you want to make
sure that the rest of your audio is pretty
much the same as mine. And what this will do is that
it will remove everything that is below that threshold.
So let's click Apply. And as you can see,
our noise is gone, and it will also do you the handy dandy task of
removing some of your breaths. In the later lesson,
we're going to go over how to remove
all our breaths, but right now that removed
some of the lower ones. So now that we have this audio, we want to go through
one last step, and then we'll have our
entire audio fully edited. We want to select once
again the empty noise. Go to effects, noise removal
and repair, noise reduction. Click, get noise
profile once more, then select our entire
audio once more, effect, noise removal, noise
reduction, and apply it. What we've just
done is essentially make sure that our audio is free of any sort
of noises that would have been left
behind by the editing. Sometimes editing is imperfect, and your audio may still
contain little bits of noise, but we can make sure that
those are gone by having one last step where we
remove all remaining noise. And now this is your
fully edited audio. We can go ahead and select
the empty noise and click Delete, and that is gone. Now let's move on
to the next step where we remove our
breaths from the audio.
8. Lesson 6: Removing Breaths in Audacity: Now that we have our
audio right here, we want to make
sure that you can't hear the breaths in
it because breath sometimes make it
really difficult to listen to audio.
How do we do this? We can notice breaths and audio almost instantly
because they look really low like this one right here or like
this one right here. In this audio, it looks like
we only have two breaths, but we'll have to
replay it to make sure. The way I remove breaths
is by selecting them. You can select them by
left clicking and holding, and then you can play it
to make sure that what you selected is a breath
by clicking space. In this case, yes,
it was a breath. The way we remove it
is by going to effect. Volume and compression, amplify and then dragging this
knob all the way down, and then clicking Apply. That will completely
remove the breath. As you can see, we
can no longer see the little disturbance
of audio right there. Now we can do the same with this piece of audio right here. Instead of having to go
through all that hassle of selecting noise and then
amplify and then removing it, we can simply click Command
R or if you're on windows, Control R, and it will automatically apply
what we previously did. We do command R.
And it completely applies the amplify effect once more. So there you have it. We've removed the two
breadths in our audio. And if we play it back now, we'll see that there are
no breadths remaining. We can truly appreciate
how amazing this audio sounds because of
the way that we edited it. And we can also see that it no longer contains any breaths. Let's move on to
the next lesson, where I'll teach you the
different audio formats and how you can export your
audio from audacity. This is a sample audio for my Skillshare course
on audio production. If you want to download this
audio to use it to practice, go to the projects
and resources tab of this course and
download it there. Test 123, test 123.
9. Lesson 7: Exporting Audio In Audacity: Lesson seven,
exporting your audio. So we're back in
audacity, right? And now we want to
make sure and turn this finished audio
product into a file. We can do this by clicking file. And then going to
where it says Export. Now, there are multiple
different audio formats. You can select MP WAV or OGG. If you want to get the best
audio quality possible, I highly recommend using WAV, as it will get you a better
audio resolution overall, and it is the one that
most professionals use. So let's select WAV. Next, you'll be brought up
to this page right here, where you'll give
your audio a title. Let's go for sample Skill share. Audio WAV. This will be how you find
your audio in the Finder tab, if you're on MAC and
in the Files tab, if you're on Windows. All you need to do now is make sure that your file
type is correct, and you can look at some of the other file types by
just selecting the menu. But yes, our file
type is correct, it's WAV, and then you
can change the encoding. I wouldn't recommend
you do this unless you're highly advanced and
you know what you're doing. In this course, we're not
going to dive into detail. I would recommend you
keep it as the default, which is signed 16 bit PCM. That is the default. Now that
you have your audio titled, you can simply click safe. It usually won't take long, and then it will take
you to this menu right here where you
can edit the metadata. If you're producing music,
you want to do this, but if you're not
producing music, it really doesn't matter. So you just want to click Okay. And then you will
be completely done. Your audio is now exported, and you will be able to
find it in your files. Congratulations. Now,
all that is left to do is use it for whatever
means you're going to. If you're a YouTuber, you can upload it and synchronize
it to your audio, or if you're doing a podcast, you upload it to your
preferred podcasting software, and then you're done. Congratulations. You have
successfully recorded, edited, and exported your very first high
quality audio file.
10. Outro: You have all the
knowledge you need to record spectacular
sounding audio. Please record a sample of your recording and
follow through the entire steps of
this course and put it in the my project
section of this course. I'll be sure to go through
as many as I can and give feedback on every
single piece of audio. Great audio is the first step
of great content creation. I wish you nothing
but success in whatever journey
you're taking to produce the best
content you can. I hope that you learn something
new from this course, and that you will take
what you learn to produce the best possible
material that you can. Thank you so much,
and I wish for you to have a great
rest of your day.
 Santiago Burgos, We Are Lifelong Learners