Transcripts
1. Welcome to your Class: Hello and welcome to
my exciting new class, pilot photography, how to become an amazing
product photographer on Etsy, on eBay, and how to make
money with it on Fiverr. My name is Sylvia
kids and I teach other people how to
make money online. The first business I will get to is taking pictures and
make your money with that. In this course, we're
gonna be focusing on economies,
product photography, how to take pictures
with your DSLR or mirrorless camera or
your actual smartphone, you need either one of those in order to get started
with this class. Everybody has a smartphone or any kind of font
that you can use. So just having a phone is good enough for you to
enroll in this course. Having DSLR or
mirrorless camera. Maybe this is the
justification you've been waiting for to buy one of those. This course is going to
be focused to hand one, how to go ahead and take amazing pictures on
eBay and on Etsy, you can make additional income. Second part is how to
make money on fiber. Well, you can start your own
DSL business of photography, where you're gonna be
selling online pictures and making money with that o
of going online services. You can sell your pictures
on Etsy as digital income. All you can go ahead and
make money on firewall, but it's selling your online
service such as photography. Regardless of what
you choose to do, this class is for you, especially if you want to master photography,
takes amazing pictures. And the one how to
market yourself as a photographer in an exciting
and blend your business. If you think this is the course for you and check
with your heel, go ahead and enroll
in this class. In this class we are
going to be loading a lot of cool and interesting things, especially how to take
amazing pictures. And we'll learn more about
product photography. I can't wait to get started in this brand new
class that I have created just for you all today and start
running right now. Over 40 hours are
exceptional and high-quality content is
included in this course.
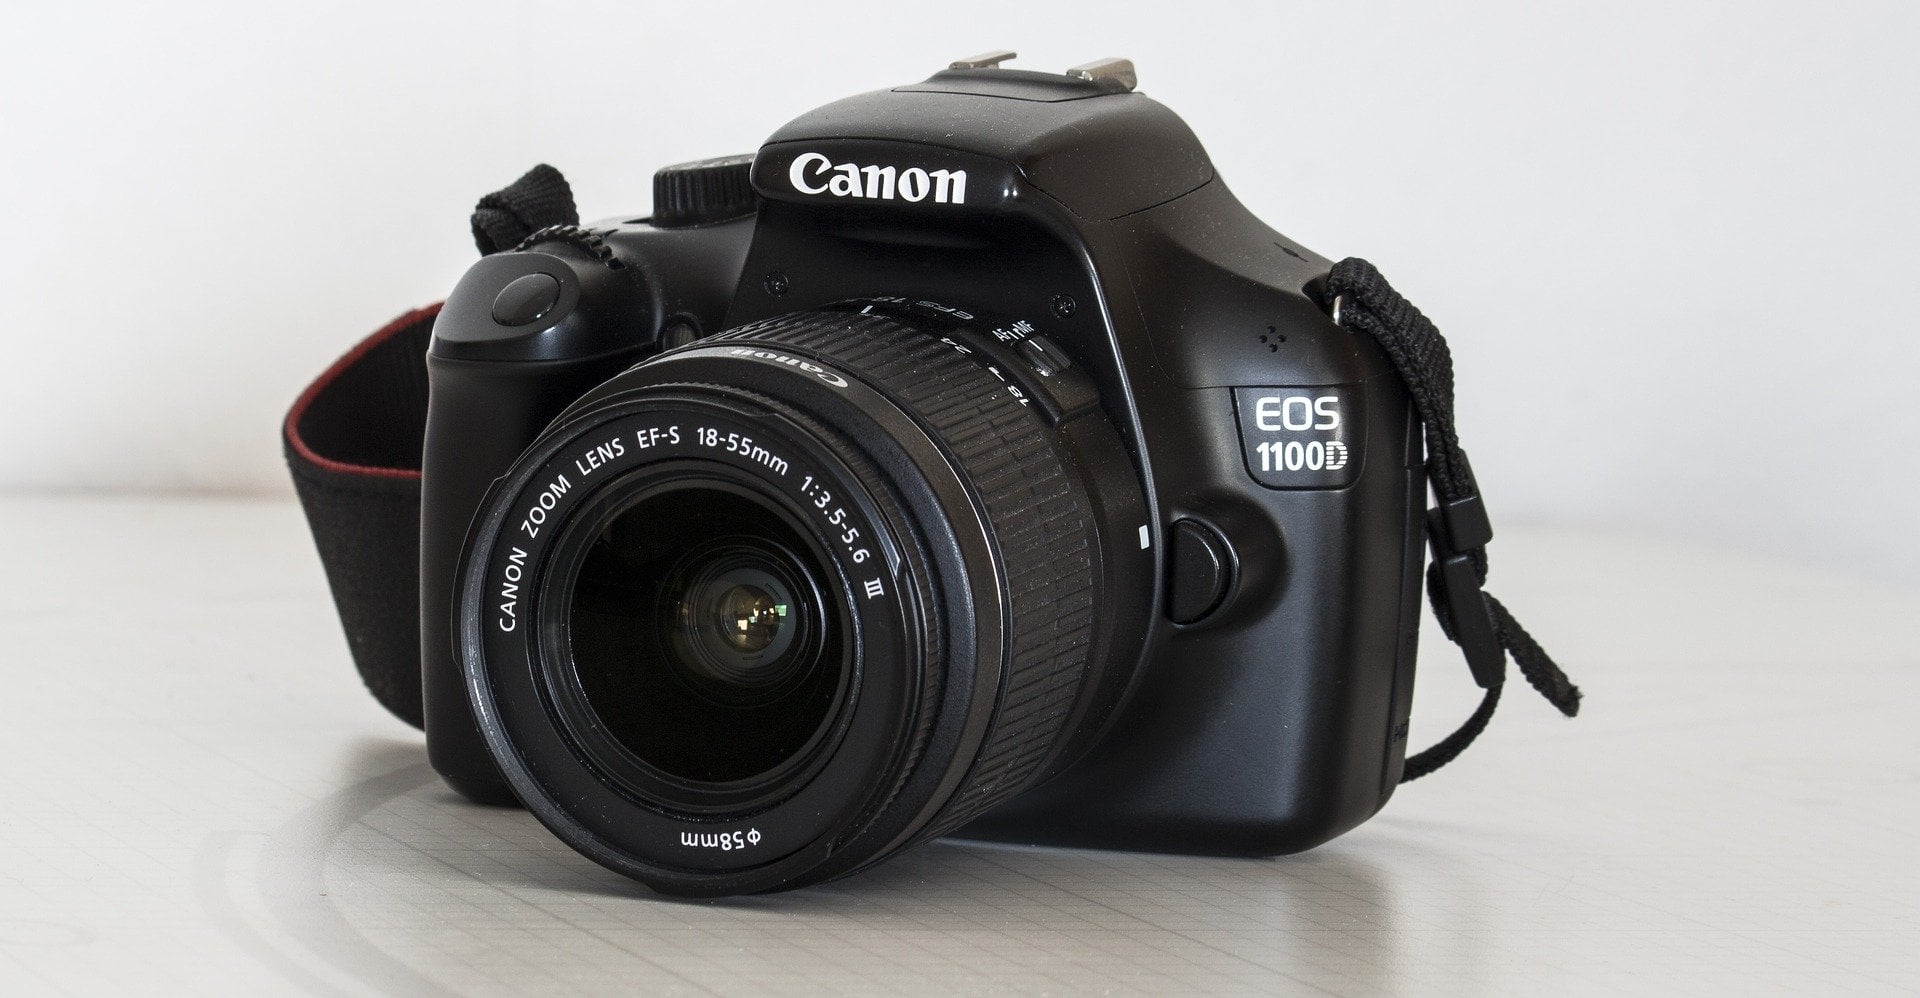
2. Picking a Camera: What camera do you actually need to take amazing pictures? Well, no, this is
not needed anymore. In fact, it used to be, well, you need a professional resume in order to take
amazing pictures. But right now, if you need specialized equipment and
to take amazing pictures, you still might be
able need something like this with a flash and
everything else to it, which costs thousands of dollars of equipment and
everything else. Especially the macro lens, which is not this one. This is the towel zoom lens, which also could be used
for macro photography. But this is the logo, a sensor, or even needed to take
amazing pictures. There's a few cameras out
there that you can use. Gopro is not one of those. One of those cameras
is the Karen Miller, whereas cameras mirrorless
doesn't have a Miller in here. And it actually means you can see the size difference
with a sensor camera, with a mirror, and one without. It is much simpler
and small as well. This can do almost
the same thing that the big camera can. The question is,
do you really need the professional ESOL
for part of photography? Know, you could totally get away with something
like this to M6, there was also the M 50
and those other equivalent to this in Sony
and Nikon as well. But do I use
something like this? I myself don't actually
use this specific camera. I use the G7 x, which is almost the
same as this one. It's also middlewares, but it doesn't have the
interchangeable and store it. Why? Because it's more
convenient, it's more easy. And 90% plus of all my
pictures are done on that specific camera
because it is just something that easier
to take out and use waltzes, this one, you have
to interchange, find the wines is the most
sophisticated. It is. The more time it takes to
set up and get the job done. So that's why I
don't use a user. Which one do I recommend
for you to use? Usually it is whatever
camera you can budget. Whatever camera you can
actually take the money and spend on it is the right
camera for you to get. The more expensive the camera, it is better if you get
something like this. You can always
replace the lenses. Those are probably one of
the best cameras for you to get because you can
take out the lens itself and you can
easily upgrade or downgrade everything
else in here. Really, the body is
when you bought once the lenses could be
interchangeable and what time you can get more and more lenses for your specialties walk, especially a macro lens
which is fairly essential. What they can, those
costs are pictures. If you actually need to do that. In most cases, actually, what you can do is use
something like this, which is an iPhone or an equivalent smartphone
form galaxy or Android. Now an iPhone, the
one l command for you to get is the 12th
or the PTO team. In fact, if you get
the minimum one, that voice difference makes
it really a no Bueno. The 12th is actually the
better deal slightly, but they told Team 450 box
you get the same form. But the camera is
so much better. So you actually should get the
total team, in my opinion. The pictures you can
take with something like this is amazing. So you have to have a foreign right now to
be in today's society. Just get the best iPhone or the best multiple
you can afford. And you can use that instead. So it's going to
save your money. And it's going to take
those amazing pictures you have always wanted to take.
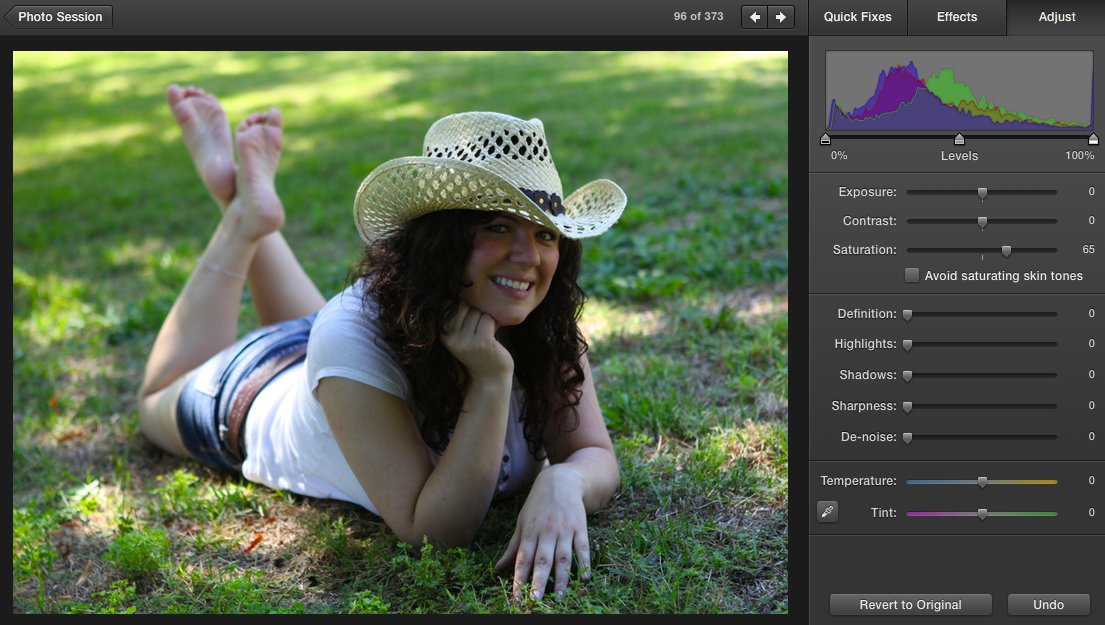
3. Professional Photo Setup: So the entire setup
is over here. You can see how I put
everything in position. Specifically, you can
see this weighting kid. So the kit itself is what
they actually use heal, it's from the womb cube
and it has a diffuser. It also has filled
dose we can use. So instead of working
with the software, well, you have to go ahead and
process every single image. And specifically if you
want to process videos, which is much more complicated, this will do it for you. And it's all magnetic. You can put them right on. And then it's going to
make it different shade of light, which is really cool. So I put this right here. This is the position
I put this in. And you can see the camera
is also put in as well. They'll both sporting a tripod. So after you put them in, and next thing you have
to do is position it. And what I like about those
tripods that you can go ahead and easily
position the camera. And it has to be watercolor
when you take the picture. The second thing is having
this white sauce now, those bigger wide sources
that I use specifically, I use the biggest
one on the top, and I use another big
one on this side. This is directly
working with specific quiet in a way and it's not going to be
behind the camera. And yeah, if you put it like
this and you take a picture, obviously it's gonna be
with their actual camera. And the camera can see it, which is not what
we wanted it to be. Over here. It's much better
because it's white. White from this side. And it actually not
shining right in the land. You want to avoid
direct shining into the lens put into it. So from this side is probably
the best for you to do is you can see here the background
is slanted over here, and that gives it the
interesting work. And we don't have a cutoff edge, which you can see right here, this edge you want to avoid. And that's why we
don't have it here and it looks really nice
and professional. So now we're going to be using the actual iPhone
to take pictures. And this is totally different. So I did shout this up
and it is ready to go. We also have over here this
white diffuser as well. So for the tribe, but they do suggest one that is flexible. So you can go ahead and use it in order for you
to put things on it. So this specific tripod as
wags and has something on the top that you can modify
and use it for the whites. Once you've gone ahead
and put this on, you want to put this
directly in the location, you want to use it, then you're gonna be turning
this on and putting it on. So let's go ahead and do this. Once you set it up in a
direction it has to go. You put this on by toning it on. So I have it on right now. And this one, the good thing
about this specific white, and this is why we are awake it, you can see how powerful it gets as I keep on
pressing on it. And the light can
get super powerful. But I only need this
much power when I go ahead and do the pictures. Because e.g. right here, you can see much this white
actually makes a difference. Let's turn it on. And
if it is too much, is just going to really do
too much to the picture. So you want to move it around. And this is why we
have the tripod, is you can see with
different direction, we're getting different kinds
of whites for our subject. And on this side they
think it looks better. Once we have the white, we want those no shade. You can see the shade
sometimes on this side and now we think we want to
get rid of the shade. And when it looks pretty
good way for you to get exactly the picture
that you want when you have the team might
hear all set up. So make sure falls to find
exactly how you want to make sure it is done
with the white itself, not having all those
shades on this side. The most important thing here is to get rid of the shades. So toning on at total right now. And this is much more better
than the previous three. And keep on upping the white
switch to its max power. You're trying to eliminate
all the shade from every single side
if it is possible. And of course, you're
working at this on the phone and sometimes
we have to go back. And of course, any more
white in the background, although this seems
like this is a lot of white on the formula
looks a little bit more darker as
you can see on here. But it doesn't mean it's
going to come out this dow, what you're going to
be doing is going to go into Photoshop weight on. And you might actually
have to brighten this up even more in
case you need to. Sometimes you have to post on the extra features on
the phone and to go forward to make sure everything is exactly how
it's supposed to be for. Sometimes this could be sad for a little bit less
resolution than it should. So going through the
different teams you like, we can go to the photo
team natural right here. And we can go into different
features that we can hear, stage wide, and so on. Once you find the correct
one that you will like, it's going to help it out with brightening and making
it much more doubt coal. In case you actually need
to moving into idle, it's going to become much more Biden wants you to
take a picture, as you can see, that
this is definitely way more than you should. But this is going to get us
the best possible image, exactly what we want. So we having all the whites walking for us like
this one right here, the side, the big one, and the huge one. It is a rather wide to
get the perfect image.
4. Scene Photo Shoot: Taking pictures
for Etsy or eBay, you have to first
set the synapse. So this is the stuff that I
sell mostly in my Etsy shop. Those are called
diagnose magnets. And we also have here the pause, really interesting
kind of things. Now, one thing I like
to do is to have an artistic picture of
this stuff that I have. And this could be like for your banner or just
in general a picture. So what you wanna do here, make sure you put your
phone in the fall of this. Now those two ways for
you to take pictures. One is from far away, and two is caused by. Now. If you make it very close
to it, you can see, you can zoom out and then
try to take a picture. My favorite is to go ahead
and go with the higher up. And then you're going to be
zooming in just a little bit. So it gives it more of an
interesting perspective to the picture and it makes it so much better
working as well. Now after you go ahead
and frame your shot, next thing you want
to actually do here. There is this button
right here on this side. You want to post on here. Just way now, as
you press on here, there's this whole
menu that shows up. This is on the iPhone, but you can do this on
any phone your way. Now, one thing that
newbies sometimes do you see your hands can
easily go in here. It's going to mess up the shot, so make sure you don't
accidentally cover the glans. Next, we want to
go into this thing that has a plus L
minus over here. What it does, it either brightens up the picture
or makes it more dark. You want to brighten this up. And you can do this with
any phone you awake. After you brighten this up, you're going to be moving world. This looks really good and
start snapping pictures. Now, the key for
you to get a lot of good pictures is to
take many pictures, which taking one
or two pictures, you are not going to get
really good pictures. You want to also move
the phone around. So just having it from the top is just one
way to see things. Moving it from the side. You get a different whole
other perspective as well. And you snap from that too. So one thing is, dont just go ahead and
take a few pictures, take as many as you
can as you need. You can always delete
this weight on. And that's really important. So always on taking more
pictures than was it. Make sure it's all
stationed really well, is you're going to be doing it. So over here we
have a seam here. And now we're picking
whichever one you want to use. Stationing ethmoidal, putting
it next to it and snapping. And then you're going to be moving to a different
kind of subject. It's still going to be using. But I'd like to do is having more than one subject at once. It puts more variety and better
perspective to the image. Another thing you wanna do is to have some kind of a light
source to write it out. One thing you can use is
an actual flashlight. You see the font does
have some flash, but you want to have a different kind of way
that is getting diffused. And here is the refusal
cap that they use for it. Now, if you move it all
the way to the top, you will see the difference. Zhe It's more doubt now. But when you turn this
on with the diffuser, it makes it more light up. And that's exactly
what you want. You want waiting to be more
wired up in a special way. And it makes it more
interesting and more appealing. Make sure you put it in a way that everything
looks much better. So now the seeds over here is less evident and it will
look so much better. Now when you want to
be taking the picture, it's going to come out so
much better working as well. You can do the same thing here. So we're going to post it up, flame it the way we want. And now we're using the row of towards when we're gonna be
taking the picture here, putting this right on the edge. So it's more interesting. And the wolf towards means
you're using one-third of the screen to capture
the actual image. And the West is gonna
be a little bit empty. Just going to make
it more interesting. Next thing you wanna do is
to take a picture of it, but we want to take it with
this side, just like this. So here is the clef and we're moving it down so we get
more of a 3D effect. A lot of times as a newbie, you have some distractions
on this side. And the fourth will
actually pick up on that. You don't want that to happen. The way. Focus. Now, when you're gonna be doing this one thing that smart
ones that we're good. If you keep on pressing on it. It has the eighth AF lock
on box into the image. It makes it even more better
working and focuses it in. And that's when you
snap the picture. And you want to
keep doing it with different perspectives. Now you can use this
as its own tripod by putting our island of row and just holding it like this. Snapping a picture when they use your fingers to
zoom in and out, snapped a picture as well. You can zoom in. Same method to now make
sure you press on. When you do this on the subject
you take a picture of it, focuses on it, and just hold it. Then you want to take
the image just to wait. After you go ahead and
take a bunch of images, the next thing you wanna do here is to check out how it came out. False thing I suggest
for you to do is to zoom super n and see
if it's blurry or not. This specific picture came out, boy, that's not good. You have to redo it. They go get this one over here. This one is actually
where autistic you can see it has the
things on this side. Usually that's not a good thing. But the way it came out,
it just came out with a really nice looking alike, the perspective in here. Here's another one. This one is really good as well. The perspective from this side, as you can see, you have to crop them to get a better image. And sometimes you
can just screenshot the actual picture and
take the screenshot. Now you are actually
doing all the work for yourself as you're
moving forward. And so we're viewing the pictures is essential
because you can see what things you need to do and what things felt like
this one is a failure. As soon as you see
something that's not good, you just go ahead and delete it so you can take more pictures
and go back venture. You have all the
really good images altogether of the stuff
that you took a picture of. You can see here
the pyramids that I took and how they work, work. And you go for it altogether.
5. External Lights: One of my favorite ways
to work with weight is actually an LED
strip for about $20. It's not too expensive
and yet it gives you the best editor facts and
also makes it amazing. So if this one, what I liked
the most first of all, is gives you a huge
amount of white. And it gives you a lot more effect and it's
already kind of diffuse. So that's good. So you can do either or
sideways from one side. You can do from the other
side in case you need to All the best one is all
the way from the top, as you can see over here. It makes it real quick and
actual sunlight is up the top. Because when you turn it off, it kinda works too dark. Right now it looks
just about right. And that's what you want.
So after you've figured out exactly the place
you want to station, the white, the next step for you is to start taking pictures. So pretty much get
your camera all lined up exactly where
you want it to be. Next, you want to go ahead
and push this button right here and move the plus and
minus, plus and minus. On this side, we're
going to be pressing on this and expose it as much as we can, as
you can see the whites. Now, if the pyramid is much
more yellow in blight, that's what you want to
actually distinct to do. Then is you wind it up the
way you want it to line up. If we move it away
from you in case you need to or to zoom out. Zoom out. So everything
is in the picture. Now it's ready to go
ahead and start snapping the images from different
directions and locations. So you want to do it
not only one area, but for many different areas
in keeps snapping pictures. Because just don't know which one is going to
come out the best. You have to keep on snapping.
6. iPhone: Taking Pictures: So you're probably got
your iPhone and now you want to know how to
take pictures with this. And there was a lot of
tutorials out there, but I wanted to make
a very good one to show you how you can use the best features of
your phone and how to do it. The first thing you
want to actually do is to know what
your camera is at. Now, how do people
have this problem? Because they don't like where is the camera and how do I use it? So pretty much you go skip
food is until you find it. Here it is. This is
not the correct way, which you want to do is
move it all the way in here. To do this. It's pretty simple
for you to do. You have to do is to
pass on the camera. And then when you press on it, you just keep holding it. Or if you hold it, you want to wait until
it says Hold screen. Let's do it again. You hold it in your person edit screen, or you just just keep on
holding it in, it gets there. The next thing
you'll have to do, just drag it around. You can drag it in
every location, but I primarily one and
drag it right in here. Now, you have your
camera right there. It's much more easy
for you to use and press the button to let this go. In other locations
where you have the camera is if you
drag it onto the bottom, move it like this, your
screen on the bottom. We have the camera
right in here. Let's go x is the camera. In the camera a bunch of different features for
us to actually use here. The first one is it gives
us the video feature. You also have a
different options here, such a slow motion time-lapse. Be given. Photo,
Portrait, panoramic. The tutorial, we'll just cover
the photo in the portrait. In a photo, you
definitely want to have something to take pictures of. What they do suggest
for you to have is interesting working
background that is going to be included
with it as well. You can see here we have the background and now
we have the item here. Once you look at this, you want to make sure it's
not blowing in the picture. You also want to use
your finger on this. Not only eat writes
up this earlier more, it also focuses on what you
want to take a picture of. Sometimes if you get too close, it gets to blowing. You want to take it away. And then one thing that
you want to make sure you don't accidentally just
sick of just a bit. You're gonna be as steady
as you can when you take the picture to
avoid camera shake. So let's take the picture. Now. Don't go ahead and
just take one picture, especially if it's
something you really want to capture memory off. I'm going to take multiple
pictures of the same image, especially if you
really like the image, because sometimes
one of them doesn't come out as well as it should. Go ahead and take
multiple pictures. The point angles, well, different ways to,
because you just never know which
one comes the best. Now, in terms of perspective, you're very far away. Oh, very close. It changes the
perspective of the nodes, but there is another
way for you to do this. In fact, you can
zoom out like this, just zooming out,
putting it farther away. And zoom in using two fingers
where you actually zooming into the image itself and then take a
picture, what it does. It changes the perspective,
the actual product. It makes it look
so much different. Keep this in mind. Also on the top here. You see right now, this
is what the camera is at. Don't accidentally
just put your finger over part of it because you're going to
mess up the picture. Another tip for you, right here. You have this button here. What it does, it's live view. You press on this.
It is wherever us. Now what it actually does
is it actually takes a capsule over the image
before you take the picture. Which means every few
seconds it's actually taking a picture of the
image all the time. Not only it drains your battery, it slows it down. One of the good
things about this, it will capture the
moment before it actually happens when
you press on it. Guess what few seconds of it was already captured before you
even press on this button. This is good for my family, steam parks eventually
in sport photography. In most situations, I would actually suggest for
you to turn this off, especially if you're
sending it to a friend. They don't have a foreign. Another option for
you is this button right here. Flashes on. Now it would take it, but that doesn't always
activate. Alternative is on. It doesn't mean it's
going to walk right now. But it doesn't turn
on. Why is that? Because it sees there is
no reason for it to be on. There is no reason. This is just something that
this iPhone doesn't do. It doesn't force
the place to turn on when it actually suits. So keep this in mind
just because you told on the finance doesn't mean
it's going to go on. Personal with this
button right here, you get a bunch of different
options for you to use. One is the flash. Right now it was set to auto. Auto mode would
not actually work. You want to have
all mode instead. So now it is on mode. Now when you print so
that it actually works. Now it has a Whiting
button right here, which means it's always on. Next one right here
is the right view. Right now it is off. You can put it on auto, so it actually detects and decides when it should be
on and it should be off. This is actually the smaller
tricks for you to use. Then when you take it, it decides to do Y view
or auto mode combined. This is the best of both
worlds all at once. Now we have different
square ratios over here for free and 16 to nine for the
free is the most common one. The time of hue,
which actually goes between three to ten seconds. And the time off. This button right here
is the different photos, original, vivid in
different kinds of filters for us to use. We just pick the one, like
snap the image. There we go. Those are all the basic coatings that is a variable for years. You can see I have the grid
that's also turned on. You can do that as well. Here. You have another
option here for us. This button right down,
which actually gives us the different core codes
that is available. This is all the options that gets you from the
bottom over here. Now, there is another
mode here for us. It's the portrait mode. Portrait mode, it actually
detects if there was a person. Also, it gives you
the natural light. And you can go scroll
through this. Change. The kind of light
you actually like. Cool is that now
the Facebook oxygen right here where you can
show it is bottleneck. Connect to make this darker
bridle as well here. The white aperture mode. Now, if you want to get into the advanced
features of this gamma, what do you have to do next? Is go all the way
to the settings, score food is, and move until you get to
the cameras section. Relates personally camera. Now, we have other options for us to use such as
activating the grip, grid, preserve settings, camera mode, my photo, and all other kinds of cool features
for us to actually you. Thank you so much
for watching this. I hope you learned something new and if you did
please subscribe, see you in another video. The kickback. It all.
7. Secrets of Taking Pictures: Secrets of taking
amazing pictures. It all starts with a camera. The full Secret, get a good camera for
yourself. Next secret. Move their landscape or can't
actually take pictures. Now, the biggest secret folio. And the reason why
having a camera is so important is that you can make a lot of different
adjustments over here, different modes, different
exposures, settings. Also a pop-up flash, something that you don't have. With a camera phone. You can even bounce
the flash the ceiling, or use it at all. You can even put in a professional camera and
external flash over here, which is going to be
much bigger and give you a lot more powerful
things that you can do that you can actually
do with Go form. As at reasons why is that it holds more manually,
it is portable. And the reason why they make those cameras is it's built specifically for
taking pictures. Now, if yours are the things that they do suggest
for you to do, to get this amazing picture is the most important
thing. Critic. Yes. You want to be able
to get quitters size. In fact, you don't know if
you're a great photographer until people start telling you that you don't do
actually grade walk. Yeah. It sounds like
something that, Hey, who wants to get
criticized in photography? I do. I actually do. Why is that? I want to know the time not doing
something right? When people criticize my mock, the more I get and I figured out that I'm not doing what
I'm supposed to be doing. And I look at my
work all the time, we examine it and see if I can
do any better job at this. Over the time you're going to be evolving your subject,
let me get better. You don't get good until
you can criticize yourself, which is the biggest
secret out there. Self-criticism is
essential for you. The only way you can
criticize your own work is by looking at other people's
work and comparing it. One of the biggest
secrets for you to become a great photographer is to find somebody who
has this same style. Not only that, when you go ahead and get different
pictures online, you see what kind
of style they have, what kind of pictures they take, what kind of angle
that they focus on. And then you're going
to replicate and do the same thing for
your own walk. And you can see how they do bad photography and
good photography. Warning from ISIL
mistakes is essential for you to take amazing pictures. Also about vision
and the angle or photography division
comes from the inside. When they take pictures
before that I have a vision, how I want my walk
to be exactly. Then I put everything, all
the props over though. I take the pictures and then
I make the vision come true. After I make the
vision come true, it is time to examine
the pictures and see how good they are
or how bad they are. One of the biggest
secrets out there is to take a lot of pictures. Some of the best photographers stick hundreds of
x two pictures, then they delete
all the bad ones. They only keep the best woke
to showcase and to show to you what other people think that you have to take
this amazing pictures. Always take amazing pictures. That is not the case. The pictures you take, the more likely you're
gonna be making mistakes. Why is that? Because you take pictures and sometimes that specific
picture you took. It only last a few seconds. But it was so amazing. And yet you could have missed the whole entire opportunity. Because when you
took this picture, you only spent and you passed
on the shadow button once. And there was no excuse
for you to do this anymore with a digital camera. It doesn't cost you money to
take a hundreds of pictures. I don't suggest hundreds
because you have to go for them and delete
are the bad ones. But they do suggest
you take a few of them just in case that one specifically a good mixture came not as good as
it should have been. Taking many pictures is one of the keys for you
to be successful. And all those other steps that the outline in this lecture. And if you have not figured it out and you haven't
take notes on this video. Go ahead. If you've watched it once
again and take notes.
8. Techniques & Style: In this video, I'm
gonna be talking about techniques and style, how you can utilize
swaps, weights, and everything else to get some of the best
pictures for you. Force-field Tony on the external white and you can see how
brightened up everything is. And the more whites, the better, because you don't
have the shade. That's going to be on this
side of any of those props. And everything else
you'll be using. You can see the
sandbox over here. This is send inside. We have the things we're going
to be taken pictures of. And we can see the difference
when we turn this off. And it's not as bright. This just weird to isis
and whites everything up. But I like to do, I like to use natural light as
much as possible. Waltzes going ahead and
editing everything, all by myself in Photoshop
or any software after that. This is best for you to get the images you
want right away. So we have another
one over here. We have the club. You can use folders. Anthony percent
box thing folded. The first thing that you have to do before you go into the
white is the technique itself. So you want to set this
to work in a certain way. Having too much stuff in here, playing all the same time, it's not a good second of all, when we are going to be
taking the pictures, you're probably going
to be zooming in in a certain way so we can get just a sand in here and nothing else is
going to be included. And of course, this
is just something to make it more interesting
for the visual eye. And then we're
going to be selling those things right here. This is not for sale. When we do something like this, the technique is essential
before we do everything else. Want to make sure this just
looks good for the eye. Next thing we want to do is to experiment with the whites. When we have the pumps,
we have the wide scale, so we can do a
specific flashlight. This one is really good white because it's shines the WACC, the at an object. And it gives us like
a spotlight effect. Waltzes the one that
whites up everything. This is a Spotlight. Instead, you have to
figure out what kind of lighting you want
to use folders. Now, this has advantages
and disadvantages. Advantages is I don't have to actually hold it when
they need to write this. I just pick the
location forward, position it the way I wanted
angel Saliba DO instead. The downside of this is that
once you put this in here, sometimes needed on the camera. So for that, you actually
have a special fide. Modify the ions. This is the super macro with lights built right in here so
we can turn the lights on. You can see the white bit here. And now it's shines
exactly on this object. It doesn't give
you as much white. But if it is fairly
macro and very small, gonna give you amazing pictures. You can see how much zoom. This actually gives
Woese's Zoom. So this has a super
zoom macro capacity that you don't actually
get anywhere else. Unfortunately, it is
a little bit blurry. Now you might say, why is this
bully, at least for that? It's sometimes done
something like that. Super Mac or you have
to actually get very close to the actual object
for it not to be boys. So this is extreme,
me, super Mac, or the more you get close
to the object or less, boy, it actually gets, which is really interesting. You can take amazing pictures with this and super up-close that you can't
do anything else. So if you want really
specific details like that, it can do with
this special lens. This is why people vote over the professionals
to get things done. Because you can't do
something like that. Will their cell phone and
you don't have the capacity. You don't have the background, you don't have everything
to be done for it. But in case you want to
do this by yourself, you may have to do
the super zoom. You have to use
software to zoom in. And what you have to
make sure that you have all the elements right here, having the whites and
everything else encoded. And specifically you need
a small tripod units, some kind of a white system. It could be a flashlight, It could be anything
else for that matter. Once you set how weeding out, you want to go ahead and
start taking pictures. Much as said this on
the picture mode, like to use the
programming mode. You turn this on and you start
to go and take pictures. And you take many pictures
as many as possible. Now, I don't have the
film inside the camera, so I can't actually do this. But when you take pictures, you want to make sure you use
different kinds of angles. When you're gonna be doing this. You specifically want
to do it from the top, from the side, the bottom, you want to use every
kind of direction. Remember when you're doing this, the camera is the one
that's going to be moving, not the pumps themselves. The only position is to wait, supposed to look like job wife. Now, just go ahead and take the pictures
and get this done. Once you're done
with the pictures, you go ahead and reposition
the plops in a different way. So we are taking one
of the pumps out. You're leaving the
stuff you want and the opposition you
exactly how we want and then you're taking the
pictures once again.
9. Adjusting Aperture: The aperture mode
picture session, we are going to be using the farmhouse scenario over here. So I built a bunch of
farmhouse over here. And specifically, the whole focus is going
to be on the dog house, outhouse that I created for it. How you can take amazing
pictures using a background with aperture mode on either your
iPhone or an actual camera. What you want to do is to
get an image that works very well with whatever kind of picture you're
gonna be taken. Now, if you do zoom
out a lot out of it, you can see the aperture
mode doesn't work as well because the track though
is in the picture too. And everything else. What you wanna do
is to go straight up to the actual image
and get very close to it. Next step you want to do is to tilt up just a little bit up. And this is, well, it comes very handy to have
something in the background. So in this specific case, we actually have
their farmhouse. And it looks good. Now with this. Now, there was a little bit of distraction with detract
or on this side. So if we remove the
actual tractor, it makes the picture even
battle, as you can see here. Now, the whole focus
is on the outhouse. For the doggie. The background just
looks really nice. So what you have to
experiment with here, and remember you don't need
to does take one shot here. You can take multiple
shots when you do this because one of them is going to come out much better
than the other. So what we are trying
to do is to find where is the best possible image
that's going to come from. And in this specific case, getting very close to
the outhouse and going down and tilting the camera is giving us the best
possible view here. That gets us very good image with the whole background
being very blurry. And that is using really
good your aperture mode. Next thing you
wanna do is not to have anything on this
side that's showing like this pig on this side that is a little
bit distracting. So be careful with that. And after you find the perfect
pitch for the picture, now this title to start
snapping a bunch of pictures because one of them is going to
come out very good. Once you figure out
what works well, you have to shift the actual background
to the side and try to figure out which is the best kind of way to get
the best possible image. So e.g. maybe like this is good, but now the pig is
distracting from the dog. So let's put that away. Put this like this, and put the dog, a pig or a little bit
in a battle view here. And you have to experiment with how you want to tilt this. Because one way, It's
just doesn't look as attractive and
interesting as another way. So you kinda have to
keep on moving it. And I think vertical is probably the best possible way to get the image
looking really good. And to make it the best looking
one out of all of them.
10. Depth Perception: Depth perception photography,
the key to do this correctly is to have a very large object
in the background. And then you have a
small objects such as this that you're going to
be taking pictures off. Furthermore, what you have to actually do is to
have something even small that you can use is
a perception of depth. One way for you to do this
is to increase the size of the actual subject you
take pictures of by station it closer to the camera, as you
can see the course. So it is to the camera. The small this object
gets right here. This one is too large, so it's
not going to work as good. What you have to have is an object that's very far
away in the background. You want to station at
as far as possible. And we have an object
that's fairly close by. So when we take a picture, it looks like the
subject is huge. The actual mini figure. Where else? The background image,
as you can see, it becomes more blurry. But this mini figure looks
to be huge in the scale. And the more you
bring this forward, the big 0, the mini fig
or actually gets small. This specific objects in the
background gets as well. So you can get really
interesting shots here just by positioning the actual mini
figure with the background. So you have to really
find a balance of the two to make sure this looks really
authentic and really good. Of course, you're going
to be focusing on the actual mini figure and
not on the background. And it's going to make it
look even more realistic. So we are having the
pyramids in the back and the mini figure in that
font is one way to do it. Another way is to zoom in. And that's going to
make the perception of depth even more
larger than life. And now, after you go ahead
and create the scene, it's time for you to snap a few pictures to make
it even more realistic. And one such key when you're
doing this is to co-active focus on the background
and on a forward as well. So when I press on the
actual mini figure, you can see the background
gets totally blown away. When I pressed on
their pyramids. The pyramids get
really in focus, but the background really messes up the
actual mini figure. Now you can definitely
get both in one shot by changing
the aperture. But to make it more interesting and better depth perception, we're going to focus on
the actual mini figure. Instead. This way, it makes everything else in
the background blurry and it makes it look even
more realistic in the back. So this is definitely what
you want to actually do. And you have to walk your way to figure out
how it looks like. We will. Well, as you can see,
this looks even more realistic from this viewpoint. Once you get a very
good viewpoint and how you want it,
it to be set up. Make sure the background in the back is also
arranged correctly. That's when you'd
go ahead and get started shooting the pictures. Having different scenes
is also very important. So over here you can see
the depth perception doesn't work as well
because the mini figure is very close to the actual subject that you're gonna be
taken pictures of. It now, it looks like
they're very similar in size and it doesn't
look as realistic. So definitely by
moving this farther away and as close to
the camera as possible, the perception gets so much better and the picture
looks more realistic.
11. Taking Etsy Pictures: So in this swiped children,
we're gonna be talking about Etsy product photography. And over here we have the pilot, but it is sold in my shop. In fact, I don't suggest for you to take pictures
or when you want you want to have a bunch of those products at once that you'll be thinking
about taking a picture of. Because you're gonna be
taking multiple shots orbit. Instead of just
taking a few things you need to know
when you're getting started with fancy in
product photography. That Falstaff, the place you're gonna
be taking pictures off. We didn't have to be all
white, the whole background. Next thing, we have to have
some wait for us to use. I have a mobile station
here. It's kind of cool. Because when you turn this on, you can have different
steams are why this is a rather actual white here. Taking this out, we
have the white one. They can put
something like this. See, this is pretty
cool by the way. Different ways for you to
have whites for the pictures. What you're trying to do
is to wait up the area. So there was no she'd over here or just position it in
a way there was no shade. Or of course use a
different kind of steroid. So this is good. But sometimes it
doesn't work quite. One of the most essential things when you do and take pictures, you want to have a
tripod you to use. We're using the tripod. You can position this exactly
how you want this too. So the way it goes in the
direction, that's correct. So all the shade gets a women eat it when you're
gonna be taking the picture. If you need more aid
to just press on it, it gives you more brightness. This is one tool
that I like to use. You can use it as an LED
one which is different. Diff, one kind of
wife's give you different kinds of
possibilities for you. You have to find which one
works the best for you to fill up all the different
shades that you get here. After you find the best way
for you to get the right, Since next step is for
you to take pictures. We need a camera for that. And we have a small camera here, which we can be using. Now, you have to figure out
which camera is best for. You can even use an iPhone. The professional cameras,
because they give me one of the different things you'll be able to view finder. You have different
settings that we can do. Zoom in and zoom out and they'll need for product photography. Of course, should
definitely have the tripod. Position this in a
way you want this to. Once you put this in, I'm gonna be tripoding it and you wouldn't be
leaving it down. And then you can have the whites giving the white overdose
in a different direction. Then you can take pictures
being at stabilized. Now for those of you who
like to use the form, it's also a possibility. Sometimes the forum,
you will have to do more edits for that. Some of the phones such as
the door, very good job. Though I love things. I am not a proponent of
using flash photography, especially on the form, because it's sometimes
messes up the picture. You can see how dark they
actually looks like. Definitely need
the white source, which is essential and
important for you to use. Having whites. Having tripod is important. Now, next thing I also
suggest for you to do is to have the pump, which we used before. Having a pop is also essential for photography
because you're going to be positioning the pilot on
the job and you're gonna be taking pictures
is going to give a lot more taste to it. And you can definitely
check out some of those things that they
sell and the photography that I do for my products
in my Etsy shop as well. This is what we solved,
these kind of things. They have created an
experimental shop just to show you how well it actually does. So over here you can see I'm
positioning it in a way. I want the picture to
actually be forced. You have division. You want to put the product into pop and you
take the picture. That's the next thing
we're gonna be doing. Much putting in a
foreign position, you get where you
want this to be. Focusing on it in
taking the picture. And then you're going
to be zooming out more and taking another picture. I'm gonna be taking one
from this side as well. As you're done with that. You have to take
multiple pictures because you don't know which
one is going to work best. If you see dark heel
using debt whites. Putting the camera once again, using the following, snapping one very close to the
object, farther away. And this is for ads. Essentially I have a
photo away picture. So it will fit as a thumbnail. If you don't like to use the phone or you want to use
something more professional. You can use the camera on doing the same exact thing
with the camera itself. And now of course, this
comes out much margin better than taking the
picture in another situation, I want you to take
a picture, meaning pictures when I have
many different angles. And to keep taking it, it is essential for you to do this because some of
them are not gonna come as guilt is you
want them to come out. When you're done with that. You're putting,
sometimes you want to have multiple products
gonna be sounds. You'll have a few
of them over here. Position you feminist
floating away. So it looks interesting. You can see sometimes
the wafer have to be positioned in
a different way. We don't have any of those
things. We can talk. Not good. There was too much right here. This please just let me get to overall brightness back a bit. So now we'll do his battle. Now we have a multiple
creation kind of a wisdom of different
products over here and I take the picture,
take another picture. So on. Once you download is moving the prop once again back here,
positioning one element. This one we're gonna be
doing next is just making it a picture of this. Taking it. Sometimes it's
gonna come up well, if it doesn't come up well, make sure you press
on it so shoulder, the picture will be good. This one is, you can see that too much
brightness, too much. If you see that there was
actually something in here that once you change the
plus and minus in here, I'm gonna be doing now. Makes it to see
the plus and minus is adjusting it to blackness, making it dark, or making
it much more bridle. You have to pick what you want and then take a picture
of me awake this setting. And I love it on the camera. Good. And then I take the picture. It's up to you to decide which pictures wanted to
take and how many of them. Keep them moving in
different directions, in thicken the picture. Then be repositioning it
in a different method. Doing the same exact thing. Of course, you're done. You're going to go
ahead and take a walk. The actual screen and
check what you did, what you did, and
everything else. So you can tell if it comes
out good and if it doesn't, and this one is not that
good, keep on walking. Seeing the results. What you did. If it doesn't look good, that means you have to come
back and take more pictures. And this one is bad. This is really blurry. It didn't come out. This one you can tell. Just the background
was not good enough. It was just way too much white. And this white here, you can even see it
because of that. That's actually a
sense of for you to review their images on
a camera afterwards. If it doesn't come
out as good as you wanted to, come back. Focuses in and keep
taking pictures. So we have a bunch of different
pictures for us to use. And then you're done. And time for the next project.
12. Etsy Photography: Success in your ads is sharp, is highly dependent
on the kind of pictures you actually
are going to be taking. If your pictures on our
professional enough, you're just not going to get
the success you want and the sales that you
actually need as well. Let's go ahead and
take a look at some of my listings
and figure out what kind of pictures
you actually need in order to be successful, to sell on Etsy or even on eBay. The first one. And this one I
usually like to use a prop. And it shows we have the actual pilot and a prop
that is being used for it. The next one is the item
itself close in, zoom into it. And then what they actually
do is sometimes show the item with another
one just like it and something else, just to illustrate the size
difference for that one. Next picture is from an angle. I have to take yet
formed a download. So you can see how it works from a different angle as well. More angles, different
pictures, zoom-in, zoom-out altogether. Mixed picture, amazing. One important thing when you
do Etsy product photography, you want to really zoom out. So the false picture you can
see not only the product, it's also the thing that you're gonna be using their
pop forward as well. This is just one example and
have many different ones. To show you two. Let's
take a look. Over here. We have another one that
I'm using in a thing. This is one of the
better examples to actually show you what
they actually do. Here we use a prop
to show the actual, illustrate the size
of those products. We have the wall and we have, we'll dos products
as an example. Another one, I'm showing the different sizes or
combined of all the products, all of them in the best
possible light as well. Not on your pictures is very
essential and important. It is also important
that you have very bright white for the pictures. It makes everything
really white. And then your eye can see
right into the actual image. When you're looking at it, you see the picture and then you see all the
white on this side. And that's the way you're
supposed to be doing it. Now of course, some
people say, Hey, there is special rules, but sometimes it's
good to break them. But in this specific case, it is not because if you
do all back background, what happens is because
most browsers or white, it actually does not look
this good for the picture. Of course, you want to have
a bright, sunny image. This is why Apple
use all the time, white and bright whites. It makes people happy. It makes them more equity
to please the porches. In this one, you
can see over here how much detail v-hat of the actual product as
well and the prop too. So there's a super
zoom in for now one over here, I decided, instead of using all
white background, I use actual sand to see
how it actually looks like. And it came out really interesting as it is like
a sheet of white in here. So do experimental
different crops and different things in order
to solve your product. Because what you really want to do is to make sure that people, when they walk in this,
they're gonna say, Wow, this is amazing. I want to have
something just like it. Over here. We don't use too many images, but we use their pop for the key chain with
the actual Beilock. And we have the
coffee on this side and some green and
some would as well. This is another way
we actually doing it. Another one to
illustrate this size, we have the hand holding
the actual pile up two. And over here, we have some fairly interesting
background that has been used for this product. The more you have different backgrounds and different kinds of pictures and perhaps
that you're using. The more interesting it
makes when somebody goes in here and tries to
porches the pilot over, he'll have a very
interesting Thank you. We're from B, so
waterlogged and we have a bunch of different hearts and the product is
right in the middle. We have another interesting
one night here as well. Your hand that's holding different size of
hearts altogether. What I'm trying to
illustrate into so people is different ways that despite architecture looks
like and of course, us tweeting for them as well. The illustrative purposes
you can see over here, we have a picture of the dog and the product
right next to it. And we even have just
a picture of the dog. It makes it more cute, interesting for the eye to see. When somebody goes over here, the score for all the products. And then when something
catches their eyes, such as this one right here, we have the Christmas
decor for the image. And this is a photoshopped
or an in here. Of course we have other
ones that though not Photoshop and we have
an actual decor. And it makes it
very interesting. Picture two, right here, you can see it how it's
hanging on the Christmas tree. And I also went ahead and experimented of all
black background. And the reason why
usually I would not use back background because it
just doesn't look good. But in this specific case, because the product
itself is silver, it doesn't really
come out as well with all white background
you can see over here, it actually takes away some of the justice of the
actual Beilock. And therefore, I tried to have all black background to see if this will make more justice for the product itself in
I think it really did. So altogether, what do
you want to do is to make as many different
products as you can create and then use
your imagination. Use different, perhaps use different settings and experiment with
different backgrounds. So a cure and using
different kinds of wood. And of course, taking
the picture of carpools and far away and
form different distances, we actually make it
look a lot different. It's really up to you to decide what is the
best possible way for you to illustrate and highlight your pilots with
pilot photography.
13. Smart Phone Photography: Today's video is
gonna be showing you how you can use props
to take pictures. So we have a bunch
of props here. We have the sand over here. The first thing you
want to actually do, make sure that this
entire thing here, let me BIPAP wanted to make
sure that no wines on here, so just make sure it
is leveled in using just sand for us to make sure you do this
because it's going to work better in
there image itself. Now of course, if you're
going for the messy work, That's the different
things you can do, the messy work as well. It's up to you to decide how
you want this structure. Because it's gonna be a sandbox. Also have the selfish over here, which we're going
to be arranging. Put a picture. You can see that this one stands out and that's
not a good thing. When they have something
that has the same colors. You don't want something
to stand out like that unless it's part of the
actual attraction itself. The other I'm going to be
using that specific one. After you write the more up in a way you want
it to work right? Next thing I'm gonna be doing is putting the actual picture of flops in the dog
noses themselves. This is another way. This is a prognosis hasn't
been called up over here, we see that this looks almost identical to an actual size of a prognosis if
you're interested, now available at many gifts up. Your put them all in and you're ready for
this to be a picture. Make sure everything is arranged
in exactly. I wanted to. Next thing you're
gonna be doing. It's getting the camera all set up and ready for the pictures. So we have to come over here. And V0, looking at how are we
gonna be taking a picture, different kinds of angles. We can do this from the top, from the bottom,
actually from this side, it's very good because we have
the free dimensional look to this and having some kind of
three-dimensional as good. You can also see the amateur mistake you
the lenses right here. And if we put with my fingers so I ovoid is going
to mess it up. And of course, yes,
you can delete those. But you wouldn't get
older pictures right? Right away. You don't want
to make mistakes in them. Second thing, you want to
be doing Etsy photography. You zoom out more
than you have to. Because flat C, that's
the way you take pictures for the force
picture or for the thumbnail. Now, we wanted to take
pictures from this side. Take a picture from the side. You want to take a
picture from the top. I'm going to take a picture
or from the bottom. And we kind of direction that
is possible for us to do. After we take pictures
of all of them. You want to remove them or just have one of
them at any time ever, ever gonna be doing this
same executive team for one of them. And we're gonna be
taking pictures as well. Now, when you take the picture,
what do you have to do? Just press on the actual item
that you want to focus on. The camera itself, then
auto focuses on it. And then that's when you take
the picture, snap it in. Of course, after you snap
it in, you press on it. The next thing we
want to do is to zoom in and check it out. You can see that this actually comes out a little
bit dark here. We have the right
thing prog problem, which is we need a lot more white for this to
come out too good. So those two ways for us to
get the good white here. One is to use an external white. And two, is pretty much to use Photoshop and post
edit the pictures, which is probably a better idea of when you're going to
be using the forearm. You can see right here the way
this picture was gonna go. Take a view in Hue. White counterparts
are positioned, have weight in the background,
the actual product. It's a little bit dark as well. More of the other ways to solve the darkness problem is to use one of the different colors. This one is much more
bright, wants to use. Let's go ahead and pick
a picture of this. One thing for us to do here, which we can do is
to go into flash. Flash wouldn't be
him the peice and minus V0 going to
go and pause it. You can see it's much
more bright now. Now after you did the
small modifications, this is the way you zoom
in and zoom out to apples. If you have Android, that
might be a little different. Now that you have the
picture we want on it, the flash team tone on
because it's an auto. One thing about it flashes
is that they don't always turn on how I wanted to
suppress fires from the bottom. We're gonna be doing a flash on. Taking the same exact picture. You can see what happened when
we took in a fresh on it. Actually, he's not as good to see you in the DSLR
when you take and use the flash is actually encompass kids forward and
that's pretty good image. When Apple, on the other hand, you didn't walk that row in the attack tree born
without the whole image. Maybe because I did
a lot of parts to it rather than external whites. And now you can see
that over here, this is much better image because I did the past to it
and they handed the heart of external the actual
modifications in the software in
the actual camera. Really good. So we did get one
beautiful image. Once we get one
glare, good image, we find the way that we got
this sweet spot in here. We can therefore take more of those images and keep taking
them vulnerable to flash. Images. Position the items
themselves and we want, one of the most important
things here is to get the part of the initial
picture all going to be false one in
here and makes sure to put it this gray
model that people are not gonna be getting
everything else seems only this one is
the one for sale. So people will not be
accepted to take a hammer. And you get this
selfish as well, where you're not just
getting dog knows, but they work so good. In here. You will be able to
see it, the wave now. Really, really amazing and nice.
14. Etsy Photo Examples: We're learning from the best
is one of the best ways for you to figure out what a deque
amazing pictures on Etsy. Etsy photography is totally different than eBay photography. And over here we
have a spouse cell, and this guy has over
4 thousand sales, which is a lot of sales. One thing I want to show
you is that things that make Etsy photography
totally different than eBay. There was attention to details zooming in into the product. You can also see a
picture in nature, different kinds of popups, different kinds of environments, different kinds of
backgrounds as well, have been taken to
take this picture. This guy took a lot of time to get those pictures
exactly white. You can see over here he totally zoomed into the picture as well. Each picture is split digitally placed and he takes the best possible pictures
for most of them? Yes. Some of them didn't come
out as well as they should. But most of them
are just amazing. He improves their photography. He puts the picture right there and you can
see it in style. You can see it in
different backgrounds. And can also have a movie over the actual pilot
quick he zooms in and makes it a
commercial wake movie. This is something you would
see in a movie theater. Yes. This guy put a lot of time, a lot of emphasis to
put his best walk into creating the most and
best possible pictures, including a video
effects as well. To get this sales. To get a lot of sales, you have to put a lot of time into getting every
single picture, white. False picture. You have to zoom out a bit
because then it shows up. And y is the force
picture so important. Well, the way ETC, actually does it
in the thumbnail. And because it is such
a small picture of, it has to be zoomed out. The first one, you
can see in his sharp, there was all kinds of images. And every single
picture of his hair's a unique and interesting
style to it. And that is very essential. If you want your sharp to
be really good and you want to get all those sales
that you always want it to. You have to put a lot of
emphasis on product photography. Let's go ahead and check
out another guy who is taking a lot of pictures
and has a lot of sales. Well, this one has
2 thousand cells. And you can see over here, those are out of perhaps
in the background, there was a ladder of
nature in the background. Yes. He takes different
kinds of angles, different kinds of things
that show you in shocky is this item in multiple
kinds of settings. But the most important part
is the actual background. It is not all white, something you expect from eBay. It is our add more creative. There was a lot
more flavor to it. There was a lot more
energy to this as well. It gives it uniqueness. It gives you the
desire they want, their story behind the picture. It makes it really juicy. It makes somebody,
we want to click on the button that they have
to click, which is buy it. Now, if you want to get
a lot of sales on Etsy, you have to do what are the
best Etsy cells actually do. They'd go ahead and they
put a lot of emphasis into the actual photography so the product itself can sell. But the biggest thing that makes people really want to get your particles is that
competition is the photography. This is what makes you stand out from the west of everyone else. I imagined the same
exact buildup of Boeing or white background. Is that really going to get as much attention as
something like this? Well, that guy is
holding on his hand. There was the green background and the zooming in
into the product too. And take a walk. And other sellers
who are selling the same identical thing. This guy is a style sell. He has 6 thousand sales. His product is
going for 32 bucks. Keep in mind, is that
the competition? Similarly, hence, pictures that have different kinds of
backgrounds to them. Why is this so essential
and important? One of the reasons
why I take a look at what the competition
is doing as well. And if you see them
doing something similar, that means you have
to copy those style and do it one over. So this one is doing very well
with the green background, some of the backgrounds
on that, this tasty. But one thing to keep in mind, if you want to make your
product stand out even better with having even more superior
by looking photography. Then the west here is one who is doing or white background. You can see that the difference between all white waltzes, that corefer background is it doesn't make you want
to click it as much. And in fact, this guy when your hair is 21
sales for a reason. Whereas somebody who has
a very nice background to the pictures and the more
decoration they have to it having amazing
photography and creativity, the more likely they're
gonna get this to ourselves. And the biggest amount of sales.
15. Etsy Shop Pictures: So I wanted to show you my actual wearable
sculptures website. This is animal art at its finest I have created
and it is my shop. Now if you're interested and
want to support my sharp, which I just made over here
and create it on Etsy. You're more than
welcome to check it out and to make approaches. Now, one thing I want
to show you here, which actually makes
my site stand out. All the other Etsy competition. And there was plenty
of people who sell similar things like it, but nothing like this. And one of the reasons why
is when you take pictures, you want to differentiate
your product in those many ways
for you to do this. And I'm gonna be showing
you exactly that. When they take the pictures. Over here, you can
see there were fluids away TO out magnets. This has a wall right next to
it to illustrate the size. The next thing we have here is a bunch of those
medium-sized magnets. I put them all on the desk
in a feature them all one by 11 of the reasons why I do this this way is when
people are walking at this, there was a three-dimensional
view to this, which makes it a lot more interesting when people are working at the actual magnets. There was also pictures, closeup of those items and Christmas decor right
in the back as well. I tried to get and
use every single one. All the different
pictures You could have up to eight in most of
my things that they do. And it'll be here. This is a picture form, the font as well. So when you're doing
something similar, you want to take different
kinds of pictures. Were probably you want
to do it in an angle. So you can see you either of
those things I've here have an angle like as if you're
watching it to form this side. It makes it a little
bit more attractive then form the foreign Tony, especially if it is a
three-dimensional product. So definitely for a
three-dimensional products such as this, if you're just watching
it from the front, it looks like it is
two-dimensional. And that is the key here. You don't want people to
think it is to D when it is dimensional to
make the product. When you mentioned
that, you have to take the picture from the side. And in a way that makes it
work like three-dimensional. It is a big key when you're
taking certain pictures. We also have he'll statues. And when you take pictures
of something like a statue, you want to illustrate its size. If you just have
regular background, it doesn't give it as much
depth perception to this. Having some kind of a
background in the back of it. Specifically, if it is different
kinds of course shade, it gives it a lot
more dimension and it gives it a lot more
attraction to the product. It makes it the most standout. It looks a lot nicer
to die than this. This is a little bit more bone. You can see all the course
or two gray for this, this gives it a little
bit more taste and makes it a lot more appealing to whoever is thinking
about buying it. You have something like
this as well here. For this one, this is a classic condition to
make it Jurassic addition, I had to use something
like a piece of wood and then put two of
them are height on this. So it makes it look a little bit different and more
interesting as well. You can see close up pictures
of the same executive. This is very important
and here is more, this is really cool too. In this I used all
white background. It makes it look as if it
is just standing on space. There was nothing there. That's exactly the
week I wanted to do. On the other hand, here is a
work that has things in it. This is belly Etsy
wake photography. When we have decor weight
with the product itself. There were other
people on Etsy do the same exact thing they will like to use outside the coal, make it very creative
and give it this, ETC, like feeling do this. So it stands out from eBay. It is also important
when you're doing this. You want your staff
to stand out, you want it to be different. And here is another one. We have the key chain. And it is sitting on
a very nice piece of wood over here too. As you work for this, I do different kinds of styles and different
kinds of works. I specifically do. I don't why the in my pictures because not a lot
of them are barely awake. There was no ongoing same team of the same decor
for everything. The reason why for that, you want people
to keep browsing. They see different
kinds of decor for the different products
that I'm selling. And that's what
makes people more likely to click on and say, Hey, I want to get this, this is unique,
this is different. I wanted to experiment. I pull stayed and I
created a brand new sharp. I wanted to see how
my sales go because I went ahead and changed
a lot of things. I changed it listing descriptions and
change the pictures. I didn't quite different than
walk into a shop to see if this new work and this new style is gonna
get me a lot more sales. You can tell over
here that sometimes the pictures don't come out
as well as they should. Like this one over here. Those too much gray
on the top here, and white on white photography is very hard for you to do. Over here. This is bellows you how we
think just blends in all the white and then the
actual product over here. So yes, once in a while, you will have something that
doesn't come up is good. And do I go ahead and
fix just one image? I'm not too sure about that. Sometimes you don't
have to go and make every single image to be
mind blowing, to be amazing. It's not really as essential. Don't have that done. But on the other
hand, if you haven't 98% of all your pictures, amazing walking, and you have
once in a while something that doesn't work as
good, it is acceptable. But if you have
mostly are pictures that have issues with them,
that's not a good thing. Now I do have one picture
that I really dislike. It is this one right here. Why is that? And you can see that
there was too much of this bluish tint
to this picture. It should be all
white, just like this. You see that it is all white. It is really good here. When those hands, this
one is not as great, but the picture came
out executive perfect. It is a hardcore on that one. But we do just for that. I'm not sold yet on it. But I am very much
into trying to get the best possible pictures for everything that you
do, for your walk. You want it to stand out. You want people to say, Wow, those are amazing pictures and I want to get their product. And when they see something like this and they will take it. And you see the attention
to details you make. They would place for justice and they will start buying the products that you're selling. So go ahead, check out my shop for ideals
and everything else. And if you're sick,
you can support it by buying any of my products.
16. eBay Photography: I wanted to talk about eBay
photography example and specifically why is your
product not selling on eBay? Lot of times it is
the pictures to make the biggest difference if
the item is being sold, all dynam is not
being sold at all. The most important
factor here is the picture itself doesn't actually show what
you're saying. And if the whites and everything
is made exactly correct. So let's go ahead and show you. The first thing you want
to actually do is to drag the most important
image to the front, showcasing the actual product. Next thing you want
to double-click on the image and do some
modification to it. In this case, it
looks almost perfect. Sometimes you will need
to remove the background. In this one, we have
to do is to frame it exactly where you want
inputs and continue. Now, we actually zoomed in much closer to the actual product
and Poisson done and C. Now the next thing
you want to do, you see the background is
darker than the actual product. It is not all white and
that makes a difference. It makes it to look
at more dirty. And you don't want
that. You want the product to be much more wider in the background itself. Now, white on white is a lot of times not
something great. You don't want to actually take a picture of a white
product and then have the whole background to
be just as white as well. What of times? It actually
doesn't do justice to the product and doesn't
actually look good on camera. But with eBay modification, you can easily make
the white with white with a very simple
two clicks that you can do. When you do this,
the whole image works so much more better. Those are the simple,
easy for you to use tools that is available on eBay. So after you do this, you can see that this
is just way too dark. This is way too white. You have to find somewhere
right in the middle and do the modification right
here. Poisson save. It actually makes the picture
looks so much better. When somebody looks at it, it will make it much
more attractive. Now the thing is suggest
for you to do after you do the right modification for those products is foreseeable
if it's still not selling. Add a different kind of
background in this specific case, they can all black background, take the same exec pictures and add them to this listening. Also, switch the
pictures around F, the force picture is
not walking well. Change it and change it over
time and after a while, if it still doesn't sell, get brand new images
impulse the Min. You can see over here
I went about and took the white image across the black background to give this much more depth and space. Next thing you want to
actually do is to take your editor and edit some
of the imperfections. Specifically, this one has too much workspace in
front of the image. So you go ahead, use the
crop tool, you zoom in. Then what you want to do
is you go to quick edit. Whereas when we touch, make this bigger and just
go for all the things on this side that don't make sense in a go for all the
different things, the different specs of white. You don't need to
focus too much on big edits when you are doing
just pictures for eBay, it is not as essential. You're not giving this to
a client for them to walk. We just need the
bare minimum for this picture to
get a lot of hits, and specifically not to
distract from the image itself. So anything that distracts
format takes away its value. More than likely,
you're not going to get this sale that you want and
applies for those products. Your focus, it's definitely on making this image as
attractive as possible. Focus on the selling points
of the image itself. What we're doing is
we're zooming into it. Sometimes we need to adjust the white to give it more white. If it is possible for it. Then we're going to
go for the next one. So quick fixes is pretty
much all you're doing here. But definitely this is much
better than the previous. All white on white background. You just didn't do any
justice to this file up and made it very unlikely that somebody
is going to buy it. We have those small edits
that I'm doing right now. It's going to make
it very likely that somebody is going to really pay attention
to this part of, more than likely they'll
gonna go ahead and bind. One of the things you
can see here that I did, I made sure that I
took pictures from every kind of
direction up, down, and on this side, the more directions in the
more different kinds of images you have for the product, the more likely that somebody's
gonna score for them. And the more they stay
on the listing itself, the more likely
they'll gonna go ahead and purchase the actual pilot. You can see that
there was one form, the top, one from the bottom. Every single image. I took a bit of time
taking the picture. But this is not something that takes too much of your time. Ido, more than likely
you'll be thinking, hey, I'm just wasting time doing those a little
bit of edits. But in fact, you're not, you're giving your
customer and let more likely a reason
for them to buy auto. You're spending maybe less
than a few extra minutes for those small edits, it makes such a big difference for the overall feel
of the product. And when you have a lot of different images to
showcase to your client, the more than likely they're
going to go ahead and buy this product at a price
you want them to buy it for.
17. iPhone: Photo Capabilities: I took a bunch of
different pictures. I'm gonna be showing you
every single one of them, almost every one of them. And you can be the judge to find out this phone is any good
for taking pictures or not. So let's go ahead and go through
this picture by picture. See if there's any good
pictures right here. Start with number one and
go through the whole cycle. You can tell where this
is any good on that. So zooming in amazing details. See the shade even fixated unless you zoom in super n and look
at the notes here. I'm like super zooming in on it now you can tell
it's a little blurry. This is some high quality image. You will have to have
at least $2 thousand of camera equipment to capture
some details that will. This amazing. What I
like is the way we end the course and shades and I
do teach a photography class. If you're interested
in iPhone photography is gonna be a link
right down below. You can tell over here another picture of
the same exact thing. Really good, really
good pictures. Here is another one I doubt. This is a park, by the way, in case you don't know
what kind of animal it is? Yeah. Lots of details. Lots of details like
the background, how it goes ahead and put so
much attention to details. Now is a model appeal. You can tell how on this side blows and out
in a portrait mode. Blows it out on
the side as well. And the face looks beautiful. You can see right here.
Everything looks so great. And then if you're
going to be zooming in the boots, Let's
check it out. Over attention to details. We will do that tension. You can see you in hue,
attention to details. And this one does an extremely, really good job in
taking pictures. Here is another one,
zoomed in portrait mode, highly recommended
portrait mode. For photography. It makes everything
look so much better. With the iPhone 13, we get the different kinds of options for the filters
for the cameras. And this is something that
in very high-tech equipment. Now, we can see
right here video, video shot on the form. And you can really
see the difference. Here is another video. Here. You'll be good. It makes a big
difference for you when it comes to shooting a picture. It just walks the
camera is in focus. That's nothing
focuses my camera. This does very good
job at videos as well. There's similar target
of phi is very amazing. Here's another
picture right here, and I kept on taking
many different pictures. Some of them didn't
come out as well as others like here it's
a little bit darker, but it's still does
a very good job, even if it is saved
and everything. I don't like this one. Here's another one. Yes, you can tell it here. Very nice picture. Beautiful picture right here. And another one that I DO. Beautiful smile. Good. Details tends to details
the jacket, everything. Really good picture.
There is another one, very nice bars on the tree. Another one as well. And you can really
tell the difference. This camera is great. Almost no pictures
are coming out bad. There is no bullied
almost images. It does a good job
with different kind of writing and different kind of camera positions is good if you want to take casual
pictures, modeling pictures. I would not take this for
a wedding photography. Not good enough. But when it comes to videos, who look at that, look at this video, work at the attention
to details. This camera is doing everything. Amazing. Amazing
when it comes to this similar type of PPE
that you can do with this, the whites and everything. Now on the other hand, just let go of pictures and it's a little
bit dark outside. Yes. It doesn't come out as good. But it can always edit this in Photoshop and everything else. You can go through those images
themselves and edit them up. Picture right here. You can see right here,
when it's a bit doubt, this camera is not doing as
good a job as it can do. But if you change the fill those or change the setting on around, you can see right here, this was not the
fault of the camera, I suppose the photo
and photographer here as well. Here's a video. Video of the same thing. Yes. Great job. Foreign protein is good. It's really good. If you can tell the
difference, but this is really nice high-end fixtures
that it's been taking. Good. And here it is, high-five. Thank you. When it comes to
product photography. Same deal. If you're interested in
getting something like this, there's gonna be a
link down below where you can sharpen my gift shop and get some of
those cool things. Those are actually dark part looks exactly like it's
a dark bar magnet. And when it comes to pictures, they can picture of
a dog pole magnet, which would take for my job. Take a look. Just take a look at this. Wow, this is amazing. This is doing the job
that I would take me a $2 thousand camera to do
and achieve the same results. And I'm just using my iPhone. It's going to shortcut
on so much time for me. I don't want go need $2
thousand equipment to get the same results
when I can use $700. Is it better than
when I go T-SQL? In some ways, yes, in other ways to know why now, when it comes to snap pictures, taking pictures of motion, the motion it's
moving a little bit, they can go blowing. The motion is not this great, But when it comes to videos, it does a great job with
videos, with steals. It doesn't do as much of a
good job if there is motion, but as long as the
subject is moving, this does a very
good job at this. But overall, nice pictures,
beautiful pictures. Zoom in. You can
see the details. When everything good,
background blow. The image widening. It's all about the photographer. It do, It comes down to that. If you're very
good photographer, you will get amazing
pictures with this camera. Video. You don't need to be an amazing
Bolson who knows how to do this to get such
amazing results. It's all about the
camera itself. It gets, say, 9.5
out of ten styles. And I think the next version,
it's gonna be even battle.
18. eBay Photo Examples: So I'm all about generating multiple ways of income online. And specifically when you sell
things online and on eBay, you want to get into multiple different ways to
make income on EB itself. Let's go ahead and check out what kind of pictures
and taking on eBay with wider I do
different businesses. And which pictures you should
avoid when you do eBay. First off, let's get started with the walls kind of
image that they did here. It is this one, no idea. I don't know if you can
tell the difference and why this is not a good picture. And yet it was sold for
exactly what I was asking for, which was 16 bucks, is that the background is not all white or at least all black. It should be neutral background. And the short is a bit
when code is well, it is vintage and the part of the business where I
sell vintage products, it is not my best example of
the items that they sell. But regardless, somebody went ahead and bought the spider, which actually shows to show you that if you do decent kind of photography and white
and describe the product, you're going to get this
sales that you want for it. Let's go ahead and show you a different kind of product
that they took right here. This one is the MAC and this is a wig or western
part of my business. Well, I go ahead and break apart different
kinds of sets and sell their pilots of it instead of actually
selling the whole set, which is how I make money and support my wiggle
investing habit. Better example of webgl vesting and pictures for you to
take is the following. You can see they're all black. On the bottom. You want to have
the background to be specifically or white, just like this, Is much
white as possible. And of course, showcasing the actual pilot and
making it very beautiful. And you can see how I do this. I take pictures from
every single angle, every single side, and including the instructions
book with as well. So I give value to this product, and therefore somebody's
more than likely to buy it for a higher price
than by competition. Let me show you a
different kind of pilot. This is part of the vintage
stuff that they sell. And in this one, it was a vintage car. So you have to show every
single angle of this. It's sort for a
decent amount of $46. And the product itself
guided super cheap. And you might say, hey, this thing is beat up. Why would anybody pay
good money forward? People who like
really old products, such as die cast or
even anything vintage, they're willing to
pay extra money for something that is old and beat up Before you go ahead and
chunk this thing into garbage. This thing that is all, it could be Wolf, a
huge amount of money. Talking about huge
amount of money. Well, this product made a
whooping free 100 doors, which is a lot of
cash for what it is. And you can see the photography. Some of it is really good and some of it didn't that
come out as well. Because the all white background makes the plant looks
so much better. It did give more
value to the product. On the other hand,
in some of it, you can see that it's not
as good in the background. You can see the black over there with the white that is mixed in. The product itself is
actually white and then the background
is not white enough. Is that with the camera, it has a hard time focusing and adjusting the
white correctly. And because of it, you either have to switch to a different background
or you have to go with the flow and just use
whatever you have over there. So in this specific case, I decided to just let it go, take the pictures as is, and just post it up though. And let the product itself cell. And it worked very well. But for you, for your
own photo nodess. And because it took such a
long time for this to sell, you have to understand to make really good money and
to make it faster. You've got to focus on having
the best possible images. And maybe I could
have sold it for much more money if this
was even better pictures, I do suggest for you to
take as much time as you can getting the best possible
images and pictures. If you can't send this
to somebody who is a professional would take the
amazing pictures for you, especially if it is cheap and products you
don't really need. And the best kind of pilots
for you to go ahead and send four pictures are those
you don't actually need, you get them super
cheap and therefore, it doesn't matter for
you if whoever is taking the pictures gets
to keep them or not.
19. Simple Editing: Editing pictures for eBay, the important thing is always
to take multiple pictures, different kinds of angles. Because you just never know which one is going to
come up really well. Over here you can see one of
the images that they took, and I'm going to go into and try to edit each one of them. Sometimes you have to figure
out which ones are editable, which ones are not. Because there is a big
thing for you to know. Like for example,
the background in this one is not
good, it is barley. The product itself
is blowing as well. You can waste a
little bit of time, try to make the
picture even better, but sometimes the
best thing to do is to take the white
picture right away. So you don't have
to go back and try to fix in the image
and to make it good. In this case, we're
just zooming in. It fixes the biggest
issue with this product, but still we have too
much borrowing in here, so it's not that good. Next one, we also have blurry, but this is bell kind of a boy. You can see more of the details of the background
and the pulp itself. So this gives us a better
kind of broadly two days. And when the picture
comes out pretty good in the background highlights
the actual product. This is what you
actually want to see. In this specific case, there was too much
background in here. Since the focus is on
the actual product. You have to go in and zoom more. And are also like to
use this situation too because it gives this
image or add more juice. And sometimes you
have to make it a little bit darker as well. Now, next picture is
this one right here. This one came out very well. You can see the background
is not boy comes out. It makes the picture
itself work already good. There is not much to do in
terms of editing over here, the picture is almost
perfect as is. And that's what you
want to go for. You want to make sure
the pictures you take don't need much
editing to them. I will do either
take a picture and habit almost full
factored then to go back and keep on taking multiple pictures and
try to edit them. Some of them are not really edit the ball like this
one over here. It is good, but
there was something not as good about
the picture itself. This is why I decided
to zoom more into it, but still, it doesn't give
justice to the actual image. You want to just showcase
your best, if possible walk. But the first thing
I want to always do is to go for
every single image and edit it out and make
it the most and the best possible image that you
can possibly do for it. And that's something
I always do. So if the picture is good, I give my time to
make it even better. If it is not this good. I just skip it even
though he did. But eventually you will pick the pictures that
are the best ones. You can only put 12
of them up there. And you would choose the best
pictures for you to use. In this specific case, this one is not too bad. I'm not too much of a fan of
this specific background. And yet you have
to experiment with different backgrounds
to see which one will walk and which one. Not. This one. It needs more whiteness. Four down one. But when you use
more brightness, the image itself in the
middle gets a bit too dark. So let's go ahead and
give it some situation. This is one of my favorite
tools, this situation itself. We have a problem. In this specific case, I have spotted something
that is now good for this. Usually when you take pictures, you want to make sure that
nothing like this happens. And in here you can see
something right there. What do we have to do
is just go over this. This is very good tool that gets rid of all imperfections. So things like that,
really small things. It is very thing
that I like to do is to pay attention to
the smallest of details. You want to make sure the
picture we'll explore fashion or any of those little smudge what's
in the image itself. Like something very, very small. Sometimes you can
get away with those. But when it gets larger, it just doesn't work good. And edges is not something
that you want to do if you're professional
because people are going to be paying attention
to the wrong thing. Instead of them paying
attention to how awesome this product is and
why they should go ahead and purchase it. There are going to be looking at and seeing something
and like, Oh, this is just doesn't
look good and so on. And because of that, there'll be skipping
on your pilot. You don't want this to happen. You want to make sure the
product is S professional and as good looking as you
possibly can make it. This makes the
difference between a professional who
sells the products that are out waltzes and amateur who doesn't
actually care. He does sloppy picture walk. And because of
that, you don't get the top prices for the
products that you're selling. The only biggest issue of this product is the
item in the middle. This right here is
just doesn't come to justice of the product because auto I made
everything else white. It is a little too deltas, so that is not something I
wanted to see in this product. This has the other opposite
of the issue here. It is too white and you
need to add more darkness, this product, for
it to come out. You want to do whatever you
can to make the product stand out in the best
possible weight. Let's go ahead and put
this in the middle and add more situation to the pilot is my favorite to use. This one that we have temperature grading that is
not correct with a pilot. You can see right here this
is more natural light. This one is not the
right temperature. We have to set the
temperature to be correct. Let's move it a bit
to the positive end. And now it looks white. Yet this one is too warm. So let's change
it to wait a bit, the West temperature, making
it negative temperature, and that's going to make it
much more better working. Temperature grading
is essential. You can see that right here. It is the long call. It is not white, it is bull. This tells me that the
temperature grading for this one is not correct. There's something that white Q. And As I'm keep on moving it, you can see that it doesn't
fix the blue, white here. Something is not right
with this image. If you add more exposure to it, it gets rid of the
Bull ad appeal. That's what you want to do. But instead what it did. The pilot itself has this white coating to it
that doesn't work natural. This is one thing
that I don't like about this product was it's a little bit
too blue over here, so this image is not this good. I probably would not be using it to showcase this product. Another hand, this one
is almost perfect. Everything walked well. You can see the
white background. The white is exactly how
it's supposed to be. Maybe either with
a bit more white, there was still too much
with fraction under pilot, but yet this one comes off, I'll add more professional. This one also has the warm
color grading as well to it. By adding more exposure, you get rid of this unnatural wore white that we see here. But then we have dazzled overexposure issue
of Despite that, once it gets to
this overexposure, there was not much
you can do to fix it. Because if you're gonna
be making a darker, it's not gonna work good now. It works fixated. You can see the
pixels on this image. This image is so bad that
I hit the delete key, I heat the reading, walks around, but this
one is just too bad. It had to go. We have
another one right here. This one who really is good. You can see that the image
has this situation co-active. It has the color coding to
it that it's supposed to be. It gives you this warm feeling
when you look at this, this is a great picture and
the product just stands out. That's what you want to see. You want people to be and want to get this brotherhood.
And here is another one. This one is also almost
perfect as well. You can see that there was not any things that are
just out of focus. Ball is at minimum order. This product is
borrowing to begin with. And then over here
it's also good to, when we have pictures that
are coming up really well. Sometimes you don't
need to do that much fixing or any editing
whatsoever to them. In fact, if you were bought the store original
networks for effect, There's not much that
needs to be done. That's how I like
the pictures to be actually done with the eye of the camera
without needing any more post-processing to them. The more we spend
time post-processing, the more time you actually are wasting at sometimes
if you're actually going to make the
picture worse than you started with by
too much editing. This specific one. It's missing some
situation and you can actually only see it by going to the other
image of this one. It seems like it's a
little oversaturated bit. But giving more situation
to the image makes it more favorable and enjoyable
for your eye to look at. This one. I cannot believe how nice
and perfect it came out. Actually really like this image. There you have it. This is all the pictures
that you need in order to create your
eBay or Etsy listing. It's up to you to decide
which ones you are going to be adding to Etsy
and which one to eBay. My opinion is to go ahead and use the same images
for both locations. Ortho the big difference on Add, so you can only have
ten images on eBay. You can have up to 12, which you have to do
next is to delete the pictures that are not so good and you're not sure about. And then just go ahead and use the best pictures
that you can find. So just go ahead and drag
the ones that you like the most and put them
on the desktop. And then we're going
to be uploading every single one of those images and putting it and making
it the profile picture, specifically the porphyrin
victuals should be the best possible image that came out such
as this white here. For ads, what you want
to do is make sure the picture is pretty
much zoomed out a bit. So it becomes the
portfolio image for eBay. It doesn't really
matter which one is the portfolio image itself, but why It's because
of the thumbnail, it is very essential.
20. Advanced Editing: So the biggest
difference between an amateur and the
professional is the following. This style in the substance, how you take the pictures. A professional, they take
as little as possible. And yet the best pictures that he can take warehouse
and amature, they take a lot more of them. And then they go ahead and
edit every single one of them. So over here, I'm
just going to edit all my best images
that they took. Everything else was deleted. And it is very selective. You can do this edit in any kind of photo editing
software that you have. I use I4 though. So the first thing I'm going
to go and go into the image itself and that
person, the edit. Next, I have to look at the different kinds of adjustments we can
do to this image. This one right here. I'm
gonna be using saturation. You see, right now talks do. It doesn't have a life to it. So adding this situation too, it makes it look unique, make it work better
and more beautiful. Next to go to the next image. And situation is one of my
favorite tools for me to use those other ones as
well, such as exposure. You can see that adding a lot of exposure makes it too bright. On the other hand, not ending enough
makes it too dark. You want and go ahead and find
a balance between both of them to make this picture just to talk, just about amazing. This one over here. I like the
background and everything, but sometimes you need to go
ahead and crop the image. So this one, when you crop it, you get much closer
to the action. Then you apply the law of torts. And with the wolf dogs, you want to have 1 third of the image and the
highlights lay then he'll and the other
tutorials is going to be farther away from
the actual image. And I do the same thing here. This brings the eye to focus on the actual
image all by itself. Next thing you want
to do is to make it a little bit more darker. And then go to quick fixes. We touch and to fix any imperfections on
the actual image. Because it's going
to make the image look so much more better. And I go through
this just a bit. And you want to go for this
just enough so we don't have any imperfections on
the image showing up. That makes the picture
so much more better. Next, this one is missing
my favorite tool, which is their situation. And in a bit more exposure. And now it looks so
much more better. If this looks a
little unrealistic, make sure you use the
temperature dial into diode down the image and add even more temperature
or less of it. In this case, just a little. On the negative side,
it's going to make it much better image right here. You can see how originally
to a quake was oval, saturated with too much
brightness in here. You want it to make sure
that the image doesn't have way too much brightness because then it's not good. Working. Making it a little darker
is much better over here. And of course, you will
have to go forward and change everything
else as well. So you can see over here that
this image, all by itself, There's a lot of small
edits that I have to do to bring this
back end to make it work with the weightage just as good as before
as you can see by zooming way then you can tell all those places like small imperfections are
showing up in it as well. So we have to go for this, especially when you zoom in. The more you zoom
in, the more you'll get closer to the action, the more the picture shows up every single imperfection in it. And therefore, you have
to be even more super careful to make sure every single one of
them is covered up. So then it doesn't
work like this. Actual picture is not good enough because you're
selling a product. And because if you're
selling the product, people are buying
the pile of dental, want to know though is something
wrong with the product. Why would they buy it if they see some imperfection in it? When as I can the
actual picture, usually I use a sample for it. So it's not always the
same thing that they get. And because of that, this is why the one you do. It's very important for
you that's going to work the best that you can have. So make sure you always find
the best possible sample. And you can see the
difference over here between fixing
it the right way. Novel fixing it. In this
specific case, I fixed it. I use the weightage tool, but they used it in correctly. I use the big blob over here and then go
ahead and waiting. Work. Not neat, but this organized and it went
overboard over here. So you can see that when you go and do it with a big blob, it doesn't work good. It's smudges or the
edges just like that. And it's not good. You can see over here and you can tell what the
original one that was done very carefully forces this one that was that down, correct. And because of it, it
deserves to be the way that there's just too much things
to be deleted in doubt one, and the picture becomes unsalvageable and therefore
has to be deleted. And you can see the
angles that they took over the same
exact image over here. This one is head-on. This one is a little bit
tilted on this side. And this one is a
lot more causal. Of course, this one also has the same exact problem
with being oval edited. So you have to make sure that
you don't edit the image. This is a different
picture and we are using a little bit of sand background
and I put it right on it. Same deal here as well
in both factions. And there's always gonna
be some imperfection that you don't actually notice, such as this green
right out of blackness. And you have to go through this and see like the smallest of imperfections always show up when the image gets
super zoomed in. And sometimes even the
whites from this side starts shining at the
picture, making it work. And Leo, and those things you that even cannot
see you in your life, but you can see them totally. When you go up
close in, zoom in. So make sure you go
ahead and fix that. Next thing you wanna do is to go ahead and play
with the whites. You want to add more, you want to subtract more. You want to crop the image. I'm going to get
closer to the action. You want to make sure that it
is put in a good direction. So your eye easily drawn to
the actual image itself. And then go for
every single picture and make sure that
it works amazing. And you have to do the
same thing as well. You want to adjust
this situation tools. You want to adjust the
temperature waiting. As you can see, the sand
totally changes from yellower, which doesn't work clearly
attracted to beautiful white. So let's move it to a white one. Because that's how sands walk in Florida does
actually beaches. Without that it was super
white and they look amazing. That was yellow sand as well. But when it comes
to the picture, yellow over here
doesn't look good. In fact, it goes back
to the film days. Well, yellow was
something that people try to avoid because yellow show that the picture itself got over-exposed with white
coming inside the camera. So I have this thing about this, that yellow means bad. And this goes all
the way back to the days of film photography. Here's another one with
changing, it's wet. You don't want to have the
yellow in the picture, make sure you get rid of it. And this one you can see here, I don't know if you
can see that there was something wrong in this picture. And if you can tell
it's on the left side, you can see how out-of-focus
two of them are. Everything else is in
focus. So what do you do? You either try to salvage this picture by going
ahead and rotating this. And then what I'm gonna
be doing is copying it. And when I crop it, I'm going to make sure
I'm gonna get rid of the ones that are not good, the ones that are blowing and just keeping
the good ones sin. So we can try this as
a way for us to fix this image and therefore the reading the bad
ones out of it. So here we go. We got rid of the bad ones that
will be blurry. You're keeping the
ones that are good. And we put this in. So this picture did walk. What does sometimes
you can actually fix the issues and therefore
you have to go to the next and take more pictures
or just keep on editing. So this one is good
at every picture seems to come out well, which do a little bit of
adjustment of saturation to it with a bit more
level to it as well. And just small adjustments. I don't do big adjustments
to the images. And this is essential. There was a lot of
people who like to, hey, I'm going to do a
huge adjustments. And then within all
those fancy effects and all and Photoshop, It's not even necessarily using simple editing tools is the key to get those
pictures to look good. In fact, though hot, you have to focus on the West
editing and more on taking a very good image that is
the key to good photography. Over here. We see one of them
is out of focus, and that does happen. Here on this side. A little bit black, so it went out of it, so I have to take it out. And then I press on Done, I kept that thing out of it. And unfortunately, this
one is still blowing. The way for you to try
to adjust it is to go with sharpness and to see if it's going
to fix this issue. And in this case it didn't. Then text of course
solution to this is either to delete this
picture or to keep it. And maybe it will pass as okay, so what do I like you? I like the gold, which came out amazing
and the silver one. And because of that and the
placement of all of them, how I placed them look too
good for me to delete. This is just not a good idea because I like the
way I did the image. So what I'm gonna be doing
is saving it for later. I'm going to
eventually delete it, but I'm going to go ahead and snap something very similar to it for the next time that
I'm going to take a picture. So that is an ideal
for me to do. And we have more
images here as well. And it just looks
brain over here. So it is definitely missing
something such as situation. Look the difference. Before this situation,
it wasn't as good. But now if situation
it works fabulous, it looks so much better to go
to the next one over here. You can see that this
one was over edited. You can tell that this
situation is a little too high, the exposure is
too high as well. And in this case, the picture, let's go to about two previous this is how the original
picture was taken. There was something wrong here. It just didn't come out right. The brightness, the shade
of it was not correct. The pictures of the
actual products on the stand are
not working good. They're really out of focus. So this picture is not
a soldier will bow. You can't really fix this image. There's nothing you can
do to make it better. This is where the delete key is, comes in handy and you just click on Delete and
you get rid of it. This one came out really well. You can see the
image details here. What is missing here is, yes, this situation is
my favorite tool. And moving the level so
we heal a little bit. And you can see that
it makes the picture makes it much more better. And if we touching, you have to fix all those
bully on this side here. Look how dark it is
over here on this side. And the panel, when you've tried to fix something like
this, it's very hard. My software is limited
when it comes to that. So what you have to
do here is to list snap this picture and
add more external light. So this doesn't actually happen. And we have the same
exact thing here. This one got too much
brightness to it. When you have too
much brightness, it's even worse than
too dark of a picture. There is not much you can do to fix this up to make
it darker because it doesn't pick up
the image quality of every single product
that was taken. And this is really
important for you. We want to make sure you get the image's white right away. You don't want to have
something that oval exposed, such as this, That's
overexposed picture. It's no good. In fact, it's so bad that
I have to delete this. Here is a very good
picture right here. You can tell that this
image is almost perfect. You can tell the word
came out really well. You can tell it the product
came out very lifelike. And it came with the amazing. Here's another one. This
one looks good too though. It's not much editing
that needs to be done. Well now other hand,
this specific one is not working as well. And the reason why it is
weight against Silver. When we have a
combination like this, it makes it much harder
for the camera to adjust into pickup
the actual image. And this is, well, very good. Camelot comes in handy though, is not much of editing
you can actually do. You can try to fix this up by moving situation
with in contrast, sometimes you'll be able to fix it such as I did over here. But then a lot of times
you cannot distinguish the difference between the actual product
and the background, the white back on and it
doesn't make it look as good. In this specific case over here, it is too focused
on the product. The product is in the middle, but it makes it real quick. It is extremely
small product just because the picture just
the way it was taking. So I will not use
this because it makes the particle miniature
in terms of its scale. And as I can the work over
here, the difference, this makes the product
look huge, big. And you want to have
something like this. You see this way it looks
much bigger than before. And that's the way you
want to make sure to appeal to the audience when
they look at the images, they want to make sure when
they are buying something, that the product is big, it is beautiful
and good working. This is why going
forward and editing every single image
is so essential and important to your success. It doesn't have to be
the best possible edits, but it has to be good
quality pictures. And then you can just edit them and create a final product.
21. Background & Setup: I want to explain the
entire professional setup that they have here and how it actually
walks to take pictures for the products
that I'm selling. Falstaff is the different
kinds of backgrounds. And this one is all black, that is made of
cardboard over here, is just pretty much a box. Can put the product over here. You can take
pictures with there. And you can use external
light shining from the top or form this
side right here. Now if I don't need
this miniature one, I have another one
which is all white. That does the same thing
as identical as well. The good thing about some of those possible and
cleaner this myself, so it doesn't cost me to mine. You can see over here, this is the police in a highly suggest
that you do have a piece that comes in and out. Because after a while, this does get damaged in this my mistake for
this one right here. This is for small mobile
one that they can take on the goal and put this outside as well if I
want some natural light. But sometimes I don't
need something like this. A lot of times I need
a lot more space. And because of that, they have even bigger vocation. Also have a small one. We just made a 100% out
of Lego pieces over here that it is for taking pictures or whatever
many figures. Now let's take a look at the entire scene
over here and how I go in and use the background for what
they needed to be. First of all, we have a huge
white on the top over here. We have a small white over here. And a have a son for AMP
is also over here as well. That's leg await it too. Show you how bright
it actually is. This only helps with
taking pictures. Now, we have definitely have a regular people that
they use specifically, you can see the angle over here. This is what taking pictures, because sometimes when
you have this angle, it makes it much better. For the picture. There
was no cutoff such as this to the file this, we have a cut-off that scene like this and you have
to edit this out. This acute illnesses
it happening. Just putting it over here down both sides. I'm going to take it in. You see that it makes a
very nice picture here. And you can't actually see a cutoff on this side over here, which is a way for you to do it. And then when you
turn on the lights, get rid of the seed that
is featured over here. Turn on more intensity as well.
22. White Background Photos: So what is the
most hardest thing for you to take pictures off? If you didn't guess it. It is actually this joy. It is reflective.
It is very hard to take pictures on and eat glucose all the time for you to take amazing pictures
with your camera. We're gonna go into
behind the scenes store where I'm gonna be
using my Canon. I'm also going to be using
some external whites. And I'm gonna be showing you step-by-step how you can achieve amazing professional
results with your cannula and amazing
white background. So it looks super
professional awake as if it is a 10
thousand TO studio. Let's get started right now. So you can learn
how to do this all by yourself in a comfort
of your own home. Full stop. We need a big external white. What I'm using here is
the door caste system. Over here. You can see the
difference on an off. Take a look at how
much extra brightness this actually gives you. One other thing
that you need to do is when you are using a white, you have to sign a directory
where you're signing it at. But you cannot just use the actual LED itself because if you're using just
this, it's not enough. In fact, it's going
to make too much of the shadows into whatever
you're taking pictures of, it's gonna be too
much straight on. So what I use over here, Here's a defacto right on here. And you can use a
cheap defacto as well. Make sure it doesn't overheat. This one was around 20 bucks in the edit to the
door caste system. This specific one
is not a motivator. There was a motivator as well. And the motivate, it gives
you an ability to change the weight towards it has two different tones
of the right itself. Don't get that volition
because you want the brightest possible setting and only this one
gives it to you. Next we want to do. And I make sure that you point this exactly where you want to. Sometimes you want
to bounce it off the ceiling so you don't get
the whacked white shining, especially if you don't
have something like this, which is a deflector, if you don't have a de facto, you bounce it off the ceiling. If you do have a de facto, you can go straight on and
to do it right over here. So now that I have
everything set up, I want to show you
how you do it with jewelry because Julie is very tricky for you
to take pictures off. So first off, you need
a few things here. One, you need to
have some kind of external inside the
whites for you to use. I like this specific
quiet over here is an LED light and you can
shine it in every direction. So this is a little
bit different than using the one that goes straight
on because of this one, which are going to
be doing is making sure the white actually works for you in a
way you want it. So if you want it from the top, you can use it from the top. You can use it from this side
and you can use it any way. You are actually like to go
ahead and put the white on. But having different kind
of whites over here, you can go ahead and make
the best that you can. And you're going to be working with different whites as well. So you can use sideways to one of the whites I have
is this one over here, which is a sideways
you can use over here. And when you use the sideways, you have to position
it in a way so the way it goes directly
on it from this side. And of course, having
different rights, going to make very
nice pictures for you. One of the things that I
like to do is having a big, huge wide all the way at
the top of the screen. And then show you
this one is what we hear is the white that I use, which is a sharp white. And it gives me the
best possible images for whatever I'm doing, because it is a big
and it is a huge wife. Of course. The best way for you to use
is to have this specialized. They use all the time. Specialized light is better because it gives me the
best possible images. And it also gives me the most
wide, as you can see here. It totally flat, everything
with big white socks. So this is good
when you're taking pictures of jewelry over here. Now, one thing for
you to keep in mind is that you can always take a very good picture
when something is really just
like this for joy. Just sink down on the floor. Because Julia itself is something that
depend on the angle. The actual thing right here would shine. Because it shines. Anyone the Ingo, the right by itself
doesn't become very good. So what you have to do
is to position it down. You can see over here I
position it all the way down. And then what I'm
gonna be doing is taking picture over
two right there. Now, I'm actually using a
specialized lens over here. And this specific glands, as you can see, has an ability
to write up the subject. From here it has its own
right in the actual lens. So that's another
way for me to get extra ability to take pictures. So the whole key here is for you to walk with the
white to create. The subject to make it very bright in a way that
you can take pictures, but that is not the
ending over here. There is another way for you to walk with the rights as well. Over here, right there
is the thank you. What's you're using here is biting this up or
making it darker. You can see the more you move
it with the plus and minus, you make it more
bright and darker. But be careful with that. If you make it too bright, you overblown the
highlights over here. If you make it too dark, it seem involves
because there is nothing you can do to change it. So therefore, you have to find something in the
middle that gives you very good image quality and makes the picture look
pretty good as well. Lastly, use props.
So this is a pop. I'll be using the hue
and when you position the item and then make
sure it looks good, then you're going to
be taking pictures and then make sure you are
stabilizing thing. Make sure this is stabilized
when you're holding it. Don't shake it. And the auto ISO, you're not necessarily get
the best possible image. You want to go ahead and
go for something like 200, maybe 400, and see
how it comes out. There were a number
of the battle. The picture is
going to come out. If you do it too high, it's definitely
going to be fixated. So I want to get around
200 dividends possible. But if it shakes, then that means you
have to either use image stabilization in the
lens or in the actual body. Or even better if
you use a tripod and you can go for 200 instead. And it's gonna get you
a very nice pictures for whatever you're taking. Although this is
what you do to get the most amazing pictures and images you have to
work with the right. You have to work with shadows. And specifically have to show your camera
setting is co-active. Wait for whatever job
that you're doing. A more advanced
technique is to use this following system that I'm gonna be showing
you right now. This is great for white on
white photography as well. Info Jew photography,
it's going to make it super
professional working. So the first thing you
need is some kind of white that is right on
the bottom over here. And we can just turn this on. It is great if you
have some kind of a diffusing weight or
something right on it, so it's not as bright. Next thing you need,
you need a piece of glass that goes right over here. The grass all by itself is
going to make this even more amazing and beautiful when you have the finished
image all at once. So you need some
kind of a glass for this system to
actually work for you. Next, you need another
kind of a light source. Now, we can have two different
kinds of white source. We can have light
shining from the sides, which is this right here. You can also use a Kemalist
system-wide if you have some kind of a system-wide
that cause waveform here. And in this one, it is built right into the white macro system
of the actual canon, which was the 28
millimeter Miko. And we can even make
it even brighter or make one of them go
in and out as well. So you can see both of
them or just one of them, or even how hard they are
going at once as well. And you can turn them off too. Now, the next thing
you can actually do here is to walk with the whole, entire system over here, which is plus and minus system. We can see the plus and minus. And we have to go
all the way with the plus to make it
as exposed as we can. So it is x super white. And then the yellow is going
to be on this side as well. So that is something
really important. You can see right
here the actual image itself and how beautiful
it actually works. And it cannot actually tell. You can see trying to focus. Here we go. We're focusing right on here. And now it looks like super
wide on absolutely nothing. To make this battle. We have to go over it, but on this side here, but we have to make
sure that we're not actually filming
part of the glass. So we have to move a little
bit in here so the glass is not showing up as part of it. The secret to make
this talk is to find a flash in a tripod. So the tripod over here is a super long tripod
that I'm using, but you can use any kind
of tripod to achieve the same results
as long as you're pointing exactly this way. As you can see right here, the photography itself is
really extremely dark. Dark it is right now. I have it much more
wider for us to work with whatever you're taking pictures of in making a video. Right now we have a sharp light that's walking all
the way from the top. And we have two different
nozzles. Sauces are white. You couldn't lose
wound cube over here. And a small different LED light that I'm going to
be using as well. This is all when
one doesn't matter what kind of brand
you'll be using. As long as it does
the job white. So let's go ahead and set
this one off on this, on different seeds or brightness
we can use for this one, not suggest for you to go
through the highest one. In fact, use the lowest
possible setting false to check out and
see how it works for you. Definitely much
better than before. Now we're also going to
be turning this on and trying to project the light
from two different sources. One from this side and
one from the other side. Sometimes it is best
for you to go ahead and do three
different sources of light when it's
coming from the top. One form this side, another one from the other side. You can see right now,
this looks so much better. It's almost
completely eliminated all the seeds over here. Sometimes we have to just
walk through the intensity. You can see that this
way it's just too dark. This is much better. And we have to position it
a little bit farther away. Keep on upping the brightness. And this looks way better. Now. Subject is much more eliminated. Just have to keep walking
on where to position it in order for us to get the best possible whitening
for their subject. But you can see over here, guys, we've decided, alright, and
what of c going this way? And you can tell how everything
works with the shade. For example, if they
see is coming in from the top, it eliminates. But we have the bottom
humming a lot of white and making a
lot of say over here, there's always gonna
be some kind of shade coming out with the right. And that's your help. So much different lights, all so much high density. There's always gonna
be some kind of shade. But it's up to you
to decide which is the best state
for you to walk in, which one makes the subject to work the best with the seed that we have working on
definitely better than this, which is no edge whatsoever. Another option for us
is to work with them. Onboard writing
system would have plus and minus in
the camera itself. And to use that in order to
eliminate their subject. Then of course, to use a
little bit of this sideways, as we can see if you're using the satellite over here as well. In order to get all. This seems to be the
perfect combination using fleet different light
sources and the plus or minus with the camera itself by upping the exposure level
in the actual camera. Altogether, this looks like
a very perfect setup and eliminating most
of the shade and making this work
really the best. So now is the best thing
for us to do is to go over all the pictures that we took and to see
which ones came out. One is that you should
have some of them and how they work like after
we did all this work. So let's go ahead
and check it out. So for stop, this
one came out fibers. You can see the details. And those are the edited
pictures after you added, you fix everything in there. Because a lot of times
when you just come out, there was a few
things that you need to edit in them regardless, this one is nearly
perfect as you can see. I just needed to
add a little bit of situation and a little
bit of exposure. This means this
picture by itself was nearly both fiction. Let's check out the next one
with a bit more situation, a little bit of exposure. This is almost no editing whatsoever that
being done in them. This one had almost
0 editing as well. I just adjusted the
levels just a bit. There was always something
that you have to do, an additional edit
that you can probably add to the picture in this
one, just most situation. And that said there was nothing else that wasn't
needed to be done. And in this one though
is more inhale. You had to add contrast, you have to add situation, you had to add more exposure. And the levels have
to be moved up much more because the picture didn't come out as good in this one, a little bit more exposure
and levels as well. So you can see over here
some pictures do not come out as good as they
should as those came out. Beautiful. And let's
take a look at this. This one had its issues. You can see that
not everyone is on focus and this one is
just with waxing as well. So sometimes when
you take a picture, they just don't look good. In fact, let me show you
a bad image right here. This one is just bad or around the actual
core of it is off. The focus is off as well. So when you take a picture, the hallmark of a
good picture is to understand what you're
doing wrong and then it'll try to fix it or just go ahead and we do it
in this one right here. As you can see, the
core balance is off. So we have to try to fix it up. For example, we need
their brightness much HIO would definitely fix
this entire picture. It's going to make it
look so much more better. So good that I have decided to just give it as a
freebie to my client. Now, some of them, as you take, there was a different
background and the wooden background
and you can see some of them didn't come
out and all right, this one over here just to Bali. This one is actually perfect. I like it. It's not the best, but it is very good. And you can see over here,
some of them have with fractions in them as well. So when you're making pictures, you want to give your client
the best possible images. As you can see, the
setup walked great. Most of the pictures
came out almost perfect. And I really like the way it came out like this one,
it looks rational. This is how it is stored
in an actual studio. So this shows you how really
beautiful work is being done when you put a lot of effort into creating
the perfect atmosphere, using the lights
to create the most perfect and the most
amazing pictures.
23. Bigger Objects Photos: Today's video viewable to
be looking at how to take pictures of big O MLB professional objects
such as distinct. As you can see here,
there is slight shadow of this product and it's much darker on this
side then on the azo. Just one product. Depending on the product
that you want to be taken, pictures have different issues
with different shadows. And one side is going
to be happening adult code and the
azole depends. All the light that
you're gonna be using was another one here. This is some slightly small
who have different products. The co-variation of it is
not coming out collecting. It is much darker
than it should. This is like gold, coal, and it doesn't work gold. This one IQ is the smallest
one and it is spoken. We can't see it here. Fix this issue. We've got to use external light. The external weight
makes a huge difference. You see how dark the object is. Having a light source,
brightens it up, but it also causes an
issue with a shadow. Here. See the shadow.
The big-O Object. This one gets him in more of a shadow
because it's much bigger. This side is much more
dog or fix this if you have a second external
white formed dazzle side. Right? Add this. Now you can see it works so much better with two
different light sources. On this side, those are
mobile whites sources, with the top being
the stationary one. So altogether we
have three different light sources for this. See how much of a
difference does make. When you turn off
the actual length. Big, huge difference. Put on the smallest one. Does have available
in my gift shop. That makes a huge
difference now it looks much better altogether. Once you pick the object, I'm gonna be taking
pictures off. We can change the way the
light is shining at this. We can have different kind of white to this by
changing the filters. Instead of bulking
full Photoshop. You can have in-house photos. This will actually gives us more control of the product
and give it different tint. I don't need to go to Photoshop. Fix that we've thing because I'm going to get it all down on camera and it looks much more natural and
less editing for me. Definitely go for a bunch
of different filters. Disregard course. You can use something like this. We can actually direct
how much right? It is getting. We can have like a spotlight,
shining, add this. We can open this
up and have full, full-blown white coming right
at this, which is good. If you're using small objects. We can definitely arrange how we wanted to
light to be shining. Using this week. If it is an actual spot
in an actual studio, which it is just a
miniature version of it. Yet again, we have this
shadow in the back. To fix the shutter in the back. You want a second, wait the side and moving it until you get
the width of the shadow. Be the flame, this as well. An ableist object. You take a picture of. It's going to have its
own different kind of light system that
you have two useful. Now, you can see
that at the moved, the filter is formed is,
you might be thinking, why wouldn't I just use the
correct white direct light? Mixed this very shiny. You have to have some kind
of filter that goes over it, such as this one here, which diffuses the whole
white and mix. It was shiny, especially for assigning objects such
as this, which is gold. Gold working with. Once you have this lady
and done with the whites. And the way that you get enough, wait for the whole system. Put it in a way that makes
it look nice and beautiful. Once you're done with that. Next stage for you is to
actually take the pictures. So it takes a while. Get everything ready. For this shot to be done. What you want to
do is to make sure a few basics are followed when you're going to
be taken to a shot, forced off the lights or
have to report factored. There has to be no shadow
in the background. Once everything is done. In the back, you can
see this is all white. It gives it fairly nice
to walk through this. Next what you're doing. You actually have to get a
camera that has a tripod, which is the recommended
thing for you to do. So you can take the
picture of out the shaking because I'm
using handhold or here, it is much better
with the tripod. Position it, and
then take pictures. On the other hand, you get much more freedom of movement when you
don't use tripod. And you can just put it
the executive with you need to take a picture. Now those two different
ways we have to take a picture other people have
done until we get this one. When you go ahead and we're
very close to the object, not every camera can do this, but the professional Scan be
able to take the picture. But it distorts the whole image. Prevent the distortion
you have to get out. It was a has to be a
slight distance to it, then you're gonna be
zooming in just a bit. Taking the picture. You want to get this to
look as natural as you can. So once you take the picture, you want to make sure
the picture itself, it looks how it's supposed
to work like that. Always get this to happen. When it doesn't happen,
it's not a good thing. You want to make sure
that the picture came out exactly how you want
it. For it to be. The preview is the best way
for you to figure this out. If you don't like the results, which you're gonna
have to do is to go back and we take more
pictures to preview. It really is a way for you
to sense how they image actually came out was
nothing del, reason why? Because there's nothing in the actual image that it
was a lot of white. Q. But it's a great way for
you to figure out if the picture is in focus or not. And how the white diffuses itself throughout the
whole entire image. When you see that point though is going all
the way to the top, means there was a
lot of white image. The rest of it is Louis dark. That's one way for
you to figure out if this is a good image or not. You want to have this more
even doubt in the, even out. The bed on the image is
going to be in the better. The white source actually came out in the horntail picture. This one is actually
pretty decent point here.
24. External Lights: Whites and product photography. It is very essential for
you to have the correct white in order to get the
image that you actually want. So I have a bunch
of different whites were asked to show you. One of my favorite is
he'll write on this side. It is this one. It is huge. And what they
do is they just move it up and it turns on,
get extremely bright. And I will show
you how it affects the picture that I'm gonna
be doing. Over here. We have the private three down, and this is where
the whites all on. Turn it off. Sometimes you can't see
much of a difference. But when it comes
to the picture, it makes a huge
difference into the hue. You can tell that the image itself starts to reflect
the actual white. When you turn this
off, fraction is gone. It could be a good
or a bad thing. But it is really important for the product
itself not to have the seed on here and it was mostly the way down you want to get
to a little bit. So those are a few ways for
you to try it and do this. It is to have a wide, wide or different lights
for us to be shining. One of which is wide
at the top hue. It is huge way down
there is a huge white that I'm using for this product. And you also can see the white background
it I'm using as well. So this is a special
setup that I'm using to get an maximize the
different kinds of lights. I can use folders. You can use a
flashlight as well. But this is a very specific
kind of flashlight. This one has the
light coming in from this side and only from here. But on the minimum, you can use it from different
directions as well. That's actually
breeding good for us to have this different variety
of different lights. And not only that, you can switch this to
be just or the white, which is really awesome. When you decide you want to use something like
this, like a prop. You want to put it in a specific direction and see how it actually goes
with this product. If it's gonna highlight
it or not, they were, the Rawlsian is not
this great for us and let's go ahead and
change it to all white. The shade is finally gone. But there was a bit of
reflection to them. Under reflection from coming in, you have to try a different kind of portable light instead. Or you might be thinking, right, Keep and have slightly
different kind of light sources for us to use. The answer to that
is you don't know which one is going to
work the best for us. And because of that, you have to explain
them in until you find one that works
the best for him. Personally, I think
this is one of the best ones for us to use an order, different
light sources. Why is that? One? Has a lot of white in
it is affordable to it gets the job
actually done better than everything else that
they have in my arsenal. As you can see over here, it gets rid of this shade. On the bottom. You have to find a
location that's gonna get rid of all the
shade over here. And it does. Actually did it. Please sing it all the way
at the bottom of the screen. So you do have to
experiment until you find the correct
placement for it. Unfortunately, this
you have to hold it. Well, you have to find
something to place it right on to get
the perfect image. Eventually you'll find
the correct placement. You take the
pictures and you get the picture, the directory. One thing exhorts the two bonds. If this is a good enough, this backbone to
use something else. Let me go, let me
say an executive as well until we find the
correct shade to this and also moving the
whites plus and minus on the actual camera until we get exactly the results we
want for the image. And when they do,
we take and snap multiple images of
the same product using different kinds of shades and making
sure the weight is in different directions
because you never know which one is going
to come out the best. Snap about ten to
20 images of entry. And every time we have
a very good shot, I take a multiple
different directions over it until I get the perfect one and we
don't know which one is for RFID and do a go-ahead
and post-process this. When I'm done.
25. External Lights II : Working with whites,
especially external lights. Right now, we're not
using any light except the one that's plus and
minus on the cameras. So we are going
to neutro it now. A lot of times I like to
up it to a certain level, so we are moving it to about one plus in the
books for what Bell. Now, you can still see shades on the side
and everything else. So for this and to fix it, the first thing you
want to actually do is to add some kind of a base plate to this to make
it more realistic cooking. And of course, the
guy at how easy dude here is not helping me because he's just
weighing over there. So putting them all
on a different kind of a simile makes it a lot more interesting for the pictures. Now, I put four to have
a bigger than this. But this is what we have to do, but you can see this definitely makes it
look so much better. The next thing you want to do is to add some white to this. So we can use this
side with a bow. Wait, wait here. And we can edit form the top. And then we can take pictures
in this makes it look so much better in Louisa guy
is still baking in the sun. You awakes the sun at
them, give me him. Now, the problem with this
specific Kuwait is it's not bright enough and it
is only on this side. You also have a light
that is shining all the way at the top
over here as well. That's very, very powerful. So what I'm gonna
be doing here is changing the white source
to a different kind of way. Now just turn on a
big white sauce. Show you the one
I use right now, which is the big light
source for all the whites. Now, I'm going to also be using the sidelight to make
this even more powerful. Because you can see here, this is much more
strong goal of a white. And we are moving it to max intensity power all the way up. And what a difference. This actually makes, this
totally lights up everything. Now I'll talk, it's
really waiting everything the way
it's supposed to. We have a problem. It only whites it from
this specific side. And because of it, what I'm gonna be doing
is moving it to the side, so it lights it up. And he gets it more to the side and this makes
it look more realistic. So you can definitely see
that this is probably the best possible
picture we can do with all the white and
everything combinations. Now, it is time for
us to start snapping.
26. Using Props: Using props for
product photography. The pop right here, it illustrates the
size of the product. You can see this has
a substantial size. Then the extra half
the product over here. You can actually tell that, yeah, this is big, but nothing us through its
size more than an actual rule. So I do suggest for
you to use a wall to illustrate this
size with the part of white on it and
take pictures of it. But not all rules are really good for part
of photography. Why is that? Because they
don't look, it really good. Their work or key
for presentation. So I usually suggest for
you to use walls as a prop, but they do suggest for you to find other props for you to be using, such as this. This looks so much better
in more substantial. I'm going to place it
in the decade of size. Or a decorator, wait
for it to work, work. And sometimes you
want to place it right on the edge itself. It looks totally deaf point when you are actually doing it. Good at the hue. You can see that zooming in and the angle it is
actually wasted, mix it much more of
a better picture. Now there's different
kinds of decorations you can actually be using. So this is just one of those. You want to have multiple
props to you to actually use. One of my favorites is
this one over here. There is so much
better with a blob. Then you're adjusting Hidalgo
white image actually is. And it makes it so
much better picture. Now this is not the only one that they appeal and you want to have a wide variety because
y is the spice of life. This one. Actually don't like this one. I'm not going to be using them. But to have different
kind of flops is good. This one is a little bit better. Does work more linked list and
I'm not a fan of that one. Another one actually realize, definitely feel Christmas decor, easy for you to use. It is extremely cheap product right over here and you
take pictures of it. One of these is really has to do with the quiz
and station itself. And after a while, you test all of them out until you find one
that looks amazing. You find went to look good for the product that
you're gonna be using. So about policing it, the white or Caucasian. Then IT staff for you to take pictures and see
how it comes out. So you want to zoom in places in the correct way and you wanted to
take the picture, it is essential for you
not to spend too much time editing the actual
image you want to take it and have it done. Very good. In the fourth spot, it is time consuming
for you to get it done. And over here we have a different
kind of board for us to use different kinds of plates. In pulling the product on. You can see that the
white bounces and makes it so much different when you put a different
product and you have different kind of pattern to it. And also how doubtful
white the actual board is. This one is a little
bit more dark. It doesn't come out, is well, I don't think this one makes
it very attractive because the dark bottle
versus a dog world doesn't actually look as good as a doc product in
something like in-between. The next step for
you is of course, to pick the correct
weight in order to make this very attractive
by the photography.
27. Conclusion: Thank you so much
for getting all the way to the end
of this class. You have made a huge joining. This course have taught
you everything you need to know about how
to take better photos, but you're not done yet. What you have to do next is
to hit the thumbs up button. Why did they view for this
class and checkout though? So my glasses on Skillshare, there's gonna be
a wide variety of classes for you to enjoy. Thank you so much once again, for checking out my
class and I hope to see you in another one of
my classes as well.
 Sergey Kasimov, Entrepreneur, Photographer and Teacher