Transcripts
1. Class Intro: Get ready for a creative
adventure where we rediscovered the beauty in the
world around us and learn how to block
Peru for creativity. Welcome to inspired by nature, a class where treasure hunt
meets drawing challenge. Together we will explore, create, and most importantly, will reignite our
ability to find beauty and inspiration
in our everyday lives. Be honest, when
was last time you actually stopped to
smell the flowers? We get so caught up in our
lives that we forget to truly observe the amazing things that we pass by every day. So this class is all
about rediscovering your childhood
sense of wonder and using that to fuel
your creativity. For the next five days,
I'll provide you with a fresh prompt to guide
you in your treasure hunt. Your mission is to
interpret those prompts and whatever way feels unique to
you and snap a photo of it.
2. Project: Throughout this
class, we're going to work in a few different things. Finding inspiration,
building a library, drawing, and
analyzing your style. First is finding inspiration. The treasure hunt part. We'll walk around
and searching nature for inspiration spaced on
the prompt of the day. In this part, we'll train
ourselves to really see and find inspiration
is in place. We wouldn't normally walk by in a blur and
not pay attention. Then we'll snap a
few photos of it, will go back and save our
photos to create a library. Building your own reference and inspiration library is a
great resource to have. You take your own pictures. You can use them as
you wish without having to worry about
any copyright issues. This means you can trace, copy or pretty much do
whatever you want with images because they're yours for either personal or
commercial work. This also allows
you to dive into a vault of inspiration
whenever you need. Next, we'll draw the
illustration based on one of the photos that
we took after each day, we'll analyze our
illustration style, will create a guideline and
make mindful choices to carrier style throughout
the hotel image and end up with a
cohesive collection. For your class project.
I'd love to see her journey from the treasure hunt to the
final collection. And since our
Skillshare community has students from
all over the world, I'd love to see you
in the class gallery. How different are sources
of inspiration can be? If for any reason you can't go on the actual treasure hunt, you can find the images that I used in the class resources. Feel free to use
those as you wish. There you'll also find the same Procreate color
palette that I'm using. And the classwork book, which I'll talk more
about in the next lesson. Aside from the class resources, these materials will also be available to download
from my website. There you also have access to my library of inspiration
and other freebies two, and I'm adding the link
in the class discussions so you can access
it from anywhere. So go grab those materials
and I'll see you soon.
3. Getting Started: Before we get started
with the workbook, let's take a quick look at pages just for anyone else
also using Procreate. This is a pretty cool
Procreate feature that basically turns your iPad into a
notebook and lets you have multiple pages
in the same file. I have my PDF workbook
saved in the Cloud. And to open Procreate, all I have to do is tap it. Oops, not there. Tap the icon. And then right up here, you can see the open
and procreate button. Once you've opened
the PDF in Procreate, it automatically goes into
the page assist mode. And you can tell by the
scroll at the bottom, you can flip through
the pages here. And also by selecting
different layers. Here are the layers.
The first page will be at the bottom
and the last at the top. And down here, the
pages go from left with the first page to write with
the last in page assist, each layer becomes its own page. So right now, if
I start drawing, it will be directly
on the workbook page. And I don't wanna
do that because if I need to erase anything, it will erase the
important pages as well. But what I can do
here is group layers. So I create a new layer which automatically appears as
a new page in my book, since each layer is
a page, remember? But once I group these layers, it becomes a single page. Now I have to do is select my empty layer and the group
and draw directly on it. Now if I have to erase anything, the bottom page remains intact. So remember to always add an empty layer on top of any page you're working on
and put them into a group. Another cool thing with
pages cyst is that you can choose a background to appear
behind all of your pages, like the paper texture
from the resources, for example, just attitude, document and actions, and insert file or photo depending on
where you have it saved. Now, drag it all
the way to the left because this option only
appears for the first page. Then tap it and
enable background. If you want to close
pages cyst and have the document set up like
a regular procreate file. You can do so an action, Canvas, pages cyst, and all your pages will revert to regular layers. If you turn it back on again, it goes back to being
a multi-page document. Now let's take a look
at the workbook. Here on the first page, you'll find a style
exploration section. The idea here is to draw this flower in four
completely different ways. If you already have a
style that you enjoy, if you're free to
skip this step. Or on the other
hand, if you feel the urge to keep testing
different styles, you can duplicate this page
as many times as you want. And I've also included
a page without a photo in case you want to
use a different reference. These drawings can be
really simple and quick. It's more just so you get the general idea and create
a guideline for your style. So don't worry about
these being perfect. The purpose of
this section is to help you with
finding your style. And I say finding likely because one of the
most important things I've learned that was a total game changer
for my art practice. Does that style is a choice? It doesn't mean that I
can't draw another ways. It just means that I chose
to use specific guidelines, either through my portfolio
or for a specific project. I spent many years
trying to find my style until I finally
understood it was a choice. It's not something passive
that happens overnight. It's not a gift from a fairy
godmother. It's an action. It's something that you
decide on and you keep working on that decision
in order to sculpt it, to look just the way you want, which can also
change through time. So funny story. I was completely mind-blowing
when I realized, as I was super-excited, talking about it
with my daughter. Lily is one of my
favorite artists, even though she's only 12. And of course I might be biased, but she's always had a
very strong art style which has changed many times. But for every single phase, it was consistent
and recognizable. Something that a lot of artists been a long time
trying to figure out. Anyway, I turned to her
and I'm super excited. I'm like, oh my god. I just realized that style
is a choice and have been looking for my him for so long
and I can't believe that. And she looks at me and mind you she was about
ten at the time. And she says, Yeah, of course, I choose how to draw my eyes and hands
or anything really. I guess to some people this
might be super obvious. But I know for others like
myself, it definitely wasn't. Okay, let's go back to
the style exploration. I'm going to name these styles. This will be dry paint, since it's the
brush that I used. This will be smooth. On the canvas. One's sketchy and the
last one painted. I've been drawn a lot to
the sketchy style lately. And I guess I normally
alternate between the dry ink and the sketchy
for most of my work. But to make a conscious
decision here, I'm going to take a closer look and see what really
defines each style. This first one has
a specific texture, which is of this
brush that I used. It's very flat and
unintended way and soft. The next one, just like
it says, it's smooth. It almost looks like
a vector drawing. It's bold and heavy
with hard edges. For the sketchy style, the first words that come to
mind are imperfect and rock. It has a handmade feel
and a quick sketch vibe. It's a rough style with
some light and dark shades. And last but not least,
the painted style. This one is chunkier and it has some whitespace
in transparency. It also uses two
different brushes, the watercolor brush and the color pencil brush
for the details. The finding your
style can be tough. So in the workbook, you'll find a list of
descriptive words to help. The better you can
define the style, the best you'll be able
to make it consistent. Because you'll know exactly
what ties it together. Once you've settled
on the style, it's time to move on to the
next part, the treasure hunt. Our first prompt is geometric. So go for a walk and try to find things in nature that
reminds you of that word. Keep in mind that there's no
right or wrong answer here. It's all about your own
interpretation of the product. So it goes maps and photos
and I'll see you soon.
4. DAY 1: Geometric: The first prompt is geometric. So I headed out to find
inspiration for this whole class. I'm going to stick
with this screen, since the intention
here is to find inspiration during
your daily life. And I walked through
your everyday while taking you for a walk. While I have to admit that I find this route
specialty pretty. And some might say, well, it's easier to find something inspiring in a beautiful place. You would be surprised with
how easy it is to overlook things when you walk on by
without taking anything in. My best advice for
finding inspiration for these exercises is be mindful. Try to give yourself
a moment now to think about anything
else in your life. This is not easy, but it's also not impossible. And like most things in life, it gets easier the
more you practice. Don't get mad if you
can't do it right away. Just brush off your
thoughts densely. Like, oops, I'm getting
sidetracked here. Let's get back to focusing
on these flowers. The second point
is to be curious. Instead of looking at
something and thinking, well, I've seen this. No, there's nothing
geometric here. Take another look and try to see things that you
haven't noticed yet. Pay attention to the colors, the textures, the patterns. Which leads me to number
three, get close. Try not to just stay at
your normal eye level. Get down to look at
something on the ground. Get close enough to a flower
that you can smell it. Presented There's a very
fine print written on the leaves and you have to
get close enough to read it. Now back to the studio. I have the folders in my library
separated by categories. It's the easiest way for
me to find what I need, what I'm looking for
a specific reference. So I've added the findings
into my plants folder. I'm going to add my reference
image to the workbook. And it is, I go to Actions. Add, insert photo. And like I've mentioned
in the previous class, each layer shows up as a page. So I have to group this image
to the page that I want. Now in the arrow up here, I can use the transform tool to adjust the size and move
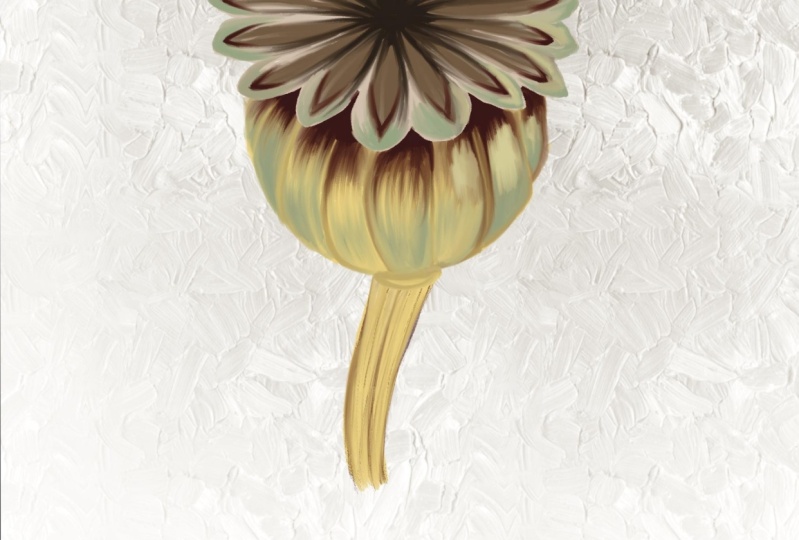
it to the right spot. I chose the birds of
paradise flower for the geometric prompt because of all the angles and the
overall triangular shape. But like I said before, this was my own interpretation
of the prompt. And there's no right or
wrong image to use here. Inside this group, I've added a new layer to make a
frame for my thumbnails, because I want to use a portrait orientation for this project. The thumbnails are just
some quick sketches to help you test out different compositions for your drawing. You can use this space to do so, or just skip it altogether
if you don't have the time to spend,
It's really up to you. I'm going to make a copy
of my reference image to use as a base
for my thumbnails, lower the opacity and create a new layer on top
for my sketch. And again, these don't have
to be perfect sketches. I'm just jotting down some
different composition ideas and seeing what I
liked the best. So I have my thumbnails here, and this version is my favorite. I'm fine with the thumbnails
in black and white. But if you want to test out
colors here to be my guest. And if you want to use the
palette from the resources, Here's how to open it here. Tap the color circle on the top. Then in pallets, click on the
plus sign, knew from file. So here's the tropical flowers swatches. And there you go. Once you've picked
your thumbnail, you can duplicate this layer and drag it up to the next page, or create the actual drawing on different document and
then paste it back here. Which is what I'm
gonna do because I wanted to have a
higher resolution. I'm going to copy this layer, go back to the gallery
and create a new canvas. My new canvas will
be 5,000 pixels by 7,000 pixels at 300 DPI, which will give me 25 layers, which is plenty
for this project. Now at Actions, Add, paste, and you can
paste your sketch here. In my case, my sketch is
very simple and it just shows that I want
this flower and the front with one
leaf behind it. So I don't even really need it. But this would be very important if I had a more
complex composition. Now I'm going to add my
reference photo here. So again, action,
Add, insert a photo I'll turn down the opacity
and start sketching. Now I can hide my
reference image, select both layers to group and move them together
to center my sketch. So like in my style exploration, I'm going to use
the colored pencil, waxy from the Max you
watercolor brush back, which add the link to
the class description. I'd like to look at my reference image when coloring it in. So I'm gonna go to
actions canvas, reference to open
this floating window. Then when I select
image down here, I can just drag it
straight from my layers. And now my reference image is in the sliding window
and I can move it around. One thing I like to keep in mind here is keeping the brush size consistent through the drawing so that it has a similar feel. Like if you were using
an actual pencil, the overall size would
stay pretty much the same, right? So thank you. And if you have to erase, hold the brush tool
so that erases with the same brush as the one
you're using to color. This way, the texture
will stay consistent. So I usually have 1
million layers going on, a different layer
for each color. But I really like how the colors blend with these pencils. So in this case, I'm keeping most of them
in the same layer. I am, however, separating
the flower from the leaf because this way I can move them freely and adjust the
composition if I want. Also, since I work a lot
with repeat patterns, if I want to be able to
repurpose this artwork later, I need to have the
elements separated. Now I feel like adding a
little bit of yellow here. So I'm going to take
it directly from my image by holding my finger down to enable the color picker
and add it to my palette. This way, if I need a similar
color for a different day, I can use the same and
keep it consistent. So remember, the pallets
are not set in stone. My idea here is to use most
of the colors throughout the entire challenge
and to make sure that all the colors go together well in the separate drawings. But there's no rule saying that I can't add new colors in. My flower is almost done. And as you can see here, sometimes the pencils can
get a little translucent. So one thing I can do here
is duplicate this layer. Activate Alpha Lock either by sliding your
fingers on top or by tapping the layer to get to the menu and fill it with white Now I drag this field
layer to the bottom of your color button and
it acts like a mask. I can do the same with the leaf. And now if I want
a dark background, it won't show through. If I didn't have this mask. This is what it would look like. Which I think it's
pretty cool too. But just if it's not the look, you're going for
this sort of fix it. I'm sticking with the white
ground, at least for now. I'm just going to add
some final touches with a darker color to
create more contrast. And for this, I'm going to use a separate layer on top
because if I don't like it, I can just delete the layer. I don't want the
full outline here, just to touch here and they're adding contrast is really important and this can really make your
work come to life. I also do the same with a lighter color to
add some highlights. So this is what I
have for Day one. And I'm going to group
my layers though. One for the flower and
one group for the leaf. You know what? I think I want another
leaf on the other side. So I'm going to duplicate
the sleeve. Flip it around. I like this better. She's got
to re-center and it's done. The last thing to do here
is high the Background, Copy Canvas and go back to
the workbook to paste it. Now let's analyze this. The brush was the max
few colored pencil waxy. And the style is
colored pencils. Sketchy. It's kind of realistic in a way as the shapes follow
the photo pretty close. So realistic because
it's not super stylized. But it also has a lighter
hand on the light and dark, which makes it kind of flat. It's also not very detailed. I'd say it's simple. And the colors are used. Well, almost all except
for the dark pink. So this is going to be the style guide for the next day's. With this list, I can double-check and make
sure it's consistent. So that's it for day one. And I'll see you tomorrow
for the next month.
5. DAY 2: Patterns: It's day two of
our treasure hunt slash drawing challenge. And today the prompt
is patterned. Step outside to
find inspiration. Remember to be mindful, curious, and to get close
enough to see the details. And I loved the pattern
on these leaves. So this is what I picked
for today's prompt. This is how my first day turned out and now it's time to work on day two that are
doing thumbnails today. I'm going to add four
different images here to pick which
one I want to use. One of the best parts of taking my own reference
photos is that I don't have to worry
about copyrights are finding public domain images. Because I own all
of these photos, I can trace them directly
without any worries. I really like how
the pattern appears here and the overall
composition. So this is the one I chose
for my illustration. Now here's a little shortcut. When I know I want the exactly the same settings as a canvas that I'm
already working on. Sometimes it just duplicated instead of creating a new one, then I have to do is delete
the existing layers inside. This saves me a few clicks, which doesn't seem like a lot. But at the end of the day, having some shortcuts
like this can really end up saving you a
lot more time than it seems. The only downside here
is that the time-lapse will record from the moment
you create a new document. So when you just duplicate
the canvas like this, the time-lapse still going to show all the way
from the beginning. So if you plan on using
the time lapse video, make sure to create
a new document. Tend to start sketching. I've already imported
my image here, and the reference window
is already opened because that's how it wasn't
a canvas that I duplicated. So now all I have to do is
drag the layer with the image that I'm going to
use on this new drawing into this window. I'll just move it
to the side since I don't really need
it for this part yet. Before I start sketching, I like to lock the
image that I'm tracing by sliding it to
the side and tapping lock. This prevents me from drawing
on this layer by accident, because there are
very few things more annoying when you're
working digitally. Then the moment you
realize you just created a whole drawing
in the wrong layer. And here's my sketch. I'm going to pull this
guy backup for reference. And let's take a look
back at my workbook to remember the
definitions for the style. So colored pencil, sketchy, not very detailed, simple. Okay. I'm gonna use
the same pencil again, create a new layer and
start coloring it in. I'm going to work on
one leaf from start to finish to figure out how
I want to picture it. And then after I have the
process all worked out, I'll do it for the other leaves. Now that I have the base
color for the leaf, I'm going to move it below my sketch layer so I can see
the pattern from the sketch. And I'll zoom in the reference image
to get a better look. By the way, I know
these colors don't match exactly the
ones from the fire, but I want to keep them
consistent through my series. I can pick an undertone
from the photo like this, darker yellow, because I do like to add some
color variation. And this actually goes
well with the palette. But having the main colors
repeated throughout, we'll give a sense of continuity and bring it all together
as a collection. I can see some pink inside
the arches of the pattern, but I'm not sure
if this will add too much detail to
this illustration. Since part of the guidelines
I decided to follow specifically mentioned
not a lot of detail. So I'll test it out
on a separate layer. And if I don't like it,
I can just delete it. Since the pencils were
a bit translucent, I'm going to add a dark
green undertone here. And I'm going to do that on a separate layer below my leaf. Now I'm going to
group these layers and start working on
the other leaves. I like how this turned out, but I still think it's light enough on details
to keep the pink. Remember I always say
to check your layers. This is why I was coloring
in the sketch layer. And I only noticed because
the green ended up being too late because of the opacity
on the sketch layer. Luckily, I caught it
before getting too far. Since I'm working with each
leaf on a separate layer, sometimes what I like to do here is draw the full
leave that behind. This way. If I want to move it around later and create a
new arrangement, I have a full leaf to work with. So I had to leave
that's in front and just make up what the whole
thing would look like. For the darker
leaf and the back, I've added pink
as the undertone, which I'm also going to
use on the top as well. Very likely. Same thing with
a yellow just to touch. The process for the other
leaves is the same. So I'm just going
to zoom through it to keep the lessons shorter. I was going to skip this
little leaf over here, but I decided to include it
because it's going to help the darker leaf tie
in with the rest of the group and not
stand out so much. I'm going to blend in
some colors here for the trunk and data
purple undertone. Now for the final touch, I'll add a little bit of
black here and there to make the leap spot and
create some contrast. Now that it's finished,
I'm going to copy the Canvas and paste
it in my workbook. This way, I can compare
it to the sketch from day one and see if I'm on
track with the style. And they should have
done this before, but better late than never. Let me save the brush
size have been using for the pencil by tapping the slider and hitting
the plus sign. Now I can change the
smaller size to write. And later I can go back to the same size I was
using and illustrations. I've already added my colors
here and now I'm going to write the description to
reinforce my guidelines. Also, if you've added
anything major to this tile, like a different brush
outline, for example. Make sure to highlight it here so you can carry it over
to the other days two. And let's compare this with
the drive from day one. So colored pencils
check, sketchy, check realistic. His check. That very detailed. While
this one is a little more, but it's still very simple. I think it still
hits the mark here. And this was my
illustration for day two. I'll see you tomorrow
for the next prompt. Symmetry
6. DAY 3: Symmetry: Hi everyone, welcome
to day three. And Today's prompt is symmetry. I had already walked by
these guys a bunch of times. And so I stopped
to look closely. And I realized that these
flowers grow mostly in pairs. And it would be a pretty good
option for today's prompt. I could even use
the symmetry tool in Procreate to draw them. But then a little further ahead, I came across this other
plants and I started obsessing a little bit with
a rotational symmetry. So this is the one I'm
gonna be working on today. In order to keep
the lesson short. Spare you from the repetition. From now on, I'm
gonna go directly into the illustration
and skip the thumbnails. Okay? So I have my Canvas and
my reference image here, and I'm ready to
start sketching. Now, I'm going to add a new layer here
and start coloring. Since this one is
completely green, I'm going to try adding
a little negative space, just like a thin white
line between the leaves. I'm done with my base
color and the end. I've decided to ignore some
of the leaves in the back because I think it's just going to look more
symmetrical this way. Now I'm going to turn
off my sketch layer and add some color variation
to the green leaves. Because if you look
closely at the image, there's a lot of
different tones in here. I'm gonna hold down the
eraser here to use it as the same brush just to clean
up my negative space is a little bit. It's done. Time to add it to the workbook. So again, actions, Copy Canvas, paste, and group into D3. The moment I flipped
through the illustrations, I noticed something was off. I knew that negative space
would make it a little different and that's
something that was already taking into
consideration. I'll work with that later. But can you tell
what's missing here? Even though it's just a
touch of black on day one and a little
more on day two. The fact that I completely
forgot to add the shadows on day three makes
it really stand out. So I'm gonna go
back and add that. It's pretty amazing how even a little touch of contrast
it goes such a long way. I used to be really scared of adding shadows to
my illustration. For some reason I thought it was going to ruin
the whole thing. But can you tell how big
a difference it makes? So let's base this in
the workbook again. Run to and yeah, it definitely looks a lot more like it's part
of the group now. So just to wrap things up, I'm going to add the colors
and the style guide. It's still sketchy
and everything else. But I'll add the negative
space here because since it's a style choice that
I decided a little later, I have to figure out how to work this into the rest
of the series. That's it for Day three.
See you tomorrow.
7. DAY 4: All Together Now: Hi everyone, welcome
today for over drawing challenge
slash treasure hunt. For today's prompt, I chose
these little red flowers, which I had originally
considered for the geometric problem because the bunches look like circles. But today I noticed how the
flowers grow altogether from pretty much the
same spot that it was very fitting for the
altogether now prompt. Also because I've
always been a bit obsessed with these flowers
since I was little kid. And this was the perfect
excuse for me to drive. Time, to start sketching. Just start coloring my drawing. I'm going to pull up the
floating reference image again. So action Canvass reference. Then I can drag my image
directly from the layers. Now I'm going to create
a new layer and start coloring. Leaves are done. New layer for this dense says the stems are
separate from the leaves. I can slide your fingers on its layer to
activate Alpha Lock. And this makes it pretty easy
to add the shadows here. I'm keeping the stems and the
petals in separate layers. So you're there now
for the petals. I'm keeping the
negative space between the petals to make it consistent with
yesterday's illustration. Now you can see that
these flowers have some lighter and darker areas. And I'm going to do
that directly on top of my petals to blend in
the colors better. I'll hide this layer for a moment so it
doesn't distract me. And I like to draw with a light touch and
build up the colors. So that means that I'll
go back-and-forth, withdrawing a few times, alternating the
colors to blend them. I think another leaf back
here would work well. So good thing that I have these on separate
layer from the rest, even though I wish I had given
each leave its own layer, this is an easy fix. So here I'm going to tap
on my selection tool, freehand and the bottom menu and carefully select a rounded. Then when I swipe
three fingers down, copy and paste menu appears
and I can select Duplicate. Now you can see the copy of the sleeve in a separate layer. And now I'm going to select it, rotate it, and place it
back here below the others. Time to add some black so that I don't forget
like I did yesterday. There's still a few transparent
spots on the petal. So I'm going to create
a new layer underneath it and fill it with
this lighter color. I'm not loving this area here with a leaf showing through
the negative space. So I'm going to try
adding some white here. And as usual, I'm going to draw it on a separate layer just
in case I don't like it. Still not doing it for me. Let me try this with red. I like this better. So I'm gonna just a light and darker tones to blend it in
with the new part. And some final touches with the black lines here and there. It's time to add it
to the workbook. I already have mine here. Everything's filled out. So I'll see you tomorrow
for the last day of the challenge. Day five
8. DAY 5: Hide & Seek: Congratulations on making
it to the last day. So today's day five
of our challenge, and the prompt is hide and seek. Today I'm actively searching. Let's just looking
around and I'm trying to find something in places that I wouldn't
normally look at. I walked by this plant
that I really like. And I always stopped
to look because I love these beautiful scallops leaves with the ridges and
how the colors blend. And I'm staring at this,
what I ended up finding this one little white flower. Then when I started
searching a little deeper, I realized that
they were actually everywhere and I
had never seen it. So I couldn't help, uh, use
this for today's prompt. I already have my picture
here and then you canvas. And I'm planning on just
doing this little part in the middle with the top and the bottom leaves
and the flower. So I'm going to scale the
photo to the size that I want my illustration to be
like I did before. I'll drag my layer to
the reference window. I don't know if you can
see it, but there's a very light X here. So I'm going to
close it for now. And when I need it later, I can just go to actions, canvas, reference,
and it's already set. So time to start sketching. Light colored flowers can be a little bit
tricky to sketch. So make sure you were
just the photos opacity and see what works best for you. Remember, you can
make any markings on your sketch regardless of what
style you're going for it. I like to outline the
ridges of the petals, for example, so I know which
direction they're going. But some people like to outline where the shadows
and highlights are. This way they know
exactly where to place it later on when coloring. Since there are only
three elements here, I decided it should all be complete and separate
from each other. This way, if I want to
play around with it later, I'll have more options
for my composition. I just realized
that I completely missed this part
under the flower. So I'm gonna go back
to the image and bump the opacity up
again so I can see what I'm drawing
and sketch it out. Now that the sketch is done, it's time to start coloring. I reopened my reference
image, the floating window. Then I hit my sketch
layer for the flowers, since I don't need it right now, created a new layer and move
it underneath my sketch. I turned down the opacity
for the sketch layer. I want to make
sure my edges look sharp and neat without
the sketch layer. So this allows me
to see it clearly. Since I'm slightly
obsessed with the leaves, That's where I'm going to start. And I'm making one
layer for each element. So there's one layer
for the top leaf, one layer for the bottom leaf, and one layer for the flower. I'm going to color here
one leaf at a time. This way I can make
sure it looks just like I wanted before
coloring in the next, I created a new layer
for the new leaf. And I'm just going to repeat the exact same steps
as I did before. So just like magic, it's done. So now it's time to start
drawing the flower, which is also going to
go on a different layer. This flower is
light and delicate. It's almost white. It has a bit of a
purple undertone. I'm going to start here with
my lightest color as a base, much like I did with the
green for the leaves. And I'm going to start building and blending colors
on top of that. And again, all the colors
are in the same layer. And I'll be going
back and forth, switching between
colors to blend at all. So I'm adding a few lines and purple to help
separate the petals. But it came out too strong. So I got the light pink base to go over again, then blended. Now I'm going to
add a bit of white to make these lighter spots, which will also help define the petals and give
it some volume. A few spots with black. Now that I have a
foundation for this flower, I'll hide the sketch layer so I can really see how
it's coming out. I can do some very
light lines and black to separate the
petals a little more. Even though this
isn't the color, I just want to add a
bit of the darker pink because I think it's
going to help tie in with the other
illustrations as well. So I'm going to use the side of my Apple Pencil very lightly, much like I would if I was
using a regular pencil. Some purple here for the ridges. But again, I think it
came out too strong, so I'll go back over
with the pale pink to soften everything out. I tried using white to
separate the petals. And I think the very light black lines work
better for that. So I went back with black
over the same spots. Also lightly mark these folds
on the two closest petals. And then smooth
everything out again with a light layer of pale pink. Almost done. But I want to add
a touch of purple. And one more time
blending with big. The last sets of wage, which I'll also add to this
part under the flower. Flower is done. So
just to wrap this up, I'm gonna do the
last touches and black to really make
the whole thing pop. Especially here
behind the flower and around the edges
of the leaves, shouldn't be done here, but I feel like
adding a tiny touch of dark pink to the lease. Okay. Now it's done, I swear, knowing when to
stop can be hard sometimes. And now it's time
to copy the artwork and paste it onto our workbook. Now that we have all of
our illustrations ready, it's time to see how they
work together to check if the style is consistent and make any adjustments if we need. So the next class is
all about tying up the loose ends and unifying
your style. See you soon
9. Consistency & Conclusion: Now let's take a
minute to assess. I can see how it looks with the other illustrations
by scrolling down here. But I just decided to
add an extra step here. I'm going to add them
all to the same page. So I'm going into each
group making a copy of the layer with the artwork and dragging it all
the way to the top. And I'll do this with
all five illustrations. By the way, it's
completely okay if each day has a little
different touch to it. Like some days I have a
lighter hand and other days a little
heavier, for example. Which is why this assessment
part is pretty important. So don't worry if your illustrations are
still looking a little bit different from each other
and not as consistent. This is what we're going
to work on right now. Was your altogether here. I'm going to select
them all by dragging them to the side and
tap it into a group. Now I'm going to resize them all together so that they
have the same proportions as the original and move them around so I
can take a better look. Now that I'm seeing
them all together. Even though I can see it's
the same process and color. And I really like each
illustration separate. I think there are some things
that could be improved to make it all look more
cohesive collection. I love how these
three look together, how they have a
similar contrast, the way the colors
blend, the overall look. To me, it seems consistent, so I won't do anything here. But these two are
a little bit off. I don't think they
really any big changes, but adding a little more
black details today one, and changing the negative space over here should do the trick. I'm back to day one to give these black lines a
little heavier hand. And whenever I change something in an
artwork that I like, I make a duplicate of the file so I can go
back to it if I need to. Now I have day one for
the original file. They want updated for the one
that I'm going to work on. Doing this gives me the confidence to go crazy
if I want to do when making the changes without having to worry about
ruining my work. It's such an easy and
quick step to reduce my anxiety that I think
it's definitely worth it. I think it's done now. I'm going to copy and paste
the back to see how it looks with the
other alliterations. Much better. The black shadows added some color variation and a
deeper tone to the lips, making it more consistent
with the other three. And the heavier lines really helped pull
everything together. Let's try the next one. So again, duplicate in the file. Day three updated. And I'm going to create a new layer underneath it
to fill in the spaces. Aside from covering
the negative space, I'm also adding an undertone to the leaves on the
same shade of green. This will give it
that deeper look. That helped tell you the
other illustrations. I'm going to add some black
on this layer as well to get that nice color variation
and add to the heavier fuel. Now just to wrap things up, I'm adding one more touch
of the lighter color. Just to add a little bit
more to the color variation. It's done. Let's go
see what the others. Here's the before and
after of the adjustments. The funny thing is
that I do like a three with a negative
space as its own thing. But I just love how cohesive it all seems
together without it. And this is exactly what
I was talking about in the beginning regarding
style choices. Does this mean that I can't draw things with negative
spaces anymore? Absolutely not. I just chose not to do it
in this specific project. Now let's say that you have two completely different styles. Try to think of ways you
can tie them together. For example, could
you come up with a limited color palette
to use throughout? Color can really help
unify your work. And that's a great way to
make things look consistent. Don't forget to
save your photos in a separate folder for
future reference. It's much easier than having to look through
your camera roll. I like to keep mine
and folders by type. So I have one
folder for flowers, one folder for textures, one folder for objects, animals. You name it. By the way, if you'd like to access my inspiration folders, head onto my website
where you can sign up and access my
library for free. Use them on your own
projects as well. No copyrights to worry about. Thank you so much for
joining me in this class. I hope you are able to
slow down a little bit and continue to find beauty and inspiration everywhere you go. I would love to
hear your thoughts. So please don't forget to leave a review as it's the best way to help other people
find this class and keep it relevant
here on Skillshare. It also really helped me
know what you liked the most when I come up with the next classes
for this series, also, don't forget to post your projects in
the class gallery. I'd love to see
what inspired you. So once again, thank you so much and I'll see you next time.
 Thais Queiroz, Designer/ Artist/ Curious Creative