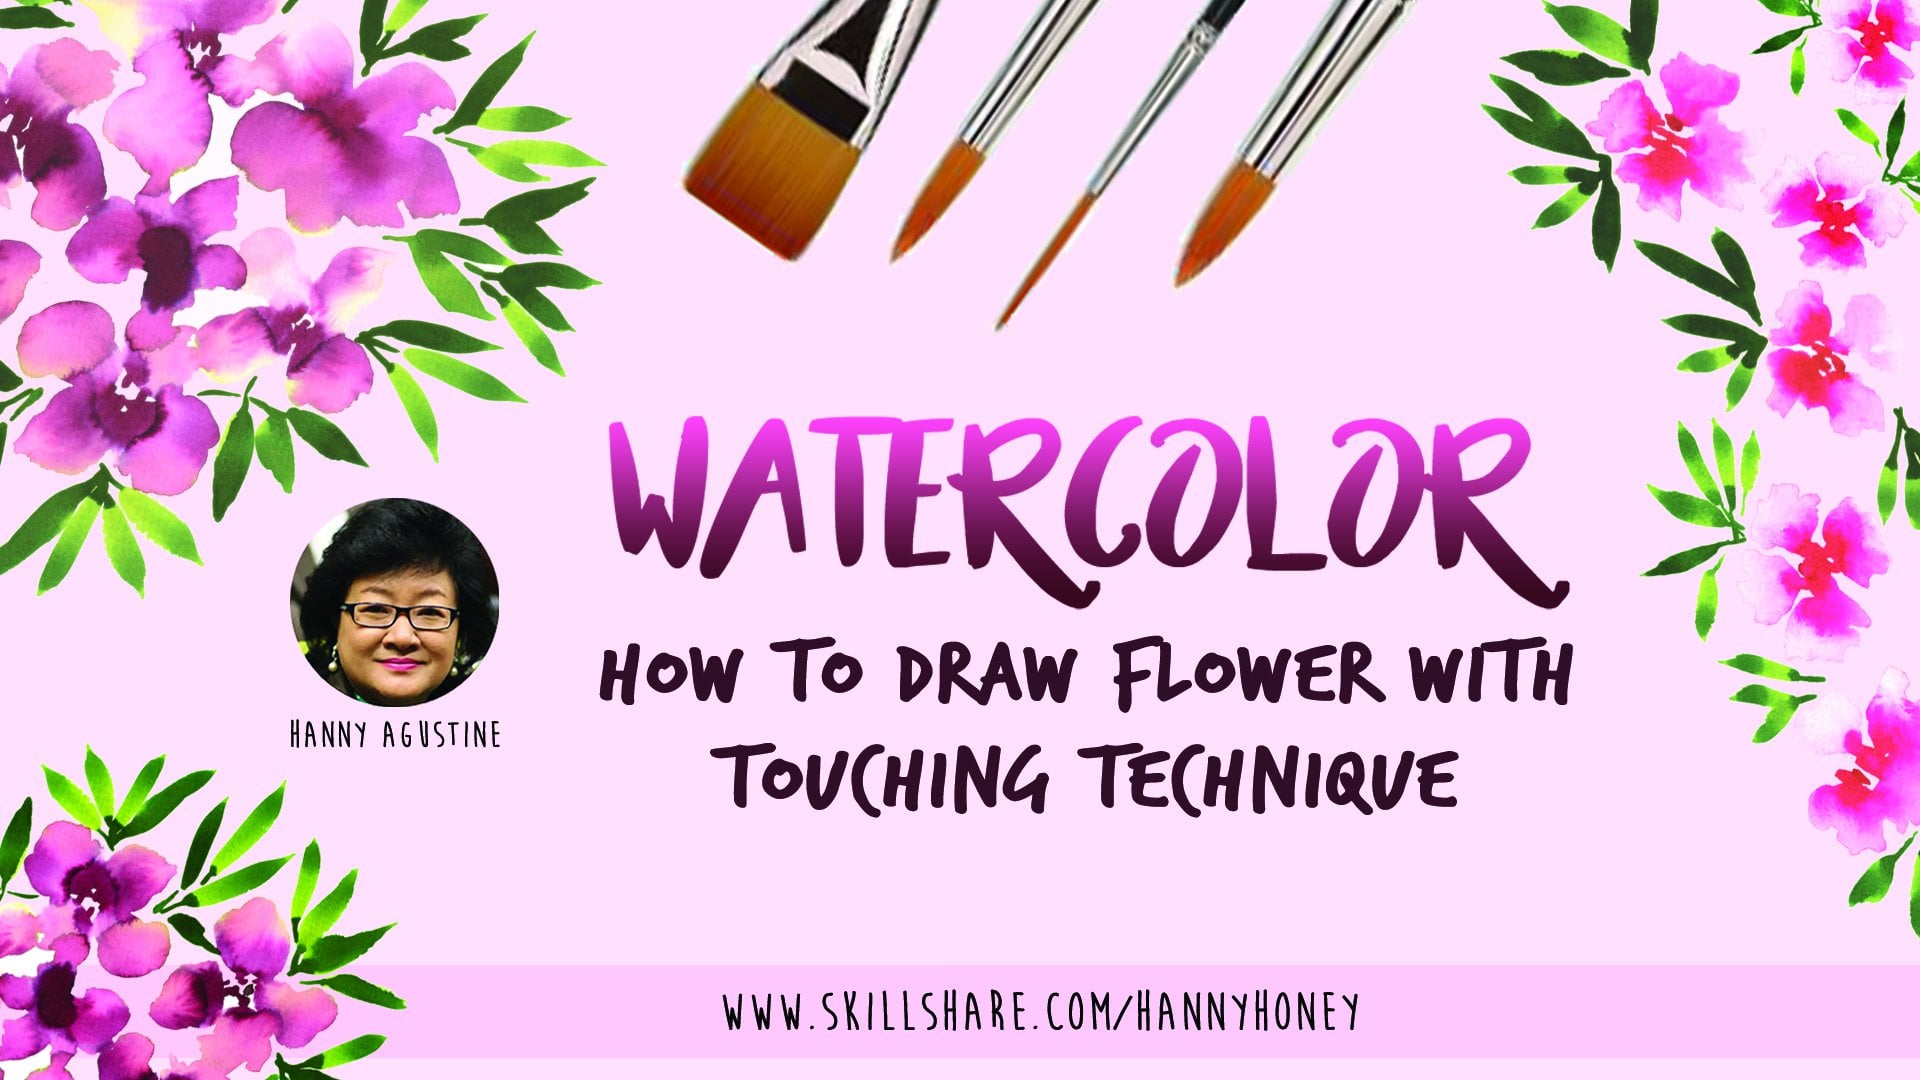
Transcripts
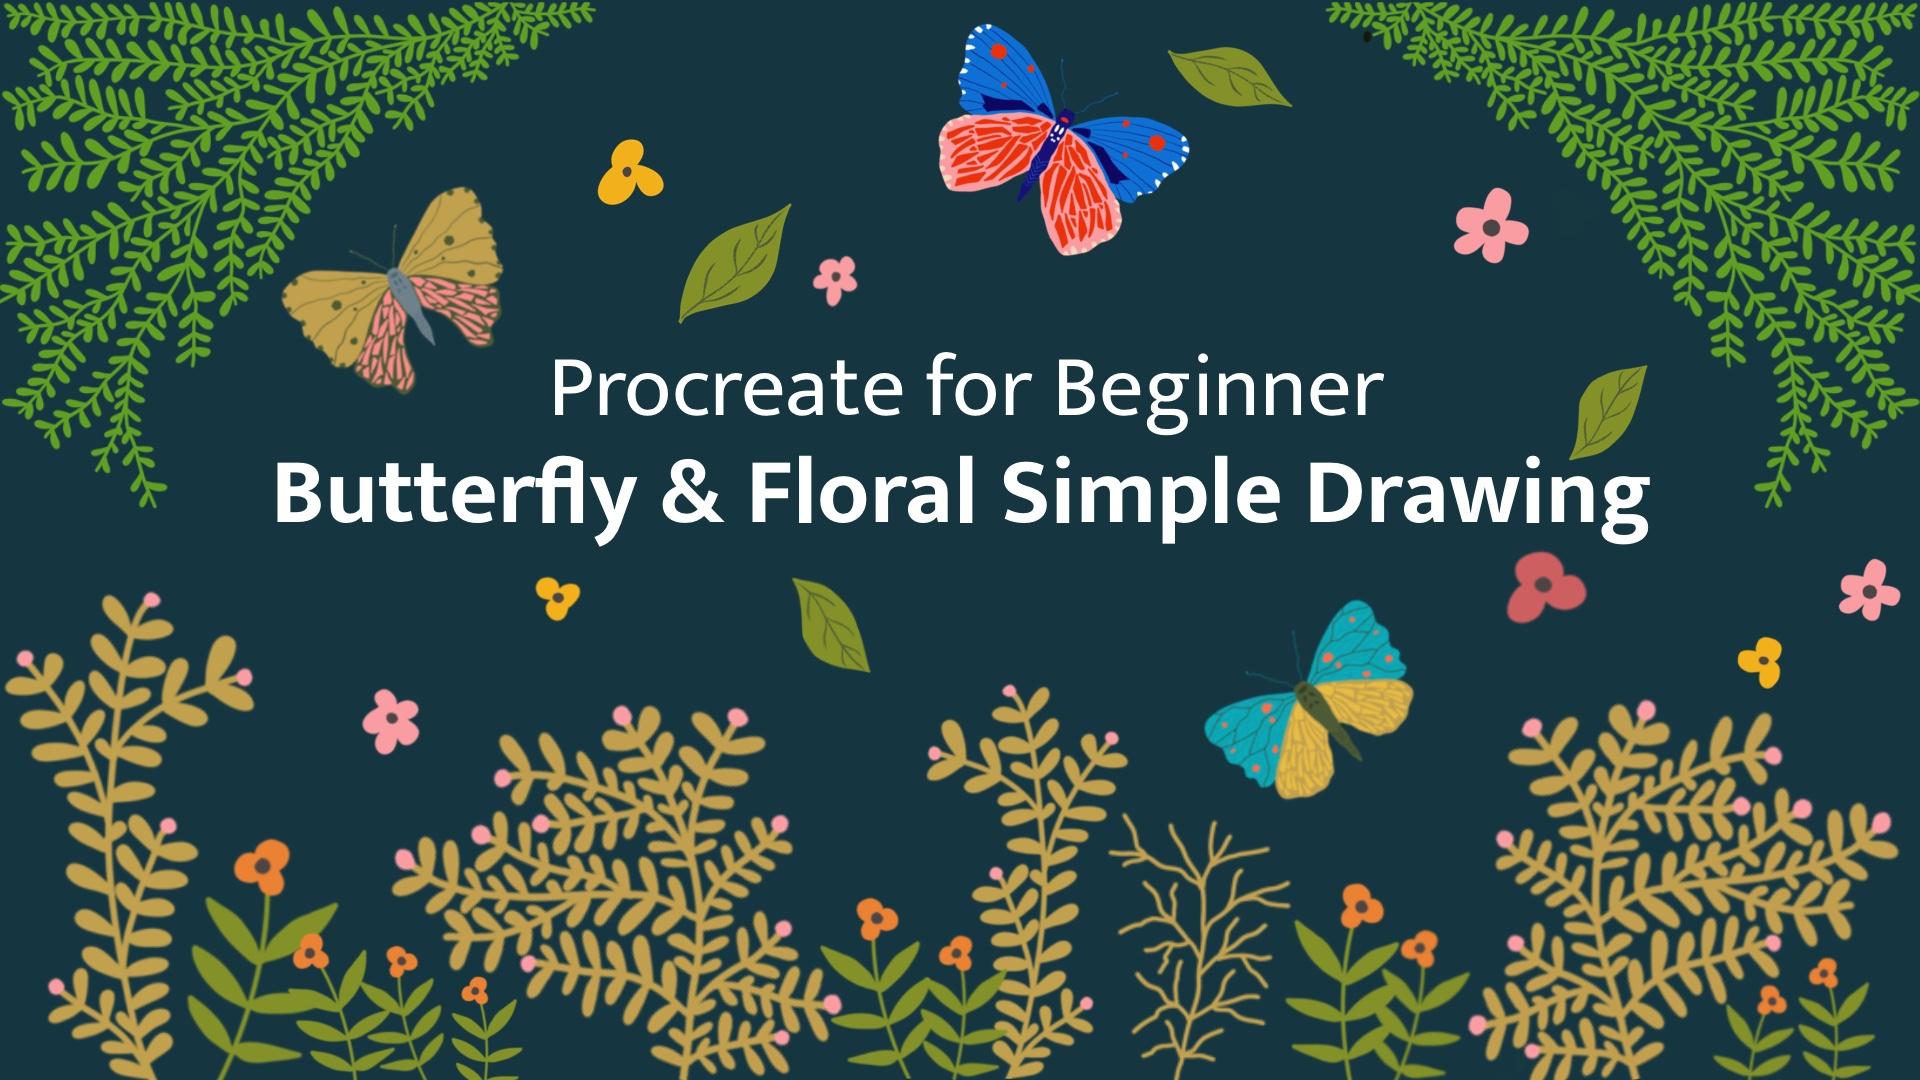
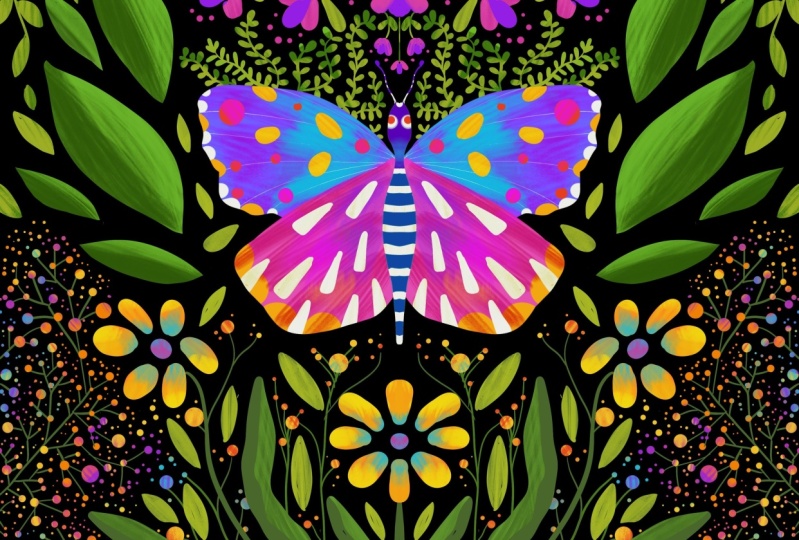
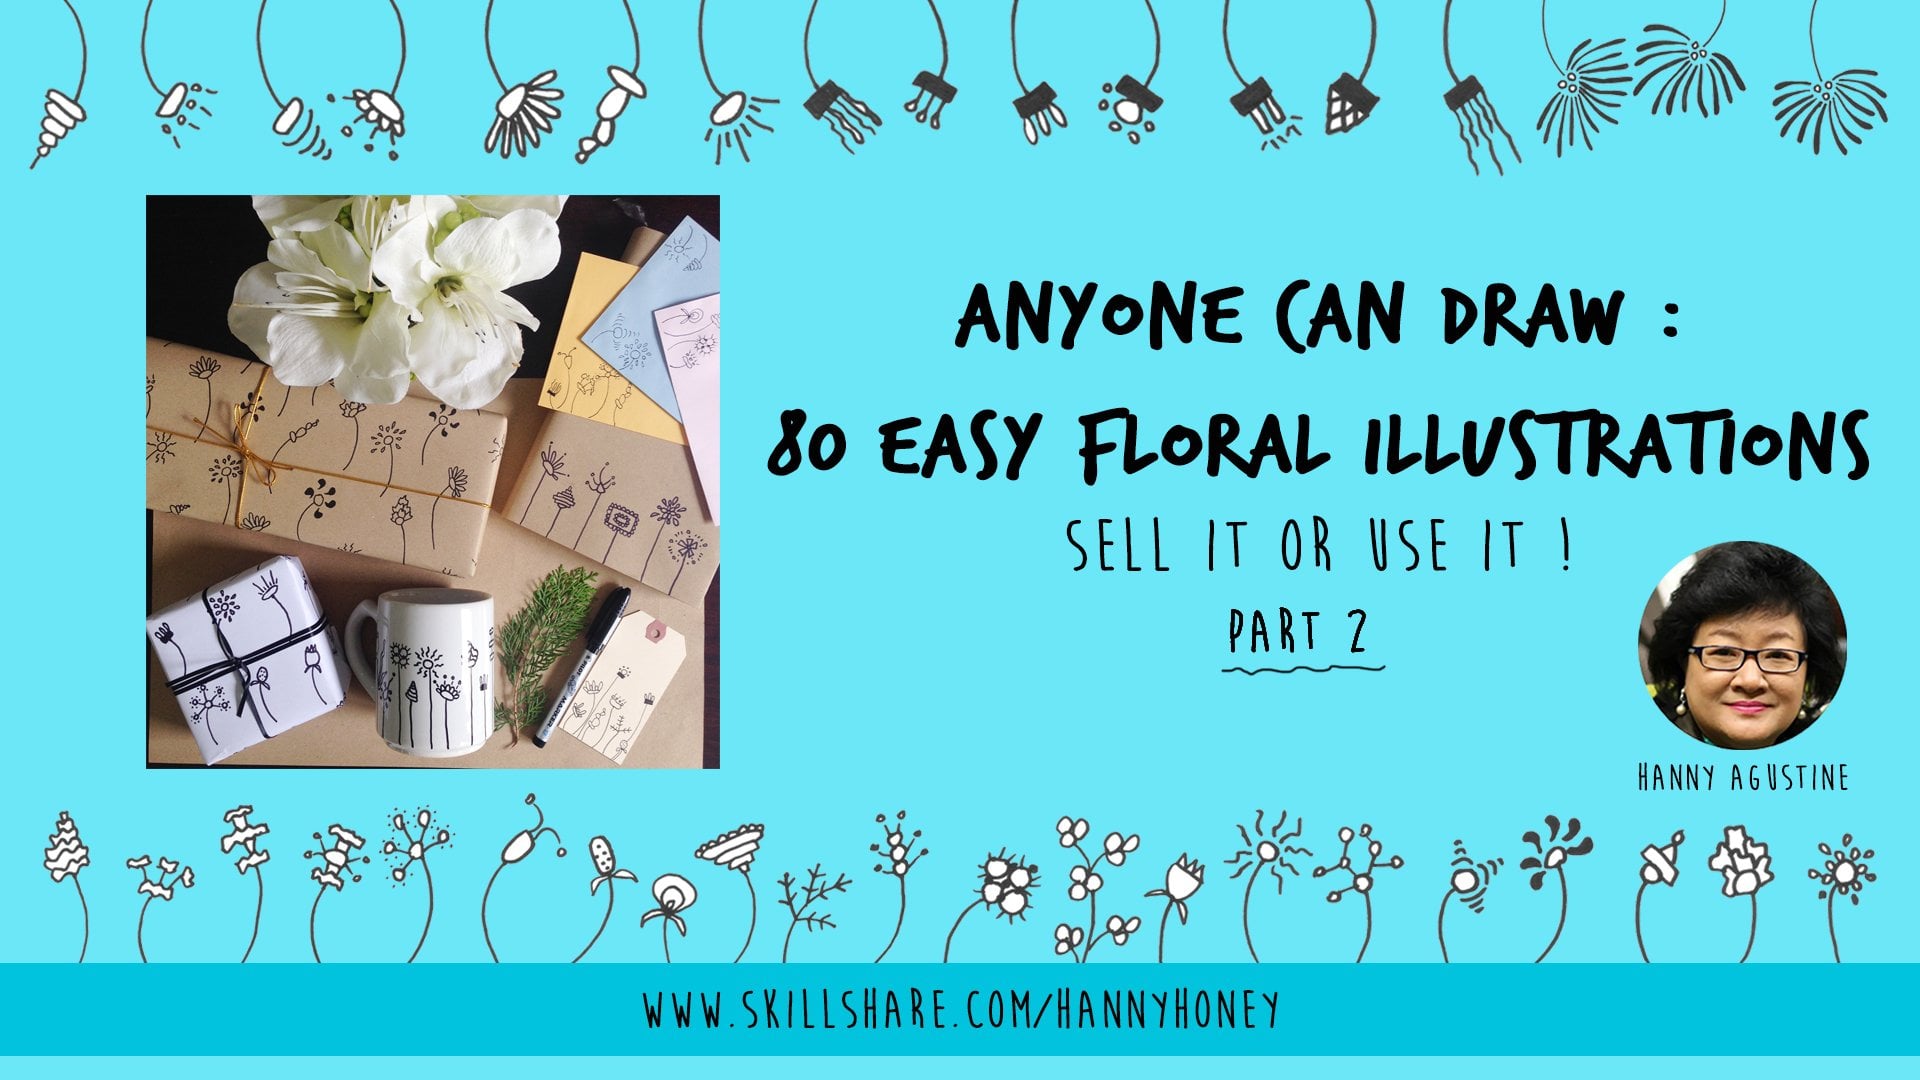
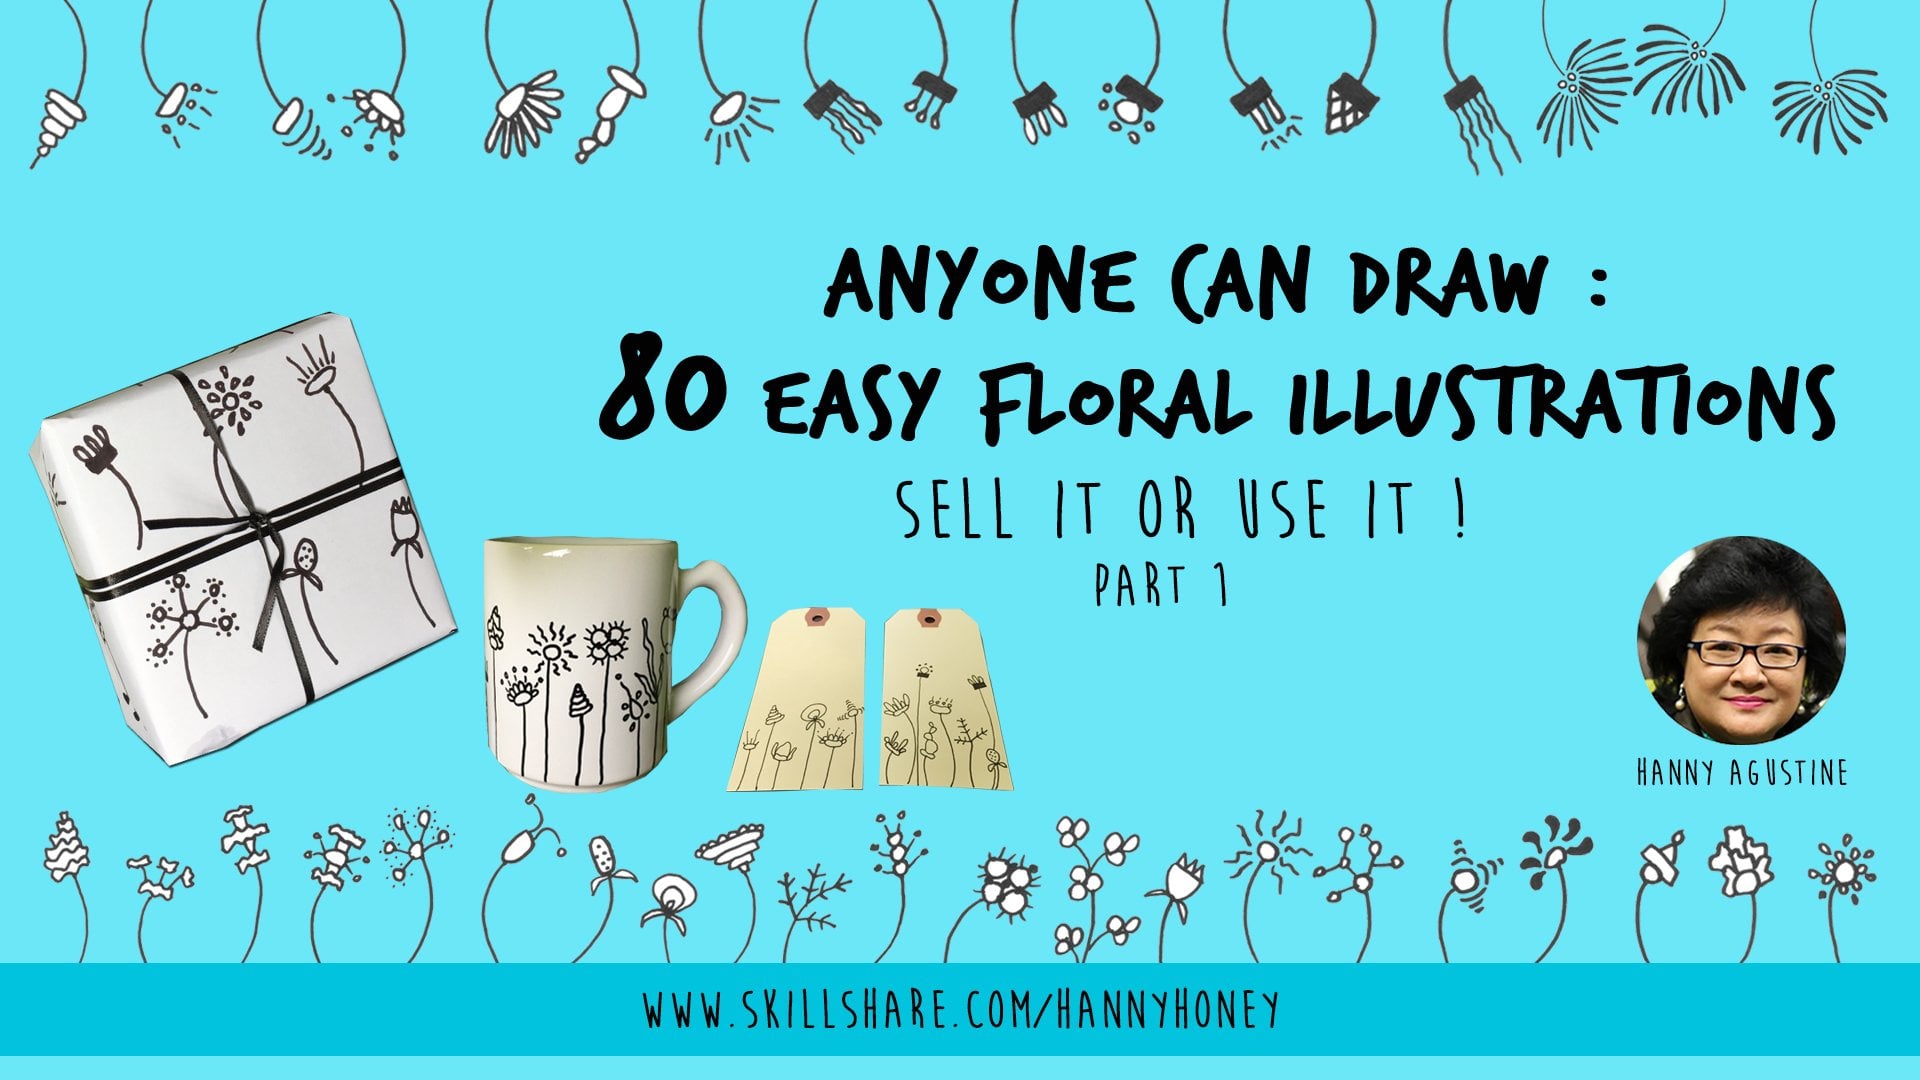
1. Butterfly and Floral Simple Drawing: Thank you for joining my class, butterfly and floral simple drawing using Procreate. But if after joining this class, you can have a beautiful butterfly in the garden emits like this, and then you can transform it into a gambler. Create the packaging was also with your drawing and you can Sally, completely beautiful UI with the packaging like this. And do you want your drawing later on you can transform it as a water butter of mass or a beautiful art print on your tests. How about if I give you for work seeds like this? I accompany you, do draw this one by one. And at the end, you will learn to draw not only one, but five beautiful butterfly in the garden, exactly as you've seen here. First, I will teach you how to draw this butterfly. I will teach you in our very easy and fun way. The drawing is very simple, and at the end you can draw the body, the wings, and the details of your but the fly. There are four worksheets that you can draw many kinds of leaves and flower. I teach you one by one. Plus I will teach you how to create this kind of text, your own style tags, and then you combine your skill from those worksheets and you can create the butterfly in the garden that you are proud of. So what are you waiting for? Let's start the class.
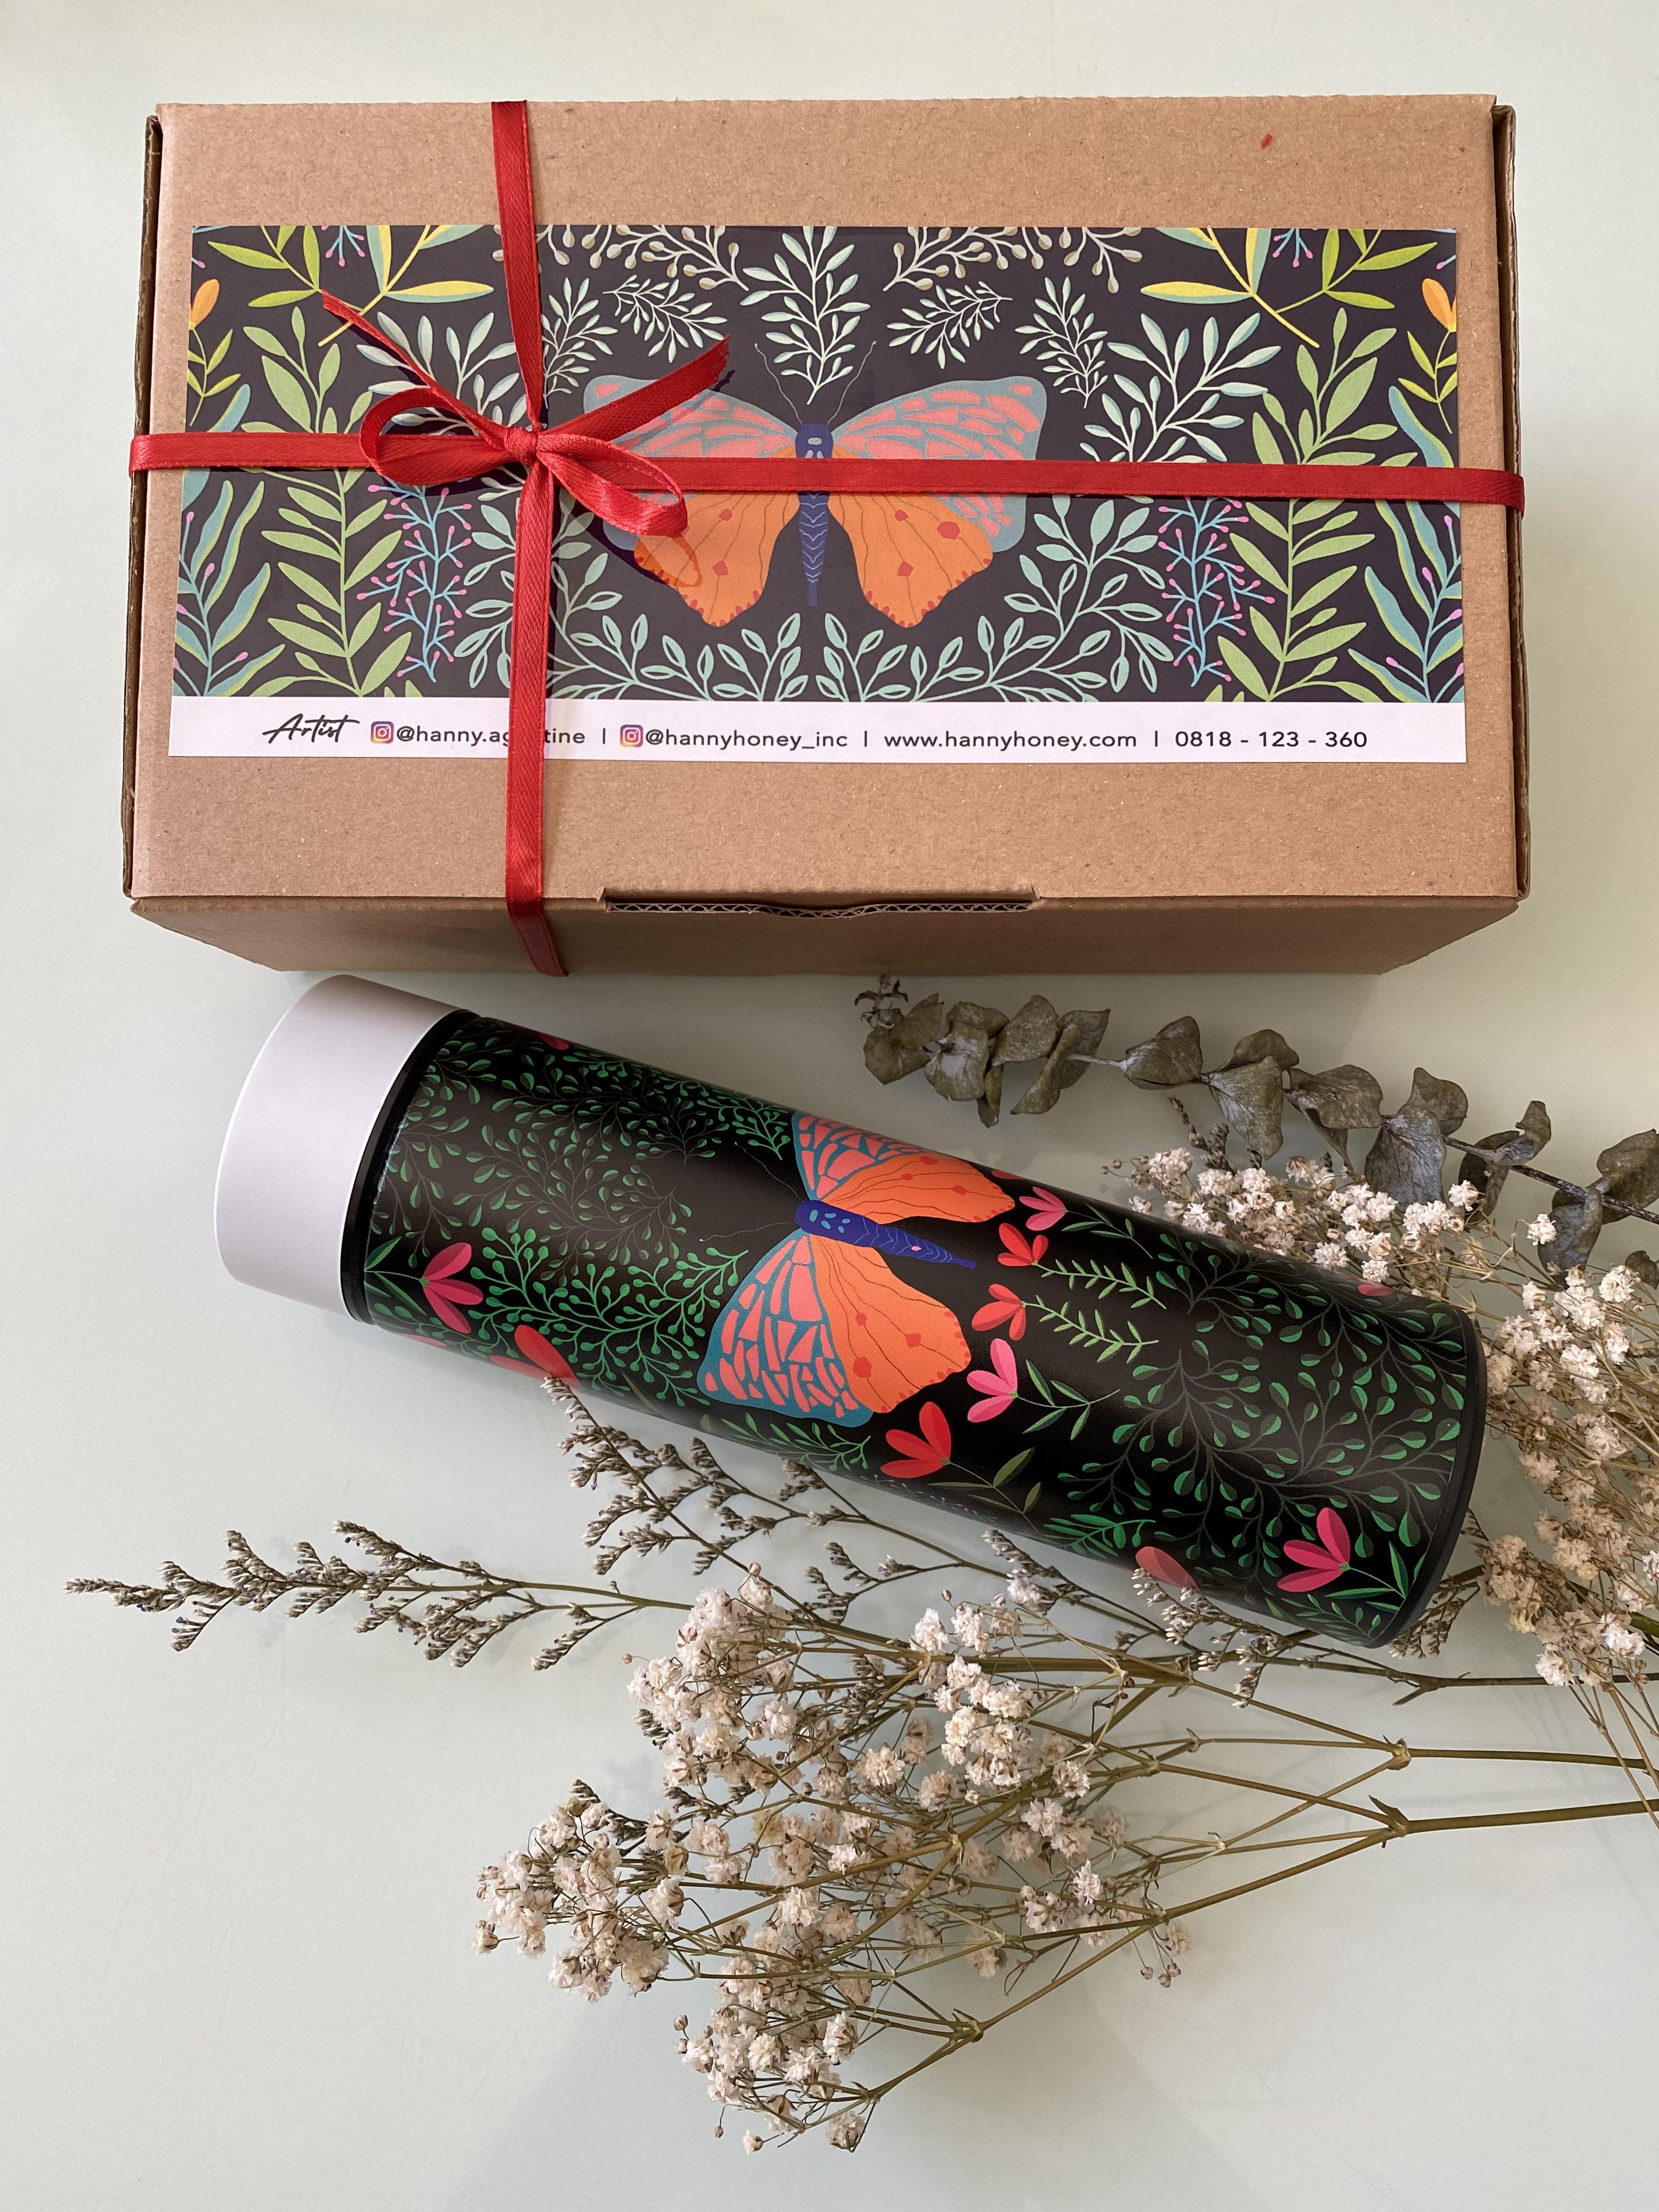
2. My Art Journey: Hi, I'm any acoustic actually am an engineer, but I love art so much. I bowed my drawing tools in 2014, but only in 2016, I start to draw every day, everywhere I can, mostly of my drawing our flower. Because when you draw colorful Florida like this, you can feel happy. You can release your stress and you can show thing your mind and meditate like me. So I draw on their births, but also fun my iPad. This is another freedom for me because no water, no messy, terrible, and I love it so much. And then finally I realized that I have so many drawing on my table. One day I can't did about 800, but another day I found more than 100. And because each of my drawing has a story, then I start to create the starting card of each of my drawing so I can remember what is my feeling, what is in my mind when I draw each of it. Then I digitalize it and I transform it into fabrics and papers and lead them to be what we call it a wearable art is like scar. To elif or your effect. Also not true about wrapping paper and also tea towel. And of course, the packaging box that also originally is my watercolor hand throwing.
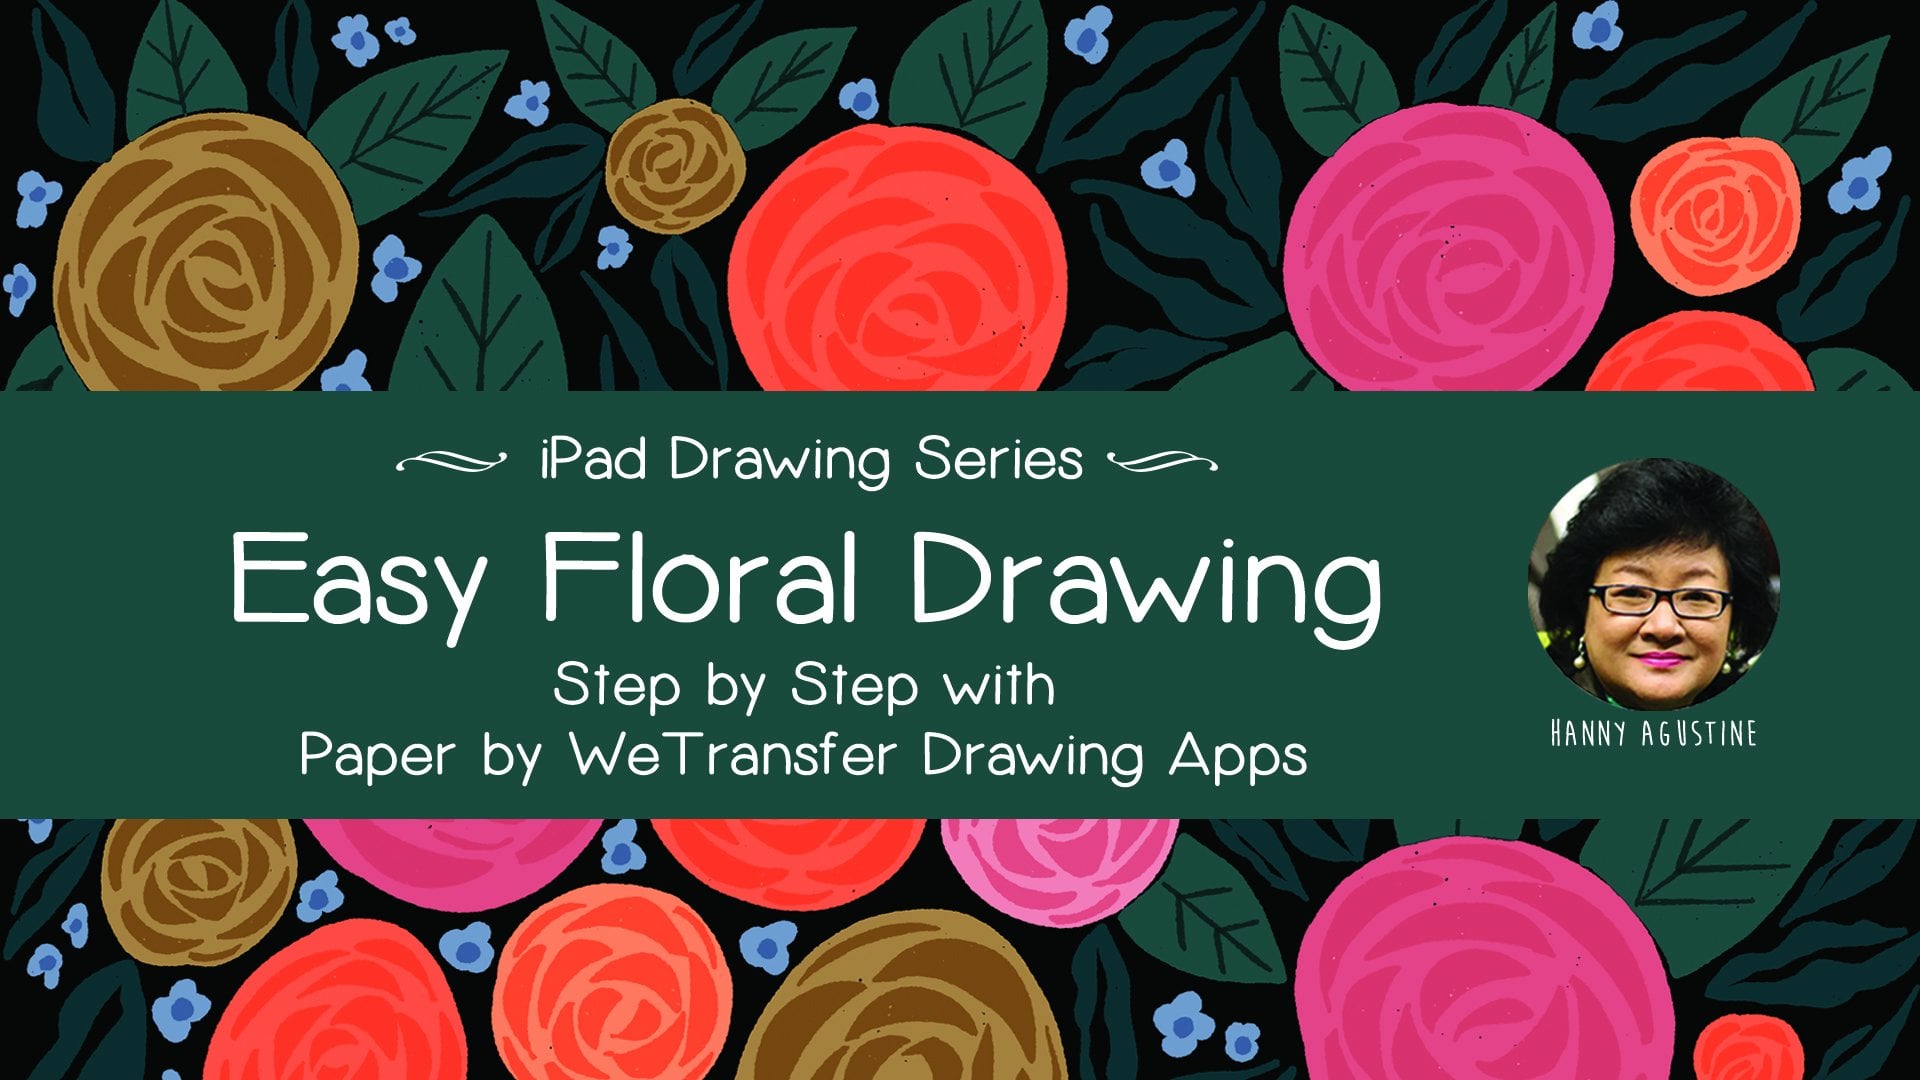
3. Introduction to Procreate: Before we start to draw, let's we understand how Procreate works. It's very simple. It's very amazing apps that you will be surprised like me, before I know Brooklyn, I use to draw with paper by WeTransfer and you can see it from my other class in this skills here. I love to draw with this apps. I call this Weber by WeTransfer is a very magical throwing eggs because it's very easy. Everybody can draw if your kids, but this is only one layer drawing x. So when I installed my Brooklyn about doing years ago, lazy to move on with Procreate because I think it'll be very difficult with via WeTransfer. We only draw a flower like this. See, you only use a 12 and the round circles throughout the lives. And that's, that's very easy. But I'm wrong because after I know procreate, this is the perfect drawing apps ever, I ever see. Procreate Mill looks like this, and this is one example of my butterfly in the garden drawing. So now we will go through procreate one-by-one. And I will tell you how ISI to draw with this drawing app. And this is the icon for Procreate if you clean, and this is the first base in Procreate. So for example, if I click this, you can make it smaller or bigger. And then here you can see all the layers to create this butterfly. And then this is the color palette that you create by your own palette, or you just follow whatever you have. And this is to erase. This is too smart and this is your breath. In this class for brass, you only go to calligraphy and then you two smaller line. And the other thing is going to sketching. And usually I use six BBN. So our technical pencil, HB pencil, so whatever we need, It's already in your procreate. You can go back to gallery to create a new class. You just click plus sign here and then you'll be asked for the screen size. If you already have 3000 times d, The awesome pixel is okay. But if you don't have it, you'll see here there is an alternate plus sign and then procreate will ask you for the size, width, and height. You can feel with three dots. And then this is May 3 thousand share your DPI is 300. So you have maximum layers 55. If I feel we, for example, 7 thousand, so I make it larger at 7,700 big cell. Here, the maximum layer is only six, so only six layers that you can work with. So that's why I make it as three thousand and three thousand. And we see here a 55 layers are enough to create our butterfly in this class. So this is your new canvas. If you click the layers you only have taken on color. And layer 1 is 3 D. And then if you click back ground, then you can change the color of this background with color palette here. So it's very easy to genes and vague ground. And if you antic, it will be no big round later on you can see with ASP.NET that to choose this light color as the background. Okay, Now we are ready to draw our butterfly. Click the plus sign and then juice 3000, 3000 big cell. And you can zoom in, zoom out, you can draw date. This is the best thing in Gropius because in other drawing apps you cannot do this. And then I will show you how to use bras. I'd use red here, and then I use calligraphy, monoline. And then on the left side we have a plus size and the opacity, you can do the biggest one. And if I drive, it looked like this. And if I make it smaller grass, smaller one again, it's You'd be like that. Now we try a different brush. We just sketching and you'd use a 6 B pencil. And then I choose to gather with green. Now I dry the event, so this is a six events. So, and then if I change the gain with Adrian's and then forget what the band for example. And then you can see this is water bent grass and I can make it thicker. And then quanta opacity. This is very small capacity. This is maximum opacity. So you can draw with your yes. You can zoom in, zoom out, and then you can rotate it. And then you can turn around the drawing with your best angle. So you do need to turn around your body, but you turn around the drawing.
4. Practise Worksheet 1: Let's start now, practice with both CVE number one. This is a symbol oxygen. You can practice to draw three kinds of leaves and flowers. Just a little bit. Flowers actually, one by one. I will show you the way to draw this. And next, you can draw it for your butterfly in the garden. Going to practice to draw leaves. You click this plus sign and then I will choose my first year. And 3000, 3000 pixel is enough. You have to click action here and then you see the blue with app. And then you just insert a photo and we'll close to your library. And then I will choose the most. You, you can download it from my gas and then you can save it to your library. And you can use it as a guidance to draw and to practice how to draw leaves like that. In the layer, it will be your layer 1. So make sure if you want to practice, then you add with new layer and you can rename it here for assemble with leave number one. So you can practice it now and you can make it bigger like this. You first draw big breaths and then small Prentice and then you add flowers. The good thing with procreate, you can just copy the color here just by use your head and then you wait until the colors come up here. Then for this one, of course, I use my calligraphy monoline brass. And then you can try here how big you want to try, for example, like this. And this is a redo and undo. And then here you can also have color picker. If you don't want to use your fingers on your iPad, then you can use this color picker. You can turn around and then find, for example, this pay and your color will be paying. And again, if I try to find this yellowish brown, then your color will be yellow. So this is the good thing in Procreate. Again, we now throughout this first leaves and flower like this. So make sure you are already in your live one. And then you draw the big brands. The first time I have Dr. Rocchio, I also like you. My handshake gain and not straight. So you just can undo or use your two fingers, step two fingers anytime with your own speed. So for example, like this. And then just undo wherever you want. I want to make it closer to me so I can make sure my fingers and my Apple Pencil going to the right place on each stem like this. And then I can add something here. This is very easy, very fun. And you can add your small brands as far as you wish. Okay, We see again, so this is a big brands and then this is a small brand. I'm using here. Sometimes I didn't make, it shows streets, but a guy like this, it's up to you. You can try whatever you like for your brands. And then you get added here again and so on. And therefore the small flower like this, I still keep doing it on my leaf one layer, so I don't need to add a new layer, but I need the pink color, so I, Darcy, and then my color will be bin. And now I can start doing my flower here. Because this is more, you can just fill in the color with your Apple pencil, with your fingers. But diffused unit, something big like this. Of course you take a long time to fill in. So you can drag this color. Do here I need only a small. Then I do it with my Apple pencil. If you don't like, then you can undo. By looking at how I draw this. You can feel that when you do a day's with your own music at home, you can feel so calm and relief. So this four is like a meditation. I like drawing because drawing helps me to soothe my mind. I always have a crowded mind. But when I draw like this one by one and then enjoy the process of each of these. And then you can feel so calm and peaceful. Okay, this is a part of your leaf and flowers has been done here. You can continue by adding more branches here like this and you can finish it. So this is your bars. Live with your guidance from my glass. You get high or assume that guidance by you. Click this layer one like this. And then if you still need it for the second lives and for the third leaf, then put it on again.
5. Practise Worksheet 1 (continued): And then now we continue with our second live Zoom. We draw the big brands and small brands and then the leaves and the pink flower. So again, I use color picker to get this yellow. And now at new layer, rename it here live number two. First, I dropped a big brands and then some small branches. And now I draw small leaves with the same color as the brands. And when Locks Oregon next, and it really looks more natural. And then now we add the pink flower on each brand. So again, I use the ping one and then now, okay, so the second live and flowers Venus per leaf number three, this is very easy. We draw the big brands. We draw the small brands and the lips and also add to win in each of our lives. And again, add new layer for the third layer. And I'll rename it with live number three. And then now I need the scholar. You can use your color picker here, and then it will be the dark green here. And then like this, I need a smaller one for the brand, so I make it smaller. And then now start to draw a leaf one by one. We'll just drag this into your lives. Again, track to your lips and tried to your lives. And so you can draw small and big leaves so it will look natural. And then formed a friend I need lighter green. I feel this is too big and then I may get the smaller size and you can add on each. Oftenly. This is a protocol to fill in you feel first and then you get the new green and finesse it gave. So so again, it does the job green and then I move the light green and John fitness. So this is our practice for leaf number one, number two and number three. And next, I'm sure you can draw the garden like this with your practice from this lesson.
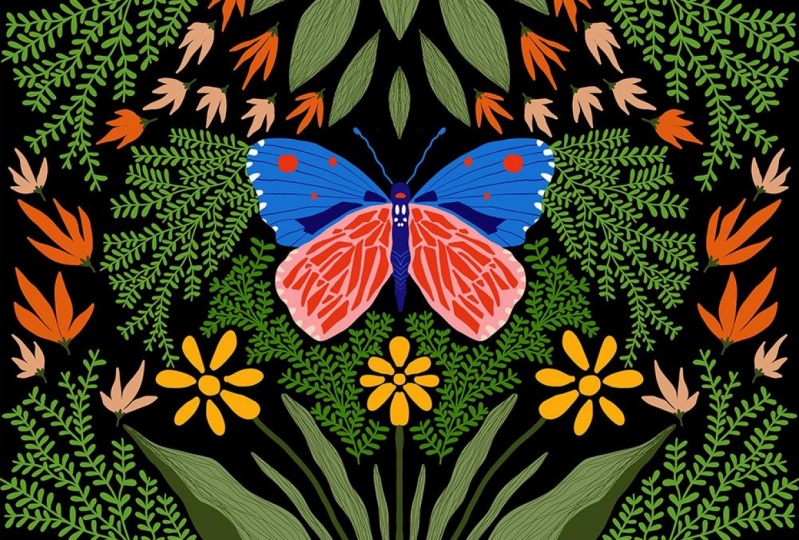
6. Draw A Butterfly Like a Pro: And now flowers, Let's draw by the fly like a probe. This is my collection of butterflies. I like to draw butterfly everyday because I can adjust the color, the details, or the form of each butterfly. You can also see my other class, that is how to draw a little fly with Procreate, is all about drawing birds fly. In that class, I teach you how to give details on each way and also how to kick textures on East detail. If you want to see that Glasgow do this claspers and then you can continue with this class because I combine the butterfly and the garden. But now I will ask you to draw this butterfly. I live the white details here because white cube sparks to this butterfly with blue and light being weeks and have a dark blue and red details. So of course, I give you the color palettes that you can download it from this glass and then you can use it as your guidance. If you are ready, now, create a new class I just 3000 by 3000 pixels is enough. And then you insert four door, the guidance of the color violet into your confess. Use Transform to locate and resize. And now you have layer 1 and background layer. Let's draw the butterfly are using this color palette, add a new layer for the wings and for the guidance plane layer one, if you want to use opacity, threat of density. So it will be on New York I dense and it will not disturb your drawing. Layer two for the weights, make sure you go to action, can fast and then turn on the Drawing Guide, USE symmetry and then choose vertical and turn on the assisted drawing. So you will see this vertical lines and you can choose the color by sliding this line and then click Done. We will use this column vendor to draw this butterfly. So first I will create by d, and this one is that dark blue. So I can pick up the color with hold my fingers, the dark blue comes up and then now we are ready to draw, buddy, I use calligraphy mono line, and now I start to draw the butterflies that D derivative color in Dubai D and you can feel this color. And now I will add a new layer for upper wings. And I pick up the color from this color pellet, the blue one. And then don't forget to turn on your Drawing Assist. And then you draw the upper wins with closed line. I mean, if you draw with close line, you can feel the gallery by dragging this though the shape. But if you're not close it, then you cannot do it. So I closed again this being at drag it and it fill the ship. Sometimes I've genes the forearm of the wings and you can undo or tap your two fingers. And now we can see here we will add the red and dark green details. I pick up the color of the red and then I have read here, still on the upper wave, the blue one. And then I draw the details. Oops, I'm bigger. Dots. You just that your two fingers or undo. I like to zoom in or zoom out so I can see that the details is good, are still need some revision. I continue to add some more details. This is only the guidance, but you can draw whatever you like. If you want to draw only inside the upper wing, make sure you turn on our file locks. So your drawing will not come out of the upper ruling. Now, I continue with the job. You details. I hold to pick up the color. And then now I'm moved to give more details. I'm still in layer 34, the upper MRI, and then I fill in by drawing this year because I add some more until I'm happy with it. Afford the lines, I will choose inking technique of pan and sail with dark blue. Now I adjust the size of the brass and then make sure you do outfile log. And you can draw the line now on this upward way. Up by logs will not allow your drawings go outside the wings and just draw it and the lines still give inside the upper wings because we already done on the alfalfa. Let's continue with being wings. This is a very nice details and I need to pick up bread color, so I hold it and then I move the layer 4, which is 4 being wings. But I create another layer, layer five. And I made sure I had done on the Drawing Assist.
7. Draw A Butterfly Like a Pro (continued): And then now I draw the details with calligraphy, monoline plus 1 by 1. Enjoyed it. Now we want to give details do budding. So I go to layer two and then make sure that drawing assist is on. And I add the eye. And then I've drawn the untenable. Now we add some white spots on the weeks. I choose y. And then I go to blue or upper wings lying or three, make sure the Alpha locks on, drawing, assist on. And now I can give the details of why Spock here, adjust the brush size and drought kind of triangle. And you will see with the Alpha I love kids will not disturb your drawing because it stops inside the blue links. Good, We finished now and you can change the background for assemble to be black. And you can see the difference when you change it to light protocol like this. And it's up to you. But I like this light purple. And I will go to the antenna. I want to change it to be white. So I erased the antenna first. I resize the size of the brush. To erase. I need a very small So it will not dance abandoned by. And then later on, I will draw the undead now with y one, the drug in the white and they're not here. So if you give the job back ground, and then now we'll comes out beautifully. Same with y. Now we add some details on buddy. Still turn on your Drawing, Assist and give lines and dots on the body. Really don't like it just undo. Yes, I made sure the layer is Alpha lock with chalkboard layer and I continue to create lines. Wow, this is so beautiful. I like it. You can hide the guidance. Just click and you now have only your butterfly. If you want to use only your butterfly, you can turn off the background color and then you can save it as P and T two. This is an example of drawing a butterfly. Later on you can practice for more but the flies with different colors, different forms and different details. And then later on we will practice to draw the garden like this. And you can use this to create your tote bag like this one. This is so beautiful. I like it so much.
8. Draw Butterfly in The Garden 1: Now we draw butterfly in the Golden Number one. I like this very much because I can draw a very bright girl who got the fly. You can see the details of the dark blue and the red squarely, right? And then one by one, we can draw the leaves and the flower as we practice from the seed in the previous lesson. Here is the width to serve your butterfly. The ancient Greeks here, and then you can save it as the bag or even BSD. Now, I click Save emits and is already in your photo library. Now, this is the way to copy and paste your parental fly in to Dan friend kind of fast. First, you have 1, 2, 3, four layers into one layer. Now you have a single layer of your butterfly and then use your three fingers and then it will come up with God copy, Copy All and so on. You can copy. And then you go out click Gallery, and then you choose your new confess and then live action, and then add and base. And then your butterfly needle is in your new canvas. And the background color, by blurring the background and the new Jews, the color from the color wheel, whatever you like. And now your canvas is ready to draw the garden with the leaves and flowers. In this glass, I give you the color palette or butterfly in the garden number one, you can download it from the glass. And then you go to axion and insert photo. You just the color balance from the photo library. And then it will be your guidance to draw the leaves and the flowers. In this drawing. Again, transform your butterfly with the arrow. And then make sure magnetics and uniform so you can resize your butterfly without Indians the original form. And then how good your butterfly in the manner of your canvas. In this lesson, I will teach you a little bit of drawing this kind of lives, but later on, I will speed up my video so you can see how I draw one by one, the leaves and the flower and it will becomes butterfly in the garden number one. Now, I change the background color to be black first and then add new layer and then rename this layer as Lives number 1. And then in the actions come fast, turn on drawing guide and click Edit Drawing Guide. And then you will see symmetry option, and then you select Practical Guide Options. Drag this line so you can choose the color of the vertical lines and click Done. I'm drying the brush. And then the color is green and now we are ready to draw the leaves. I use calligraphy mono line here. So this is only an example. There on you can see how I create butterfly and the garden number one. For example, here, after you create the leaf, you drag the color into the shape and it will prevail the golfer. I adjust the background to light bulb ball so I can see the layer sped them now. Drag again and it fill the color. Okay, Let's start to draw the first leaf at the bottom I use to color the darker green and lighter green. And then I use technical pen to draw the 66 lines on the leaf. Next we draw a little yellow flowers, just make the shape of its petals and you fill in with the color printers with the first bar. Now, I create stamps for the second lives. I draw a big stems and then many small branches and lead their odd. We give each leaves on its stamp drawing this GYN of little lives. I make sure that you will create so many lives, sometimes hundreds of lives like this. But this is very therapeutic drawing because it helps you to calm your mind. Just drawing one by one foot your favorite musics. And later on you will see how beautiful this little leaves created on each stems. And at the end. If you see it, you will be surprised with yourself. After you draw this lives in one layer and then you can duplicate this layer and you flip it vertically. And you can position made at the top of your drawing. Then now it's time to draw the big leaves. At the top of the butterfly. You draw forces shaped, fill in with the color and men use technical pen, draw a 6 second lines on, it's off the leaves. Don't forget, you still can use the color palette that I provided to you. And then some banks, you need to duplicate this layer and you bought it behind the butterfly. And you need to erase some of the bar that you don't need, for example, above the butterfly's wings. And then you can continue again with fill in the blank space with another leaves. In this blank space, I add some more flowers with the light or in Scholar. And then you can see again with blank spaces that you can fill in and just draw some more flowers or Gibbs model lips. And then you will see that the whole square is full of your leaves and flower. With a black background. I cannot see the butterfly antenna, so I will erase it and draw it again with a different color. And now it looks bit with lighter blue. And then you can see that each of your drawing we will be in separate layers because it will make you easier if you want to change your mind. Two genes, the color on you change your leaves and flowers later on. And then next, you can use your drawing to upload it in print on-demand like Fred Bob will also say at the sex like me, it will be a nice boards or water but or Tumblr or the drawstring bag like this.
9. Practise Worksheet 2: Let's practice with work seed number 2. Now. We will practice to draw a leaf, normal one, and then we will draw a simple flower lifelong or nervous, say well, and we continue with number 8 and 9 that you get mixed them all in your drawing. Later on. Again, we have a blend space again, and then with a new layers now I add another worksheet, this worksheet number two. Number two as our guidance here. And then again, I create a new layer and then add in the mid S flower number seven, for example, it's up to you. You want to rename it or not. But I like to rename all my layer. So it will be easier for you later on to find which one you like, do show it up or you do shoot it up. So now we practice to draw this leaf. I take the green here and then it's very easy. I can draw this, the law. Okay? And then now we see that we use a different color to fill in the leaf with the frame. So sometimes like a curve or straight or a little sick segue. This is the more, the first one. For example, I use this yellow and I think the smallest size. And then you can do like that or you can give it straight frame. And then for the small one, ITNs with inking and then you use the technical pen. We try here, the small or the smallest I use here and 1% like this, okay? And then if I do this except it will goes outside the layer. If you want to draw only inside the leaf, then you click this layer and then you choose Alpha Lock. It means you lock your drawing, your lift drawing, and the next drawing will not go beyond your choice. So I take this and then you can see the difference with your layer become a check board like this. And then now IgD. Now, if I draw it now go into the area outside. So alpha lock is very important features in group yet, so you can draw inside your first drawing, and I love it. You can draw it until you feel this is enough. Maybe you think this is enough, then you can start with, and you see there is three types of leave that we already read this now. The other one is to give lighter green to your lives. So I use GIN the same. Okay, I cannot draw here because before we Alpha lock our drawing, so we released again the Alpha Lock because we want to draw in the same layer. I have to change a kill with calligraphy, monoline and k. And then I draw the leaves. And now with the ds, I tried to find lighter, clean and then active feet again, the Alpha Lock, because I want to draw only inside the leaves. And D, If you throw like this will not cause here because you already key with alpha lock to your lives. So later on you can draw leaves and flowers with two different color to give a GYN or shadow of each flower and it will look beautiful. The next one is this flower. So I add new layer again. You don't have to draw to perfect, that is no rules here. And then while the little circle here. And then I need this red and this one is three. So you can draw lie One, 23. And then I left circle here. Next flower number eight. So you see I'm half ellipse here and then give a 6 second form here. And then we fill in with red and then fill in with the orange and megaliters 12. Okay, let's do it now. So first I need this thread and then I draw like this, and then I believe. And then I start to add some details here. Look at my hand very easy. And then we fill in, so I pull it close year and then we'll in 66 forms here. And then we need this orange, and then we draw another flower inside this red flower. And then go back again to wrap to create the small penis. And then I continue with this one. I need 1234 and then fill in. And then you need this screen for the brand. Well, I need the spin. And I make a little circle on this flower. In this session, I just follow whatever color I have in the worksheet. But again, when you do this practice is up to you. You can choose your own gallery, you can choose your color combination. This is only another example. After this, you can add other details on your flower. Live from my worksheet, you can make all the technique that I use to draw leaves and flower here, there is no rules. I just gave you an idea how to draw this in Procreate. So now we finish again with the receipt number two, you already practice it and later on you can use it for your butterfly in the garden.
10. Draw Butterfly in The Garden 2: And now we drove whether fly in the garden number 2. First. If you see this, it looks so complicated. But actually if you follow me one by one, you can see that the flowers and the live is also the symbol, one that we already practiced in the previous lesson. Don't worry, just take your, I bet your app offense. And now we start to draw two butterfly. First, this time I use technical pen, brass, and then I tried to sketch my butterfly. So you just follow my scarce you create the body, the upper wings and bottom wings. And then the details on the wings and also the butterfly. And then this is just in one layer and then make that layer with opacity like 50 percent or 40 percent. So it's only to be or guidance. You create layer number 2 now to create the upper wings. And then next on a different layer, you draw the details and then legs you add a new layer for the bottom wings and so on. So separate your drawing in its layers. So later on you get edited easily. Or if you wonder genes the color, then you can do it layer by layer. I used a light beam as the upper wins, and then dark blue and red for the details. I use gray for the body. And now I draw the antenna. And they just follow my step. And then Eurycleia, a beautiful butterfly. With the techniques. It's easy. Create a new CAM class and then both light green as the background. And then from butterfly can fast, you can copy and base your butterfly in today's class. Now we start practice our worksheet number. Do you draw the flower as you like? And don't forget to put Drawing Assist on your layer. So it will draw both on the left and right side. So Dance a dance my mind in the middle of my drawing. So you also get the leaves or the flower that you will think it's not mastered this overall joy. And then you can dance again, let Apple you lie. And fitness. It's time to time. In this chapter. Great. Okay. Does this make sense? A second shot. In this recording? What does three things? It shows if you almost finish your drawing, new LLC that is still small, blank spaces that you need to insert your small floors or you can act with small leaves. Good, it finished now, exactly like what I did here. And then later on, you can use your drawing like me. You can sell it in the print on-demand platform like read buffer or society six. And it will be beautiful pillows or not bore or tote bag or the iPad casing.
11. Practise Worksheet 3: Let's practice with your seat number 3. And the worst thing, number three, you have three flowers. Flower number 4, you draw the stems and then the lives. But the lives is almost like our lives. And then you draw the female flowers, wildflower number five, you draw again the stem and then the sharp edge lives. This is different with global number four. And then you add the pink flowers and flower number six, you draw a little stem with red dots and then the collagen stem and yellow leaves. And then another letter. Law works. You can fill in later on in a small space when you draw your garden, there will be very easy. It will be very fun to draw this and we will practice on this lesson. And then you'll be ready. Dot continue later on with your butterfly in the garden number three. And then now we are going to do another practice. So I close this and then I will add a new layer. We need a guidance so the action you choose, Add and then insert photo and then you continue with another worksheet. You make it smaller here as you can intense and we are ready to practice flower number four. Again, I add layer here. I renew mid-year flower. So I choose the color for the dark green. And then the big brands and then the small Prentice, and then the lives. And the last one is the flower. So again, I separated into underlayer flower number four, and then I create the big brands. For example, like this. Or sense. This is not a straight line. If you see here, this is not math. You can just undo and you can drown slightly two days, and then you can have small brands. And now you get the way I draw the leaves. So this cutoff leave as deliberate. Usually we draw the leaves like this or like the second one. But look at this, I slightly give a girl at the bottom. Yes, girl at the bottom. And then you get fill in their lives. So this is the way you draw, and let's draw one by one. Groups, I make a drought year, so I see I can yes. Okay. Now I draw again. Sometime you does the screen, but you have this undo and redo buttons so you can enjoy drawing. Again. Before going to bed. Sometimes I like to draw this rapid they did drawing by this leaf and this flower. Because small movements with our hands. Very simple routine and then it will sustain your mind, clear up your mind before you are going to bed. And I'm happy when I doing this, probably you dream of trying to shock. You don't have a space here. If you draw disease too small, you just left it blank like this one too. Yeah. I add again. And sometimes you need to zoom and Jamal so you can see how it really looks like. Emil myth. Top here. If you made a mistake here, you also can use eraser. And I chose a small size because this is only a small dot. And then I can. It is said like this. I can still see. I erase a little bit more. Okay. So it will be good again. Okay. The liver is finished now, and then we need to add some more with being a flower with dots ideas. Though, I choose the color with color picker and become being here. And then I want to make first the big 112345, okay? So I can make it here. For example, 1, 2, 3, 4, 5. And then for the other flower, I only made big and small circles here also. I mean big one and the small one. You don't have to draw the same middle flower here. It's up to you. You can just enjoy your drawing. Now we add something, wait for the big flower, we add this one. So I choose data. So I draw like water drop here. And then you can continue with different color. This is a being and this is red. So you can continue, I can hear you mix between small and big data. Yes, noun, lower number of floors, Phineas, and it lost a proton. But you use the same technique. Just don't use the straight line at this time. You draw it like a golf line each for the big one and the small branches. And you completed with leaves and then the flower. I'm sure you can also practice with this flower number five. If you see here, you draw a gym friend lives with edge on the both sides, left and right. Drawing flower number six is also easy. You draw this step and then buy a small bridges and then add a little dot of red as the flower, because it's very easy. You can follow my worksheet one by one and dare flower number 6, all our fineness. And that's it. That's the best practice you ever had so far. Then one more thing, this is the worksheet that you can download it also from the class. I teach you how to draw the leaf. There are three kinds of leaves. The first one, you first draw the outline of each lead. And then you fill in one-by-one, and this is the final lives. For the second one, you draw the stem first and then the outline and fill in with the green color. And then for the third one, you can add a little lower on it. And then you are ready to draw butterfly in the garden number 3 in the next lesson.
12. Draw Butterfly in The Garden 3: Good, I'm so proud of you. Now you only have one more. We will draw butterfly in the garden number three. This one is also a simple drawing. After you draw the butterfly with the light gray colors and red dots everywhere on the wings. And also purified color palettes for golden number three, you can download it from the glass and you can use it to draw and just color for your flower, leaves and butterfly. And then probably you only need four or five green colors to draw the leaves. And then you use orange and blue and being to draw the flowers. Don't forget to turn on your Drawing. Assist when you start drawing like this. This is my deal. I will not explain too much. You can just follow my hand when drawing stems and flowers like this one by one. And then you fill in the blank space, as I told you in the worksheet in the previous lesson. This butterfly in the garden number three, I did not finish it in one day. So after a VC will day, I'd take a rest in the evening and then I take my bed and start to draw. Usually, I draw a little bit today and then I continue another day and probably I need three or five days to complete it. As you see here. Throwing this kind of metering technique, it gives you a very therapeutic situation. It come your brain, it calm your mind. And after I finish this drawing, I feel so light, so col with my mind. And I think in this band mic is good for you to draw this kind of drawing because the repeat their lives and repeated flowers, the small one, the big one, it will give you a very meditative Mormon. Now, I add the butterfly in the middle. Remember, the way you copy from your butterfly, confess, fly, and then base in do your toy. And sometimes you need to erase standards, you don't need it anymore and put your butt the fly right in the middle, and then you continue drawing the leaves and flowers. Again. Don't forget to separate your layers. So it's leaves, we'll have each layer. This is very useful when you want to update the color or you want to edit the farm off your nears or your flour water. So make sure you put it in its layer and you will have many layers on your drawing and desk, okay? Correct. Hello. Let them on a view almost finished style. You can add some more flowers if you think that there is a blank space that you need to fill in with your flower. And then now you finish it. Look, this is fairly beautiful butterfly in the garden. And if you like, you can go to B or D or print on demand sites. Then like me, you can sell your drawing and it will be a beautiful art. Things like Skype or meaning our brain, or even an epsilon. So this is very good for your mind for years. So, but also it gives you some money too.
13. Add Your Text: Now we add text to our drawing. Here you can see that I put a God, it's okay to not do everything. It sounds like very useful, good, especially when we are in this band of me. And then how about after death, you create an art print like me, this is very beautiful. You can hang it on in the living room or in your bedroom, and it's okay. Do not do everything. We will create a garden but with butterfly and flying things here and there. There are three butterflies here. And then we learn to create our own bags. I mean, by drawing each of the alphabet and it will be like this. Don't worry, because in this class, I will give you a color palette, but this is only a guidance. You can create your own color palette, of course, for your butterfly, your lives and your flower. I use the breath from Galilee gravy monoline. And then I draw its alphabet like I, D and then comma and S. And then when I draw the outline, then I fill in the white color and also for the rest of the alphabet. So please do your own style hand drawing to create another alphabet and deal. It will agreements the sentence. It's okay to not do everything. So just draw the outline of its alphabet and then drag the color to fill in it's alphabet. And that's it. It's very easy, very unique because you create your own alphabet. Do create these quotes. And then I add three butterflies. So I got p and base from butterfly gunfire us into this contrast. Next, without turning on your Drawing, Assist, just draw the leaves and flower wherever you live. Now, you are done on your drawing. Assess and start to draw its leaves and its flower. One, buy wine and just follow through this video, listen to the music and you will be happy up there offender's desk drawing. Sometimes I turn off the Drawing Assist. As you can see here in the middle you see the yellow leaves with the big flowers. There is only one on the left. So I just turn on and off the Drawing Assist where i 1. And this mix of style creates a beautiful drawing at the end. Again here I don't often drawing assess. When I see the blend space, I add some more flowers or leaves where the color as the same as the color palette in the beginning. And then finally, when I see it's complete, now I finish it. Otherwise you will draw again and again and Uganda stop. Like me. Sometimes also you tens the Vega, I'm looking for the best background. Is there a light gray or black or dark gray? Then if I'm happy, I save it as my final drawing. So now refund is destroying further fly in the garden with additional effects. And you will amaze when you can make it as adult bed or a notebook. It look so unique and very interesting. It's an egg.
14. Your Assignment: Wonderful. Now you've finished the lessons and this is a later assignment for you to have fun with your own butterfly in the garden. Draw your butterfly in their garden. You can use the color palette that I've given to you, or you can use your own favorite colors. And then you can create your project. Juice days Create Project that appear. And don't forget to leave the review for me. You can clear the steward generate deadlier. And then don't forget to post on your Instagram and tag me at Jaime dot acoustics and also use a headset and me honey skills here. Thank you.
15. BONUS !! Time Lapse Butterfly in The Garden 4: And this is one as phi u. This is my afford drawing and I give you the time-lapse of this drawing, you can follow it. This turn on your Drawing, Assist and alpha log as you need it. Enjoy the music. And then Q for joining my class. In this video. Hi.
 Hanny Agustine, Artist | Technologist | Educator