Transcripts
1. Welcome to Your Procreate Fundamentals: Procreate is a
beast of a program. It has been such an
amazing inclusion to the iPad and for
designers everywhere, and there is so much to
know about it and so much that we have
left to discover. And I want to welcome you into this mini course that's
going to go over all of the fundamentals to get
you up to speed so that your workflow is nice,
consistent, easy. You don't have to try to
jumble and figure it all out. It's one of those things
that you can use for years and still never uncover
all of its potential. And so we're going to
kind of fast track to get a lot of those things out of the way so
that you can get rolling with ease
in your workflow. I'll be providing you
with all the tools that you need to create a
more efficient workflow, optimize your potential within the program and most of all, enjoy the discovery of it. On day one, you are
going to be learning shortcuts and gestures to
speed up your workflow. You'll discover the tricks
about procreate that otherwise can take a very
long time to stumble upon. You will equip your quick menu and customize your settings, which is huge in
optimizing that workflow. And on day two, we're
going to dive pretty deep into layers
and blend modes. You're going to learn why and
how working in layers will help your workflow and
demystify all those mask techniques. What they all mean? Day three will be going over
your brushes interface. We're going to jump into brush adjustments to render the exact results that you want. You'll get some of my
favorite custom brushes that I've created that I
use in all of my work. You'll also discover
some brush hacks that will increase
your productivity. So without further ado, let's just jump right
in and do this.
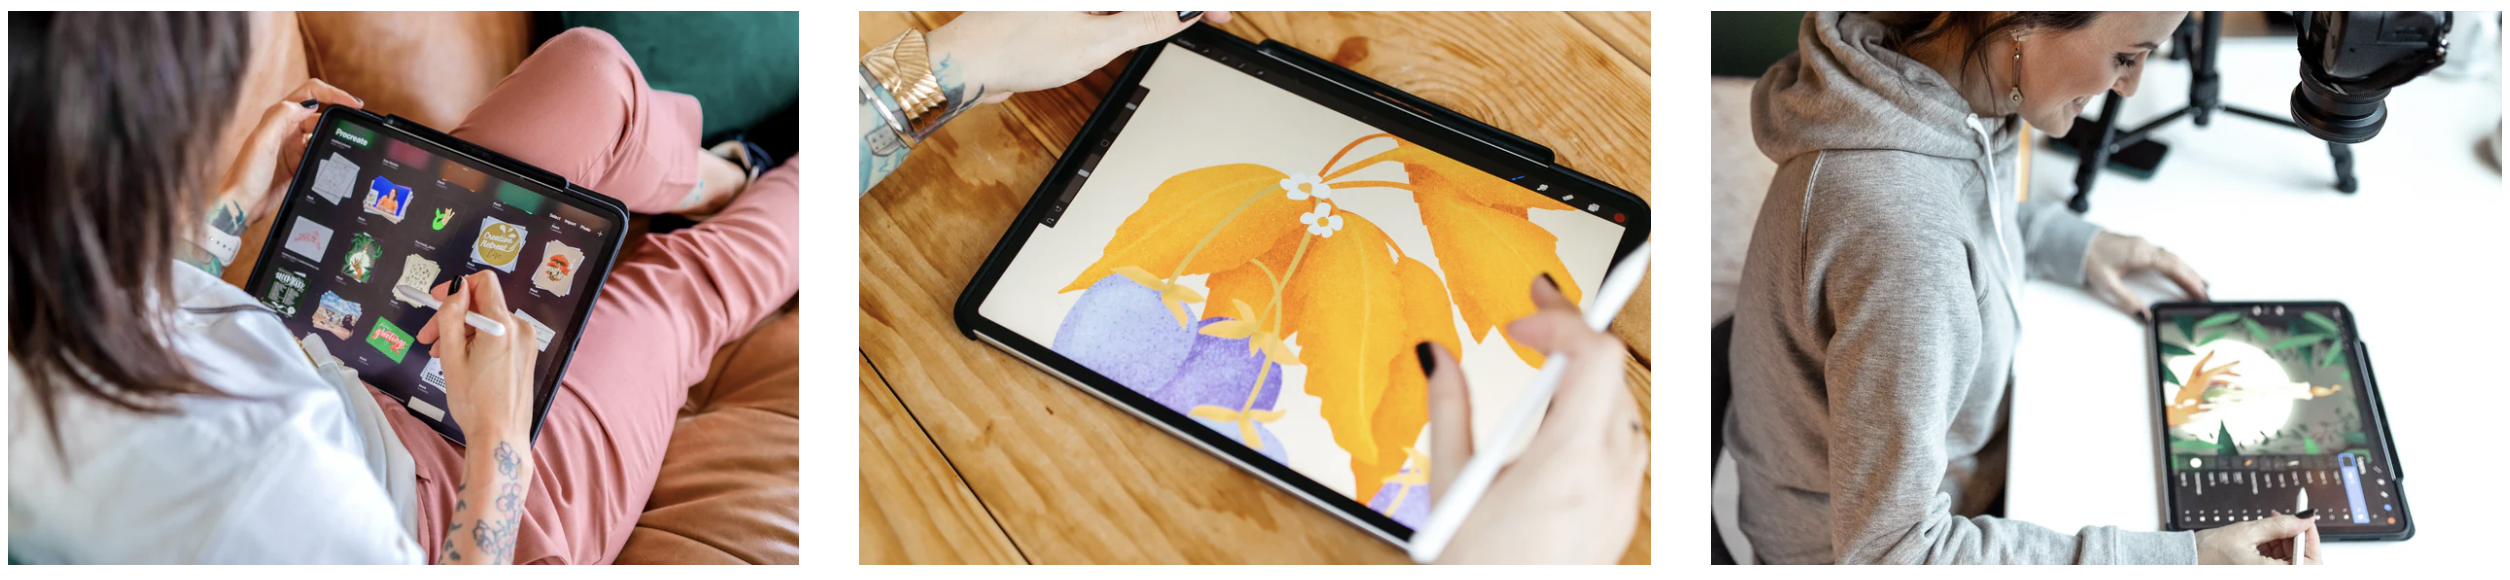
2. Set Up Your Digital Workspace: Welcome to the first lesson in your course on Pro
create fundamentals. I'm very excited to go along this journey
with you and introduce you to all of the interface tips and tricks to speed
up your work flow. We're going to be going
over these shortcuts and gestures that
you can use along with tricks about
pro create that can take a very long
time to stumble upon, and I don't want that for you. I want you to get it
right off the bat. And then you're also
going to be able to equip customizable settings, which is also going to really cater to making things
streamlined for you. So let's jump on in. When
you first open procreate, you will see your gallery, and this is essentially where
all of your work lives. You can stack so
that your projects, if you have multiple canvases, they're all together, so you can see I've stacked these two. I've stacked this project, and then you can have
things live on their own. You can also label stacks so that they're easy to naviate. Now, the one thing to note
is that when you stack, let's say I wanted
to stack these two, I will select, so there's
select button here. Select, and then
I tap those two, whatever you tap
first is going to be the top layer or the
top image shown. But then when you say
stack, which is right here, It will then remove the
label that you had, so you have to rename it. You can remove items
from a stack by going into gallery and
just dragging them out. You could select a
bunch and do it all together and then hold onto them and take them
out of that stack, and then place them where you want them to be in your gallery. You can also take a canvas and then hold it on top
of another one and then drop it where you want
it to be inside of that, and that will also stack them. You can also import images. The reason why you
might want to import an image instead of opening a canvas and
creating one is just to preserve the
actual image size. However, if you want to import an image into a canvas
size that's particular, you can create a canvas first. Just know that it might change. If you have to
enlarge the image, it might make it a
little bit pixelated. If you have to shrink
it, that's fine. But to do those, you
can go to import, that's going to be file
types that you can bring in. If you go to photo,
it'll bring up your photo gallery
that's on your iPad. But otherwise, to
create a new Canvas, you're just going
to go to this plus symbol here and you
will have options. If you haven't already, you can create your
own Canvas sizes. To do that, you'll just
go to this top plus symbol and create
your own Canvas size. Oftentimes, let's
say you want to make a repeat pattern that can
be used for printing, This also is dependent on
the size of your iPad. Sometimes you'll see
maximum layers here. If I go like 3,000
pixels by 3,000 pixels, and I want the DPI to be 300, which is dots per inch. I'll let me have 55 layers. That's something to
keep in mind as well. Your color profile,
for the most part. I like to go with RGB, and then I just keep
it on display P three, that should be standard of
what years will come up with. CMYK is more for printing. If you are to do something that somebody will require
you to work in CMYK, know that that's a possibility within procreate and you
can totally do that. I'd say I've used
that 5% of the time. I like to keep to RGB, the difference is
you'll have a lot more vibrant colors in this setting. You also have time laps setting. Your time lapse, if you've
ever seen those really quickly done illustration styles or whatever procreate
projects that are sped up, and it's just a screen
that's showing it. That's your time laps,
and we'll go over it and your actual canvas so that you can see what
that looks like. But your settings here, you can choose to
have it be 1080. I don't see a reason for it not. I don't see a reason
for it to be four K, but if you so desire. Studio quality, I think
that it's standard, it's going to have nice quality. It doesn't need to be gigantic unless you want to
Canvas properties. You can choose to have your
background on when you start. Once you're in a Canvas, you
can adjust all of this too, but this is just like to begin. That's to create
your custom Canvas. The main area that you want
to focus on is the size. Now, if I want to this every single time you
create your own Canvas, it's going to save
in this area here. You can see I have
some untitled canvases here because I had to work
on certain dimensions, but I didn't save them because I only needed them
for that project. So to delete them, you can just swipe to
the left and say delete, delete, you can also edit them, which is nice, but you
can see what I have done is label them according to their size and I've
done inches here. It's easier for me.
But if you want to do, let's say we did the 3,000
pixels by 3,000 pixels, 300 DPI, what I would do
here, so that I know. I know that it says
it right next to it, but it's just for my brain. It works better. I'll say 3,000 by 3,000 pixels, and I'll just do a
comma and then 300. I know it's 300 D PI, but I could also say
300 DPI, create. Then that's going to
open your Canvas. But if I go back to
my gallery and I look at those canvas sizes,
it'll be at the bottom. Right here, 3,000 by 3,300 DPI. Then the P three, CMYK, I
didn't mean to open that. The P three is just meaning
that profile under RGB, so you can be aware
of that at a glance. The one thing it
doesn't show you on the side right here is the DPI and that's why I like
to say 11 by 17, 300. Typically, I stick with 300, but some people
will go up to 600. You can go to web
standard is 72. I just work in 300 to be safe. That is basically the gist of your canvas and your
gallery and all of that. Once we're inside of a Canvas. I'm going to say screen size because you're going
to have that as a standard when you open procreate. It's just
going to be there. When you go to this
wrench at the top left, that's going to
allow you to look at all of these and we're going to go over
what they all mean, but Canvas and you go
to Canvas information. It's going to show you
all of the same things. It's going to say pixel width, pixel height, and then it has actual inches and then the DPI. Your screen size
setting is at 1:32. If you want to change that, you just create a new Canvas
that is that size, you can't edit it at least that I know of once you're
inside of here, there is though a crop
and resize setting. Within here, you can go to settings and it looks
like you can change. I was wrong, but you
can change it in crop and resize and then
change the setting. Sometimes what I'll do is
I'm working on a Canvas. I want this size, but then
I want to make it square. I've decided to make it square. This is where I can
come in and let's say I have here I'll just draw a
little square here real fast. Really good square. Let's
say I have some artwork. I want it to be in a square, and I go to crop and resize
settings and then see this the lower number
is the shorter width, so I'll just match
that and go 2048. Now it's going to be a square. But what I want to do is
line it up so that it will be according to my artwork because I don't want
any of it cut off. The other part about this that's cool is if I wanted it to be smaller and let's say I go to 1,000, then it
makes it like this. But if I had gone to
this little link, it will make sure that each side sticks to whatever
the initial ratio was. If it's not a square,
let me show you, if I want to link that
and then make this 1,000, see it makes it,
it's the same ratio. And then I can just adjust it like this as well
if I don't want to put in a specific canvasize. Sometimes I'll do
this if I know that the work is just going
to be digital or something that
doesn't have to be a specific size for something. That way, I can crop it without having to enlarge a
bunch of my work because the thing about procreate
to note is that when you enlarge anything,
it will pixelate it. It's really unfortunate. I try to only resize
something once, twice at the most so that I
don't keep losing quality. When I want to crop something, I usually crop it
from the outside in, and then you'll say
done and then it'll crop that according to
what you want it to do. So That being said, we will get into some
gestures in a bit, but I want to show you
the overall interface. The light interface
versus dark interface. L ight interface is going to give you everything's
just going to be lighter. Your layers are
going to be light, everything's going to be light. Dark interface, has more of a
focus on the canvas itself. Right hand interface. I feel like this
should say Well, I think that I think
it should be swapped. I'm right handed, but I prefer my sliders to be on the left because I don't
want to bump them. I just don't trust my
palm resist all the time. I feel like I could easily just accidentally use a knuckle, which isn't going to feel
like palm resist if I use. Maybe Maybe it
will. I don't know. I like it to be on this side, but if you want to switch your
sliders to the other side, all you'll do is
go to preferences, and then you can turn on right hand interface and
it'll pop it over there. Now, dynamic brush scaling. What that is is basically, if I was to change
the size here, it's going to go pretty fast. If I pull out. Change
the size and pull out. See how now it's slow. I can go up and down and it's
going to go a lot slower, so that's going to give
me a precise size. Pressure and smoothing, I don't
touch this unless F here, I touch it in my brush
settings specifically so that it's not global and
it's per brush. We're going to go into
that in a later lesson, but just as an FYI, it is here if you
want global settings, and the toolbar here is
for your size and opacity. I very rarely touch
opacity because I'd rather play with
opacity in layer settings. It's part of working
in destructively. For example, if I
was to use a brush, I'm going to get a
bigger one here. If I was to use a brush
and put the opacity down, you can see that
it's transparent. But I can never get that
higher. It's already done. If I go to that layer,
there's nothing I can do. Whereas, I'll just
do a different layer real quick. I'm
going to move this. I'll tell you why in a minute. Well, actually, I'll tell
you why in the next lesson. That's the opacity
low, whatever. I can't do anything about it. The opacities on the
layer all the way up. This was the brush setting. If I was to make that all the
way up, my opacity slider, it's going to be nice and solid, but I can then change
the opacity right here. The only time it would work
in your benefit is if you had some paint type of effect you were going
for because you can see you can't
see strokes here, whereas you could here. That's the difference.
But that being said, I still don't touch
it right here. I would still prefer to go
into my brush settings, which we're going to
do and actually change the opacity within the brush so that it has that
effect if you want it to. Then you can have, let's say two brushes, one of them that is
more opaque and one of them that's translucent. And then you can choose
between those two. That way, this part, I just like to have things as editable as
possible, basically. Something I want
to share with you before we go into select also is you'll see these lines
right here on my slider. This is intentional that I set the last time
I used this brush. Let's say I'm
working on a project and I have to leave it to
work on another project, and I I want to know exactly what size I had
that before I left it. You can easily
wherever you're set. Let's say I've been using this size and I don't
want to forget. I can just tap it
and then say do the plus symbol and it's going to make a new
line right there. When I want to get rid of it, I can just tap it and remove it with the
little minus sign. I just hadn't done that yet, but it's nice because this didn't used to be
part of procreate. The work around I
had was just like, create an invisible
layer and make notes, essentially or just
create one at the top. What I would do is
be like, Okay, well, I was using my mono brush at 81%. These are
terrible notes. Then I would just
turn that off and the next time I go into
that layer, I know. I do think that's helpful
still because you can record what brush
it was you were using if you forget or you work
on a lot of things at once. A little tip that will help, but you can also use those
selectors, which is nice.
3. Procreate Interface: As we get back into this wrench, there's a lot of stuff going on. You got your actions.
In here, you have ad. This is where you
can also insert a file on top of the canvas
that you already made. That's what I was talking
about in your gallery. You can already have your Canvas created and then
insert the file. When I say file, I mean, you might have an
image or that lives in or lives inside of Dropbox or Google
Drive or something. Was insert a photo pulls from your photo roll on your iPad. You can also take a photo. I've never done that. I don't know if you want to. Hey. You can also add text and you have your
fonts to choose from. If it's not super intuitive because you're like,
where are my controls? If you just double tap here, you'll see this control setting right here
and then you can click on the font and then make all of
these changes here. Including tracking,
leading, and this is like your line spacing,
your letter spacing. There's a lot that
you can do with this. If this is larger,
you'll see it better. You could also outline. What that looks like
without being highlighted is this versus that. That's just something
neat that you can do as well with text, and then to show you
right off the bat, and we're going to
jump back to here, but since I want to
clear this layer, your layers panel is right here. It looks like two squares
on top of another, and this is where all
your layers live. I'm going to delete the text
layer that I just added. Note that it is
currently a text layer. If I was to select it, it's automatically a text
layer, I can edit it like so. If I was to rasterize that, it would turn into an image. Let's say I want to
change the color of it. Don't worry we're
going to go over color in just a minute. But if I wanted to change the color, I could
do it like that. But if I drag and drop
a color on top of it, it will rasterize it. It tells you that in the very, very look at this. Text layers rasterize,
and it tells you that so quickly that
you might miss it. If you end up having
a color drop, putting a color drop into
it and it rasterizes it, you will no longer be
able to edit that text. It will now become an image. K that before you
change the color. If you do change the color, do it from within the text. You'll just go into
the text box and then you can change it from that instead of doing a color fill. I'm saying that now so that you don't make that mistake later, getting it out of the
way because I feel like the more information
we end up digesting, those little things can
be missed later on. If you like texts, you
want to work with text, you want to be able to edit
your text, Just know that. To clear layer, to delete it, I'm going to swipe to
the left and say delete. We'll go over layer
controls in a bit, but just as an FYI. Back to my wrench here, I've got all of those, and then I have cut,
copy and copy Canvas. I typically use
gestures for copies, so we'll go over those two, but they are here, so
just keep that in mind. You Canvassize, we looked
at crop and resize, animation assist,
your reference, we will talk about as well. I basically I'll tell
you all about it when we get into layers and
working with layers. You can flip your
Canvas horizontally, you can flip it vertically. We already looked at
Canvas information. You're sharing, that's how you share your files when
you're done with them. Basically you can share
them as a procreate file. Let's say you wanted to keep all of the layers
intact if you've ever used an editing
software like photoshop. This is very similar. You're going to share
where all the layers maintain and Then when
you upload it again, let's say you're
switching iPads, you can import that
as a file and it's going to keep all of the layers,
which is really helpful. You can also export
as a photoshop file. PSD is photoshop. If you work on the computer and Photoshop or
anything like that, or if somebody wants
a file in that form, you're able to share it
that way, which is great. Aside, if you're looking for a vector based file
type to export to, procreate does not work
in vector base, anything. It is strictly a
raster based program. That's not something
you will find here. Just so you know
right off the b. You can export as PDF, which is a typical file. JPEG and PNG, those
are image files. As TIF, JPEG is a
little bit smaller. It's good for sharing PNG. It keeps more of the quality in. You can also remove
a background and keep the background out of
it by exporting as PNG, and then TIF is more like a raw. It's more of a large file type. Then you can share
layers individually, and that's where the animations
really come into play. But let's say I wanted to
share individual layers. You can do that as
a PNG or as a PDF, which is really helpful if you want to continue working
outside of procreate, but not something really
that you're going to need to know right now. Video. When I talk to you
about time laps, this is where you're
going to find that. In each canvas, it will have
its own time laps replay. In this one, you're
going to see what I did. I had that quick
square that I made and then I had the text.
That's all you see. You can turn this off. When you turn it
off, you can say, don't purge and that's going to keep all of
that original work, and then everything
that you work on, when you turn it off
won't be recorded, but then you can
turn it back on. You can also turn
it off and just purge everything so that if you want to start from a certain point and then pick
up that time lapse later, I don't think I've worked
on it long enough. Let me see if I can
do it to this one. I I export time lapse
video, There we go. I can choose to do
the full length like where it actually
goes through. It's still going to be sped
up, or I can choose to condense it into 30 seconds.
It gives you that option. Then it's just going
to share it as a video file, you
can choose where, but you can have it
be on your iPad. From there, then we
have preferences. This is where we're
going to spend some time and you
will love this. Once you're done with
wrench, you can go into this little magic wand icon and this is all
your adjustments. This is going to be really
helpful if you want to adjust certain aspects. O M
4. Adjustments & Fine-Tuning: You can go into this
little magic wand icon and this is all
your adjustments. This is going to be really
helpful if you want to adjust certain aspects. I'm going to open a piece
of art I have already done. If I work on this collage here, this will be a good example, you'll see I have all
these layers done. I'm just going to
select this cat layer. As an example, I make this
a larger so you can see it. I can go into my adjustments. Hue saturation brightness
is what it sounds like. Huge, I can change the
color of this cat person. I can also boost the saturation
to make it more intense. I can go down to gray scale. I can also make it lighter and darker. That's what all that is. Back in adjustment panel, I also have color
balance where you can really adjust
the color itself, so more blue, more red. That doesn't do a
whole lot to this, but let's see magenta really
makes it more vibrant. Green neutralizes it, but you still have some little
hints of green. Yellow to blue. You can tweak these based off of
what you want to see, and you can also do this with your shadows
and your highlights. Oftentimes if you see something that's a little bit
moody and muted and that's like shadows
that are leaning more blue. See how the mouth here, wait, Let me get
out of here there. When the shadows lean more blue, it's just a little it has
a different personality. That's where you can adjust
all of those settings. When you go into curves, that's going to
be your contrast. When you pull down, it's
like an S curve basically. If you pull down,'s
going to really deepen the darks and then
if you pull up over here, it really highlights
the light colors. You can adjust that. It's not really going to do much
to this in particular. Let me go to one of
the flower layers. Okay. This one here. Let's see what that will
do to this one. If I. See how it just deepens
it and then I can lighten it and that just
adds a lot more contrast. If I deselect it, I'm
going to use two fingers, that's going to allow
me to undo something. Undo. See now it's more neutral. If I do the contrast, if I add the curves
edit that I just did, I use three fingers just
so you know to redo. Come on. There we go. It just really deepens it. That's what curves will do. Now I can go to gradient map and this is going to
give you a lot more. You're going to play
with gradients here. It makes it so that
it's an isolated theme, and then you can
play around with the settings there,
which is just fun. Not something I like
that accident I did. Okay. Get out of here, get out of here. There we go. Your Gaugin blur, that is
going to blur something. All that you do is you select it and then you take your styles, your apple pencil, or your
fini and you will drag it. This is nice if you have a situation where
you want to blur a background or add some
Boca or something like that. Motion blur. It's
a similar blur. It's just going to I'm only on the layer right now that
you see this effect too. That's why it's only
happening to that one. In the layers panel, you
see them right here. But that is going to get you set up to create that effect. Perspective blur. If we're on that same layer,
I can show you. Basically one of them,
play around with them. You have the option to create positional specific
blurs and whatnot. So you can see that one is
going from a certain point. This isn't really something
you're going to need a lot of when you're
creating art, but it's still nice to know. I've used Gaugin way more
than I thought I would. So But I don't usually use
motion or perspective, but there's always
a time in a place. Noise is what it sounds like. Let me focus on something that's at a little easier to see. I'll go to this hand. If I go to noise, you can see that it
just creates that grit. If I was not push it up
all the way obviously, but if I was to just
push it a little bit, you can see that it creates this almost gritty
old photo vibe or something that was pixelated. You can do that
with intention too. Let's say it was with art. I'll pull up a different canvas. And show you something that was like if I was to
pull up this guy, and I wanted to add some
noise. He's all one layer. But noise, noise noise. That would just
create some texture that it's even. K that. I wouldn't say this is the
best sheet sheet for it, but if you wanted to
throw some in quickly, you could, then you have the
option to change what kinds. If I make this larger, you can
see this is called clouds, this is billows, this is ridges. You're not going to see a
lot of it in this scale, so you can also
increase the scale. You can actually
see that this is what the texture is
that's happening. There's just little minor
details and you can change the turbulence of it. You don't really notice.
Let me make this bigger. It just changes how fine
the separations are between here it's a lot wider and here
it's a lot smaller. If you want to use that,
it's there for you. There are those options. I have never used
noise, but it is there. Sharpening. I will say
I have used sharpen. It's usually when I
have had to resize something enough times to where it does start
to lose quality, which I mentioned in the
beginning, try not to do that. I'll show you sharpen. If you just slide it up here, I'll make this bigger, so you can really see it. Slide it up. See how it just it's taking that blur and it's making
things a little crisper. I'm careful with sharpen
because you don't want things to look to I mean, when things are too sharp, they just look a little bit
and we don't like them. But sharpening a little bit can help you if you end up
resizing something too much and then you didn't have a way or you didn't want to undo a bunch of things
to get to the point where you know what I mean. There's a time in a
place. Real quick note. You saw how I moved this, how I resized it, and now it's
coming off of the canvas. Something that you
will probably run into is You'll notice,
now it's gone. The rest of it's gone,
where did it go? I didn't mean to do that.
Why isn't it working? Especially if you're
used to using Photoshop because
it doesn't do that. It just shows you your workspace and everything is fair game. That's not the
case in Procreate. You have to have
every single bit that you want included on
the Canvas at all times. If for example, if I'm going over here and
moving stuff around, it's no big deal
until I deselect it. Once I deselect it and reselect it, the
rest of it's gone. This is all I have left. Let's say I just did
a bunch of work. And I didn't I didn't
have like let's say I did a bunch of work
after it was already at let's say this point, and I just kept working
a kept working on it. And then I wanted to move it over and then I notice
that that's what happened. Maybe I've even exited out and gone to my gallery
and then gone back in. This is where you're
going to run into an issue if you don't
know this ahead of time, which is you can no longer undo. Once you leave the canvas, you cannot undo anymore. That's one of the reasons
you want to preserve that original layer so that
you can still work off of it. Yeah, you might have gone
backwards a few steps, but if you were to let's
say 15 steps from here, you really like
how it's looking, just duplicate that one and
make that one go away and then create on that new layer
and continue to do that. That way, you're not going
to lose that original work. You can also do
this in the form of creating a duplicate Canvas. If I was to swipe to the left
and duplicate that canvas, I can leave this as is. I don't have to mess with my
layers, nothing like that. It's just a matter of of having
a whole new work project. That being said, I will
get rid of that layer, get rid of that layer, turn
this one back on and we'll go back into the
adjustment settings, and you'll see there's
a lot of fun ones like Bloom is going to
give you this glow, and then you can change the transition and where
that's coming from, change the size,
change the burn. Just little things like
that that are fun, and then there's
glitch and half tone. Glitch is going to
separate stuff. And give you this
I think it looks like confetti. It's pretty fun. You can change the block size, change the zoom of it, you can split things like this. Me things wavy. This is
fun if you do it to text, change the zoom of that
one, you have signal. This is the same, but it introduces that color
back in and then diverge. You can change the shift. If you go up close here, you can see that it's shifting
off of the original one, you can change each shift. Blue to green to
red and whatnot. That's just fun to play
around with just for a added effect and
then half tone. I like this one
because it's like that old like pop art style. You can go from screen
print, newspaper, and full color and make that
pretty small, pretty large. You can do this with brushes because there are
half tone brushes, but if you wanted to
apply it overall to a background or some
shape or something, this is a quick easy
way to do that. C chromatic aberration. This one is my favorite
of these techniques because it separates
the primary colors. You'll see the blue and
the red and the yellow. Then you can see this
transition that you can adjust and the fall
off and adjust that. You can also change the displacement that makes it look like it has a glow too. But the perspective
part is very fun, especially if it's like a basic shape or
something to play with. Liquefy. Liquefy is
what it sounds like. You can move stuff around
changing the size of the brush. You'll see the brush here, and what this does is it
lets you nudge things. So let's say you
wanted instead of having to erase and move and
do a whole bunch of stuff, and let's say you
have a bunch of layers that are
applied to this face, and you don't want to have to
adjust every single layer. You can group them. I'm not sure if you can
work in groups with this, but I would probably just duplicate the canvas and
flatten those layers, and then I can come
in here and change the size and nudge
the face where I want it to go and
then I can make those edits without having
to work on all those layers. That's nice. You can change pressure sensitivity, momentum. You can also have things toral. If I press down you can't tell. Yeah, tell right there here. Press do, it'll to. I can change the size of that. Press, spin. That's really fun with different effects, text and whatnot, T right, twirl left, pinch, that's where it's
going to pull it all together like this. Ft expands the opposite, it blows it out crystals. See how that just turns it
into those little crystals. You can change the edge. You can reconstruct, which is going to put things
back to where it was before you applied liquefy. But you can do that
only in certain areas. Let's say instead of a let's say you made a bunch
of liquefy effects, and then you didn't
want to have to do to get to one part. Let's say you made
these adjustments here, but then also these adjustments, and you didn't
want to undo those even though you had
just done them, but you want to fix this one and make it go back to normal. Reconstruct that area, and
then it goes back to normal. Adjust the strength and then you can also just reset
the whole thing. There we go and we're
back to normal. That's liquefy and then
clone is where you can. Let's say I love
this dot so much. I make this larger. I can I can clone that whole area basically
by using that as a guide. Just a fun little
thing you can do. Then that's for the adjustments. You will use adjustment layers so much, adjustment panels. That's great to keep in
your back pocket. A.
5. MUST KNOW Gestures: Quick tip that I wanted to share with you as
far as gestures go. You can set it up where I believe it's not
set up this way already. Let me show you how to do it. But if I hold down the middle square in between
my two sliders like this, and then I hold my
stylus or apple pencil over a certain area. You can see that
it's going to pull up the layers that
are right there. Then I can select which layer I want based off of
where my pencil was. In this case, I want this
red layer here and I don't want to have to go through and sift through all my
layers and find it. I can just hover and then it'll select it
if it's only one. Otherwise, I can hover and
select the layer I want, and then it'll be on that one already, which is
really helpful. To set that up, you'll
go to your actions, you'll go to preferences, and we didn't go
over preferences. I want to do that, but
you'll go to just controls. This is where you
can enable disable. All of these things
make these adjustments the way that you
want them to be. I have to tap the middle there, which I believe
to start out with is a color sampling,
if you will. But for me, if I tap this,
my quick menu comes up. That actually might be standard, but if it's not, I recommend having
it set up that way. Going back to preferences,
just your controls. Finger touch will
invoke quick menu. I don't have that
on because I touch my screen and use the pencil and I don't want to have to think
about any of that. I don't have any
of these set on, but you can look at them and see if that's something
that you want to do because everyone's work or
work process is different, so those might be handy for you. Eye dropper, that's where
you can pick up a color. That's on automatically,
what that means is you hover over something and you can grab that color from it, which is really helpful. Then what's the other one? I want to show you Layer select. This is the one where I have, it's holding down
that little square that's in between
my two sliders, which, you saw where that was. Then using the Apple pencil and that's going to
invoke ayer select. You can decide what you
want to use for that, but I highly recommend using
one of them because it will speed up your
workflow so very much. It's incredible. Then of course, you can go in and change
the settings here as well. Like a finger will always erase. You can set things like
that if you want that just it's going to make
your workflow easier. I do recommend looking
through all of these. Quick shape is another one. You can decide how
that comes up. I will draw on hold and
that will make that shape. Hold and then it locks in place. If I touch my finger to it, here, I'll do a square, it will. Maybe I think I changed it. No, it's working.
It'll just make it more effective
for that shape. The other thing that's
new, I'll do this one. It makes it a perfect circle
versus just a perfect line. The draw and hold is
your perfect line. Draw and touch is
your perfect shape. That goes for lines too, so you can draw and hold,
and then if you tap, it will let you do 15 degree increments,
which is really helpful. Back to this part, I'm going to hold that and
it'll get on that layer. I'm going to go to, I can choose it like
this if I want to. Those flowers. Now, this next thing
I want to show you is having to do with color and with the
quick menu is why. We're going to get into color, but for now, this is
regarding the quick menu. You saw that if I tap here, which you saw in settings, how to change yours,
how it pops up, you will see your quick
menu. Quick note. This will pop up wherever
your apple pencil was last, so you can see nats over there. I think that's annoying. I wish it always showed
up in the middle, but just so you know
that, if you're like, Wa, why is it cut
off, that's why. So pulls up. You'll see I have recolor here. The reason why I want
to really call this out is because this tool used to be used by everyone so much
and then in an update, which it may by the by
the time you watch this, it might change again, but you will have access
to it and Quick menu. That's where you can
put your controls that you want. Where you want them. All that you need to do
is enable quick menu, like you saw and hold
down one of the controls, and then you can choose
what you want that to do. When this pops up,
you can go down, find recolor and put that in as a control,
which is awesome. Actual size makes it so that you can see the
canvas as actual size. Just play around
with those, you're going to see how that will work. Now, recolor, the reason
I love this so much is because you can see
this little cross here. Since I'm on the flower layer
only and the base layer. There's texture
layers over that, but I'm on the base layer. This is letting me
recolor in live time. If I go to my color wheel, anything that I do will
reflect in live time. If anytime I
deselect by the way, it keeps on that last
color, so know that. But if I was to turn off
the textured layers, then I'm going to
really be able to see these colors that
I'm playing with. In this live Color recolor is my favorite thing ever because I feel like I end up
creating something, not really worrying
about the colors and then isolating
what I want later. It's just like a workflow I've adapted to or adopted or put it. I don't know. I think that that's going to be
really helpful for you. Just as a quick refresher. If you want to
enable quick menu, you're just going to
go to your tools, go to your preferences, go to just your controls, go to Quick menu and decide
how you want that to come up. I have the top one,
which means I can just which means I can just press that button there
and it will come up. To set your quick menu, you just hold down on one of those controls and
decide what you like. You can even do this for
brush settings if you don't want to have to go through
all your brush settings, you can select the
brush that you want. It's really handy. I
haven't used it except for recolor because
that's the one thing that I constantly
want access to, but I feel like that's
a missed opportunity, and we should take
advantage of it. So that is that. Okay. Now, we are going to
go on to the select tool.
6. Manipulating Selections: Let's do selections now. I just want to identify
what layer I'm on. I'm on only the flowers, the base of the flowers. This is going to let
me move things around, adjust them in size, and whatnot. I'm just
going to explain. I'm going to before I do that. I'm going to go to a new canvas and I'm just going to
draw a simple shape, so this is not so confusing. Color drop, just an FYI, you pull the color from the top right and
then just drop it in. You'll also notice a color
threshold when you do that. In a circle, it's no big deal. If it was a grittier piece of art or something
with more texture, you'll see a threshold
once you drop. It looks like this, and
you don't see it until you pull it down you're still holding onto it and then that's
when it comes up. Color threshold 100% is
going to fill entirely. Then if you go down more, it will only fill
little bits and pieces and you'll see what I mean as you get into creating. But This shape I select it
with my selection tool, and this is my menu
that comes up. Snapping, what that means in magnetics is
that as I move it, it's going to snap and be a
magnet to the original line. That's really helpful
when you want to center things like
super helpful. You're not always
going to want that. You're going to
want to be able to nudge things where
you want them to go. That's under snapping and just turn those off
and you're going to have a lot more freedom. There's a time when
you're going to want it and a time when
you're not going to want it. Then you can also
adjust the distance. If I wanted that to be on, if I meant that go way way down, it's going to allow me
to do smaller spacing. But still, I would
rather have it be where I either have freedom
or I have really concrete, I know this is going
to be centered. The other part is, this
is uniform right now. That means if I
was to resize it, even if I go up or around
or down or whatever, it's always going to
maintain the original size. If I go to free form, it will not happen that way. It will happen in this warping weird way
and it will not maintain. It used to be that you could put a finger down
and it would adjust, but now it has its own little
friend and its uniform, and that is that. You can go to distort and
that's going to allow you to move things up and down around the corners and along the sides. But you can also do
this in free form. If you just take one of these little blue nodules
and hold it down, You can do that in free form. I never ever use distort. I just do things in free form, and then I can hold down a corner and move it
how I want it to. It's on snapping, so that's not going to give
me that free form, so I want to turn that off. But there we go. I can do that with that
or I can go to Distort. I'll just automatically
do it without me having to hold it
down and then warp. That's where you have
even more control over specific areas
within something. That's really handy as well if you want to do
something like that. Back to select, you
can fit to Canvas. If your canvas is a certain size and you want it to
fill the whole canvas, just hit that and it's
going to get as edge to edge as it can while maintaining its shape
or maintaining its art, nothing's going
to get distorted. You can also rotate, so I can show you
add some colors you can actually see
what's happening here. Color. Another color. I don't know. Color choices. I select that and I can
say rotate 45 degrees, and that's going to give you
angles along the planes. You have your x plane and your plus plane and it's going
to hit all of those points. You can also flip
it horizontally, flip it vertically, All those
things are really helpful. That's basically your
select tool. Let me see. I wanted to show you what the
color drop looked like when it was applied to only a
certain part of something. Let me go into these friends. This one here, just make sure. I'll do the recolor or color
drop. Same thing will apply. If I'm going to pull this down, see how it covers
basically everything. If I was to pull it down, See how it stops
selecting everything. This has a lot in it. It's going to be hard
to apply as a whole, but that's why I wanted to
use that example so you can really see what the color
threshold looks like. If I go all the way up.
Now, sometimes you'll go all the way up and it doesn't
actually fill all the way. It means I just
ran out of space. I'll undo and it'll remember the last place that I
was when I do it again, so see it's at 58, and I can just bring
it all the way up. This is the same with recolor. If I get my quick
menu going, recolor. The reason I like this too
is because I can decide where exactly I want
it to go to affect it. If I apply it to a darker area, it'll get that color, the darker area, and
lighten everything else, but still change the color. But let's say I
only wanted it to be this little blushy area. See how sometimes if I hit
it just in a certain spot, it affected everything else, but let's say I want it to
only affect that blush spot. Down here, it's called flood. It's the same thing as your
threshold essentially, and I'm just going
to pull it down. You can see now that
it's really only affecting that blush spot
instead of the whole bird. So that's where your color
is going to be a lot more manageable and
customizable based off of what you want to do with it and the controls that
you have over that.
7. Procreate Color Interface: Now we're going to move into
more of the color options. Well, first, we'll go over
what these tools are, but you're going to spend most of your time in
this area in your, your main brush setting, your layer panel and
your color panel. Let me quickly tell you
what these two mean. Your brushes are
going to be here. We're going to get
into all of that. But this is here
is your blur tool. You can blur with any brush that is in your
brush panel. Same thing. You'll find them all here
and same with your eraser. You can use your eraser with
any brush that you want. This is nice because
you're able to apply these effects with the same
style brush so that you don't have something
super textured or pretty or transparent and then you take a
hard eraser to it. That's going to be
really helpful. Then my layers panel is here. We're going to go
over all things layers in a different
lesson, so not this one. I'm very excited
about that lesson. But for now, we'll
go into colors. Just quick gestures. If you pinch open, you're going to
see that you have a larger view of
this color panel. It makes things nice and handy. Right now, it's docked
up to the side, but you can actually
there's a little line right here and if you take that
line and pull it down, you can move your
color panel anywhere that you want it to go so that you don't have
to keep opening it. It's just a little cheat. You can also open your
palettes from there, go to your color wheel. And more, but I'm
going to click the X and show you what
everything looks like on this larger scale. You will have a
history right here. I did get feedback when
this first launched that some iPads were not showing the history, a
certain size of them. If you're not seeing that bar, just make sure that you
have the latest updates. Otherwise, it's probably, I don't know why
they would do that. The size of the iPad, whether that be storage
or actual size. It doesn't make sense to me. But either way, what this does, it's just like this
addition they had in a mid update where
you can see like, Okay, well, four times ago, what was the color I chose? It was this green. Cool, I can get back to that green now. Just a little cheat. But if you want to remember the
colors you're using, you can just create
a new palette. To create a new palette, you'll open the color interface, and you'll go to palettes, and then you'll see that you
have all these palettes. Procreate comes with some,
but you can do your own, and you can just tap the
plus, create new palette. You can also do it from
a file or a photo, but I'm going to say
create new palette. It's going to
automatically be selected. When I go back to my disc, when I go back to my
disc, gets right here, t's say I love that color, I just tap a square and
it'll save it for me. You also rename your palettes
within your palette space, just go to these three dots. Oh no, that's to
share. You just tap the actual title and
you say new palette. That's how that works. You
can also see them as cards. If I go to, let's
say this one here, ops, I want to select it. If you select any
color in a palette, it'll automatically select it and then it'll come up here. You can also view
them as cards and it actually says the name of it, vibrant yellow green, which
I think is really fun. But the other parts
are if you ever see a Hex code or anything like that of a color that is
the color identifier, you can go to value and
enter that code here. This also works for
the classic RGB or, I guess it is in here,
you'll see right here. It's really dark. Let me turn the
light interface on and see if that makes
it easier to see. Cool. You can see
226, 212, two oh one. That's also a color code. But typically, it'll
be on a Hex code, which you can enter right here. If I go to F, F, it's
going to turn a white. There's always six digits. That was only five, one, two, three, four, five, six there. See how it turned a
white. Hex codes. I think if I do like B four, B four, B four. Is a gray. Yeah. This one is a whole
bunch of different things. But, you can use Hex codes. You can go to the This is just going to show
you like a classic color picker versus a disc. I like the disc because I'm
able to play with hues as well as shades and as well
as a everything there, but then there's harmony. I love this one so much. The one thing about this is that it's not
intuitive that you can change underneath what kind of color harmony it is because you can't tell that's a select. If I tap whatever word
this is, it's tetrotic. I don't even know how to say
that. On mine right now, yours might say complimentary, I might say something else,
but if you tap that word, you have all these options. Complimentary colors
are fantastic. I love them. They are directly across each
other on the color wheel. Whatever color I have selected, it's going to automatically select the other one
on the other side. This can be playing with shade, playing with hue, up and down
here, playing with tint. Really, really helpful. You can do split complimentary. What that means is it's the color opposite of the
color wheel one over. It creates three colors, and that's split complimentary. If I select this, then
I can also select this and select this and use
split complimentary colors. It's pretty cool. Analogous
is my all time favorite because it's going
to pull colors that are next to each other
on the color wheel. If I show you an example, I click, I select this one. I'm going to get a brush
that you can see better. Oh, I'm not used to
this light interface. Throwing me off.
Here's this color. I go to the color wheel, I select the one right
next to that one. Then I select the one
on the other side, and this is an
analogous color palette based off of the initial
color that I had chosen, which is very, very fun. You can also do triadic. That's perfectly dispersed into three areas on the color wheel. Basically a perfect triangle. And then Tett Tettic. I don't know how to say
it is perfect quadrants. You'll see no
matter what you do, you have those
perfect quadrants, so you have the complimentary of each depending on
where it is. Very fun. I highly recommend
playing with color. I have a whole thing on color that I'll actually link for you because it's going
to be an added bonus. Just bonuses on top of
bonuses where you can really identify color and
how you want to use it and how and where and
why with a file I have. Very fun to play with. I
want to go over the gestures that you can use to make your whole process
so much faster.
8. Layers & Clipping Masks: Okay. We are going
to play with layers. I love working this way. I remember when I
first got procreate, what I would end up doing is using Alpha lock for everything. I'm going to show
you that first and only so that you
know it's there and then show you why we're
not going to use it. We're going to use other things. I'm just going to collapse this so that I have a
nice clean layer. I'm going to turn that off
to toggle layers on and off, you can just select this
square on the right. When I open this up,
I've grouped all these, so I showed you how to do
that in the last lesson, but just in case you don't know, you're just going to select a few layers and
then you're going to say group and it'll
create a new group. You can name those groups, collapse those groups, turn
them all off together, select a group and move
everything together, that makes things
nice and streamlined for you and clean so that
it's easy to work with. I'm going to turn that off and show you what Alpha Lock is. Let's say I have a brush
and I have some artwork, and that's what's on this layer. Here I'll turn this one off, so you can see that that's it. This is what's on this
particular layer. If I turn alpha lock on, I go to my layers panel, I take two fingers, swipe
to the right and release. You'll see this
checkerboard grid. I might be a little hard to see, but you'll see it on yours. Then basically
what that means is anything that I do
to this layer will be only apply to what is
actually already on that layer. For example, if I go to this
red color and I'm over here, nothing's going to happen until
I start to get over here. It's only applying
to that layer. Now, the reason why
this isn't great is because anything that you do, it's not easy to
toggle off and on. It's done. It's basically
a flattened layer. To work with layers
independently so that you can then change your mind
later or decide what you want to keep and
what you don't want to keep or change the opacity, let's say, of an overlay. Something like that.
Instead of using flock. I'm going to turn that off
same way, two finger swipe, and then make sure
the checkerboard and in the background
is gone and it is. We you can do instead is
what's called a clipping mask. I'm going to create
a new layer on top, make sure it's on top of the previous layer
directly on top, too. If you have a whole
bunch of layers, you want to make sure that
whatever you're going to be doing that will
affect only the layer, that you want is
directly above it. Then you're just going to tap
it and say clipping mask. It's the exact same thing. I can come out here,
nothing's going to happen until I get over here. That's essentially a
clipping mask in a nutshell. That's all that you
need to know about it. You can stack clipping masks. If I have this
layer, I can create another layer on top
of it, select it, say clipping mask,
clipping mask, and then same thing will happen, so I have another color or a texture or something
that I want to use. It will apply only to
the layers below it. I say layers because depending
on the order this is in, see the oranges on
top of the red, it'll clip to the black, but it will also cover essentially whatever
is underneath it. If I wanted the orange
to be underneath, I can drag it
underneath the red and so it will affect
it in that way. Now, you will use this
so much when you're applying different kinds
of shading and whatnot. I'll show you what
that looks like. If you want to delete a
bunch of layers at once, I usually just merge
them together and then delete instead of going through and doing
each individual one. If I turn this on, I can see that there's a lot
of these types of layers. You can see this
little arrow that's going to show that
it's a clipping mask. It's also slightly indented, and then like this one
is affecting the stems. If I turn that off, solid color. It looks a lot more detailed
than the actual color is. It's just this really
simple shape that I that I applied a technique to. And looks like, let's see. Clipping mask here,
a clipping mask here, a clipping mask here. This one it looks like I
ended up using alpha lock. I'm not sure why I did that. It might be the
file size wouldn't allow me to have as many
layers as I wanted. That could be it, or I just
knew that's what I wanted. But the other thing about it is if you know it's
just a quick edit, Saving layers is something
you might want to do depending on your
iPad storage size. For this example, if I
wanted to revert it back, all I would need to do is make sure Alpha lock is turned on, select the color that I want, and you could do that
in the color panel too, tap it and say fill layer. As long as it's either
alpha locked or selected, it'll fill that solid color. That's a little trick. If
you know it's a simple edit, you don't care if you revert it, you could use Alpha Lock. It looks like I've
done both here. Now, so The other cool thing about
using clipping masks is, yes, I can toggle the
effects on and off, but I can also change
the blend mode. That's what I want
to talk about before we get into other
types of masking. Blend modes are a lot of fun. I'm going to use this one as an example because
it'll show up more. I have two different colors
on this clipping mask. I'm going to turn this off and undo the clipping mask
just by selecting it, tapping clipping mask again. This is what that
actually looks like. You can see I've
got some orange and some pinkish red in here. That's what's affecting this
underneath layer and it's just clipped to that beneath layer. That's
what that looks like. Now, I can change the
blend mode by tapping the n. A lot of times when
I do a clipping mask whips, when I do a clipping mask, I will just adjust the opacity because maybe I don't
want it to be so intense. Maybe I just wanted
to have a little bit of man, keep doing that. Maybe I just want it to have
a little bit of effect. If I tap this and just go down, it's just a little bit speckled
but not crazy intense. I like my texture to be
intense, so I keep it. But this is pretty
light for me actually. But if I go to all of these
different blend modes. I have a cheat sheet
for you so you can see exactly what they look like
and you can download that. It's going to tell you what
all the blend modes mean. We'll also cover it a bit more
at the end of this lesson. I am going to approach this in a way of
experimentation, though. Because I think that depending on depending on if you're
using a light color against a dark color or
a dark color against a dark color or any
of those variables. It's going to significantly change the effects
and it's so easy to just play with seeing
how this is going to affect changes in
what you're doing. Lighten, it's only picking
up the lighter color and it's not really picking up
that darker color that I used. That will help you get the actual so you know exactly
what's going on there, but Overall, I just want to
see if there's Oh, my gosh. See if there's something
that I like more than what I had when I just did
the normal blend mode. If you don't like any of these, just remember that
if you go back to n or go back to
normal right here, that's what all
this n means here. That just means it's on
a normal blend mode. But all of these
will change things. Vivid light is going to really
enhance saturation there. Hard mix, it really isolates the lighter color and just makes everything
a lot more vivid. And there's just a
lot to play with. I typically, I
like that one too. I typically stick with normal, but I really like multiply
for a lot of things. I want to show you Let's say
I wanted to add shadows. I'm going to do a clipping
mask on top of this, so I'm going to
select a new layer, tap it clipping mask. That's going to do
the same thing. It's going to affect
everything underneath it until there's no
clipping mask anymore. Just a quick note, if
you wanted to sandwich a clipping mask in between
this layer and the main one, when you tap a new
layer because it was already underneath, real quick. Whatever layer you're on
when you tap a new layer, it will create it directly on top of the layer
that's selected. When I do that, because it's
in between a clipping mask, it'll automatically
be a clipping mask. There's no way around that. Because this clipping mask, there is, you could turn off the clipping mask right here, but when you click off
this clipping mask, it's going to make it so that all of these are then de
selected as clipping masks. You don't want to break
that. Just know that. But I'm going to do it
on top of there and I'm just going to go to black
and I'm going to choose. Let's go to Inking studio pen. It's just a basic procreate pen. Maybe I want to
create some shadows. You can see it's already
a clipping mask. If I draw outside of here, nothing's going to happen.
Something to remember. Let's say I draw this
line and I'm like, Okay, that's all I wanted and now you think you could color fill. You can't without it affecting the whole
thing on that layer because do because when you turn off this clipping mask, this is what it looks like. If you want to do something like that without
having to color, you would want to here, I'll do this and then I'll
show you what it looks like. You would want to
create the shadow that you want and
then connect the two. I guess you wouldn't
go that far out. Create the shadow and then connect the two and just
make sure it connects. What that looks like without
the clipping mask is this, that when I go to
fill it, it will actually fill only that area. When the clothing mask
is back on, there we go. Let's say I wanted to create these shadows and I know
it's black right now, so you're like, this
is not looking good. This is terrible. Yeah. But we're going to make it not terrible
in just a moment. I'm just going to
do this loosely and I'm going to do this
holllow because I want to show you how you can continue your color fill
without having to go without having to
do it individually, just as a sped up workflow, so you can just assign
where you want these to be. Now that just know, it's not the whole layer because the only thing that
this is affecting this clipping mask is the orange stems, are
the orange stems. Then when you want
to fill everything, if you color drop in here, I'm making sure the
threshold is up. You'll see continue filling. I I I Do this. I can say continue filling, and then when I tap, it just lets me continue
filling everywhere that I tap, and then you can
exit out of that. So that's just something
that's really convenient. Okay. So from here, I think I want to add just
a little guy right here.
9. Bonus Walkthrough: Colors & Layers: Essentially, what I love most about working in
layers is that you can make all the
effects that you want and let me show
you actually this. I ended up taking that
artwork and I wanted to share certain brushes that I had put into
this brush pack, and it it highlighted
those same textures, but I changed the colors
so they would show up more true to what they were. And all I did was just go in and change the hue and the
saturation and all that. I did end up compress or merging some so that the whole thing would
change color together, because otherwise it's going to change independently
and then you might have hot pink texture on
top of the shape, which is fine because
I think that's actually better because then
you still have full control. But if you're happy with
the texture overall, if I was to go to hue saturation brightness and move this around, everything will change together
and same with recolor. I toggle on recolor
and come over here, find the area I want
it to be affecting. If I go darker, I want it to get in there on one of
these areas that there we go, on one of the darker areas so that the lighter areas
pop still because if I go with this
darker color on top of an area that I like that, that is or that's light, it's going to make everything pretty dark and
it won't stand out as much. If I hit one of these pixels
that is already dark, I still have that nice contrast. The opposite goes for if
I have a lighter color, I'm going to want to
hit the lighter areas instead of the darker areas. That can be hard when
you have fine texture. But anyway, I'm in recolor. I can move the recolor
around, which is awesome. It makes things really handy. If you love a color
and you're like, wait. I wonder if this could
be applied in this way. That way, you can see it as a whole is what I'm
trying to get at. That's pretty fun. That's going to allow you to play If I
had those separate layers, then I would be able to
work with that more. This is a separate layer. If
I wanted to change that one, it wouldn't change everything. It wouldn't change this part that's underneath the mushroom, it wouldn't change
the top of it. I could just change that color. Let's say I wanted
to pop a color. I'm going to go to recolor and make sure that it's
over what I want. I'm going to make sure
that the flood is up so that it gets
to, to all the lines. Then I'm going to
go over here and maybe I want it
to be lime green, or maybe I want it
to really stand out with a bright
blue or something. That's where I
have that control, and that's the control
that you want. You want to be able to control
everything on its own. I think I hope it's not
flattened, It is flattened. If something's
flattened, by the way, if you want to unflatten it in some way you possibly could. If you go to your selection
tool, go to automatic, you could free hand
this too, but I'm going to try to do
it in automatic. Your threshold works the same. K Let's say I select
this and it's like this. Well, you can select it and
move your threshold up, see the thresholds coming up, and it's going to select more. You don't want it to
select everything, so then I can come back down. When you have texture, it
won't grab everything, everything, but it will grab
enough, I don't want that. I'm going to undo.
That's the background. That's why. Undo. Until that goes away.
Select this part. You it's going to continue
to select as you tap. I can tap that area, tap
this area, tap this one. You might need to adjust the threshold here and
there as you go. Make sure to check
your previous work because what you do
here for some reason, could affect the other,
which is just annoying, but it is what it is. Let's say I wanted to do that
and then this area here, I can adjust this flattened, but I could also
create a copy of it. With the selection here
on this bottom area, I also have the
option to copy paste. I could cut and paste
where it takes it away from that layer
and puts it on a layer, but I'd I'd rather just
copy and paste it. Now I have it on its own layer, and that will separate things
and then I can go here and change the color
of just that part without ruining
the actual layer. That's another way to
work and destructively, especially if a layer
is already flattened. Yeah. There's a lot there. But the main part, and this is probably, I mean, it's my favorite thing to
teach because it's going to help you so much
in the long run, so so much, and you're
going to be able to do anything that you want without ruining
anything, which is huge.
10. Procreate Blend Modes: From here, I'm going to go into my blend modes on that
layer particularly. I like to go to multiply, and then I like to decrease
the opacity quite a bit. That is going to let me just
see a nice drop shadow. You can do this with
darken, color burn. It's not going to create
that much of a difference. Between these, but you can
just see this one allows for that texture to show up more
than let's say darken wood. But multiply, you can see, it's still it's still in there, it's just darkening things. This is a mass there we go. It's just darkening things. It just depends on how
you want that to show up. Color burn is the color
is burning through it, whereas these ones will still show the texture
underneath that, but because it's
on the top layer, it's going to have
some coverage. Now, light, you're not going to see anything
happen because the black that I added is
darker than everything here. If it was lighten, if I
was to choose a white, and make sure that
whole layer is white. And have the opacity up and
then brought that down, it would act like a highlight.
If I go to Lighten. Now if I go back to darken, nothing's going
to happen because it's lighter than the
color that I chose. I'm going to undo that
and get it back to black. Blend modes are
very fun for that essentially is what
I'm trying to get at. But I would multiply as my
favorite toe for shadows. Sometimes I don't even use it, sometimes I keep it on
a normal blend mode for shadows because it doesn't really make a
difference either way, but just play with them
is what I'm trying to say and you'll get the effects
that you actually want to get. From there. If I wanted to
do that to all of them, I could just go and
create let me show you what it looks like when we
do it in between layers. This one's just that one. If I added a shadow here, let me make sure I'm
on the right layer. Always make sure you're
on the right layer because when you're
moving so quickly, if something's not working, just check your layers and make sure you're
on the right one. If I want to have it in here, you can see that now this is it's underneath all that
texture, which is fine. It's totally fine. I think
it looks good like this, but if you want it to
be more prominent, you could have it be on the top. If I don't do a blend mode or if I don't decrease the opacity, this is what it's
going to look like. If I had a purple that I
chose instead of black, which by the way, you can do. Here I'm just going to
color drop that in. You can do that. If you want
it to have a certain effect, you can use blend modes, basically is what
I'm getting at. See when I use these
multiply with purple, darken with purple,
color burn with purple, it will have a different
effect when it's not black. It'll be a lot more prominent. That's also fun to play
with a darker color of the version or of the
color that you're using. And then you can decrease
that and it looks pretty cool and just bring
in different shading. Now let me show you
what that looks like. If I move that layer to the top, here on top of everything. See how much more
intense that is. I can decrease the
opacity and then it's just more
uniform instead of having those really they're they're like speckles,
like confetti sprinkles. But instead of having
those be so prominent, like they were when
it was underneath, they then go into that
blend mode as well. So options that
you can play with. As a summary, this is going to help you work indestructively, as far as when you're adding techniques and whatnot
or techniques, shadows, shading,
effects of any kind. Now, When it comes to let's
say you want to make. Let's say you want to make
this skinnier for some reason, or you want to shave
some of that off. Instead of going
to that layer and taking your eraser to it
just right off the bat, where there it's gone and
you can't bring it back, what you can do instead. This is often when you have other working elements that are communicating
with that piece. Let's say you have some
words and you're drawing flowers around
those words and you want some interwoven somethings. This is where that
can come in handy. M
11. Procreate Masks: When it comes to
let's say you want to make something let's say you want to make this
skinnier for some reason, or you want to shave
some of that off. Instead of going
to that layer and taking your eraser to it
just right off the bat, where there it's gone and
you can't bring it back, what you can do instead. This is often when you have other working elements that are communicating
with that piece. Let's say you have some
words and you're drawing flowers around
those words and you want some interwoven somethings. This is where that
can come in handy, be behind this stem. But if I was to take because
these are on the same layer, if I was to move it under, it's also going to be, this
is on a different layer, but let's say these
are all on the same. It would be under that layer
too, and I don't want that. In this case, I can do a regular mask, not
a clipping mask, a regular mask on the
layer right here, which is this pink layer
to hide this area, which is not going to erase it. To do that, I'm just going to instead of
creating a new layer, I'm going to tap this
layer and select mask. This, you have to only
work in black and white, and this might seem a
little bit strange because we're used to using black for putting things on
and then white is like, Oh, that's my canvas,
it's a erase, but it's actually opposite. To hide things, you're going to make sure you're on black. If you want to bring them back, which I'll show you after
you're going to go to white. I'm going to just grab
the studio pens fine, and I'm going to start
from the middle so that I don't go too too far over,
I'll make that larger. See how I'm on black right now. I'm just coloring over
the pink layer and I'm hiding it is
what that means. If you have this issue and
you keep running into it, you don't want to
keep doing guesswork. All that I end up doing is going to that
initial pink layer. You see I'm on the
pink layer and it changes my color
back to normal. If I go to the mask
layer, it goes to black. But if I go to this layer and
just decrease the opacity, I can see behind it and then I know what to
take away in my mask. Going back to my mask layer, making sure it's on black. I can get rid of the pink layer. Another way to do
this is to go to your selection tool if you're
on free hand and you can. You can just go along here. And then you can fill
this layer with black. I'm going to
actually come up and come right to the edge here. Since this is just, I'm
going to have to do this to the orange layer too because
it goes behind there, but that's okay because I can just do that quickly afterwards. I'm just making sure I'm just slightly inside because
I don't want it to have that white space if I erase too much or
excuse me hide. Too much. From there, I can close the selection, but anytime you don't
close the selection, it'll close automatically
depending on where it is. If it's way over here, it's
going to chop this way. But if it comes
all the way here, I'll close right there and
I don't have to close it. To close it, you just tap that square or tap the circle
and then it closes it. But I could just keep it
open and do a color drop. Because that's closed,
it's a selection. If I drag the black
inside of it, it's going to hide everything
there, which is great. That's what I want. You'll see that I'm going to deselect. You'll see there's an
area that's not done to, that's because those
are different layers. I would have to go to those
other layers and create a mask and just Hide that. I'm not going to do a great job because I just want
to show you quickly. So you can have a full vision. Now, these lines are showing up. I saw that that's
because they're not a clipping mask to the bottom,
so I'm going to clip them. They're going to skip
the mask because the mask is just applying
to the layer below it. We're good there, and
then the last one is, I'm going to tap that layer, say mask, and the last
one is just this orange. I'm not sure what that little
guy is, but that's okay. See how now, if I
turn the opacity back up, and nice and solid. Now, it looks like that's
behind that layer. It's not. It's just that all of
these masks are making it so that those parts of
the front mushroom are hidden so that you can see it reveals what's
underneath that layer. Let's say I have a
tweak I want to make. Let's say on this
layer, the mask, I did go too far and I
didn't realize it until I would have to do a whole
bunch in order to undo it. All you need to do is
switch from black to white. Quick tip, double
tap the white area. I'll give you a true white, which is the FFF value.
You'll see it right here. That's your true white
because if you come up here and you try
to guess it, guess, it's not going to be true
white ever, f8f1, whatever. Double tap, true white, and then I can come in and reveal the masked layer
to bring that back. That's how you can
work indestructibly, and it will save you so much. Whoa, in the sense of, let's see W OE Whoa. You can also toggle
masks on and off. Let's say, I don't want
these masks anymore, but I'm not sure maybe I will. I don't want to have to erase
every or go to white and color them back or you get what I'm saying. I don't
want to have to do all that. I'm just going to
turn them off and they work the same
as any other layer. You just go to the
mask layer and toggle this little switch
off and they're off. So That is what masking
is in a nutshell. It seems really difficult
because it's like, we're going to apply masks. What does that even
mean? It's that simple. You have clipping masks, which anything on top of a layer is applied to
the layer below it. Then you have your mask, which affects the actual layer in taking away and revealing. Now, I just want to show you
what happens if you do go to a different color or
whatever on a mask. You can see I went
to a different color and then it actually
made it gray. When I work with gray, what
layer am I on? This one. Yeah. I I work with gray, it's not even hidden
because it's hidden. Let's see. Looks like I rebuilt. That's okay. You can see that it's not fully
getting rid of it. There's some transparency there instead of being white for
this white background. That's because it's
working in gray scale. Gray scale is not going
to be pure white, pure black, so it's not going
to fully erase something. I acts like an opacity. Instead. Yeah, there's a
time and a place for it. But overall, just make sure that when you're
working in masks, you're either all the way
black or all the way white. Then that trick I showed you with tapping to white
will work with any color. If you want that true, if
you're in here and you want the most pigmented
red, double tap here. If you want black, double tap, usually this whole
area is going to give you a nice black,
it doesn't matter. But if you want the center,
double tap the center. That same thing works
well for all of these areas to get the colors that you're
really looking for. For when you want them
to be true colors. Then one thing that
I had forgotten to share, I just
want to show you, if you go to Canvas
under your wrench, you can turn on drawing guide, and that's going to
give you this grid. You can adjust the drawing guide because once you toggle it on, you'll see that this
part edit drawing guide will reveal and you
can click that. Change the opacity,
change the thickness, change the grid size up here, you can change the color
of the grid itself. See, I've made it
like a reddish color. You can make it large and small and that's really helpful. It reminded me because I
have these words here. I used the guide so that
I made sure I wrote well, as much as I could
on a straight line, but we all know how that goes
sometimes. That's helpful. This is also where
you would go into to start your assisted drawing where you do symmetry
and all stuff like that. But We have too much to
go over to get there, and there are resources for it. I will make sure that
by the end of this, you will have everything
that you need to continue. But for now, this is what
Layers is all about. It's straightforward once you know and understand the terms. I know that the last
lesson was a lot, and I know that this one
was probably even more so. But I hope that this stuff clicked for you and I hope
that you really take it and use it to your
benefit because it really will help you save so much time. It will help you in
your entire workflow and keeping things clean, right? I'm not always clean
with my layers, but it will help you keep those things independent
of one another to really allow you to edit and move and make adjustments
because we want things to be able to have a flow and just make things
easier overall. I wanted you to really
get familiar with that before we
dive into brushes, and I know that's
something that you'd think that you would
go over first, but I like to be really particular with
the way that I deliver information because I
think that it will build that fundamental foundation
that you need in order to really take
all these next steps, where you want them to go, and you may or may not use them, but if you needed to, they are there, those tools
are there to help you. So in our next lesson, I will be introducing you
to the Brushes interface. We'll be going over
brush adjustments, how to render the exact results
that you're looking for. You'll get my favorite
custom brushes that I use in all of my artwork. You'll also discover some brush
hacks and tweaks that you can do and use to continue to
increase your productivity. So I'll see you in
our next lesson.
12. Procreate Brush Interface: Welcome back. In
our last lesson, we went over layers, masking that whole interface, and how you can
really use that for upping your productivity and making sure that you have a nice clean work flow altogether. So in this lesson,
we are going to dive into your
brushes interface. We're going to be
able to edit things. Particularly so that you can render the results
that you so desire, and there's a lot to
know about brushes. I have a package
for you so that you can grab my favorite brushes that I've created and
use in almost all of my artwork. Let's jump on in. As we've went over, just in case skept a section or maybe
you just want to refresher. Your brushes are obviously
found in your brush area here. You have your
brushes, your blur, which is also same
brushes you have access to and your
erasing brushes. In your regular brushes, that's where you're going
to spend most of your time finding exactly what
you want to apply. We're going to go over
everything inside of there. First, I will show you all of your brush sets will
live on the left, all of your brushes
within those sets, will live in the right. This will toggle each of those open so you can see
exactly what's going on. If you want to create a new set, you will just tap
the P symbol here. You can title it new set have
that as an example before. New set and within there, if you select it, you
can add new brushes. This is what your brush
interface will look like. We'll get into it
in just a minute, but for now, that is how
you will set that up. You can also import. Surprisingly, it's
not at the top, it's actually at the bottom. You'll see your
imported brushes. That's not where you're going
to actually import them. You'll open them in a file
wherever they might live. Let me show you an example. At the end of this
lesson, you're going to get a brush set from me. What you're going to do
is go into that folder, you'll see I have two and here, one's a sampler and one's
an actual brush set, but I'll show you
the full brush set. This is all banners.
Actually, that's confusing. I'm going to show
you actual brushes. You'll see something
that looks like this and it's dot dot brush set. That's what you want.
If it says dot brush, that's an individual brush. If you see dot brush set, that's like a folder brush set
with brushes inside of it. I'm just going to click
the three dots right here and I'm going
to say open in. It's going to download that. And then open it in procreate. I'm just going to swipe
through this section here. Procreate. It's going
to import to procreate. You're not going to see
anything right away. I must have done
that accidentally. Then I go to my brushes
rather than having it be under imported because
it wasn't a single brush, it's going to be at the top. Don't let that confuse you,
but you can now see I have my vintage texture brush
right here or me set, and you'll see all of those brushes that
live inside of it. It's really simple to import. And I'm going to delete it because I already
have it right here, to delete a brush set,
you're just going to tap and delete. Then it'll ask you to confirm. If you want to delete
a regular brush, you can just go to a brush and swipe to the left
and say delete. This is handy because it's let's say you have
a brush that you like, but you want to apply a
different setting to it without ruining the
original brush. You can create a
second copy of it. You can say I have three
versions of my brush pen and All that I need
to do is swipe to the left and say duplicate
and then I can make adjustments according to it without affecting
the original brush. The difference between
procreates original brushes. I made a little folder of my procreate favorites because I don't really use
a lot of these, but there are some that
I love that I use. I recommend doing that, too. You can create duplicates of these by doing
the same thing, but you can see where
it says reset here. That is because you won't
see that on regular brushes. If I go to a different one, it'll let me delete
it, but not reset it. The difference between
procreate brushes and others is that Instead
of deleting them, if I make any edits to this,
so I'll show you what that. I'm not going to do a whole lot. I'm just going to move stuff
around and I say done. That totally changed
the studio pen. If I want to reset it to
its original settings, I'm going to swipe to the
left and say reset and done. If I loved the edits
I made though, I can always duplicate it, do it to this version, and then I can delete that one because
it's the duplicate. But the original brushes
will always have their reset Spot. One of the cool
things that you can do with the brushes that
you create or that you import or any
edits like that, you can me, under properties. No, about. Yeah, about. You can create a
new reset point. If I was to make edits
and I wanted to make sure that I had a reset point, I can say create
new reset point. That's going to happen
right now as it stands, and then we're good. Now you see reset brush. If I was to make a
bunch of edits to this, I can say reset brush and it's
going to reset it to this. You do have that option,
but I always recommend duplicating brushes if you're going to make any edits at all, that way it preserves
the original one, you don't have to
worry about it. Okay. When I'm on a brush, basic settings, we'll go over
editing in just a minute, but basic settings here, you have your slider, and I mentioned this
in a previous lesson, but in case you miss it
or want to refresher. This little line right here is there because the last
time I used this brush, I set it so that I wouldn't forget some project I was
working on or something. Something. I wanted
it to be that size. The way to do that is
simply you have your size, you just tap this plus symbol. Cool. Now I have a line there. If you toggle in between sizes, that's going to
remember your size on that particular brush. It won't happen to the
rest of your brushes, just that one, and
it'll remember it, which is really helpful. You can delete them just
by tapping and then selecting that minus
button. So then it's gone. Then the other thing
I like is that if you want a specific number and it's like you're having
a hard time getting just right there because
of how quickly it goes. If I select and tap this and
hold down and bring it out. Notice how slow it goes now, so I can get those
precise percentages, those precise numbers. Also a helpful deal. Your opacity slider for brushes. Some people love it. I
don't use it at all. I like to use opacity in my layers panel and I I
want opacity in a brush, I set it in my brush settings. But if you do like it, something you want to use,
it's the slider here. It's going to change
the opacity of that brush. Just know it. Now we're going to move into brush settings. We've imported. We have real quick, to share a brush or a brush set, you're just going to swipe
to the left and say share, and then you can say, put
where you want to share it. You can also tap a brush set, say share, and
then go with that. That's how you also
rename brushes. If I tap this, go to
about this brush, I can rename it up here. We'll go over all these
settings, but rename it there, and then the brush set, you just rename by tapping
and saying rename. So let's move into what rushes are all about and
how they come about and all the things that
have to do with it.
13. Brush Customization: Let's move into what brushes
are all about and how they come about and all the things that have to do with it.
I'm going to choose. I think I'll just go
I'll do my ink scratch. That's a good one as an example. Now, I don't know if I'm going
to mess around with this. Just to be safe, I'm
going to duplicate it, so I don't mess this one up, and then I'm going to it to go into my brush studio
is what it's called. This is my drawing pad. I can sample things
here. I don't like to. I don't like to because to me, that looks nothing like
how it comes out here. I guess a little
bit, just for me, isn't my favorite. I don't know. It's good for a quick test, but I don't really
base anything off. Stroke. Before we
get into stroke, there's two main elements
that make up your brush. That is your shape.
And your grain. What the shape is is
basically if I was to take any pen or marker or whatever and just put
it down on paper. That's the market would make. The grain is when
you actually draw, what texture what comes out? Does it have some opacity?
Does it have some grit? Does it have rough edges? Well, edges is a
different setting, but roughness on the inside
of the stroke itself. That is what shape
shape is going to be your your dot so you can see how
that's coming about, and then grain is what's
inside of that shape. Those are your two
main elements. So I wish that those were at the top so that
it was in order. But that way, you have the base base of your brush and how that
foundation is built up. When you see stamp brushes, this is what you're seeing
is the shape source because you see the
repeating brushes. Let me show you that real fast. If I was to create a new brush, I'm just going to go I
have this working folder, and I recommend creating
a working folder. It's just going to help so that you know, I'm in
the middle of this, nothing's actually done yet, but these are things I'm working on and I'm
editing and playing as I go. Basically, what I do is
when I create a new brush, I use it and I use it and I use it until I'm
really happy with it. If I feel like there
needs to be a tweak, I'll just go in and edit the
tweet, but I'll be using it. Then when I feel
really happy with it, that's when I make it an
official like, this is a brush, I'm ready to put into
a brush set and build from there. I have
a working folder. Now, real quick, I
also want to talk about organization just because I feel like it's
going to come up. I have my brush sets that are under my name and then
I have Lisa glands, I have Lisa Bardo, I have
Liz Cooler Brown Trailhead. You can see that they're
technically in these folders. The folder icon is just
to separate sections. If I click that, nothing's
actually inside of it. All the brush sets
are underneath, but that's just
for my own brain. These are the ones I
imported from her. From Lisa glands. But I
create a new brush set. I just go to Emojis
and I go to folder, and then I select
the folder icon. See it popped up here, go
back to my keyboard. Come on. Rename, go back to my keyboard, new set, category, whatever. Then you can see new sets
are there, so I'll do this. New sets plural. Then
you can see new sets, boom boom, and you can adjust these by dragging them
wherever you want them to go. Just as an F, I might
help you organize things like all of my brush
sets have this little pigeon, the front of it because
I think it's fun. And that way when people
download my brush sets, they see this little pigeon. In their space, so
they know it's ours. Going back to here. If you want to
create a new folder or anything that you work
within for working brushes, I recommend doing
it, but I'm going to do my plus sign here, and I'm going to go to shape. It's a circle. I'm
going to keep it shape. I'm going to go to
grain, keep it grain. This is going to help you really understand the process
of the brush studio. The shape itself, you're
going to edit this. We're not going to for this one, but if you want to edit it, You just are on shape, you go to edit, and
then you can import, and you can use their
source library. They have a ton of
different shapes here. Quick note, they
did separate it. They didn't use to
separate shape source from grain source,
but now they do. Basically, their grain source goes edge to edge and
the shape source doesn't because the shape
remember is like the dot from the top
of a pen or whatever. These are shaped sources.
But we're going to stick with the circle for now. I just wanted to share that. You can also import a photo. Let's say you created
an ink swatch on paper, took a image of it. Made it black and white,
you can import it there. You do want things to
be black and white. If you ever import an image and it's turning out
incorrectly like backwards, it's two fingers,
two finger tap, and it inverts it.
It's that easy. Just know that the
part that shows up is the white part. Just as an FYI. Just know if anything's not
coming up the way it should, just invert it and see if that works and solves the problem. Grain, same thing. Your settings are there as well.
You can edit them. You'll see import,
two source library, the grain sources are
all here, which is nice. Okay. Now, to create the
actual movement of this, we need to go to
our stroke path. Our stroke path is the spacing or the
spacing is basically how much space
there is in between the repeat of your shape
of that initial dot. On a straight line, how many times is this spacing out right here, it's
next to nothing. If I was to make this go up, you can now see that there
is space in between all of those initial I'm
going to clear this. If you want to clear
your drawing pad, you just tap it and
say clear drawing. That's going to show
you how it repeats. And you can have this be pretty far out or close together, however you want that to be. This would create
a fun little edge. Now, the other part
of this that is fine because that spaces
it out on the line. For example, on the
line that spaced out. But let's say, I'm
going to make this closer together for
this next example. Let's say I wanted it to
be spaced out this way. Off of the line, coming
off of the line, so it has some jaggedness,
that's going to be jitter. You can see now,
it's spreading out. Jitter is awesome, even if you have this straight
line that has no spacing changes to
create rough edges. This is one of the things I have in a lot of brushes to make that organic ink
looking texture, especially on pressure
sensitive brushes and it creates that
nice textured edge. Then fall off. What
this is is basically in a stroke if it has
any opacity fall off. If I put this up,
you can see that it starts to fade away. I don't usually use fall off because I prefer to have that, like physical power over it
with my pressure sensitivity. This one doesn't have any
pressure sensitivity yet. We're going to apply
that together. But I'm going to
clear my drawing pad. I'll just have this line so
that we can see the sample. Stabilization. We'll go
into the rest of these, but real quick, stabilization, what this means is the amount
that actually, real quick. You don't have to do this
if yours is anything, but this is just going to
let you see it better. Your streamline. See when I do this, you can
see wobbles pretty easily. If I was to have these
imperfect edges, when I turn streamline up, it's going to smooth
all that out. Pressure smooth
out with pressure. It's not set, but
stabilization is another one where it just
gets even more fine tune. Streamline It doesn't
take it completely away. Stabilization really
smooths things out. There's a time and a place
for a streamline. For sure. I'm not a huge fan of anything being all the
way up on streamline. I usually stick
around 30 to 40%. That way you have that
hand drawn element. If you're trying to do
something more geometric, for sure. This is
great for that. And then you have those
controls, which is fantastic. But just know that's
what streamline is. You could totally keep it up to 20 ish and you
can still see I have these nice like a
nice flow here, but you can still see what I'm doing and it's
not like Boom, we are a magnet. We've magnetized to
what we're doing. If I have this all the
way up, look at that. It's literally a magnet, and what I actually
did was this. That's the reason. I just think it interferes
with our organic process. Obviously, if you go slower, it would take some of that and your stroke if it's slower,
is what I'm trying to say. It will maintain it
better than if it's fast. Just know that. Okay. Taper If you were to edit this area in the beginning of a stroke
or the end of a stroke. It's going to allow
you to taper the top. This is also something
I prefer to do in my pressure controls rather than doing it
automatically because then no matter what,
it's always there. I don't always want
that. Sometimes that will serve you depending
on what you want to do. You can also adjust the opacity, it's getting lighter
at the beginning. That's also something
that you can control in your pressure. I like to do it that way, but play around with this if
it's something that sounds enticing. Let's go to shape. We'll go to that pressure, what I'm talking about in just a bit. But shape has scatter. This will apply more to
when you have a brush. I'm going to go to one
duplicative first. Go to one that has more of something you'll see as an
example when I do this. Shape. The scatter, what that does, I'm going to clear
the drawing pad. If I was to just
stamp down once, stamp down once, stamp down
once, stamp down once. You can see that they're all
in different directions. If I had this or if I had
both of these turned down, it would all come up exactly
the way it's showing here. If I turn on scatter, it's going to disperse that and then if I
turn on rotation, it's going to make
it so that these are all coming up differently upon both the flow and the stamp so that they're
not all showing up the same. The count depends. It just changes how
much it's going to repeat the shape
in one stroke. If I do a ton of these, it's clearly very condensed. The count jitter.
If it's on one, you're not going to
see a difference. If if you have it
on more than one, you're going to see, let's see. You're going to see how it
can also jitter similarly. That's going to
depend on the type of brush that you want to use. Moving into grain. M.
14. Brushes in Action: Let's apply some of this. In this case, let's
say I want to I'm going to get rid of these
texture layers right here, and then I'm going to go to that main layer, create a layer. It's automatically a
clipping mask because these two on top of it are. That's
what I want to work on. Let's just say I go
to a grain layer and make this a lot smaller. I just want to add
some depth here. I add the step inside here. I'm not going to make
this too fancy because I just want to give
you an example. Let's say I want to adjust this brush because
it's too powdery. Even though I did make
it that way on purpose, but let's just say in this case, I don't like how powdery it is. I want it to be more more.
I have more going on. I can go into that brush
and instead of editing it, I can just duplicate it and I can go in and make
some adjustments here. So The first thing
I think I want to do is increase the
size of these specs. To do that, I'm going
to go to my properties. I'm going to change the
minimum size and make that larger so that it
isn't that low. Then I'm going to go in let's just sample that real quick and
see how that looks. Already that's more textured. One of the things
that I will do, especially if a brush is larger like this and
takes up more space. If it ends up getting some place that I
don't want it to go, for example, up here, I'll just go in and
just erase that spot. Some of it isn't
removing because I have another layer of
grit on top of this, but just so you know. Yeah. Then one of the things I love doing is
increases like this. If you make a nice sharp
crease in between shading, it just brings things to life a little more in a three D
way, which is really fun. Here I could do the same thing. And I've got lots of
resources that we go over, like this type of
lettering together, which is so much fun. But in this
particular, of course, we're just going over these
must nodes because gosh, I wish there was
time for everything, but there's just not I I
make that even smaller, I can do it inside here. Which is just fun and then I can fade that out with an
airbrush, blah, blah, blah. That just creates that
pretty effect and if we go in and apply what
we've learned so far, we can decrease the opacity. We can change that to darken, co color burn won't do
anything because it's black, but if we change it to recolor and change it to a green
or yellow or something. See how that just creates that natural element.
It's just very fun. So there's a lot to play
with with brushes and a lot to play with with blending modes and a lot over the interface. But hopefully this, really
gets you set up on that jump start that is so important to be able to have these
seamless work flows.
15. Procreate Fundamentals UPDATE 15 free brushes (1): And as promised,
you can grab all of my favorite custom brushes
that I use in my artwork now. And these are so much fun. You're going to get
things from shading to particular unique edges
as far as outlining goes. And I've worked a long time on these because I wanted them
to be exactly what I wanted, and now you have the
tools to do that as well. So I can't wait to see the brushes that you
end up creating, whether it be for
yourself or to Share. I also want to give
you an invitation to join me inside of one of my other classes because
you never know what kind of creativity is waiting
to burst out of you. And well, I've got a
few to choose from. So I will see you next time.
 Peggy Dean, Top Teacher | The Pigeon Letters