Transcripts
1. Procreate Dreams: From Illustration to Animation: Hi, I'm Priscilla and welcome
to my skillshare class. I'm an Illustrator
surface pattern designer, top teacher on skillshare, and owner of Cardwell and Inc, a design studio
based in Australia. I am passionate
about simplifying digital design in a way that allows it to be
accessible to everyone. Today, I'm so excited to introduce you to
Procreate Dreams, a game changing new app by
the creators of Procreate, that allows anyone
from a novice to professional
illustrators to access the world of animation, Movies and animation
enable us to communicate our unique
stories to the world. Procreate Dreams has taken this to the next level by giving everyone the tools
to communicate their stories in a simple, fun, and intuitive way. In a one time purchase
ipad based app that requires no
ongoing subscription. It's affordable, it's
frequently updated, and it gives
creatives ownership, the tools they need to create professional animations
at their fingertips. In this class, you will
learn the skills to turn your illustrations
into animations. We will start from
the ground up with the basics of the
Procreate Dreams app, an overview of its tools to help you navigate
the interface, as well as going
through the settings, menus and gestures that help
to simplify your workflow. Next we'll talk through using animation tracks and navigating the drawer and paint mode. You'll learn how to
import your projects. Work with color
palettes and brushes. How layers in procreate dreams interact with your animation
tracks in your timeline. We'll also learn how to use clipping masks to
enhance your animations. Next, we'll go
through a series of animation exercises in a
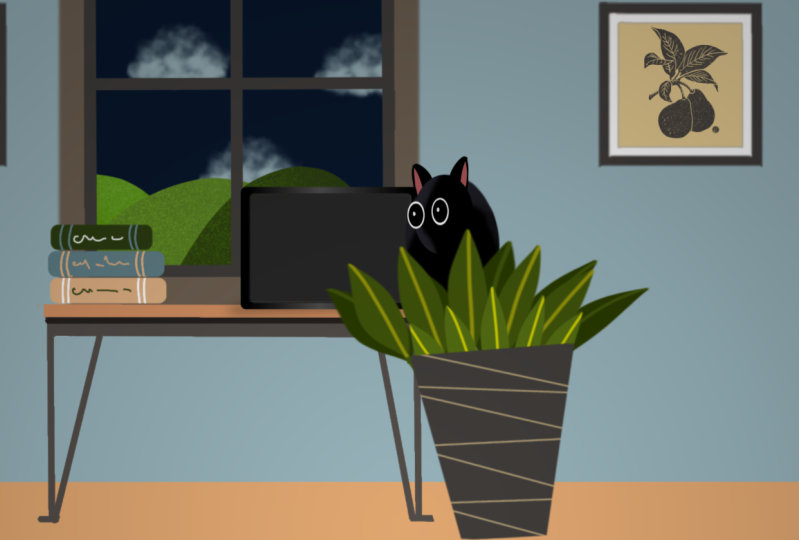
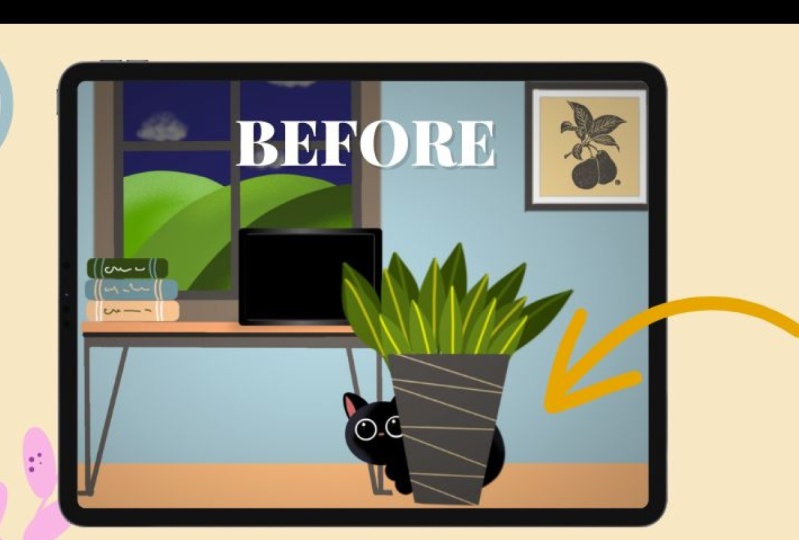
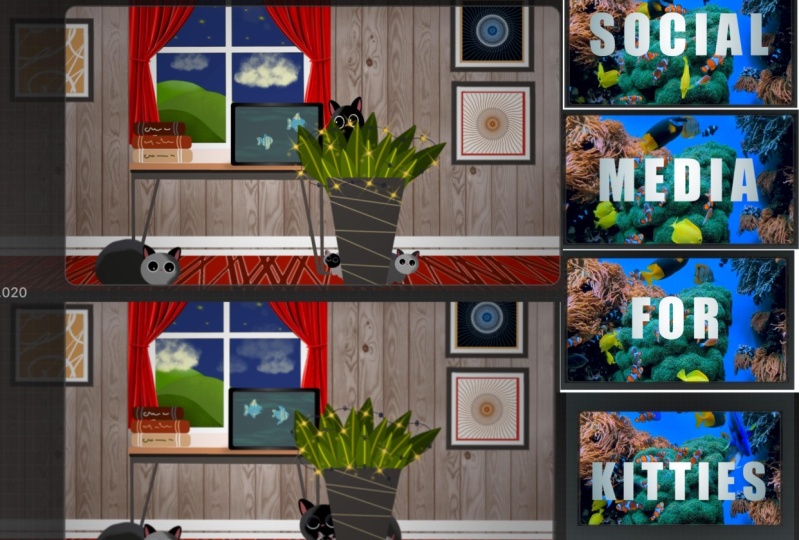
beginner friendly way. And turn a pre prepared
procreate illustration called Social Media for Cats
into an animated movie. By going through the
steps of this project, you will learn to create an animated title that
incorporates text, audio, video, and layer masks. Then we will move
on to converting the layered illustration
into a movie by applying key frames from motion and
live filters Performing and the flip book in drawer and paint mode to bring
our animation to life. Don't worry if you are
brand new to animation. Because the project file, the brushes, the palettes, the video and audio files are all included in your
class resources So that you can
use the same tools that I'm using every
step of the way. That way we can get
straight into animating. All you will need to take
this class is an ipad, the app Procreate
Dreams, and a Stylus. For the best results
I do recommend the pressure sensitive
model of the apple pencil, which I will be using,
enough talking. Let's get started. Join
me in the next lesson to find out how to access
your class resources. And I will see you in class.
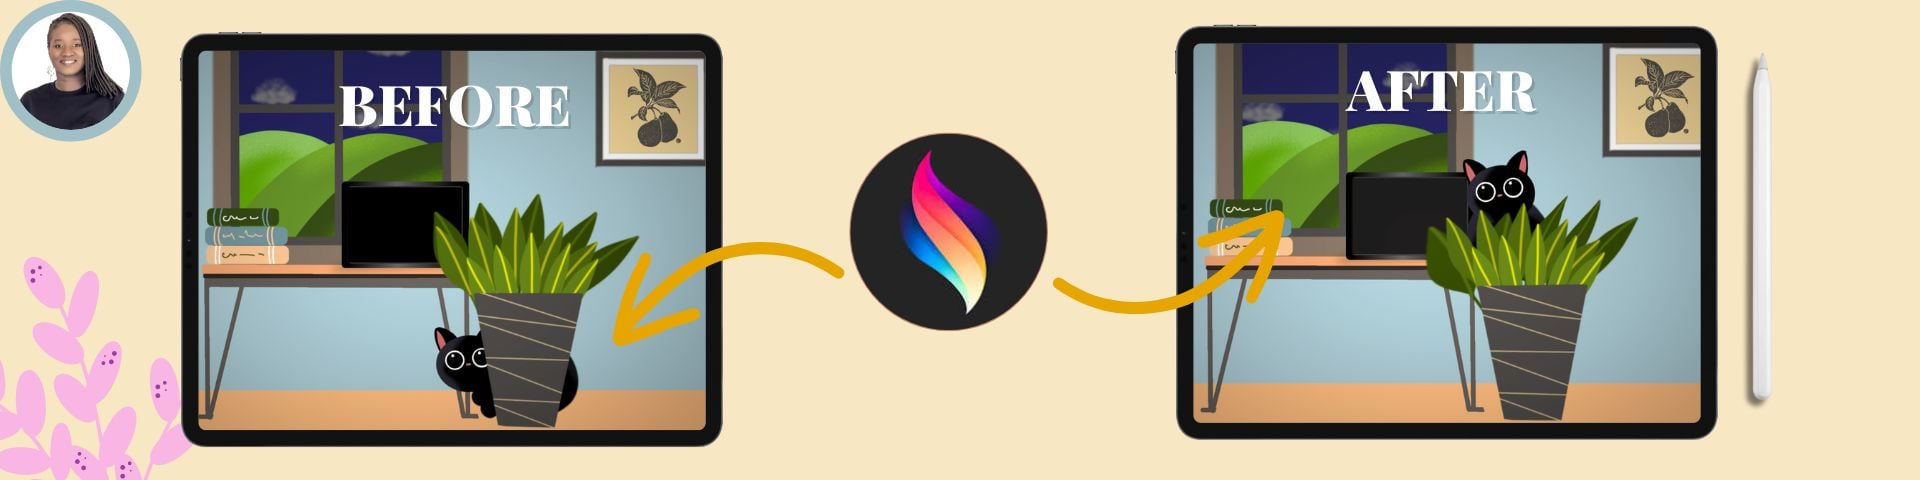
2. Class Project and Resources: Your class project
will be to share an image or video file
of your animation. In Procreate Dreams, you can do this at any stage in
the course and really easily by taking a screenshot of two frames of your movie before and after an
animated motion. This could be a
performance animation or a live filter animation at
any stage in your movie. Alternatively, you
can upload your video to Youtube or social
media and then link the video class
project section just below this
video in the Web, not the mobile version
of Skillshare. Some of the most
creative ideas come from allowing yourself to play and
experiment with the tools. If you apply any of the
skills to something original, I would love to see it. Sharing a project also helps to inspire other creatives
to try it as well. You can find the class resources to download in the
web version of Skillshare in the class
resources section just below this video. Tap on each resource and then save it to your file storage. From there you can
open or export it to Procreate Dreams as we
progress through the lessons. All right, let's dive in, meet me in the next lesson for an overview of the interface
in Procreate Dreams.
3. Interface and Settings: In this lesson, we
are going to get a comprehensive overview of
the Procreate Dreams app. We're also going to look at the features that
are tucked away in the interface that maximize
the animation experience. Once you know them,
they will make your workflow easier and
more efficient. All right, let's dive in. Tapping on the Procreate
Dreams icon will open the app to its home page
known as the theater. There you will find
a few demo movies once you get more comfortable with how to use
Procreate Dreams. These are so helpful
and allow you to view the way that
other animators have applied the tools so
that you can reverse engineer different techniques
into your projects. It's also a great
bird's eye view into the depth of capabilities that can be achieved
in this app. There are a few hidden
features on this interface. On the left hand side, tapping the icons shows you the file locations
for your movies. I have mine on my ipad, but you also have the option of the cloud tapping anywhere in the theater
collapses this view. Tapping on the text at
the top left brings up a procreate dream slide
where you can get a video overview of
procreate dreams. You can tap to access the help center website or reset all the examples
in the gallery. We'll take a quick peek at
the Getting Started tab. This opens a video giving you
an overview of the program, the basic gestures you can use to navigate
around the program. An overview of draw and paint,
performing key framing. We will look at all
of these features in detail in the class. Tapping done will return
you to the theater view. On the right hand
side, you can tap on the select text where
you have the option to tap on movies and create a new folder to
group your projects, delete them, or
duplicate a project. They will not activate until
you have selected a movie. The X will return you to the theater view to create a new project in
the theater head to the top right,
to the plus icon. And you will get
a new screen pop up with an option to
create a new movie. I'd like to stop for
a moment and draw your attention to the little
dots on the right hand side. They indicate that there are other size options
for your project. Swiping up or down
allows you to see your preset canvas
layouts for your movies. For this class,
we're going to use an HD widescreen format
for our animation. On the top right, within
the panel you'll see three dots again indicating
that there are more options. Tapping brings up a
new contextual menu that allows you to adjust your frames per second
to a range of options, or to set your own custom
frames per second. I'm going to leave mine on 24, which is the default setting. You can also adjust
your duration of your movie file by tapping
to bring up the number grid. We are going to set ours to 30 seconds in procreate dreams, any text or icons highlighted in red
will allow you to make adjustments or indicate that a tool is activated
on this screen. Tapping on the HD text will allow you to adjust the
resolution of your movie, but we will leave it
as is below this, you can either start
your movie in draw mode, the content track, ready to go, or as an empty movie, where you can start to create and import content like videos, movies, and illustration files. Now I'm going to select Draw. Now you'll be taken to
your main Procreate Dreams interface for your movie, where all the magic happens, the screen is automatically
split into two parts. At the top is the stage
and the backstage area. They will be separated
by a thin shape outline. The difference being that only the stage area
will be visible. When you export your movie file, just like in a real theater, you can use the backstage
to bring elements into and out of the
view of the movie file. As you animate the way that
stage hands would bring in different backgrounds and props in and out of
a theater stage. You will also see a timeline at the border that separates the stage from the tracks below. This will have a ruler that
shows you the seconds and the frames that your
illustration is on. It corresponds
with the playhead, so that whatever position
you are on the track. Ruler will also have
a red highlight to show the seconds and the
frame position precisely. This will become
very useful when you start to move tracks and
objects on your timeline. Underneath a stage on the left, you have an icon that
looks like a gallery of wall photos tapping. This will take you back
to your fat to view. Tapping and holding down on your movie with
one finger will bring up a menu that will
allow you to rename your file. Type in your project name, social media for
cats, and click Done. Tapping the movie again
will take you back to the stage and timeline view
next to the theater icon, you have the title
of your project. Tapping on the title will open your movie settings
and properties. On the left hand side, your Properties tab is the first tab open, highlighted in red. And it allows you to
adjust your frames per second and the duration after your movie
has been created. You can also adjust the width and height of your canvas by tapping the numbers and using your keyboard to adjust
the sizes in pixels. We will look at the
other settings when we are exporting our
procreate Dreams file. But for now, I want to draw your attention to
the Preferences tab. Here you can adjust your
draw and paint settings. First, pressure and smoothing. Tapping on the brush
icon allows you to adjust your
pressure sensitivity, which relates to a pressure sensitive
stylus stabilization and motion filtering. Motion filtering
basically acts to stabilize your movements
and minimize shaking. When you are
performing motion with your stylus or finger
dynamic brush, scaling should be turned on for your procreate brushes because it ensures the brush has
the same pixel size, regardless of whether you are zoomed in or out on your stage. If you see brushes
behaving unusually as you adjust the size in
draw and paint mode, this is the setting to check. I just want to
make a quick point here that procreate brushes are designed to work with a pressure sensitive
apple pencil, which was the case with all
apple pencils until recently, when new pencils came on the market without
pressure sensitivity. If you want the full range of pressure settings for drawing apple pencil will need to be the model that has
pressure sensitivity. Otherwise, this will also affect the strokes
of your brushes. The brush and opacity
slider allows you to toggle the slider either on the left or the right
hand side of your screen, depending on which is more comfortable
enabling painting with finger is
generally turned on. But I tend to turn
it off because it means that if I'm
using my apple pencil, I'm not going to get
any accidental marks on the screen from my fingers
when I'm in drawing mode. If you do like to draw with
your fingers, leave this on. Same with the enable
time line edit. This means that you can
group your key frames and tracks with your finger as
well as your apple pencil. I generally leave this one on. The next option, rotate
stage with pinch, zoom is automatically activated
and is a great gesture for zooming in and rotating
your movie using two fingers. Rapid undue delay are
the seconds taken to undo an action When you tap
your screen with two fingers, side note here, just like in
procreate the red stroke, inaction gesture is a three
finger tap on the screen. When you perform either
of these gestures, do a quick tap, as lingering will rapidly cause several actions
to be undone. If you find this too sensitive, you can adjust that here. Finally, the stored
undo steps are at 50. You can increase these, but I would recommend that
you keep them as is or lower depending on your
workflow as increasing, it will take up memory
on your ipad or device. The last tab is the Help Center, which will take you to the
Procreate Dreams Handbook when you are connected to Wi Fi, which is a fantastic resource. All right, that's all
for our settings. Tap done on the top right
and head back to the stage. Join me in the next lesson
to import our project file and start learning to work with tracks in Procreate Dreams.
4. Working with Tracks : In this lesson, we are
going to learn about how to use tracks and their features
in procreate dreams. To start off head to the right hand side
of your timeline, where you'll see icons that represent the
different modes. We'll start all the way on the right with the create mode, which has a plus and allows you to import a range of
files into the interface. Procreate Dreams works in
tandem with procreate, and the file types carry
across seamlessly. When you tap on the plus icon, you'll see the full range of
options available to you. We will look at each
of these options as we create our animation. But we will first start
with the basics of tracks. A track in Procreate Dreams
is a layer of animation. Just like when you draw
a layered illustration with elements on separate layers able to move independently. In procreate dreams, you can also layer your animations so that you can animate objects on different tracks
independent of each other. Tap on the text track menu to create a new animation track. A light gray track will be
created on your time line, and the red icon of a playhead will show you that
the layer is now active. This indicates the point
your animation will play from or the position where files will be
added to the timeline. To start, we're going to import our procreate project file, social media for cats
that you would have downloaded to the file
storage on your device. Tap the plus icon and then
tap files From there. Navigate to where it is stored on your device
and import it. Those that use procreate. This file also works in the original procreate app
as a layered illustration. Side note here, if you are creating illustrations
in procreate, you can also import your procreate files
directly from Procreate onto the stage in Procreate Dreams using a
split view on your ipad. When your file is loaded, it will initially
come in as a drawing. On this stage, you'll see
a rectangular shape with large red dots in the corners with dashed
lines connecting them. You can place your
stylus or finger or to the side of that bounding box to move your object around
the stage or backstage. Adding a second
finger on the screen while you do this will
also activate snapping. The red guidelines will indicate
that snapping is active. The presence of the
bounding box indicates that your transform tool
is active to allow you to resize your project uniformly by tapping and
moving the corner dots, or using the dashed lines to adjust the width or the
height of the object. Tapping on the corner
dot will also reveal a rotation handle that allows
you to rotate your object. The three dots at the top right of the bounding
box will give you the option of flipping your project or
objects horizontally, vertically, or adjusting
the rotation point, which is called an anchor. Anchor point is the
point around which the object can be
rotated or scaled. When you tap Edit Anchor, you will see a light gray plus symbol appear
on your screen. This is the rotation point. Take a moment to adjust your rotation point.
Then tap done. And then repeat your
rotation to see the difference between that
and the initial rotation. Remember that moving
an anchor point will alter where the image
will scale from. Use two finger taps on
your screen to undo and return your project to
its original location. For now, let's
resize our project uniformly until it fits
the area of the stage. The bounding box will disappear
if it's not being used. But tapping on the stage or the track on
the timeline with a finger or stylus will reactivate it and make
it visible again. If you want to move
an object group or project on the stage, you must first select the
track in your timeline. This will be more relevant
as we add more tracks. The track in use
will be outlined in red to show it is active. Side note here, when
none of the modes at the top of the timeline are active and highlighted in red. This means that your
transform tool is active. And you can move any
highlighted tracks or objects if you want to move
an object in your animation. And cannot just check that
none of the modes are active. First, now let's set
up our project file. Our file on the timeline
is titled Drawing, and it's a layered
procreate file. To convert the illustration
layers to group tracks for animation long
press on the track in the timeline to
activate the Track menu, then select the Convert
Layers to Track option. This will change the layer
drawing into grouped tracks. It will also automatically
be renamed as group. You'll see an arrow in the label and tapping
it will allow you to see all of the
tracks in this group. We're going to take a
moment here to rename our project group by long
pressing on the group title, then select, rename and renaming it as social media for cats. Then we are going to repeat that action of
bringing up the menu. And this time select Highlight, and Highlight Color to make the group more visible
on the timeline. The tracks in the primary group should already have group names, but take a moment to pick a high light color
for each group. This is a good time to
talk about gestures that simplify navigating around
the timeline and tracks. A three finger swipe to
the right will space out your time line view to the left will
condense the timeline so that more of it comes
into the screen view. Note that as you space
out your time line view, the labels will remain
docked on the left. Regardless of how
space the timeline is, your labels will be clearly visible when you assume out
of the track time line. It also makes the
individual tracks easy to distinguish by highlighting the whole
track in that color. A three finger swipe down will condense the tracks and make
more of them come into view. The opposite swipe up
will expand the tracks and bring more of the objects
on the tracks into view. A four finger tap on
your stage will also enlarge the stage view
to a full screen mode. Then tapping the screen again will bring up
a play button at the bottom and
scrolling buttons that will allow you to
play your animation. You can use a four finger
tap again to restore it to the stage and timeline
view to zoom into a track. Double tapping will allow
you to easily zoom in until you can see individual
frames in your track. Can also have blending
modes applied to them, which will alter how they
interact with the layers below. To test this, scroll around to your labeled table and books Track and tap to activate it. Long press on the track
to bring up the menu. Tap on the blend mode option and it will bring up a
range of blend modes. Scroll through them and
you can see how it makes the objects on stage interact
with the background layers. This can be a great way to experiment with tracks
in your animations, but for now we will
leave it on normal. As you scroll through
the layered file, you will see labeled
groups in your timeline. When this file was
created in procreate, I placed any objects that I
wanted to move together that were created in layers into groups in that
procreate file. Then any labels
that you create in the procreate file will also translate to dreams
automatically. I cannot stress when creating
animations how important it is to plan first so that
you have your files. Organized. Groups are
so important in dreams, not just for organization, but they'll make key
framing that much easier as you move
objects as a whole. And then in parts to
create an animation. Each layer label that
has been converted to a track within a group
is also imported. You can see this
by, for example, tapping on the ipad group. Inside it, you can see
the labeled tracks. You can deactivate the visibility
of a group or track by tapping on the tick in the
box on the left of the track. You can also hide a track or a whole group
by long pressing, selecting track options,
and hide all or show all. This can be a very
useful gesture when you want to focus on one area of
your animation to work on. You can use the Track menu to delete content
within a track. Or delete the entire
track layer and condense your tracks
in the track options. This helps as well if you
have empty tracks that you want to get rid of in
between your content tracks, you can test this out on any tracks that are
not being used. Tracks can also be
clipped to each other using clipping
masks and layer masks. Clipping a track to
another means that the objects in the
clip layer will only be visible in the area of the objects on
the track below. In the ipad group,
the track from masking is clipped onto
the ipad screen track. You can see when a
clipping mask is active by the dashed line between the clip track and
the track below. Tap on the track to
activate the white screen. And then long, press the layer, select mask, and tick non. Now you'll see the full
layer when it is unclipped. Long pressing again and
then selecting mask and clipping mask will now attach the white area to
the ipad screen. You can also use layer
masks on tracks, which makes part of
the track invisible or visible by how
much you use black, white, or shades of
gray on the mask. But we will address this a bit later when we use it
in our animation. Tracks can be easily moved
by long pressing and moving to rearrange them
above or below other tracks. You can also cut a track
from its position by long pressing and selecting Cut at
the top of the track menu. Then you can create
another track with the plus button
of Create mode, long press, and this time a Paste option will be
available in your menu. You also have options to
copy a track in this way, which is a great way
to duplicate a track without having to redraw
or create new objects. I'll use a two finger tap
to undo these actions. Back to when we cut the track. When we start to
animate in dreams, we will come back
to this feature because although you can cut, copy, and paste
individual objects, You can also long press and
select Track options to cut, copy, and duplicate an
entirely animated track without having to
start from scratch. Which is a tremendous time
saver in your workflow. To create a group in dreams from individual tracks is a
very simple process. I'll show you using the frames group tap on the group layer in the
menu select group. This will make the two picture
frames individual tracks. Again, to regroup,
the layers head to the double layered
icon at the top right. In the mode section.
Tapping this icon activates the time line edit
mode and it will be highlighted in red
to show it's active. Now you can use your finger or stylus to circle the tracks
that you want to group. Then long, press
and select Group. We can now deactivate the time line edit mode by selecting done at the top right of the screen or tapping the red icon until the color
changes back to white. We will come back to
this mode a bit later. Okay, that is the
basics of tracks. Join me in the next
lesson for an overview of the drawer and paint
mode in Procreate Dreams.
5. Draw and Paint Mode: In this lesson, we will explore
the draw and paint mode. In Procreate Dreams,
tap on the icon, which looks like a pen stroke on the right hand side of the
timeline until it turns red. And you'll notice that the
view changes so that you can see the backstage
and the main stage. The drawing tools will be on
the perimeter of the stage, the title paint on
the left hand side. The first feature I want to
draw your attention to is the time stamp at the
bottom left of the stage. Tapping on this opens up a few options for us
related to our movie. I will come back to the
onion skins when we are creating frame by frame
drawings in the flip book. But for now I want to draw your attention to the
background color option. Tapping opens a color
disc that allows you to select a background color
for your movie that will fill the stage and
backstage area to see this change head to your sky track in our
timeline and untick it. Then you will see a background
color through the window of our project and in
the backstage area. As you select a color family
from the outer perimeter, you can then move
to the circle in the inner disc to select
a specific color. If you would like your
background to be transparent, you can toggle on the
transparency switch and any areas where color would have been
in the background of your project
become transparent. For now, I will
leave it this way, but we'll reactivate our
sky track in the timeline. Take a moment here and head to the color panel at the
top right of the stage. Tapping the circle will
open your color menu. This panel is much more advanced than your stage
background color disk. And allows you to
choose, modify, and save colors for your brush strokes and
objects in your movie. The colored circle
at the top will show the color that
is currently active. You can also use this to recolor objects easily with the
color drop function. To see this, select a navy color from
your palette and drag the color from the circle
to the sky in your window. This will change it
from day to night, just below it in
your color menu. Two rectangles will show
your primary color on the left and secondary
colors on the right. These are more important
if you are using a dual color brush when selecting colors
from your color disc. The outside of the
disc works to show you what hue or color family
you are working with. When you move to the
circle in the inner disc, you can then pick the saturation of that color that you want for your brush. A great hidden feature here
is that you can expand the saturation circle by using two fingers to give a
wider range of colors. Also for pure colors, double tapping in the white
section will give you a pure white in the mid range
will give you a mid gray. And a double tap in
the black section will give you a true
black on the right. If you double tap, you will
get a fully saturated color. A pinch with two fingers will restore the original disc view. Below the color wheel
is a history of the last ten colors you
have used for your project. You also have the option
to clear that history. On the right below that is your default color palette that remains docked to
your color disk. You can alternate between
this and other saved palettes by tapping the icon to
open the palette menu. On the bottom right here, you will find a
few native dreams palettes that you can dock to the color menu by tapping on the three dots and
selecting set as default. You can also import
palettes from saved files. Here for this class, I created a color palette
which you can download from the Skillshare resources page as a Swatches file and save to your file
storage on your device. To add it to the palette menu, create a split screen. And then drag it from
your file storage onto your dream stage and it will be added to your palette list. You can also use the plus at the top right in the palette menu to
create your own palette. Colors can be added
by selecting and tapping or deleted by long pressing and
selecting delete Swatch. Any palette can also
be duplicated or deleted by tapping
the three dots and selecting the relevant text. For now, we will set
our social media for cats palette as our default. You also have several
other options for selecting colors
at the bottom. The classic view has
hue saturation and brightness sliders to
adjust your color choices. Selecting the color
harmonies options allows you to use the slider to adjust the brightness of the color disk and move the circles to create
color selections. Tapping the text at
the top left helps you to create color harmonies
for the colors you are using in a project
Value option allows you to select values using
HSB and RGB sliders manually or by tapping
in numbers using your keyboard to enter precise numerical
values at the bottom. You also have the option to enter specific color hex codes. Finally, you can hold the
little gray at the top of the color menu to detach and move it on your
screen as you draw, so that you do not need to
keep opening the color menu. You can use any of
your color options in this view and tapping the X will return it to
the color menu. For our next tool,
we're going to look at the brush menu activated
by tapping the brush icon. On the left hand side
are the brush sets, and on the right the individual brushes at the top of your brush set are recent
brushes you have used, which is a wonderful feature. Because if you have used brushes from
different brush sets, they'll all be in one location, which really simplifies
your project workflow. I really love this feature. You can also swipe
to the left in your recent brushes to pin your favorite brushes
permanently in this folder. And you can swipe again to
unpin or clear recent brushes. You can also import
your brush sets from your procreate app or
your file storage. The same way that you did your color palettes
for this class, I created a brush set to
use with our project. In your class resources. Locate where you have downloaded your brush set from Skillshare. And place your file storage app and the Procreate Dreams
app in split view. Then you can drag and drop your procreate brushes into dreams and it will be
added to your brush sets. You can long press and
move to rearrange any of your brush sets or individual
brushes within a group. To delete a single brush, swipe to the left and select
delete For a brush set, you can long press and then
select the text, Delete. This will not work
with native brushes, only your imported brushes. For individual brushes, tap to select them and then
you can adjust the size of your brush or
the opacity with the sliders on the left for
more precise adjustments. Tap and then slide your
stylus to the side, up and down on your screen. The next icon is
the smudge tool, which allows you to
take any brush in your brush library to use as
a smudge or blending brush. If you're already using a brush and want to
use it in this way, just long press on the icon. After using the brush, the smudge brush will automatically
change to that brush. This works the same way
with the eraser tool, which is the next icon along. Then we have our layers menu. Tapping on it will open
your drawing layers layers, interact with your
animation tracks. To illustrate this, we're
going to create a background of green hills behind
the window of our movie. Head down to your
clouds track in your timeline and tap on it until it's
highlighted in red. Then head up to your layers
icon in drawing mode, and you will see that track mirrored in your drawing layers. We're going to use the plus to add six layers to
our drawing layers. You'll see the name change
happen from clouds to layer. To keep some organization, we're going to label
our drawing layers by tapping the
bottom layer first. And then in the side menu, you can select Rename
our first layer. We're going to name Clouds, the second layer above it. We are going to label hill one. Then we are going to tap
and select Rename again. But this time we are going to use the copy icon
on our keyboard. To copy this title. Head two layers above, tap and select Rename, and then use the Paste icon on your keyboard to
paste the heading. And just change the
number one to number two. Head two layers up
again and repeat rename and then change the
number to number three. You'll have 12.3 Now
we're going to label the layers in between
because we're going to use them as clipping
masks above hill one, tap to rename the layer, clip one then tap again and we're going to copy this label head two layers up. Tap, rename again
and paste and change to clip two for our
last clip layer, tap rename and change
the number 23. I'm going to take a
moment here to introduce another aspect of the
draw and paint mode called flip book. Flip book allows you
to maximize your view and focus when you are
drawing on the stage. To access the flip book, there is a gray line at
the bottom of the stage. You can hold and pull down to
see an expanded stage few, but still maintain your drawing
tools on the perimeter. A new flip book menu will show up at the
bottom of your screen. The flip book menu
itself can be moved by holding the gray line at the top to move it
around the screen. In the same way, flip book is generally used for frame
by frame animation, which we will look at in
detail in a later lesson. But I really appreciate
this mode for the increased screen
real estate when I'm illustrating in
drawer and paint mode. Okay, let's create some hills in our window in
this flip book view. In your brush set, locate
the hill stamp brush, then in our color palette, the lightest green in
the first green column. Tap the stage to create the first hill stamp behind
the window sidenote. If you disabled paint with
your finger in settings, in our previous lesson, you can only do this
with your stylus, not with your fingers. Remember that you
can always zoom in with two fingers or zoom out, you can always undo
with a two finger tap. If you're not happy with
the position of your stamp. If the stamp is too
large or too small, adjust the size of the brush
with the slider on the left. Don't worry too much about the
positioning at this stage. As we do the different hills, as long as the hills
overlap each other, we will adjust the final
positions at the end. Next, head to the hill two
layer in our drawing layers. Then to our color menu. And select the medium
tone of green from that first green column in your palette stamp on your stage to create
hill number two. Then we'll head
back to our layers, to our hill three layer, to our color menu to select the darkest green
tone in the column. And then we can place
our hill three stamp. You can see that the hills are shown in all
of the frames in our flip book as they will fill the whole track
that we are working on. Next, we're going to use
our clipping mask tools in drawn paint mode to add
a few highlights to our is our clipping mask will attach the contents of a layer to the layer
that it is clipped to. In our brush set, select the noise brush in
your color palette. The second green column
is our high light colors. Each hill will have
its highlight color directly to the right. We're going to select the
first one for hill one. Select the clip one layer, tap and select Clipping
Mask from the side menu. You can zoom into
your stage using two fingers and gently
highlight the top of the hill. You can now repeat this for the second highlight color
on our clip two layer, gently highlight
our second hill. Finally, we're going to select the last highlight color or clip three layer and then
gently highlight that L. Now to head
out of flip book mode, you can either tap the X
that appears when you tap the menu or you can tap
done at the top right. This will also deactivate your drawing paint
mode so that we can access our transform tools and bounding box by
tapping on the stage. You can re size
uniformly or adjust the width and length
using the dashed lines. As you do this, you
will notice that the hills and the
clipping masks move all together despite being in separate drawing layers because they are still on
the same track. To move them independently, long press on the
Clouds track in our timeline and select
Convert Layers to Tracks. Now you have each of your
layers as individual tracks in a group and they will all
maintain their track titles. Now you can tap
on each track one by one and move to
reposition them. You can also select
your clipping masks, which are easily seen by the dash lines between them and the track
they are clipped to and move them independent
of the hills at any time. You can also detach
a clipping mask by activating the track
menu by a long press, selecting mask, and then
setting the mask to none. If you want your
clipping mask to return to an individual track. Well, that's it for this lesson. Take a moment to highlight your new tracks or play with some tools in the
drawing paint mode. And then join me in the next
lesson to look at creating an animated title to our movie that is going
to incorporate texts, key framing, and the second
type of masks layer masks.
6. Keyframing Text, Masks, Video and Audio: In this lesson, we are going
to create an animated title to our movie using text
keyframe animation, layer masking video and audio. First, let's all our
illustrated frames. Then we can head to
our create mode. Tap the plus icon
to select text. We want to add our title text that says social media for cats. One word at a time with
each word moving into. And then out of the screen, we're going to type
our first word, social using the
onscreen keyboard. Then you can use the red
dots on the sides of the bounding box to make sure all the letters
are on one line. And then place your stylus
and a second finger on the screen to activate snapping to make
sure that the text, now we're going to open
the typography menu and make some adjustments. Double tap on your text to
highlight all the letters. And you can access the typography
menu either by tapping edits style or tapping the lower and upper case
A to activate this menu. This will bring up
your typefaces. There are a range of native typefaces that
come with procreate, but you can also
import any fonts that you have in your files on
the right of this menu. For now, I'm going
to scroll through and select Impact for our text. Also have a color disc in this menu to select
a font color. But for now I will
leave it as black. Then in your format tab, tap to open the menu and set your font size using the side. Next, I'll set ning at
five and tracking at five. I'm also going to toggle on
all caps on the right and make sure that the text is
still snapped to the center. Then we can tap done at the top right to exit
the typography menu. Now to organize long
press on your track and select Highlight to give
it a color for visibility. Now we're going to apply
our key frame animations to this word to make it move
into and out of the stage. Then from there,
we can duplicate our animated text and change the words for the rest of
the words in the title. A keyframe allows you to create an action or movement
between two points in time. Procreate Dreams allows you to make these key
frame transitions. So easily zoom out of
your stage and we can see the stage and backstage around it clearly
for our motion. Then make sure your playhead and your text track are placed at the beginning
of your timeline. Tap the track to place the
playhead at 0 seconds. Tap briefly on the red playhead and a new action
menu will pop up. We're going to select the
move and then move and scale. This will create a new key
frame track separate to the text track with a new symbol that looks
like a crop sign. The beauty of this is
that any edits that you make on this track apply like
a non destructive filter. Even if you change your mind and want to delete the
action or filter, it will not affect
your original text. Procreate Dreams
automatically places your first key frame at
the start of the track. Next we will set
our endpoint for our action at 1 second
in our animation. The numbers you see
on the timeline at the top are the
frames swipe with three fingers on the
screen to the left until 1 second comes into
view on your timeline. Then tap and drag your red keyframe until the ruler at the top
of the timeline, the red marker at 1 second. And then tap again till it's
white to set it in position. You can also do this
by tapping once to place and tapping again to
set the keyframe in white. But I like to match mine up by dragging and setting
it on the timeline. We want two midpoint
keyframes, 0-1 second, drag the end keyframe to move to frame 16,
and Tap to set. Finally, drag and set another keyframe at frame
12 on the timeline. Ruler and tap to set
it until it is white. Now we have our key frames set. We need to now tell
the key frame where we want it to start and
where we want it to end. Head to the first key frame and tap it in the menu that pops up. The X axis is going to determine your horizontal movements minus to the left and
positive to the right. The Y axis is going to determine your vertical movements minus for down and positive for up. I'm going to type in -930 and make sure I've clicked the
negative sign for the y axis. Then tap on the stage
to lock in the value. You'll see the text. Move to the starting position
below the stage. We're going to leave our middle key frames so that the text will pause in
the center of the stage. And then for our key frame, we're going to set it
at 930 in the positive, the text will move
above the stage. You can also expand
these settings on your timeline by
long pressing on the key frame track and selecting expand,
move, and scale. Then you can see an
individual key frame icon for each of your movements. You can make adjustments
to the X and Y axis. Also the scale of the letters to stretch them horizontally
or vertically, or add a rotation to them. You can also reverse this expansion by long
pressing on any of the motion tracks and then selecting collapse,
move, and scale. A side note here, your
animation will only play what is visible
on your ipad screen. If it stops short
or goes too long, just adjust your timeline with a three finger swipe
to the left or to the right so that the view that you have is the section that
you're working on. Then when you press
your play icon, it will only play this section. The play icon will
also change to a red pause icon so that you
can stop your animation. I'll pause here for a
moment while we're talking about how your
animation plays and take you back to your
animation play settings by tapping the title in
your movie settings. The timeline tab will give you a few relevant settings
for our key frames. The first setting
is on by default, to place your key frame down at the start of a track
or section of a track. That is why we only had to place three of our four move
and scale key frames. The second setting
applies to playback. Our setting is on one shot. Our animation will play
from start to end, or start of our view to
end of the view as we saw. Ping pong will play and
then reverse that play. I'll show you on
your animation by tapping done and
then pressing play. Heading back loop
will go through the movie and start from
the beginning again, which seems similar to one shot, but when it's a whole movie in one view, one shot will stop. Whereas loop will keep
looping from the beginning. I'll place it back on one shot and head back to our movie. Now we can set our
easings for our text. This is how the motion
comes in and out. To make it feel smoother, you can access this by long pressing on the
key frame track, not the icons, which will bring up a menu
for you to set you. Easing, then you
have a few options. Linear gives you
a constant speed. Ease in, starts
the motion slower in the beginning and
faster at the end. Ease out faster in
and then slower out. Ease in and out. Slowly in, hits a constant,
and then slowly out. I'm going to set all
easings to ease in and out. And that is the end
of our animated text. Okay, now we've done
all the heavy lifting. I'm going to show you how procreate dreams is
going to simplify your workflow by cutting and pasting everything
that we've just done, animations and all head to your text track and set your playhead just
after 1 second, tap on the playhead,
select edit, and split the text track. Now you can long press on the right until
the menu pops up. And select Delete Content at the bottom with the
text that is left, Tap and hold and
select Duplicate. And you will see that our
text key frames have all been duplicated for the next
second in our timeline. Now we want to
change this text to our second word media tap
to activate and then long. Press Select Edit Text
and enter the text. Media double tap to highlight, and then in the format
menu, select all caps. Now we can repeat this for our last two words in the title. Long pressing to
duplicate the text, media double tapping to
highlight and retyping the text. Four, then in our format menu, selecting all caps and finally repeating all
the steps with the text. For the last word cats. The last thing we're
going to do is head to our modes and activate
the timeline edit. This will allow us to
group all of our texts together by using our stylus to circle all the text and then long press and
selecting group. At the moment our
text is sitting on top of our illustrated group, we are going to create a plain background
behind our title so that the illustrated
layers below are hidden until we
want them to be seen. Head to our Create menu, tap the plus icon, tap on track, and
add a new track. We're going to rearrange
our layers here so that the text is sitting
above the background. And any unnecessary
layers you can delete. Tap on our new track and activate and set the
playhead at zero. Then tap our drawer
and paint mode. Head to our color menu. And double tap your color
disc to select a pure white. Place your stylus on the
color drop and drag it to fill your stage
in your timeline. Tap on the frame long press
and select Fill Duration, so that it fills the track. Then head back up
to your brush set. Select the gradient stamp brush. From your brush set
in our color menu, select a color, I'll choose
teal from our palette set. Set my brush on large as this is a pressure
sensitive brush, I'll place a firm
stamp on my stage. I'm doing this with
my stylus as I deactivated draw with
finger in my settings. But if you would prefer
to draw with your finger, you can turn this on by tapping the title heading
to preferences and toggling on enable painting with finger okay to
resize the gradient, Deactivate, draw and paint mode. To access our
transform tools, long, press on the track
and select and convert layers to
tracks from the menu. Now you can open the
group and tap on the gradient track and
resize it to fill the stage. And then use a second finger to activate snapping to center it. Now you can collapse
the group long press to rename it gradient
and highlight it. Now we're going to use
our text to create a layer mask on top of a video to add a bit
more visual interest. We'll begin with importing
our video file from our file storage
using a split screen. The same way that we did with our brushes and color palettes. Drag and drop in your
fish video file. I found this royalty
free video by Lisa Redfern on a
website called Pixabay. Please always check
the licenses for how to use videos
and audio files. The video will come in on
its own track and you can adjust it to make sure it lines up with the
beginning of your movie. Make sure your video
track is above the gradient background
layer we created, but below the text. If not, just rearrange it
with dragging and dropping, then with no modes active, we can use our transform
tools, Tap the video track, and resize it so that it fits our whole stage and
it plays correctly. A side note here as well, At the time of creating
this class, most ipads, except the most recent
ipad Pro 12.9 model, could import only
one video per movie. Check the procreate website for the capabilities of
your ipad model. Now we're going to create a layer mask over our
video with our text. A layer mask for a
track allows you to select areas of the
track that the mask is attached to to make visible by coloring the mask in
white and invisible. By coloring the mask
in black or semi transparent by masking in
gray. To make a text layer. For our video, I'm going
to long press on the track and select the text mask
and then layer mask. You'll see that Procreate Dreams automatically makes the
area of the text white. Which will make it invisible
so that you can see the contents of the video track and the rest of the track black. Which makes that area of
the video below invisible. So that the gradient
layer underneath shows through in all the
layers around the text. It's amazing that
procreate dreams makes a fairly complex
technique like this. So simple, you can
just as easily invert a layer mask so that the text is visible and the surrounding
area is invisible. You can do this by
long pressing on the text layer and
selecting mask. And then invert at the bottom, you'll now see the colors
in the text track, invert that the text is black and the
background is white. I'm just going to
do a two finger tap to undo and restore
our original mask. Then we can activate
our text in play mode. You can see how this motion enhances this technique
even further. Now we need to limit our
video and background files to just where the text ends. We can zoom out on
our timeline view. Go to the end of the video and just drag the end backwards
to crop it to where the text ends with a background frame and
gradient group head a few seconds further on the timeline because we want to
gradually fade them out, tap on the track to
activate the playhead. Then tap on the playhead and select Edit from the Action
menu and then split. This will separate your
track group into two. Now we can long press
on the group to the right and select
Delete Content. We're going to apply an opacity key frame filter to
our gradient group. To fade it out, Tap to place the playhead in line
with the end of the text, tap the playhead icon
and select Filter. Then Opacity, a key frame will automatically be placed at the beginning of the track. But just ignore
that hold and then drag it to the end of
the group track and tap, set down another
opacity keyframe so that in total you have three. If it doesn't quite set, just go back and tap it
to place the key frame. Now with the last
keyframe, this time, tap again and adjust the
slider until it's at zero so that it will fade
out into the scene below. Finally, we're going to add an audio track to
our title sequence. In your class resources, there is a royalty
free audio file from Pixabay called Sheri Meal. I typed in Cats Meal because I thought it would be fun to layer beneath our title track to emphasize the fact that it
is a cat related video. Place your file storage in split view and drag it
onto your time line. When the file comes in, drag it to the beginning of your timeline if
it's not already. And then crop it from the
end to just after 6 seconds, which is where our
title fades out. We're going to adjust the
levels of the audio so that the sound reduces
as the title fades. Swipe up on the screen with three fingers to enlarge
the audio track. And then tap on
your audio track at the beginning of the
track to activate it. Then tap the playhead. And you'll see that
with an audio track, you have the options to adjust the volume levels
or edit the track. We're going to apply a level, a new level key frame, track and menu will be placed. And use the slider to set the
volume to your preference. Tap and set the level key frame at the end of the audio track at 6 seconds and bring
the volume down to zero. We're going to tap and set one
more keyframe at about 4.5 seconds where the
fade out starts and set the level to about 45. That's all there
is to it. Now we can play our animation through, you can hear your audio
in the background. Well, we have covered
a lot in this lesson. We've looked at text functions, keyframing motions, layer masks, live filters, importing video, and finally audio files. Take some time to have a play and experiment
with these techniques. And then join me in
the next lesson to learn about flip
book and performing and to apply the techniques
that we've already covered to the rest
of our illustration.
7. Animating the Illustration: In this lesson, we are going to apply key framing, performing, and using our flip book to
turn various aspects of our illustrated scene
into an animated movie. Head to your grouped tracks
titled Social Media for cats, up with three fingers to
make the track more visible. And then long press and drag
the group to the right until the marker in your timeline
is at about 6 seconds, where our gradient
starts to fade. This will create the effect of fading into our
illustrated scene. Zoom into your
timeline view so that your scene starts on the left hand side at
just after 5 seconds. This will also stop the tidal replaying every
time we test our animations. Double check here and make sure your fade out key frame
in the background is on zero so that it fades away completely into our
illustrated scene below. To begin with, we're going to create a gradient vignette to allow the viewer's eye
to focus in on our cat. Then we're going to zoom
in on the whole stage, head to your social media for cats group and tap
the arrow to open it. At about 6 seconds, we're going to try and
locate our plant layer. Then using our create mode, we're going to select to
create a track above it. Then activate your
draw and paint mode And head up to our brush set. And select the gradient stamp. Brush set its size at max. Using our slider
in our color menu, we're going to double
tap to select black. Then we're going to tap firmly on our stage with our Stylus. Next, zoom out so you can see your stage and
backstage area clearly, so that you can identify the
boundaries of the stamp. Then deactivate
drawn paint mode, so we can use our
transform tools. Long, press on the
gradient stamp frame and select Fill Duration to extend
it throughout the track. Now we can resize it, tap the track at about 9 seconds so that
you can see it clearly. Our aim is to have
the lightest part of the gradient
highlight the cat, extend the stamp outside of
the boundaries of the stage, and adjust it so that the lightest part has
the cat in focus. You can also use the dash lines around the bounding box to adjust the width and the
length of the gradient. Now we can long press and
rename the track gradient. And then long press
again to select a highlight color to make
the track more visible. We want to create
an opacity filter on this gradient so
that it's more subtle. First tap at the
beginning of the track, tap the playhead select
filter, and then opacity. An opacity key frame will be
placed at the beginning of this track at 100% Just adjust it with a keypad to 40% Now we can create a zoom effect over all
our illustrated tracks. Go to the entire
illustrated group and collapse the tracks
by tapping the arrow. Place your playhead at 6
seconds and then tap it. And select Move and
then move and scale. Tap and set a second key frame at about 10 seconds
on the timeline. Then tap and enter the
coordinates to set our x to 120, but make it negative y at 84, scale x and scale y 1.2 Then we are going to long press on
our key frame track and set our easing to linear for
a smooth transition. Now we're going to add
a bit more motion to our illustration by animating clouds floating
across the window in your illustrated tracks. Locate the clouds
group and open it. Scroll down to beneath the heels that we
made last lesson. And tap on the empty clouds
track to activate it. Turn on your drawer and paint
mode. In your brush set. Find the cloud stamp brush and set your brush size
on the slider at about 4% then choose a gray color from
your color palette. Backstage area. Make
a few brush stamps on the left hand side at the level of the
window in a random group pinch to zoom out. And you can use
the grid lines in the transparent backstage
area to assist you deactivate draw and
paint mode to use our transform tools and tap the playhead at the
beginning of your track. Select Move, and
then move and scale. Tap on the key
frame and then use your bounding box on
the stage to place your clouds just
behind the window until you can see
the first cloud in your group peaking in. Then zoom out of your timeline, head to the end of the track, and tap and set a second
key frame until it's white. Then move your clouds to the
right of your backstage area with the last clouds
in your group just visible on the right
hand side of your window. You can do this freehand or with snapping to stay
on the same plane. Tap on the key frame track and
set your easing on linear. Then zoom out and
play the animation. And you'll see the clouds
slowly move across your window. Pause your animation and we'll continue to key frame our cat. As an overview,
we're going to make our cat wake up and
blink with key framing and then climb the
potted plant to get to the ipad using the performing
function in dreams. Finally, it's going to activate the face ID on the ipad and see images of fish on the screen before
our animation ends. First we'll begin with a cat opening its eyes and blinking. Locate and open the cat group. And then tap the
arrow to enlarge it. Find the sleepy eye track. And we're going to use this
to open our cat's eyes from sleeping and then make them blink throughout
the animation. Swipe to the right
with three fingers until you can see the
time line frames clearly. Place the playhead at about
6 seconds and five frames, and then tap the playhead, select edit, and
split the track. Then delete the rest of the
track on the right hand side by long pressing and
selecting, delete content. Then long press and duplicate this section and move
it down on the track. Shorten it to about four frames in length on your time line. Then long press on the track. We're going to
repeat duplicating using the pop up menu about
eight times in total. Each time we're going to move this section of
the blink further down the track over the duration of the movie so that the cat blinks throughout
our animation. I'll speed up my time lapse
here of these duplicates. Once you have placed the
sections along the track, pause and play the animation
to view the effects. This subtle and fairly
simple animation adds a lot of realism
to the character. Next we're going to key frame the pupils track to
move from looking forward to looking
up at the ipad on the desk head to your pupil
track in your head group. At about 10 seconds, we're going to tap the track
to place our playhead. Then tap the playhead
and select move, and then move and scale. Tap again at 10.5 seconds
and place a third key frame. Tap the third key frame and
move the bounding box from the side to move the pupils
to look at the ipad above. Long press on your track and set easing at ease in and out. Next we are going to collapse the entire
head track group. Then set a key frame movement
for the whole group to bring the cat's head up and
then behind the potted plant, place a key frame on
the grouped tracks at about 12 seconds by placing the playhead and then
tapping Select, Move. And then move and
scale and drag. And place another key frame at 12 seconds and about ten
frames until it's white. Then using the bounding
box on the stage, reposition the head higher and a bit behind the potted plant. Then on the key frame track, place another key frame by
tapping at approximately 13.5 and activate it
until it's white. Use the bounding box
and place the cat head completely behind
the potted plant. We also want the cat's
body and legs to thin out at this point before it
climbs the potted plant. Using a moving scale key frame, find the track in your group
for the body and feet. And tap on it to activate
it At 12 seconds, tap the track, tap the
playhead and select move. And then move and scale to place your key frame track down. Then at 12.5 seconds, tap the key frame
track to place and set a new keyframe on your stage. Use the dash lines on the side of the bounding box to thin out and narrow the cat's body and
feet just behind the plant. Now we can tap the
key frame tracks, long press to set the easings
at ease in and out on the head and also on the body track for a
more fluid motion. You can play your
animation now to see how this movement plays out, then pause Next, we're
going to use performing in Procreate Dreams to animate the movement of the cat
climbing the potted plant. And the potted plant
shaking as it reaches the top of the leaves and
leans towards the ipad screen. Performing is a unique and
intuitive function that creates automatic key frames
for you as you record a motion with your stylus on your stage and
allows you to create quite complex motions with
ease to your cat group, Collapse it and
tap to activate it At about 13.5 seconds
on your time line, Place your playhead
on the track and we are going to start to
make the cat climb. The boundary box will also
appear on your stage. Tap the three dots on the top right and
select Edit, Anchor. And place your anchor
point at the center, at the bottom of
the potted plant. Head to your icons
above the timeline and tap your circle icon to
activate performing. You'll see text appear at the top left of your
screen that says, ready with a blinking
red recording light, tap one of the red dots
on your bounding box. And then tap on the
curved gray handle. And rotate your group back and forth as if the cat is shaking. To set the rotation key frames, it may take a minute
to get this motion, but you can always undo
with a two finger tap and try again until you
are happy with the motion. The recording of your actions
will stop when you move your stylus off the screen and start you place it back on. You can take your time
with this motion. I just want to draw
your attention to another great
feature of performing, which is the modified text
at the top right hand side. Tapping on this gives you
the motion filtering menu, where you can adjust
the smoothing of your motion as the
key frames are being placed on your track at 100% the smoothing
feature is at maximum. Even vigorous rotations
will seem quite mild. At zero, it is at a minimum. If you find your rotation, motion is not registering when
you replay your animation, you can adjust this slider to adjust the streamlining
of your motion. Generally set mine about 5% head down to your time
line at 13.5 seconds. Again, we're now going to
use performing to place automatic key frames
down as we move the cat up the potted plant
till his head pops up. Place your stylus on the
screen with performing still active and move the cat
to the top of the plant. When you are done, tap
the square icon to stop performing and play
your animation to check it. If you head to your
group tracks at this point and
select expand, move, and scale, can see all the key frames
that have been placed as we were performing. The brilliance of this
is that Procreate Dreams has also layered several
actions on top of each other. Movement in the x
and y directions, and the rotation on
separate tracks. This allows us to make the
movements more organic and significantly minimizes the time taken to map out all
of these actions. The last thing we're going
to do is to place a move and scale keyframe at 18
seconds on our track. To make the cat lean into the ipad screen to place your new key frame on the track and set it to white. All right, next we are going to apply this
performing motion to our potted plant so that it also shakes as the cat
climbs to start with, head to the plant group
and tap to activate it. Make sure no modes are
active so that we can use our transform tools
and tap the stage to see the bounding box
in the three menu. Select, Edit, Anchor, and place your anchor at the base
of the pot and tap done. Next, we are going to
set our playhead at 13.5 seconds when the cat
starts to climb in our movie. Tap to activate,
performing and then tap the red.in the corner
of the bounding box. And use the rotation
handle to record the pot shaking until the
cat appears at the top. Take your time with getting this motion the way you want it. Remember, you can always undo with two fingers if you
want to redo the motion. Once you are happy,
deactivate performing. Now we're going to do this with the three layers within
the plant group. As the cat reaches the
top of the leaves, open the plant group and
head to the front leaves. And place the playhead at about 14 seconds,
Activate performing mode. And then rotate the leaves by tapping the red dots and then rotating with your
gray handle head to the next track of leaves. Tap to activate, place the
playhead at 14 seconds, then tap the red dots and rotate head to our
last track of leaves. Head to 14 seconds
on your timeline. Place the playhead and tap
the red dots and rotate. Finally, we are going to perform a warp over the movement of
the last group of leaves. Set your playhead on
the back leaves at about 15 seconds and tap
to place your playhead. Tap again, select Move. And then this time warp
from the menu head to the top of the timeline and activate performing this time. Select a node near where the cat comes through and pull
the leaves apart. I love this feature with
Warp because you can now head back to the start of
the Warp key frame at 15. Select a new node in the Warp and move it
again while performing. It will layer both warp
motions on top of each other. Deactivate, performing, and limit your timeline
view and play through your animation to
see the effects of our performing
and key framing. Okay, pause your animation
and we're going to use the flip book function of draw and paint to
complete our animation. As an overview, the
face of the cat is going to activate
the face ID and we're going to use flip
book animations to create those images
on the ipad screen. Start, collapse any tracks in your timeline that
are not in use. Then locate the ipad
group and open it. Head to the layer
for masking track, and tap to activate it. And then in Draw and Paint mode, select a black color and use your stylus to color
drop to fill in black. Next, create a new track using the plus symbol
In create mode, place your playhead at 18
seconds on this new track. Then pull down the
small gray line at the bottom of the stage to activate your flip book
on the left hand side. Tapping on the time
stamp will bring up your options to hide or
edit your onion skins. Onion skins are a faded layer
to see what was drawn on previous frames or frames that come after
your current frame. They are activated by default in the flip book as
you draw on frames. But you can hide them if you choose in the edit
onion skin section. You can select if you want
your onion skin backwards to show previous frames or forwards
to show upcoming frames. You can also select the
color that you want the onion skin to be
in either direction. The number of frames
that you want to have visible and the
opacity of the skins. This is very helpful
when drawing frame by frame animations
to guide your movements. Now we're going to collapse this menu and zoom
into our stage to see the ipad screen clearly
Head to your brush set. And locate the square brush
stamp using the slider. Set the size at about
4% Select a color from our palette and tap the ipad screen to create
the stamp on the screen. Next we're going
to long press on this key frame flip book to activate the menu
and select Duplicate. Go to your eraser brush and make sure that
it is on mono line. Simple set it at 30% on
the slider on the left. And then on the second frame, delete the middle of
the top of the square. Then long, press again on this frame from the
menu, select Duplicate. This time on the next key frame, we're going to
erase the middle of the right hand side
of the new frame, long press, and
duplicate one more time. This time. Erase the
bottom of the square. Finally, long press and duplicate this frame
one more time. And erase the middle of the
last side of the square. Now we have those
four sections erased. We're going to duplicate
the frame one more time. And select our mono
line simple brush. We're going to place a tick
in the center of the square. I'm going to duplicate this
frame three more times. So that in all you should have
four tick frames in total. Go back to the first frame with the tick and erase
most of that tick, except the beginning on the
next frame reveal a bit more. On the third, a bit
more the last frame, just leave as the full tape. Now we can close to exit our
flip book on your timeline. Zoom in and find your
frames on the track. You can swipe with
three fingers to the right to expand
for visibility. And use your stylus on the right hand edge
of the last frame and extend it to about 20
seconds on your timeline. Exit draw and paint mode, and tap to activate the
time line edit mode, and highlight all the frames
by passing your stylus across them and then long
press on these frames. And in the pop up
menu Select group. Next we are going to head
back to our layer for masking just before
the tick finishes. At about 20 seconds, we're going to place our
playhead on the track. We're going to tap
and select Edit, and then split on the portion after the playhead long press and select Delete the content. Then head to about 19.5
seconds on your timeline. And put down an opacity
keyframe by tapping your playhead selecting filter and then opacity from the list. This will create two key frames, one at the beginning
and the other where you just placed the
opacity keyframe. Set the end key frame at
0% using your slider. And then tap to
about 14 seconds. And set another
keyframe at 100 long. Press to delete the
first key frame. Then long press on your key frame track to
set your easing to linear. Now we can import the image
that we want the cat to see on the ipad screen from
your class resources. Find the royalty free
image from unsplash. Navigate to your file storage
where you have saved it. Create a split screen and drag and drop it onto
the for masking track. This image will come
in fairly large. Zoom out using two fingers on
your stage and then tap on the corners to resize uniformly
just outside the ipad. Then we are going to
create a clipping mask by long pressing on the
image and selecting mask and clipping mask until we only see the image
on the ipad screen. We're going to place a moving
scale key frame down at about 20 seconds and
make our fish appear to be moving across and increasing
in size towards the cat. Tap your playhead, select move, and then move and scale
your key frame down. Then place the next key frame
at the end of this track. And use your bounding box
on the stage to place the image at the bottom left in the ipad and increase its scale. Now when we play our animation, we can see this
movement clearly. Okay, pause your
animation again. Before we end our animation, we're going to create
some expressions in a thought bubble stamp so that we can see what the
cat is thinking. Collapse any layers
that you don't need in your timeline
and then locate and activate the cat group head to create mode and create a new track above the cat group. And place your playhead
on the timeline when the cat leans in at
about 17 seconds. Then we're going to activate Draw and Paint mode
in your brush menu. Select the Think bubble brush. Use your slider to set it at
12% in your color palette. Select white and then stamp the think bubble
onto the stage. Deactivate draw
and paint mode and long press on the frame that's been created
in your timeline. Select Field Duration, and
then use the bounding box on your stage to resize and place the bubble where you want it on the right of the cat. Now we're going to create
a new track above it. Using the create mode, we're going to reactivate,
draw and paint. Then in your brush set, select the thinking dot damp
brush and set the size two, 5% in your color palette. Select a dark gray and
stamp on the top of your think bubble head to the frame in
your timeline long. Press on your frame and select Fill Duration to fill
the rest of the track. Deactivate, draw and paint. And then re size and center your thinking dots
in your bubble. Now we're going to adjust the opacity in performing to add a bit of visual interest. Set your playhead at the beginning of the
thinking dot track. Tap and select filter opacity
to place a key frame down. Now activate your performing
at the top right, Modify, make sure your motion
filtering is at about 5% tap on your
opacity keyframe. This time we're going to
adjust our slider up and down while performing is active until the end
of our timeline. Now you can deactivate
performing and you can now zoom in on your view and play back the animation to
check this effect. Okay, now we're going to change our thinking dots to an exclamation when the
fish appear on the ipad. And then to Love Hearts
as the cat watches the fish swim towards him head to 20 seconds on
your thinking dots track, tap the playhead, select it, and then you'll notice
in your time line that your performing key frames after the split
are still active. Place your playhead
just after the split on the track and then activate
draw and paint mode. Head to your layers panel and tap on the layer
and select clear. Now head to your brush set and select the
exclamation brush. Set the size to about 12% and then stamp on
top of your thinking bubble. You'll see in your timeline that the stamp fills
the rest of the track. Deactivate, draw and paint to activate our transform tools. And then re size the object to the center
of the think bubble. Now when you play the animation, you'll actually see
the opacity key frames will still apply across exclamation marks
from performing or pause. And then at about 22 seconds, tap on the track and
tap the playhead. Select Edit, and Split Again, place your playhead on
the right of the split. Activate Draw and paint mode. Head to the layers
and then clear the layer head to
your brush set. And this time select your love heart brush
and set the size at about 16% Select
a red color from your color disc and place above heart on
your thought bubble. Deactivate, draw and paint and tap the track to access
the transform tools. To resize and center it, place your stylus at the
beginning of the track. Tap the playhead and select
move and move and scale. We're going to use
performing to make the heart beat by adjusting
the scale up and down. Zoom out on your timeline so you can see the whole timeline view. Activate performing and then use a red corner dot on your
bounding box on the stage. And make the heart
smaller and larger like a heartbeat until the
end of the timeline. Then deactivate performing. Now we can play our heartbeat
to see it pulse in and out. Okay, pause to close
the animation. We are going to fade to
black and have the text, the end come up, collapse all of our
animated groups. In our social media for
cats illustrated scene. And go to our create mode. And we're going to place a
track above all of them. Tap at 25 seconds. Activate draw and paint mode. Select pure black
by double tapping. Then use your stylus to draw a color drop over the
whole stage area. Locate the frame in your timeline below,
select Field duration. And then we're going to use an opacity filter
to fade to black. Tap the track, tap the playhead, select filter opacity, and move the slider to make it 0%
capacity at the start. Then tap at the end
of your time line. Scroll with three fingers
to enlarge the track. On the end time line, set your capacity at 100%
We're going to place two more opacity key frames
at 26 by tapping and setting, setting to 71% then at 27 seconds and set
to 100 on our track. We're also going to set the easing to linear
by long pressing. Deactivate, draw and paint, and tap the create
mode and select text, Tap edit style on the
text box that pops up. And then select
white as a color for your text from the color
wheel in your typeface. We're going to select do tap the keyboard icon
and type the end. Then double tap to highlight
in the format menu. Adjust the leading
to -122 size to 300, set to all caps. And then reset the text in
the center of the stage. And click Done on the track. Place your stylus at 26
seconds and tap the playhead. Select filter and
opacity and set to zero. Delete the first keyframe on this track and then
head to the end of your timeline and
set another opacity keyframe by tapping
and setting this time, make sure it's at 100% long. Press on your key frame track to set your easing to linear. Now at the same locations, we're going to set a move
and scale key frame. Tap on your track and then on the playhead select move and then move and
scale at 26 seconds. Then set another
keyframe at the end and set till it's
active in white. And then enlarge and center our bounding box to the
middle of the stage. Now we can play to
test this animation in our view and then pause. Okay, now we can collapse
our whole cat group. Swipe to the left
with three fingers until your whole movie
timeline comes into view. The last thing we're
going to do is layer an audio track over
the whole movie in your class resources like the Silver Sparkles Royalty
free MP three by Jeff Harvey. And drag and drop it into the timeline below all
your other tracks. And make sure it is docked to the beginning
of your movie. Zoom in, tap the track
playhead and select levels. And place the volume at 57 with your keypad swipe to the left
to compress your tracks. Then at 22 seconds, set the new level key
frame at 40% Finally, just before the animation ends, tap and place a final
level key frame and set it to 13% long. Press on your key frame track
and set easing at linear. Congratulations we are done. Use a three finger swipe to the left to place your
whole movie in view. And then tap the screen
with four fingers. Then tap to activate
the play icon at the bottom to play the
animation from the beginning. Well, we have covered
a lot on how to use performing and key framing to bring your illustration to
life as an animated movie. Take some time to
go back through the lesson experiment
when you are ready. I'll see you in
the next lesson to talk about exporting our files.
8. Exporting and Final Thoughts: In this lesson, we are
going to go through how to export our Procreate
Dreams animation. I'll share a few final thoughts
about your class project. We're going to head briefly back to our theater view
in Procreate Dreams, I just want to highlight that Procreate Dreams movies
are automatically trials either on your ipad or your cloud storage depending on the location you selected. Also have the
option of exporting your animation in a
range of other formats. If we head back to our movie and then to our settings
by tapping the title, we can export our movie using the shared tab here you
can export as a video, export each of your frames in your movie as single images. Export one image based
on the frame that your playhead is on or save
a procreate dreams file. Now if you tap video, it'll automatically
start exporting. But if you want to determine what type of video
format to export, access your advanced
export custom settings at the bottom of the screen. Tapping on the text of the
right of each option will open a pop up menu where
you can select further settings
starting with video, video codec options to re scale your document size and your file container settings as either a movie or MP four. You can also select your
type of audio and then on the top right can tap the
text to export your video. This will then allow you to
save it to your file storage. For now, I'm going to cancel and return back to our
previous screen. Thanks so much for doing
this class with me today. I hope that it has
really simplified your understanding of
the amazing capabilities and tools in procreate dreams, that you've learned new skills. To streamline your
animation workflow, you can submit a
class project in the class project section
just below this video. By taking a before and after screenshot of an
animated movement you have performed
in your movie, I really encourage you
to experiment and add your own unique spin on the
skills you have learned. You can also place links to your Procreate dreams movies in the class project section with an image if you would like to share your project that way. Sharing really helps
inspire other animators to learn and try their
hand at the skills. The more we share, the more
we all grow creatively. If you are in social media, you can always tag me at Cardwell and Ink on
Instagram and Facebook. I really enjoy resharing
student projects in my stories. If you have a moment,
I would love it if you could leave a review
of the class. I take the feedback on
board and it really helps me refine my techniques
As I create more classes, you can stay updated
on my latest classes, tips and giveaways by
following me here on skill share at Cardwell
and Inc. Design. Have a great day guys
and happy creating.
 CardwellandInk Design, B.Sc, B.A, M.Teach