Transcripts
1. Let's Get Started: So I'm not an animator, but I'm an illustrator, and procreate dreams really just opened a world of possibilities. In the last few months, I've been so hooked on
bringing my drawings to life and sharing
them on social media. And soon, you two will be
able to animate a pro. Hi, I'm Simon. I'm a
digital illustrator and a top teacher on Skillshare. And my goal is to make the art of digital drawing
accessible to all. Now, as an artist, I love to use
Procreate and share snippets of my life via
wholesome drawings. And if you two are a
big fan of procreate, well you're in love because Procreate and
Procreate dreams, they are a match made in heaven. I've divided this class
into two main parts. First, we will talk
about the basics of Procreate dreams and
how to get started. I'll even show you how to import your favorite
settings from procreate, such as your own
customized brushes, color palettes, and files. And in the second part, you'll have access to three downloadable Procreate
dreams file where we will work step by step to put your animation skill
into practice. So, listen, by the
end of this class, you will be able to animate
with key frames to move, rotate, and even change
the lighting of a scene. Create simple frame by frame animation
with the flip book, record your action in real
time with performing. This is a super cool feature that allows you to
give your animation subtle and more
realistic movements that would be difficult
to create manually. And for your project, you will share your
first animation based on this class learnings, using the template or creating your own
original animation. So this class is really for anyone who would like
to start animating because all you need is an
iPad with appropriate dreams. And with these new skills, you'll be able to share your
own drawings with cool, simple animation on social media and really impress
all your followers. So if you're ready to embark on a new artistic journey and
bring drawings to life, watch the next video,
and let's get started.
2. Your Project: For your class project, I love to see your animated
creation come to life. And this has come with
three procreate dreams file that you can modify
and experiment on. This means that as
a class project, you can submit any animation you've created from the provided Procreate dreams template. That could be a
facial expression you're really proud about, or you can share the rotating
from the moon to the sun. Really, the choice is yours. You could also share
the entire three sequence animated scene,
stitched together. Or why not share your own animated drawing
based on this learning, such as using the flip book
or performing in action. So for convenience, submit
your project as a gift, and I'll show you all the step by step in
the video lesson. Submit your project as a gift. Let's learn about
procreate dreams and let's animate together. Okay.
3. Creating a New Movie: When you first open
Procreate dreams, you begin in the theater. Now, the theater
is where you can create open and
share your movies. Okay, so let's start by
creating a new movie. We're going to tap
on the plus sign at the top right corner. So, I love that
Procreate dream has a lot of stage presets
for different devices. Since we're making a short vertical animation
for social media, swipe and choose social. You can also tap the
ellipses to set frames per second to 12 and
duration to 5 seconds. The standard frame rate for animation is often
24 frame per second, but for a quick social
media animation, I find it okay to use
12 frame per second. Now, tap empty to confirm. This will create a movie
with an empty track for you. If you'd prefer to start
drawing frame by frame, on. This will create a movie and directly prompt you
to draw and paint. I usually import my
files from Procreate, so I personally prefer
to select empty. So the timeline sits in the bottom half of your screen where you first open a movie. In this case, you can see
that it goes up to 5 seconds. That's because we
selected 12 frame per second and 5
seconds initially. But you can change
this if you'd like to. Tap on the movie title
to access the settings, go to properties and then select your frame per
second and duration. Finally, remember to give
a name to your video. So tap on the Theater button. On the Theater review.
Long press on your movie, and tap on Reading. Call it My Movie, and now you have
your first movie available for you to
start experimenting. So far, we've learned
the following. Theater is where you create, open, and share your movies. Your timeline is at the
bottom of your screen, and this is where
you will use to edit content at key
frames, et cetera. You've also learned how
to create a new movie, access movie title and
change the settings, and also how to
rename your movie. Congratulations. Since
I'm an illustrator, I work a lot with Procreate. I will show you how
to import files from your favorite settings from Procreate to procreate dreams.
4. Procreate to Procreate Dreams: Procreate and procreate dreams, they really go hand in hand. And in procreate dreams, I'm going to show
you how to easily import from procreate.
Let me show you. So let's go to procreate. I usually draw a
lot on procreate, and I love to import
my favorite brushes, color palettes and
overall drawing files. So, for example, some of
my procreate brushes, they have some modification,
such as stream. And I'd like to use them
in procreate dreams. The good news is that
we can easily import all of those modifications,
and here's how. So let's sart for brushes. Go to your brush library. With my right index finger, I long hold on the set
I'd like to import. And then with my
left index finger, I swipe up and go to
procreate dreams. Drop it on the stage and your brushes have
now been imported. You can also import individual brushes using the same drag and
drop technique. To see your brushes, go to draw and paint and tap
on the brushes. Draw and paint is
where you can sketch, draw and paint
characters, backgrounds, and other elements directly
into your timeline. Here, you'll find your
import brush sets and also color palettes. And to transfer your
favorite color schemes directly, it's the same thing. Drag and drop to the stage. So you'll find your
exported color palette under draw and paint. Tap on the top right
corner on Color dot, and tap palette.
And there it is. For importing files
from procreate, I often have to plan my layers differently
before importing them. So think about how to
organize your drawing files, especially for moving elements. For example, see how I separate the branches into different
layers and a scarve two. Okay. That's because I want the separate
elements like the scarf and flowers to be
animated on their own. First, you can drag and drop individual layers into
procreate dreams, and each layer will appear as a single clip or
content on a track. You can also select
multiple layers on procreate to drag and drop
into your procreate dreams. The layers will then appear
as multiple content, but on the same one track. That means that you'll
have to move them yourself into separate tracks. My preferred way to
do it is to drag the whole procreate file
into procreate dreams. And to do so is I go to
the gallery in procreate. Select the file, and I drag and drop it into
procreate dreams timeline. And here, you can see
that it's just one file, but it's actually a group. If you long hold on the group, you can convert
layers to tracks. And remember, tracks
are like layers. Now, tap on the little arrow and you can see all
the different layers. For me, this method
is recommended, especially when you have
more complex projects. So let's do a quick
wrap up because so far we've learned how to drag and drop your
favorite brush set, color palette, layers,
and procreate file. We've learned about
draw and paint, and this is where you can sketch draw and paint
characters background, and other elements directly
into your timeline. And finally, we've learned to ungroup to reveal the
different tracks. You now have the
skills to create a new Procreate dreams movie and importing files from Procreate
to Procreate dreams. Now it's time to learn a bit
more about the interface.
5. Interface: Stage and Timeline: We start in our theater view. This is your main hub where all of your
movies are stored. When you select the movie, you'll see the timeline at the bottom half of the
screen and the stage on top. The timeline is where
the work is done, and the stage is where the
show is being presented. So let's start with the stage. All right. So above the
timeline is the stage. And the stage is a small
window displaying your movie. Behind this stage is a
backstage area visible to you, the creator, but hidden
from the viewer's side. And it's your job as the creator to decide what your
audience will see. So for example, you can see that the tail of the dragon is backstage to create the illusion of continuity as it rotates. The character also disappear backstage once they state off. On the left hand side, you will find the time code. Now, the time code
displays the time as the location of the
playhead on your timeline. Tap the time code to
access the stage options. Here, you can show or edit your onion skin and change
the background of your stage. We'll get back to
the onion skin once we start drawing frame by
frame in the video lesson, flip book, create an
expressive character. By default, the red
buttons are hidden. They can be tugled on movie
settings by tapping on the title under
preferences. Okay. Now to the timeline. So the timeline is
where the work happens. It's the control center for navigating and editing content, adjusting keyframes, and more. As you can see the timeline has a lot of different tracks. Tracks are like layers except
over a period of time. You can name them
and also toggle their visibility turning
them on and off. On the left hand side, you'll find the theater button. Tap on it to return
to the theater. Movie title and setting
displays the title of your movie and can be taped to access movie settings
and preferences. On the right hand
side, you'll find the play button to
play your animation. Tapping play changes
the button to a pause icon and
plays your movie. Here, you can see that the
time line is zoomed in. So the animation only plays this specific
segment in a loop, namely from second seven to ten. If we zoom out, we can see
the whole time line and the playhead is now playing
the whole ten second video. Tap pause to pause your movie. If you look at the circle, you can activate performing
by tapping on it. It looks like a record button. As you tap on it, it changes
the button to a stop icon. You can also see the
word ready blinking with a red dot flashing on the top
left corner of the stage. In this specific instance, we won't be performing,
so tap again to exit. We will, however, get into how to use this really
cool feature in the video lesson performing to animate your character.
So stay tuned. Tim Lne edit activates content and tracks
selection on your timeline. This allow you to use
Apple pencil to make bulk selections and edit
to your timeline content. You can also see that all the
selected tracks are in red. When you tap the
timeline eddit button, the words timeline edit will appear in the top left
hand corner of the stage. Tap the timeline ddit button
again to exit this mode. Remember, you can select multiple clips using your
finger instead of a pen. Just set this
preference by tapping the movie title to
access the settings. Under preferences,
go to gestures and Tuggle enable
painting with finger. Draw and paint
turns a stage into a canvas for sketching,
drawing and painting. When you tap the draw
and paint button, the words Draw and paint will appear in the top left
hand corner of the stage. And you'll also
see a top bar and side bar menus with painting
tools that will appear. Here, you'll find an interface similar to procreate
such as the brush, smudge, erase, and layer. I've shown how to import
your favorite brushes, color palettes and
file from Procreate in the video lesson Procreate
to procreate dreams. Now, tap draw and
paint again to exit. The add button is used to create new tracks and content
in your timeline. Tapping the plus
add button opens the add manufacturing
content you can add to your timeline,
such as tracks. All right. This is what
we've learned so far. We've covered the overall
interface of procreate. We've discussed about stage
and backstage. The timeline. We've also covered
play performing, timeline, edit, draw
and paint at track, and also a few preferences
customization, such as undo redo, edit content with finger. Now that you've
mastered the interface, I will help you optimize your time with six of
my favorite gestures.
6. Six Favorite Gestures: Gestures are hand movements. You can use as shortcuts, and I re believe that
every artist need to optimize their time by
knowing how to use them. So here are six of my favorite gestures
on Procreate dreams. Let's pan with a
two finger slide. You can pan in any direction
across a time line or stage. Just tap and hold
with two fingers, then slide in the dirion
that you want to move. Also, on the timeline, you can even pan with
just one finger. Ooh. Quick pinch to fit screen. Quickly pinch to fit the
scene to your screen. It's great for getting a
full view of your work, especially when you zoom in
too much or you're too far ahead. Undo and redo. Uh oh. Now, this is
my personal favorite with two finger tap to undo
and three finger tap to redo. It's a quick way to correct
mistakes or redo changes, and I do it all the time. If you're on in preferences
by tapping the movie title, you can also add the undo and redo button you
see on the stage. Instant playback. Flick the playhead
to the left of the timeline for instant
playback from the beginning. It's a fast witch
review your movie. Telne adjustment. Use a three finger
slide to adjust the time line vertically
and horizontally. Full screen preview. With finger tap for a full
screen preview of your movie. This really helps you to see the bigger picture without
any distraction and to focus what's on the stage and completely ignore
the backstage. All right. So so far, you've learned the following, how to pan, how to quick
pinch to fit screen, under redo, instant playback, timeline adjustment, and
full screen preview. Now that you've learned enough about Procreate
dreams interface, let me show you how to get my exercise files and launch them into your
procreate dreams.
7. Resources: Importing Templates: We will work with three
different procreate dreams files that you can find
under project and resources. Once downloaded, I
recommend moving them from your download folder
to your iCloud drive. I personally like to place
them in my iCloud drive as this allows me to easily
access them between devices. From Procreate dreams, let's
go to your theater view. You'll see options on the left side to choose
where to extract files, either iCloud drive or my iPad. And if you tap and
hold your file, you can easily copy
it to my iPad. Now, about the files
you'll be using. There are three in totals. We'll be using them
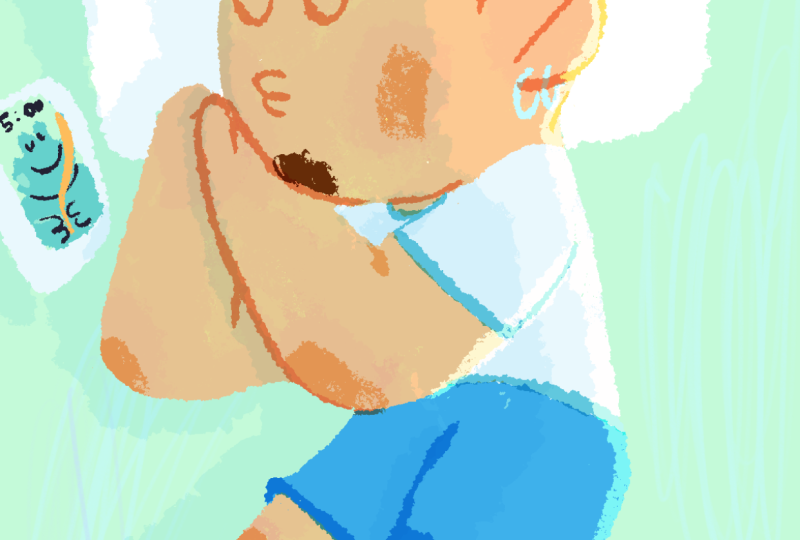
to tell a story about a little orange
head morning routine, waking up with the sunrise, brushing teeth, and
drinking coffee. Each scene is designed with
a combination of wide, short and medium shots to create a more engaging
and varied storytelling. We have our procreate
dreams files. Now we can get practical. Let's dive right into the first practical exercise turning a night
sky into daytime.
8. CONTEST: Win a Year of Skillshare: You are win a year
of Skillshare? Well, it's super easy. Since you're already
halfway through this class, simply submit your project and enter to win a year
of Skillshare. And I will select the
project at random. So make sure you
submit your project by the deadline on May 31, 2024 at 11:59 Eastern
Daylight Time. Also, please do share a
review as this really helps teachers like myself to create more relevant classes
for you guys. Good luck, and back
to Procreate dreams.
9. Night to Day with Keyframes: Let's open the Procrean
dream file called sky. I want to show you
a simple way to transform a night sky
into a dark sky by rotating the moon into a sun and gradually changing
from dark to bright. So tap on the small square on the track guidelines
to Tuggle visibility. You can zoom out to
see the whole picture as it goes beyond the stage. Here, you can see that
I drew a moon and sun, including a little x. X
will be a rotating point. What we want to achieve is a
night to day animation with the moon circles
out of the frame and the sun circles
back in into the stage. And we'll also add a slow sky transition
from night to day. So let's start drawing. So let's start in draw and paint
mode on your timeline, tap on the plus sign
and add a new track. Tap on draw and paint, and use your Apple pencil to draw and moon on this new track. We will use white
for the moon and a bright yellow for the sun
to better differentiate them. Here, I'm also using the dry ink brush with the help of my
guide line as reference, I'm drawing the
crescent moon on top. Now you can see
that your moon is appearing in one single frame. So to make it visible for the whole duration of the movie, which is 5 seconds, you can simply tap on the track and select
filled duration. Another good practice is to
always name your tracks, and you'll see throughout this video that sometimes
I forget to do so. Now, the next step is to repeat the same steps while
drawing the sun. So we first add a new track. Pick a nice bright
yellow this time, select the same dry ink brush, and let's start drawing
on top of my guide line. Finally, we tap on the track
to feel duration and you now have your sun and your moon visible throughout
the whole 5 seconds. Okay. The moon is on stage, and the sun will be hidden
below on the backstage. Now that we've drawn
our moon and sun, let's group them
together so we can rotate them around the
same anchor point. Go to the main toolbar
and select timeline edit. Select both the moon
and sun tracks, long hole on the new
selection, and tap group. Exit timeline edit by
tapping on it again. You can now see a
red dash rectangle around the moon and the
sun when you select them. This shows you that they
are now grouped together. It's time to edit our anchor. So in our guideline layer, I place an x between
the moon and the sun to help you
find your anchor point. This x will act as the
rotating point for the moon and the sun and should be placed between
the two of them. To edit the anchor point, tap on the group on stage, tap on the ellipses
and tap edit anchor. We can see that our
anchor is not in the middle between
our moon and sun. So we're going to drag it on
our X as per the guideline. It's much better now, so we're going to tap done. Now it's time to
animate this group. So we're going to
add two keyframes, one at the beginning of the timeline and one at
the end of the timeline. Adding keyframes is important. Keyframes enable an action to occur between two points
in time on your content. We put the playhead to
zero and tap it once. We tap on action, then move, and then
tap on move and scale. Okay. Okay, now we've added one key frame at the
beginning of our timeline. Let's go to the end to
access the move and scale. I will rotate my moon and
sun group to one 80 degrees. This means that by second, five, they will be reverse. The moon will now be at the
bottom on the backstage, and the sun will be
on top on the stage. I flip the playhead
to see what happens. And it's not bad, but I would prefer for my sun to come the other way,
meaning clockwise. In that case, let's add
a minus sign in front of one 80 to change the
direction of the rotation. And just by adding a minus, we can see that the rotation is going clockwise
that we want it. And now it's time to
layer our tracks. So just like tracks
can be layered, I'd like for the moon and sun
to not go over the houses. So I'm going to tap on my group and drag the track
under my houses. Now the moon and the sun
are both from the houses. I like that better.
Finally, let's add a light filter for opacity. So it's not always
night and day and your sky should not
always be bright blue. So let's add a bit
of darkness to it. Let's add a new track. Go to draw and pine, select a nice dark purple
and drag it on stage. We will tap on field duration, and now our sky is
purple 0-5 seconds. But I think it's a
bit strange because now it's always night
even when the sun is out. So let's add two new
keyframes again, one at the beginning
and one at the end. At the beginning of a new track, let's tap on the playhead. Tap on filter, and here we're going to
play with the opacity. So at frame zero, it's nighttime, so the sky
should be dark purple. In that case, our purple sky
should be revealed at 100%. Then at second five,
the sun is out, we would like our
blue sky to be back, meaning that the dark purple
pine shouldn't cover it. So we repeat the steps and add another live
keyframe at the end. Tap on the playhead
filter opacity at 0%. And let's play to
see the result. You can see our sky gradually going from purple to blue while the sun is rising up. All right. So far we've learned how to use R and paint in
procreate dreams. Creating and managing
group with time line edit, rotating content using
motion keyframes and adjusting opacity with light filter keyframes
for dynamic effects. This is the first
scene to our reel, and in the next video lesson, we will play with the
flip book and learn how to do frame by
frame animation.
10. Flipbook: Create an Expressive Character: Let's open the file
called brush teeth DRM. You can see this cute
little character, but he doesn't have eyes, so let's animate some
facial expression first using frame by frame. We open the file and right away, we add a new track on the timeline and
select draw and paint. Drag down D part to access the flip book and have
a full screen view. In traditional animation,
a flip book is a small book of drawings
to draw frame by frame. When you flip the pages quickly, it gives the illusion
of movement. If you tap on the timestamp, you'll have access to
the stage options, including your onion
skin preferences. Now, to better create movement, we also need to see
several drawing frames at once through a technique
called onion skinning. Onion skins are a useful way
to see more of the frames immediately preceding and
following the current frame. They can also help you
decide what comes next or how to edit an animation
cycle you're working on. In this case, our backward
frames will be purple at 20%, and we'll only show
the last four frames. And on forward frames, it will be in orange at 20%, showing the next four
frames forward, not more. All these customizations
are great. It's a great way
to differentiate from previous and next frames, and it also allows four year selected
onion skin color to pop up from your drawing. So let's try the eyes
in draw and paint. Now, I'd like my
character to have green eyes the same as the
darkest part of the leaf. Tap, hold, and select the green. Select the dry ink brush, and now I'm going to
start drawing its face. One eye here and one eye here. I will select the previous
frame and tap duplicate, so the new frame is identical
to the previous one. So I want my character
to start blinking his eyes open and close
while brushing his teeth. This will give him the
illusion that he's blinking. I'm selecting my eraser brush, and I'm going to delete half of his eyes on the new frame. Now, tap on the flip
books next frame and on an empty frame which can start drawing his eyes being
completely closed. So now we have
three frames open, half open and closed. Let's pred done and
see how it looks. Let's extend the opening
eye content a bit. So I'm going to hold the edge of the content and drag
it on the timeline. This means that his eyes are
open from the beginning. Now I'm going to copy the opening eye content and paste it right after
the closing eye. It's good, but still
a little bit fast. So I'm going to add more frames by extending my in
between content. In this case, the mid closed
eyes and the closed eyes. You can select the
edge of your content and drag it on your
timeline to extend it. Okay. I think the timing is better now that we
slow it down a little. So now that our animation
is 6 seconds long. I'd like to repeat the
animation three times. Therefore, I'm going to make
sure that the animations 2 seconds so it can be
repeated exactly three times. On the timeline, I'm
going to grab the edge of the open eyes content and
extend it to 2 seconds. Now, I tap on timeline edit and I'm going to
select all the content 0-2 second to group the blinking eye animation
into one sequence. I tap on the group
and tap duplicate. Again, this duplicate the
sequence on the same tract. Now you can see that
two times three. Let's say I want to
add more emotion to my character and
exaggerate his excitement. So let's draw big
star in his eyes. First, I'm going to
add a new tract and tap on draw and paint
and use our flip book. Let's select the color of
the character's teeth, which is white and pick
dry ink as a brush. Let's draw a four corner
star in the center of its y, and let's color the inside. Now, on the next frame with the help of the
previous onion skin, I'm going to draw a start
slightly bigger this time. On the third frame, we
want our four corner start to explode into four
smaller start at each corner. I'll pick a smaller
brush and start drawing them here and here
and here and here. It's the same as the
big start exploded, but just four little
versions of it. You can repeat this as
many times as you wish. In this case, I only draw a total of five frames
for this anomation. All right. Now that it's
done, let's see how it looks. We have a one star animation, but how about the other eye? I don't feel like redrawing
all these frames again. So what we're going to do is duplicate this
animation instead. Tap on timeline edit and
select the animated content. Group these frames, and here, I'm going to name this
animated sequence stars. We could put the stars in the tips as well to show
that they're super clean, but I will put them into his
eye to show the excitement of the character. Okay. However, now, there's
only one star in one eye. So in that case, I will
duplicate the animation. I'm going to tap on track stars, go to track option,
and duplicate it. By doing it like this, this will duplicate the animation
but on a different track. Now I can select the
new track and put it on the other eye
simply by dragging it. I can also group the two
stars again and easily place them whenever my character open its sie on the timeline. Let me copy this
animation and put it every time the
character opens its eyes. Now, let's play the video again. Pretty cool. An optional exercise would be for you to incorporate the stars into your
night to day sky. Okay. Okay. So the character
is brushing its teeth, and I'd like to see some
foam around the mouth. I will add the animation foam using a technique called boil. Now, boil animation
is a way to add subtle movement by retracing
elements multiple time. In this case, we will retrace the foam around the
mouth four times, and we will use the flip book. On the new track,
let's go to dry and paint and let's select
a bluish soapy color. This time, I'm going to
use a more texture brush. So let's go to painting
and select spectra. This is one of my
favorite brushes. Okay. Drag the tap down again. So now you have access
to the flip book, and let's start drying our foam around the
mouth four times. So on four different frames. One, two, three, and four. Let's select timeline edit. Let's group these frames again, and let's call it bubbles. This is pretty cool,
but the foam should be under the toothbrush
and the hand. So let's drag the track and
put them under the track arm. Now, I'd like this foam to be present throughout
the whole movie. So I will select and duplicate,
duplicate, duplicate. But this seems like
a lot of work. So at any time you can
tap on edit timeline again and select multiple
of these foam duplicates, group them again, and duplicate these
groups of duplicate. But this really
accelerate the process. Okay. And there you have it. So let's see what
we've learned so far. First, you've completed
three different frame by frame exercises using flip book. You've learned the techniques
for selecting colors and editing onion skin
for smooth transitions. You've learned to group and duplicate animation
for efficient reuse. And finally, you learned about the boil animation technique by tracing element multiple times and having a slight
movement effect. Our character is
definitely more animated, but let's use some performing to add even more life to him.
11. Performing: Animate Your Character: Let's continue with the file
called brush teeth do DRM. This character is
coming to life, but he's still a
little bit stiff. So let's add some movement using performing techniques
in procreate dreams. Now, in my opinion,
performing is what makes procreate
dreams so special because you can record
keyframes in real time using gestures without
being an animation pro. And let me show
you. Okay. So let's continue with this file
called brush teeth DRM. This character is
coming to life, but he's still a little
bit stiff because he's brushing his teeth
and his arm isn't moving. So let's use performing, which in my opinion, performing is what makes
procreate dreams so special. And you can record keyframes
in real time using gestures without being an
animation, w I'm not. So let me show you. So what
we're going to do is we're going to move the arm so we can see that the character
is brushing its teeth. So let's stop the playing. Let's go to the arm track. Arm. Oh, here it is. Arm track. What I'm going to do now is I'm going to tap on the circle, which is the performing button. I'm going to go to the
beginning of the timeline, and you can see here that
the red dot is blinking, telling me it's ready
for me to perform. What I'm going to do
is I'm going to place my apple pencil on the arm, and I'm going to start
making subtle movement, and these will be recorded live. You brush up and
down, side by side. There you go. Let's
see how it looks like. Up and down, side by side. There's a little speckle
of dust on my iPad. Let's do it again. Up and down. Side by side. Happy
little fella. Great. So this is one way
to performing. And if you zoom in, you'll be able to see
These are all key frames. Remember when we were creating the rotation from
the moon to the sun. These are all key frames
now that have been added. Meaning it's all
the subtle movement that have been registered whenever we start
performing. Great feature. So you don't have
to do it manually, and you have a movement
that is more natural. This is why proc dreams
is so good because you don't have to be a
pro animator to do this. What I want to do now is I want to Using performing again. I want the leaf on
the top of his head to bounce a little bit as
he's brushing his teeth. So I'm going to tap
on edit anchor, like we did for the moon. I'm going to put
it at the bottom of the leaf at the stem. And what I would like
to do if I tap on it. Again, at the corner, I'll be able to see the little
handle. It's very faint. I don't know if you
can see it right here. Tap performing, tap here,
see the little door. Duck. And let's see
how it looks like. Now you can see that
the leaf is moving back and forth as he's
brushing his teeth. Cute. What I'd like to add now is a little bit
more flow to the leaf. Let's go to Warp,
which will allow us to the leaf this
point to distort. When we're ready, we're going
to press on performing, and I'm going to
start distort leaf as the leaf is moving. Let's play. And you can repeat this several
times as much as you want. The last thing I'd like to do is bob the character's
head a little bit. Again, using performing, let me start going
to move and scale. Let's make sure that
the anchor point is in the middle of his head. Let's on the corner to have this little handle
that you can see here. Tap on performing. Subtle movements of the
head going back and forth. Done. And that's our animation, adding subtle
performing movements. What do you think? What we've learned is to use
the performing feature to create realistic movements
and subtle movements. In this instance, we've
used warp and rotate in order to animate
elements using performing. Performing is great for
subtle and natural movements. It's saving you also
a lot of time instead of manually adding
every single keyframes.
12. Quick Review: Three Ways to Animate: Let's do a little bit of review since we already covered a lot, and we will review two
ways to move the cloud. The first one using keyframes and the second one
with performing. Finally, we will change the day sky color from darker
to a little bit brighter. To start, let's open the last of our files called
window dot d RM, and let's focus on the sky on the other
side of the window. So on the Cloud track, we will add a
keyframe by tapping on the playhead at the
beginning of the timeline. Then tap move and
move and scale. Now we're going to add another
keyframe by tapping on the playhead at the end of the timeline on
the same track. You can see that move
and scale is in red. This means that a move and scale keyframe has been
added at that position. You can see also that
the red icon means that the keyframe has
been added and is visible under its
associated content. Tap an individual keyframe
to view its parameters. The key frame has been added, but its position of the cloud is the same
as the first key frame. So while on the last keyframe, we will define the
desired finnal position of the cloud by dragging
it from right to left. Now you can see our clouds continuously moving
from right to left. Okay. In case you find your clouds to be moving too slowly at the beginning, you can tap on the
keyframe track and hold to select set easing. Now, easing is a fancy word that animators use to describe how a movement starts and stops. In this case, I will make sure
that my easing is linear, meaning my clouds are moving at the sixth speed
throughout the animation. Okay. Option two, let's start from the beginning
and rewind a few steps. As an alternative, let's use performing this time
to move the clouds, just like we did for the arm of the character
brushing its teeth. So when on our cloud track, let's tap on performing. We can see that the ready button is flashing on the
top left corner, so we are ready to recard
our live gestures. For performing, we
tap and hold on our clouds moving them
slowly from right to left. Remember that at any time, I can lift my finger
or pencil to pause the animation and restart
as many times as needed. Here's our animation of the
clouds using performing. Performing is a great tool
to add subtle movements. In this case, it might not be necessary to add too many
movements to the cloud. But I wanted to review
these two options with you. In this case, we will
keep the first Sydney to animating with two key
frames for our clouds. Another review I wanted to
cover with you is how to change the sky color
from darker to lighter, similarly to what we've done in the exercise from night to day. So we're going to tap on the plus sign and add a new
track on top of our blue sky, but under our cloud. We tap on drawing
paint and select a darker purple color and
drag it on the stage. Tap on the new track
and field duration to make sure that it's visible throughout the whole time line. Just like we change the
sky from dark to bright, we will do the same here. So in this scene, remember
that it's already daytime, so the sky shouldn't
be completely dark. So at second zero, tap on the playhead, go to action filter opacity
and lower the opacity to 20%. Let's do opacity keyframe at 0% at the end to show
the bright blue sky, meaning that there's 0% of
the purple showing this time. The result is quite subtle, but I can still see it. In this case, let's go back to the first opacity keyframe and increase the opacity
of the purple to 50%, and this will make
this transition a little bit more dramatic. What do you think? Now, we've reviewed together movement via motion keyframes, movement via
performing, change of opacity via filter keyframes. And I think this review video lesson is super
important because on top of repeating
a few exercise to really help you master these, it also showed that there are more ways than one to
do similar action.
13. Masks and Ambient Lighting: The scene is set.
Our character is now drinking its morning coffee. It's the early morning hours. So let's add more details by playing a little bit more
with the ambient and lighting of our character using clipping mask and
different blend modes. Okay. Here you can find
a track called shadow. This is only the outline of the character in dark navy blue. But you can't really
see the character now that the layer is visible. The shadow shouldn't
be so opaque as I still want to see some
features from my character. Let me long hold
on the track and switch to blend mode now
from normal to multiply. Blending modes
combine a base layer in this case our character
with a blend layer, this shadow to achieve
different visible effect. From zero second
to eight second, the sky is becoming a
little bit brighter. That's because it's
the morning time. The brighter the sun, the darker the cast shadow will become. So what I'm going to do is
add two filter keyframes, starting with the end this time. I'm going to tap on the playhead at the end of the shadow track, go to live filter, then opacity. And we're going to set
the opacity to 60%. I like it when it's
real dark and dramatic. Now, let's go at the
beginning of our timeline, and let's add another
light filter keyframe to change the opacity. We tap the playhead
on the shadow track, tap light filter opacity, and set it up to 15%. Now that our opacity
keyframes are set, the shadow will go from 15%
opacity to 60% over time. So going from
brighter to darker. Now, in order to make this
animation even more dramatic, let's add some
bright yellow light on our character's face. The light will come
from the window, so from the right hand side. So we're going to tap on
track, add a new track. Go to draw and paint, and we're going to pick that really nice yellow
color this one. Let's use our dry ink brush. And here, I'm going to drag
this line down to have access to your flip book and also have a
better visibility. I'm also going to start drawing a nice yellow contour on the right hand side of
the character again. Doesn't have to be perfect,
and I'll show you why. Now I'm going to drag the bright yellow onto the stage
to fill in the color, and you will notice
that if you need to fill up outside of the stage, no worry, you'll have to
drop your color once again. So you do it in two
steps, and there you go. A good practice is also
to rename your track. Let's call it light. We want to extend the duration of our track all
the way to the end. Let's tap and hold on
the tap fill duration. Now, this yellow doesn't
look really nice, so I'm going to tap
on the track and change the blending
mode to screen. I want the light track to act as a clipping mask also to the
layer shadow underneath. In this case, the outline of the characters shadow will define the visible
boundaries of the light, meaning that it will not
be visible outside of the set boundaries.
Green nice, right? As the sun is moving
up throughout the day, so will the light
and the cast shadow. So the sun light is coming
from the right hand side, coming from the window and
hitting our character's face. So let's add some
movement to the light by adding keyframes
at the beginning, tap on the playhead, tap
on motion and scale, and this is where our
first keyframe is. But maybe I'll move
the light slightly, so we have a little less
light on the character. And let me add a key
frame to the end as well. Tap on playhead.
Motion and scale. Move the light as desired to register the final key friend. Here I'm going to
add more light to my character's face,
and there you have it. You can see the progression
of the slipper light and going towards casting more light on our characters over time. Okay. So, feel free to add your own expression on your little character while reviewing previous video lesson, such as the flip book. That will be a good
one. I've also allowed to have
the leaf, the arm, and other elements
of the character in separate layers so you can play with it at
your own leisure. So I'm also going to draw the eyes here, but
they will be closed. So I'm keeping it simple,
but you don't have to. So once again, you
can be creative, you can play with the eyes, make them blink and close
using the flip book at stars, have fun and show me your customized
animation by the end. Here, we've also
learned how to set blend modes with
multiply and screen. We've created dynamic
lighting effect with clipping mask and
motion key frames, as well as opacity
filters. All right. And here's your final
scene out of three. Let's put all of these
animations together and create a nice reel
that tells a story
14. Putting Every Scene Together: Once you've completed
your animation, it's time to bring
them together in a new movie project and
create your mult scene reel. This will allow you to further refine and add dynamics
to your movie. Do you remember how we created a new movie for social media? So let's do a quick review
together in the theater, tap on the plus
button and select social 19 second and
12 frame per second. And now that we have this shell, let's start grouping our movies. So I'm going to go, for example, to Sky. Select timeline content. Group. Copy. Add a track, put paste. So now we have the timeline sky. And I can see it's
only 5 seconds. So let's make sure that our
movie is long enough in order to host all of the different
reels that we've created. So let's go to
properties, duration. Let's say, 19 seconds. Let's go to brush teeth. Select everything group, copy. Mm. Not bad. One example would
be to zoom in as the sun is going up and add a keyframe at the
beginning and end. So I don't know if you
remember how do it you tap here, move and scale. So this is how we're going
to start and at the end. When the sun is up, let's
add another motion keyframe. And let's Okay. And we can apply
the same one also to this little character
at a motion key frame. As the character is
brushing his teeth at the beginning. And then. At the end as well. And refocus on the
twinkle in its eye. So let's see how it looks like. Good morning. What
a wonderful day. Cling. Enjoying my cup of coffee. Okay. Because it's always good
practice to name your files. Let's call this specific movie with your name
followed by Project. Now it's time to share
your finish work. So tap on the movie title
and go to settings. So share, and I typically share my project as
videos and P four. That's what you're going to do. And you're done. Uh uh. Actually, almost done.
Because you see, for this specific project, I'm going to ask you
if you could share it as a gift, and I'll show you how
15. Submit Your Video Project as a GIF: For the specific instance, please share your
project as a gift. That's because the video might be too large for
uploading on Skillshare. As a reminder, you can upload any of the
movies you worked on, as well as a combined version of it or your own
movie masterpiece. Here's how to convert
a movie into a gift. So now you're going to
launch the shortcut apps, and if you don't
know where it is, you can simply search for it or download it via the
Apple App store. But I have it right here, so let's tap on shortcuts
and go to the gallery. In the gallery, going to type the word gift in the search bar. And here we select
make a gift in pink, and let's add it
to our shortcuts. You can see that I've already added Make gift to my shortcuts, so I'm going to go
to all shortcuts, tap on Mike gift accesses all my photos and videos
from my iPhone camera role. Since we previously saved our video project as a
video on our camera role, we should find it there as well. Select it. And now let's save
it as a gift. Edit video. Yes, and tap Save. And now your video has
been saved as a gift. Done. And your gift is now
available on your film role. Note that it doesn't
have a timestamp. So you might think
that's a still photo, but it's actually a gift. If you tap on it, you'll
see some movement. Upload to Skillshare
under project and resources, and there you go. Okay. So a huge congratulation to you because you've now
completed this class.
16. It's a Wrap: So thank you for joining me on this journey through
Procreate dreams. We've covered a lot of
ground in these lessons, and I really hope you found them both informative and inspiring. And let's recap some of the key points and feature
we've explored together. We've discovered how
seamlessly we can bring our favorite
drawings, color palette, and brushes from procreate
into procreate dreams, expanding our creative
possibilities. We've also learned how
to set up keyframes to dynamically move,
rotate, distort, and change the transparency
of our drawings over time, bring them to life in
new and exciting ways. And we've unlocked the power of performing to record key
frames actions in real time, allowing for more intuitive
and natural animations. We've also tackled
the creative use of mass layers to create
stunning visuals, illusions, and add
depth to our animation. The art of frame by frame element using
the flip book feature, which we use to add boiling
effect to static images, infusing them with subtle
movement and vitality. And as we wrap up, I really encourage you to continue exploring
with Procreate dreams, exploring its vast
capabilities and finding new ways to
express your creativity. And remember, animation is
a journey of discovery, and every project is an opportunity to learn
and grow as an artist. And before you leave,
please do share a review and follow
me on Skillshare because these two actions really help teachers
like myself create more relevant classes while improving communications
with you guys. I can't wait to see the amazing
animation you've created on Procreate dreams
and see you soon. Bye.
 Simon Ip, Digital Illustrator