Transcripts
1. Intro to Procreate Dreams: I am so excited to bring
you a class all about this cutting edge app,
Procreate Dreams. It is designed for
digital artists and animators and offers an array of features that make the creation of
animation such a breeze. Whether you are a
seasoned animator or your complete newbie, it's designed for ease of use. That means that experienced
animators now have easier workflows and you
can save valuable time. And it also means
that someone doesn't need to know a thing about
animation to get started. This app takes the
familiar animation as procreate and
turns it up to an 11. It delivers a powerhouse
of features and user friendly tools
that will have you creating professional
level, but with ease. And not only will you have the tried and true frame by frame and key framing
capabilities, but you will also be able to
now control it as it plays. All you need to do is move your apple pencil around on
the screen. I am Peggy Dean. I'm an artist,
author, and educator. And I've had the honor
of teaching over 500,000 students how they can hone in on their creativity. And now I could just show you a new program that
has further allowed me to lean into my own so that
you can do the same as the art world evolves from static imagery into this
dynamic motion and video. Procreate dreams is coming
at the perfect time and it's giving us an opportunity to
expand our own capabilities. I'm here for it and I'm ready to dive in and show you
every step of it.
2. Overview of Projects: Now we'll be covering
a few projects in this class together and I
want you to come along, every single one
of them with me. It's a challenge I know, but I want to challenge you to do it so that you can really get your hands dirty so that
you can just take off. And it will be effortless. We will begin with an easy one, to get familiar with
all the settings and animation styles. So you will learn
to animate with filters like opacity and color, and then warping and movement. And after you've gotten
familiar with the basics, you're going to have a cute little heart balloon animation. And then after that,
we will move into a full project together
where I will walk you through creating
a parallax effect after drawing layered landscape with an animated foreground and night sky along with a fun
little surprise spread. I'll also be jumping
into a quick demo on putting animations on
top of video content. After that, I will be
showing you how you can use your existing artwork and
breathe new life into it. We'll be going over
exactly how to set up your files so that they
are animation ready, along with how you can use groupings for
accumulative animations. Let's jump in.
3. Dreams Interface: Let's take a look at your main area when you
open Procreate Dreams. If you're familiar
with procreate, then this is known
as your gallery. Procreate Dreams refers
to this as the theater. This is where all of your movies live and this is where
you will start with your projects to touch on this real quick in
order to access files on your ipad or cloud or anything that you want to import without starting from scratch. You'll be able to do that up
here at the top left where you can grab icloud
drive or on my ipad. Now, the next one,
Procreate Dreams. This is going to give you when you first download the app, you know how it walks you
through all of those visuals. That's going to
bring that back up. So you can see getting
started, there's help. And then resetting the examples, which is everything here. You should have a few of
these to start with too, where you can open
those up and see all of the different layers and what's happening and you
can play with them. But if you ever want them reset, that's where to do that,
to select a project. Same thing up here as procreate, you can say select and
then grab several. You can create a
folder out of them. You can also tap and hold. And you're going to reveal a flyout menu that lets
you rename your project. Duplicate it, you can share it. All of these options
are here for you. That being said, to
create a new project, you're going to go to
this plus symbol here. And this is where it's
going to bring you the options to what
style you want. Do you want four K wide screen? Do you want ultra wide screen
social media template? So it's vertical
square screen size. You have two options
on each one of those. One is draw and one is empty. And draw just puts you right
into drawing mode empty. You can turn draw mode on, so it's not like you have
to pick one or the other. Let's fly out here. By default, it's set to 30 seconds
and 24 frames per second. My recommendation is to bring this duration down to
anywhere 3-5 seconds, because that is just too ambitious before getting
started on what we're doing. And you can change
this at any time. So let's say that we
open this project and we want to change
the frames per second. You can do that by going
to the properties. Now, it doesn't seem super intuitive, but it's right here. It's the title, properties
are here, frames per second. You can also change the
width and height here. And we'll jump into the project settings in the next video.
4. Project Interface: Now, just like Procreate has very user friendly gestures
and a clean interface, Procreate Dreams does as well. Some of these features
have been carried over from procreate and
some of them are new. Let's take a look at what these features are and
what you can do. All right, when we
open a project, we are going to have the stage, which is the top half, and the time line which
is the bottom half. If I show you what
this looks like on a project that's
already in process, you see stage, you
see time line, there's one other part,
It's the backstage. Right now, it's darkened. If I turn on draw mode, you can see
everything outside of that bounding box at the
stage because with animation, maybe you have something
off screen and things are, you know, walking past. And you're going to
bring that on screen so you no longer are
restricted to that boundary. We have backstage,
your main stage, and then we have the timeline. The timeline is where
you're going to organize, edit, add key frames, all sorts of things like this. And I'm going to show you some gestures as we go as
well that are going to help you really take
advantage of using this in a seamless way where
you're not feeling like anything is
clunky or confusing. Make it more painless. First
thing that you'll see, if I go from right to left, here is this plus
symbol, adding a track. So you can add a content track. That's typically what we're
going to be doing as we draw. You can add a video track, add text import from file
ships and from photos, I add content tracks. And then you'll note
there's a track there because this
playhead will be here. You can see I have
a couple on here from earlier and it's
kind of hard to see, but if you tap and a
playhead goes there, that's a track I can delete
by holding down and deleting. We'll look at those
other settings in a bit. The next to the
left is draw mode. When I toggle this on, you'll
see that backstage lights up and matches the background
color of my stage. That means that I can draw anything over here
and it's going to carry if and when I decide for it to basically
no bounding edges. The other thing about
draw mode that I love is the ability
to go full screen. To do that, there's
a couple ways. Only in draw mode will you see this little horizontal line in the very middle of the
top of your time line? You can either
hold and pick that up and move the menu up here, which actually is
not the time line anymore, it's a flip book. The other way to
do that is to just hold it down and then the flip book will
appear in the bottom. I like to pull it up
into the left because otherwise what I end up doing is pulling down
and then moving this. Anyway, this is a floating
menu, it's flip book. And what this is showing
me is frame by frame. This is going to, let me animate frame by frame and
draw new things. Every single frame right now, it's all the same. There's
a reason for that. Real quick though,
to get rid of this, I can either slam it back
into the bottom like that, This X ends up
disappearing in a minute. So if you don't see it, it's probably because you
just need a tap. And then it comes back
and then press X. It'll bring your
timeline back up. That is how to go in full
screen draw during draw mode. It doesn't. Again,
as a reminder, you're not going
to be able to do that unless you're in draw mode. We'll break down draw mode
in detail in a moment, but we'll continue on here. This is timeline edit. Timeline edit lets you do things like group multiple
tracks together. Let me show you an example here. If I wanted to do
something where I could, let's say I wanted to
select all of these frames. If I do something
like this, it's just going to move it around. But if I tap time line edit, I can circle what
it is that I want. Circles, fine. De,
select, see, select. If I want everything, I'm just
going to run through them. That's how I can grab everything and that's how you
can group it at that point. So if I hover again, I can change the blend mode
of all of them at once. I can group them all. You'll see why grouping
is important in a bit, but this is how I'm going
to get into that mode, and that's what you need to
know more than anything. It's for bulk edits essentially for multiple
frames. That's time line at it. Now, this next one, we're not going to get
into this too much right this moment, but
know that it's here. This is going to toggle
on your perform feature, which is the most exciting, we'll get into it, and then
play as your playback. So we've looked at what that is. As a reminder, if you
have this expanded, let's say that you only have
this much on your screen, that is exactly what we'll
play back if you have. More, it will continue to play. Just as a reminder,
if you're like, oh, this isn't playing through. Just make sure that
everything that you want to see is on the screen. And the reason this is helpful
is let's say you're only working on an edit
that's like this long. Well now I can hyper focus
on that edit and only have that playback so I'm
not wasting my time having to keep you
continue scrubbing back. Instead I can set my
timeline to have that work. And my benefit, which
I think is really, really helpful and
intuitive and wonderful. And then the title of your project right here is
what brings up the properties. This is where you can
reset frames per second. You can set duration, the
width, and the height. You can put your information
in here, your photo. You also have control
of the stage, allowing you to blend
the primary frame with onion skins timeline. This is where you're going
to set the playback mode. Right now I have it as one shot. If I put loop on when
it gets to the end, it's going to come right
back to the beginning and go through over and over
if it was ping pong. When it gets to the
end it's going to reverse and then go
forward and then reverse. If you're familiar with
animation, assist in procreate. The playback mode
is very similar. Share, this is your exporting. So you can export as a video. You can export each
frame as its own image. You can export just the
frame you're currently on. You can also export a
procreate Dreams file, which I super recommend. So you want to make
sure no matter what your work is always saved, I would always just export a Dreams file and then you
can import it back in. There's an advanced export
if you are an animator and you want to go into all
of these additional ones, but if we're playing,
there's no need for that. And if we're not,
then you already know what this means, okay? Now, preferences, brush
size, and opacity bar. You can change it from a
left to right interface. So maybe you want to have
it on the left side, maybe you want it
on the right side. That's great if you're
right or left handed. Dynamic brush scaling, this is where when you adjust a brush. So let's go into drawing mode. If I'm going to change the size instead of just up and down
really fast like this, If I pull it out and I go down, I can go pretty fast,
but it's like really, really taking its time to
get there so that I can get the exact fine tune
number that I want. So that's what that
means, keyframe to start. This is basically when
you set a key frame, do you want it to
automatically have one in the beginning? I
would just keep that on. It's on by default and then enable time line
edit with finger. I'll show you how to do
this with Apple pencil. This is something
you can visit later. This one's easy to miss, but
there are stage settings and all you need to do is tap
the time code right here. I tap that and you'll see
I have show onion skin, edit onion skin, and
then background color. The background color,
that's what you see here. Edit onion skin.
I can change the previous and the
next color of it, here and here, And then the
amount of frames that I see. We'll get into this
in drawing mode, but I just want you
to know it's also available on your
main project stage. Um, and then you can
also show it or hide it. Currently, I have this flame and smoke track selected
and show onion skin. Remove it, we'll get into
that more, but it is here. If you ever want quick
access to onion skin and you will want access to background
color on the time stamp. And then lastly we have
going back to your gallery. Pretty straightforward and then there's additional
tools depending on which mode we're in
and we're going to get into more of those next.
5. Procreate Dreams Gestures: Now if you have watched
my procreate class, you know that I am a
sucker for gestures. Gestures make your
workflow, so very easy. And they are these little tips that just have
these Aha moments. And I guarantee you even
after watching this lesson, you'll want to watch it again. Because you'll
have been thinking about one thing you could do and miss this other really
good delightful moment. And these are my favorite things that will help you
throughout your workflow. So here we go. This is going to speed up your
workflow even more than procreate dreams already does stage, this is your stage. Here you're able to zoom in
by pinching with two fingers. Similar to procreate,
move things around, same way you can pinch
out two fingers closed. Quick pinch, just
like procreate will reset it so that it fills
to its full screen. To undo, you do a
two finger tap. And that's going to
undo what you just did. Fun, exciting news. Upon release of
procreate dreams. Procreate doesn't have
this capability yet, but it will now. It has eternal history. If you're familiar
with procreate, anytime that you
would tap to undo and you'd leave the
project and come back in, you can't undo anymore. Whereas this procreate
dreams has changed that. And now you have infinite und, it has eternal history. That's great news.
Now, by default, this is set to 50 undues. You're going to find
that in your properties, in your project settings
under preferences, and at the bottom it
says stored undue steps. And you can change this to a
minimum of ten or infinite. What I will say about
infinite here is that, yeah, it's going to warn
you that storing many undue steps can result
in very large files. And what I'll say is,
while this is great, it will affect and impact
the storage on your ipad, which will make it
difficult to continue with more projects
because you're going to fill up
very, very quickly. You can also set it by
project, which is nice, so if you know that you're not wanting to lose your progress, you can just change
it per project. Okay, Now three
finger tap is redo, so let's say undo and then
three finger tap to redo. If you want to go
into full screen, take four fingers and tap and that'll put
you into full screen. If you tap again, you'll see a play menu where you're
able to play and pause. Force fingers to get that small again when you're in full screen to scrub
through the frames. You can do that just by
dragging one way or the other. So that's another way
of previewing frame by frame that gives you a better visual now in
the timeline space. You also have the ability to
make this easier to digest. What I mean by that
is, let's say, okay, I'm moving around here and this is going on
for so, so long. And maybe I want to be able
to see what this says. So you can also to
pinch out to zoom, but in addition to that, you
can also change the length. See how it says 0 seconds, 1 second, two second. Let's say I have a 32nd clip. And I want to be able to see
all of that on my screen. I can take three fingers
and just smush it together, and then I have my
whole clip here. I can make that as short or as long within that
framing as I want. I can also do that
with the height, so if I want to see
more or less of it, like let's say I
have a lot stacked, I can come down
with three fingers or come up with three fingers. And that's going to
compress or expand. Soak, expand, compress, expand, compress, zoom in, zoom out. It's very intuitive,
very flexible, and makes things so very easy. Now something to note about
this is that playback in dreams is set to only play what's currently visible
on the timeline. So let's say I have
everything, you know. Let's say I have this
really, really stretched. When I press play, it's going to loop only with what
it sees right here. And right now, that's just
the end of this clip. If I go smaller here, it's going to bring more of it. Smaller brings more
of it if you want to play back and you don't
want to have to sit here. And short, and
short, and shorten. You can also take the
playback right here, hover over it, and
slam it to the left. And it's going to
put the entire clip in view and play through
the whole thing. So those are the
general gestures and I'll remind you as we go through the process so that we can really take
advantage of these. There's some other ones that I'll be introducing as we go, but I wanted to give you
those straightforward, this is how you can
touch the interface.
6. Draw Mode + NEED to Knows: I want to give a quick
overview on the drawing mode because we're familiar with the brush interface
in procreate, but in procreate dreams we
don't have as many options. When we toggle on draw mode, we have the right side
of our brush interface. What we don't have if
you tap on brushes, were not able to tap and
get to a brush studio, we're not able to do any duplicating or editing,
or anything like this. However, we can bring procreate brushes into
procreate dreams. It's very simple. Not as intuitive as you
would think though. So what you want to do
is open, procreate. And I'm just going to split
screen that next to it. I'll open the brush panel here. And it seems like
what you want to do is drag a brush
over and drop it in. But that's actually
not the case, what we're going to do instead, if you want to do
a whole brush set like from here versus a brush, it will create its own
brush set to the left. If you want to organize anything
like that ahead of time, I'd recommend making a brush set in your procreate brush library
and then drag that over. And then that's
what you can do on procreate Dreams to
keep things organized. Instead of dragging
it over here. I just want to make sure that I have the stage
available right here. And I'm going to take the
brush set that I want and I'm going to drag that
over just to the stage. This is important,
just the stage. Then it will import, and then when I go back
to my brushes, I'm going to see it
at the bottom here. Mineral Noise That's what
I just brought over. That is how we can do that. Now I'll show you
one more thing. If I grab roller and I
bring that over here, it now creates a folder
called Imported. So all of your
imported brushes will live in there. That
is how that works. I like to do the brush
sets just so that I know you know what's what and you can organize
ahead of time that way. But as far as customization,
it's possible. So don't fret, this
is how to do it. So just remember that
you're going to either drag individual brushes or brush sets over to the stage and just drop. And it will import
now just like in procreate we have
the blur and eraser, so you can use the
same brushes that are within the brush studio. You have eraser, and if you didn't know this about
procreate, here's a bonus. When you are on a
certain brush and you want to switch to the
same type of brush, but use it as an eraser, all you have to do
is tap and hold it. Has that setting where you can erase with the
current brush. And same with blur. Those
three settings are there. And then we have our layers
panel still. This is great. We're able to go in and create
layers on an illustration. A couple things to
note, when we tap, we can rename the layer and then swiping to the
left, we can delete it. And then we can turn
layers on and off. This is different
from procreate. If you're not used to procreate, then this is no issue, nothing will be different. But yeah, drawing layers, let's say I create a
completely new content track and then I have a
drawing layer on. I can turn these off so
they're not confusing. Just FYI, no matter
where you are, even if it's a different track, you'll see everything
that's toggled on. If I turn these off,
it won't confuse me. And I'll just be able to work
on this canvas if they are, even if I am on this track, this new track and I create
and I go into draw mode, I'm still going to see everything
on those below tracks. That's I will turn
those off just for my own focus unless
you need them as a guide. It totally depends just right now for what we're
doing. I'll have that off. In drawing mode, as you saw, we're able to bring
it into full screen. When we do that, it's going
to give us frame by frame. There's nothing on it right
now, but if there was, then I would see frame
by frame by frame and be able to make adjustments accordingly to
enter full screen. There's this little
bar right here. We're, you can either drag it down and then flip
book comes up right here. Drag it up and you'll have flip book will
automatically be on your finger basically when you either pull down or pull up and then
to get rid of it, this little X is here, it's going to disappear
to get it back. You just tap and
it'll come back. You can tap the X to get out or you can just slam this
back into the bottom, so whatever suits your fancy. Yes, while in draw mode, we can create layers. So let's say I do something
here, Beautiful illustration. And then I want to create
layers and layers. I'm able to do that.
I'm able to come in and do additional things
at the time of release. Now this might change, but right now you cannot re order layers within
the drawing layers. If you do end up
having something that's massive and you're like, oh my gosh, I can't
re order and I need something on the bottom
my suggestion would be Go back into these tracks here, I'll just make this
bigger so you can see it. But I would do where I
add a new content track, drag it underneath that one, and then create
whatever it is you want to create on the
bottom layer of this one, just on a separate track. That way it will be beneath
it. It will be underneath. Because it's underneath on the tracks, if that makes sense. Clipping masks, because I know that clipping masks
are a big one, like Alpha lock,
stuff like that. Where to apply. Let me show you a
better example where you're able to apply
in effect to a layer. Usually would be able to do
that in the layers panel, but on procreate dreams, they work on each frame. That means that rather than applying an effect to
the drawing layers, I'd have to apply
it to the track. That's where it's like if
you know that going in your workflow won't be cumbersome because you'll
be able to plan around it. Let's say I want to do
an effect to this shape, which is this one here. Well, I'm going to go
to the above layer. Let's just pretend this
content isn't here. I'll go to this above layer. I'll grab just a texture
brush to show you. Let's charcoals. And then I'll just grab
like a darker color. And I can go over it like this, You can see that I have
some texture in here. And that looks nice, but
it goes around everything. Well, the same way
that you would apply a clipping mask in the layers panel when
there's multiple layers. In procreate, you can in
procreate dreams it's just that those layers are
now tracks right here. If I hold down that
texture layer, I can say mask and
then clipping mask, now it clips to that. Now this is really important. As we get into this
whole software, you're going to see
ways that you can apply keyframes and
animations and whatnot. Well, because these are
two different tracks. If I add any key frame,
I'll do a really, really minor one to start just so that you can see
what we're looking at. Okay, here's a good example. If I apply this here, notice that from right
there to right there, the clipping mask does not move, but this frame or
this track does. What that means is
that we would have to apply that effect to
both of these items. We're going to go into this, but I'm going to show you now just so you know how to do it, we're going to group
these two together. Okay, again, we're going into this in detail
in just a minute. So this is just quick
but time line edit. I'm just going to
grab these two. Toggle group or hold
it down rather. And group now I can expand that and collapse
it. They're both here. Now when I apply a key frame to the group move, we'll
have it stop here. Now everything's going to go together and the texture goes with that is how
clipping masks will work on procreate dreams. And that applies to masking all sorts of,
anything like that. All of your effects
and whatnot are going to be per
track, not per layer. I hope that that's helpful. Draw mode, That said, again, a lot of things are
going to be gone over. But the reason why I'm telling
you this now is because if you get into this as we get into the class
and you're like, oh my gosh, this isn't working. This isn't working. I got you. Now, real quick, see how a few things now that this is in a group, see
how it's in a group. And I open that up and then
I can see them in here. But I have it selected.
Even if I have it open, open, and expanded,
I have it selected. Great. I try to open my layers
panel, it doesn't work. Maybe I want to go
into draw mode. No matter how many times I try, it's not pulling up or down. And then I notice that it says, cannot open flip book
on a keyframe track. Okay, well then I try to open layers.
Nothing's happening. Can't open layers on
a keyframe track. Well, what does that mean?
There's a few things. One, I have this
keyframe track selected. Right now. This is what I'm on. I'm not on, you need to
be on the play icon, but it's still not working. Why? That's because the layers, it can't open any layers. It can't open draw modes
if I'm on a group. So you need to make
sure that you are on the actual layer that
you want to be working on. These are the two
content layers. This right here with this icon, any sort of skinny
track with these icons. This is going to be a key frame, or excuse me, in effect, track. Then you can't draw on groups. You can't open layers
on groups because the group contains a
whole bunch of stuff. So how could you edit
that? Makes sense. If you run into that, just double check what you
have highlighted. You have this play icon. You know that you're on a track, right now, it's on a group. So just make sure it
doesn't say group. But then you can go to drawing. Drawing. One of the
things that I would recommend doing is
renaming a group, or you can just highlight it,
you know, it's the group. Then you'll know, okay,
these are the two. Don't click this
one. Does that make sense? I hope that makes sense. Okay, lastly on
drawing, let's see. I think actually
that's it for now. Everything else
will get into here. And a bit just, there's limitations with
the drawing studio. Brush studio, but you can bring things over from procreate
if you have brushes that you absolutely
love and that won't be an issue just so they
can work together. Basically, the idea is not that Procreate Dreams is
a drawing software. It's meant to be like
an animation studio. And typically, at least
from my experience, if a program is going
to be like solid, it's got to focus on,
it's one good thing. So that's what they've done
with the animation here. All right, that's
all for this one.
7. The 3 Ways to Animate: Three ways to animate
and procreate dreams. The first is frame by frame. Think old school animation. You flip through a book.
Each frame is different. This is classic, this
is always a good time. The second is key framing, and you may be familiar with
this if you've ever used any motion graphics or after effects, a
program like that. The third and most exciting
is Perform, which is a new, fully groundbreaking
animation method where you are going
to be able to move things in live time and
it will automatically assign the frames that it needs to for exactly
what you're doing. So I can't wait to
dive in with you. And what I should
mention is that I'm teaching in an order to
set you up for success. So while it might be really enticing to jump into
a method right now, if you learn and you really give yourself the time to walk
through the next lessons, you will be able to use
these methods in tandem. Because at the end
of the day they really do collaborate
together and you will want to be able
to know exactly what you're doing to then
go in and tweak. It will make creating
and procreate dreams much more exciting
because it will be painless. That said, let's move
into the first technique. I am so excited.
8. Frame-by-Frame Animation: We're going to jump into
frame by frame animation. First, you may be familiar with it from
the animation tool. Assist in procreate, but
procreate dreams even enhances it and makes a lot
more of a seamless process. We're going to
create a cute heart, we're going to draw it in first, and then we're going
to have it beat. It's very simple. It's going to go over
a lot of the features. We're going to create
a new project. I'm going to hit just
screen size I think. And then I will do
these three toggles. Make sure I'm on
frames for a second. I think I want to do 12 or 15. And then the duration I'm going
to set just to 5 seconds, I might even go
shorter than that, but you can always change it. There we go. And
I'm going to start on a drawing timeline. When I have a drawing timeline, it gives me a track right away and it puts
me in draw mode. The only difference if I had started with empty is that
draw mode would not be on. And this track
would not be here. There wouldn't be
a track at all. That's what that would
look like. I'm going to undo that and
bring back draw mode. What we're going to do is
explore frame by frame first. There's two ways that
you can do this. The first is you
can start frame by frame right on the timeline. Just know that this whole
track is selected right now. Anything that I do
on that layer is going to be the whole duration. If I wanted to shorten that, I would be able to by dragging
it and making it smaller. But let's say that
I wanted to apply the frames per second that I used or that we're
in my settings. And I wanted to
also have more of a space that I could actually drop if I get
rid of that content. And I bring up flip book, so I can pull down
it, brings it here. I can put it wherever I want. This is your frame by frame. I can push it back
into the bottom. The other way that I
could bring it back. Well, there's two things. One, to bring it back up, I don't have to push down. I can actually drag
it off somewhere. And that'll bring up flip book. And then the other way to
get rid of this is to tap, bring that X back
and then X it out. Let's say I don't have
my content on here yet. And I bring, instead of drawing and having
it hit the whole thing, delete this content,
bring this up. And now what I do
is only one frame. Each frame is going to be
independent of one another. So you can see it's only
this small space right here. Okay? We'll start
with frame by frame, and that's going
to give you a good solid space to take off from. I think I'm going to
be having a hard time drawing a heart just like this. I think I want to
reference to do that, what I'll do is just
create another track. I'm going to end up deleting it. I'm going to pull it underneath. And I'm just going to draw the heart on this
layer so I know what it is. I'm tracing and I'll make
this color quite light. And just as an FYI to color
drop like what I just did, you just grab the color it out, drag it and then release it. I'll go back to this track. I have to make sure that
I select it and then I can bring flip book up
and now I see this again. I think I'm actually going
to clear this layer. And I'm going to
come to this frame and clear this layer so that I can actually just
trace what I was doing. It doesn't want to clear, okay, I come in a lot of
overlap, a lot of overlap. And that's going to make it feel like it's flowing a lot more. Instead of being like
boom, boom, boom, and you get the
idea at the heart, you'll actually see it
come to fruition here. I'm going to do both,
then bring here, if something's a
little bit wonky, it's not really that
big of a deal because the strokes are there for
such a short period of time. Don't think that any of
this has to be perfect. You can always come
in and make edits. So I'm going to show
you that in just a second too when we finish. Okay, let's look at what
this looks like in playback. I can scroll through
my flip book here and see how
that's going to go, and I feel like I still
want these to be longer. I have a couple of options. I can come to my initial
beginning and lengthen it, or I can add in between so
I can connect it even more. For example, let's say that
this wasn't connecting well. Or something I can
tap on any frame. And then this plus
symbol comes up. I'm going to tap
that. And it's going to add a frame right after it. Now I can see the beginning and the end of the two previous. I can just make that whole thing basically
the whole length. And then I have it shorten
here and then add one, and I'll make that the whole
length of both of these. It's going to help me too, to get down to only having
the before and after. Instead of this huge
cluster of onion skins. I'm going to go to
edit. Bring my frames for onion skins down to one. Now I only see the beginning
and the end of it. I made one. There we go. Okay. Beginning and end of that, I can bring this almost
the full length, so it's just like that
middle matchy like this one. Add another in between. And now I want to
drag that through. Not all the way, all
the way, but enough. And that's just going to
be like an opportunity or an example where
you can tweak to make these changes so
that you are happy with your finished results
also. It's okay. That's okay. I'll
add one right here. I don't know if that'll do much. But then this one I could add in where it starts to go down. Then maybe one here,
that's at the end. One in between here
where it flows together. Okay, let's see what
this now looks like. And I can turn onion skins off. I can also just
go through and do the whole playback.
But do you see? I feel like this is a
lot more of that flow. I'll close flip book. I'll go to the beginning
and I'll just watch that. Okay, I think that's really fun. Now, what I want to do at this point is I would want
that part as I'm drawing it. I wanted to actually
stay what I would do, what I just did, but
I wanted to show you how you could
do that motion. What I would do is I would
just add onto it each time. For example, on this frame here, I have my initial frame. Just duplicate this.
Right now it's there. But then this next part is I'm actually just
adding onto it. Okay. Then I'll duplicate, duplicate and then add
on to duplicate that. Add on, duplicated on, dated and so on. So I'm going to finish that
up and that is how I'm going to draw it so it's in place
and doing what we want. Then we're going to have
this heart fill up, which is going to be
really fun, dot there. It doesn't have to be anything too fancy because we're
going to fill it. Okay? That is what
I want it to do. Now if I want to
remove the other ones, I can do that altogether. But we're going
through this whole process so that you can see how easy it is to
make that happen. I'll bring this back
down, collapse this area. You can see the
initial one played first played second rather the
first one draws the heart, keeps it in place, the
second one floats through. Let's say I wanted to get
rid of the float through, or let's say I
tried both and I'm not sure which one I
actually want to keep. Well, I'm going to
find the end frame which looks like
it's right here. Then I'm going to go
to time line edit, and then swipe through all
of the ones that I drew. First, Hold down
and select Group. Now these are all together. Will I want to use
them? I don't know. Probably not, but I have them here since we
worked on them, we might as well keep them. I'm going to pull that group down to the bottom
because I'm not going to want to be
in my way at all. Then I'm just going
to uncheck it. That means that it's
not going to play. It's not visible, but it
does exist in the project. There's a few ways that we can expand on this, a
few different ways. Organizationally, with
procreate, we're used to having our drawing and our layers panel and working
just with the layers. But there are a
few things to note when we're working
with layers here. For example, effects
and things like that. They happen per track. They don't happen per layer. If I want to do a clipping mask, I'm doing it per track. If I do it without grouping it, it's only going to
apply to one frame. That's why when I group this, any effect that I do to this group will affect
every frame within it. We're getting easier as we go. So the next lesson
we'll fill this up and then have it start to
beat using key frames.
9. Keyframe Animation - Filters: Key framing is what animators
consider easing in and out. You may have heard
of eased keyframes. This is essentially setting a start point and an
endpoint and telling where you want
something to begin and what you want to be
the finished result, whether that be moving, warping, changing colors,
things like this. And then allowing it
to gradually change. When you keyframe and
set different points, you can adjust the cadence or the consistency of
anything your heart desires. This one's a lot of fun. It makes things feel relatively effortless and it's so
fun to watch the results. Now as I move into
this next part here, I'm going to want this
heart to just stay solid. So what I can do
is create a frame, duplicate this last one, hold it down from the time
line and say duplicate. And then take this next one. And I'm going to hold down and extend it so that it is the
full length of my clip. That way it will take up
the rest of the time. I could do this on a separate
track if I want to edit it, like let's say I grouped this whole thing
together and I don't want the effects here
to impact this one. I could either just set a group here and keep this separate
or I could split tracks. You'll see what I mean
as we get into it. I just want you to think
this way starting now, so that you know how you want to set your project
up as you work on it. This guide layer, I
don't need anymore. I can actually just go in
and delete this track. And that's going to delete
both the content and the track. I don't need it. What I'm going to do
is I'm going to color drop into this area here. I have to make sure
it's selected. If it's not selected, what's going to happen is if I draw, it creates a new track. I have to undo that,
select my drawing layer, and then you'll see
that that pops up. So I'm just going to color drop into the heart to fill it. If you notice that you have
these little white lines, that's the color drop threshold. If I bring this in and
hold and then shoot all the way to the
right before I let go in procreate it. Fixes this. In dreams, at least at
this point it isn't, so it's not fixing it. So I'll have to go
in and just clean up those lines so that they're
not showing those outlines. But overall, I just wanted
that to be solidish. Then from here I can create the effects
that I'm going for. So once it's full, I just want to point
out that it's going to pop into being full right away. So I think it will be fun to create more of like
a fade in and out. So what I can do
is after filing, I put the playhead at the beginning of the
track that I want it to impact and I'm going to
tap it and I'll say filter. And that's where I see opacity, gauging, blur, sharpen noise. And HSB is your color. It stands for hue,
saturation, brightness. So it's going to
be those controls. I'm just playing with opacity. I'm going to tap that.
That automatically creates a key frame. It's also going to set
the starting point. These are editable
later so you don't have to have it perfectly
on point right away. But I'm going to start kind
of like faded a little bit. And then I'm going to take
this keyframe and I'm going to pull it over to the
endpoint and tap it again. And that creates an
endpoint quick note, if ever you have something where you want it to
be a perfect loop. The beginning and end point
should be the same values. Right here you can see I'm
at 38% and here I'm at 38% So if you have a
loop as your playback, like a gift or something and you want it to be
a perfect loop, just make sure that
your endpoint and beginning point of a
keyframe is identical. Then within the middle, wherever you drag this, you can set different points. If I set it in the middle here and I bring
this all the way, now if I play this
back from here, you'll see that it gets
darker and then lighter. That's a simple
way of doing this, but let's say I wanted it to be more impactful and
go a lot quicker. Well, I can add
additional key frames. I can bring one here
and bring one here, and then maybe skip a
little, Bring one here, it'll flicker, which is fun. I wouldn't want this to be
the whole whole way though, because it's going
to be full and then I'm going to want it
to start beating. What I would have to
do in that case is create a different track or make this smaller essentially, and then a different track for
the rest I'm going to get. You can get rid of key frames
by holding and then you can delete the opacity keyframe and then just get this shorter. Let's see how long that seems. Fine, I will keep that approximately a little under a second. I'm at the beginning. Tap, Move, Tap, Filter opacity. And I'm going to have
that be pretty low. And then I'll bring this over here and keep that the same, but tap it so it actually sets. And then bring one maybe here. Here. Here. Let's see. Let's see, Move this one. Okay. It starts low. And then I'll have
this one come up a bit more and have this one
come down even more. Maybe I'll bring this
one over and set that so it gets even brighter. And then one here, eventually I do want it
to actually go full. I'm not doing a loop, so that's why I'm
doing it this way. And then I'll just add one here. Let's just see what
this looks like. I think that I want it
to be less intense here. It almost flickers on. Okay. Now, the
other thing that I want to do is because
this gets to be such a low opacity right
here, this one isn't. I am going to bring this
opacity down right around here. How am I going to do this? This one's where we're going
to go into timeline edit. I'm going to grab all of these tracks or all
the ones that I want. Impacted. It could be
just a smaller amount, but I'm going to show you
how I do the entire thing. I'm going to tap and group now. I can open this group up
by using this arrow here, but I can also apply a
keyframe to this entire group. I can start here,
or I can start over here where I want
it to start fading. And tap here, Filter opacity, we're starting at 100. I'm going to drag this
and tap again at the end. And then I'm going to
match this to whatever the beginning of the
next group keyframe is. It's 12% so I'm going
to come down to 12% and we'll just see if 11% is fine. We'll see how this looks. Okay. Yeah, that
looks about right. Then I'll have this part here, the final be where we stay. I've already created all
of these edits and I need this solid heart. I'm
going to duplicate. But now you see I duplicated this whole key frame and
I don't want any of it. If I hold down, I can say
delete key frame individually. I can also hold
down next to it and say just delete the whole
opacity adjustments. Then I've got this
normal situation, okay? Maybe not something
you would do normally, but something that
is good to know. These are just little examples of how you can play with it. Now let's say you wanted to play with two different types
of filters on one track. That's actually really simple. You're just going to
start wherever it is that you want again, tap it again, and then apply the new filter or the new move or the
new warp or whatever. If I wanted to also play with, let's say I could come in here, select U, then have
it start somewhere, and then bring this over. And maybe here, here, and here, and make
a few adjustments. It's going to end the same. Then let's just say
I want to come to this first point and
then I can change it down to this green color. And then if you double tap, it's going to put you right
where you are working. Then I could come over
to this pinkish color. And then it's going to create
that linear easing for you. You don't have to do
anything about the playback. It's like, I'll show
you what I mean, it's going to fade into it
without having to do much. Now, everything that
we're able to do with key framing for filters, we can also do with moving
and warping and distorting. And we're going to
get into that next. Along with diving
into perform next. Everything to create
through key framing we will be able to do
as if we're conducting, think about it like physically drawing the motion that
we want to create. Because procreate dreams will be able to record it in real time while automatically
creating the frames for us simply from motion. If you're as eager to
dive into this as I am, I will see you in
the next lesson.
10. Keyframe Animation - Move + Scale: What I want us to do is select the new
drawing that we have. There's no effects
applied to this one. And we are going to use the
move tool, but not to move. We're going to use it to warp. This is fun. We're going
to start at the beginning. Let's see how much this plays. This is going to be
about a second long. What we can do is add a
frame, a keyframe here, a keyframe here,
just a few places, and then duplicate that track so that it continues
in that way. It's less work for us. I'm going to tap here
at the Playhead menu. Playhead, Playhead
icon, select Move, and you'll see Move and scale. Warp and distort. Move and scale is going to allow you to do what
it sounds like. You're going to be
able to rotate things, you're going to be able
to move them around. The easiest way to
describe this is if I add a move tool
here and then here. I can move this one over here, and then the beginning
of it's here. But those are communicating
to each other. When I press Play, it's going
to move it that direction. That's the best way to describe
like point A to point B. Moving with warp is
going to be a lot of fun because we're going to be able to actually have
this heart beating. I'm going to come into about here and then again about here. And then I can shrink this
track down to that end point. I want my end point and
beginning point to be the same. But the middle one is the
one I'm going to warp. I'm just going to pull out a little bit here and
a little bit here. And then I might even
bring this down. So like the center is really
the thing that's filling up. No, not that far. Far, Not quite far. There we go. Okay, so let's
see what this looks like if I come over here. Okay,
see what I mean? What it does is it
takes it to this point, but then right here is normal
when that comes through. I'm going to just
bring this large, so it just does a playback
of what we see here. It's beating, it's doing those intermittent ease
easing if you will, into the center and then back. It's doing all of those frames in between so that
we don't have to. Okay, the next part of
this as it's beating, is we can take this
here and duplicate it. Hold down on that frame. Duplicate, and then
it's going to continue. Notice that it's a perfect, seamless loop because
the end frame and the beginning
frame is the same. Okay? What you're seeing in the yellow right there
is the onion skin. Remember if you want
to turn that off, you're just going to
tap the time stamp. You can say hide onion skin
so you don't see that. If it's distracting.
And you're like, what's this yellow drawing? I didn't do this one.
I'll duplicate again. Now let's look at
the whole playback and see how this looks. All right, this is
where we are going to bring some of this
even more to life. I have this part here. Once it's complete, what
I want to start doing is changing the rotation and
the size a little bit. And you might be like, wow, there's a lot going on. But what you can see is that
I have this group here, which is just the sketch group. Right here is the part
where it sketches, and then this part is
where it blinks and then we've got the
beating heart. And what I can do is group any of this together and apply a key frame to
everything as a group. Essentially, that's
what I want to do and it's going to like group the
groups, if that makes sense. The individual frame, all of the key frames
are still applying to only that one on. These have their
individual edits. But then I'm going
to create a group of all of them so that the
next part of what I do will apply to everything
while they still have their independent
edits timeline. I'm going to select the
items that I want to group, hold down and group them. Now, if I toggle this down, I still see all of those
individual elements. But up here it's nice and
clean and anything that I apply here will be for
all of the tracks. Now I'm going to tap the
playhead select move. And I'm going to do a couple
of movements on this one. The first one that I want
to do is to scale it. So I'm going to select
move and scale. You'll see here I've
got a bounding box. As soon as I press that, before I do anything with it, I'm going to want to
create an end keyframe. And I want to keep this key frame as is
the beginning one. But then right after it
I can create a few more. This is the same thing where
you can go point to point B. Let's look at what
that looks like first. So point A to point B, this first one as it is, and then the last one here, where do I want this to end up? If I tap it again, it'll bring the
bounding box back. If it disappears, just
tap that key frame again. You can change, you can shrink it up and
down and sideways. By grabbing the edge here, it doesn't look like you
can, but then up here, it's going to be uniform. I just want to make this
a little bit smaller. And I'm going to
bring it up here. This is, let's see, I have to tap that and move it. This is still a keyframe, right? I'm starting here
and it's going to get smaller and go up there
as it starts to beat. Now what I want to do as it's beating is I want it to
turn into like a balloon. I know we're getting so wild
with this simple heart, but I want to do it
in a way where it rotates and it floats away. So we're going to do
this with perform. I'm going to select Go on here. Again, not the key
frame but on the track. Say move, I'm going
to go move and scale. What I want you to
notice right away is that there's not another
key frame that added. What does this mean? This means that it's going to
override what I just did. Anything that I do is
going to override it. That's an issue. If you want
to do multiple movements, that's not the case
if you do a filter, if you add a key
frame like a filter, you can pile those up, you can't move the
workaround for now. At the point of release, what I would do is just create another track on
top or on bottom. You know, draw, draw
whatever you want on there. And then you can
group these together, Timeline, edit,
grab both of these. Hold down, create a new
group and then open that up. Tap on it and
delete the content. That way it's a group
within a group. Simple little fixes
that you can do to clean things up and
make it easy for yourself. Now, if you have a better
suggestion, let me know. But for now, as far as
what I've been told, do you want to
group within group? That's the way to do
it. Okay, collapsing this so it's not confusing. If you want to label things,
that's another suggestion. Once you get to
do more and more. So you can hold it down, rename, and you can
say beating heart. And then you can also change
the color. It highlights it. It's tap and then highlight. And then you can
change the color. And then you have like this. Once you get more
and more tracks, it's just easier to see. You can do that too,
as many as you want. Okay, and the next part, we're going to bring this even more to life and we're going to be
exploring the Perform feature.
11. Perform Animation Mode: Now we'll get into perform, which is this incredible brand
new method of animating. You're now able to create actions as you'd like them
to appear on the screen, and it will be
recorded in real time. It works by taking your
movements and automatically translating them
into frame by frame. It's not recording
input on the stage like a canvas where you like insert brush strokes
or time lapse. It's not like that, but rather it's basically
you instruct it to do something from point A to point B and how you want it to
get there along the way. So if that sounded technical, let me condense this
into a sentence that everyone will understand. Now, anyone can animate
without even knowing how to. Again, though, I
took you through this process in a very
particular order. And I did that so that
you would be able to take full advantage of the tools that you have at
your fingertips, because knowledge is power. So I'm going to come in here, bring the playhead here, tap. I'm going to add a move effect. I'm going to move and scale, and then I can tap the outside. What that does, if I tap
any of these anchor points, it creates this little
curve and that's going to allow me to rotate it. While I want to do this for
the key frame and whatnot, what I actually want to
do is show you how to create effects in live
time that it picks up. It's going to play exactly
what I already have going on, but it's going to pick
it up in live time and apply the frames for me. What I do is I come over here
to record. It says ready. All I need to do is tap, rotate, and then
start the motion. Let me show you what
that looks like. Now that I have finished, all I did was rotate
here and there, so that it had some movement. And you can see, okay, very fun. Now I'm going to do
this one more time. Where I'm going to have it go up because I want it to move up. Remember it's going to
overwrite it if I do it here. That's annoying, I know, But that comes in, we get to do another group. Notice there's
nothing here to grab. I'm just going to
create a track. Who already have a track? I'm going to draw on this track, then I can drag it
where it needs to be, then go to timeline, Edit, grab these two together. Tap and hold group. Open this group up. And then I can just delete
that drawing I just did and then delete this track. Okay, then I have this group within a group within a group. But now I can apply
another move key frame. So I'm going to come
to the beginning here, tap it, move, move, and scale. Press record. All I'm going to do at this
point because all I'm doing is moving it,
it size change. It already has its
rotation Now I want it to just
move up to do that. I'm just going to begin. I'm going to press record. Just a quick note
too on the perform. It's not recording right now. It's only recording what I do on the like with
my Apple pencil. So I don't have to
worry about getting a certain timing because
it's just going to start playing automatically
upon contact. What I'm doing here is I'm going to have this
slowly come up. Play back the whole thing. See, that's slowly going up. Okay. Now another thing
that I realize I want to do is actually have it
come up into the side. Let's say you wanted to
then go in and edit this. I'll show you here. See
all these key frames. I didn't put any of
those keyframes in it, did it automatically for me
based off of my movement. So I can come in and
edit any of them. Also, when you tap on them, move them and change anything
that you want to like, let's say I put this over here, well that's going to skew
everything because it's going to pop way over and come way back probably pretty fast. Yeah, I'm going to undo the movement that I just did and I'm just going
to start that part over. I've got moving
scale, it's record ready and I want to just
make it go off to the side. I'm going to start that
where it's drifting, now I have all of these elements where it's drifting away. Okay, and that is
just so much fun. Then I can start to have
that string come out. I'll quickly do that
and put that in. I'm going to do it in a
similar way that we just did, but I don't want to
talk your ear off. So I'll speed this part up. So done. I can see the sweet
part is that I created a little heart
out of the tail. This could go well,
it might not. But look at how
cute as it forms. Okay, let's play
this whole thing. Here we go. I think
that's super cute. Obviously, There's so much
more we can do to all of this, but this gives you an
idea of every part. Since we have that first sketch where we drew it
without it staying. I think that might be fun
to put in the beginning. I've been thinking
about it. What I'll do is go to timeline edit. I'm going to grab
everything except for that initial part and I'll group that together
so I can move it together. We'll go here, right there. I've got a lot of
tracks right now, so I can get rid
of some of these. What I want to do is tap
here. I'll say filter. And I will put in HSB for color. Now I'm going to do this, I'm going to do this
with Perform also. So I can select the Perform button and
then just play with the hue as it bounced. You see now it just
recorded what I did, even just with the effect. And then it'll
continue as purple, which I think is fine. But if I really wanted to play, I could apply that same
effect to this part here. If I added a filter and I added HSB for hue
saturation brightness, it's still on perform. So I could change that
a little bit there too. And I'm going to stop
before it gets too much because it's applying
it to this whole group. And really I only want
it for that section. Instead of expanding everything,
I just applied it here. Now if I start from
the beginning, four finger tap, I can get to full screen actually
for full effect. Let's change the
background color. I'm going to change
the background color. Let's see what black
might look like. That could be fun
or something else. But four finger tap and then
tap to get my play button. And it's just something
that's so fun and so simple. This project is a
pretty simple one, but it just goes through all of the three ways to animate. And so I wanted to give you guys a good grasp on how
to operate all of these before we get into
the more complex projects. Speaking of, we
are going to dive into parallax scenes next. This is actually easier than
it looks. I can't wait.
12. Parallax Animation | Full Project: This lesson is going
to be a lot of fun. Not only are we going
to go over all of the techniques that we just
have to create a full scene, but we're also introducing
a parallax effect and simple steps to create
dynamic animations. You can draw along with me. I'll be creating this cute
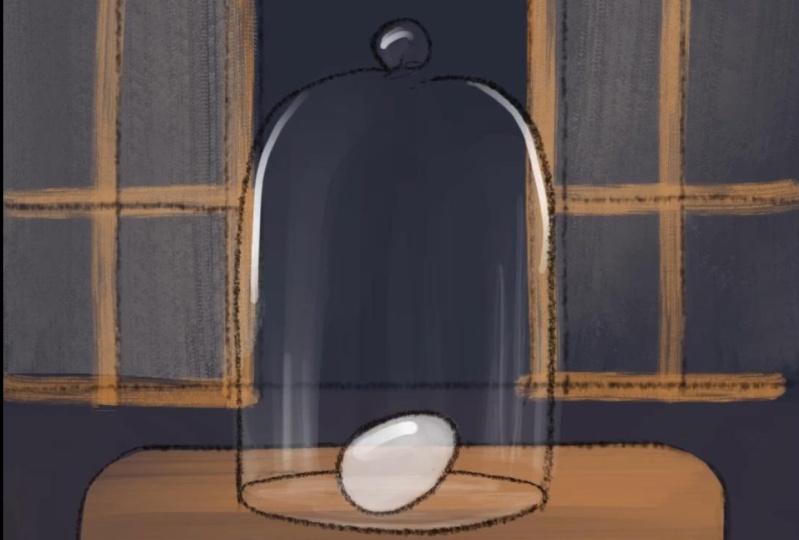
little forest illustration with this little Peekaboo ghost, but you can of course, work
on whatever pleases you. We're going to be focusing on a, a midground and a background, and then moving
elements alongside. Let's start with
creating a new movie, and I'll go ahead
and go Screen size. And immediately jump into draw. And we are going to set the animation if you
haven't already. If I tap on the title, I'll go ahead and go to 12
or 15 frames per second, and a duration of
anywhere 3-5 seconds. Now this time I wanted to start my background color first. When I'm in draw mode, you can see that
backstage is lit, so I can see everything with the background color I choose. So I can go to this
time stamp here, background color, and change it. This works similarly
to procreate. You can pinch open to get to focus on or you can
change the hue around. So I'm going to go for, I think I'm feeling layer yeah. And then on my drawing layer I'm going to draw my
background scene. And this is just, we're
going really, really simple. You can do this with
trees or you can do it with buildings but
just silhouette, you know. You don't want this to be too extreme and grab any drawing
brush that you want. I'm just going to go
to drawing and grab, actually I think I'll do inking
studio pen for this one. It just makes it clean and easy. Okay. So the first
thing that I want to do is kind of create a canyon. And it doesn't
matter what color, because I can change the color. Even though this doesn't
go the entire way, I can still color drop within. But if I want any
movement at all, I do recommend because
you just never know just finishing
that part off. So it might look like
just a little bit, I don't need to do too much. Then color drop in, I'll
just clean up those edges. Then I'll do the same
thing on the other side. And you can do this by layer. When we get into drawing
layers, like, you know, if you're familiar
with procreate, you know you can do layers. What I will say is at
the time of release, there's no reorganizing layers. So you have to love the
start into the rest of it. Or you can create a different
track underneath this one, that's another way around it. Then I'm going to go a
little bit lighter and create another version of that. The end doesn't have
to be super clean, but I just want it to come
off the edge a little bit so that if I want to bring
it in slightly, I can. Okay. Maybe even a
little bit further. I've got that in the
I can do a few more. Like I could do some bushes or something along those lines. I can do it on another layer a little bit darker
because they're going to be shaded something like
this color drop in. I could even just
make the brush larger and do some scribbles. Now I should also note if
you guys are used to putting in like solid whatever, solid illustrations and then using clipping masks
and things like that to add effects or texturize and just
bring things to life. We're not going to
have that option on the layers panel like
you would on procreate. Instead, it's all going
to live on the timeline. If I wanted to apply anything, it will apply it to
this entire frame. It doesn't take into account
any of these layers. Just know that going in, in this case I'm going to have the a little bit darker and
you'll see what I mean. But for now, for the sake
of creating this together, we don't have to get 22 finicky. We'll just get the
base in place. I can add to that
if I wanted to, but for now I'm going
to keep it as is. I'm going to close the flip book and come back and I'm
going to actually create a new track,
Tap Content Track. And then I'm still in draw mode. This one I want to create something even
further in the background, so I'm going to drag
this track underneath the previous one and
then open flip book. Then I think I want to
just do some trees. I'm going to keep the
same color palette and I'm just going to sketch these in because
they're just going to be some background elements, just something quick and easy. I might have some of these be a little bit sparser
at certain points. It just adds to that eerie
effect that I'm going for. Then I'll be further in the
background as that happens, as they get further away, it's worth thinking about
having those get lighter, like they're faded
into the distance. If I tapped and held
the lavender color, it's going to use it at
like a color picker. Then I can just offset it slightly and see how now it looks like that's
more in the background. I can make it a
little bit smaller, a little less detail. But then those are just the
Peekaboo elements and it just adds a little bit more depth.
Just look like texture. And then you can always put like mountains even further out. Let's do one more layer here. I'm going to close flip book. Notice how, okay, this is a good example of
this happens to you. The frame with the trees, I started with flip book. I didn't start with my timeline. It made it so that it
was only one frame. Since I want it to
be the whole way, I'm just going to tap and drag it so that it is
the right length. Then I'll do one
more content track. I'm going to bring this
one down and I'm going to put some hills. I don't know if I want
like true mountains but some hills in
the background. Open this again so I have my full screen and I'm going
to do this really soft. It's going to just be slightly
darker than my background. Just barely, should still
be able to see these trees, just some hills like this. Okay. Then maybe one more a bit. Actually it could
be the same color. Okay. So the reason that
it filled everything was because it's on its
own separate layer. It doesn't have anything to do with what's in front of it. So I want to make
sure that it actually joins before I fill it. Otherwise, it'll
fill everything. What I think I'll do is add some more of this color
into the foreground. So I can go here, tap on that initial drawing.
Okay, same thing here. I need to expand this out, make that larger so I
can grab it coming in. If you want to go back into a drawing layer, you're
just going to tap it. And then you'll look
at your layers panel and you'll be right
back where you were. Just like, if you're
familiar with procreate, it's going to be really similar. I'll do color picker, I'll go to the bottom here. I'll go in between
here and add a layer. And that's going to
sandwich it between the beginning and then these
little bushes in the front. I'll add a little bit of
texture in right there. Add a little bit here, maybe
a little peekaboo here. Then I'll also do the same
thing at the very top layer. It's in the front, just
so I have some noise. Okay, that clears that up. I'm not going to worry
about any effects right now because I want to get
you guys through this. But I will show you some blend modes and some fun things you can do to enhance. Now what we're going
to do with movement, there's a few things here. We want to bring in
a parallax effect. What I mean by that is part
of the foreground is going to move faster and the background is going to move a
little bit slower. So it's going to look like
you're walking in real life. Obviously this is
not in any sense. We're also to change
the hue of the sky from going more or dawn rather into night and then
we'll bring the ghost in. That's our plan here. What I can do, timeline, this is going to help me
know, this is my background. I'm just going to
select those three. Hold down, group them now. I'm going to play a
little bit with the Sky. I'll tap a new content track. And this will be a drawing
layer. I'll press Draw. I'm going to create some stars. And it's going to be subtle. And then it's going to get more intense if I tap my colors here, if I double tap,
it'll lock to white. Just a little
procreate trick and then the same rush is just fine. I'm going to tap here so that it selects the entire layer you
can draw straight from here. Stars are not going to require a lot of effort on
our part because they're just like little dots
that we're putting in here. Okay, that's like at twilight, before it gets super dark, before all the stars are out, but they're out enough, then what we want to do
is on the same layer, we're going to
apply an effect to this so that it's
moving through. Like have you seen those time lapses where you're watching like space, right? It's going to do
something like this. That means that
I'm going to bring even more stars over here. Now this is going to be strange because it's on the top layer, we're going to put it
on the back layer. We can edit frame by frame
like you know how to. In the middle is where I'm
going to have most of them. I'm going to sprinkle those
in even more and then I'll add probably
a few larger ones. And then I can even do like a little planet
that would be fun. The larger ones in my
mind are like planets. So then there we go. Okay, so that's just fun and
weird and I'm into weird. Okay. What I'll do
here and you can always edit these tracks too. Like if it doesn't go, the flow isn't exactly
what you wanted it to be. It's all editable so we don't
have to worry too too much. Now we're going to
close flip book. We're bring this underneath
all of those layers, make sure it locks in place. And then we're going to
apply a darker color on top. So just create a
new content track, it looks like I already had one. And then go into drawing. And then you can
select a color that is just darker than what it is. Now I have this pinky color. I'm going to come
down and select like a cool purple tone, just in the middle here. Not too too saturated,
but enough. And then I'm going to color drop it in to fill everything. If it doesn't fill the
whole frame, that's okay. This is, it only matters
that it's on your stage. And then we're going to
apply a blend mode to this that's going to reveal
everything underneath, but darken it and create
more of this tone, this purple tone, which you can always change if
you don't like the color. But I'll go to blend mode. I'm going to bring this over
here with the blend modes. I just like to go through them and see what I like the most. Lightens, actually, really cool. It almost makes it
look like it's pulling the shadows up and
making it almost like, I don't know, it's
weird, it's cool. This one's also cool, but
I just want something that's going to deepen. So it looks like it's night. This is kind of fun because
it changes the hue. I would just go through these
and see what feels right. I like hue a lot
because it's making everything
monochromatic and it's almost going to take away
the color to make it night. So that one could be really fun. Saturation, even more same idea, but it's not totally
taking away the tone. I think I'll go with
that. And then what we're going to do is create an effect to where this is only happening in the middle of
the night, not at dusk. That's where we come in and
we play with key framing. So I'm going to tap
here, tap filter. And then we're going
to go opacity, okay? And then we're going
to bring this all the way to the end. Grab one here, and
then we'll come in the middle and tap here, The first one to come in
and set that to zero. The last one, same thing. Set that to zero, then
we can watch this play. We get to be night, then we get to be day. Now you can edit
these if you want. You can set the easing. If you hold down on a key frame, you can set the easing
where it eases in, eases out, eases in and out. Or if it's linear, linear
just means it's going to be like flowing the
same the entire time. Now another thing you can
do, let's say you want it to be night for a
shorter period of time. You can take this keyframe
and move it in a little bit. You're starting off the
same way you drew it, then it starts to have
the effect afterwards. Playing that through, stays
daylight a little bit longer then becomes
daylight sooner. Totally up to you how you
would want to do that. But these are ways that
you can set that up, that's fun and all. But now I think it would be
fun to play with the sky. This part, we're going to go to this layer,
this drawing layer. We're going to tap our key
frame, move and scale. Then I'll need to apply the rotation and
I'm going to bring this all the way to the end. I'm only doing two points because I'm going to start from one side and go to the other. I'm going to bring this to
where I want it to start, which is about here. I also want to add this
rotation to it, okay? I can do that in one sweep swipe where I've moved it and
I've started the rotation. I can go to the end point. Now drag that where
I want it to go. Add that rotation in
to about right here. That's where I'll have it stop. Now, that's going
to look like this. You can change how
this is responding, what type of like
how fast it goes. If you tap and hold, you
can see set all easings. You can have it be linear. You can where it
eases in, eases out, it should slow down
and it should now be the same speed. And it is. One thing I'll point
out is because I didn't go a full circle, there is a chop off, it's not perfectly seamless. If you wanted that,
then you would just have to set the same
start and end point. But I'm just going to have
this, I'm fine with it. But the other thing
I want to look at is where there might be gaps. Like right here, I might want to bring a few more stars in. So I can come in and just
tap in right here here. I'll tap some more in here. It looks like I really
fell off right here. Okay. And then it's
going to start getting sparser as it gets
lighter again. Then I think I want to also
change the easing in the sky. So I'm going to
tap and hold, set, easing linear and see
how that plays out. Okay, so that's just
a lot more seamless. You can set those settings up to where it's behaving exactly
how you want it to. Now that that is done, we can also add some to the
foreground and background. This is moving pretty
fast, I will say. So it might be worth
actually doing less, like less is more as much
as, that's sad to say. But I might actually have this start and end
in different places. If I tap here, that makes more sense to me. Okay, so now I can
apply the effects to the mountains and to
the trees and whatnot. And I'm going to want
the foreground to go faster than the background. I'm going to open this group up and I see my
foreground is right here. I can treat this since
it's its own track, Even if it's in a group, I
can treat it as its own. I'm going to tap this playhead and say move and move and scale. And I have this
beginning and the end. And I'm going to do this, it's not going to be super fast, but it's going to be
faster than the other, which is going to
be really subtle. I'm here, it's going to
give me my bounding box. If I start here,
then I tap this one, and I bring this out this way. Now we need to fix these trees
because they are floating. Before I do anything,
if I just tap here, you see that bounding box. I can move these, they
are down further. Then now I can apply
the parallax to those. They're going to go
the same direction, but just a little bit slower. I'm going to tap the
beginning of this track, move and scale, add
one to this side, then come back to
this beginning. It's going to start a
little more this way. And Here. Let's see. Okay, so we see some of that
parallax come through. And then we can do the back
mountains if we wanted to, but because the sky
is going for us, we almost don't need to. I think that that works well. Okay. So four fingers
and we'll play this. Okay. The last step is
that we're going to put our ghost friend in here and
then I can add my ghost. I actually want it to be
in between those layers, so I'm going to bring it up in between right here and
go into draw mode. So who's going to come up here? And he's just going to start small and then I'm
going to have him, I could go frame by frame, but I think having
him come up like this before he transforms into something else
might be good. What I can do with this is shorten this track.
Let's see how long. Okay, then from here he
can come up and out. I'm going to use warp
and I'm going to move, so I'm going to tap here. So I'm going to perform
to move this guy and I'm going to have him just float
on up here, just like that. Then I can change the frames so that he starts
to come to life more, which makes it really easy
for me because I already have the movement in place,
movements there. Now I can open cry
frame by frame. But I could also use and then coming in here and
changing this a bit. I can have it start here and
then move this over here, and then see how I
can just warp it. It looks like it's flying. I'll add some key
frames in here that also change the shape so that it's constantly looking like it's actually
having some motion. I just move it, move this ad where it looks like it's
in flight and you don't have to worry
about it looking right, frame to frame, because
the key framing creates the blend
essentially for you. Like now it's going
to, I'm going to make this longer so that you can actually see
what's going on. And then I just add a couple. I can move these key
frames this way, you can see the
movement with the warp. We're just looking at this
to see how he's going up. It looks like at the end here, I started warping almost down. So we need to bring
him this way more. He actually looks like
he's going over there. And then I'm going to have
him expand. Here we go. There we go. Now I
can draw him again. And coming off of this
one, essentially, if I come to this
point right here, I can start to build
this so it's a thicker, more recognizable little guy. I'll go to draw, I'm going to create a new
content track, just right here. I'm going to move this, but I want to trace it a little bit. The I have the idea that it's this ghost and
then I can warp him, but that way it's
in the same spot. He's just going
to be opening up. But I'm going to make him
a lot smaller, right here. There's going to
be a lot that goes on during this period. One thing is, oops, see that started on a new track because I wasn't on
the selected one. I want to select
this one and make sure that's the one I draw on. Then in the beginning
here, that's the old one. I can move this, it snaps
to the end of this. Then I do want the warp, so I'm going to apply
that Warp. Warp. And I'm going to want
this to be a lot smaller initially so that it does line
up more with the old one. I'm going to make
a keyframe here. And then one right away
that gets him larger. But this initial one is going to be a lot smaller
because he's going to be the little body that
he has to start with. Let's see, from here to
here, that's decent. Let's maybe go a little bit skinnier in right
here and then right here. Okay, that makes sense. And then you can see starting
to expand and then I'm going to have him continue to expand and continue to float. I'll come here and have
him out just a little bit. It's just basically
showing movement then. And then another here I
actually like to drag from the previous one because that way it's coming from
where I left off. Right here is good here. I'll bring him up to
fly a little bit more. But I want this movement
basically see how he's moving. Okay, he's warping. But I also want to be moving, as this happens, that's
going to be that secondary. Okay, great. Now this part where
he's moving about, that's going to be where
we're going to go in. We're on this key
frame track right now, but what we actually
want to do is tap again, so the playhead comes up again. Tap the playhead move and scale. And then we're going
to use perform so that we can move him around. I didn't like that. I'm
going to override it. I'm going to tap here, so
my bounding box comes back. I think I actually
like the idea of him like I could start
here like I like this. Okay. But I think it
might be more fun to have a dip right here so I
can come down like this, see how it overrides. And then right here, I want him to just hover. Okay? So let's see
what that looks like. Okay, it's a little
too much motion. I'm going to have him
just peek behind here. Okay, I think I like that. So I'm just going to have this
play one way through now. I also want to give
him a couple of eyes. I realized I didn't and
I want him to have eyes. So I'm going to
open this drawing. Put some eyes in here, so I'll just grab a darker color and just give him
these little eyes and see what happens
with the warp. There we go. Okay,
turn drawing off. Okay, so when I go
on full screen, I have so many elements happening that make
it so much fun. The last thing that I
want to show you is, let's say you wanted to add a clipping mask to the mountains
or something like this. You're going to create a new
content track on top here, create a drawing layer. Let's say I wanted
to come in with. Let's go with one
of the charcoals. Okay, six feet compressed. That seems fine, just to
make sure that's large. And let's say I came through
and did something like this. I know it's all over
the whole layer. But just as an example, I'll set a blend mode so it
doesn't look so ridiculous. But I'm also going to make
a clipping mask out of this blend mode that might
be good, the hard light. And then I can go to
mask clipping mask. Now I have texture
just that fast. It doesn't have to be like, oh, this looks so unfinished. I mean, you can
obviously draw and draw however much you want to. And you can see now it's to the layer or to the
track rather below it. And the same goes for masks. If you're familiar
with how masks work, one thing I will say is that the clipping mask does
not have the effect. You would have to
group that and then apply the effect to the group, but otherwise that's how
you would get that done.
13. Animate Over Video Files: Let's say that you
want to import a video so that you can create
some effects on top of it. This could be any
small animation, just something
that's fun and cute. And I'm actually doing one
as we speak for this class. And so I thought, why not
walk you through the process. So I'm just going to
create an empty project. When that opens up,
I'm going to go down to the plus symbol here, files or photos, wherever
yours is living. I'm going to grab the
video that I want. I'm going to just pull
this to the edges. I'm just going to use frame
by frame to make this simple. One thing that I will
say is just make sure that you're on the
correct frames per second. Because let's say you worked on an animation project beforehand and it saved your frames
per second as 15. Well, this footage is
30 frames per second. If it's set to 15, it's going to be a little bit choppy like gift
style, if you will. I'm going to put this at the point where I want to
begin, which is right here. And I'm going to create
a new track on top of it, go into ramode. I'll pull this away so I can
have the full screen here. I'm going to see a lot of facial expressions that
I'm sure I'll love. I'm going to use
white. I'm going to use the black
burned drawing pen. I think that's
what I want to do. Yeah. Okay. Frame by frame, I can see that I am going
to go like an arch. Basically, I'm going
to just create the starting point and then make sure my
onion skins are on. So I'm going to go down
to the timestamp here. Show onion skin and I'm going to edit them because
I want only to see one and then one on the back side and I'm going to decrease
the opacity too. Okay, that'll be good. Now, I'm just going to make
this larger and I'm going to pull from that one and I'm
going to make these longer. But I like it when it trails longer than cutting off because it just
creates that motion. Like if you watch this, it creates more of a
motion than having just do another thing
that I could do, let's say I wanted to
stick to where it started, is I could always hold it
down and duplicate it and then continue on like this. Then it's just
going to add to it. I don't want to do that though.
I'm going to undo that. I have done it and I do like to. I just don't want
to for this one, because I want it to
feel more flowy and fun. You can also turn
the canvas just like you would be able to in the regular procreate
drawing app. Which makes things nice
because that way you can reach those weird angles
that nobody likes. I'm just coming in
a little bit from the end and then
trailing through, then at the end going to
make it smaller and smaller. Then at the end, I'll keep
that there for a minute. I'll add a couple more frames, almost like little confetti. I think that's fun. And I'll just make it get a little bit bigger and see how that looks. Okay, that's fun. And then
I'll make that get smaller again to make it look
like it's disappearing. Just put a couple in.
I think that's it. Let's see what this looks like. Okay, That's exactly
what I wanted. So you can see I've got my starting point here
and then it trails along. And you can see it's
almost like that shooting star style
because of the brush type. And then it lands and then
it just has a little, I've landed that simply, I am done and will export.
14. Set Up Existing Artwork for Animation: Let's look at some
existing artwork within procreate that you want to
bring over into dreams. This can be a little tricky
because a lot of us will have worked in procreate in layers that aren't
meant for animation. Let me explain. If I was to open up one of my pieces here, my layers panel is going to
have a now don't judge me, I'm not very organized
but it's just set up to where I'm going to apply shading and effects
and things like this. That makes sense for my project, not necessarily for animation. What I mean by that, it's not that one is in a
situation like this, I'm going to want to have certain pieces where
like my groups, for example, are not
what I want to animate. I'd want my arm to
be its own thing. I'd want my leg to
be its own thing. Where this is just showing me different sections
so that my shading applies the way that I would
want it to what I've done. And you can do this too,
where you can go in and edit essentially and group according to how you're going to want your
animation to go. For this case, I
ended up just going through and isolating
certain elements. I have upper lower leg, you can see I've
sectioned these off. I'll show you how I
did this without you having to watch me go through the whole thing I duplicated. First of all, always duplicate your original projects
so you're not going to mess with the original and
label them to make it easier. But now, if your layers
look really messy, like mine, not to worry. What I did was
started at the bottom and I just started
grouping things. I would turn it off and on. Okay. This is neck and hand. Well, I don't want those
two things to be together. This is also the shadow
for the neck and hand. What I did was I went into
the layer of the hand, I grabbed the selection tool, I circled that you can either cut and paste
or copy and paste. I like to copy and paste, especially when it
comes to like the arm, because I'm going to want to
grab up higher on the arm, on the lower arm. And then for the upper arm, I'm going to want to come
into the lower arm a little. I just got in the
habit of copy paste then that copies it away
from the original layer. And then I'm going to do the
same thing to the shadow. Grab the shadow on
that hand, copy paste. And then I'll go back
to these layers. And then it looks
like this turned into a clipping mask because of
how I have this set up. Get rid of that. And
then I'm going to grab the shadow and
bring it up to the hand. Merge those together. It's going to be flat now. It doesn't have to
be, but this was I know I'm not going to
make edits around it. And then I'll just grab
this and put it to the top. What I'm going to end up doing is grabbing also the upper arm. Then I'll end up
merging those together. My end result ended
up looking like this. Where, let's see,
right arm, lower arm. Now that whole thing is
together in that one piece. That's what we want
to do. It might take some restructuring
on your part. But you can animate any
of your existing artwork, which is going to
be very fun to do. For example, let's
say I wanted some of these mushrooms
to be like waving. Well, right now I have them grouped according
to color layers. That's not going to be helpful for going into this project. I'm going to demo
and then you guys will have a walk through
that we do together. There's a couple ways to get this artwork over into
Procreate Dreams. The first is to go
into split screens. Pull up on the bottom and the press and hold,
not for that long. Press and hold Procreate Dreams, have it side by side
and you can drag that. You'll want to
open a new project and I'll go into square, since that's what this shape is. And I'll say empty, then all I need to do is
hold and drag this in. And you'll import now you're not done at
this point because you're going to want
to convert the layers. I'll show you what I
mean in just a second. But I want to show you
a couple other ways you can do this if you don't
go into split screen. Because with procreate you can do things a lot of
different ways. The other way is to hold
the project you want. Pull up on the bottom
open procreate dreams, and then drag it
into the timeline. Once that's done,
you're going to notice you don't
really have tracks. You have one drawing, it's flat. If you go into that
drawing layer, you'll see your layers here. But they're on drawing layers, they're not on tracks. And we want to have all
of these be individual. In order for us to animate
them individually. So how do we do this? We're going to just go
to the drawing layer, press and hold, and
you're going to see convert layers to tracks. And now you see that the
drawing layers now says group. It's no longer, I can't press layers anymore because
now it's a group. I can open the group up and now I have right arm, left arm. I have jacket, left leg. So I toggle that
on and then I can see exactly what those
layers would have been. But now they're on tracks. That's what we want, because
that's going to allow us to animate these items
independent of the other. I'll just show you some
simple animations. We can use any of the methods
that we've gone over, but I'm going to use
perform because it's the easiest and I
think the most fun. I'm going to start with leg
now because this is left leg, this is showing me
the entire left leg. If I open this up, I see foot, upper leg, lower leg. I want foot and lower
leg to be together, but I don't want it
to be flattened. Because if I want
to move the foot separate from the lower leg, I'm going to want
those to be separated. When I have all of my
groupings in place now, I want to start animating this. I'm going to start with the
right leg on the front, and I'm going to go to the
beginning of the track. And I'm going to
tap the playhead for move, move and scale. And I'm just going
to rotate this out, and if I go to perform here, you'll see it says ready. I'm going to tap the
edge, show the rotation. And now I can move and scale. I can go back and forth. Now I want to point
something out. What I just did was quite a lot, but you'll see that
when I press play, what I did is not translating. It's not doing what
I wanted it to do. Why is this? You can see there's
one key frame here and one here sometimes. Let me show you, I could
do this more extreme, and I'll just override this by going to
move, move and scale. Here we go. I have a few, you can see it only added four. Now if I go to the beginning
of this and play it back, it's not doing much
of what I did. The reason why this is
happening is because there's also modify so that it
smooths things out. Which is great for
certain things, but it's not great when we
want all that movement in. You're going to find this
before you even get started. You can go up to the top here, it says modify and you'll
see motion filtering. We're going to want this
to come way, way down. If not 02, 3% it smooth
things out, procreate. This is very similar to
streamline it essentially. It's like a magnet to what you're doing so that
it keeps smooth. But when that's turned
all the way up, you're going to lose a lot. You can see now all
these frames came back. If I go to the beginning
and press play, now everything that
I did is here. And that's what I want. I'm
going to redo this now. I'm going to make sure
that modify is way down. Now I can try this and have it act as though how
I want it to act. You'll notice that in
these moments where I lift my apple pencil,
nothing is happening. It's not recording anything. It's just ready for me to go
back in when I'm ready to. You can see that we're
only at 4.5 seconds right now. It's not moving. You don't have to worry
about getting stuff done quickly because it's only going to record when you're
touching the screen. So I'll go to about 6 seconds and that's enough for
me for right now. I'll go to left leg and do the same where I'll add
move and scale, tap for rotate, and get
to about 6 seconds again. Now I want to independently get the lower leg
and the upper leg. I'll go to right leg again, open that up the group toggle the group open to lower leg. I'm not going to open that
up because I want to keep the foot and the
lower leg together. I keep this group
together and I'm applying the effect to the group. Move and scale tap here. You can see I can move
that independently. I probably don't want that to go quite as dramatically open. This looks a little
like a gallop. If you want this to
look more realistic, what you can do is go
in and key framing. If I delete this, do perform, all I need to do is turn this off and then I can
add a move and scale. Now it's adding key frames. Let's say I go to about here, I'm going to start where I am, and then I can go in, and then when it
comes out to here, I can just straighten the leg, which would make more sense. And then when it
comes back down. And then as it comes up, I'm going to want
to straighten it, because if we're walking, that's what makes
the most sense. I'm going to tap here to
create a new key frame. Rotate out, right? We have that walking motion, we're out, and then
coming back in. I'm going to come as far as it comes in before it starts
to come out again. Set the key frame,
Rotate that again, and then we'll see
what that looks like. Okay, that looks better. It's coming out again. And then before
it comes back in, set a key frame, straighten out, that's looking more correct. We're going to do the feet
independently though. Remember, I wanted to do that. I'll come back in, set a
key frame, come back down. Out, set a key frame, rotate, come back out. When we come down
again, I'll set one. You can see how this is just creating more
organic movement. It is paper doll so
we don't have to get two is picky about it, but it's still giving
you an idea of how we can do this independent. Okay, let's look at that. Yeah, we're kicking,
we're going, I'm going to collapse right leg, I'm going to do the same
thing to the left leg, the entire lower left leg. Move, move and scale. I'm going to set that first
key frame about here. I'm going to have this come like this and then as it comes out, set a key frame straighten
out as it comes back, before it goes back out. Set a key frame here,
forward, key frame. Then let's say you want to go in and edit one of these because it doesn't look quite
right like when they go together certain times. You can always go in
and do that just by tapping on a key frame
and moving it again. I'm not going to worry
about doing that right now, but I am going to adjust
the feet a little bit. If I tap lower leg, I'm still on the left
one here to foot. I'm going to want to do the
same thing just a little bit. I don't think I'm going to me, I could do it literally
where I key frame and go according to the
lower leg motion. But I'm going to try to do this on perform and see how we, how well I can make this happen. So I'm going to go into rotate. Yeah, I just want the foot
to be moving a little bit. Not too crazy, but it's just something to where
it looks more animated. And I don't want this to look super realistic because I want it to look
like a paper doll. But know that you do have the opportunity to make it look on purpose exactly how
you want it to look. So I'm going to do
the same thing to the right foot and go ahead
and start the rotation here. And I'm just moving it
back and forth a little bit so that it has
some movement. I'm laughing because
this looks so silly. Okay, now I can go in
and I can animate. I can do the arm or the hand, I'm going to just
collapse these. Then maybe I'll try doing
something here with this arm. The right arm here. I'm going to check
the rotation first. Whoops, I want to turn off, perform, check the rotation. And you can see that this is actually coming from
the middle of the body. Again, it tends to do this. When you group, what I
want to do is adjust the anchor point by tapping
these three dots at anchor. And bring this up to the shoulder because
that's where I'm going to want the rotation
to come from, say done. Now when I rotate, it's doing what I want. I'll do this and perform where? I'll tap the record button
and I'll start this rotation. And I'm just going
to go a little bit slower than the legs. Then I'm going to
go and open this up and grab the lower arm. I can tap and I can
do the same thing, but before I do that, I want to make sure again,
anchor is in the right spot. So I'm going to perform off, Grab my little anchor, grab my little rotation. See it's in the
middle of the arm. I'm going to tap
these three dots. Add anchor and bring
this down to the elbow. Say done. Now I can tap, perform and record what
I want to do here. There's a bunch of things
that we can do here. We can group the arms with the main torso so that we can
have movement at the waist. We can have the head move
all sorts of things. For the sake of time, I'm
not going to hit all of these things because we would
be here for a long time. But what we can do is move
where we're actually walking. I'm going to toggle the group
to just its main track. It's just one group because we're going to move
the entire object. Now something to note though is I also came and brought
the background in. So that means that
if I move this, I'm moving everything I need
to make this group aside, outside of the background. I'm going to open the group
up and I'm going to drag these layers at the bottom
out. I don't need this one. Delete that. I just need this. Yes, I do. One of these is texture and
one of them is color. I can drag these out of this
group to keep this clean. I'm going to go into
the bottom here, Go into timeline, edit. Grab these two. I'll group those together just so that
it's nice and clean. Get rid of these extra tracks, then I can grab this and
pull it out of the group. Now when I go up here and
I collapse this group, it's now its own thing. It now has nothing to do
with my little paper doll. What I want to
start doing before I press perform is drag this
over to its starting point. Let's say I want it starting
point to be off of the page. That's great too because you can have it walk through
the whole thing. Because when you come off of the canvas and procreate dreams,
you don't lose anything. That is so that you can go edge to edge with
your animation. So when I tap the playhead, I can say move, move, and scale. I can go ahead and
press perform. And then I'm going to just create some fun
movement that goes off. Okay, now when I go
back to the beginning, I've caught this cute
little animation. You can imagine what this
is going to look like when it has even more
movement in the whole body. In the next session, we
are going to work through together so that you can apply exactly what we've just learned.
15. Import Layered Artwork | Full Project: What I'll have you do first is open up the file that I have provided for you and you'll find it anywhere that
you have saved it. If you haven't saved it yet, go ahead and jump into, download it, save
it to your ipad. Maybe on your ipad or on a
cloud or wherever it is. And then open your files
and search Flamingo. And you'll see
Flamingo, Peggy Dean. If you have to search my
name, that's fine too. You'll find it here.
And then you're just going to tap on it. And it's going to
open up in dreams. You don't even have to
have split screen open. Frannie has decided to join us. I have not converted
this layer yet. You're going to see this
as a drawing layer. You're going to see the
layers here together. We're going to convert these
layers into their tracks. Tap drawing, convert
layers to tracks. Now it's created a group. You no longer have the layers in draw mode because
it's in group. Then you'll see that
we have front leg, back leg, body and neck. This is just exactly
what we saw. But they're collapsed
in groups versus being open where they were
open in the layers panel, front, front foot, lower leg. Now we have these
groups. The way that I have separated these
for you is very simple. The way that we did in
the previous lessons. We have except left and
right leg. I did front leg. The front leg is the one that has this pink stripe through it. Back leg is the one behind that. And then inside of those groups, we have the front foot, the lower leg, and
the upper leg. Those are the only three things
collapsed in that group. If you want to you the
same thing that we did in the previous where
I highlighted so that I knew that there were groups. So I'm just going to do it with the gray so that when
these are toggled open, I can see, okay,
this is the group. It's just an easy way to
identify at a glance. I like to do like
the parent group, if you will, a different color. So that I know that
this nests everything. It just helps with
my organization, which I'm not very organized. But in this case I do
like to for these tracks, it just makes things easier. And then we're also going
to play with warping, isolated animations and then
a cumulative animation. So you've got this, we're
just going to break it down piece by piece.
Let's start simple. I want to go with the front leg, and we're just going to
bring the front leg up. The first part of what
we're going to do is move the whole entire leg up. Because if I opened this up
and I moved the upper leg, it's only going to
move this part, which will then leave the
lower leg where it is. Since we have this whole piece ready to go already
in its group, we can just animate
this whole piece and then grab this part
individually to finish, which is just going to
make things a lot easier. Go ahead and select Perform, which is going to be recording
everything that I'm doing. I'll tap the bounding box corner here to reveal the rotation. If this disappears on, you just tap the playhead again and it'll bring the
bounding box back. Then I'm going to
rotate up like this. That was a little slow actually, she wouldn't think so,
but a little faster. As I do that, I want to
bring the lower leg in, but because I recorded
over what I just did, I have to get rid of
these two keyframes. So I can do that just by tapping and holding
delete key frame. Now I can make sure
that this group is open and go down to
the lower front leg. You'll notice too that
the lower front leg and the front foot are in
separate sections. Which means same thing
as what we did before, where if I move the
lower front leg, it's going to leave
the foot here. We don't want that,
but we do want the front foot to act independently of
the lower left leg. In case we want to
animate the foot as well, what you can do is
go to timeline, edit, select the two that
you want to group group. It's going to then put the foot and the lower leg together, but they are still
separate within the group. But then I can apply the
effect to the group. You can rename it just so if you go to rename when you're
still in time line edit, it's not going to give you
the option just toggle off time line edit and
then you'll see Rename, I'll say lower leg, then I can delete these excess tracks
that they came from. Okay, I'll go ahead
and highlight this. Just so I know that
it is also a group. Now I can animate. The lower leg with the
foot on this track. Go ahead and add
a move and scale. I'll do a keyframe
just so that we can apply both of these
animation styles. I can see my
keyframes above here. I'm just going to drag it to about the same spot tap to
add that second key frame. Now this is where
I'm going to edit only the second key
frame and then it will do the work for me from bringing it to
point A to point B. As a reminder, if that
bounding box disappears, you can just tap the key frame again. It'll bring it back. I'm going to tap one of the corners so I can
bring up the rotation. And then, okay, so
what happened here? Because I grouped it and I didn't adjust the anchor point. The anchor point is now again,
in the middle of the body. We need that to be at the knee. So I'm going to
undo that action. And I'm going to tap to
bring up the bounding box, tap these three
dots, edit anchor. And then see the anchors
in the middle of the body. I'm going to bring it down
to the knee, say done. And now I can rotate and it's going to be in this position that I
want it to be in. Now the other thing
I can do is move it so that it lines up better. It's going to
capture the rotation and the movement in one sweep. So let me show you
what that looks like. If I go back to the
playhead, there we go. I'm going to collapse that now. And I'm going to
adjust the weight for the back leg so that
it's straight up and down. And I'm going to do
that in the beginning, so it's going to be
one fluid motion going to the back leg. I don't need to do
anything individually, so I'll add the effect
to the full group. You can do this in
perform or key frame. This is an easy keyframe,
so that's what I'll do. I'll go ahead and start,
Have the starting point, tap, move, move and
scale. Drag this over. Create another key frame, and that's going to
be the ending point. I'll go ahead and make
sure the anchors in the right spot with these
three dots at anchor. Now it makes sense to put it right here at the
connection of the body, but what that's going to do
is make it so the leg moves. But I actually want it to look like we're balancing
out the body. The body is going to move, but this point is going
to stay the same. In this case, I'm going to
make the anchor point at the foot because that's going
to be the balance space. The first thing I'll
do is move the leg. You could group these two because I have the legs so
separate from the body. I'm working this
way because it's just going to be easier for me. But once I have the anchor point on the foot, I'll say done. Then I'm going to
do the rotation. Tap to bring this up. Tap for rotation and pull
this up straight. Okay? Now I know exactly
what I need to shift, but first I'm going to move the foot so that
it balances out. So I'm going to open back leg. I'll go to back foot right here. Then I'll set the key
frame to about right here. And I'll do the same
thing, where I'll have a rotation of this foot. Move, Move and scale. Same thing over here, tap and then I can come
in and rotate. This first thing I'll
check is to make sure the anchor point
is where I want it, So I'm going to put it right
at this connection done, and then tap and rotate. Now that's going to be
one fluid movement. Let's look at that. Here
we go. There we go. And if that's too fast, let's say it's too fast, it's really easy to then just adjust where
the key frame is. I can bring that out to here, drag this one out
to the same spot. Now it's going to go slower. Okay, which might
make more sense. I'll collapse back leg and now let's look
at head and body. All I need to do here is
move it to the left so that it still is balancing on
the central balance point. Create a key frame,
Move and scale. Come over here,
create a key frame. And this is the one
that I'm going to edit. So I'll go ahead and just move
that because we don't need a rotation and then
we have that balance. Okay, so this is what
that looks like. Perfect. We've got some
movement and now we can move into tilting
the body and the neck, and then elongating
the neck with a little bit of warping
so I'll make sure all my groups are collapsed and that's just going
to make it cleaner and easier to digest. So I'm looking at head and body. We've already moved it, but
once it's finished shifting, that's where I want
it to start to move, so I can set a new keyframe. Tap on, perform the
key frame track is already here and it's
already set to move. I'm just continuing. I'll tap these three
dots to make sure my anchor point is where
I want it and I want it to be at the connection where
the legs are then done. Then I will tap the
corner for the rotation. And then I'll tap, perform. And then I'll just have it
shift down a little bit. As it does the shift, I'm going to have the neck
and the head start to move. I'm going to open head and body. Now I'm going to change the neck position so that
while it starts to lean, it's also elongating
the neck a bit. If I open up the neck, I see I have neck and head. I could rename that
to make it easier for myself, head and neck. Because then I know that
it's two different elements within it which is going to be helpful right as it
starts to come down. Right about here is where I
want it to start to elongate. But first I'll have it rotate
just a little bit more. I'll set a move and scale. I'll go ahead and do a perform
on this one tap to rotate. There we go. Then I'll move the head just a
little bit as well. During that same process, I can go in, make sure my
anchor points correct. I'll have that be right
at the neck here. This is going to be real subtle. I can do this in
a keyframe here. I will move, move, and scale. Move this down, set a key frame, then go ahead and
just a little bit, let's see what this looks like. You can always go back
in to edit a key frame. I want that to be a
little bit more perfect. Now I want to elongate
the neck a little bit. I'm going to have to do
this to just the neck, because if I try to
apply a warp or distort, I'm not able to
do it to a group. You can see distort
can't be applied. I have to open this up
and go to the neck. We'll create the first key frame right where we want
it to start about. Right here, I'll say you
can change the amount of, let's say five or six
horizontal controls. Maybe I think four verticals. You can see you have more
fine tuning options. Five seems fine. Then I'll
set the second key frame. As it gets to about right
here and tap it sets, and this is the one
we want to move, we're going from
point A to point B. I'll open this,
I'll make this larger. And then actually I'm going to turn off the head
layer, toggle that off. That's going to help
me see what I'm doing. Because I want to, I want
to take this and make it so that I think I need more
actually lengthening. So I'm going to bring it down in this area so that
it looks like it's stretching out and
getting flatter, bringing this part in and
bringing this part down. But I also want to make
sure it's not getting super skinny because then that
doesn't look like quite right. I'll keep the thickness but just straighten out. Let's see what this looks like. Okay, see what I mean. The warp you're able to animate just by warping the exact same illustration.
It's pretty cool. Let's turn the head back on
and we'll need to move that. I'm going to look at the
same key frame area here. I'll go here, have
the head come. Let's see if that worked for us. Okay, right here, we're going to need to
start that movement. I'll go ahead and
bring this up here. Okay, so I'll go ahead and bring this one
in further here. I think it just
needs to come in. Just as a little added bonus, I'll have it rotate one more time for some
additional movement. Okay, so this is just this
independent animation. Different things that
you're able to do to bring one
illustration to life. You just want to
make sure that you are layered properly
and then you have the ability to do as
many layered groups within groups as you want to. As long as you have those
independent elements, it turns out really fun. You guys are going to
have the capability of doing even more
inside of here. Under body, I have added
wing for you so that you can also do something
with the wing if you want to, just as a simple practice. Now the last thing
that I want to do, the last thing I want to do is add to this existing
illustration, because we want to
add a little on here. Now the last thing
I want to do is add to this existing
illustration. Because we want to
add a little on here. I'm going to open head and body. I'm going to open head and neck. And then on head, if I go to the draw mode
and I go to layers. Okay, you can't open layers
on a keyframe track. What that's telling me is that even though this is selected. Notice the playhead
icon isn't here. So I need to make sure I'm tapping on the actual
drawing layer. Not the key frame track,
the drawing track. Then I can tap here,
you could see head, if I add anything to this layer, it's going to keep
it on this frame, it's going to keep
it on this track. I can create a new layer
or draw directly on it and grab the
brush that I want. So I'll just go to
drawing or inking rather. Studio pen, seems good and
I can add a little on here. And then everything that I
do, he'll have this little. But if you want to
bring it to life even more and even if
it's on a new layer, anything that you do, it will follow because it's
on this head layer. What I think would be really fun is that throughout the
reach, it's got this E. And then what I could do is actually have the
eye start to blink, bring this track
into about here, and then duplicate it, and then bring the rest out. The reason I'm doing this
is because anything that I do to the layer of the eye, it's going to stay
the entire time. I can't make any edits. If I want this eye to blink, then I need different frames. I can do this by frame by frame. If I am in draw mode and
I have these layers, I can open draw mode and
then change these frames. Basically, I can
bring this smaller. Okay, let's see
how long that is. Open up draw mode, then go to this frame
here. I can duplicate it. Then you see I have
two of them here. Then on the next one, what I can do is go
into the layer and actually change it so that
it is more of an open eye. Then if I get out of here, I can make this longer and
then duplicate this one again. I'll have to drag this
over to this side, which is fine, but
you can rearrange, but you can go
frame by frame two. If I open this up, and then I'm doing it
here, same thing. I can just duplicate tracks. But what this is going to do is allow you to have
this animation. And then all of a sudden
you've got this blinking. Let's make this smaller. And you can also group
quicker with timeline edit. Like this, I can grab
the tracks that I want, which are these two. Group this. Then I can duplicate, duplicate. And then it's like this
blinking toward the end. Then I've got blank,
blank, blank. Now when you open
all of this up, you've hit all of the animation. And you know how
all of this works. And you're able to then
adjust by key frame. Adjust by perform
frame by frame. And what I want you
to do now is to take this illustration and play with the background that
it can live within. Maybe there's a fountain
or a waterfall. Maybe you could have
some plants sway side to side as
if there is wind. I can't wait to see how
you bring this to life.
16. Bonus Download: All right. You should
have a project or two, or three, or four by now, and you're probably
on your way to make more unless your brain is feeling like it needs a little break because
I totally get it. This is a lot to cover. But once you have that in place, you're gonna wake up
tomorrow and you're going to feel like you can
blast through this stuff. It's like learn it, get muscle memory in there, take a little break, and
then it comes with ease. And I cannot wait to see what you are going
to create with this. And don't forget, I have a
gigantic bonus for you guys. I've linked it for you so
that you can snag that. It is going to help
you so much when you need that quick reference
or quick reminder. Because there's so
much to go over, it's easy to get
something skipped over. The options are limitless. You can create animations
on top of videos. You can bring an
old illustration in and animate it and
bring it to life. You can play with color, you can play with elements. There's just so much fun
to be had and I can't wait to see what you have
done and continue to do so. Please share, share your work. I want to see it. I know
other people want to see it. If you share social, be sure to tag me at
the pigeon letters. I am dreaming. I am dreaming of what
you will dream up. Got that for you, and I will
see you on the internet.
 Peggy Dean, Top Teacher | The Pigeon Letters