Transcripts
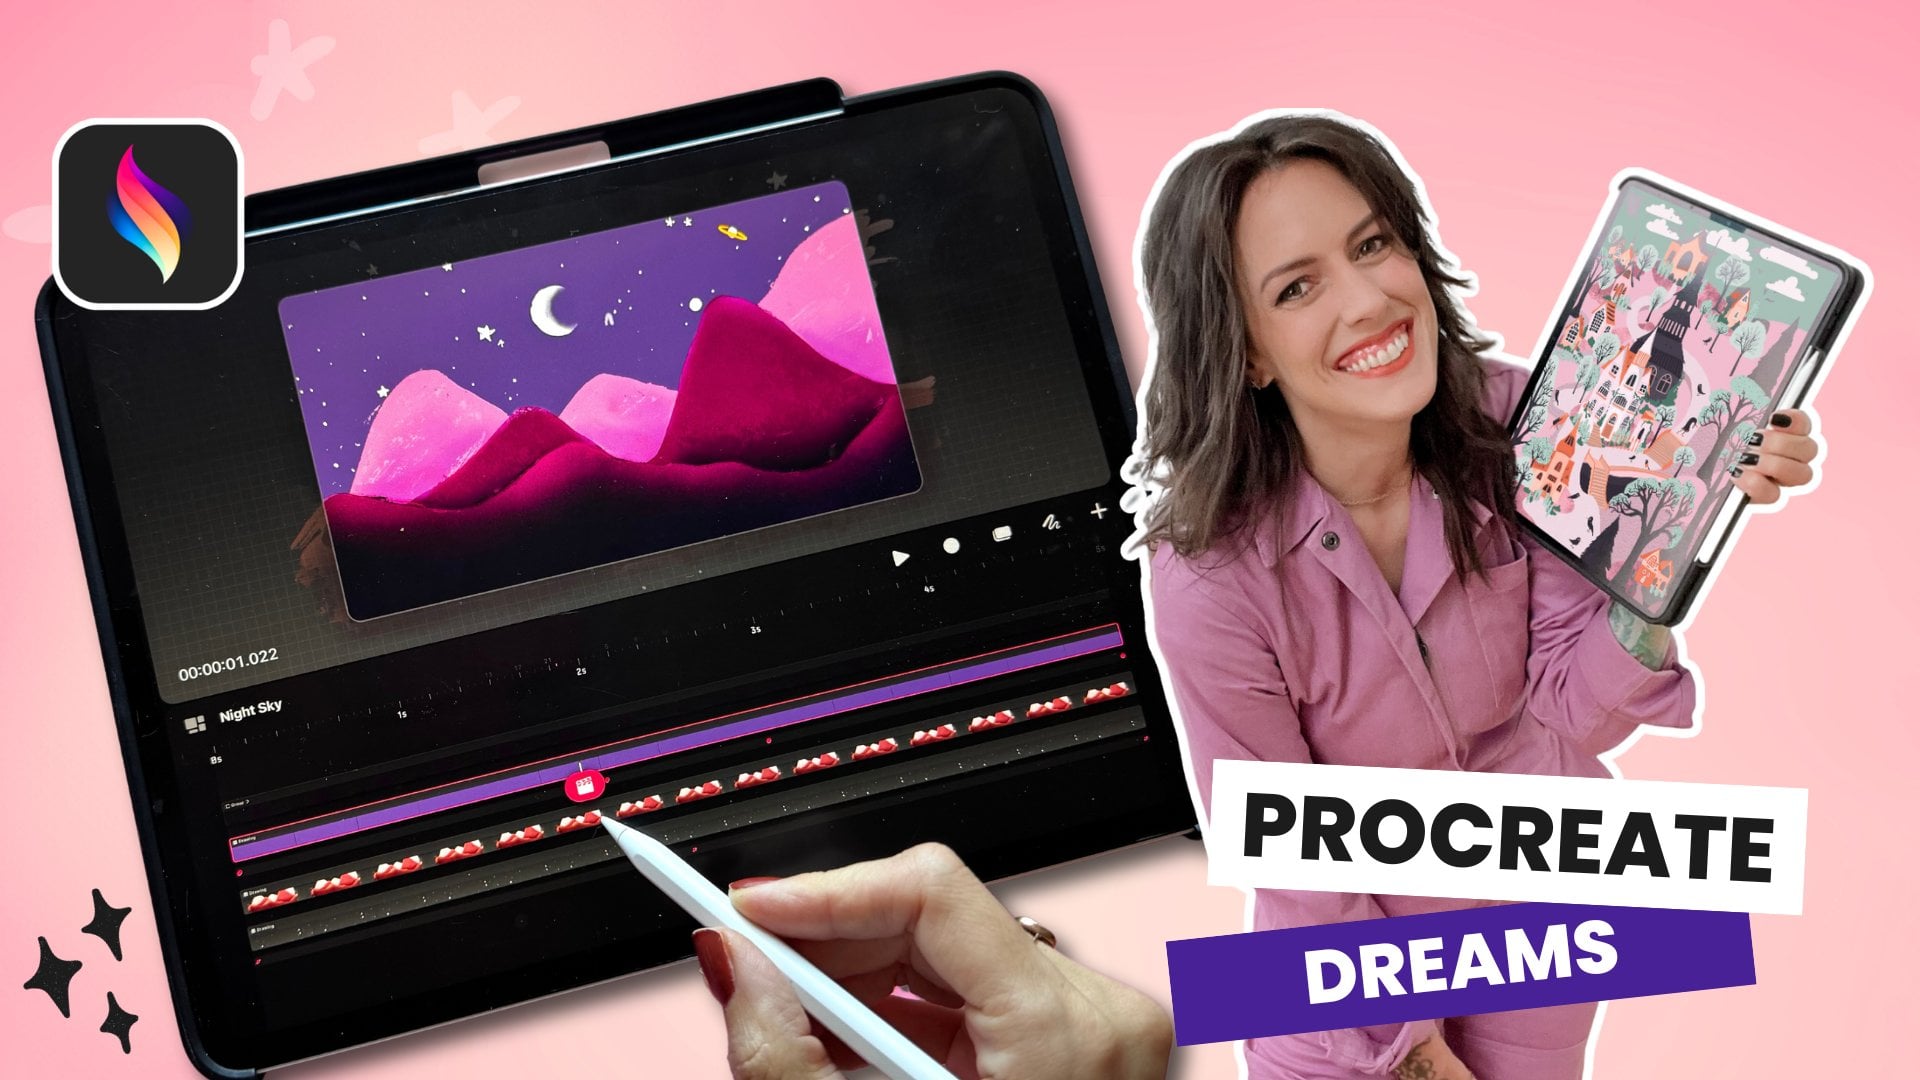
1. Introduction to Procreate Dreams 2: I am so excited to
bring you a class all about this cutting edge
app, Procreate Dreams. It is designed for
digital artists and animators and offers an array of features that make the creation of
animation such a breeze. Whether you are a
seasoned animator or you complete newbie, it's designed for ease of use. That means that
experienced animators now have easier workflows and
you can save valuable time. And it also means that someone doesn't need to know a thing about animation to get started. This app takes the familiar
animation assist in Procreate and turns
it up to an 11. It delivers a powerhouse
of features and user friendly tools
that will have you creating professional
level, but with ease. And not only will you have the tried and true frame by frame and key framing
capabilities, but you will also be able to
now control it as it plays. All you need to do is move your Apple pencil around on
the screen. I am Peggy Dean. I'm an artist,
author, and educator, and I've had the honor
of teaching over 500,000 students how they can hone in on their creativity. And now I could just show
you a new program that has further allowed me to lean into my own so that
you can do the same. As the art world evolves from static imagery into this
dynamic motion and video, Procreate Dreams is coming
at the perfect time, and it's giving
us an opportunity to expand our own capabilities. I'm here for it,
and I'm ready to dive in and show you
every step of it.
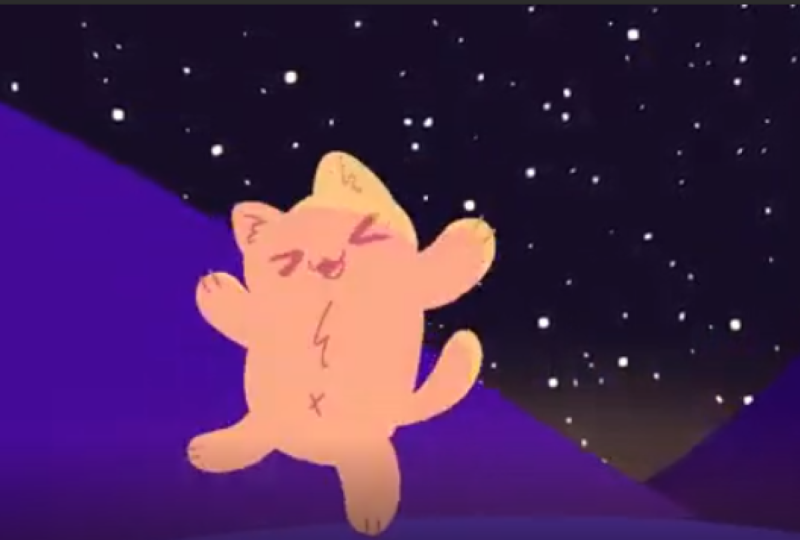
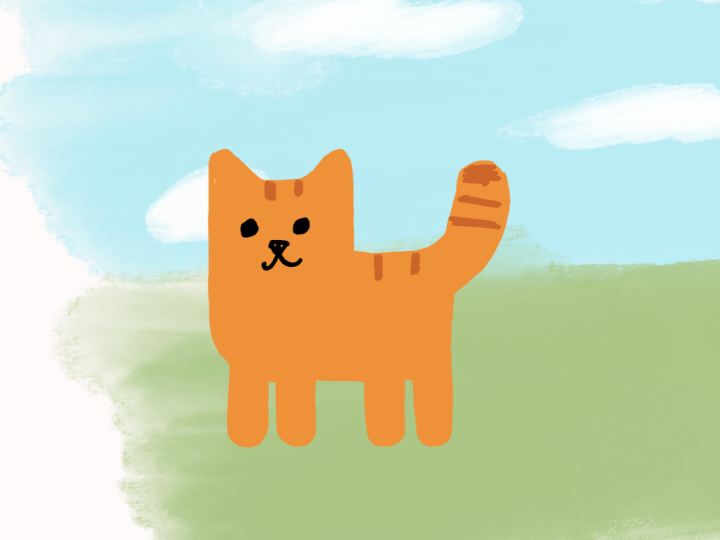
2. Class Project: By the end of our class,
you'll have created a cute, animated jumping cat set against a starry night sky with a
subtle Parallax effect. It's playful, a little magical and gives us
a great way to learn how Procreate Dreams works without overcomplicating things. The cat helps us
explore motion and timing and easing in a
simple, approachable way. While the starry sky lets us
work with layers in depth and Parallax so you can actually see the
space come to life. We're going to build this
step by step, and by the end, you'll have a finished piece
that you can tweak, replay, and reuse, so grab your iPad, open Procreate Dreams, and let's bring this
little cat to life.
3. Theater Interface | Set Up Your Project: When you open Procreate Dreams, you will see your theater, which is essentially your
gallery of projects. And you'll see this preloaded
with some example projects, which is really helpful
to go in and look at elements and see how
they are working together. You'll be able to manipulate
elements to play around and see how all of these
effects come into play, and this is where your projects will live when you start
creating new movies. Now, on the left side, that's where you
can access files that are on your
iPad or on Drive. And then from there,
you can also do a little organization in your
theater by going to select, and then you can select a few projects and create
maybe a new folder with them, duplicate them, delete them. But let's create a new folder. Just call it projects and apply. And then you'll see
if you deselect, you'll then see you
have a projects folder with those
inside of them, and you can keep things
nice and neat that way. You can also go
in and rearrange. Let's say you have an older file that you want a
little further in, you can just drag and drop. But let's say we don't
want these in here, we want them to be
in our main gallery, and we want them
out of the folder. So go ahead and
select, tap all three, and then you can just tap
and hold one of them, go back and then drop them
back into your galleries. And you can tap and hold to
delete projects or folders. So pretty quick and easy. So the last thing is this
plus sign on the top right, which is how you are going
to create your movie. When you select that, you're going to
have some options. You'll see that you have these little dots
on the right side, which is going to go
through your widescreen is what defaults as
the first option. And then you have
ultra wide screen. You have social media,
square screen size. That's the iPad screen size. Additionally, from here, you'll also see this
says four K. You can tap that and change
it to two k HD 720. So let's just go two K. Let's
make it a little smaller, just so we can preserve your iPad storage
for this example. The other one is the three
dots on the top right. So this is where you can change your frames per second
and the duration. I'm just going to keep
mine at 24 frames per second and the
duration at 3 seconds. And we may change all
of these settings, and that's fine because you
can do that later as well. So it doesn't have to be
locked in right this second. The last thing that the
app wants to know is, do you want to open Flipbook or do you want to
open an empty Canvas? The only difference here is that empty means you don't have any tracks
that exist yet. We're going to add to
them. Flipbook means Whoops, as I open it. Flipbook means that
you have a track in here that is allowing you to draw directly on. You can also. I'm just going to show you
you can delete this track, and this is what it will look
like if you choose empty. And then you can
add the Flipbook in by going to add Flipbook. I'm going to explain that
here in a little bit in more, in more detail. So, you know, that's
the difference. It's not like one or the other is going to make
or break your project. You can open either
one. So for now, just open empty, and this is what it's
going to look like. I'll just go back here real
quick so I can show you if you're on that screen without me pressing something
by accident, press a plus symbol
on the top right to get to your choices
and then just empty. That's going to be
your new project. It will open automatically. So next, we will look at
what all of this interface means to make it as easy and
streamlined as possible.
4. Get Oriented in Your Project Space: In your movie interface, I think about this
in four sections. So on the top, we have our
stage, essentially, right? So this is where everything
is going to play. And on the bottom, we
have our timeline. Nothing is there
right now, but this is where those tracks will live, and you will be able to
look at your flipbook, et cetera. So
everything's in there. And then we have these
smaller sections, this middle area, which has all these controls, the buttons. And so think about that as
the middle control buttons. And then we have
the bottom buttons, which are our animation modes. I also wanted to show
you that there is this little vertical line
here that if you tap that, you can tap this and enter
a different duration, and you can also fit to content. So if you have content
in here and you need to drag that to
shorten your project, you can do that very easily. You can also drag this
middle section where those controls are so that your stage is
bigger or smaller. You might want to see more
of your working project, and that's a good way
to be able to expand, to be able to see it quickly. You can also, if you're
familiar with Procreate, you can pinch a pinch and zoom, rotate with two fingers. It makes things very, very easy. Speaking of finger gestures, let me just show you in one of their sample projects,
you can stay on here. I just want to show you quickly here if I go into one of these. So you see all
these tracks here. You can use one finger
to scroll around here. If you use two fingers, you can pinch and zoom the same way that you can
pinch and zoom here. You can pinch and zoom so
you can see that better. But the one that I like the most is three fingers
where you can compress or expand the tracks so you can see what's on it. So we have 14 seconds. It's not changing the
length it's just making it stretch out so we can fine tune and really see
what's going on here. The other one is with
three fingers still, before I was going
left and right, now if I go up and down, we're going to be
able to expand so we can really see those
previews better in here, so you can go smaller
and then keep it wider, whatever you want, it makes it really customizable
for your view. I can't tell you
how many times I will see something
I want to fix, and it's just in this
tiny, tiny area. So if you expand way way out, you'll be able to see
that frame really easily. Since we're in here,
I also want to show you some hierarchy, and this is going to seem
really confusing if you're not used to working
in the program. But let's just isolate
this one spot. When we open this up,
see how it says group. If we open that up,
you're going to see these three
different areas here, and you're going to see
some frame by frame, you're going to see
some that's longer, and that's probably and
what that is is just stretched so that this
one image lasts longer. But then on top of all of that, there are additional
groups that have all of these other
elements inside of it, but you're going to want to
know about groups because it keeps everything very organized. So keep that in mind. Now, going back
into our project, the buttons here, theater
you Saw me use it. It's going to bring you
back to your gallery. So pretty easy to get back. The next one here is your
global project settings. So if you tap it, you'll
see about this artwork, lets you add your name
in here and a photo. Frames per second, which you
saw when we set this up, but you can also
adjust it once you're working in a project.
Change the duration. There's also history, which remembers all of
your undo steps. So you have basically
recovery points, and you can choose how
many undue steps you have. This will also affect the
storage on your iPad. So I typically keep this
lower maybe around 50. I don't I don't need that many recovery
steps because I don't do that extravagant animation. Mine are a little more simple and cutesy, and
it's pretty easy. But that's going to be helpful for you to
know that you have access to. Your
resolution is here. Now the next one's here.
So you see at the bottom, when you first open
your movie settings, your project comes up. So that's what
we're on right now. Then we have stage, timeline,
share and preferences. So, this is the global setting. The next one is
stage. That's going to be our top section. This is going to be
where you can access your background color of the full Canvas if you
want to change that. You can also now in the
new Procreate dreams two, change it so that you can export in transparent background,
which is amazing. I'm so excited about that. So you can turn this on to toggle on
Transparent Background. Your onion skins we'll talk about that when we
actually get into animation, but it's essentially
really helpful for seeing what your frame
before and after is. And then time code.
I keep that on. It shows up right here so you can see where you're
at and your timeline. Okay, timeline. This is helpful if you're
doing a gift or something, Jiff, however you
want to say it. One shot is your movie. I also turn off add keyframe at Start because that's going
to make keyframes for you. We're going to set
those up ourselves. We don't want it to add a
keyframe if we don't you know, if we add something later, and it's going to
mess things up. So that is something
I want to turn off. So if you go to your
global settings, go to Timeline and go to turn off Add keyframe at
Start if yours is on. Then we have Share and
then we have preferences, which are just basic gestures. You can change these according
to what you would like. We're going to keep these
pretty basic for now. One thing I really like is that there's keyboard
shortcuts available. So if you use a keyboard, you can bluetooth it and
then use any of these keys, essentially is kind
of gestures for quick access back and forth
from tracks, et cetera. We're not going to use
any of that today, but no it exists if you like
to speed up your workflow. Okay, the next one
is Multiselect, and we're not going
to touch it right now because we don't
have tracks yet, but know that that's
what it's for otherwise, you're probably going to wonder your play button in the middle. And finally, we're going to add. This is where you
add your tracks. So, in Procreate Dreams two, they introduce the flipbook. It is preferable. I will tell you that right now.
You're gonna love it. So we'll start with that, and then I'll also show you drawing, um you can turn anything
into a flipbook, so you can convert
it at any time, but just know that's
available to you. You can also import photo video and file, whatever
you want to import. Add text. Add a track. And a track is basically
an empty track. You can see it's kind
of gray right here. You can tap and
delete that as well. So we'll go ahead and
we'll add a flipbook, and this is going to
open your drawing area. The only difference between this and drawing, I'll
show you real quickly. I'm going to go ahead
and say finish drawing is if you go to drawing, it still opens this up, but
you don't see flipbook, which means you don't
see the frame by frame. So let's say I just
did something on here, and then I go up to the top left where it says drawing,
finish drawing. Now you can see the
track is right here, but it will make it a lot
easier for you if you use a flipbook because that's going to give you
frame by frame. So I'm just going to delete
all of this so that you have a clean canvas in case you
added a bunch of things. Let's just delete,
clear that out and go ahead and Tap plus
and tap Flipbook. It opens our drawing area. So next we're actually
going to draw our first project together while we explore the
drawing interface.
5. Drawing in Flipbook | Frame by Frame: Alright, now it's time to draw directly in Procreate Dreams. I used to draw in
Procreate and then bring layered illustrations
over into Procreate Dreams. But in Procreate Dreams, too, they have updated it to where when you go
to your brushes, you actually have
brush library options similar to Procreate. So if you tap in here, you have the ability to go in and change some
of the settings here, the streamline,
and then you have more a brushes available to you. You have some in
the classic library and the animation
brushes they've added. Now, you also can import
Procreate brushes. So let's say you have a
favorite Procreate brush. It's really simple to do this. You can actually just
go into split screen. So make sure you have
the newest update to the iPad because
for a second there, they did take away split screen, which was not my favorite
thing, but it is back. So, here's how to do it. You want to have Procreate open or available at your dock. You can take Procreate
from the dock. Oh, you can pull this up, take Procreate from the
dock, slide it over. Don't slide it all the way. You just want this to scoot on over and then drop it and
you have split screen. Now, if you don't have your stage manager on or if you don't have
access right here, you can find it in your setting. If your stage manager is off, then you're not going
to have the ability to pull over into split screen, so you want to make sure
that that is enabled. You can access it from your top right little widgets here, but you could also access
it in your settings. Just stage managers on now. Look at that. Now it wants me to drop Procreate back
where it goes. Okay. So from here, you can open any canvas. Doesn't matter because you just want to access your brushes. And let's go into let's say
you have brushes from Myset. Let's say you want one
of the vintage brushes, so the vintage flexible
nib. Let's pull that over. So you're just going
to take that, drop it on over into dreams
and that's it. And then you will open up
your um brush library, and you'll see it
under imported. Now, it will show up
wherever you import it. So if Classic is open, like, let's say classic was the last brush library you have open, if you import that, that's where it's going to show
up under imported. So just make sure that you're
looking in the right place, because if you
don't see it here, it might be over in
your other library. You can also create
new libraries. So I can pinch to close this. So I have brush libraries, and I can go ahead and
create new library, and I'll just call this EPO for the pigeon letters, apply, and then I can drag this brush, pinch, open this one, and drop it in there. So you can organize this
however your heart desires, but that is an easy
way to do that. If you're having trouble
with split screen, which could happen,
let's be real. That's the thing. You can also just
open Procreate. And then grab a brush. I'll grab a vintage
monoline for a new one. Grab this and just open dreams and then drop it in like this. It's going to do the same thing. So you don't have to
use split screen, but there we go see
it's under imported, and then you can tap and
hold the brush and pull it into that untitled set
that I just created, maybe. There we go. And then drop it there. So that is how you can import brushes. We'll use one that's
in their library so that we're all
using the same thing, but I just wanted to give
you that so that you have that option because
it's going to be really nice to be able to import
brushes that you love. Going to go with a really
simple illustration to make this pretty quick and easy, but it's going to be adorable. So you're going to actually
like it when we're done. You have these brush
sliders on the side. The first one is your
size of your brush. The second is the opacity. So if I'm drawing and have this full opacity
versus lighter opacity, it's hard to tell when
the background is white, but it will give
you more opacity. I never use opacity. I always use blend modes
and clipping masks, which we'll cover, but I do
use the slider for the size. So we're just going to draw
an adorable dirpy cat. So let's go to Monoline and choose this MDO, if
that's how you say it. It's just an easy
monoline brush. It doesn't have any
sort of opacity. So it'll make it easy
for us to work with. And we're just going to do it
with a silhouette at first. So when we draw, it's okay if you go
outside of this line, but know that this line
here is your stage. This is all that will show up in your actual movie export. However, if you pinch, you'll see that this
canvas is quite large. So you're able to draw
a lot of elements here and then change how they
show up and where and why. So we could draw the
cat pretty big and then have it enter the
frame and whatnot. But for now, let's just draw inside of this, make
it nice and easy. So when we start drawing
this, we can just do a little circular shape for
the head and then ears. It's going to be
real dirty and easy, so don't overthink this. A little body, have a
little chunkier maybe. Uh smooth that out a little
bit and have its little arms. How about come up like this, 'cause it's going to be
dancing, little arms. And then the feet, let's have one of them
kind of come up, and then the other one
will be down like this. Okay, now, from here, we can color fill by going to the color wheel and
not tapping it, but actually dragging
and dropping color in. You'll also see this it's
going to come up pretty quickly that menu where
once we drag and drop, it'll say continue filling. If you tap that, then
you'll be able to tap, tap, tap, tap, tap, tap. If you're having an issue where you're tapping and it's
filling the whole page, make sure that you
don't have any areas. I'll just show you an example. Make sure you don't have a
situation where you have any openings like this because it will fill
the entire canvas. You want to make sure Whoops. You want to make sure
that that's closed. So then it'll fill. Now, the other thing to
note is if you're using a brush that has some
transparency in it, there's a chance
it'll spill over. So when that happens, you have something called
a color threshold. I'll just show you real quick. If you tap or if you drag and then hold, the
threshold is up here. If I go all the way
down, see how it doesn't fill everything, if
I go all the way up, it should be fine
if you're working with an opaque brush,
but otherwise, know that that threshold
is there and it will save you a lot of stress. Like, you'll be a lot
more happy with yourself if you know how to fix that. Okay, we have our cat. Now we just need some
simple lines so that it can have some expression
and some detail. So to do that, we're
actually going to create a new layer on top of
this cat because we want the expressions
to be editable. So we'll go to our layer panel. So go to the layers panel. It's two squares
on the top right and then tap this plus symbol to create a new layer on top of that layer on the drawing layer. And then we can
just go to black. We'll make this line
a little smaller. Yeah, I think that'll be good. And then we can add
its little detail. So Hi, it's Peggy from the future
after we did this class. Now, I want to quickly
show you something before we get into the next
steps because I have us drawing within the cat on another layer
to draw its expressions. And I did that because
I wanted you to see all the different
ways that you can draw within the program. But what I'm deciding
now in Edits is that I actually think
it's going to help you to use this ahead of time. So you're going to see
different ways to draw it, but let's go ahead and
do it in this way. I'm going to delete this
real quick so you can see. Don't worry about down
the second track. We're going to get to
that in the class. The expressions on the cat to do is use this
symbol right here. It looks a little bit like a hamburger icon or equal sign. If you tap that,
it's going to create a new track within
your flipbook. And let me show you an
example of that in action if I go into a different
project that I've done. So there's a lot going on here. You're going to see
a lot of groups. But if I open this
particular flipbook here, you'll see it is this
character right here. Now, if I have these
expressions on this layer here, which is the tooth, if I have it here,
you're not going to see the onion skins
of the expressions. Whereas if I go so
it'll look like this. If I go to this expression track anywhere
here and I let go, I see I'll go ahead and clear this one so that you can see the onion skins
before I draw on it. So I see the before
and after onion skins, so I can see exactly where the placement was
of the expression, so I don't have to
guess on the next one. So I do go over showing you without doing it
this way because I want you to have
full familiarity. But again, I'm deciding,
as I'm editing this that this is going
to be the better route. So everything we're doing
in a clipping mask, so we have this
track here, right? Everything we're doing
here in a new layer, rather than doing a new layer, we're just going to
create a new track. So this hamburger
right here and then the new track for the
expressions will just go right above the actual
illustration of it, and you can draw
directly on that. So that is going
to help you a lot, be able to cut some guesswork. Okay, let's continue. So go to the layers panel. It's two squares
on the top right and then tap this plus symbol to create a new layer on top of that layer on the drawing layer. And then we can
just go to black. We'll make this line
a little smaller. Yeah, I think that'll be good. And then we can add
its little detail. So how about we start
with two little eyes, and I always put these
kind of I like to put them wider and a little bit
further down real quick. Keep if you have stray
marks like this, You don't have to keep
going to the eraser. You can use two fingers to undo. You can also redo something
with three fingers and tap. So two finger tap to undo, and then that will get rid of that unwanted stray line
that you just made. Alright, so then we can
do its little nose, and I like to do these features pretty close together
horizontally. I think it makes it cuter. So you like right here.
I'll make a lot of stray marks a lot. And then we can do its little
mouth. So we're happy. We're having a good
time. And then let's go ahead and put little
details in for the ears. You could do them the
full way if you wanted. I'm just going to
do slight ones. I think it's going to be
fun to add in that way. And then right here,
we'll go ahead and add a line coming this
way for this little arm. Now you'll notice I'm drawing
off of the illustration, and that is because I want that line to go all the way up. Now, you could
erase that part so that it is so that it
is nice and clean. But another way that
you can do that, let's say you have a lot more
going on, you have, like, textures and things that
you're adding that's going off of the actual object, but you want it to go
all the way to the edge, you can create what's
called a clipping mask. So when you go into
your layers panel, you can go to that top layer and tap it and then
tap clipping mask. That's going to make sure
that anything that you draw on this layer is only going to impact or effect or show up on whatever is on the
layer underneath it. In this case, it's this
blob shape of a cat. I do need to erase
a little bit of that because I went off of the off of the crease. Sure. But then you can see it makes it really
clean and easy. Let's do little paws. So I'll just make these little circles for this little paw. It's gonna be cute, you guys. And then this one I'll go
ahead and make a little oval and have it be kind
of on the side there. And that way, it looks
like it's a little more directed that way. And then this little leg
is going to be upward. And then this one
here will just leave. And then, Oh, we need
a tail. How dare I? So, let's go ahead and go
to the previous layer, and we'll select the color
that we were on before. So you could go up
here and you might have and you could
go to your history. Another way to do this is
by tapping and holding, and it'll pull an eyedropper and grab whatever color
you're hovering over. Okay, and then we'll
have our little tail. Now, if we want to add
a few more details, we could add some
little whiskers and maybe some hair marks. So let's go to the layer above. Grab the black color we were on. We could also just go to
black on the color wheel. Now, this is silly, I know, but I always give all of my animals that I draw nipples.
It's just a thing I do. And if you choose, you can also give your animals their nipples. I don't count. I don't
ever try to say, I know how many
nipples they have. But there they are. Okay,
so from there we can do we could add a little line there showing the separation
if you wanted to. You could also do it right here. But I don't think I want
it on the bottom leg. And then if you want to
add little hair marks, you could I feel
like with the nips. Sorry, then I think it's enough. But I will say, one
of the things is, let's say I want to move these or move an element
after I draw it. One of the things that
Procreate Dreams has added is the Lasso tool. So you can select by
tapping select on the top, and then they have
freehand selection. So you can go ahead and draw around anything
that you want to move, and then just tap Transform, and then you can move
that wherever you want. Let's say you want to
move just a few of these. I'm going to go to
Select, and then I'll drag let's say
these three over. So I'll tap transform and
then move those over, and then you can just tap the brush or whatever to
get out of Transform. And then you have the ability to move certain elements
should you want to. So that's going
to be so helpful. Now, from here, this gives us the base for
the rest of our frames, which will be a lot easier because we're essentially
doing the same thing, but making small
changes so that we have an actual illustration and
then we're going to make it and then we're going to
make that element repeat, so it's going to be super easy. So when we go see down here,
we have this flipbook. If we go to the next frame, you're going to see the previous
frame in an onion skin. So you can change what the onion skin
looks like by going to settings and then onions and change how many
frames we see. Right now, it's only one
because we only have one, but you can also
change the opacity, so it's not so, so, so in your face, so it
doesn't feel distracting. And then backwards and forwards, you can change that, as well. So right now, it's
showing backwards. Forwards, you can change,
so it's a different color. I'm just going to
change the opacity there, so it's about the same. But we don't have
anything there yet, but you'll see what I mean. So from here, we can just draw based off of
the previous frame. I'll go back to that pink color, and we're just going to
slightly change this so that it is moving. So we'll just go ahead and draw its little body and
draw its little head, just basically kind
of in the same place, but just a little bit different. And then we'll change the
direction of the arms, so we'll have it come out a
little bit more, let's say. And then this one will come up. And then let's say it's going to straighten out a little bit. So then let's move
this leg here, kind of come out
like a little bit of a jump and maybe even shorten
the body a little bit. So what we could do is
actually bring this up, and then I'll just
erase this part. Now, the eraser that I'm on right now is not
the one I want to be on. So instead of having to
go and search for it, make sure you're on
your actual brush that you like that you're using, and then you can tap
and hold the eraser, and it'll say erase
with current brush, and then it will bring
up the same exact brush, and it makes it much easier
to accomplish what you want. Okay. And this leg
is a little wonky, so I'll go ahead and give it a little bit of a better shape. Just a little more round. Okay, let's fill this. Go ahead and pull the color in, continue filling top, top, top, top everywhere
that needs some color. If it's a little sliver, you can always press the little check, and
then just draw that in. I also have a stray mark
again, so I'll erase that. Okay. Now, let's go ahead and add the same details
that we added before. We'll add our new layer. And if you feel
confident to draw directly on this layer,
you definitely can. I never know if I want
to change something. It's pretty simple and
straightforward when you are just doing this on a flat layer. But if you have like, you know, a lot of blend modes and
things that you're doing, you're going to want to
be able to edit those. And so that's one of
the reasons why I just get into the I get into the habit of
doing it this way. Okay, so we'll go
ahead and add all of those cutie pie little
features that we added before. So we have our paws, our little pop pads. And I think I'm going
to just go here and make this a little chunkier so it feels more cutesy.
See the difference. We just make it a
little chunkier, make the neck kind of
disappear a little bit. It makes it really cute. Okay. Yes. Yes. And then this area, we can go ahead and do the
same thing. Just for fun. You want a cute, a cute
little guy here, you know? And then I forgot his tail
again, which is crazy. It's, like, really unacceptable. Alright, so the tail
we'll have kind of float. Well, I think we'll
have it still be maybe just a
little more behind. But we'll separate
that with the lines. So go back to the line
layer and just separate so you know that it is defined, and then we'll do the same
thing with the little feet. Here, I'll just make
these little tobin marks. And then of course That looks good. And then I'll
just add a little arm line just to have a little
like a little definition without detracting from the
blobby shape of this guy. All right. And then we'll
do another one of these. Now, this is actually
pretty drastic of a change. So let's say you did that
and then you're like, Okay. What if I want to add a frame in between here?
You absolutely can. You can just tap and
then insert frame, and you can see there's
one in the middle here. And now you can see
the previous and the next frame in this sandwich because we
have our onion frames on. So this is where
we can add one in the middle that kind of
brings them together. Now, you can set the
colors to what you want, but I know the purple here
is the previous frame, and the yellow is
the next frame. And I'm going to round these out so they're a
little more cute see. And then the body, it looks like it's about the same spot, so I will just add that
in And then the arms, this one looks about
the same spot, but this one over here, I can draw right in
the middle of that to just create that transition
a little better, and then go ahead and put the little arms in and the tail, it's about the same spot, but why not put the width of
it in the middle of these two so that it actually looks
like it has the transition. These legs here, I'll
go ahead and just put one in the middle, have this one in
the middle, so it feels like it's a
little more seamless. And then the head, it looks
like it does need to be quite a bit wider and taller. So I will just widen that and there we go. So that is one of the
things you'll want to keep an eye on
when you are doing your own frame by frame
animation so that you can ensure that you have the transitions that
you actually want. And I'll show you
a trick to this in just a bit on different
ways that you can add frames without having to draw each
individual one, but I wanted to get us familiar with this process so that you know how each
frame actually works. So go ahead and draw these
features in So from here, what we can do is actually
we have these three frames, and together, they're
working, right? But we need the
rest of this dance. So in the next video,
I'm going to show you how to do that
without having to draw a single other part of this cat because we're going
to work smarter, not harder.
6. Drawing in Flipbook | Flip & Warp Tools: From here, what we can do is actually we have
these three frames, and together, they're
working, right? But we need the
rest of this dance. And so what we can
do is actually take what we've drawn and duplicate it and
then flip it so that it's dancing on the other side. So let me show you what I mean. Right here is the same loop
that you saw in the theater. When we're in flipbook, we can also use it.
It's multi select. And so when you tap that, you can drag through
anything you want to select, and this is the case for groups, anything if they're stacked, you can drag through
whatever you want. So I'll drag through
those first two, tap and hold and duplicate them. What that did was it duplicated both of these again
before the end. So what we'll do here is
drag and select these two. Actually, we'll
select these three. Because we want
this one included, and we're going to flip
the order of the tracks so we can tap and hold
and flip the frames. So now it puts this one
back in the middle, and it puts the next
two at the end, so it's basically a ping pong. And that's going
to play like this, which essentially makes it like this little kitty is dancing
to this side every time. So what if we wanted it to
then dance both directions? We can flip the
actual cat, as well. If you go to your layers here, you can select
both of them here. You could also just
collapse it if you're happy with where
everything's positioned, you can pinch them to close or I'll go to
the next one to do that. You can tap the clipping
mask and say merge down. That's another way to
merge them together. So let's just do that
to make things easy. Okay, so now everything's
on one layer, but we want to flip
this one here. You go to transform and you
can go to flip horizontal. And then we'll want to
move this direction. Now, I don't know about you, but whenever I draw
something in one angle, it always looks a little weird
when I do when I flip it. And so we can change
this a little bit so that it looks more,
you know, correct. So what I'll first do,
I want the feet to pretty much line up with
the middle one better. So I will tilt
this a little bit, and then I'm actually
going to go to warp. So if you are on your transform, you've already moved
it, flipped it. As soon as you flip it,
you can go to warp, and then all of these
little spots are going to let you kind of
adjust it so it looks a little more you
know, like you intend. It's just an easy,
quick way to do that. Okay, but we don't want to
make it crazy different, but just enough to where
it's looking right. Okay. So then we can deselect it by just
tapping the brush, and then we'll go
to this next one, which we're going to
want to flip, right? So we'll go ahead since
we're on this page now, we'll go to transform
and flip horizontal. See how it looks a little
strange. Always does to me. And then get that
positioned where we want. So this is warp right now. We want to go back to
either freeform or uniform and then move
it where we want it. And then go to warp and you can make those
little adjustments. And if you want to
edit something, you can always edit by drawing, but this is just
going to be like an easy little quick way
to make these edits. Okay, so that looks
better to me. Okay, now, when we play it, it looks like it's
dancing to both sides. Like we are having
the time of our life. From here, we want
to make this a loop, and there are a
couple things to note when you're doing this so
that you have a proper loop. So we're going to
go over that next.
7. Changing the Speed of Your Frames: From here, we're going
to make this really easy and just have it duplicate. So right now, it's just a one
take all the way through, but we're going to
want these frames to repeat so that we're
dancing back and forth. So, had a little bit
of a camera blur, so I'm going to show
you right here. So we're on this final frame. And we could duplicate
this whole set, but what we'll be missing is the middle area where the middle like the halfway
kick and then the stand because if we are here, the first frame, we have
our kick to the left, and then the fifth frame
is the kick to the right, but there's no transition. So what we need are the three in the middle before we
return to the first one. So Go ahead and grab the multi select tool and drag through the middle three, okay? And then we will
tap and hold that. And we can duplicate it, but what will happen
is it'll duplicate in between these frames
and the final frame. So instead, let's just tap copy and then go to
the sixth frame. We can hold that
down and tap paste. Now, while it did take those over there and we
have the transition points, it still needs some work
because it's out of order. So what I mean is right here, go ahead and deselect the
multi select this little icon. So if we go to frame
five, which was the end, and then we go to Oops, and then we go to frame six, it still flops to
the other side. What we need is for this halfway point so frame four to be right after
frame five as well. So with the duplication
of what we made, we're going to do multi select, drag through the frames that
we just copied over here, and then tap and hold
any three of them. They're all selected. And you're going to
say flip frames, and what that's going to do is flip the order of the frames. So now when we can deselect
the multi select tool, now you can see that they actually do go in
the proper order. And this is our final frame, and then we can repeat
to the first frame. So see how one and eight are
essentially one and two. So it'll look like
this, which is correct. We don't want one at the
end because we have that. We're going to be
repeating that anyway. So when we're at this point, we can go ahead and grab our multi select, grab
everything here. Now we can tap and hold
and just simply duplicate. It's still selected that group, so just tap and hold
and duplicate it again. And now we have a full playback
that is a proper loop. Now, you're going to end up
running into this issue with your flipbook where you are stuck in running out of frame. So what you can do to fix that is actually exit your flipbook, so you're going to tap
the top left where it says flipbook and then
say finish drawing. It's going to bring
you to your movie, and then you're going
to tap toward the edge, and you'll see those
arrows pop up. You can drag that
so it's longer. So it's either the
track, you know, the full length of the
track, what have you. That's going to give you
all those extra frames. So then if you go back
to Edit flipbook, you're going to be able to
see there's a lot more here. Now, what we're going
to want to do is test the actual speed of
it because I have a feeling this is going
to be a little too fast. So when we look at speed, we have our flipbook
ready, right, and we see it's going
in the proper order. But now when we play it,
let's say it's way too fast. So there's a couple
things that we can do. Go to your multi select icon and just drag
through everything. So I'll drag through with my
Apple pencil and then use my finger to pull to the right so I can grab
the rest of these. Then when you tap one of them, arrows will come up like this and it could be any of them, then we're just going to drag it one frame over and see
how it made all of the frames two frames and then tap the multiselect
to deselect. Now when we play it,
it slowed it down, which is definitely
more of what we want. It's more our
speed, so to speak. Now, if you wanted to
do it another way, you can go back to
your movie settings, hit flipbook, finish drawing, and then go to your global
settings right here. You can go then to Project and see frames per
second is here. If you went to 12, I'll show you how much this
slowed down. See what I mean? Much slower now. So
you can set this to whatever speed that you
want anyway that you want. So you can keep your
frames per second. Let's say you wanted the rest of your project to
be in that speed, but you wanted this particular
flipbook to be slower. That's where you can go into your edit flipbook and
change the speed here. So it's a little tip
that's going to help you when you need to adjust your speed of your animation without having to add a ten more
frames in between.
8. Perform Mode (aka the Magic Animation Mode): Okay, we are back
in our timeline, so we're not inside
the Flipbook. If you are still
in the Flipbook, you will just go
Flipbook, finish drawing. We're back here. Now, if you ever want to go
back in, you can. You can edit
Flipbook right here. But now we are going
to go into perform. This one is so exciting
because we're going to make this cat jump
back and forth, so that it is really like
it's having an actual jump. And you can do
this you can do it either by composing and
actually positioning it, but you can do it from perform. You can also do
it with Keyframe. What perform is is, as soon as you tap perform, do you see this
little record button? So anything I do to the
canvas now is going to be actively recording
keyframes as I do them, so it's going to start playing. So, for example, I'm not sure I'm going to like
what this looks like, but I'm going to
go back and forth. Okay, it it was a
little too long, so I'm going to undo and
just go back and forth. Let's try that one more
time. Back and forth. Okay, so let's
just see what that looks like. Back and forth. Now, if you don't
like something, but you still wanted
to do perform, let's say I want
the bounce to be a little different
at a certain point, I can change that, as well. So if you go see these little these like they
look like a crop symbol, that is your Keyframe. So it created all of those for you so you didn't
have to do them, but you can adjust each and
every one of these keyframes, but it made them based
off of what you did. And then I'll tell you, too. See how it's only play I
tried to play that back, and it's only playing
through right here. That doesn't mean it
cropped everything. It just means that it's playing what's available on
screen at that time. So now it's gonna go through
the whole thing again. Now, something that I'm noticing is that you see
these empty frames. We want those to not be there. It looks like I just did one
too many Keyframe there, so I'm just going to get
rid of those by squeeze by a by tapping and then just bringing that in to get rid of
that extra frame. And then now I'll play it back,
make sure it works. Okay. Now, I can bring this back and do another perform function on top of the Keyframe
that it already created. So once it's on
this area, again, let's rotate this so it looks like it's dancing
back and forth. If I tap the corner here, you can see this little
If you have a pencil pro, you can hover and
it will come up. But there's this
little curve here. And if I hold onto the
curve, not the node. If I hold the node, it's
going to be a size thing. And so then you'll see, Oh, size change, which is fun. There's time and
place. But right now, I just want to rotate this. So I pressed Undo. It's back at the beginning. I'm gonna grab that curve
and go back and forth. Okay, so cute. See how easy that is. And that's all perform. Now, it creates these
keyframes for you. So if I go in here, you can then see each individual
Keyframe is editable. So if you wanted to
remove one of them, maybe that one is unnecessary or you just wanted to edit it. So maybe, like,
from here to here, you want it to jump a little
higher at a certain point. Well, I can go here,
see here to here. But what's happening is
you'll notice that just because this is here, up high, and this is down low, that doesn't mean
it's going from the top down and shooting
down to the bottom. It actually is making a transition in between each
and every one of these. Do you see what that's doing? It's creating the
transition for you. It's animating it for you so that you don't
have to move that. So essentially,
that's performed. Basically, anything
that you do on screen, you're able to
have in live time. So if you wanted a bird to fly and you wanted to adjust, like, where it is on the
screen or if you wanted to rotate something or
resize it, make it larger. So if this cat was dancing
and coming closer to us, then we could make that happen by just changing
the size here. So it just gets a little larger, and then maybe it
goes smaller again. So let me show you what that
looks like. A little larger. We're kind of dancing
toward the frame or toward the screen.
And that's fun. I just I don't want
to change the side, so I'm going to press
Undo so that it's just that dancing
kitty back and forth. So that's move perform, but you also have you
can filter with perform. So filter right here. This is like, let's say
you wanted to change the opacity or make some
blur or something like that. You know, you can also
apply filters in live time. So like opacity. Let's say you just start to fade something
away, fading away. So in lifetime, which
is really handy. You could use those
for so many things. Maybe you want a candle to
start to glow or something. So that's where you can tap that record and tap
either move or filter. So let me show you now what you can do with keyframes because you can take this even further.
9. Keyframe Mode | Let's Play With Color: Alright, so let's look at some fun effects
that you can do, and we'll do it with keyframing. Now, you know keyframes
at this point are these keyframes that
have been set up for us, and it allows a
motion basically to start and end at a point and
then it fills in the blanks. It's amazing. So you
can do this by tapping Keyframe and then going
to this little clapper. And you can use move, same way we did with perform, but you have more fine tuning on it because you're not
doing it in live times. You also have the ability
to warp and distort. So the same thing that we did before, but you can also warp. Now, if you try to do this,
it's probably going to tell you you can't reason why is it's because it's in a
flipbook and it can't do it it has to do it to
the individual tracks. So if you tap and hold, you can convert the
flipbook to tracks. You can always go
back like let's say the group is here,
you have the group. You can always go back
and convert it to a Flipbook again.
So don't worry. If you want to use it
as a group, go ahead. It's not going to let you
apply it to the group. You actually have to go
down to the drawing itself, and then you're going to tap the clapper and then
say move and then warp. And it will let you warp
that individual frame. So that's something to
note if you want to be able to access that, but
we don't need to do that. So go ahead and tap
undo if you've gone to this point because we
want it just to be a flipbook again, so
it's easy to see. Bring the playback to
the very beginning, and then we're going to tap this little clapper and
let's go to filter. So let's look at filters now. This is a really
easy example of, you know, what we just
did with opacity, but let's say we want to go from a certain hue
to a certain hue. Hue saturation brightness. This is our color sliders. So we can add a Keyframe right
here that is, let's say, on this purple, and let's bring the brightness up so
it's not so deep. Okay, so that works. We'll go ahead and add that
Keyframe, right. And then we can
bring the playback. Somewhere else, let's
say, at the end. Then we'll just pop
the hue over to this, like, yellowy color and bump the saturation
up while we're at it. So then we can play that. And you're going to see
it's going to go across the spectrum of colors
from purple to yellow. You can already see
that starting to happen right here in your preview. So look at this. We have that whole thing
going back and forth. Now, if you wanted it to
go through and, you know, come back to the same color, so we can actually bring this a lot earlier,
maybe right here. And then we can create another
Keyframe, let's say, here, and set that saturation to
a pinkish hue. How about? And then the final one, we can add back to
that purple color. Okay, so let's see
what that looks like. So now it looks like
it's all flowing because it returns to
that original color. So let's bring this over a
little further so that we have more room to transition because you can see
it doesn't just go yellow, orange quickly. It's actually going through the whole hue and
making that so cute. Okay, so that's one way
you can do keyframing. You can do key framing a
lot of different ways. It doesn't have to be color. You can stack Keyframe. So let's say you wanted
to do another Keyframe, well, you can easily do so. Just go back to the track. And then tap and create a new
action or a new Keyframe. So Keyframe with move, you can still add that
on top of an effect. Keyframe with filter, maybe you want to blur it
out toward the end. So let's say I added the blur. It creates the Keyframe
where the playback is. Right now it's at the beginning. Let's add one at the end, and then we'll go maybe 2% blur. So that's going to make it
blur as it goes to the end. I don't want to do
that, but that's just an example of
something that you can do. Now, in the next video,
I want to show you another thing you can do
within your flipbook so that you can add an additional
element because you're probably going to want to use
that feature at some point.
10. Add Tracks Inside Your Flipbook: Okay, let's say that you
wanted to add more to your illustration
specifically within one element because you can
add more tracks, and we will. But let's say you want to actually add it within this
one contained element. So you can go to Edit Flipbook, and maybe you want more
tracks within the flipbook. That's what this
hamburger icon is for. So you can add a
track right here. So you can see I can
go to frame one, and then I can draw
directly on frame one, and it's not going to
affect this one here. So, let's say we want
to add a shadow to the cat so that when it
is going up and down, we see the shadow getting
smaller and larger. So we could do that with, let's say we just
grab, like, a gray. So this is the high kick, which says that this bottom leg is going to be the
lowest it's going to go. So let's make that
a larger shadow, and we're gonna want
that to go underneath, so you can actually drag and
drop the track below it, and we can remove
this whole track, so track options delete. So now it's on the
bottom. Okay, so we have that first
shadow, right? Now, you could tap and drag
this to go the full way. However, we still have those
Keyframe that are moving it. So that means this shadow is gonna be moved
that whole time. Probably don't want that. We want it to stay
where it's at. So you can go frame by
frame and add this in. I'm just going to do it quickly so that it is more applicable. So it's going to be smaller when the cat is jumping
higher, smaller. It can move with the cat. And that's the reason I didn't
put this in ahead of time because I knew that we were going to do all
these adjustments, and I didn't want the shadow
to be impacted by that. So you can see it's
kind of, well, we want to look at the
onion skin so we can see where it's going to where it was and where
it's going to land. So it's going to get
larger and then larger. But then we're going to Oops. This one I could probably just duplicate because
it's about the same. This one I can duplicate. You can also just drag. You don't have to duplicate,
you can tap to drag, and then that's going to
take up those frames. But see how each
individual frame now, even though that
was its own frame, now those Keyframe that we added created all of these frames
created a different version. So that is something to consider when you
are adding all of this in because you
don't want if I was to drag this and
the cat's moving, the shadow will move, too. So look at the difference, how the shadows moving.
We don't want that. So I can duplicate at one time, but see what's happening
is the shadows moving. So I don't want to do that. I want to actually go in and we'll make
that a little larger because we're at
the lowest point of touchdown off the ground. And here we go. And I'm
just doing this sloppily. It doesn't have to be
doesn't have to be precious because it's just
it is frame by frame, but that way, you're getting
the impact that you want. Make it a little smaller
as we're jumping now, little smaller, smaller and the smallest Okay. And then we'll get larger and larger. Larger. Okay. So now let's look at what this looks like when
we play it back. So now it looks like an
actual shadow with the cat. It's very cute, and
it works really well. So that is an example of how you can use multiple
tracks on one Flipbook. And that's the reason
why I would do them separately is so that you have that control so it's not
moving all over the place. I know this is a wonky shadow, but you get the idea. I mean, the cat's moving a lot, so it's going to be wonky. I want to show you some
stuff that you can do to apply to your illustrations
if you are working directly, because it's not something
that you can do in Procreate. So I'm very excited you
can in Procreate Dreams. So in the next video, we are going to add a
little bit of shading just so you can see how you can apply some effects
with Blend Modes.
11. Clipping Masks, Groups, & Blend Modes: Alright, I'm so
excited about this one because you may be familiar with working in Procreate and
how you can add clipping masks like we did
before to one layer. This allows you to create multiple layers in
a flipbook or in a group, what have you, and apply a
clipping mask to all of it. So what I want to do with
you is add a new track. We're going to go to the
beginning of the playback, go to the plus symbol
and go to Flipbook. We're just going to create a new flipbook on
top of this one. It's going to show us
the previous flipbook, but on the bottom here, you
can see this is a new one. It doesn't have anything. So I want us to grab,
like, a yellow color. We're going to add some
highlights to this. I don't want you to
worry about drawing over any elements. We're just going to
color fill some of the like some high
highlighted areas toward the top of the cat, maybe the top right
to kind of show that there is some light coming
from that direction. The only thing I'm worrying
about as far as smoothing goes is I want smooth
connections off of the cat, but over top does not matter. That's going to be
cut off because it's going to be
a clipping mask. So I'll go ahead and just have a little
highlight maybe right here. Okay, so let's sample what
that looks like before we continue so you know what you're getting
yourself into. So I'll go back to I'll say Flipbook here, finish drawing. It's only that frame right now. If I tap and hold, and you'll see mask right here, tap mask and then
tap Clipping mask, see how it clips to that cat. Now, that's just one color
the yellow color we chose. We actually want this
to be an overlay, so it actually looks
like a true highlight. So if you tap and hold again, if you go to Blend mode, you'll be able to
change this to, let's say, I'll move this
over so we can see it better, tap and hold, Blend mode. You could say overlay. That's going to make
it just lighter. But let's say we do want
to pull that warmth. You can make this
blend mode anything that looks as you are intending. I mean, sometimes depending
on the color you use, it's going to pull
something very different. So, if I used color and then I change the opacity
of the blend mode, it'll be just like
a warmer glow. But maybe if we went to add that might be good because then it's pulling
the color from underneath. So it's just how you would
like this to be relayed. So I could go to ten or I
could go to linear burn. That's going to be a
little bit more intense, but really just select, like Hard Light works. It's really up to you, okay? So this is going to apply the entire flipbook as a clipping mask to the
previous flipbook. So as we continue, that same blend mode
will be applied, okay? So let's go back
to the Flipbook, edit Flipbook, and we'll
go to the next frame. And now we can see the onion skins from the previous frame. So we can just go
over that again. And we're going to see now that blend mode
applied right away. You can see that you
can still see part of that paw and ear. Now, this one kind of covers it. Almost like the opacity
is the only thing that lets that detail come through. So so if we go back
to the blend modes, I'm going to bring this larger. Back to the blend modes. That's something that
I want to look at as far as the darkness
of the detail. So color works well because
we grabbed the yellow, and when it's applied, the dark detail
still stays well, so I'm going to
choose that instead. So, again, this frame here, I can see the onion
skins from the Well, now you can't really see the onion skins from
the previous one, and that's just because of
the type of blend mode. So if it helps you, you can turn the blend
mode off for now. Oops. And just remember
that when you do adt, you want to be paying attention
to that, so it's color. I'm going to just go to
normal for right now so I can see everything I'm
doing edit Flipbook. And the opacity is down, so that's going to help
us visualize it better, but then we'll have just some
highlights here and there. Okay, next one. And this, again, does not
have to be pretty. It's just a quick. You can just do these circles
around and then color fill. So color fill, color
fill, color fill. Just make sure that
everywhere that you're adding color, is closed. For example, if I just come
this way and then color fill, it's going to fill everything because I didn't
close that loop. So the circle has to be closed, even if you can't
actually see it. Okay, so this is
basically just giving us a teensy more interest so that we have a little
teensy bit of depth, even on a simplified
illustration. So I'll go ahead and
apply this to everything, and then we'll look
at the final result. Okay. When that's done,
we'll go to finish drawing, and then we can apply
that Blend mode by going and tapping and holding Flipbook blend mode
and go to color. Then let's see how this looks. As a reminder, I only have this much of the
timeline actually showing. So when I tap this,
it's going to cut off. So you just want the
full timeline to show. Drag that back through. You can do that
with three fingers, just drag it. Let's see. Well, that looks good
to me. It's very fun. So at this point, now that we have
these two flip books, we can grab both of
them with multi select. So just go through to both and then tap and hold
and group them. So now, anything that you
do add on top of that, you have this group,
and at that point, you can add however many
more tracks that you want, and your cat is
contained in this group. Make sure you're out
of multi select. If you tap and
hold, then you can rename the group to Dancing Cat. Now, one thing I do want to
do once we have that group is duplicate it for the length of our
track because the cat, at this point, I
don't need it to be doing anything
else in this scene, so I can tap and hold the full group and
say duplicate after. So you could duplicate
it. It's going to create a new track underneath
or duplicate after makes it at the very end of that track or that
group on that track. So duplicate after. So now
it's the full length of the track in case you know, you have content
that goes off of the track. Let's
say it's longer. That's where this
comes in handy. You can tap that vertical
line, say fit to content. In this case, we're fine, but just know that that
tool is there for you. So now this cat will be
for the full duration, and whatever we add, maybe we add something
that isn't repeating will create a will create that
more dynamic effect. So I want to show you that next. Of course, this is
darling and could work really well as
a gift or something. But let's make
this a full scene. It's pretty simple and easy, and it's going to give you
that more dynamic completion.
12. Parallax Scene + Bonus Brush Download: Okay, we're going to
really bring this to life. This is going to be fun.
So we have our cat. It's amazing. We're
going to create a new we're going to
create a new drawing. We don't need the Flipbook now because this is going to be a flat drawing that we then
add some basic keyframes to, and you'll see how this is
really going to come to life in very few steps. So let's go ahead and tap the plus symbol.
We'll tap drawing. Something that you'll note it did open drawing, but
if I go back here, you're going to see that it
became it went above the cat. I actually want
that to come below. So you can drag that
down and below, make sure it's actually at the beginning of the playback,
not before or after. It does leave this
open track on top, so you can tap that and delete it just to keep things clean. We'll go ahead and
go to Edit Drawing. So once we're in here, we'll see our cat because that's already part of our movie. It looks like I have a
straight line right here. But that's part of the
cat, not part of this, so that's for another day. But we're going to just
grab like a neutral color, not the same color
as our shadow, but just grab like
a more desaturated, deeper tone, and
we're just going to draw the ground, okay? Now, we can't color fill this, even though it is
within this area. I'm not going to be
moving the canvas around, so I'm fine with just
closing it here. Notice there's a closing point, closing point so that when I drag and drop, it
just fills that area. Don't worry about this
part. Remember, this is all you're seeing
is right here. So there we have
the ground, okay? From here, we'll
create a background, and that is going to be on
a different drawing layer. I know this is such a
boring drawing layer, but it's just going
to be static, and the rest of them
are not static, so we'll say finish drawing, and then that's that. Okay? So the next one we'll do
will be below that one. So go ahead and
create a new drawing, so tap the plus symbol drawing. Now, remember below that one, so that means it needs to be. I'll say finish drawing, just so I can drag this
and put it below and then make sure it lines up
where it needs to, and then we'll get rid
of this empty track. Okay. At a drawing. So this is going to be we don't have frame
by frame on this one. We're going to create the frames in a different way this time. So what we'll do is create kind of like these
hills behind the cat. And I'll just bring that
same ground color up, so it's a little lighter and then maybe a little
more saturated. Um how about this? I think I want it to be
lighter 'cause you don't want the colors to be
too close together. It's gonna make the cat kind
of What am I trying to say? It's gonna make the cat compete too much with the background,
and we don't want that. But let's actually go darker. Let's go darker this
time, and we'll do, like, a starry sky with it. So let's see. Okay,
that looks great. So let's go ahead and make
these hills, and I'll start. We want these to
be a little larger because these are going
to actually be moving. So we want to come off
the canvas a little bit, and then we'll bring let's see. Do we want mountains or hills? You can do mountains or hills. I'm just going to do simple
mountains like this, I think, maybe just long. Okay. And then connect
those so that when I fill, it fills everything. And I think that this color doesn't work with
the cat too well, so I'll go ahead and
grab a different one, maybe something a little
more vibrant but darker. That one works a lot
better, I think. Yeah. So basically, like a dark dark dark purple
is what I've gone with. And I think that also I'll separate these
two with a different color. So create a new layer real quick just to create
this separation and then I'll just merge the two
together because I don't need them to be separate
after I do this. It's just a very simple
simple illustration. And I think I might
make this one just a little bit taller. And just make sure
that the drawing looks correct up until you
won't see it anymore. So, I probably will stop here, but it looks correct until then. The messiness afterwards
does not matter. Okay. So then I'll just
merge this down. Okay, so my hills are done. Those are on their own layer. They're going to move
separately from the sky. So I'll go ahead and
go to finish drawing. And then I want one more layer, and this one we need it
to reach the whole way. I'll tap this, tap and
hold, and drag to the end, and then I need one
more in the background. I'll go ahead and create
that new drawing, and then I want that
to go to the back, so I'll go to drawing, finished drawing,
I'll just drag this, make sure it's the right length, and then drag it underneath. Get rid of this empty one
and tap this one, edit. Drawing. Okay. Again,
no flipbook needed. We're going to be applying our animation
differently on this one. So for this one, you
can go ahead and set the canvas color so that
it's not white anymore, or you can just drag a color
in. It's totally up to you. The global settings are over
u over in your movies space, otherwise, drag and drop,
and that works for me. So that's in there.
I am going to create a different
layer, though, so that if I want to
edit this part of it, I can without that background. And I'm just going
to go to pure white, and you can double tap to get to pure white on
the color wheel. It makes it pretty easy. And I will tell you that I there's not a good stars
brush. There just isn't. You have the option
of going in and, you know, drawing
individual stars, and that's totally fine. There's nothing. I mean,
that's going to be fine. I've done that before
with Procreate Dreams, but I also created a brush that is so helpful for this exactly. And I've included it in the
class so you can download it. And this will also tell you
how you can import you know, a brush that's not
already in Procreate. So if you go to your brushes, and I'm going to go to, um my own library. You can put this
wherever you want, and then tap the plus symbol
and say Import from files. Find where you saved that brush. I have to search for it
because I do not know. Starry Sky. And then tap and open, and that's going to
import the brush for you. This is going to save you so much time, because look at that. You can change the size. I'm just going to
go the whole way. And then you know what
I think I'll do is go a little smaller and tap a few in and then a little
larger and tap a few in. And then I'm going
to bring that down, as well, just in case we end up circling that. You'll
see what I'm talking about. Okay, and then you can
go in with any brush. I'll just grab this since it's
here and do little flares, if you want to, like little star flares,
like a little smaller. Because they're cute. And you can do those in a few places. And then you'll
be able to add to this because we're going
to make this move. Now, I also think that the shadow doesn't
work with the ground. So let's just adjust our colors real quick, so
we're happy with them. So I'll go to the mountain
layer and go to Edit Drawing. And we don't have to go in and tweak with the colors too much. You can go to filters, hue saturation brightness, and I'm just going
to bring this. I just want it to be brighter. Bring the saturation down
so it's not overwhelming. And maybe go into this. Yeah, I like that
better. It just feels more of what
I'm wanting to do. Okay, and then finish drawing, and I'll go to the ground layer, and I'll just have that match
the shadow a little more. I could do a blend
mode with the shadow, but let's just see. So it filters, and then I'll
just bring this hue over. Yeah. Okay, and then finally, I think this guy is good then. I feel let's see. I'll
try a little bit lighter. So that layer maybe a
little more saturation. No, I kind of like the
depth that it was. So I'll keep this guy. Okay, now from here, we can go and animate. We don't have to do anything
else unless you wanted to. You could add clipping masks. You could add effects, all
the things you might want. I'm going to make these smaller, three fingers, drag down
and three fingers in, so I can see everything
really clearly. And now for the mountain layer, all we're going to do is drag it so that it just slowly
moves this direction. So you can do that with a
Keyframe by going to this edit, you know, it says Edit
drawing, but we're going to actually switch
over to Keyframe. Add the Keyframe, so
we're going to go move, and we'll say move and scale. And so that Keyframe will
start it where it's at, and then you can add another
Keyframe at the end here. And so the end Keyframe is
the one we'll want to move. So we're going to start here, and then by the end of the clip, we're going to want these
to move all the way here. Remember till it doesn't
look good anymore. That's the stopping point. Okay, so let's see
what that looks like. Okay, cute. I think it's moving
a little too much, so I'll go back to this Keyframe and just come over
a little more, so it doesn't actually
have to do much. I just want it to be subtle. Okay, that one works. And then we want
the sky to rotate. And so I'm going to
have this sky rotate. Let's try it first,
a little slower, and then we'll try it
the opposite direction. I think slower will
be cool because it'll have a parallax effect. So let's go ahead and go to
this here and we'll go to perform instead of Keyframe
just because we can. So I'll go to perform and then we can't see everything because the sky
it's taking the whole canvas, so it's going to
be pretty large. So I actually it's hard to see being so small with
the canvas size, but that's okay,
because all we're doing is I'm going
to take the corner and just rotate it super
like, not very much. And you'll see that the
track will be going. So not much is needed. That was it. So let me show you
what that looks like when it's not so teensy. Okay, so there we go. It's a little too fast, so I'm going to go
ahead and undo. You can also do this
with key framing. I just want you to
have the tools at your disposal so that you feel excited about being
able to use each one. Okay, so going slow. Let's see. Yeah, so see what I
mean, that Parallax. Now we can try the
opposite way just to see what it ends
up looking like. I'll do it how.
Yo, keep it here. Okay, so rotate this direction. Oh, that could be kind of cool. I think I like that. Let's see. Wait, smaller. It feels
like it has more movement, but it does make me want to
make the mountains teensy, but slower, if you will. But basically, that
means move them less. So I'll go to that
Keyframe and come over. Whoops. Not that. And come over just a little bit. Oh, I'm doing perform a way. Keyframe. Bring that over back toward where
it started more, so it's more subtle.
Okay, there we go. That's really all that we need to do to have this
dynamic illustration, it looks like a disco cat. Oh, my gosh. Okay,
that's so fun. And then if you wanted one
final touch would be like, adding, like, sparkles on. So let's look at Let's
add one more just for funzies plus simple Flipbook. That's gonna put it on
top. That's all we want. And then we can add
little sparkles. So basically these twinkles, but maybe even larger, let's just see what that looks like and see if we like it. How can we not? How can
you not love a sparkle? But I think we want
to go grab a yellow. And this could be any brush. This actually is not the ideal brush that I'm using for this, but because it's, like,
a vintage outline, which I don't necessarily want, but I'm I'm gonna do it 'cause
it's just easy right now. Okay, so there's some in the first frame and
then the second one. Then I'll go to the next one, and I'll just do one kind
of above where it was, so it doesn't look like
they just disappeared forever because there were two, and then maybe one here, and then I'll introduce
one over here. Let's see, from
one to the other. Yeah, and then you can
just sparkle them through, they don't have to be
the whole time either. You could just have
one or two and then jump over to frame seven
and have one over here. Maybe one right here
that's really small. Let's just see what
that looks like. Okay, so that's super, super fast because
the frames I put them in are really close together. So what I want to do is
move this, move this. Maybe just two, and
then we'll skip. And actually, let's
just do something random right there so it
doesn't Let's do this one. Okay, so we'll skip to, like, eight, the eighth frame, and then we'll do maybe three
and then move this one. Oops. Move this one
toward the end, and then this one will
be like two frames, and then this one
could be three. Let's see. Okay, where
is it going pretty fast? That one? We could go. Yeah, that works. Okay, so from there, then they could repeat
and we could flip them or rearrange them. So we can go back
to the flipbook, duplicate after, and then open that flipbook and
then rearrange these. So that's where we can pull the multi grab them all
and then flip frames. And that's just
going to make it so that they change the order. But I would say it's too ure, so I would just switch like two of these around
so that it doesn't feel so repetitive or
so mewyRather finish, and then we'll do that one
more time, duplicate after. Yeah, that's cute. Okay, so
let's play the whole thing. Yeah, the sparkles are fun. Okay, so there we go.
Dancing Disco Cat. And then it looks
like the light source is the fun Starburst. I know that this
is really flashy. One of the things real
quick that you could do is go here and convert
Flipbook to tracks, open that group, and then
make these keyframes. For each of these drawings, have the opacity like barely at the beginning
and barely at the end. So basically, Keyframe, add
it here, filter opacity. We're going to start at
like 19%, maybe 10%. And then right away, basically, we're going
to add another Keyframe. I'm going to extend this with three fingers, add
another Keyframe. Filter and the opacity
will be all the way up. And then I'm actually going
to move that Keyframe so that it is a little
bit further left. Oh, it won't let me. So we need this frame
to be a little longer. So we can just hold
down and then drag. Okay, so then that's
going to be full opacity. We'll keep that
going in the middle, and then we can duplicate this one or copy rather and
then paste it here. See, now we have that where it's going to go
from light to dark. So see, it's like a twinkle now, but I actually want
two of these so that the opacity gets brighter
and stays brighter longer. There we go. So I
can delete this one. So basically, I
have low opacity, full full and low. So the sparkle kind of happens right in
the very beginning. But then stays bright longer. Let's see. Yeah. Okay, so that's
what we want to do, and then we could do
that to all of these. And now we have our
twinkly disco cat, and the light source does look like it's
coming from there. It's a very brief
transition that opacity, but it does make a little bit of a difference because it makes
it feel a little smoother. So now you have
your little kitty and you could add an
astronaut helmet to it, some blush, you name it. It's ready to party.
It's ready to have a good time. So yeah.
13. Next Steps + Bonus Cheat Sheet: Alright. You should
have a project by now, and you're probably on your way to make more unless your brain is feeling like it needs a little break because
I totally get it. This is a lot to cover. But once you have that in place, you're going to wake up
tomorrow and you're going to feel like you can
blast through this stuff. It's like, learn it, get muscle memory in there, take a little break, and
then it comes with ease, and I cannot wait to see what you are going
to create with this, don't forget I have a
gigantic bonus for you guys. I've linked it for you so
that you can snag that. It is going to help you
so much when you need that quick reference
or quick reminder because there's so
much to go over. It's easy to get
something skipped over. Options are limitless. You can create animations
on top of videos. You can bring an
old illustration in and animate it,
bring it to life. You can play with color. You can play with elements. There's just so
much fun to be had, and I can't wait to see what you have done and continue to do. So please share. Share your work.
I want to see it. I know other people
want to see it. If you share on social, be sure to tag me at
the pigeon letters. I am dreaming. I am dreaming of what
you will dream up. And I will see you
on the Internet.