Transcripts
1. Intro to Product Photography On White: Hi! This is Adam Bader,
In this course, we will learn how to shoot your products for Amazon, eBay, or your online store, and get your product images with 100% WHITE background without even using Photoshop or any editing software! So, Who Can Benefit From This Course? If you run your own eCommerce website selling your products online, or you sell them on Amazon & eBay & other online market places, & Would like to make a quick & professional images of your products with a pure white background and you don't want to use any image editing softwares for that. This course for you, if you’re a beginner photographer and you would like to enhance your product photography experience and master White Background Product Photography. This course also for you if you run online digital marketing and social media platforms and would like to have great product images for your marketing campaigns. And this course for you also if you do print design, such as catalogue or product packaging and you need your product images with a clear background that is so easy to isolate from the main object in the image whenever needed. So, in general, this course will be indeed a great use for you, and it will definitely expand your capabilities and speed up your production time! and “Time is money!”
Isn’t it?
2. Equipment: In this lesson, we’ll talk about the Required Equipment for this course First comes first, you need your Camera & Lens You need a DSLR Camera with the available zoom lens, Canon, Nikon, FujiFilm, Sony.. any good brand But personally I use canon DSLR cameras If you have yours already, that’s great, and if you want to buy one Entry Level new DSLR Cameras price range falls between
$350 - $800 different brands and different camera specifications Most of them comes with a kit Lens, 18-55mm or sometimes 18-135mm last one is even better, it gives you a longer zooming range. So, Why DSLR Camera Not A Compact Camera? DSLR cameras are recommended cause you’ll need full manual control for your camera, such as shutter speed, aperture, ISO, and a custom White Balance, which probably, Compact cameras are limited with. Moreover, with DSLR cameras, you have a wide variety of lenses you can add later to your gear, to be used in any other photography projects in the future Unlike the compact cameras, the lens is fixed. The 2nd thing you need is a Camera Tripod you’ll need it cause you’ll shoot the products in a slow shutter speed mostly, and you need the camera to be steady while you shoot to maintain image sharpness also the tripod will help you to get constancy in each next product image. Good enough tripods are affordable, for about $15-30 you can get a decent tripod with adjustable height, as well as horizontal leveling. Next, you will need Lighting & Diffusers There are 2 main types of photography lighting; Continuous lighting & Flash.
both are suitable for still product photography but if you conceder their cost, Continues lighting are cheaper and they last with you even for longer time and you still getting a great image results for your product So, we’ll be using Continuous light in this course projects You’ll need at least 3 Light Heads, 3 Diffusing Softboxes, and their light stands You can purchase them online if you like, they are really affordable nowadays and they come even as a Complet Kit! You can buy an Entry-level continuous lighting kit of 3 Headlights and their Softboxes and Stands, between $100 - $250 different brands and different manufacturers and different product specifications I’d recommend the ones with 4 or 5 bulbs on each head, for a better lighting quality The last thing you will need is the Tabletop Setup A blank white Cardstock sheet (A1 or A2 Size),
Larger is better of course for shooting larger items. Also, you need a small table, whatever available there White color table is recommended
3. Setup Plan: Let’s have a top view of our setup plan, Our tabletop in the middle, and the Cardstock paper settled on it This blue square indicates our product Now the lights; One light softbox will be the background And two light softboxes on the sides Let’s move one of them slightly to front and further from the tabletop The camera is mounted & well-leveled on the tripod and ready Let me show you how my setup for this course looks like.. This is our back softbox as a background and here are the other two on both sides This is our tabletop with the Cardstock paper And at the front, the camera mounted on the tripod Distance between the camera and your
product depends on the product size and your lens focal length For most common zoom lenses, let’s put the
camera about 40cm away from the product, and distance between the back Softbox and
the object about 25cm. Make sure the back softbox is horizontally straight and slightly leveled lower than the tabletop height,
and there is no gab between them. And the camera height will be at the same
level of your product.
4. Camera Exposure Settings: In a moment we will start shooting, but before that, we need to go through the 4 elements of manual exposure settings on the camera which you can adjust according to your needs If you’re a beginner photographer, probably you know how to handle your camera's manual exposure settings, But let’s assume that you’re totally new for manual shooting & let’s get a quick explanation of the 4 elements The first Element is Shutter Speed The camera shutter is a mechanism right front of the image sensor its job is controlling how much of exposure will get through to the sensor On a standby status. the shutter door is already closed and once you hit your camera’s button; here happens the Magic! The shutter door open up and close quickly allowing the image scene to go through to be absorbed by the sensor this short moment between opening-to-closing is The Shutter Speed. The SLOW Shutter Speed allows more of the scene’s light to be absorbed, and the FASTER Shutter Speed allows less light goes through. If you are shooting an object indoor with average light you’ll need your shutter to be somehow slow to let the sensor have its enough light for the scene. But, if your object is in a very bright light around the camera shutter need to be faster cause if you set it to be slow; too much of the light will go through to sensor and the result will be an over-exposed image. Shutter speed is measured by the time between opening and closing which is part of the second mostly For example, if you say Shutter Speed is 20 or (1/20) it means it’s faster 20 times than ONE second And if the Shutter speed is 30 it means it’s 30 times faster than ONE second, and so on. For our kind of light setup, we’ll probably set the shutter speed between 20 to 50 We’ll test different shutter speeds and we'll see the results & difference. The 2nd element is Aperture Now we know the shutter speed plays a big part of how much we need of exposure on the sensor but also, there is another factor here, it’s the opening size of your lens, it's called Aperture. It’s like a door for a dark room, the wider you open the door.
the more you allow the light to go in. Aperture unit is called F-stop for instance f2.8 is a wide lens opening will allow a lot of the light to go through to the camera's shutter and then to the sensor And f5.6 is slightly smaller opening it will allow less light to go through. The brighter light environment; the smaller number of aperture you'll need. and the opposite is true. Here is a generic Illustration shows aperture values and how the the lens opening looks like.. Aperture plays a major part also for the (Depth Of Field) a very wide aperture. will give the far parts of the product some fuzziness but we need our product sharp from all edges and all corners. right? For that; we’ll shoot mostly with f6.3 and more. The 3rd element is ISO Away from the Sutter & Aperture mechanism. we have here another rule player. which is the camera's sensor itself how much is it sensitive to the light? It’s called ISO. ISO-100 is the standard value. it’s less sensitive than ISO-200 to the light and ISO-400 is even more and more sensitive, and so on. Usually. high ISO values can be used for poor light environment Though. it’s not recommended to use high ISO numbers. as the higher ISO will show some image dot-grains We need our product images at highest quality, clear and crisp! So. we’ll shoot only with ISO-100 or ISO-200 by max and If the image will look dark, we’ll make it up by reducing the Shutter Speed then, not ISO. The 4th element is White Balance It’s as it sounds, How much is the white of an image looks white? Is it cool white? Is it warm white? Or is it neutral? Probably you can determine that with your eye once you look at a picture We need our product images with a background that is pure and neutral white. ZERO Colors. Look at the samples here. which one looks accurate for your eye?.. Usually. what effects on the white balance of a captured image. is the light temperature which measured with (Kelvin) that’s why we choose light bulbs with a specific color temperature. between 5500K to 6200K this is the range of a natural daylight color temperature and flash light as well. And now you have the right light. it’s very important before start real shooting to do White Color Balancing of your current light setup I will show you how to calibrate your DSLR camera’s White Balance manually
5. Custom White Balance: Alright, Let’s turn on camera and set it to manual mode Shooting then find White Balance button or menu function, which can be different from a camera brand
to another Ok, now press it, and then choose (Custom) Set your shutter speed and aperture to the
proper exposure As for my light setup here, I’ll set my Shutter speed to (30) and Aperture to (f6.3) and ISO will be always 100 Do a test shot.. check exposure results if it’s ok, and don’t
worry about the color tones, we’ll take care of that shortly. Now, let’s remove the object for a moment from
the tabletop, and hold the camera in your hand,
and aim down at the white tabletop surface which is the Cardstock here take a shot.. Now go the camera’s Menu settings, locate (Custom White Balance) and select it, it will ask you to use the last picture you’ve captured which is the picture of our white tabletop to be used as a reference for customizing Select the image and press OK. Perfect, now we are done WB customizing! Just to make sure your white is truly white in
the next pictures, take a shot of your tabletop again and see how the white color temperature looks like. An accurate white balance will also bring the Real colors of our product from now on.
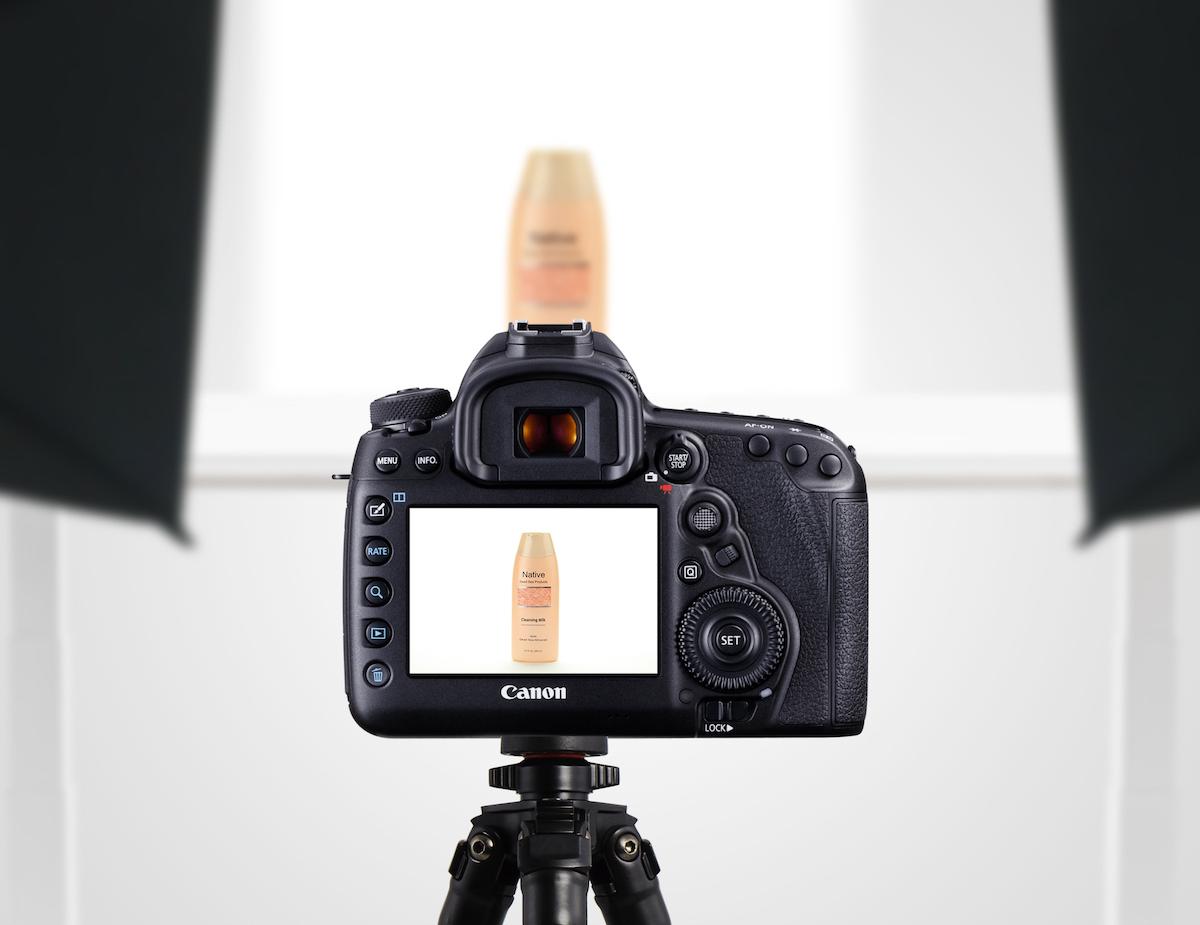
6. Let's Start Shooting: Ok, Now let’s Shoot a couple of
different products with different shapes First, Make sure your camera is well-leveled horizontally so your product will look straight in the picture Place your product on the tabletop and adjust the height of the camera to be at
the same level of the product I would recommend to set lens focus to manual and your focus will be at the product face but you can use Auto-focus if it’s difficult for you just make sure your camera is focusing on
the right area of the object Aim correctly at your product, and
keep a little room of white around the object and SHOOT! Perfect! Clear image and pure white background! I like that If you feel your image a little dark or over exposed, Adjust the shutter speed if needed make the shutter slightly slower if the image looks dark and make it faster if the image is over exposed. Let’s take another product sample I’ll shoot this watch in the box, I will do a regular shot first It looks flat kind of let’s add a little life to it I will rotate the product slightly
to show a little of the box side it will give a better feeling of the product people will see some of its dimensions That's nice! As you see here at the far edge of the box it’s blurred a little bit this is result of what I’ve explained earlier; the relation of aperture value & depth of field If you’d like the far edges to be sharp then you need to reduce the lens opening; by choosing a higher F-stop numbers.
7. Shooting Complicated Products: Sometimes we need to shoot glossy on highly reflective products, the light may cause harsh reflections, covering some details on the product, like logo or some text. For example, let's take this shot as it is. See this one here. How part of the product text got lost with light reflection. To avoid that, we need to change the light angle. I would move the light to the side or the product. And I will take this shot. Perfect. Now the light glowed isn't cover the text anymore.
00:01:21.160 --> 00:01:21.720
in some other cases also, we need to shoot white color products on the white background like this product. For example, if the light comes from the front, it will bright in the products face, which would make product. It just blends with the background. To avoid that, we will keep the lights for on the sides, not on the face. Here the product looks clear and separated from the background. Now let's combine to products in the same shot. I will use this product with its packaging box. The main item comes to the front on the box will go to the back. We will still shoot with aperture F 6.3 to lay the box in the back, get a little blur and the focus will be on the main product. But if you need both to be sharp now, you know what you need to do, right? Increase the aperture value. That's right.
8. Product Reflection Effect: If desired, adding a natural reflection of
the product front of it like a mirror give a nice touch to the product image et me show you how to do it If your table surface is pure white, You can
shoot directly on it and probably you’ll have some faded
reflection of the product on it but if you need a sharper and more visible reflection of the product, we’ll use this.. White color Plexiglass Acrylic board it’s a kind of plastic material you can find it at hardware stores,
or you can purchase it online they come in different sizes and thickness I use usually 5mm thickness. Let’s shoot this nice cosmetic product make sure the acrylic board surface is
clean from fingerprints first And place the product on it and Shoot.. Excellent!
9. Custom Large Background: If your product size is larger than the background
which is the softbox, then, you need a larger softbox or, you can customize a larger diffuser for
the backlight for that, we need Suitable diffusing material here are some options: Backlit Film paper, you can buy it from
printing supplies shop or get online, they come in rolls or sheets And if you need more affordable material, then this next option is good for you; Photography light-diffuser fabric Also comes in different sizes, and can be bought online they are affordable and useful, and easy to store. The 3rd option is White Acrylic Plexiglass (0.5mm) thickness or less which I used in the previous lesson It’s commonly used for signboards and you can buy it from hardware stores or online. Now I will show you how to place a diffuser
as a product background I will use a backlit film sheet I will simply hold it with clamps on a Boom-Arm which you can get it also with your lighting kit or if you don’t have it, you can hang it with
strings to the ceiling. The light soft box will go behind the diffuser but with a distance between them, about (40cm) And for a better light, I will remove the
original soft box diffuser cause we have a diffuser already. I will turn it on to show you how it looks like.. Great! Is in’t it?
10. Final Thought: Finally, Now we’ve covered all topics of this class about
shooting products on pure white background you know already what equipments you need and how to plan your setup and you know how handle your DSLR
camera manually to get best exposure and get clear crisp images of your products and you’ve learned how to manage light
angles for challenging projects Congrats! I bet you’re so excited to start shooting
your own products by now. If you have any questions related to this class, please feel free to post it down at discussions, I’ll be more than glad to answer you and
help you to improve your skills. And Please, if you’ve enjoyed this class and
found it useful, please share it. Thank You. Be creative.
& Snap Happy! :)
 Adam Bader, High-end Commercial Photographer