Transcripts
1. Intro: Bad audio will kill
your video seriously. People say that audio
is 50% of your video, but I would argue that
sometimes it's even more. A low quality video is watchable if you have
exceptional audio on it. But a great looking videos, with bad unintelligible
audio will just get skipped. I want to help you
avoid bad audio no matter what gear you possess
or what your budget is. Hi, my name is Josh and I'm a videographer and
music producer based in Belgrade, Serbia. I have been making music and working with sound
for over 10 years. For the past three years, I've been shooting and editing Skillshare classes by
my sister [inaudible]. We have made over 17 classes, eight of which were
awarded the staff pick. I was fortunate to
use my background in audio production to ensure that each class we
made had clear, understandable audio,
even though we didn't possess the best equipment
when we started up. From hiding microphones
in plain sight to removing noise from the fan of the cheap lights we were using, I've had my fair share of
difficult audio situations. In this class, I want
to help you improve your audio recordings using the equipment you already have, even if all you have is a phone. We'll go through
some practical tips on how to reduce
noise in your room. I'll explain to
you how to record using different types
of microphones, and I want to get
you up and running, even if you're a
complete beginner, so we'll go through
all the steps you need to get a crystal-clear
recording. I'll also show you my step-by-step process
to edit your raw audio. We'll learn about
noise reduction, EQ, and compression, and how to give our recordings the
professional shine. We'll go through a couple of different setups at different
price points starting from $0 because I want to
show you that you can really improve your audio
in any situation you're in. I'm very excited to
teach you all this, so let's get started.
2. Project: For the project for this class, I want you to sit in front of a camera and tell me what
your favorite movies are. What would be great is
that you go ahead and record this before watching
the rest of the class. This will allow you to
compare your results before and after you apply the techniques we
discussed in this class. For my base recording, I'll just use my
camera microphone in a regular room in my flat, since that is what many
beginners would do. Hi, my name is Kourosh, and my favorite movies are
Blade Runner and Arrival. Once you're done with the class, you can record your
sound bite again, this time using the recording
techniques we discussed. Afterwards, you can use any
program to edit your audio. I will be using Premier
Pro from my examples, but these techniques are universal and the
effects I will use are available in most modern audio and video
editing programs. When you are done, put your recordings
in the class project. I would love to hear
about your improvements. When you're ready, just click on the "Create Project" button and share with us your results. I can't wait to see
what you come up with.
3. How to Get a Clean Recording: First things first, the
Number 1 piece of advice I have for you is don't use your built-in camera microphone. In 90% of situations, it will sound terrible
because first of all, most built-in camera
microphones are of bad quality. They sound thin, they pickup handling noise from your camera or the
out-of-focus motors, even if your camera
microphone is good. The second reason why you shouldn't use it is
that when you're recording a lot of the time the camera
is far away from you. The thing about sound is that
it drops in level a lot. When you double the distance between you and the microphone, the sound level
drops four times, and this can add up quickly. When your microphone
is far away from you, it will record a lot less of your voice and a lot more noise. That's what all bad
audio recordings have in common, noise. When I went to my audio
engineering classes, we defined noise is
any unwanted sound. When you're recording an
interview or a talking head, all you want to hear is
your subject's voice. That's our main objective, that the vocal we're
recording is as loud as possible and
everything else, the unwanted noise is
as quiet as possible. Now, if your camera doesn't
have a microphone input, what do you use? This is something we'll
talk about later in the class because you will
need an external recorder, but that recorder is probably
already in your pocket. The first thing I wanted
to talk to you about is the most common sources
of noise you can find, and how to properly set up your recording equipment to
get the best recordings. [NOISE] When you
walk into a room where you're going to record, I just want you to
stop and listen. Chances are your room isn't
going to be absolutely quiet. You could hear outside
traffic, a noisy fridge, neighbors doing some construction
or playing loud music. These are all things that
could be picked up by your microphone and could distract your viewer
from your voice. You should try to mitigate this noise right at the source. If you live in an area
with a lot of traffic, completely close your windows
to make the room quieter. If you have a neighbor
playing loud music, knock on their door and
ask them to turn it down for a couple of hours
because you're filming. Noisy appliances should
be switched off if possible or doors closed around them to
make them quieter. If you don't have doors and the appliance needs to stay on, you could hang some
heavy blankets around it to block the sound. This all might seem a bit
excessive, but trust me, you don't want to be running
heavy noise reduction, and degrading your
recording and post, if the solution was as simple as closing a door or a window. Try to fix it at the source. This will help you a
lot in the long run. [NOISE] The next
thing I want to talk about is the sound
your room makes. You've probably noticed that different spaces
sound different. If you go to an empty
large hall and clap, [NOISE] you will notice
the sound in there will linger for some time before
it becomes quiet again. This is called reverberation. It's the persistence
of sound in space. Now, reverberation is
a natural occurrence, and it happens when the
sound bounces around and gets reflected by the
surfaces in the room. Flat, hard surfaces like walls
or wood or glass reflect and bounce back a lot
of the sound coming at them while things
like furniture, blankets, and clothes
absorb sound. When you are in a
specific space, look around and notice what items are on the
walls and the floors. A bare room with parallel walls will
usually sound terrible. The sound in it will
linger for a longer time. But another thing you should notice is that the
room also rings. I'm here, this is the
smallest room in my flat, and as you can see, it's mostly bare walls
and it sounds terrible. Listen to this. [NOISE] Ringing is what happens when you have
two hard surfaces that are perfectly parallel. The sound will bounce from
one wall to the other wall, and it will keep doing this. But a certain frequency
will get amplified because it is exactly
the length of a wall, resulting in
resonances or ringing. The problem is, since
the human voice occupies a wide space in
the frequency spectrum, your voice can trigger
those frequencies, and your recording
suddenly sounds muddy. How do you fix this though? How do you cut down on the
reverb in your recording? How do you fix room resonances? When you're recording, try to be around the
center of the room. If you're too close to a wall, this can make these
effects exaggerated. The single biggest thing
you can do to mitigate your room reverb is to get
your microphone closer to you. When your microphone is close, it picks up a lot more of the direct sound
from your mouth, which is louder than the
reflected sound from the room. In turn, when your
voice is louder, you can turn down the
volume of your microphone, and you can get a
cleaner recording because the room noise
will become quieter. You can also try to reduce the reverberation of your room. The easiest way to
make a room sound more dead is to strategically
fill it up with stuff. Bare parallel walls are the
enemy of a pleasant sound, especially in a smaller room. For example,
bookshelves are great for sound because their
surface is uneven. Even though most of it is hard, it will scatter
the sound around, making it more pleasant. Couches, beds, and
blankets all absorb sound. One idea is to put
some moving blankets, some stands in front
of you to absorb your voice before
it hits the walls. Putting a thick carpet on
your floor can also help. If you are savvy, you could fashion yourself
sound panels from Rockwell, which is the best
professional solution, because these panels are thick, and absorb a lot more
of lower frequencies, and do it more efficiently
than household items. But in a pinch, hanging a thick blanket
in front of you is a whole lot better
than having nothing. Your first instinct
might be to put the blanket or a sound
panel directly on the wall, but you will get a much better
result if it has a gap. Why? Because the sound
goes through the blanket, bounces from the wall, and then gets absorbed again, if you have a gap, making
it much more efficient.
4. Recording Equipment: Now you've listened
to your room, heard potential problems
and solved them. But how do you
record your audio? First, you need a
microphone and you need something to record your
microphone with, a recorder. I'll talk about
different types of microphones later in the class, but you need to understand
that you can plug any microphone
into any recorder. We could break down microphones into two common categories, microphones with the
XLR connector and microphones with the
3.5 millimeter jack. The XLR connector is a standard
in the audio industry, and it's most commonly found in professional microphones from studio microphones and
handheld microphones used in live shows, to shotgun microphones
used in the film industry. Most of our consumer
grade electronics like cameras, phones, laptops, and PCs, have a microphone input, but it's not an XLR one. If you plan on
using a microphone that has an XLR connector, you're going to need
something to plug it in. This can either be a
portable recorder with an XLR input or an external audio interface
for your computer. A portable recorder
is great because it's battery operated and you
can take it anywhere, but these can get expensive. A decent USB audio
interface can cost around a $100 and it can be
really versatile. But then you also
need a computer to act as the recorder
for your sound. This can be any Mac or PC. Whatever you do, avoid
those dirt cheap XLR to USB cables or XLR to
3.5 millimeter cables. These work really poorly
or don't work at all, and I wouldn't waste your money. Now that some XLR
microphones require power, this is called phantom power, and it's most commonly needed
by condenser microphones. If you own or plan on owning
a condenser microphone, check if it requires
phantom power and when shopping for an
interface or a recorder, make sure that it
has phantom power. This is standard on
many interfaces, but the really cheap ones can
skip out on this feature. Also, if you plug
in your microphone in your interface and
you hear no sound, check if your phantom
power is turned on. This is usually a
switch or a button labeled 48V for 48 volts, which is the voltage the
phantom power provides. Now, the 3.5 millimeter jack is something that you are probably
a lot more familiar with. Almost every computer has a
3.5 millimeter audio jack. You plug your
headphones into it. On older computers, cameras
and portable recorders, you can see a dedicated 3.5
millimeter microphone input, while modern phones and
laptops have a combined one. What's the difference? Regular 3.5 millimeter
jacks have three sections, a tip, ring, and the sleeve. Combined headphone jacks
have an additional ring, so it has four sections, a tip, a ring, another ring,
and the sleeve. The added sleeve is what
carries the microphone signal. The problem with these is
they don't mix and match. So for example, when a microphone has
a standard TRS jack, it carries the microphone signal on both the tip and the ring. If you plug that
into your phone, you would get no sound. Conversely, if your
microphone is meant just for phones and ends
in the TRRS jack, if you plug it into
your computer or a portable recorder with
a 3.5 millimeter input, you would get no sound. Fortunately, a lot of
microphones with TRRS jacks have a dedicated
switch to switch from regular to smartphone mode. If they have a TRS jack, they come with an adapter that allows you to convert
between the two standards, or you could buy it separately. The 3.5 millimeter jack is great and microphones using it are
a lot more budget friendly, though the connector
itself isn't as strong and as secure as XLR. You can find the 3.5 millimeter input in
a lot of devices, but be prepared for it
to sound worse on some. PC motherboards, for example, can introduce more noise
in your recording when compared to something
like a Zoom H1, which is a dedicated recorder
with a 3.5 millimeter jack. They're also microphone
recorder combos. Your phone is an example of one. It has a built-in microphone, and you can also input the microphone signal into
it using the headphone jack. There are also various
portable recorders with built-in microphones on the market for
different purposes. These are very compelling
for beginners. For example, there
are field recorders which have two microphones
for stereo recording, like the Zoom H1, Zoom
H4n or the Tascam DR-40. These are more suited for sound effects recording
than dialogue, but they will work
for dialogue too. There are also
lavalier microphones attached to a recorder like the Zoom F2 or
the Tascam DR-10L. In my opinion, this is a great option for
beginners because it takes the confusion and the
anxiety of mismatching your microphone to your
recorder out of the equation. So you have a recorder, your microphone is connected and now we can get to recording. [NOISE] The first
thing we want to decide when setting
up our recorder is if we're going to record in compressed or in
uncompressed format. Compressed formats like MP3 are great if you're low on space or you plan to record for hours because they keep
your file sizes low. If you're recording in MP3, always use the highest bit rate. What is bit rate? Its a quality setting, and it represents the
maximum amount of data per second that
can be captured. We want the maximum amount
of data we can get. For MP3, that setting is
320 kilobytes per second. Recording uncompressed
audio is the best because you will retain
a lot more data, which is useful when
editing the audio later on. This means recording
in the WAV format. Here you have two settings, bit depth and sample rate. What is the sample rate? It's how many times in a
second your recorder takes measurements of the
incoming signal to convert it into
a digital format. This determines the
highest possible frequency your recorder can record. I recommend using a sample
rate of 40,000 hertz. This is the standard
in the video world. There's really no need
to go higher than that, especially when you're
recording just vocals. The bit depth determines the overall dynamic
range of your recording, which determines how
quiet or how loud of a sound can actually be
recorded into the digital file. On most recorders, you can pick between 16-bit and 24-bit. I would pick 24 bit
if it's available. What this means, is
you can increase the volume more in
post-production if your recording was a little quiet and you will get a result that has fewer artifacts than if you were recording in 16 bit. [NOISE]. We have picked our
recording format, but now we need to set our gain. What is gain? It's
the input volume of your microphone and this
is measured in decibels. Decibels are a measurement
of loudness and one decibel is around the smallest change in sound level we
humans can perceive. What can be confusing about decibels is that they
are a relative unit, meaning there is not one
universal decibel in audio. If you measure the loudness of sounds like in a
concert or speakers, these are decibels of
sound pressure level. These go from zero
decibels and up. If you're just recording vocals, you don't need to
worry about them. The decibels we need to look after are in the
digital audio realm. These are dBFS or
decibels of full-scale. This is a scale that goes
from minus infinity, which is absolute
silence to zero. This zero is very
important because if your sound ever crosses
the zero while recording, you could lose information, Here sound will distort, which is also known as clipping. The idea of setting
a proper gain is to ensure your sound
doesn't distort or clip. Easy, you would say, I can just turn down my gain
a lot and I will never clip. The problem there
again is noise. All audio recorders have a certain amount of noise
they always produce. Now, this is quite low
in terms of level, but what happens when you turn your gain too low is that you'll need to turn up the volume of your sound in post-production. All the noise from the recorder will get turned up as well, increasing the overall
level of noise. How do you set up a proper gain? You do a sound test. Before recording, set
up your microphone and ask your subject to talk,
like we're recording. You should turn up your
gain up or down until the highest peaks of the audio
hit around -12 decibels. If you don't have exact numbers, like on a mobile app, this is usually the color green. Now, if you're
recording by yourself, to make sure you won't clip, try being a bit louder than
normal and look at the meter. It should be around
-6 or -3 decibels. If it clips and goes over zero, turn your gain down. Congratulations, you have
set up a proper gain. Here's a practical
demonstration of me setting up my gain
on the Zoom H1. Here's a practical
demonstration on how I set my gain on the Zoom
H1 hand recorder. As you can see, we're
currently pretty low in level. My voice is hitting just
about -24 decibels, and we want that to be higher. At the side, these
are my gain controls. Because I'm too quiet, I'll just start
turning up my gain. We're turning up the gain, maybe around 50, 58. As you can see now,
when I'm talking, my voice is hitting around -12, which is the proper gain. If I go over it,
see what happens. So we'll just start raising
the level even more. Now I'm at around 80 and you
see if I'm talking quietly, it doesn't still
go over the zero. But the moment I
start being louder, you can see it hitting
zero and distorting. This is what we want to avoid. I'll just turn down my
gain and talk again. As you can see, we're
hitting the -12. Now, if I go and be louder, hi, my name is Uros, and my favorite movies are
Blade Runner and The Rival, I still didn't hit the zero. So this is my gain set
and I'm ready to record. Now, all of this might
look complicated, especially when doing it for the first time and you could be tempted to just let your device automatically
set the gain. But let me show you
why it's a bad idea. This is my Zoom H1 recorder, and now I'm going to
set it to auto level. [NOISE] There's the button and let's turn on the auto level. [NOISE] You might have noticed that everything got
really loud all of a sudden. If I start raising
my voice and talking normally, it gets quieter. If I get even louder, it gets even quieter. But listen to what happens
the minute I stop talking. The noise gets turned up. This is why it's a
really bad idea to use auto gain because you can't
fix this in post-production. It's really hard. All of these gains
settings apply to traditional 16 or
24 bit recorders. But lately, there have been
a couple of recorders that hit the market that
have 32-bit recording. Thirty two-bit audio does not have a limit
at zero decibels, which means that these devices effectively don't
need to set gain. If you own one of these devices, you just press record
and that's it.
5. Lavalier Microphones: Now let's talk about lavalier microphones
or lapel microphones, which is their other name. These are really common and
useful for several reasons. They are affordable. You can get a decent lavalier
mic for a good price. The other thing is, they are attached
to your subject. So you don't have to worry
about stands or you don't need someone to move your microphone if your subject
moves in the frame. The other thing is,
they are small. So if they are
visible in your shot, it's not a big deal and
you can get away with it. I use a lavalier
microphone most of the time for my
classes and projects. There are also some cons
involved with them. Most lavaliers are
omnidirectional. This means that no matter
how you orient it, it will pick up the same sound. This little lavalier
microphone is omnidirectional, and what this means
is that I can move it around and the sound
will stay the same. So I can orient it
anyway that I want and it will still pick
up the sound the same. This dynamic microphone
is directional and what this means is that it will pick up the sound
just from the front. As soon as I start rotating it, you can see how my
voice gets a lot more quiet and as I get
back to the front, it starts sounding normal again. There are also directional lavalier microphones
on the market, but these need to be
carefully positioned because their sound level drops a lot faster when they're
further away from you. I wouldn't call them
beginner-friendly. Because the lavalier
microphone is omnidirectional, if you are in a room with
a lot of reverberation, it will pick up a
lot of your room. But with proper positioning, we can still get a
clean sound out of it. What's the best place
to put your lav mic? It's the middle of your chest or slightly higher,
if you need to. You shouldn't go
lower than this spot. This is an ideal spot because it will pick
up direct sound from your mouth and give you some nice low-end
from your chest, so you get a rounded sound. How do you put the
microphone there? The easiest way to mount your lavalier mic is by using the clip that
comes with it. Choice of clothing is very
helpful here as shirts and jackets allow you to mount the microphone
in the ideal spot. If you have a T-shirt, mounting the lavalier on the color will make it
too close to your throat, which can give you
an unnatural sound. Lavaliers can also be hidden. You can take them
directly on your body or you can tape them to
the inside of shirts. The most common tape
used for this is medical tape or you
can use moleskin. There are also foam
wedges that you put your microphone in to
avoid clothes rustling. Keep in mind that these
are really meant for more expensive microphone
and budget ones are more sensitive when
mounted under your shirt. Again, wardrobe
choice here is king. When preparing for this class, I actually changed up my shirt because the material
was really noisy. It wasn't rubbing on
the lavalier mic, but me moving my
hands just made it rustle and it could be
picked up by the microphone. Here are a few practical
ways to conceal a lav mic. I'm going to show
you two techniques for taping and concealing
a lavalier mic. The first one is called
the sandwich method, which can be used to tape your microphone
directly to your body. You can use medical tape like I have here or you
can use moleskin, but the process stays the same. First of all, I'm going to cut up a strip of my medical tape, around this big, and then I'm going to place
it on some parchment paper or wax paper and this is so that the tape doesn't
stick to anything. Cut up our medical tape and just place it on
the parchment paper. Next thing I'm going
to do is I'm going to remove the clip from a lavalier microphone because
this is what we need. I'll put the windscreen
back on just in case and then you just place it on
top of the medical tape. Then you take another
strip of medical tape. This one should be a bit
shorter than the one we have here and you just place it
over the microphone like so. Now you have a sandwich. You can use this sandwich
to put your lavalier anywhere on your body or even
on the inside of jackets. This is the method I used for
my sister's latest class. The microphone was
just taped to her body and you can see on the frame where the
microphone is hidden. Since her shirt was open, we didn't have to worry
about it rustling over the microphone and we got
perfectly clear audio. The second method is called the encapsulation method
and it's much more useful when sticking your microphone to
shirts or jackets. You start by making these little triangle
pills from tape. You just take the tape and then fold it over in a triangle, sticky side out, and then once you fold
it over the triangle, just fold it over
itself, so it sticks. Then you should
repeat that maybe two or three times like this. Then you just cut the tape and you're left with this little
triangle pillow. Then on this triangle pillow, you just place your
microphone on one side, and then you make
another pillow. Let's do it again. Make a triangle. Fold it over itself, fold again, fold one
more time, and cut. Then when you have
another one of these, you just put it over your
microphone and as you can see, it's now completely
encapsulated. You can use this to mount
it inside of button up shirts and here you can see how I'm mounting
it to my shirt. I also use some
medical tape to stick the cable to the inside of the shirt so it keeps
it more secure. Another thing you
should be adding to your lavalier cables is
something called strain relief. You just go and make a loop and then you get a piece
of tape once you've made that loop [NOISE] and you just sticky side out, you just tape this loop together and this will
provide you strain relief. If your lavalier microphone
is mounted up here and you pull on
it, this happens. It allows the cable to move freely and it doesn't tug on it. You can tape this
to the inside of your shirt if you need
it to be more secure.
6. Shotgun & Pencil Microphones: Shotgun microphones
and pencil microphones are another popular category. They're used in
movies as main mics, while lab mics are
used as backups. In recent years,
there has also been a surge of on-camera
shotgun microphones, which are a great
choice for vloggers. So what are shotgun and
pencil microphones? They are directional-powered
microfilms. These microphones pick-up sound that is right in front of them and reject the sound that comes from the microphone at the side. How much sound they pick-up and reject depends on
their polar pattern. A polar pattern is a
visual representation of how much sound the microphone
picks up around itself. You have less
directional patterns, like the cardioid one, or really directional ones like this shotgun polar pattern. Here lies the distinction between pencil and
shotgun microphones. Shotgun mics are
by their nature, a lot more directional. This directionality
reduces the pickup of any sounds that are not
on axis of the microphone, but the drawback is that your voice starts
sounding unnatural. This is why pencil
microphones can be used in indoor dialogue
where it's less noisy, while directional
shotgun microphones are more beneficial outdoors or
in rooms with more reverb. These microphones come both in an XLR form or as
3.5-millimeter mics. They're usually meant to
be mounted on cameras. For the XLR versions, you'll need phantom power, while the 3.5-millimeter versions are usually
battery-powered. How do you place a
shotgun microphone? The idea here is
to be as close as possible while being
out of your frame. These microphones are usually positioned over your subject, and you want the
microphone to be at an angle and pointing to the space between your
mouth and the upper chest. If there is a lot of space
above your head in the frame, you could also place
the microphone from under the frame pointing
at the same spot. Now, if you have one of
these on-camera microphones, they work really
great for vlogging or anywhere where the subject
is close to the camera. But if you want to
record a talking head, you run into the same problem as using the built-in camera mic. The way to get good sound
from them is to actually take them off the camera
and put them on a stand. They do have very short cables, so you'll either need to buy a 3.5-millimeter to
3.5-millimeter extender cable, or you could record them
into an external recorder. The positioning is the same, just out of your frame, pointing at the space between
your mouth and the chest. For this class,
I'm actually using my SC7 pencil microphone, which is an XLR microphone
with a cardioid polar pattern.
7. Studio Microphones: The last category
we're going to talk about is what I call
studio microphones. These are not really meant to be concealed in the frame
because they are meant for voice-overs and recording singing
or instruments. These mics are mostly
XLR microphones, or you have USB versions which just have an audio
interface built into them. The two most common
studio mics are dynamic microphones and large diaphragm
condenser microphones. Dynamic microphones are known
for their durability and are generally less sensitive to really fine details
in the sound, which makes them great
if you need to get a clean recording in a regular room because they
will pick up less of it. Here's how a dynamic
studio mic sounds. This is an AKG D5, one of my favorite microphones. This is the AKG D5
dynamic microphone, and here's how it sounds. Hi, my name is Uros and my favorite movies are
Blade Runner and The Rival. Dynamic microphones are also incredibly popular in podcasts. Also by their nature, they don't require power, so they can be used in
any audio interface. Note, that these
really do drop a lot in audio level when you're
further away from them. Dynamic microphones
aren't the kind of microphones to boom
over your subjects. Large diaphragm
studio condensers are probably what comes to mind
when I say studio microphone. These are microphones that have that shiny top end clarity, they make your voice
sound expensive, they are stable for voice-over work and
professional recording, but because they are
really detailed, the benefits of being in a properly treated studio room
can make these mic shine. Here's an example of a studio condenser microphone,
the Audio-Technica AT2020. This is the Audio-Technica
AT2020 studio microphone and this is how it sounds. Hi, my name is Uros and my favorite movies are
Blade Runner and The Rival. Notice how much more of the
room it picked up compared to the dynamic microphone
and this is because I just used the AT2020 in my
untreated room at home. There are also USB condenser
microphones like the Blue, which are really
popular for voice-over. The reasons why I
don't recommend these to my friends are these. First of all, when you
buy a USB microphone, there is no upgrade path. If you buy a dedicated
audio interface and a dedicated microphone, later down the line, when you need something better, you can just upgrade your microphone and
keep the interface. The costs at the beginning
might be a bit higher, but later on, you can get a lot more out of your purchase. The second reason is
that these USB mics are mostly condenser ones and
beginners, in my opinion, will benefit a lot more from using the dynamic
microphone because they really do pick up the room less and you get a better
sound out of them.
8. Syncing Audio: When you record externally, the audio files will be
separate from your video files. This means that in editing, you will want to
replace the audio of your built-in camera
microphone with the sound from your
external recorder. You want the sound to match perfectly to your image so as to avoid the Kung Fu effect of
mismatched audio and video. For this purpose, all you need
to do is clap, seriously. Clapping will register as a
line in your audio waveform. This will make it a
breeze to sync the audio. If your camera by chance
doesn't have a microphone, makes sure you clap in
the frame, when editing. Then you can match the frame
where your hands first close to the clap line
in your waveform. A good idea is also to say, watch your recording
and what take it is. If you're working with
a multitude of clips, in the film industry, they use special tools for
this called clapper boards. Most editing programs
have the ability to automatically synchronize
your video and audio, but it's important to know
how to do it manually because the automatic process
sometimes gets it wrong. Here's a practical demonstration of how to sync in Premiere Pro. So here we are in Premiere Pro, and I just imported my camera recording and
my external recording. As you can see, they're
completely out of sync. Here is my nobody. We need to fix that. The easiest way to fix this in Premiere Pro is to
select both clips, right-click and
press "Synchronize". Select audio and press "Okay" Premiere has
done its magic. Here is my nobody. The tracks are in
sync and aligned. But what if Premiere
doesn't work? Sometimes it can pick up the sync because the
audio is too quiet, or it gets confused and the sync is off by
a frame, or two. That's why you need to learn
how to do this manually. Let's put back the
actual audio recording. As you can see, I'm
doing this visually. Here is my clap, in the camera audio, and here is my clap in
the external audio. What I want to do is just move it around until they get in the same proximity and zoom in and move the external
audio tracks so it matches. The easy way to do this
is by pressing Alt on your keyboard and using the arrow keys to
move left and right. Now as you can see these claps are almost
perfectly aligned, but if I move it one
frame over here, it's too far left. If I move it another frame, it's too far right. The way to fix this
is by clicking here and selecting
show audio time units. What this allows you to
do is to zoom in even further and move your waveform
until it looks perfect. Whenever you sync, you should check
the beginning of the file and the
end of the file. If you don't even
have a selfie stick, you can put your iPhone on. That sounds perfect to me. Once we're done, we
can disable showing the audio time units because it's easier to edit that way. What I like to do is actually
unlink my camera audio. I just right-click
and click "Unlink" and then take my video and my external audio and link them. What I've done here is I
basically made sure that my video and my external audio
will never go out of sync. We can just remove this, god awful, camera audio. Here is my no budget setup. I just use the share. But let's say that
you haven't clapped. Let's say you forgot to clap and your clips look
something like this. I just started talking. Here is my, no budget setup. The principle here is the same. I'm looking for something sharp that has
happened in my speech, maybe like that, that
sneeze right there. It's sharp. I can see it has the wave form and I can see
it on an external audio. The principle is the same. You just move it
until it matches. The trick is to listen to both the camera and
the external audio. If they are in sync, they will sound good. They will sound like one
sound source. Listen to this. Here's my no budget setup, in a true no budget fashion. Listen to what happens if the external audio
is off by a frame. Here's my no budget setup in
a true no budget fashion. You can see how it
sounds doubled. Sometimes this can also sound like some
frequencies are missing, like the sound is hollow. This is because the wave
forms aren't matching perfectly and they're
canceling each other out. But if you have a
good sync like this. Here's my no budget set up
in a true no budget fashion. Everything sounds natural. Also, you might notice that when
you record for a longer time, like an hour, or
maybe half an hour, the audio might get
out of sync with the video for a
couple of frames. This happens because
your recorder and your camera have an internal
clock when recording audio. These clocks might be off
by a millionth of a second. This isn't a problem
on shorter durations, but the longer ones, this difference
multiplies and you get this problem that
is called sync drift. If this happens to
you, don't panic. It's really simple to
fix in Premiere Pro. Here we have an
example of sync drift. This is a segment of my
class that I recorded, which is around 30 minutes long. As you can see in the beginning. The audio is perfectly in sync. You can see at the end that
it got way out of sync. Using the sample rate
of 48,000 Hertz. This is standard in
the video world. Now, the way to fix this
is extremely simple. You go to the last
usable word, for me, I had something more here
but it didn't matter, but this is the
last usable words, it's but, I also cut the audio because anything later
on I just won't use, then you go and press
R on your keyboard, for the Rate Stretch tool. You can also find it
here and you just start moving it until the
wave-forms match. You can also do
the hearing tests. For example, if I
stretch it too much, it would sound like this and
If I stretched it to level, it will sound like this. The idea is to just move it
until it sounds perfect. As you can see, we have fixed the sync drift,
listen to this. What this means is, you can increase the volume
more in post-production. Determines the overall dynamic
range of your recording, which determines how quiet. That's it. That's how
you fix sync drift. It's three clicks basically, if you're worried about the pitch of your
voice being altered, keep in mind that
this is 99.99999%. This change in patches, basically imperceptible
to our ears.
9. Gear Talk: Let's talk about gear. All this audio equipment
must sound expensive, but I prepared a couple of scenarios for you so
that you can see, you can get better
audio with any budget. First off, let's listen to
our base example where I just use my built-in camera mic
in a typical beginner setup. This is what I would consider
a pretty basic setup. We have my Sony flip out LCD camera just on my tripod and now you will hear the sound from it's built-in microphone. Hi, my name is Urish and my favorite movies are
Blade Runner and Arrival. As you can hear, we can do a lot better than that and now let's draw the iPhone. For the first example, I just used my phone. Our phones these days do have decent microphones and if
you get it close enough, you'll get a much
better sound than the built-in mic of your camera. I used the Rose reporter
app on my phone, which allows me to
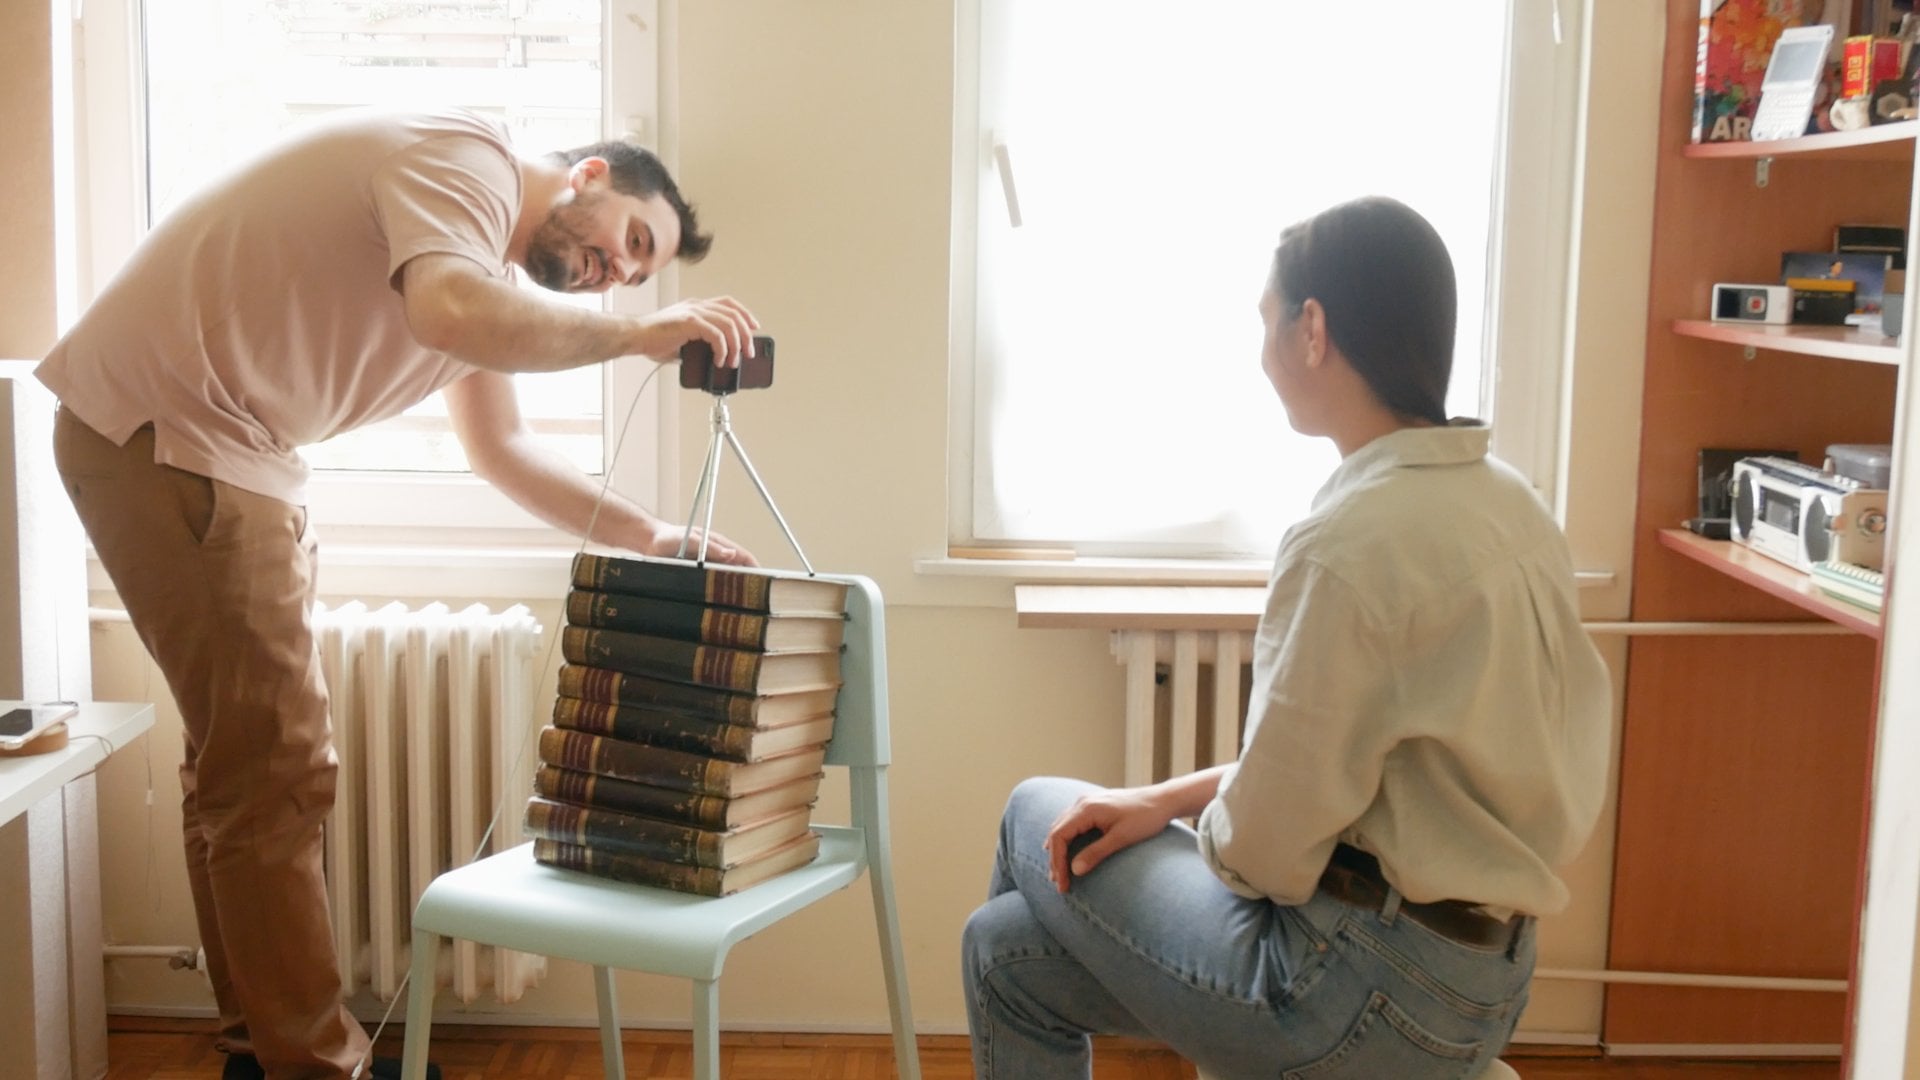
set my gain manually. Here is my no budget setup. I just use the chair and
the selfie stick and I tape them together to make a stand and then I
placed my iPhone, see, just outside of the frame. When I zoom in, you can't see the iPhone and
this is how that sounds. Hi, my name is Urish and my favorite movies are
Blade Runner and Arrival. Here's how the iPhone sounds
edited and cleaned up. Hi, my name is Urish and my favorite movies are
Blade Runner and Arrival. If you have $20, there is an excellent
value microphone you can pick up and it's
called the Boya BY M1. This is a 3.5 millimeter microphone that can be
plugged in both phones, and cameras and recorders, and for $20 I think it's
an excellent value. Here's the Boya mic, plugged directly into my iPhone. This is the Boya
BY M1 microphone and it was set around $20. This is how it sounds
when it's running into my iPhone using the
headphone jack adapter. Hi, my name is Urish and my favorite movies are
Blade Runner and Arrival. Here's the Boya BY M1, plugged into a more
traditional recorder like the Zoom H1. This is the Boya BY M1
that's plugged into the Zoom H1 portable recorder
and this is how it sounds. Hi, my name is Urish and my favorite movies are
Blade Runner and Arrival. Here's how the Boya BY M1 sounds when edited
and cleaned up. Hi, my name is Urish and my favorite movies are
Blade Runner and Arrival. I think this is an
incredible value and if $20 is all you can spare, this is a great option. The Zoom H1 is a longtime
film making budget option. I have the older version, but the new one can be
had for the same price, which is around $100. You already heard
how it pairs with the budget level here from
earlier and the reason why I would pick the Zoom H1 over the iPhone is that it's
more robust and stable. The battery lasts
longer and it has a proper level read out
for setting your gain. The built-in microphones
on this recorder are more suited for
sound effects recording, but it can work for dialogue as well as they are
of high-quality. Here's the Zoom H1 combined
with a stellar technique, I call hiding the
microphone in plain sight. So if you're further
away from the camera, like I am right now, there's a really simple way to conceal microphones
in plain sight, because this is the Zoom H1, and it's been here
the whole time. The key to this
is really simple. When you're recording
and you're done, you just take the
microphone out of the frame, like this. This is how you do the invisible microphone
shot inside of Premier Pro, but this can be done in
any other editing program. The key here is that you need to have a non-moving background
behind your microphone. You could also probably make it work with some a
moving background, but it would be a lot harder. Here, I just have my
computer screen with a fixed image so it's
not moving at all. Like I am right now
and you don't have. You can see that I'm not interfering with the
microphone in any way. There's a clear line
right here that I'm just not crossing
in the video ever. Here's a critical moment. I'll just mark it right here
so that when we do our mask, I keep my fingers. The idea is when I
started recording, I just went and removed the
microphone from the shot. Then I sat back down. The autofocus is on me and let's use this shot right here for
our replacement background. I'll just cut it. Cut a portion of it, remove the audio, and bring it over my footage. What I want to do right here is I want to
add a frame hold. What a frame hold allows me
to do is to basically freeze the entire frame all
over my recording. The next thing you want to do is go to the effect controls
and under opacity, you go to a free draw bezier, and you just start drawing a rough shape of your
microphone where it was. Once you're done with the shape, you can see that microphone
is not there anymore. Now, let's go back to our
problematic spot right here. As you can see, my
fingers are cut off. I'll just zoom into 100%
and now just start moving my mask so I cut off the microphone and not
cut off my fingers. If there was a lighting change, what I would suggest
is that you go here to the mask feather control
and just increase it a bit. This will give you a
smoother transition and let's go back. Looking at their whole frame. It's been here the whole time. As you can see, the
microphone, is just gone. Easy as that. There you go. You have a concealed
microphone in your shot and this is a
really good technique. I used it a couple of times
on my sister's classes. Here's how the Zoom H1 sounds
when edited and cleaned up. [NOISE] There you go. You have a concealed
microphone in your shot. This is a really good technique, and I used it a couple of
times on my sister's classes. At $200, we can really
get some great options. The first one I wanted
to talk to you about is the Tascam DR 10L portable
recorder with the Lavaliar. This has been my
love of choice for some time now because the
battery lasts forever, it's small, and the mic is of very high-quality and
here's how it sounds. Now you're listening to the Tascam DR 10L
recorder/microphone. It's been hidden
right here, see, under my shirts and
this is how it sounds. Hi, my name is Urish, and my favorite movies are
Blade Runner and Arrival. Here's how the Tascam DR 10L sounds when edited
and cleaned up. Hi, My name is Urish and my favorite movies are
Blade Runner and Arrival. For around $200, you can also get a decent
pencil microphone setup. I own the SE7, which can set you
around the $100. If you combine it with an inexpensive audio
interface from focus, right or the end, SSL or native instruments, you get a pretty nice package for recording in the dialogue. Here's the SE7 running into my audience, EVO 4 interface. This is the SE7 small
condenser microphone, and I have boomed it just right outside of my frame
and this is how it sounds. Hi, my name is Urish and my favorite movies are
Blade Runner and Arrival. Here's how the SE7 sounds, edited and cleaned up. Hi, my name is Urish and my favorite movies are
Blade Runner and Arrival. Note that these are
just example setups and not reviews, and absolute
recommendations. This is just what I use and what works for me
and my purposes. You might have noticed
that I didn't put any on-camera shotgun
microphones in my setups. That's because I don't own one. I'm not big on vlogging and my cameras don't have a
separate microphone input, so I never needed one. For $200 you could
definitely pick up a decent microphone from
Rode, DET or taxter. If your camera doesn't
have a mic input, a Zoom H1 can even fit in the $200 budget as an
external recorder. If you would like
to hear how many of these microphones sound
before buying them, there are some amazing
resources online. Youtubers like Curtis Judd or Podcastage are
amazing sources of gear reviews and I highly
recommend checking out if the particular
microphone you want to buy has been tested by them.
10. Audio Editing: Noise Reduction: After recording, it's
time to edit our audio. Basically, all sounds you
have heard in television or films has been edited in
some way or shape or form. That's because even if you
have a perfect recording, there's still a need
to edit your audio. Maybe your gain was a bit off, or maybe you used the
cheap microphone and there is some noise you
want to get rid of, or maybe the
microphone wasn't at the perfect position and
your voice sounds a bit off. Maybe it's a bit muddy or
maybe it's a bit harsh. We can fix all these
problems with editing. There are three steps
to audio editing. The first one is
noise reduction, the second one is fixing
up your frequencies, and the third one is
fixing up your dynamics. I think noise
reduction and dynamics are pretty easy to understand for a
beginner because noise, as we said, is any
unwanted sound, and dynamics are just how
loud or quiet the sound is. But what are frequencies? Let's talk about them. All sound is, is air particles oscillating around you and moving around. We as humans can hear
these oscillations. Humans can hear from 20 hertz, which is 20 oscillations
per second, to 20,000 hertz, which is 20,000
oscillations per second. In the beginning of
this frequency range, we have the low frequencies, which are also known as base, and this is where the
body of your voice is. In the middle frequencies, we have the tone of your voice, which is what makes
your vocal unique. In the end of the
frequency range, we have the higher frequencies, which are just the air of
your voice and the S sounds, also known as sibilance. Now notice that when I
talked about our voice, I didn't say it's
just one frequency. That's because most sounds
are complex and they are made up of many frequencies and these frequencies
have different loudness. The thing is, our
brain perceives all these different frequencies
together as one sound. Let's talk about
noise reduction. I'll be using Premiere
Pro to edit all my audio, but these steps are repeatable
in any other program. I just want to say that all the examples of editing
you have heard so far have been edited using built-in Premiere
Pro plugins and the free de-noising plugin
that I'm going to show you. So here we are in Premiere Pro and this is an example project
I set up for you. It's just me recording my audio with my iPhone
outside of the frame. So let's listen first to how the built-in
microphone sounds. Hi, my name is Rush, and my favorite movies are
Blade Runner and The Rival. Yikes. This is the
sound from our iPhone. Hi, my name is Raj, and my favorite movies are
Blade Runner and The Rival. It's cool, but I think we can
definitely improve on it, especially on that high-end hiss you can hear in the background. First things first,
I'll be using the audio track mixer
to add all my effects. If you want to add the audio track mixer
to your workspace, you just go to Window, select Audio Track Mixer, and select the timeline
you're editing. In the audio track mixer, we want to click
this little arrow in the upper left corner to show and hide the
effects and sense. These five effects
slots are where we're going to be adding
our audio effects. This allows me to have
as many audio clips on a single track and they all
get the same processing. What this also means is that all my tracks need to
have only one purpose. So if I have music that I want to go and play
in the background, I cannot add it to the first
track because it will get affected by the effects
that we add on it. Now, noise reduction is ideally something
that you don't need. If you had a good microphone, a perfectly quiet room, and a decent recorder, there shouldn't be any
noise in your recording. But in reality, there's
usually some noise in the recording and
noise reduction plugins can help you reduce it. There are a lot of ways
these plugins work, but the basic
premise is they are trying to separate
the frequencies of noise from the frequencies of your voice that they
want to keep intact. Now, these plugins
are not magical. They are not. So they won't
save any terrible recording. But if you followed my advice and kept your microphone close, your voice should be a lot
louder than the noise. Also note that the key with noise reduction is
not to overdo it. Subtle is key. So if you overdo it, the plugin will start
removing frequencies from your own voice
rather than the noise, and this can create some really bad effects,
like you're underwater. So let's check out the built-in de-noise
plug-in in Premiere Pro. On your audio track
in the first slot, click on the arrow, go to Noise Reduction and
select DeNoise. Double-click on
the plugin to show it and let's listen to it. Hi, my name is Raj and my favorite movies are
Blade Runner and The Rival. Now, you see the plugin already removed a
lot of the noise, but you can hear
these artifacts. So let's turn it to
zero and fine tune it. This is how the vocal sounds
without any noise reduction. Hi, my name is Raj, and my favorite movies are
Blade Runner and The Rival. Now, as I'm closely
listening to this vocal, I hear there's a lot of hiss
in the higher frequencies, but I don't see any
problems in the low end, in the base frequencies. So there are these buttons
in the noise reduction plugin that allow me
to change its focus. We can say to focus
on all frequencies, to focus on the
lower frequencies, to the middle frequencies, the lower and
higher frequencies. For this particular vocal, I think this preset of focusing on the higher frequencies
will work the best. So I'll just switch it over. Now let's play back our vocal. Just start adding the
noise reduction slowly. Hi, my name is Raj and my favorite movies are
Blade Runner and The Rival. I think that's it. As you can see, the noise
has substantially lowered, but there are no
audible artifacts here and listen to what happens
if I go overboard. So this is 25 percent. Hi, my name is Raj. Listen to what happens
if I go overboard. My favorite movies are
Blade Runner and The Rival. Hi, my name is Raj, and my favorite movies are
Blade Runner and The Rival. So all of the noise is gone, but you can hear that it
sounds unnatural now. This is why you
should be subtle. You just need to lower it enough so the noise
isn't distracting. But if you remove all noise, it doesn't sound natural. So let's dial it back. Hi, my name is Raj and my favorite movies are
Blade Runner and The Rival. Hi, my name is Raj, and my favorite movies are
Blade Runner and The Rival. Now let's listen to the recording without
noise reduction. Hi, my name is Raj, and my favorite movies are
Blade Runner and The Rival. With noise reduction. Hi, my name is Raj, and my favorite movies are
Blade Runner and The Rival. I think that sounds fantastic. When you're doing
noise reduction, always do frequent checks, turn the plugin on and off. Our ears adapt very
quickly to changes, so if you don't do
the AB testing, there's a high chance
you'll overdo it and your vocal will sound unnatural. Now, if you wanted more control than the Premiere Pro plugin, there is this great free
plugin from Bertom audio, and it's called
Denoisier Classic. Once you install it, you need to load it
into Premiere Pro. The way you do that
is by going to Edit, Preferences, and Audio. In the audio preferences, you click on the Audio
Plug-in Manager, and here you click
Scan for Plugins. I already did this, and as you can see, I have. But these are all mostly
for music production. So just press Scan for
Plugins and it will find any audio plugin you
have installed on your computer and press
Okay, and Okay again. Then if you want to load the Bertom noise
reduction plugin, we can just remove the built-in Premier
denoiser go to VSD3, which is the standard the
plugin is written in, Restoration, and the
Bertom Denoiser Classic. Double-click to open the plugin and now you see this interface. It might look a lot more confusing than the
built-in Premiere plugin, but trust me, this
one is also as simple to use as
the Premiere one. If I play back any
audio with this plugin, you can see that it currently
isn't doing anything. Hi, my name is Raj and my favorite movies are
Blade Runner and The Rival. That's because
it's currently set at zero percent of
noise reduction. So this first slider here is the amount of noise reduction
we're going to apply. These sliders here represent
certain frequencies. So these are low frequencies and these are high frequencies. The easiest way to
use this plugin is by moving all the frequencies
all the way down, and now let's play
our audio and start turning up the master
noise reduction slider. Hi, my name is Raj and my favorite movies are
Blade Runner and The Rival. Just like that,
all over noise is gone and you can
even go further. But listen to what happens. Hi, my name is Raj and my favorite movies are
Blade Runner and The Rival. As you can see, the plugin
is now removing frequencies of our own voice
thinking it's the noise. So let's turn it back down. Hi, my name is Raj and my favorite movies are
Blade Runner and The Rival. You can just stop there. But if you want, you can fine-tune
specific frequencies. So for example, I know I don't have a lot of noise in my middle frequencies, so I can just turn them
back up to make sure I'm not losing any detail
in my voice in those areas. My name is Raj, and
my favorite movies are Blade Runner and The Rival. Hi, my name is Raj and my favorite movies are
Blade Runner and The Rival. I also turned up a bit of the higher frequencies to
make it sound more natural. So I like to leave a bit
of hiss in the background, if that makes sense. My favorite movies are
Blade Runner and The Rival. Hi, my name is Raj, and my favorite movies are
Blade Runner and The Rival. I think it sounds perfect. Let's listen to the
original sound. Hi, my name is Raj, and my favorite movies are
Blade Runner and The Rival. Now let's listen to the
Bertom Denoiser Classic. Hi, my name is Raj, and my favorite movies are
Blade Runner and The Rival. That's it. The key here is turning the plugin on
and off every time you make an adjustment
almost just to hear and listen to what sounds good
and what doesn't sound good. Now, there are also paid
plugins for noise reduction, and I personally use the
Waves Clarity VX a lot. It's an AI-based plugin and
it's just one moving knob. I got it on sale for $35, which is I think a
pretty fair price. But if you're on a budget, you really don't need them. For all the examples
you've heard previously, I just use the Bertom Denoiser.
11. Audio Editing: EQ & De Esser: Let's talk about frequencies. As we said previously, our voice is made up of lots of different frequencies that
have different loudness, and the beauty of audio
editing is that we can alter the loudness of
specific frequencies. I want to show you two plug-ins that will help us do that. The first one is an equalizer, and the second one
is a de-esser. We're back in Premiere Pro, and an equalizer is a
plug-in that allows us to change and alter the
loudness of frequencies. I'm going to be using the built-in Premiere
Pro equalizer. Let's go to the
second effect slot. Click on "Filter" and "EQ" and select "Parametric
Equalizer". Double-click to open it, and this is the plug-in. Now, what's cool about
this plugin is that, it can show you the
frequencies you're editing. Listen to this. My name is Raj, and my favorite
movies are Blade. You can see a graphical
representation of all the frequencies that
make up our recording. It starts at 20 hertz, all the way to 20,000 hertz, and this line shows you
different loudnesses. This plugin is made up
of different sections. Each of these sections
are called the filter. Let's disable all
of them for now. Let's talk about the first
one and the last one. This first filter is known
as the high-pass filter. What the high-pass
filter does is that it removes everything under it. It removes all the
low frequencies, and lets the high
frequencies pass through. Let's listen to how that sounds. I'll just sweep it up. Runner and Arrival. Hi, my name is Raj, and my favorite movies are
Blade Runner and Arrival. Hi, my name is Raj. What you can change in
this filter is the slope. This is how steep the filter is. If we set it at six
decibels per octave, the removal of low
frequencies will be gradual, and it will sound more natural. My favorite movies are
Blade Runner and Arrival. If you want the filter
to be more surgical, to have a more harder cut, you set the slope
to a higher number. If we set the slope to
48 decibels per octave. Hi, my name is Raj, and my favorite
movies are Blade. You can see and hear how
hard that cutoff was and how aggressively the filter
removed the low frequencies. The low pass filter is the
same as the high pass filter, but it does the exact opposite. It removes all the
high frequencies, and it keeps the low
frequencies intact. Let's listen to how that sounds. Blade Runner and Arrival. Hi, my name is Raj, my favorite movies are
Blade Runner and Arrival. This filter also has
the slope setting. It can be a very smooth cut
with a gradual reduction. Hi, my name is Raj, and my favorite movies are
Blade Runner and Arrival. Or it can be a very hard cut. Hi, my name is Raj, and my favorite movies are
Blade Runner and Arrival. Let's talk about the
second next filter and the second last filter. These filters are
called shelf filters. This is the low shelf, and this is the high shelf. What the low shelf filter
does is that it boosts or cuts all frequencies under
the selected frequency, while the high shelf
filter does the opposite. It boosts or cuts all
the frequencies over it. Let's listen to how the low shelf filter affects the sound. Hi, my name is Raj, and my favorite movies are
Blade Runner and Arrival. Hi, my name is Raj, and my favorite movies are
Blade Runner and Arrival. It might sound similar
to the high-pass filter, but remember that
the high pass filter will cut off everything. This one just lowers
everything to the same values. In the low shelf and
the high shelf filters, you can also select
how steep they are. This is the smooth option
and this is the hard option. Let's listen to how the
high shelf filter sounds. My favorite movies are
Blade Runner and Arrival. Hi. Let's cut the
high frequencies. My name is Raj, and my favorite movies are
Blade Runner and Arrival. The next filters we're
going to talk about, are these in the middle. These are known as bell filters. Why are they called
bell filters? Well, when you boost or
cut their frequencies, they form a bell. These filters boost
a specific frequency and frequencies around
it on both sides. You can control how
many frequencies on this side this
filter packs up, by using the Q value. It's this value right here. If we lower it, the filter becomes broader, and if we go and make it higher, the filter becomes narrower. Let's listen to how boosting or removing a certain
frequency sounds. My name is Raj, and my favorite movies are
Blade Runner and Arrival. Hi, my name is Raj, and my favorite movies are
Blade Runner and Arrival. Hi, my name is Raj, and my favorite movies are
Blade Runner and Arrival. Let's reset everything for now. How do you use these filters?
That's the question. First of all, let me tell
you the same thing we talked about the noise
reduction applies here. Your ears get adjusted pretty
quickly to EQ changes. It's important to turn
the plugin on and off to make sure you're
not overdoing things. Let's EQ this vocal together, and let me share you my
approach and how I do it. I just start out with the clean default preset in
the parametric equalizer. Let's now listen to our
recording once again. I just have the denoiser
on from the previous part. Hi, my name is Raj and my favorite movies are
Blade Runner and Arrival. The first thing I do is
I high-pass the low end. We have talked about how the human voice is made
up of many frequencies. But the human voice, no matter how deep of
a voice somebody has always starts at
around 85 hertz. I like to go to my
high-pass filter, turn it on and cut off
anything under 80. Let's listen to how that sounds. Hi, my name is Raj, and my favorite movies are
Blade Runner and Arrival. As you can see, there's not really a big
change in their voice. But if I turn on the
high-pass filter, hi, my name is Raj, you can see this low-end rumble. My favorite movies are
Blade Runner and Arrival, that we removed and
made it extra quiet. That's the point of
a high-pass filter. It keeps your vocals clean, and removes any low-end humps. I keep my high-pass slope at 24 decibels per octave because, I think it sounds natural and that's the default
in this equalizer. The second thing I want to do is clean up weird
resonances in our sound. As we talked earlier, this might be a room, or maybe you had a cold and your voice sounds a bit nasally. Room resonances are
found from 300-600, 700 hertz in this range. But how do you find the
frequency that is problematic? I like to use a technique
which is pretty simple, and it's called sweep and cut. For doing the sweep and cut, we need to use a bell filter. I'll grab one bell filter, which is filter number 2. I'll just set the Q value to three to make it a bit steeper. Then with this filter, I'll go ahead and sweep
the frequency spectrum, and what I'm listening
for are weird resonances. If you're in an untreated room, there is probably
some rude resonance that is affecting your vocal. If you boost too high, everything will start
sounding resonant. But if you boost for
around 10 decibels, once you get to a
certain frequency, you will hear a certain ringing. This might be harder to
do in the beginning, but the more you do it, the more you train
for this situation. Let's get started. I'll just start
sweeping my vocals. Hi, my name is Suresh and my favorite movies are
Blade Runner and Arrival. As you can see here, I've found the room resonance, it's most hearable
when I say hi. It just stands out from
the rest of my voice as not natural and that's because it's the
room resonating. Once you find your frequency, you go to the decibel
selector and you just turn it down.
Let's do that. Hi, my name is Suresh and my favorite movies are
Blade Runner and Arrival. You can see that the vocal
sounds more cleaner now. If I go overboard and remove
the frequency by too much, listen to what happens. Hi, my name is Suresh and my favorite movies are
Blade Runner and Arrival. The key here is to be subtle, maybe three or four
descibles of reduction, maybe 5, 6, depends on how hard
the resonance is. Hi, my name is Suresh and my favorite movies are
Blade Runner and Arrival. Now let's listen with the
filter off and the filter on. Hi, my name is Suresh and my favorite movies are
Blade Runner and Arrival. This is with the filter on. Hi, my name is Suresh and my favorite movies are
Blade Runner and Arrival. You can maybe repeat this
process two or three times, but don't go overboard. Simplicity is key. Another frequency
range that might be interesting to you is
around one kilohertz. Let's listen to what happens
when I boost and cut it. Hi, my name is Suresh and my favorite movies are
Blade Runner and Arrival. You can see that my vocal
starts sounding a bit nasal, and this is a really
cool trick to fix a vocal that
sounds a bit nasally. You just turn down
the one kilohertz. My favorite movies are
Blade Runner and Arrival. Again, the key here
is to be subtle. You can see that I'm
not doing these moves. Hi, my name is Suresh and my favorite movies are
Blade Runner and Arrival. Another range that
is interesting is this right here
from 2-4 kilohertz. If you're using
cheaper microphones, these sound a bit harsh and
you can remove harshness by sweeping these frequencies and cutting them.
Let's try it out. Hi, my name is Suresh and my favorite movies are
Blade Runner and Arrival. You can see that right there it sounds particularly harsh, so let's just
reduce it by a bit. Hi, my name is Suresh and my favorite movies are
Blade Runner and Arrival. Let's listen to it without
the fourth filter. Hi, my name is Suresh and my favorite movies are
Blade Runner and Arrival. Let's listen to it with
the fourth filter. Hi, my name is Suresh and my favorite movies are
Blade Runner and Arrival. Again, all these
differences are subtle, but once you add them up, it will transform your vocal. The last thing I like to do and this depends on the
microphone you use, is to boost or
reduce the high end. We'll use the high shelf here, I just leave it
at default slope. Let's listen to what happens when I boost my
high frequencies. I start to boost from
around five kilohertz. Hi, my name is Suresh and my favorite movies are
Blade Runner and Arrival. You can see now I went overboard and it sounds too harsh, and if you lower it slowly. Hi, my name is Suresh and my favorite movies are
Blade Runner and Arrival. I think that sounds good enough. Again, if your microphone was maybe having too
much of a high-end, you would reduce this. So you would go, movies are
Blade Runner and Arrival. I'll just boost slightly. Hi, my name is Suresh and my favorite movies
are Blade Runner. That's my EQ done. Let's listen to the
whole recording before and after we equed it. Hi, my name is Suresh and my favorite movies are
Blade Runner and Arrival. This is with the EQ. Hi, my name is Suresh and my favorite movies are
Blade Runner and Arrival. The key is to keep
your cell natural. If you go overboard, it will just make your
recording sound artificial. The idea here is to make your vocal prettier and not to transform it from the ground up. The next thing I want to tackle are S sounds or sibilance. Now, you might have
noticed that I didn't want to fix
this with an EQ, and that's because
if we take an EQ, like the one we did
and, for example, you can hear the sibilance
right here when I say Suresh. What would happen
if I took an EQ? So the Sure is right
there, Suresh. You can see it actually. If I took an EQ like
this band five, and I just turned it down, it fixes the problem, but the rest of the vocal
can now sound a bit dull. My name is Suresh and my favorite movies are
Blade Runner and Arrival. Here's how it sounds without it. My name is Suresh and my favorite movies
are Blade Runner. You see how we removed a lot of the high frequencies
just to fix that Sure. That's where an
DeEsser comes to help. A DeEsser is a plugin
that turns down the volume of your esses
whenever they happen, but it doesn't affect
the rest of the sounds. Let's add one. We go to
the third effect slot, go to Amplitude and Compression, and select the DeEsser. Now, you can see that this plugin isn't in the
EQ and filter section, but it still affects
frequencies. This is because it's a hybrid. It affects the
dynamics of the sound, but only in a certain
frequency range. This DeEsser plugin from Premiere Pro is
pretty easy to use. It already has a range
selected for you. Now let's listen
to what it does. Hi, my name is Suresh and my favorite movies are
Blade Runner and Arrival. Here you can see how much it is reducing the
sibilance sounds. If we lower this threshold, this is the control that
will allow us to add more or less of our reduction. Let's try it out. Hi, my name is Suresh and my favorite movies are
Blade Runner and Arrival. As you can see, I have
overdone it here and it started to remove some
frequencies that I don't want. Let's turn it back up. Hi, my name is Suresh and my favorite movies are
Blade Runner and Arrival. If you're not sure if it's
hitting the right frequencies, you can even select the
output sibilance only option, and this will allow
you to listen to just the sibilance sounds. Hi, my name is Suresh and my favorite movies are Blade Runner and Arrival. I see that I should maybe turn the frequency range a
bit up and a bit lower. Hi, my name is Suresh and my favorite movies are
Blade Runner and Arrival. That sounds good to me. Let's click this button off. Hi, my name is Suresh and my favorite movies are
Blade Runner and Arrival. Subtlety is key. I'll just go and disable this effect and
listen to the sound. Hi, my name is Suresh and my favorite movies are
Blade Runner and Arrival. Let's listen to the
sound with it on. Hi, my name is Suresh and my favorite movies are
Blade Runner and Arrival. I think I removed too much, so I'll just go and make
my threshold a bit higher. Hi, my name is Suresh and my favorite movies are
Blade Runner and Arrival. I think that sounds good, so let's listen to
it before again. Hi, my name is Suresh and my favorite movies are
Blade Runner and Arrival. Let's listen to it
with the effect. Hi, my name is Suresh and my favorite movies are
Blade Runner and Arrival. As you can see, the
esses are still there, but they're not so
distracting right now, and that's the
point of a DeEsser. It's not there to
remove the esses, it's just there to balance them out with the other sounds.
12. Audio Editing: Compression: Last but not least, we need to fix the
dynamics of our sound. So the human voice has actually a pretty
incredible dynamic range. We can be really quiet or we
can be suddenly really loud. This might even be okay when listening to people
in day to day life. But when you record something, you don't want the
viewer to be turning the volume knob on their
computer up or down.
13. Thank you: We've made it to the
end of this class. I hope you enjoyed it, and that the world of audio
equipment and editing is perhaps a bit more clear
and more understandable. If you liked this class, be sure to rate and review it, and if something wasn't clear, I'm always here for your
comments and suggestions. If you want to get notified
about my next classes, you can follow me
here on Skillshare, and if you want to
keep in touch with me, you can follow me on
Instagram @umcaruje. I'm wishing you a
fantastic day or evening. Thanks for stopping by and
I'll see you in the next one.
 Uroš Maravić, Videographer & Music producer