Transcripts
1. Introduction: Imagine having your
own embroidered shirts that you design and procreate. Seeing your illustrations
embroidered on clothing is just so much fun, and I get excited every time I get something
new in the mail. Join me in this class
where I show you how you can make this to this and this to this with
Procreate and print on demand.
2. Class Project: For the class project,
I want you to share your design
from Procreate in the project section
so I can look at it and maybe I can give your feedback if what
you can do different, maybe it needs some changes. I would also love
it if you share your embroider design,
that will be amazing. But I would also love to see
your designs in procreate. So upload them in the
project section and show me.
3. Make a T-shirt: For this class, I'm
using Print fall. It's one of a DmaniPrint on
demand businesses out there. I'm using Printful because
I know that they are big into embroidery and I have some good
experience with them. First thing that
we are going to do is find the shirt we
are going to use. I'm going to use the Bella
plus Canvas T shirt. The reason that I'm using the Bella plus Canvas
T shirt is because it has a lot of options in
color and it has a nice price. After you picture
shirt of choice, we are going to scroll down and download the file guidelines. Now, let's have a look at the guidelines from the file and see how big we need to make
our Canvas Improcreate. It says a four by four inch, so let's make a custom file
that is four by four inch or if you're European
ten by 10 centimeters. For this project,
I'm going to use one of my old classes
on skill share. I think it's actually
one of my first, and we made this
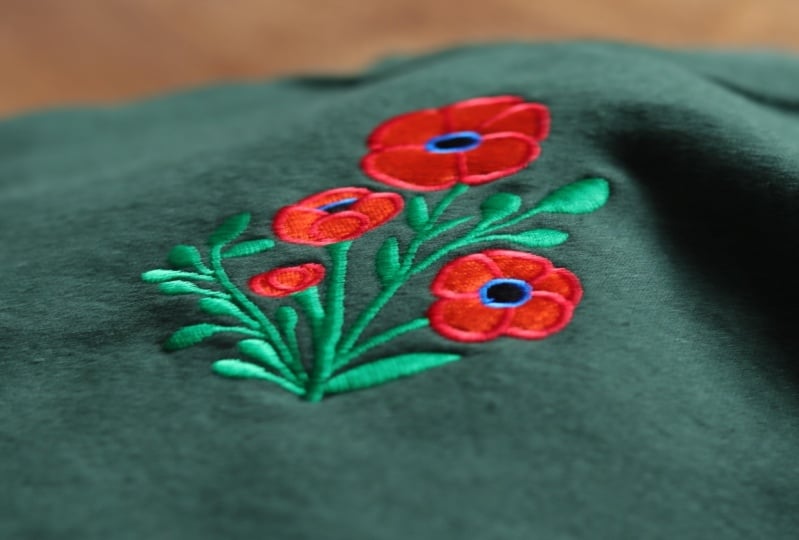
poppy on a sweater, and I'm going to use the pattern for that to make my
drawing and procreate. And placing the
file and Procreate and go back to the
guidelines files again. In the guide, you can see that the detailed
thickness needs to be 0.05 inch or four points. If you make the line smaller, you can get lines like this one. And this is like
a running stage. It can work in some designs, but most of the time, it's not something
you really want. You rather really want
to have a solid line. In the guidelines, we
saw that the lines has to be 0.05 inch. So what we're going to do, I'm going to use my phone
for the calculation, and I'm going to
calculate how much is 0.05 inch in pixels. Now, I can see that
it is 4.8 pixel, let's round it up to five pixel. I'm going back to my Canvas
and go to the actions. Turn on drawing guide,
and edit drawing. Here we are turning the
grid size to five pixels. And now we know to make the lines bigger than
the little squares. For the colors, we go
back to the guide, you can see the
available colors here. In the project
section, you can also download the color
palette for Procreate. I'm making a new layer and
use a green for the stems. I make sure that they
are thick enough. For the little side stems, I'm making them a
bit thinner and also make sure that there is enough room between the lines. I'm using orange
for the little bud. For the puppy, I'm using black for the middle and
orange for the outside. The inside, I'm making
a bit more swirly, and I'm choosing red. After turning off the background and the drawing, it says, I'm going to export this as a PNG fill and go
back to print fall. You want to order
your own shirt, you have to make an account, and then you will see
this dashboard. And in this dashboard, you
can place a new order. You can choose a test
order or a normal order, and you can only order once a month if you want
to use the test order, and I already did that. So I'm making mine as a
normal order and going back to that bella plus Canvas
shirt and drop my design. You can see that
the website already detects what kind
of colors you use. You can also play around a
little bit with the placement, but stay within
those guidelines. And another fun
feature is that you can drop your logo
inside the shirt. You can pay extra for this, but it's such a cute little
professional detail. Well, I see that I
clicked the wrong size, but other than that,
it is ready to go. And here is the result. In the inside, you can see the backing to protect
your embroidery. I'm really happy with
how it turned out, and I hope I inspired
you to create your own.
4. Make a Sweater: In this lesson, we are going
to create an embroider for your sweatshirt and placing it in the middle of the sweater. We start with creating
another ten by ten canvas. I'm going to use an old
embroidery piece that I made. I'm just going to
use a picture of it. After I place the picture, I'm going again to actions and Canvas and turn on the
drawing guide and again, make it five pixels. And now I can draw over it making bigger
than the squares, so we know that it's not
going to be a running stitch, again, like we did before. And we are going to use again the principle color palette that is in the project section. I'm going to make the lines of the leaves with dark green. And I'm not going to make all the leaves
because I really want to make sure that there's enough
space between the graphics. Now, what we're
actually going to do is quite similar to the poppy
that we already made. The one big difference is that I'm going to place the lines
pretty close to each other, and I'm making a lot of contrast
lines with the flowers. So you can really
see the thickness of these lines and see how they are placed within
if it's an embroidery. Other than that, there
is not much difference. It's the same process
of putting it on the sweater and
ordering your piece. And here you can
see how it looks. I love how it looks. I really like the dark colors. I have worked with all
the colors of this shirt. This is a Gildian sweatshirt. And I love this sweatshirt. It has a lot of
nice navy colors. A lot of I love this
color, the green. And yes, I do prefer this
one over the T shirt, but it does come a little
bit more expensive, but now it's a fall. I'm going to rock this shirt. I hope you enjoyed this class. Thank you and see you next time in another
embroideredventure.
 Floor Giebels, Embroidery Artist