Transcripts
1. Introduction: I'm Justin Bridges and this is one-light setups for portrait photography on Skillshare. Today, I'm here to talk to you about how to light a fashion editorial or shoot, or portrait shoot, which is one-light. My favorite part about photography, is the ability to express yourself and really like make some cool stuff. You might have seen my first class with Skillshare, about dramatic portraiture. In that class, we were able to use natural light to build on the idea of using light and shadows, to make a cool photo. I think, this is kind of like a natural progression. We're going to use one-light and that could be a window like it was in the first class, or you can take it to the next level and use a studio strobe. An off camera flash to make a cool photo of somebody, whether it'd be happy, emotional, bad ass, whatever. We're going to cover split lighting, loop lighting, butterfly lighting, and Rembrandt lighting. All four of these are very simple one-light setups, that can allow you to get something out of your subject. We'll show you what I would do in a studio setting, but you'll also be able to learn how to do it with your iPhone, for instance. We're going- at the end of the show, what I would do, for some basic retouching just at the end of a session. If you are just a beginner or maybe just took my last class and want to try to take things to the next level by using strobe lighting, this is the class for you. If you're a camera enthusiast, you shoot on film, you shoot with a DSLR, everybody should always learn lighting by starting with the basics. First, you start natural, understanding what lighting is doing and then, you build onto that. So, this one-light lighting setup is like a gateway drug, to really starting a career or starting a new level of your photography. Gateway drug, cool.
2. Project Assignment: The project for this class is going to be taking one to five photos that demonstrates the different lighting setups, and then, also, maybe the fifth photo is something where you played around, and sort of deviated or sort of broke the rules a little bit. When I learned how to shoot, I started on natural light. A lot of what I had to deal with was basically one light source, you have the sun, and you have to navigate around that. I think when you're learning lighting, and you're getting the fundamentals down, the next step is controlling that one light that you already had when you were using natural light. Shaping it in a different way that gives you more depth and more interesting into your photo than just taking what the sun gives you. I think that'll be an interesting step for people to take and see that transition point in their photography. So, some things you should probably be comfortable with before you start this class are, one, how to use your camera, whether it be your iPhone, your DSLR, even a film camera. Two, I think it's really important to understand if you decide to go the studio or artificial lighting route, the basics of using a flash. If you're not comfortable with the strobe light, you can still learn from this class by understanding the technique behind it by using a constant light, sunlight, window light. If you're choosing to do this on your camera phone, that's probably all you need. If you do have a little bit more of an advanced kit in your bag or at home, I would say, you can have a camera, you could go with a V-flat, or you can use a silver, white, black reflector. A tripod because it's easier to go back and forth, and adjusting the lights if you have that. You really don't need much more than that besides the light. The basics are having that light source, whether it be the sunlight, or window, or an artificial light, the camera, a tripod, and your intuition. In terms of picking a subject for this project, and if you're looking for a stylish photo, just make sure you have a stylish friend. If you're looking for some really glammed up photo, just make sure you have lots of make up. I mean really you can get anything out of these photos that you want, but we'll go over some quick tips on how to adjust the light and be sure you are using the right lighting method based on your friend or your subject's face. For this project, it'll vary how long you want to spend. But really going through each one of the lighting set-ups, getting a couple of different photos, trying that lighting a different way, posturing the model a different way. I would say give all the lighting techniques in total about an hour, hour and a half, and then maybe spend like 30, 45 minutes going through your slacks, and picking two, or three, or four to edit and show off to the class. One or two are the most important things you have to remember when you're doing a one light setup. I would say, at the top of my list, it's just making sure you're using the appropriate lighting setup for the model's face, the subject's face. We all want a beautiful photo, but we also want to make sure that the model is flattered as well. Another important thing is really just being cognizant of your exposure level. In the past class, we asked for people to overexpose and underexpose their images, so they could understand what a really good exposure is. When you start introducing artificial light source, it starts to change what you think the definition of exposure is, and so we want to make sure that you are not blowing out the subject, and not underexposing the subject. You're getting that right exposure level, and that can be really hard on your first go around with artificial lighting. If you get stuck with any of the lighting setups or you're not figuring it out, and maybe my instruction is not as clear as can be, feel free to ask me a question on the discussion board, I'm always there to help out. But one of the things that I always push people to do is dig in on the internet like go find some research. You can, basically, google any of these lighting techniques. If you get stuck, don't be frustrated. Some of these are a little bit more complex than the others, and there's always a way to figure it all out. When I looked through the gallery to see what pictures you'll submit, I'm going to be really impressed to see a lot of good exposures. I mean that's really, I think, one of the hardest things we struggle with as photographers when we're using artificial light is to actually get an exposure that is one nail on the head, what we want, what we were looking for. The second thing that would really like blow it out for me, and I'd be really impressed is capturing all the different things that you learned in the class, not only the lighting setup but the way the model's face is angled. Really taking advantage of understanding how facial features are interacting with the light, you're able to overcome all the different challenges through the lighting, that will be hands down some really impressive work. We're excited to teach this class and show you some cool techniques, and I look forward to seeing it work. So let's go shoot.
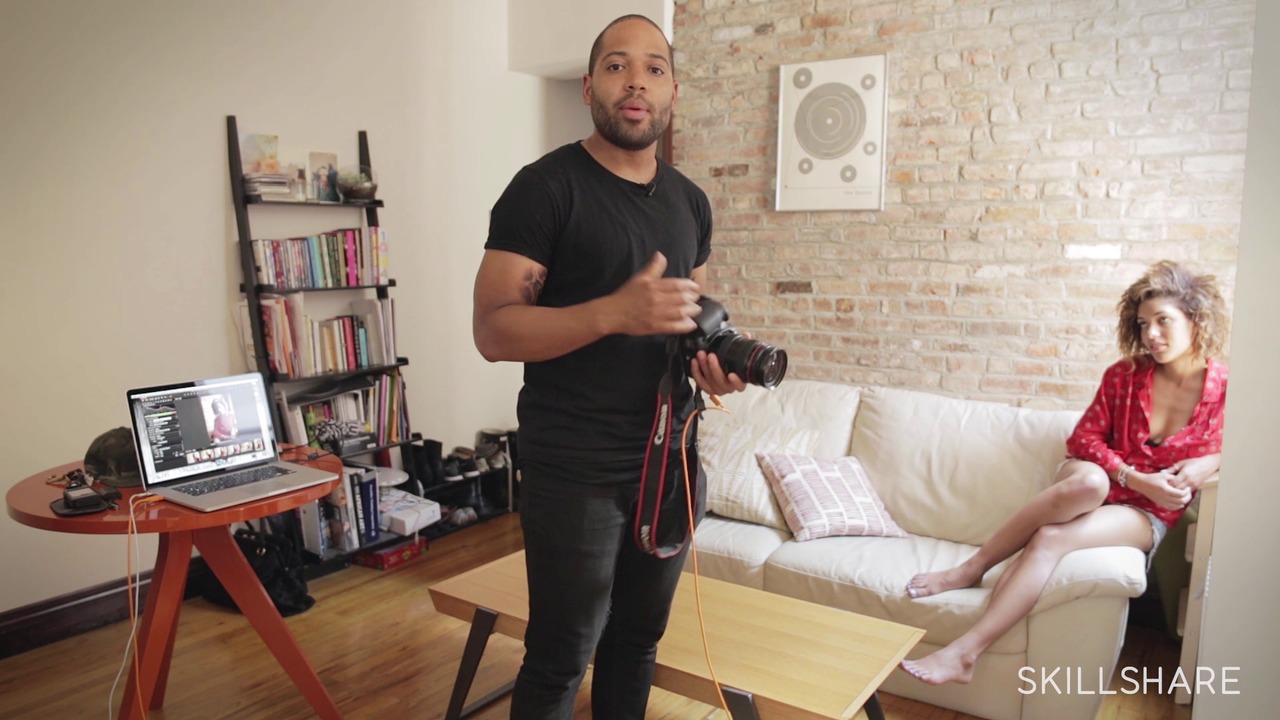
3. Equipment: So, we are right now in Chelsea in New York at a photo studio called Drifft Studio. It's beautiful, big, white room which is great filled with natural light and then we're going to be using an equipment setup today. I'm so, I'll walk you through what gear I brought or what gear we're going to be using for the shoot and also sort of relate that to what gear you might have in your own kit. I'm using a medium format camera but you can use a DSLR, an iPhone, whatever you want to use to get the best portrait and out of your subjects. We also have set up our light source which is a big octabox. It's sort of like a big window light but it's artificial and we have a beautiful model named Estelle. And we are, because we're in the studio we're fortunate enough to be able to use a laptop and monitor setup. So, as I shoot, you can see the pictures come through and we have a light meter. If you saw the first class, I use this a little bit and talked about it a little bit but this helps me tell based on the strobe light and the amount of light in the room, what exposure values I should be out on my camera so I get the right exposure. And you're also going to see today another tool that we use on our light shaping kit which is the V-flat. This is a white and black sided cardboard that we use to sort of manipulate the light. When we use the black side as it is here, that means we want to cast more shadows on our subject and we flip it to the white side, it acts as a bouncer, a reflector, something that you might see as a circular disk when you're out on location. This is sort of a setup that you're probably more used to seeing for professional photographers and professional gear kits but don't be afraid. You can also do this with a Cannon or Nikon DSLR. The equipment, you don't need to go all out and have the most expensive equipment. You can do this with a off-camera flash, a small one and you can do this with the sunlight through the window and you can do this with pretty much a lot of different things. So don't be afraid, also don't need a computer, you can use a memory card in your camera and you don't need a big piece of cardboard. You can do that with a piece of paper taped to your wall in your house. You can also do this with the iPhone. You won't be able to really use the strobes set up but you can use the iPhone with window light, with a reflector, all kinds of things to sort of tailor that light to your subject but you can pretty much accomplish this with anything. The reason we're using a studio today is for the pleasure of having the video rolling very clean and seamlessly as well as the ease of having our makeup artists and everybody else work in one space. If you need to do this on location, outside of your house, and in the apartment complex, in your room, that's also possible. I love the studio because we have high ceilings which allows us to control the light better. There's all the equipment at our fingertips which is great. But if you need to use your bedroom and clear out furniture or something like that, it's definitely the same thing and you can accomplish the same goals. I would say when you're thinking about shooting in broad daylight, you have to be more cognizant of taming the sun since you can't and dial it down or turn it up, you have to literally work with what you got. So, you'll probably use a couple different modifiers to help you accomplish the same goals. When you're choosing a subject, whether you're working with a model or you're working with a friend, you don't have to worry about who you're shooting when it comes to what you're trying to get out of the photo but you do need to worry about how you're shooting them. We'll go through it on the different lighting set-ups but if you have a model with a flat nose bridge or something like that, if you do a split lighting, the light's going to spill all the way over to the other side of the face and you don't know what split lighting is yet but the point is certain face types are better for certain lighting setups and so we'll go over that and it'll be something that you need to remember and maybe write, jot down. So, when you're looking at your subject and sort of profiling their face, you'll know exactly what light to approach that subject with. You'll see just how easy it is to just move the light around and you get a totally different result and the picture will seem totally different from each shot.
4. Split Lighting: So, our first set of today is going to be split lighting. Split lighting is when you have your light source at a 90-degree angle from your subject. This lighting setup is going to guarantee that we have light on one half of a face and shadow on the other side, so we get a pretty dramatic portrait. The one thing you want to be careful of is that split lighting is usually reserved for male subjects, because it reads a little bit masculine, but no worries because she's going to look great. For posing the subject, it doesn't matter if they're standing or sitting. You just want to make sure you adjust the light for their height of the head. The one thing that you want to do in order to maintain that split ratio, if you have the light all the way to the side, her face should be forward. If you move it, she's going to have to move with you and the camera, that way you can always keep that 50-50 ratio. In terms of where the light is and distance from the subject and height, there's not necessarily hard and fast rule, that you have a light source closer to the subject, it's going to be a little softer. When it's further, it's going to be a little harder, depending on the size of the source. What we have, it is about six feet away from the model and the light is basically right at the head, the shoulder level, and a little bit higher which is generally just as a rule of thumb. It's usually a little bit higher than the subject just so you get a good angle. As long as it is 90 degrees from the subject and at a distance where you can keep playing with to see how your picture comes out, it's all subjective after that. So, I guess now we'll go into taking a couple of test shots. Here we go. So in these test shots, what I'm looking for is to make sure that one, the lighting is hitting her face the correct ways and we're going to use this V pad in the background to stop the light from bouncing off the next wall and getting back onto that shadow side of the face. Then I'm just looking to make sure that we got a good emotion, a good look. We see the eyes very nice and sharp. We go back and forth a couple times until we get something or a couple of shots that we really like. Hold that right there. So, we're just going to look at a couple of the test shots we just took. This is my wonderful assistant, Pierce, who will be helping us out on the computer today and as well as the light setups. You might notice on the screen, there's a lot of black and white. The reason I'm shooting black and white today is because I really just want to focus on the lighting technique. Color can be quite distracting. When I look at black and white, I can tell exactly where the highlights are, where the shadows are, how the exposure is looking without being sort of taken off track by, if the colors are right, or et cetera, et cetera. So, we're going to be looking at everything today in black and white which will be fun and it'll look cool. This first shot, as you can see, the light is hitting her on this left side and the shadows falling off very strongly to the right. You can even see a little catch light in the eyes, which is great and makes the eyes feel alive. You can see that there's light that does fall on your subject's body, a little bit on the shadow side which is totally fine, that's just called light spill. I like the idea of being able to see what she's got on, which is important as well as get that face in perfect lighting. We'll see another one as well. So, as you can see, the split lighting is really giving her an attitude, which is really cool because she's got such a beautiful face, it's not reading masculine. It's not making her look unattractive, it's actually very flattering. Let's see one more. Even with a little bit of a smile, it's still a great light and it adds a little bit of mystery to the subject, which is really cool. Just one quick tip and it depends on who you're shooting, but if you look at the face structure on our model today, split lighting is a lighting that the light comes in from the side and it's going to rake across the face. So, if you have somebody that has a more flatter structure to the face, a flatter nose bridge, maybe a less prominent forehead, and all the other things that go along with that, maybe not high cheekbones. When the light comes across the face, if there's nothing to stop it or crawl shadow on the other side, it's going to spill over to the other side which is going to make this not look like split light. It's going to make it look like another lighting setup. There'd just be too much light on both sides of the face. She's great because you can see her bridges is nice and high, the forehead is great, it's got great shape to it. Her cheekbones aren't high but they're not flat either. So, the light is hitting the side of the face and then it's stopping and this direct fall off into shadow on the other side of the face which is great. You can do this with the sun, the strobe, but that's what you want to look for every time you set up that picture. The one thing that I didn't mention earlier is when you are setting up the lighting. If you're in the sun and doing this, you can actually tell where the light's hitting and just by looking at where the sun's hitting the face, and when there's not sun on the other side, you'll know what the picture is going to look like instantly. One of the things we'll show you with the next lighting setup that's a little bit more difficult, is we're going to show you how to be able to tell that you're going to get this lighting before you even take the picture. You can do this in the sunlight, you can do this in a studio, as long as you can block out the sunlight from coming in the windows and turning off the artificial lights and just using your strobes setup but we'll give you a quick and easy tip on how to do that using my wonderful assistant. So, I think we got some great pictures from this, so we'll show you the next lighting setup.
5. Loop Lighting: Now we're going to transition into loop lighting. Before we were at 90 degree angles, now my assistant Pierce is going to move the light at a 45 degree angle. Just to explain the loop lighting and what we're looking for, we're going to be looking for light that comes a little bit from an angle and down on the subject so that it casts a shadow using the nose onto the cheek without spilling too far. It's just a small shadow that you're going to see to the right, depending on what side you're shooting. Then it's going to create sort of another dramatic look. What we're going to do now is, as Pierce moves this light over, you're going to be able to see the light on her face change. This is the quick and dirty tip I was talking about. If you're using the sun you'll see instant payoff, but when we're in a studio we add the dark and the light a little bit and then pull down the baffle that's on the front of the soft box that makes it soft, just to see that light tailor-make itself on the face. As you can see, the light now is shining on the face. Instead of before, when the light was on that side and you saw light on one side and shadow on the other, now you're going to see light spill over to the other side of the face. What we're looking for is this shadow, that's right on her nose, is spilling off a little bit onto the cheek. It looks like we're right in the right neighborhood, but we're going to lift the light up a little bit, because that shadow should be pointing a little down towards the mouth without connecting to the mouth itself. Then it's too long. So now you see that there's a shadow coming down from the nose. If your subject has a more dominant nose the shadow will be a little sharper. Right now we're using the soft box without a baffle, so it's very hard light. When we put the baffle back on the soft box, this is going to soften up a little bit and you'll be able to see, basically what you're seeing now you're going to be able to see on the picture. That's how we figure out the lighting before we actually take the shot. Let's go ahead and seal that up and then we'll take a test shot. Okay, so we just took a couple of test shots and got down with the readjustments. We ended up taking off the outer baffle of the soft box, which is the part that helps diffuse the light and make the light softer. We took it off because we weren't getting a strong enough loop on the nose. It was sort of bleeding into the mouth shadow, which is not what you want, you want to have a very distinct shadow coming off the nose. The other thing I noticed in the picture is that, because we have this blackboard here, you get a lot of shadow on the jacket she's wearing, because it's black. I wanted to show a little bit more of the details of the jacket on, so we went ahead and A-clamped a whiteboard here. What the white does instead of being black is that the light comes off the light, bounces on the whiteboard and bounces back onto the subject, which fills in some of those shadows. We put it below the head so, it doesn't fill in the face too much, it's only filling in that upper body of the portrait. So, we're going to jump right into taking some more test shots. Perfect. That's perfect, hold your eyes like that, awesome. Cool. All right, so we're just going to look at a couple of these shots we took with the still. There's two varieties of lighting that you're seeing, well, it's the same lighting but two different shadows that are being cast. So, as I said before, with the loop lighting you want that shadow to come off the nose and coming towards the mouth without stretching and touching to the mouth. In the first shot, you see the shadow coming a little off the nose. You can also see the shadow from the chin on the neck which is very nice. A shorter shadow is what I prefer but you can also, depending on the way her face is angled, you might get a shadow that stretches a little bit and it creates an elongated shadow of the nose. I think that one is a little less flattering, but it's very subjective. Still a great photo. Still some great shadows on the face. You can see, in both these shots, catchlights in both the eyes in this shot, catchlight in this eye for the other shot. The reason we missed the catchlight on this other eye's because her eyelid is a little lower. Basically, you have a great shot demonstrating the loop lighting and the other thing that we mentioned earlier with the fill card, you're seeing a lot more of the hair, the texture, the detail, a lot more of the detail of the jacket, just because we put up that whiteboard to bounce some of the light back into the subject. Just to recap on loop lighting, one of the more important things is to make sure you check your photos as you're shooting for the catchlight. And the catchlight, again, is just capturing the light source in the person's eyes, whether that be the sunlight, a window light or a soft box, you just want to make sure you see those lights pop up in the eyes, that's what gives the photo life. One of the other tips that we showed at the beginning is using a darker room to shape the light before you take the shot. So, what we did was we blocked out a lot of the window light. We took off the baffle from the soft box so we could see the light as we moved it, how it hit the face, how the shadows played with the face. Another tip which would be really cool and which I don't ever get to do but would be awesome is to take a high-powered flashlight. Even if you don't have a dark room this would work, but just to hold up the flashlight and see what angle you're at, which will be, you're mimicking your light source and use that light to see how the shadows are playing with the face. Wherever you end up with the flashlight is where you're going to move your light source, figure it out before you take the shot. Then remember, the key thing about loop light is how the shadows travel on the face. So, the important thing is to have the shadow coming off the nose going towards the mouth, but to make sure it never connects with the mouth, because then you get basically unflattering big shadow blotching across the face, which is not flattering for your model and not flattering for your photo. These are two examples of how loop light can be structured and still give you a very flattering and pleasant image. The next lighting setup we're going to go into is called the Rembrandt lighting. It sounds very familiar, because it's based off the painter Rembrandt. Basically, this lighting is going to be somewhat similar to loop light, except instead of just having one shadow coming off the nose, we're going to have shadows coming off the nose and the cheek so that they create an upside down triangle light on the subject's cheek. We're going to walk you into that in just a second.
6. Rembrandt Lighting: So now, we're about to jump into Rembrandt lighting. Rembrandt lighting is basically just defined by the patch or the triangle under the eye on the shadow side of the face. So, what you'll see is the light will be at a similar angle as a loop except that it'll be a little further over so that shadow is cast on the opposite side of the face but a little bit deeper, but it just leaves a little patch right underneath the eye, and that is just named after Rembrandt, the painter. A lot of the lighting techniques that he used in his painting show that window light coming in from the side and painting that little patch of light under the eye. What we did was we changed the setup a little bit. We changed our modifier to a beauty dish just to get a smaller source and a much more harder source because it's so tiny. It's like the sun being really far away but it's a lot more harsh, and we have that still at 35, 40-degree angle from the model but a little bit higher in the sky like if it was the sun, and we'll show you something similar maybe with the iPhone later. We move the whiteboard. It used to be a little higher at the shoulder length to fill in the leather jacket, now we've moved it down a little bit lower just to fill in that bottom half of her. If we left it at the height it was at before, it fill in a little too much of the face, which wasn't giving us the look we wanted. The other big thing about this type of lighting is you want to position your subject to be turning a little bit away from the light, that helps to get that shadow cast over that side of the face and that's creating the triangle, and it's also gives you that Rembrandt feeling too as well when it comes to portraiture. Just a couple of small changes and we'll take a couple of touch shots. So, we're just going to take a look at some of the shots we got from the Rembrandt lighting. If you remember from the last lighting setup, loop lighting is where that light starts right below the nose, doesn't touch the mouth. On the Rembrandt lighting, we're trying to create that upside down triangle right underneath the eye on the shadow side of the face. All the shadows from the nose and the mouth are all connecting to form that box. What I really love about the Rembrandt lighting is you really get this beautiful mystery and painterly feeling from that little patch of light hitting the other side, but the rest of the faces and shadow, which is a big contrast to the split lighting where half that face is in shadow, I think showing a little bit of light or letting a little light escape onto the face really like plays up the drama and gives it that dimension that you don't have in the split lighting. Just as an example, I'll show you three shots we got from this lighting setup. You've got the beautiful highlight on the cheek closest to the light, and then you've got the shadows casting on this side. It's very faint but you get this beautiful patch of light on the cheek which illuminates a little bit of the eye. You can barely see the catch lights in this one, you won't always get them. It really depends on the angle of the face, every shot is going to be different as your model moves with you and the mood of the shoot. In this one, you get a lot more broader side of the face. The hair is a little bit further over and you're still seeing this upside down triangle, and we were lucky enough to catch the catch light on the side of the face where the light is shining, which is great because it really adds that liveliness to the shot. In this one, you get a fainter patch because the head is angled a little bit further, but you still get it and you get this beautiful catch light in the eye close to the light as well. With all of these, you get this mood that is a little bit more special than you get from the loop and a little bit less dramatic but more mysterious than what you get from the split lighting. As you can see, as we transition through all the different categories of one light setup, you're getting a little tiny degree of change from each one that totally changes what the audience is seeing in your photo. One of the big things that you want to remember when you're doing this one because it's a little bit more complex, a little harder to carry off is restricting the light. With this one, it's even harder to do. You really, really have to be careful about how you're letting the light bounce around in the room and how you're angling the light just to get the triangle in the first place. Again, this may take a couple of tries, maybe a few tries to get right. Well, I like to do step-by-step as one, turn off all the lights in the room if you're using a strobe light in your own house, angle the light with the modeling light on on the face so you can angle it, figure out where that triangle is. After that stuff's complete, take a test shot, see how it's all coming out. If you're having a little bit too much light bouncing back on the cheek and you're not getting that perfect triangle, you're going to introduce a black cardboard. It can be black cardboard you get from Kmart, Walmart, wherever or it can be a black reflector, the black side of a reflector, it can be a v-flat if you're in the studio, just something that will keep the light from bouncing back on the model's face and then retake the shot. You might want to pull the black closer to the model, further away from the model. You're just going to play around and you're really going to fail a bunch of times, we even in the studio as we're setting up a million times. So, you're going to play around with it until you get those ratios just right and you get the little patch, it's defined, you can see it in every shot, and then you're good to go. Another tip when it comes to the face and the contouring of the face with the light, in split lighting, I mentioned that smaller features, lower features that on his boulder prominent are harder to use in split lighting. With the loop lighting and the Rembrandt lighting, it's a little more forgiving. So, even if the subject does have the shallower nose bridge because you're angling them to the side and restricting the light from bouncing back on the face, you have a little bit more leeway to create this lighting setup. So, you can get somebody that has a wonderful modeling face with the high cheekbones and the sharp jawline or you can use a slide on somebody that doesn't have those features and get the result a little bit easier than you would if you're using something like the first lighting setup we went over. The next lighting setup we're going over is butterfly lighting which again is going to be a little bit more forgiving than the first two lightings where you actually need a more prominent nose, you need a more prominent forehead, you don't necessarily need the cheekbones but they hope that lighting look even better. We'll go into butterfly lighting, and that'll be another setup that you can use for faces that don't necessarily have that bold and crazy dramatic shape.
7. Butterfly Lighting: So, for our fourth light setup, we're going to do butterfly lighting, which is really defined by the shadow that's cast under her nose. Basically, butterfly-shaped shadow that is cast by the light being above the model's head versus off to the side or completely a 90-degree angle to the model. So, what we did to change the setup this time, was we still kept our beauty dish. Instead of having it at angle, we moved it right over top of the camera, which is right above the model in a sense, because all the light's coming front of the face, and the shadows are cascading down, so you get this very beautiful contour on the side of the cheeks, under the neck. It's a very slimming light if you will, and then you, of course, get the shadow underneath the nose. So, we moved the bounce cards from the V-Flat over to underneath the camera and what the silver card is doing, is it's helping filling out some of the shadows on the jacket and under the neck, as well as the nose, and then it's also helping us with the catch light in the eyes. So what you'll see in these photos when we get done shooting the test shots, is instead of just having that one main catch light, you're going to have the main catch light in the top of the eye and then you're going to have a little, small, tiny catch light which is from the bounce of the silver card in the bottom part of the iris. So, let's take a couple shots. Yeah perfect, and then a couple which is all face attitude. So, we'll just show you a couple of examples from our test shots. I want to basically walk you through what's really good butterfly lighting, what's really bad, and what sort of subjective. So, the first example is what happens when the model's face is not positioned correctly or the light's positioned incorrectly. So what you have, is a very, very big butterfly shadow, where it's casting almost about to touch the mouth. This is all subjective, but I personally and a lot of people probably won't like this. When you have too big of a shadow, it becomes distracting on the model's face and that's not what you want. You want these beautiful contour lines going down the side of the cheeks so you have this great shadow on the side casting down to the neck, but you don't want to elongate the shadow under the nose too much or else it becomes a little unflattering and a bit distracting. The next photo we'll show you, it's sort of a half and half. It's a little long but not as long as the other. This is where her chin goes from being down to being up, but not up that far, just right in the middle at level. So, this is not distracting, but I still tend to push a little bit further to get that shadow just right a kiss under the nose. So, the next shot will be the one that I liked the most. We have her chin a little bit higher, which gives you less shadow under the nose, and so you have this very thin, but very flattering shadow under the nose, and a very thin butterfly shadow. You still get the beautiful contours on the cheeks where you have the shadow coming in and you still get the beautiful shadow under the neck that's being filled a little bit by the silver card, you get the catch lights on, but only the top and the bottom, but you get a very thin butterfly shadow and that's where you really want to be. Just stay aware of where the model's head is moving, how that angle of the chin is going up and down, whether she's going left to right. This one is a very forgiving light, but it also can be difficult in terms of positioning because if the model turns to her left or right, basically that butterfly is going to go from a butterfly to just one nostril shadow, then you want to be careful of that or it's not technically butterfly lighting. These are good examples of how you can go a little too far or get it just right.
8. iPhone: We're going to try to demonstrate using the same studio techniques but with your camera phone on your iPhone or whatever phone you might have at your disposal. So, the first thing we're going to try to do is work with sidelining. We're going to be using big, huge studio windows filled with natural light. My assistant is going to use a black card to fill in shadow side of the model's face. We're going to do it with and without to show you the difference. It'll also show you that it's not necessary that you have somebody always to assist you to get more shadow on the face. It's just a point of preference almost. So, let's try it without. Can you step out for a second? Then, you look right here, chin down a little bit. Awesome. Cool. All right. Now, we're going to introduce the black card to sort of cut down on the shadows. Go like right, yeah. Then, look straight ahead. Perfect. So, one of the things that I did, that's a quick tip for anybody trying this on your iPhone, is once I got the exposure I wanted, so basically I point at the model, figure out the place like the bright spot on the screen, and then when I find that good exposure, what I do is, look straight ahead for me one second, on of the side closest to the window is really bright, so I find the spot that will reduce that. Then, what I do is hold down and so you get the AE/AF lock, which is basically going to hold the exposure value so you can take a bunch of shots at that same level, then just fire it at will. Let me show you guys a couple of different examples. So, without the black card, there's still a little bit of jag on the other side. It's a little fainter as if you use the fill to sort of brighten that side of the face. It's still very beautiful, very soft light because it's coming from such a large source, which is huge windows, and then that's really great. But if you want to go for a little bit more dramatic, when you add the card in, you get a whole lot darker shadow on the other side of the face, which that is more to me a true split light. There's way more shadow, there's way more drama, way more mystery, and that's the goal with the split lighting. The second light setup we tried to do with the iPhone and natural light is the butterfly lighting. So, for this setup, we moved the model a little bit lower to the ground before we had her on a staircase about level with the panes on the windows. Now, we've moved her below so we get more light coming down over her and hopefully cast that shadow below the nose. So, we got some pretty good attempts. It's just an approximation. What it's better to do this is to go outside under sunlight and manage with reflectors or V-flats or whatever you have at your disposal to get more directional sunlight. But I'll show you the example we have. It's a very thin butterfly shadow, but we're able to get it. What we did was by moving her lower from the window and also introducing a black V-flat, we're able to make sure that the light when it came on the face wasn't bouncing back and causing any more light to spill over. Then, we made that little darken of the shadows with that. It is very faint. Again, better to do in direct sunlight or just outside where you have more of directional light coming at you than to do it in a studio using such a big window with so much diffusion because it almost paints the whole face with light. But you can achieve very good results using just an iPhone and playing around with your angles and a reflector. So, everything is possible.
9. Notes on Editing: Butterfly Lighting: So, we just wrapped shooting the four different types of lighting techniques with one light. What I like to do after every shoot is sort of filter through some of the best shots and look at a couple of quick edits just to see where I'm going to end up. We're going to look at one of the last shots we took, which was the leather jacket and for that shot we were doing butterfly lighting. This I think might be one of my favorite shots from the entire shoot. As you see we already have the black and white treatment on there, and I really like it in black and white. So what we're going do is basically, do a little bit of correcting and a little bit of stylistic decisions about the shot just to get more out of it. So, the first thing I want to do is- and these sliders, just so you know, we're editing in Capture One right now. These sliders are very similar in Lightroom as well. So, if I say things like shadow recovery, highlight recovery contrast, all these things are still in Lightroom, if you choose to use that. So, the first thing I want to do is, I love the image. I think the lighting has plenty of contrast in it, but every once in while, I still like to push it a little harder. So, what we're going to do is increase the contrast by just a couple of points just to get it to pop a little bit more. We're going to go from a four to a 17. Remember, don't get hung up on the numbers. It's not important. Basically, it's just like cooking, season to taste. So, we're going to increase the contrast a little bit which we just did. We're also going to go down to our clarity slider and Capture One, there's all types of different clarity adjustments. There's four different methods, and then there's clarity at the structural level, and then there's clarity at the overall level. It really improves contrast on a local level which makes things stand out a little bit more. So, what we're going do is we're going to increase the overall clarity by six points, and then we're going to increase the structural clarity by six. What this is going to do is increase the contrast by pixel, so basically, it's a bit more of a sharper more bold picture. Then we're going to look a little bit at the contrast curve, and what I see right here is beautiful shadows on the chin and on the jaw line. I really love the way the light is hitting the forehead but I kind of want to take it down just a little bit. Flatten it out a little bit. So, what I'm going to have my assistant do is bring the highlights down just a tiny bit in the face, so it's a little bit flatter but still dynamic. So, it's just a just a little bit, not a ton. But this is before we added a little highlight reduction on the forehead. You can also do this in highlight recovery. We tend to like to play with the curves a little bit just for the freedom to move at multiple different points on the curve. And then we added it back just now. Then that has just taken out a little bit of the shine on the forehead. The other thing that I like to do that I've already done in the shoot, is I like to add a little bit of grain. You can also do this in Lightroom through styles or presets. But what we did with this screen is we added a smooth grain, so it's almost sort of like that dreamy, clean, just a very smooth nice complimentary grain to the photo. So it has sort of that richness, and depth, and detail. And we've applied that to the image so it's sort of got that magazine touch and this is without doing much at all. Our black and white it's just a preset style that's already in Capture One. The only thing I want to show you that I do to a lot of photos is technical correction. On a lot of cameras, so if you're using a wide angle to shoot or you're using something under 200 millimeters you'll get some barrel distortion on your lens. I think I talked a little bit about this on the other class and just to correct that, depending on what lens you're on, all you have to do is go into your lens correction tool. That's the same tool that's in Lightroom and you can change distortion from zero percent all the way up to 100 to sort of fix and flatten out the distortion. And you will see very subtle changes, but it'll stretch the face, flatten the face a little bit, and it'll give you a more true to what you're seeing out of your eye feel on the picture. Another thing you can play around with, which I rarely do, but if you're shooting really wide, say 24 millimeters, there is a light fall off slider. You can drag it to taste and you'll see it instantly when you do it light will start to open up on the edges of your photo, which is basically, another word for where the vignette would happen when you're using a wide angle. So, this is at 100 percent. I like to keep it kind of normal unless there's something that's making me feel stylistically like the light's not right. The only other thing that we do is we go over to our adjustment brush. You'll notice that the model today is wearing all black, so sometimes we lose some of that detail. We're not going to do this correctly. It's going to look really sloppy. But I'm going to just have my assistant paint over a section where it might be a little too dark and we're losing a little bit of the detail in the photo, and we're going to show you how to bring that back. So, we're going pick an area on the jacket, maybe right here in the arms. Then what we're going do is take an adjustment brush and just paint over the arm area where you want to bring back some of the shadow. Or conversely, some of the highlight. You can also use this adjustment brush to make a number of other changes as well. But just for now, we're going to show you a little local shadow recovery. The red is just your mask, so basically, anything you've painted will turn red so you know where you've used a brush. And now, he's going to go down, now that he's painted that arm and some of the leg, we're going to go and tweak with some of the sliders. So, if we go to our high dynamic range, this is where you do highlight and shadow recovery. And he's going to drag the shadow. As you can see, if you shot this a little dark, you are now able to pull out a little bit of what you might have lost. Don't be afraid, if you feel like you've lost a little detail. There's always ways to get some of that detail back, depending on what kind of camera you use. So, this is an extreme case. We would never go this far, but this is just to show you that we can still get some of that detail back. So, this is without applying anything. He's already painted the mask and now we're going to bring in some shadow. So, we'll go from zero to 20 and you can just see, you get a little bit more detail back and that adds a very good dimension to the photo that I think it was lacking. But when you actually sit down and do this in Photoshop, you want to be a lot more careful. You want to make sure whatever you do locally that it blends in very nicely and it looks like it just was a natural photo. So, this is basically it. A little bit of contrast, a little bit of film grain. I would recover highlights or shadows just to get that right amount of balance between dark and light. If I go into Photoshop later, I might bring out some of the hair. I might add a little contrast to the hair. If there's any liquefying that he's done, as in a wrinkle on the jacket or something that I want to smooth out, you can do that in Photoshop. I always look at the eyes to make sure they're bright and full of life. If these were dark I'd just either use a curve or shadow recovery and I just paint it in. But there's always a million things you can do with the photo, but when you get a photo that's just beautiful out of the camera, try not to touch it too much. Just get it to where you think it's just perfect and polished, and then roll with that. If you are a film shooter and you are a purist at heart, don't even touch it in Photoshop if you think you got what you want. So, that's just a little brief tutorial on that photo. We'll show you one more. I'm doing basically, the same things and hopefully you'll see little minute differences that really make the difference.
10. Notes on Editing: Rembrandt Lighting: So, we're going to show you an edit for one of the Rembrandt shots. This is a picture that I probably wouldn't use. It's not my favorite, but I wanted to show you what you can get out of a photo if you feel like the lighting wasn't perfect, or there's something that's missing, that you want to put back in it through retouching. So, for this shot, you'll notice because the lighting setup isn't over-the-top like the other photo we showed you, from the side, the jacket's a lot darker. So, we're going to show you the shadow recovery slider, and normally, what I would do is, we just pump this up until we get a happy mix between getting the detail back in the clothing, and not losing the important shadows in the face. Because we're not doing this locally, shadow recovery is having over the whole picture. So, you have to be really careful about how far you drag it, and how far you go. So, what he did was, find the happy medium. So, this is before recovering, and then he adds about 30 points to shatter recovery, and we get the details and the contours of the jacket bat, which already is a huge win. Then, what we noticed when we were testing this light is, her face is just a tad bit shiny due to the makeup. So, one thing we can do to help bring down that highlight is, to recover some of the highlights, to bring down that shine and flatten out that contrast. So, he's going to put a little bit in there, that'll help flatten that out, and dole that shine a little bit. He's put in a little bit, you can already see how that went from being like boom, to a little softer, a little less bold, and that's perfect. One of the other things we would do is play around with the curve a little bit. So, he's going to go down to the curve, and we probably try to pull out a little the darkness, so we get the hair back. But we keep some of the beautiful shadows around the face, and some of the great contrast in the jacket. The great thing about curves is that, you can pretty much hit the curve at any point. So, as you know on the curve's probably from last lesson is that, the curves is like a straight line that you can mess with. So, at the left side of the curve, you have all your rich darkness, and at the total opposite, you have all the highlights. So, we can go into the curve and pick a specific point on the curve while controlling the rest of the curve to bring out different parts of your image. Let's try to bring out just like this little piece of hair, just what the curve will show me the extreme example. So, don't pay attention to the whole picture, but he's just going to try to bring out this hair a little bit more just using a curve. So, as you can see, all this hair is starting to show a little bit more, and if you want to go for a less stylistic shot and go with a little bit more of showing the detail, showing the clothes, you can bring out the curve. The main thing for me today on this picture was to bring out the details in the jacket, take down some of the shine in the cheeks and the forehead. The other thing that we would do is probably add a little bit of clarity here, just to punch it up a little bit. On this, we're going to add a little bit of that light fall-off correction, about 30 percent. Because since we're lighting from the side, it's going to be a lot darker on the edges than when we were lighting from the front. So, I just want to bring back some of that light around the pants. I'm pretty happy with this. Like I said, this isn't my favorite photo, but we wanted to show you how to recover information from a photo that might have been a little too dark, might have too many highlights in the wrong places. That way you know even if it didn't make the selects file, that it's not totally a garbage photo. There's always some rescuing you can do.
11. Final Thoughts: All right, so we just finished shooting the four different lighting techniques, we even did a little session on the iPhone. Just to recap, we did loop lighting, rembrandt lighting, split lighting, butterfly lighting. We've tried split lighting and a little bit butterfly lighting with the iPhone. I showed you a little bit about how to process an image when you're done with the session, which was cool. I'm really, really excited to see what you guys come up with. It's always hit or miss in the studio sometimes. Sometimes you can be on fire and sometimes you'll hit like a stumbling block, but you always will get one or two images that are really great and will really impress you. So, I'm hoping to see some of your stumbling block, some of your successes. So, don't forget to post in the class and I look forward to commenting. If you have any questions, please feel free to reach out. Let's have some fun.
12. Explore Photo Classes on Skillshare:
 Justin Bridges, Fashion Photographer, Former Finance Pro