Transcripts
1. Pocket Puppets Intro: Have you ever noticed
how a simple puppet instantly changes the
energy in a room? There's a unique kind of
magic in puppet making. It has this incredible power to bring a sense of joy, curiosity, and just pure play back into our lives, no
matter our age. When we create characters, we give ourselves
permission to imagine, to tell stories, to become someone else,
and to just have fun. And today, we're
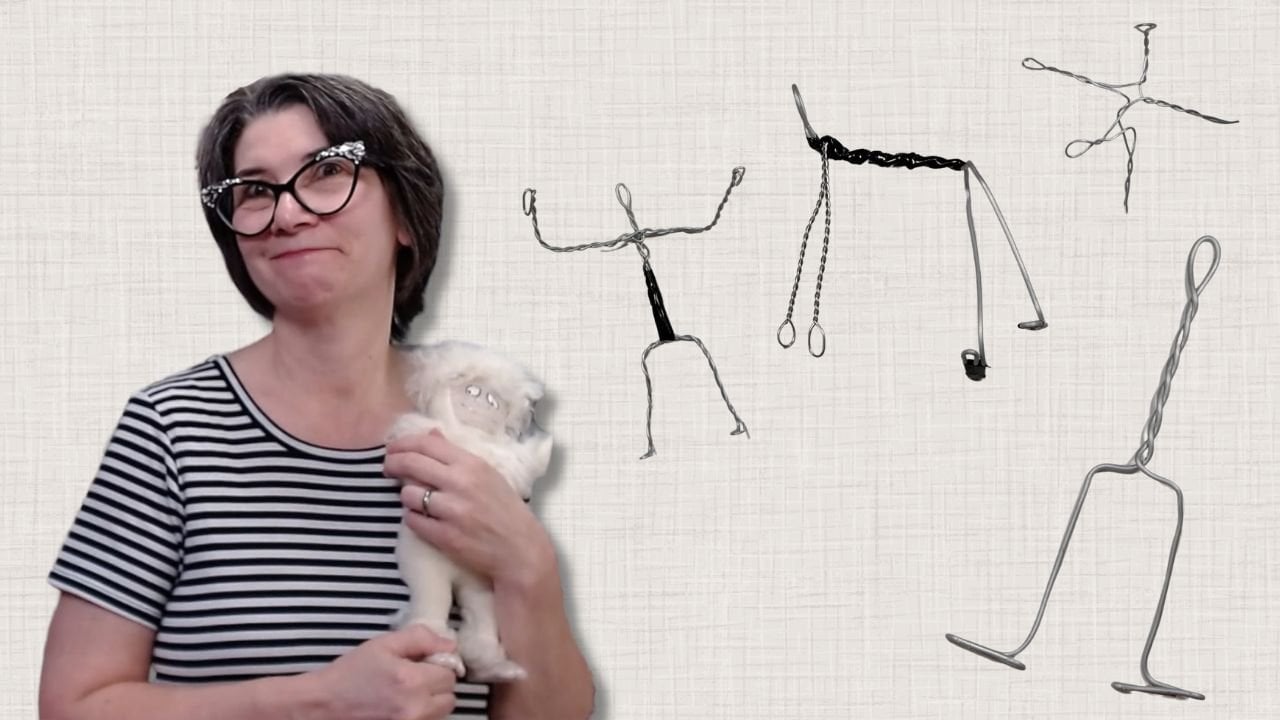
going to bring that big imagination down to a very small scale. Hey, folks. I'm Luci here at
Ballyhoo Creations in my home studio
where I create dolls, puppets and plushies that
makers all over the world bring to life using their
sewing or embroidery machines. And today, I've got a no
so option for you, too. I love engineering
new characters, but more than that, I love
making the craft accessible, which is why I'm so excited
about today's project, because for this tiny character, you don't even need
a sewing machine. You can use
traditional stitching, or you can use fabric glue
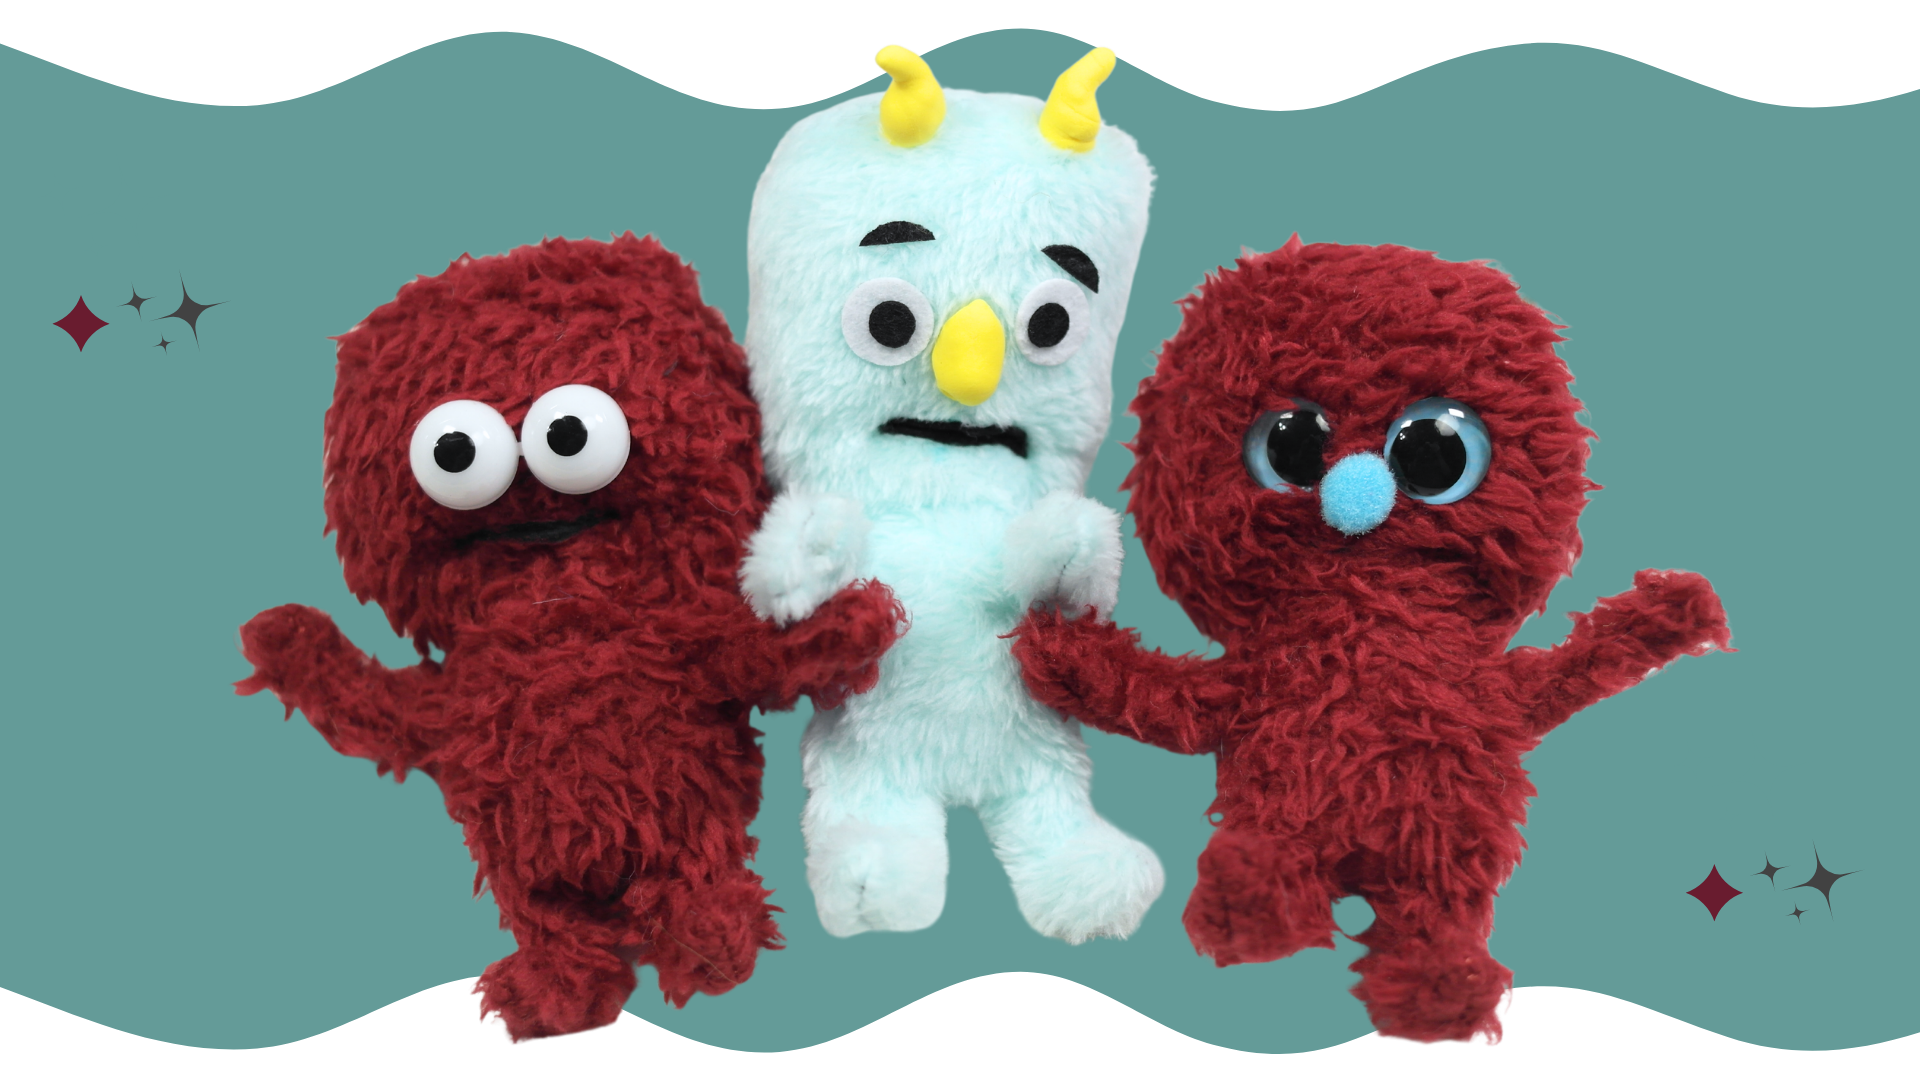
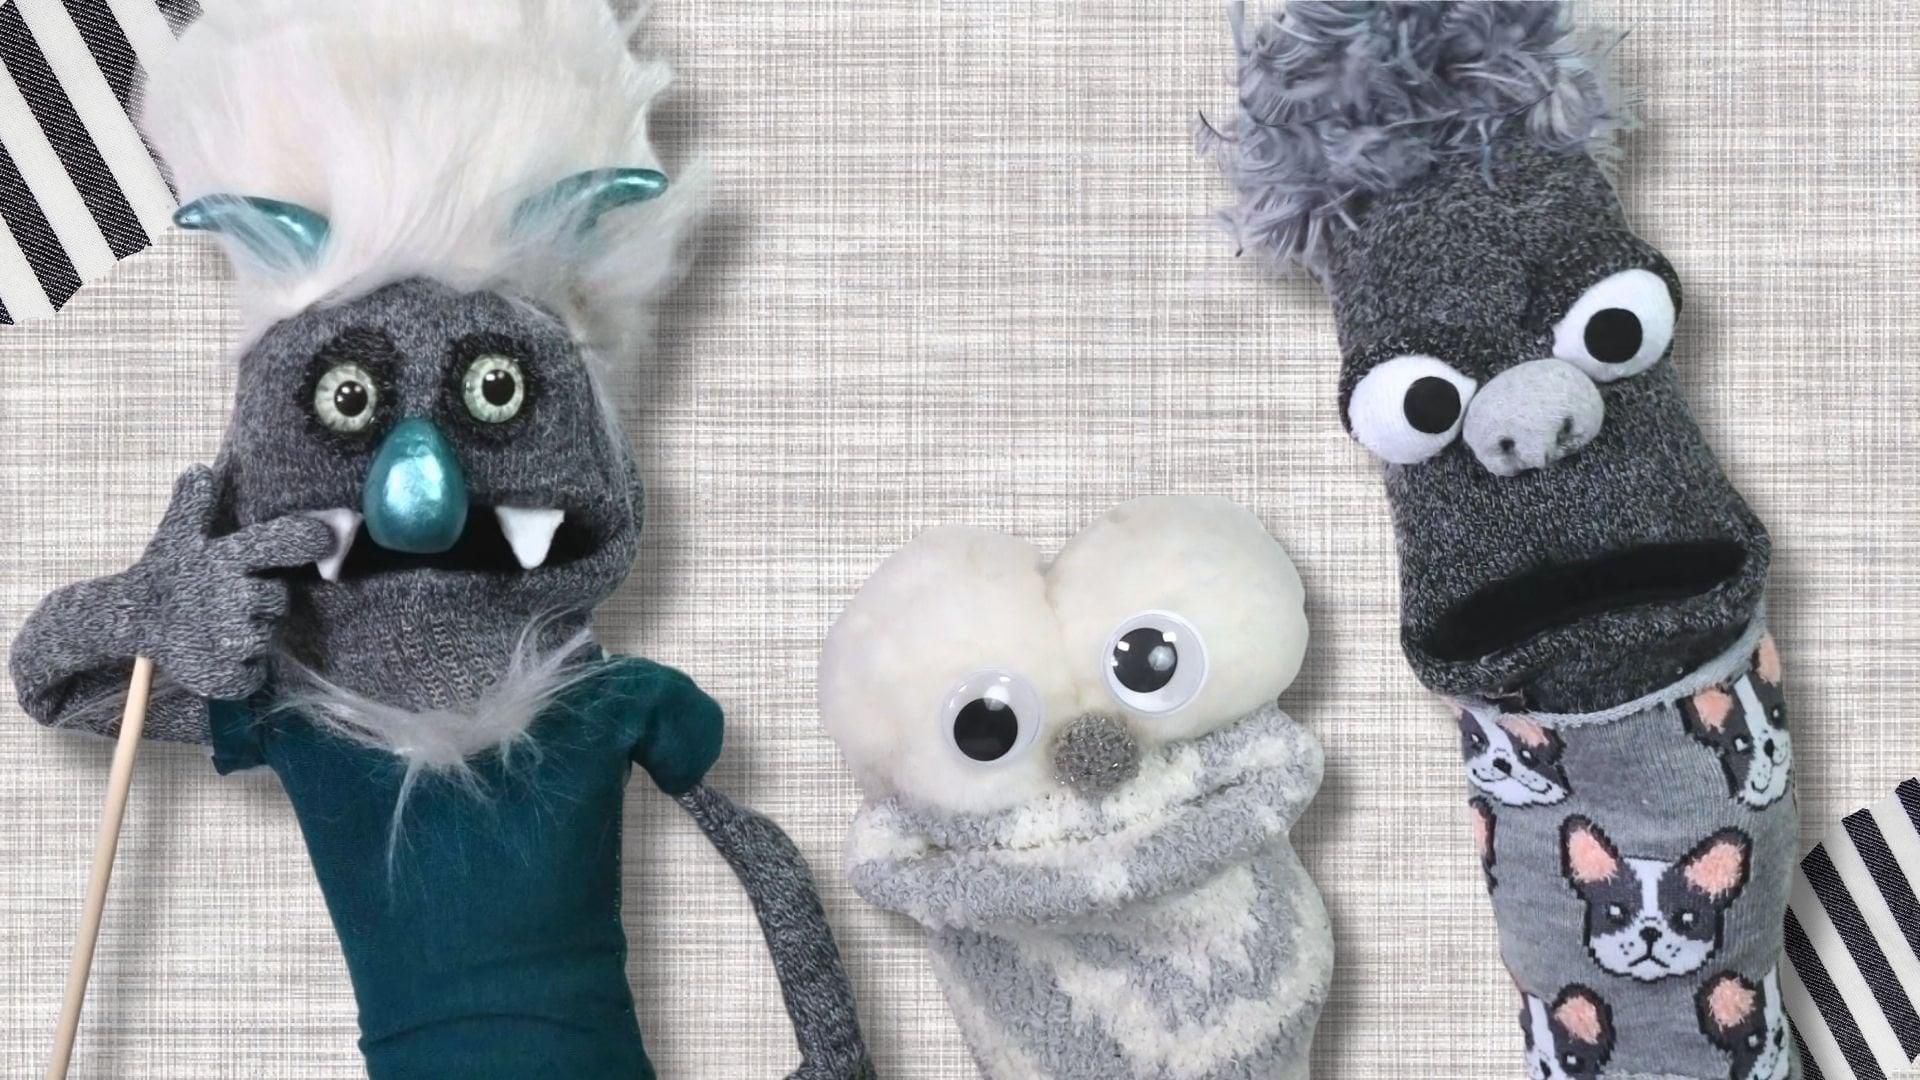
for 100% no so puppets. In this class, we're crafting a tiny five inch pocket puppet complete with a fully functional moving mouth and poseable limbs. Step by step, we'll walk
through the entire process from a flat piece of fabric to a fully realized
little character. I'll show you how to trace, cut, and turn these miniature
pieces cleanly, and then we'll dive
into character design. I'm going to share
ten different ideas for creating unique puppet eyes, plus fun ways to embellish your puppet to give them a
one of a kind personality. This class is designed for
anyone who loves miniatures or doll making or puppet making or just wants a fun
creative escape. If you're an experienced soist, you'll love the precision
of this mini scale. And if you've never touched a needle and thread
in your life, the no so glue method means you can jump right
in with total confidence. By the end of these
lessons, you'll have a pocket sized talkative
little friend ready for the spotlight and
the skills to build an entire gallery of
miniature characters. Are you ready to bring a little
more play into your life? Grab some fuzzy fabric, clear off a small corner of a table, and let's start crafting. Yeah.
2. Project: Hey, I'm glad you
decided to join us. In this lesson,
we're talking all about your class project and gathering all the supplies you need to bring your
pocket puppet to life. There are more details about the supplies in each
of the lessons, and you can find a
downloadable PDF supply list that you can then print out
and take shopping with you. Your assignment for
this class is to create your very own five
inch miniature puppet complete with a moving
mouth and poseable limbs. And then snap a photo and share that in the class
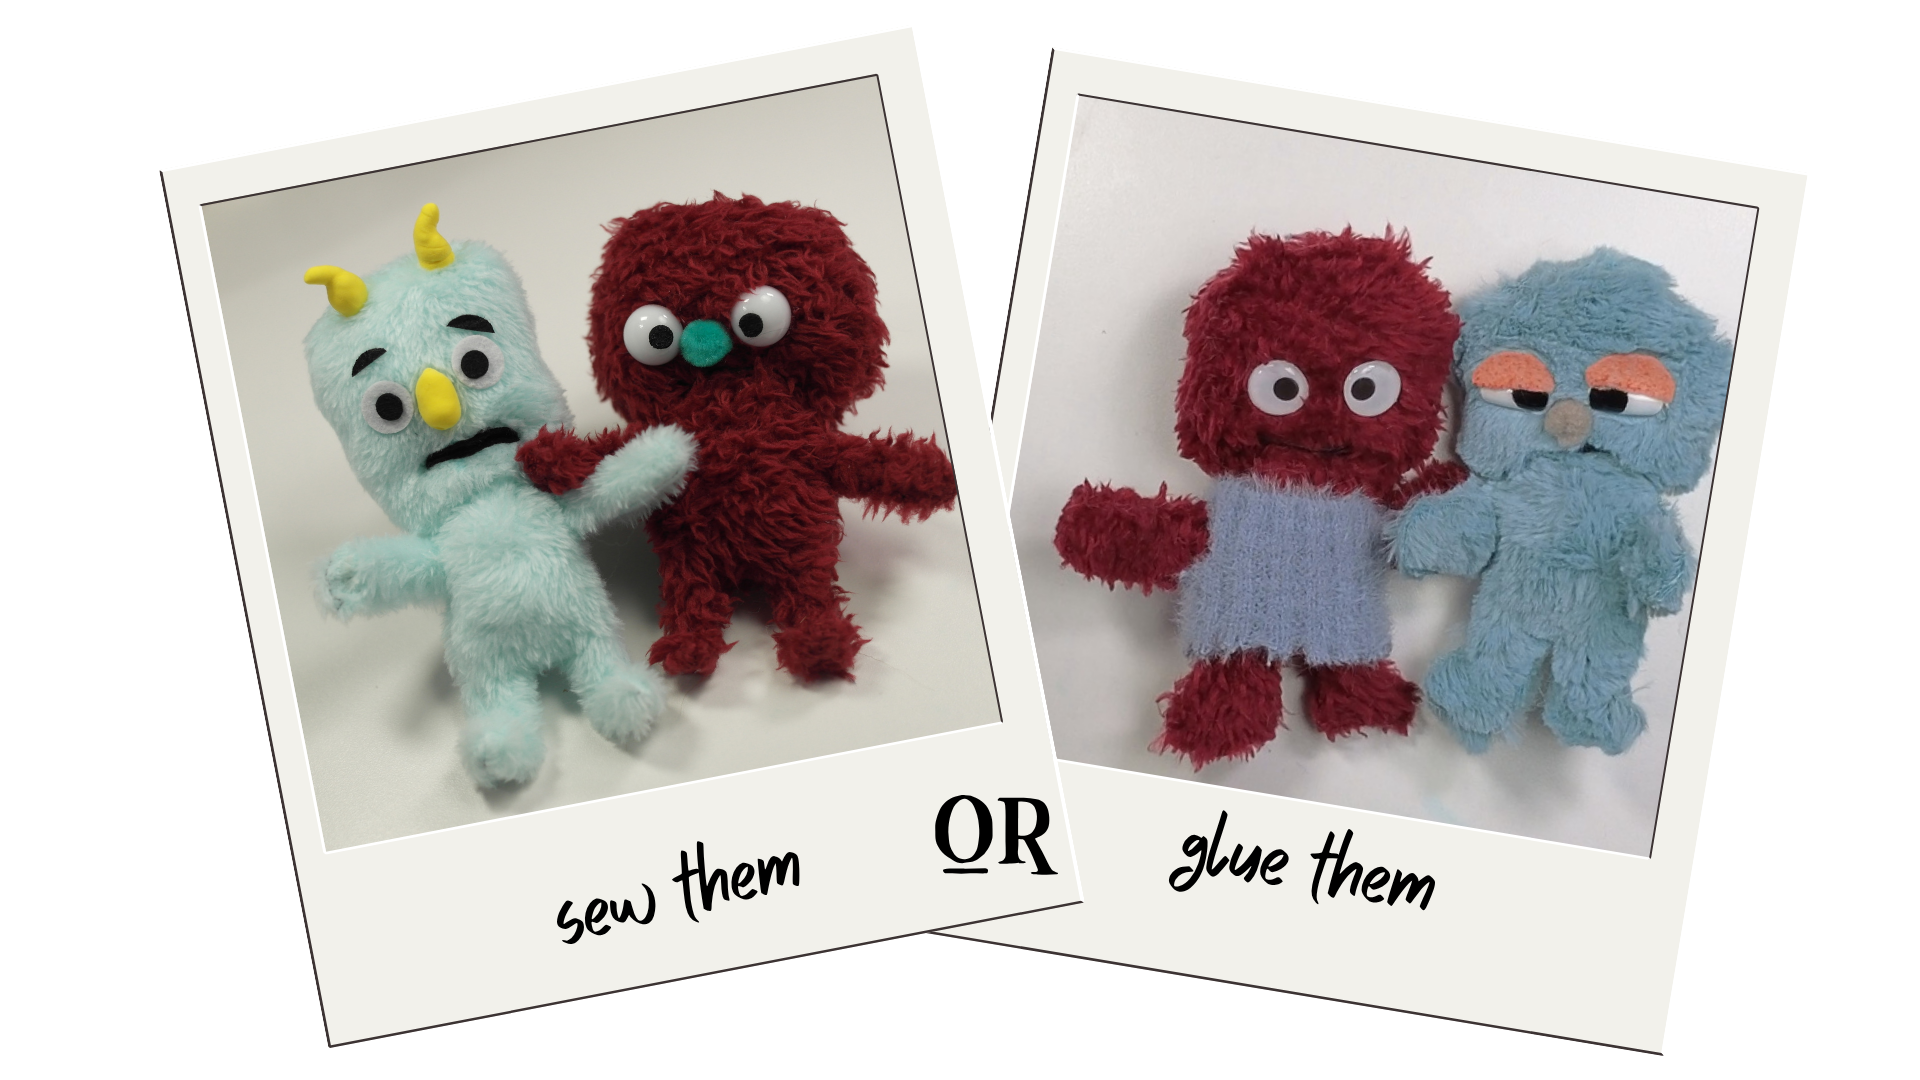
project section. As we go through the lessons, you can choose to follow the
traditional sewing method, either using a sewing machine
or by hand stitching, or you can choose the 100% no sew method using
a fabric glue. Whichever path you choose, the end result is a charming
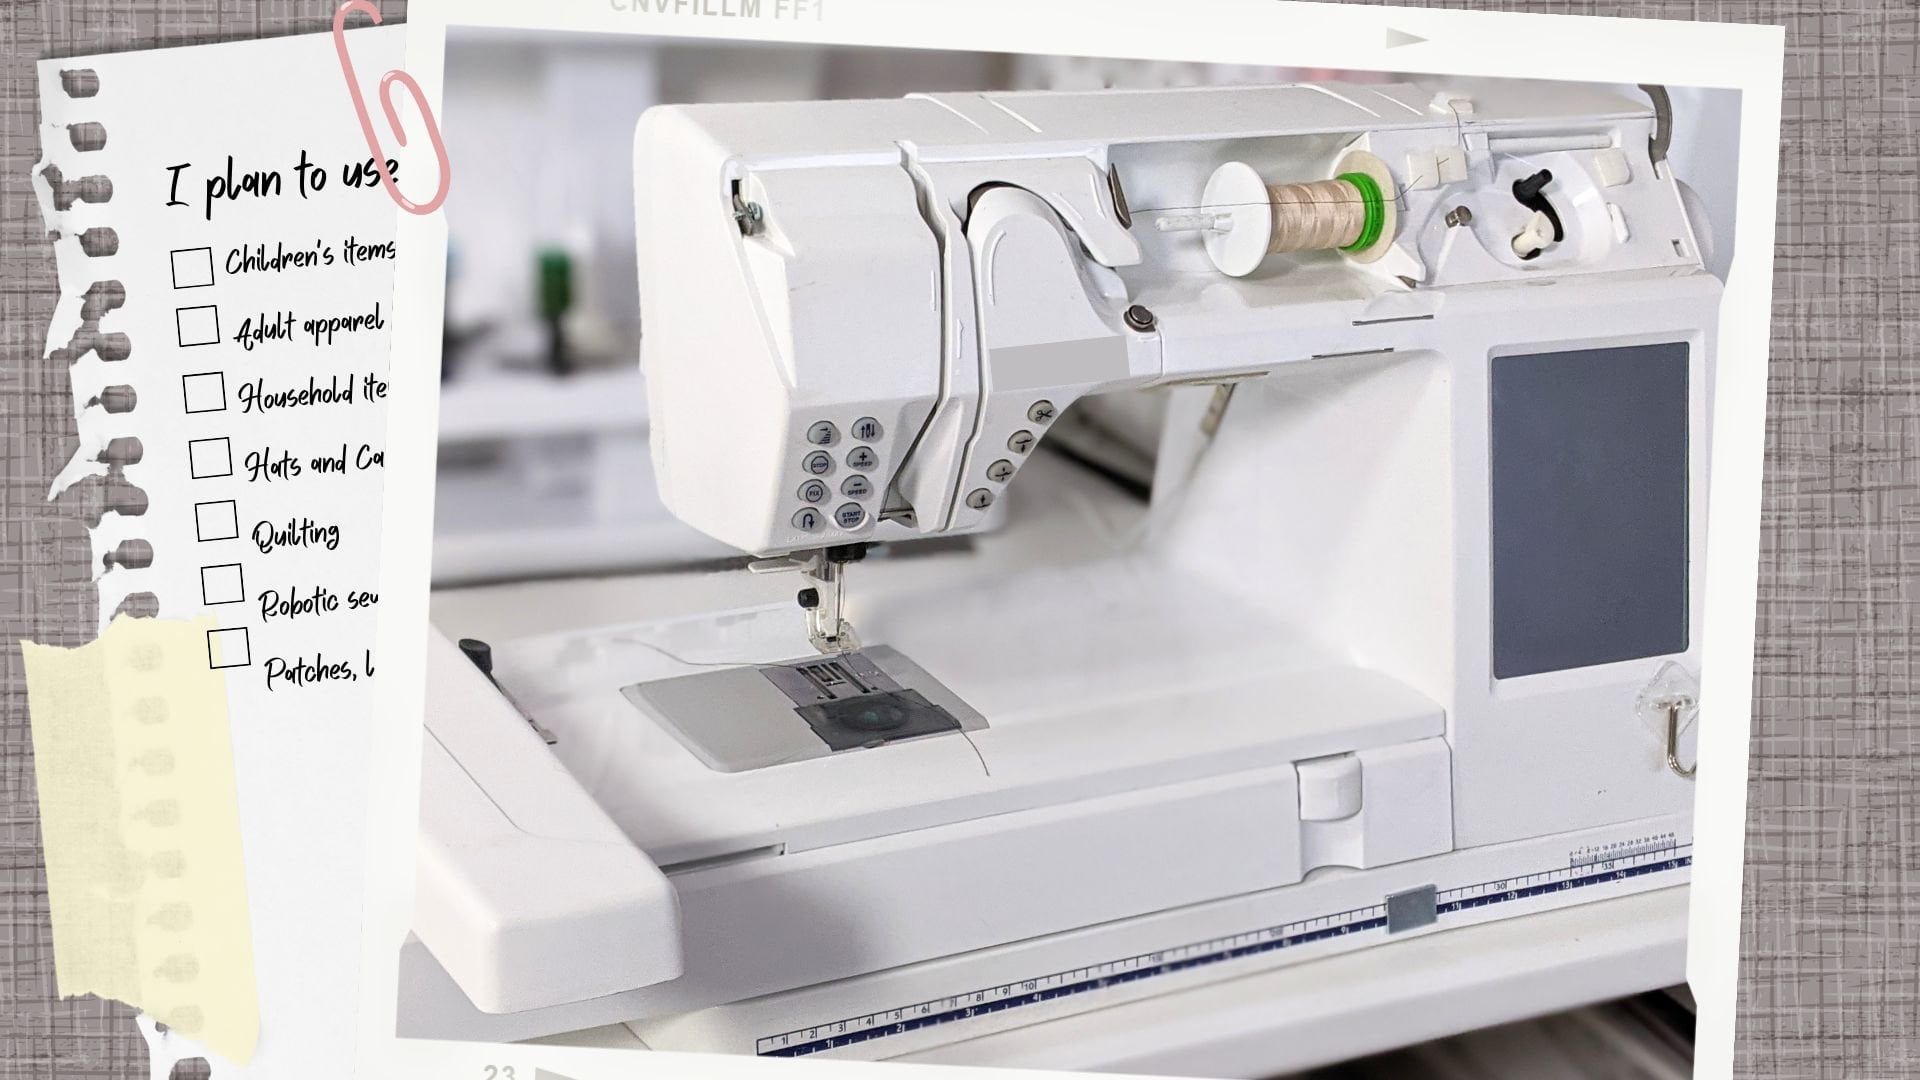
pocket sized character that is uniquely yours. Before we dive in, let's
go over our supply list. And these are the things that
everybody's going to need no matter which method
you choose, glue or sew. We'll start off with
our fuzzy fabric, and you just need something that has a little bit
of furrinss to it. Minki is a good choice. There's this some
stretchy, small Sharpe. It's not exactly a Sharpe. And then this one here was a sweatshirt or
sweater type of thing. And I encourage you to look at second hand materials to make your pocket puppets with
because you can go to the thrift store and find
some second hand clothing. This is like a fuzzy
sweatshirt hoodie type thing. You can find blankets. Even pajama pants have a good
texture for making these. So you don't have to go to the fabric store and buy
something brand new. You might have something already around that you were
going to donate anyway, or you could go thrift
shopping and find something really furry
and nice and soft. So check that out,
too. You'll need about a five by seven inch
piece of fabric for two sides. So two pieces, five by 7 ". If you're working with this kind of furry fabric and cutting it, then you definitely should consider wearing a
dust mask because these little fibers can get in the air in your nose
and in your lungs. And that's not good. So I'm just going to say safety first, put a dust mask on when you cut this stuff. You'll
need some felt. Plain, regular
craft felt is fine. Or I actually like
the peel and stick or self adhesive because
then I can use less glue. So that's just an option. Black felt is a good one. You could also do pink or
red for inside of the mouth. And if you get black, not only can you put
it in the mouth, but you can do things like eyes and other
embellishments with that. Of course, you're going
to need some scissors, and a good sharp pair is always good to have
around. Fabric glue. I like fabrifix
for this project, or my other preference would
be a fine tip, hot glue gun. No, it's not turned on.
It's why touching it. And these fabric, Serbonder fabric gluticks
these work great with fabric. But any hot glue with a detailed tip is going
to work for this, or just get the fabrifix either one are going
to work great. Whether you're sewing or gluing, I do recommend having
a little bit of fabric glue around for
the embellishments. Just need a handful
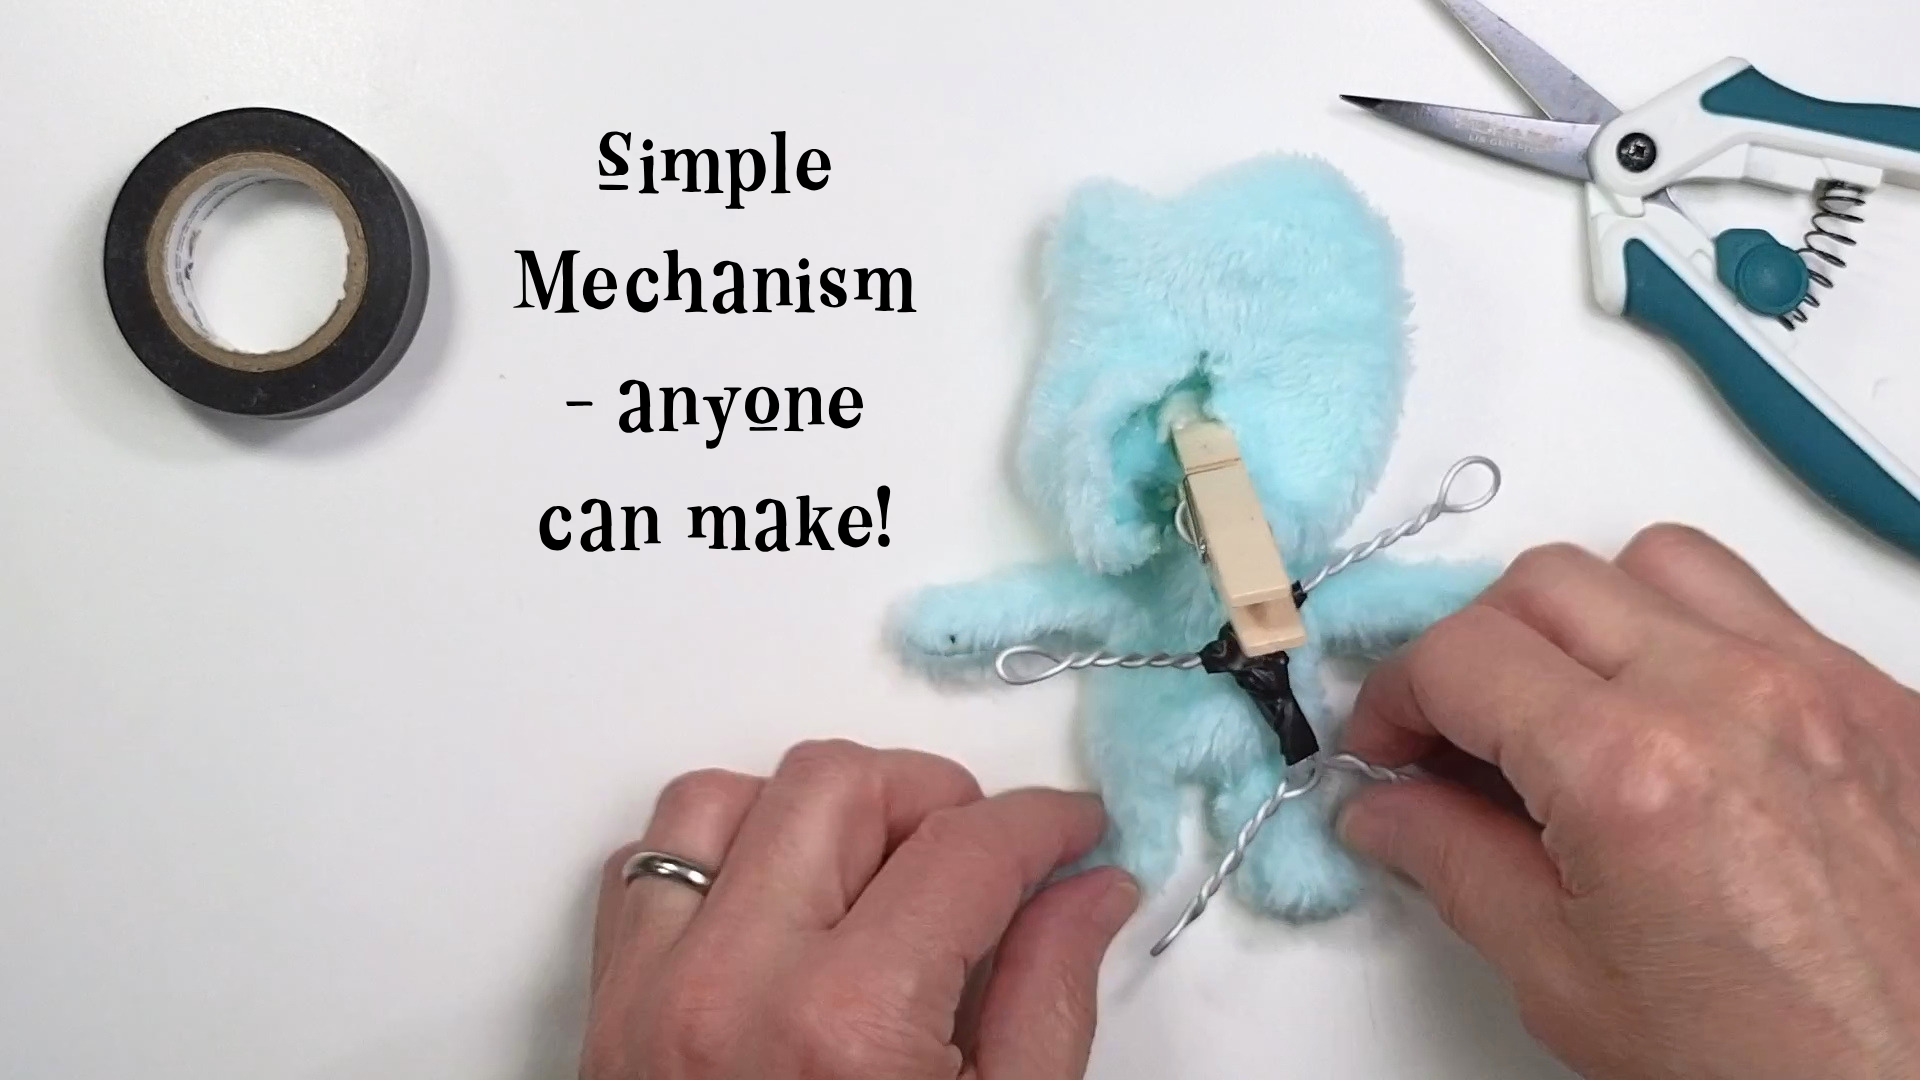
of a fiber fill, any kind of polyester stuffing is good for the head and body. You'll need a clothes pin
or some other kind of clip. This is going to be the little magic ingredient that
makes the mouth work. You're going to need
some type of eye, and don't worry too much about
this yet because I've got a whole lesson on a lot of different ways that you can
add eyes to your puppet. This part is optional, but I do recommend some aluminum armature
wire from the craft store. It's very easy to bend. It won't rust, and it's much more durable
than regular wire. And then also a pair
of wire cutters. If you're going to
work with the wire, you don't have to put
wire in your puppet, but that wire is what allows the arms and legs to be posed. So I do recommend it. And if you don't have that
aluminum armature wire, you could also use something
like pipe cleaner, chenille stem, floral
wire, jewelry wire. Any kind of fin wire is
going to work for this. If you're choosing
to sew your puppet, you will need some
tearaway stabilizer. This is made for
machine embroidery, but it's a really
good way to hold our fabric sandwich together and just stitch over
the traced lines. So I definitely recommend this. You'll also need
needle and thread. Of course, your sewing
machine or hand sewing, whatever you're doing that way. And you'll need to
turn your puppet right side out if
you're sewing it. So I recommend a pair
of hemostats or turning tubes or some other way
to turn those tiny limbs. If you're gluing your
puppet seams instead, we're going to be making
a clear plastic template like this of the pattern shape. And I recommend either
a cheap cutting mat from the dollar store is
one way of doing that, or just any kind of
packaging plastic that you may have leftover, pull that out of
your recycling bin, and you can use
something like that. And finally, you might want
some little embellishments. I've got some little pom poms here that I'm going
to use for nose. You can have flowers or ribbons. Here's some extra
felt or fun foam that you might want to
use for facial features. Also, air dried clay is
a good thing to use, and this is one where the nose and the horns were
made with the air dry clay. You can also make the eyes
and other features with that. So this is another
very inexpensive, easy to use material. Once you've decided
on your supplies, you are ready to start building. If you're sewing
your puppet seams, you'll want to watch the
lesson on sewing seams. But if you're gluing the seams, you can skip the
sewing one and skip straight to the gluing
seams lesson instead. I will confess, this class was actually going to
be for sewing only, but then I started experimenting
with the Noso version, and I saw how great
it turned out, so I decided to add that in. So hopefully, that
doesn't throw you off. Alrighty gather your materials, and I'll see you in
the next lesson.
3. Sew Seams: We're going to get started, and we're going to take
our pattern piece. This is just one piece that you have here for the body head. All of the pieces are one piece, and then there's this
little 1 " circle for the mouth that
you'll cut from felt. But don't cut out the actual
puppet from your paper. We're going to take this product called tearaway stabilizer. After you stitch on this, it easily tears away
from your stitches. So different products that
you could look for would be sulkis tear easy
is one of them. It's a very thin and
lightweight one. Also, Pelon stitch
and tear light is another option that
you can find at places like Walmart or
sewing supply stores. And these are machine
embroidery stabilizers, is what they're sold for, but they work great
for machine sewing of small parts, and
you're about to see that. Any tearaway stabilizer
will work for this. You may be wondering,
can I just use regular paper or tissue paper? And the answer is
yes, it will work. However, those are not meant to be sewn on the
sewing machine. So if pieces of it get down in your bobbin case,
it would be a problem. This product is actually
made for sewing. It's not going to
damage your needle. So I'm going to recommend that you use the Taraway stabilizer. So we're just going
to put this over our pattern on the paper.
Nothing's getting cut out. And then I'm just
going to trace it with a pencil or any kind of fabric safe pen you could use and just trace
around the whole thing. It's okay if it's not perfect. And I'm going to just
speed up through that. You might be noticing that the pattern is very
blocky and chunky, like on the hands and the
feet, they're squared off. That's just so that
if you're not very skilled at sewing
small curved lines, this will be easier for you. When you get to the
corner, you pivot instead of trying to go
around a little curve. If you want to round them
off, you certainly can. But I decided to
make the pattern so that you don't have to, and it does sew a
little more quickly. But that's up to you,
however you want to do it. And also make sure
that you trace the placement of the mouth
onto your stabilizer, as well as the two
eye placement dots. And if you want to, you
could put this arrow here. This is the fur
direction like that. And then if you have
stretchy fabric, you want to make sure that
it's going across the puppet, whereas the fur needs
to be pointing down. Okay? So now we've got
our little tracing. And then all we have to
do is take our fabric, make sure that the
fur is pointing down. You can tell when
you pet the fur, it should lay down flat, whereas if you go
against the grain, you see how it kind of
bubbles up like that. If you go different directions, it just doesn't lie as smooth
as that down direction. And I'm going to This is
right sides together. You can either fold
it or if you have two pieces that's
cut, that's fine. It doesn't make any difference. And I'm going to lay
my pattern on top to make sure that there's room
outside of the pattern. I got plenty of room here. And then we're going to pin
that in place or use clips, whatever you have
and prefer to use. If your stabilizer is hanging over the edge, you
can just fold it over. You see what I've done
here? This actually started bunching up,
and I don't want that. I don't want my
stabilizer to get bunched up it could
distort my fabric, and that's not what we want. So I could either fold it or I could even cut it so that it's even
with the fabric. It doesn't really matter. We're just trying to keep
all of these layers together because we're going
to take this over to the sewing machine
and stitch it. And another thing
to note is you want to start here in the
middle of the head and stitch all the way down one side until you get to
the center between the legs, then stop and go back to the top and stitch
down the other side. The reason we're not
going to go all the way around in a full, you know, full circuit is that it will distort one side as you go down, and the other side will distort
up, and it could twist. So just a little safer thing to do is just always
stitch it down. Just a note here,
if you don't have a sewing machine and you
want to hand sew this, you certainly can with
a needle and thread. I would just use a backstitch, if you're familiar with hand
sewing and just stitch right along this line through all of the layers, and
you'll be fine. I'm gonna actually
put a pin in there, 'cause I don't like how
this is distorting. So just be careful when
you're sewing that you don't sew over the pin or
stick yourself with it. That's why I like clips better. So you can hand sew this, but I'm going to use the machine because
it's much faster. On your sewing machine, you should change
your stitch length to something like 2 millimeters. That's two on the
stitch length dial. And the reason for that is it's going to slow your machine down so it's easier to
sew around these curves. And it's also going to give us a nice tight seam on this
small little puppet. In a little bit, I'll
speed up the video of the sewing so you don't have
to watch me in real time. But just to start
out, I wanted you to see the speed that I
sew this small part. It's pretty slow.
Um, I am pivoting. I have a knee lift on
this particular machine, so you're not going
to see me reaching around to lift the pressor
foot all the time. It doesn't matter what kind of machine you have and
how you do that, as long as you're
just pivoting around the corners or you
can smooth them out. This is the actual
speed that I'm going, and then we'll go ahead and speed through the rest of this. At this point, I've
gotten down to the bottom between the legs. I'm going to stop, and
I'm going to restart at the top again and just stitch
down the same way I did. Our stitching is done,
our seams are finished. Now we've got it
sewn all the way. And remember, we went down one side to the
middle down here, and then back around. And you can see that it stitched
through all the layers. I got a little bit extra
up there. That's fine. And you see how that
stabilizer easily comes away. Now, I wanted to
point out that I did not stitch exactly
on all the lines. If you look here on that toe, I missed, and that's okay. You don't have to stitch
exactly perfectly on the lines because this
project is pretty forgiving. You're not matching anything up. So if you miss or go
outside the lines, you're one thing that you do
want to watch for, though, is that if you are inside
the lines too much, then the arms or the legs, they might be too skinny
to turn right side out, and you're gonna make
your job harder. So just be careful about that and make sure that
you have enough room. Don't try to make
these too skinny. I'm going to go ahead and cut this little mouth circle
out so that I can mark it. And you have to be very careful when you do this
because you just want to cut off the stabilizer
and not the fabric. You can even just tear it a little bit because it's easy to tear the stabilizer,
but not the fabric. And the reason that I'm doing this is I'm
going to be able to mark that mouth
placement more easily. Okay. Just be careful you're not cutting
the fur underneath. We're just cutting away
a little circle of stabilizer so that we can then take some kind of fabric
marking pencil or marker, and a washable crayola crayon, make sure that it's washable. And then same thing
for the eyes, I'm just going to use a
pencil to poke through that stabilizer and then
make a little dot there. And this is on the wrong
side of the fabric. And before we tear away the
rest of our stabilizer, you want to cut this out first because it's going to be hard to see your seam lines on the fabric that can
be harder to cut. I think it's much easier to cut away from the stabilizer here. I should also say here, you want to choose your top and bob and thread to
match your fabric. I actually chose one
that would stand out a little bit so that you can
see it in this tutorial. But I'm just going
to cut this out and use about a quarter two, maybe even less than a quarter
inch away from the seam. You don't want to
cut into that seam, that'll mess things up. I'm going to use both big and
little scissors for this, and we'll speed through
it because I think you know how to cut. Whenever you get to
an inside corner, just make sure that you kind
of clip close to that seam. I will say, at this
point, if you're working with a fabric
like Minke where it has all of these tiny little
pieces of fiber coming off, you really should be wearing
some kind of dust mask over your nose and mouth because this stuff does get in the air, and if you get in your lungs, you're going to be probably sniffling and coughing
for a couple of days. So do wear a dust mask if your Minkes a really
bad offender, but any kind of fur, if
it's getting up in the air, if it's blowing around, you
should be wearing a mask. We've got everything cut out, and you saw how I clipped into these little
inside corners, even around the tops
of the feet here, here into the crotch area. We need to make sure that
we're clipped almost to the seam and under
the arms, as well. I think we've got all of
those nice and clipped. So now we can go ahead and
remove the stabilizer. And this stuff just tears away very easily from your seam. That's one of the
reasons that we used the short stitch length, makes it tear even easier. But don't rip it
off too quickly. You do want to be a
little bit gentle because you don't want
to pull out your seams. If your sewing machine
tension is set correctly, you should not have any
problems tearing this away. If it's pulling
out your stitches, that probably means your
tension was too loose. I did have a problem, and I'm going to
show you how I'm going to fix that
in a little bit. This happens to me sometimes. You don't have to worry about
getting every tiny bit of stabilizer off because you're still going to be able to
turn this right side out. And now you may notice we're ready to turn this right side
out, but there's no hole. We did not leave a hole,
and that was on purpose. Usually, you'll have a hole
in the seam somewhere, but this is a doll making technique that I
actually prefer. We're gonna cut our
own hole in the back. Make sure you've marked the
face on the front here. So we're going to turn
it over to the back, and we're just going
to separate the fabric because we only want to cut
on one layer of fabric, not both. A little snip. Get your scissors inside, just one layer, and then we're going to cut up through
the middle of the head. And then down to
just a little bit into the body right
between the arms. So we've got, what
is this about 2 " right here. So, what is that? It's about an inch and a half. You could make it more like 2 ". I'm gonna make it go
up a little higher. That's going to make it easier to do the mouth in a little bit. This hole should be big enough for you to turn it
right side out, and it's also where
we're going to put the clip that is going
to work the mouth. Now, some tips on turning
this right side out. I'm going to use my hemostats. This is my favorite tool. You could buy these at sewing store or someplace like that. But honestly, this
is my favorite pair, and these are the fishing aisle for people who go fishing, and they use it to pull
hooks out of fish mouths. But it has a nice
rounded nose here. You don't want it
to be too pointy because it could go
through your seam. But it's got that
nice square jaw, and I can just put it in. Let's do the hard part here all the way to the
bottom of the toe, and then just I'm
opening that up. When you put it
down in that foot, I'm going to open it up
a little bit and just put a little bit of that
tip of the seam in there. And then you pinch
here at the top. Right at the tip
of that hemostat. And as you pinch that fabric,
you can pull it through. And we're just going to pull the limbs into the body first. I'm going to do
the feet that way. And then I'll show you another
tool that you can use. Some people use chopsticks to
turn things right side out. Some people even
use their scissors. I can't use either.
Scissors will cut. I mean, I don't understand
why people use scissors, but I don't even
use a chopstick. If you don't have
hemostats and you don't like these are $5, $6. But if you don't
want to use that, you could use some tubes, you could actually use two
different sized straws. You just need small pieces. You need a larger one
and a smaller one. What you do is you put the
big tube into the limb. And that was the problem
that I wanted to point out. I actually my fabric didn't go all the way
to the edge here. You can see one layer
of fabric didn't go all the way to the edge here,
and that's a problem, but I'm going to fix
it later by gluing this closed once my
glue gun is going, or you could hand
stitch that closed, or you could just put
it back on the machine. It's gonna be okay.
Sometimes we'll have a little missing, you know, the seam misses the
edge of the fabric, and it's pretty
easy to fix just by gluing or stitching
that back together. So let's do the other arm. Just put the turning tube, the fat one inside the arm, and then you use
the skinny one to just put that seam,
just push on it. And then when you
push, and again, we're squeezing right
at the top there, and the fabric is going to
curl over the skinny tube, this one, and it turns
it right side out. And then we just pull that tube out from there,
and that's turned. So we've got everything
is inside the body. I'm going to use the hemostats
on this one that's broken. There we go. And now, all the arms and
legs can come out, and the body and head are very easy to turn with your fingers. So that's all there is to the turning of your
pocket puppet. And again, don't worry
about this little mistake. These happen, and we can fix it. He's cute already. That wraps up the lesson on sewing the
seams of your pocket puppet. You saw how to trace the pattern onto some tearaway stabilizer, which not only makes it
easier to stitch tiny parts, but it also stabilizes
a fabric so it doesn't stretch while
you're stitching it. You saw how to stitch
it on a sewing machine. You also have the option of hand sewing if you wanted to do that. And then we cut out
the pocket puppet with a very small
seam allowance, and you learned how to turn
tiny parts right side out, and a couple of different
tools were shown for that the hemostats
and turning tubes.
4. OR Glue Seams: I wanted to see what
would happen if I glue instead of
sew this together. So I'm gonna try an
experiment here, and let's see what happens. I'm tracing my puppet pattern onto some clear plastic so I can cut out a template and then trace around
that onto fur. I'm actually going to
cut a little bit beyond the line so that my puppet
turns out the right size. Let's try that.
See what happens. You don't have to do
all the square cuts. You can certainly
round this out. It's easier to cut when
you round off the edges, and I think it's gonna work better when we glue it and make it a little
easier that way, too. Let's try it with some This is an minky fabric with
some short fur. Let's see what
happens with this. Should be pretty
easy to trace this. Do I have enough for
two? Oh, just barely. It's really, really
gonna cut it close. Let's see what
happens. I'm using my washable crayola
marker again. These come in handy when
you're working with fabric because if you need
to wash them, you can. But you do have to be careful because I found that
sometimes it gets ink on your fingers and
it spreads on the fabric, and you may end up
staining the front side, the good side of your fur just because there's
so much ink on there. It's a good time
to put on a mask. And just cut out
both the pieces. Try to avoid cutting
the fur if you can. And then clean up the workspace. We don't want all that extra fur getting in the
way of the glue. On one side of this blue puppet, I'm going to use
the fabrifix glue. It takes longer to set up, but I can make a longer bead of it. You can see that here. On the other side, I'm going
to use the fabric hot glue, which I have to make much
smaller beads at a time because I don't want it to set up before I put the
two pieces together. But once I get that done, that side's pretty
much ready to go. I didn't quite love
how the edges of that blue puppet looked because the backing could
show in the seams. And I'll show you that at
the end of this lesson. I really wanted to try
something that was furrier that would
cover that seam better, but I couldn't
actually trace onto this red fur because it's furry on both sides
of the fabric. So what I did instead is
I clipped my template, the same template I
used to trace around. I just clipped it onto two pieces of fur that
were right sides together, and then I cut it out that way. And that is actually going
to work better, I think. And then I just glued
the two sides together. And that hid the seams much better with that
double sided fur. I'll show you both
of them at the end. I sort of jumped ahead
here and finished off these two puppets that I
glued the fabrics together. And on the blue one where you could see the backing
and trace on it, you can see that seam. You can kind of see the
backing in the seam. It still looks good, but I think that the
red one actually looks a lot better because
it was much furrier, and we cut out around that
template for this one, and you can't even see
the seams on this one. So this glue method turned out actually
better than I expected. It was an experiment when I
started but I'm impressed. So if you don't want to
sew, you don't have to. You can just glue the
two sides together. Different kind of fabrics are gonna give different results. Well, that wraps up the lesson on gluing the seams together. And what started out
as an experiment actually worked out rather well. You can either trace the pattern onto the backside
of your fabric, or if that's not
really easy to do, you could just make
a rigid template out of some clear plastic. Packaging or one of those dollar store cutting
boards works great for that. Just cut out your
template pieces and then cut around it and glue, again, wrong sides together
when you're gluing. You could use either
fabric glue or hot glue. I used both and I got good
results with both of them. Use whatever you prefer.
5. Mouth: Now we're ready to put the
little mouth on this guy. And I had showed you
earlier how I have this little plastic
clear plastic just from a piece of packaging
that I cut out the 1 " mouth pattern
from your paper pattern. I just traced onto that clear plastic
and then cut it out, and that's going to
make it easier to trace this onto some felt
for the inner mouth. Could use any kind of felt. This is just craft store felt. Cheap stuff is fine. I do like to use the felt
that is the peel and stick. It has a sticky back because I find that this stuff is sticky enough to stick to most furs, the short furs, and it's
much easier to trace, also. So I'm just going to put it down on the back side
of this sticky felt. If you were doing
it on regular felt, you would want to use a
chalk or something that's going to show up on
your black felt. For a puppet mouth, I
should mention too, the type of felt that we
use is usually a black, but if black is not going to
show up against your fabric, you might want to
use a pink or a red. If you do something that's
really a weird color, like a green, for example, for some kind of monster, that's fine, too, but you
just have to keep in mind, sometimes green coming out
of the mouth or even red. It looks like the mouth
is full of something, like the red sometimes looks like their mouth
is full of blood, green might look
like they're like, oozing slime out of their mouth. There's just something
about human psychology and the inside mouth color that it's typically you want to stick
with black or a pink or red. I'm just saying that
a little tip for you. It's okay to break the rules, know that you're
breaking the rules. Then I'm just going to cut
out this little circle. It does not need to
be a perfect circle. Just not that big of a deal because it's not going
to show that obvious, but, you know, clean it up
a little if you want to. And again, we marked on the inside where our
mouth needs to go. I can kind of see that
blue line in there. But it's on the inside, but we need it on the outside. And a way that you can
do that is just take a stick pin and stick the
pin around a few points of that marking and then
transfer it to the front. That's the top of the mouth. That's the bottom of
the mouth right there. So now I know about where I want my felt circle to stick to. Make sure that pin
is out of my way. Kind of flatten this head
out as much as we can. And we're going to stick
the felt right there. Another tip is to
make a little slit in your circle on both
right and left edges, right in the middle where
you're gonna be folding it. Actually, just fold it in half. Like that and then just snip. That's going to help it crease better and make the
puppet mouth move. Now we can peel away our backing and make sure that those little
slits that you just cut are on the right and
left side. And there we go. Just press that down. If you don't have
the sticky felt, you could just use a little
bit of fabric glue or a little bit of hot glue to attach the felt onto the puppet. Here are several
different kinds of clips that we can use for
our puppet mouth. It's going to go in the back and clip onto the folded mouth. And we're going to
glue that in place. A clothes pin works very well. The only problem with
the clothes pin, it doesn't open too widely. And also, it sticks out
really far in the back. So if you wanted to carry this around like on a purse or
a keychain or something, the clothes pin
is very unwieldy. The shortest kind of clip
would be a binder clip, but binder clips are very
hard to open and close, and you won't get as much mouth movement with
a clip like that, but it does work
with a binder clip. A little bit bigger.
You don't want to use the tiniest ones, but this hurts my fingers
when I squeeze this. So this is not something
I would use very long. Um, you could also use
a shorter clothes pin, like the little crafty ones, but you're not going to
get as much movement because it doesn't open as wide. You can see with a
regular clothes pin, you're just not going to get
as much wide mouth movement. And the other clip
that I do like to use, these are something from the dollar store in
the craft aisle, and these have good opening
and they're easy to work. The only problem
with this one is it's very got squared off edges. It could cut your fabric. So I like to put a little bit of tape over the edges just to make sure that
these sharp corners don't poke through my
fabric, eventually. And then you also have the
option of a larger clip, whether you cut it to size
or leave it large like this. This is like a little chip
clip or something like that. Any kind of clip or clamp, try it and see if it works. This one just makes
a bigger mouth. It goes like, all the way across the head. But that is okay. It's just a different look. For example, here's
a finished one that has that same
kind of clip in it, and you see how wide
and flat the mouth is, but it still opens
nicely, and it works. So look around your house and see if you already have a clip, if you don't do like these
little clamps a lot, but like I said, you need
to pad these corners quite a bit because you don't want that to cut your fabric. It's pretty sharp. For this one, let's use just the
regular clothes pin because I think most people
have access to that. All we have to do here is we're going to fold
that little circle. And move your side
fabric out of the way. We want it to go
right there, a clip. And you want the tip of the
clothes pin to be right around the tip of the
felt circle here. If you push it too far in, then your puppet mouth
is going to disappear, and you won't really
see any edges until it's open. And
that's fine, too. That's not the worst
thing in the world. If you have it too far back, then you're gonna have
these really dark edges, and the lips are going to
kind of play out like that, and you won't get as much
movement in your puppet mouth. So I recommend putting the
edge of the clip right around the fabric right there at the tip of the
felt circle, okay? I'm going to use hot glue. You could also use a
fabric glue for this, and I am going to glue
just one side at a time. I'm going to do, let's see,
the top first, I think. And this is a fabric hot glue, but for something like
this for so small, it's not really a big deal what kind of hot
glue you're using. Make sure that your sides
are out of the way. I'm just going to push
that fabric circle in until I can feel the clothes pin right there
at the edge of that circle. Fabric glue is a
little bit easier to work with because it
doesn't set up as quickly. So if you need to move
things around, you can. And then, same thing here. I've already got it glued, and I'm just going to add a
little bit of glue onto here, clamp that down, and then
check it from the front side and make sure that
it's right where I want it right there. I can feel it. Right there. Alright, so his glue
has set up in there, and I've got his head turned, all the edges pushed out. And now you can see
his mouth is working. Hello. Hey. And
that's it, folks. That's how you make
a moving mouth for your pocket puppet. You saw how to use different kinds of clips
and ones that you can try, how to attach the felt mouth to the outside of
the puppet's face, how to glue the
clip on the inside, and also how to position it so that you get the best
little speech pattern. And I can't stress this enough. I am not responsible for the words that come out
of your puppet's mouth.
6. (optional) Wire Armature: This next step is
totally optional. You do not have to wire
your pocket puppet, but it gives it a
lot more character and charm if you can move
the arms and legs around. You should never put
wire in a child's toy. If this is going to be
played with by a little kid, please do not put wire in
it. It's just too dangerous. The wire can come out. They are rough with
wire. It can break. So just don't do it.
These pocket puppets are really designed for adults
and much older children. I'm going to be using this
aluminum armature wire, which is very easy to bend. It also doesn't break very
easily, and it doesn't rust. So aluminum armature
wire is going to be the most durable long term thing that you
can use for this. I'm using the thin one. It is 0.1 centimeters
or 0.055 " in diameter. And I'm going to
use 30 inch length. There's a couple of
different brands. I buy this at Michael's Crafts is one place
you can get it. And then, of course, on Amazon, you can find different
brands there. A lot of different places
where you can find this, look for aluminum or
annealed aluminum, and it's usually
called armature wire. The armature wire is getting
more and more expensive. You could use other wires. You could put some pipe cleaners together or Chanel stems. You could use jewelry wire for something like
this if you wanted to. You could even use floral wire
if you already have that. But these are not going to be as durable or as easy to bend. They're also more prone to
break when you bend them. So I do like the aluminum
armature wire the best, but if you just want
to do something quick and easy, use
whatever wire you have. I am folding it in half, and that's the top of
the half right there. And I'm going to put
it inside my clip. I'm going to put it somewhere in this area and just
string it through. So it's going to hang down from this inner clip area. Okay. And like I said, this
is totally optional. You don't have to do this, but I'm going to show you
how and now we're just going to use the body of the puppet as our template for where
to bend the wires, okay? I'm going to twist it
together a little bit around this bottom part of the clothes pin and twist it a few times until
it's right around the arms. Then I'm going to
take one side to the arm and bend it back
towards the center, and I'm going to do
the same thing with the other side. Bend it. Okay. And I'll make those two sides go
down in the middle. What we're going to do with the arms is we're
going to twist those. I like to just twist
as I go along, at least to get so that I know what each
piece is going to be, arm or leg or body. Okay, so we've got the two arms, and now we're going to put this back together and twist until we get down
to the leg area. Right about there. And
I like to have it where it comes out like hips and
then goes down into the leg. And then back up
because we're going to twist that leg also. Same thing here. Hips go down. Just kind of follow the
pattern of your puppet. Okay. And then each loop, I'm going to get
this out of the way. Each of these loops
gets twisted, as well. That's going to be the legs, and a little loop at the
end will go into the foot. It doesn't matter
which direction you twist it, honestly. Okay. Got that. And then
these little wire ends. I'm going to just
pull these back up. I've got way extra. I
did not need this much. So whatever excess
that you have, just go ahead and clip that off. Somewhere in the body area. I'm just using wire
cutters to clip this, and go ahead and twist, get that more closer to the
body center for those arms. And then this we're
going to use tape to tape around this to keep
the wire from poking out. The kind of tape that you
use is not that important. You could use a duct tape, a masking tape,
something like that. I typically will use
electrical tape when I'm doing something
with wire because electrical tape is
made to stick to wire, and it's a nice thick plastic, so I feel safe that the
wire's not coming out. But like I said, a masking tape or duct tape
or something like that. Scotch tape is not going
to work as well for you, but use something that
you already have. I'm a big fan of
using what you have. It's kind of hard
to get it in there. I do want to also get it up
and over these shoulders. And just kind of get it
something like that so that those little ends of the wire are not going to
be bothering us. You see how that works? It's connected here
to the clothes pin, somewhere in your clip. I'm going to tighten that
up with another twist. And then we've got the
arms and the legs. And we can bend the legs back into that shape
that we had before. That's going to be fine.
So to thread this through, get the arms in first.
And just put it in there. And I had told you
before how I have this little this little
problem area right here. I'm just gonna put a little
glue on it and fold it over. And that way, that will keep
my wire from poking out. I'm not gonna let it bother me. I know that. 'Cause here's the thing about when
you're making puppets. If you get a troublemaker like
this little guy is being, that's just their personality.
They can't help it. They're always going
to be like that. So if this one wants to have something weird
going on with his hand, let him have something weird
going on with his hand. We don't really get
to decide for them. There's some weird thing
going on where they just kind of kick in
and do their own thing. I'm gonna finish putting
the wire in there. And for the legs, you really have to bend and just kind of have
the m dive in there. Don't be afraid to bend this around and get it threaded
down into the legs. If it's giving you
too much problem, and this one is really giving me more problem than I
think I've had in the over a dozen
of these that I've been making in the
last couple of days, you could always cut
the slit a little more. If you need more room,
that's okay, too. Wow, little guy, you're
really annoying. I like to push the wire
all the way down to the ends and then bend that foot You can also when
you have wire in there, you can make the
foot face forward. After I find it and bend it, and then you can turn the legs forward instead of having
them out to the side. That's another advantage of
having the wire in there. See how his foot
is this way now. And yeah, you can pose him, and he can do different things. You can see how
adding that wire, even though it's optional, it does add a lot more
character to how that pocket puppet can pose and look while you're
manipulating the mouth. You could have it
straight out like that or he could be reaching forward. There's all different kind
of things that you could do. You can even make him sit down. Sit in the palm of
your hand like that. So, I like to put
the wire in because I think it's a nice
extra step to do. And that's how you put wire
in your pocket puppet. It's optional, but it does
add a lot of character. And again, I can't say
this enough times. Do not put wire
in a child's toy. If this is going to be played
with by small children, please do not add the wire. Armature wire is the
best choice here. It's more durable, but you
could use other options. And you just bend the armature into place and insert
it into the puppet. It's a very quick and
easy thing to do, and it's well worth it because
it adds so much charm.
7. Eyes: I Alright, now it's time
to talk about eyes. And you see I've got
a whole table full of little pocket puppets here
with different eye types. I've got ten different
ways to do eyes that I'm going to
show you so that you have a whole
bunch of options. The first and
probably easiest but maybe not the cheapest is
to get some purchased eyes. And I've got several here
that I will show you. If you go to your
materials list, there's a link in there to
where I have a web page setup where you can link to different purchased eyes
and things like that. And I can keep that updated
more easily from a webpage. So just check your
materials list and then just follow the link. Little puppet eyes are attached, and these are safety eyes, so they just have
a little plastic back that will snap
on the back of that. And you'll see that
in a little bit. I'll show you how to install
something like this. But we've got this option. We've actually got an option
that's just a plain white, and you have to actually get some kind of little felt
circle or something, we'll talk about
that in a minute, too and make the pupil that way, but you can position the pupil better if you just
have the blank white. We've also got these our
purchased safety eye. These are actually a clear
eye with a black pupil, and the pupil is off center. And that's a big
deal with puppets. We don't want our puppets to look like a deer
in the headlights, and I'll show you an example of why the type of eye you use matters because
here's an example of one that has
some Google eyes, and you notice the pupils
are right set in the center, and he's just kind of
got this blank stare. It's not as much character. Same thing goes for
these purchased eyes. He's just staring
straight ahead, but his eyes are
close enough together that it's still a
good expression because they're so small. Something like this would be an example of where the pupils are offset towards the center, you want it kind of
looking towards its nose, and it looks like it's actually making eye contact with you when the pupils are offset
towards the nose area. A lot of them, you'll
see like that. That was an offset offset. So that's something to consider when you're making puppets. This one, again, the eyes are so small that it will make
eye contact with you, even though the pupils
are in the center. So keep that in mind.
The bigger the eye, the more important that
pupil placement is. But with smaller eyes, you can kind of get
away with that deer and the headlights
look a little more. But this is not the best. This is not something
that's going to be making good eye
contact with you. He's just kind of
staring off into space. So that's why we like
the offset pupils. And these clear ones are good. Like I said, you can paint
them different colors. And I've even got just to
show you acrylic craft paint, or I'm using a
paint marker here, and you can just paint
the back of it like that. And then that will give you the puppet eye with the white, with the black pupil or you can color it and have a
colored iris instead. That's up to you how
you want to do that. These four here in the center are the examples of
different safety eyes. There are other ones
that you can find. But craft stores,
their selection is not very good anymore, so I'm looking online for
a lot of the safety eyes. I do like about a
15 millimeter eye for these pocket puppets. Now, you can go
larger or smaller. That's up to you. Whatever
your preference is. But let's see. This is a 16 millimeter, so that's kind of big.
This is a smaller one. This is more like probably
an eight or ten millimeter, that's the diameter of the eye. So it's smaller, but it
works. It works very well. So the safety eyes are a good option for your
pocket puppets, and again, look for something around
the 15 millimeter size, and you can go a
little larger or smaller. That's the safety eyes. That was just the first option. The second option you can
do is embroidered eyes. This is a machine
embroidered eye, and I'll talk more towards
the end of the Closs about where you can
get that file from. But you could also
do hand embroidery. If you're into hand embroidery, I'm not going to demonstrate
how to do that because I am not a hand embroider.
I'm a machine embroider. So these are the machine
embroidered eyes on the design of PopcaPuppets. You could also do Google eyes. And these are a I
believe this is either a 15 or 16
millimeter Google eye that I found at Walmart,
a whole package of them. They don't look too great when they're sitting in the center. These aren't actually googly. These have been held
in place by resin, and I've cut off the back of the Google eye and then filled
it with some resin inside, put the pupil in there and put resin on top and then
painted the back white. It still looks like a googly
eye. It's just not googly. Here's another trick
that you can use for this one is what I did here. I'm going to show you a
little trick with Google eyes to make them not Google
because I don't know, Google eyes just look very like elementary
school craft to me. So I'm not a huge fan of them, but I don't mind how
they look when they're stationary and off to the side, and that way, you
can get that nice eye focus that we talked about. Here's the trick. I'm going
to take my Google eye. I'm going to turn
it on its side, so the little pupil is
down at the bottom. I'm going to take my
glue gun with a fine tip and make sure that tip of
your glue gun is clean, wipe it off with a paper
towel or something. I'm going to position
the glue gun on the back on one side and push until
it melts and pokes through. And then I'm going
to just hopefully you can see what I'm doing here. I'm gonna squirt a little bit. A little bit of glue in
there and then pull back. And that should glue
that pupil in place. So it's not going
to google around. I messed up while I was talking, and I see a little speck there. So that can keep
your Google eye from wiggling around
and making noise, and it also offsets
that pupil towards the center in the nose
area, so we get good focus. So that's just a little
trick if you want to buy a bag full of Google eyes and make something
that looks like these guys or this
one or this one. These are all the Google eyes. Or you could do the filling
with resin trick like I did, but that one it's
not as successful. Number four would be
purchasing resin sticker eyes. Here's a sample
puppet here where I use this style of eye. And you can buy these cards. These are adhesive,
and then they have a resin dome on top. And there's different
styles of them, as you can see, and they come in different colors and sizes
when you buy a card of them. That's just an option
that you have. I would not rely on the stickiness of the eye
to hold it on the puppet. You would need to use some
kind of fabric glue as well to keep it on there because I find that these stickers, they don't stick to
fuzzy fabric very well. But they do work.
And like I said, there's a bunch of different
styles that you can get, so you can get some
interesting looks there. Number five is making
your own eyes with resin. In the class project section, you'll find a sheet of Is
that you can print out. You can print it on paper, or I actually prefer to
print it on a card stock, but it doesn't matter which one. And then you can
use some UV resin. This is a dome type
or high viscosity, meaning it's thick
and it gets hard, and this you put under a
little UV light like what you use for doing nail
manicures, and it cures it. And the way that you use this
is you just um pour it on. You have to be careful. It
does bubble a little bit, and then just put it
right in the center. Let me see if I can
get a better angle. Put it in the center and
then just fill it until it reaches the outer area and
let it bubble up like that. Maybe one more drop for this. See how it got a little
bubble in there. We don't want that. It does tend to bubble a little bit more than other eye types. But if you already have resin, this is a interesting
way to use it. And then I just put it under my little UV light for a minute. And that has dried. If it's a little bit sticky, it needs
to go under the light. Again, it should be
hot because that's part of the process of curing. And then you just take small scissors and then cut those out. That just gives you an idea of some different ones that you can make with this printable sheet. If you don't want to make this, don't print the sheet
out. You don't need it. But if you already
have the resin, this is a good way to get some interesting looking
little plastic ice. To see how the resin
eye looks on a puppet, here is a pair that we
just had made there, and that's a nice
little puppet eye. You could also do here's
some smaller pink ones. Those the pupil
is in the middle, and it's a little
blank stare for me. I'm not a huge fan. And then the black
rims, let's see. How do we like that.
That's a nice look, too. I could deal with that. And then of course, these
are little These puppets haven't been the mouth hasn't been installed
or anything yet, but it just gives you an idea of what it's
gonna look like. You do want the eye placement to be around the
center of the head, and on the pattern piece,
that's where it is. So that's where I'm putting them to show you these samples. So that's resin eyes. Again, if you're already
into resin crafts, that's a nice way to do it. But if you don't already
have all those supplies, it's probably going
to be too expensive. Another option would
be air dried clay. And here's just like
Crayola crayon, even has a brand of air dry clay that is very easy to roll
it into little balls, maybe squish it, and then
you can paint the pupils on. You can paint the eyes
themselves with some paint. I've used metallic paint
on these green ones. You can color them,
like, however you want. But you get that
nice dome shape with that clay and it just dries
It's an air dry clay. You could also do it
with polymer clay and bake them in the
oven. That works, too. But that's an option to make these little dome shaped eyes, whatever size,
color, whatever you want with some air
dry or polymer clay. Number seven is a ball
joint to doll eye. And the reason it's called that is it's a lot of
ball joint to dolls. Use this style of eye
where it's not solid. It has a little hollow
dip in the center, and then the center
of it is painted, and then a little black
pupil dot is put in there. And you can fill
these with resin when you're finished
painting or not. Either way it works.
You can purchase these as finished eyes for
ball joint to dolls. Look for the 16 millimeter size, 15, something like that. Or you could make your own, um polymer clay is
one way of doing it, rolling out a little ball and then using a little ball tool to press the hollow
and then cure those, bake them, whatever, and then
you can do the painting. There are also little molds
that you can buy that you can use UV or two part resin
to make this shape. And I've even made
these particular ones on my three D printer. So once you've got
that little shape, then you can paint
them however you want. And with this type, when there's a little
pupil in the middle, once you fill that with resin, they're also called follow me eyes because as you move around, it looks like they're
following you. So you can get good focus
with this type of eye. This one here with
the Black people doesn't have that same effect. That's not a bad look. And that's the ball
joined to doll eye. Again, you could buy them. You could make them
out of polymer clay, out of resin or
three D print them, even if you know how
to design those. Number eight is actually a new one that
I've come up with, and I've not seen other
people doing this, but I think that other
people are doing it. I just haven't found them yet. These are clear
fingernails for, like, gel manicures, and they
have different sizes, and they're just these little
clear nail tip things. And on the back side of
it, you can paint it. I paint the pupil first and then paint the
white background. And you can then trim
them with nail clippers. Here's a big pair
here on this guy. Or you could try let's see
how these smaller eyes do. Let's have him looking
off to the side. So you can see how
that's actually not a bad looking eye for
something like this, and it's relatively cheap. I bought this whole thing at the dollar store for a buck 25, and then you could
even use nail polish to paint these or acrylic
paints, whatever you have. So it's a pretty
inexpensive solution, and then you would
just glue those on. Here's another example
where did you go? I have another one that uses these eyes it's right
here in front of me, and I've glued a little piece of fabric to the top to give
him a little eyelid. So that's another
option that you have is you can glue some fabric around top bottom for
eyebgs, things like that. And that works well with the large surface of
these fingernails. So that would be the
fingernail option. For number let's see
where are we at nine. We're up to number
nine, and that is using die cuts,
whether you have, like, a cricket or a silhouette or even a physics machine,
even a whole punch. You could use felt. And again, I like the peel and stick, the sticky back adhesive felt for if you're doing
something like this. You could also use
the craft foam. This is a two
millimeter EVA sheet. You can buy this at
the craft store. You could also use vinyl
for your cutting machine. And you can make just
different little eyes of different shapes and sizes. For the eye and the pupil
are cut separately. Here are some different
examples of some die cut eyes. This one is made
from the EVA foam with a vinyl sticker
pupil on it. And then these
other two are made with the self adhesive felt, and I just ran
them through a die cut machine to get
my little circles. You could hand cut your circles, as well, but they're not going to be perfect
little circles. If that's fine with you, then go ahead and do it that way. You can cut different shapes. It doesn't even need
to be circular. And then you would just
glue or stick those on. I do find that this adhesive on the self adhesive
felt does stick well. And that's a cute little eye. That's nothing shabby at all, and really inexpensive one. But again, getting
that perfect circle pretty much requires
a die cut machine. And now we're up to number ten, and I don't really have a
good sample to show you, but number ten would be
three D printing your eyes. You could print any
of these safety eyes. There are Google eyes that
you can three D print. These are the BJD eyes. I'm sure you can
find these files. They were very simple to
make in Tinkercad, as well. That's what I just did, and
it didn't take long at all. So three D printing eyes
for your puppet, again, look for about a 15 millimeter
or design something. If you're good at designing
for your three D printer, you have that option, too. Where's his little black ones? I kind of like those better
for the three D printed eye. The Those are some cute little puppet eyes that you can do. Actually, like a bonus, number 11 is combine different methods. Oh, wait, I had
another bonus, too, because I totally forgot
things like beads and buttons. These are little buttons
that are little black eyes, little black glass beads. You could also do something like that to just have
little tiny black eyes. That's another option. So
that was the bonus number 11. So I guess there's
bonus number 12, too, is that you can
mix and match and combine and do all kinds
of things together. Maybe you want to make a
little dome out of clay, and then you put a glass
bead in it to be a pupil. Or maybe you let's see.
What else do we have? Maybe you want to do the foam. But instead of painting a pupil, you could use your
little die cut, use a whole punch to get a little felt circle or
something like that. So there's a lot
of different ways. So don't think you have to
do just one of these things. Think of mixing and
matching and use whatever materials and tools that you have available to you, whatever skills you
may already have. Combine those into a
puppet eye that you like and that makes your puppet have your own unique style. Okay, and I did want to
show you how to install the safety eyes just so you know a lot of people are kind of confused
on how those work. So here are the two eyes
that I've purchased, and here are the two backs. And I'm not going to mark
my eye placement because I definitely did give you a place to mark your eye
placement on the pattern, but you don't have to
put your eyes there. You can put them really
kind of wherever you want. Just don't let them
interfere with the mouth. I'm using an all, and I like using this better
than cutting a hole with scissors because it spreads the fabric fibers apart
rather than cutting them. And then once you've
got your hole punched, just put that little
stem of the eye, and it can be hard
to find in this fur. Just poke that through,
pull it all the way down. And here's a tip for you. I do prefer to add a little
bit of glue when I'm using safety eyes because I
don't want them to unravel. I don't want that
fabric to unravel. And I feel like it's just
a much safer way of doing things because this will
hold in place until the fabric unravels around it,
and then it'll come apart. Make sure that the excess
fabric is not getting in there, and then you just keep pushing push down until it's
all the way in. And so there's one eye, and you should still be
able to turn them if your pupil is not
where you want it, but try to get it right
where you want it. Okay. And I know I want
the stem right there. Push that all through
to make a hole. I felt one little thread snap. Ooh, that's a pretty
big hole, actually. So I definitely want to
have some glue on that. There we go. You can put the glue on the
front side, as well. I'll even show you. If
you wanted to do that, you could put it on the front. The reason I usually put it on the back is that I don't want any glue to seep out
under the eye and show. So the back side is really
a safer place for it. And then snap that all the way down know we got our
two eyes on him. Now, this one I
haven't put the mouth on yet, but that's fine. And this little guy that
we've been working on, he's already been wired, but we could still
put eyes on him. I think I'm just gonna glue
some eyes on this one. Yeah, I want to actually try. Yeah, I think I like
these little felt eyes. I want to see how that
looks. So let's try that. These are the self
adhesive felt, so I can just peel
that make it simple. And I've already done the
peel and stick on the pupil. And I want to get the pupils so that they're kind
of in the center. I want them matched
up. Here we go. Alright, so a little sample
that we're working on. He's got eyes. He's ready to go. So you saw how quick and easy it was to do the safety eyes on this one and just gluing some eyes or peeling
stick eyes on that one. And you've also seen
a whole bunch of different a whole bunch of different samples of
eyes that you can use. Oh, my gosh, there's so many. Like, I think I gave
you ten options, but plus a couple of
bonuses. So, wow. You have options. That might
be the hardest part is choosing the eye to
put on your puppet. So to wrap it up, we did
a lot of different eyes. You can use all of these
on pocket puppets. Here's a list of the
ones that we did. I won't go over it again, but there's ten
different types of eyes. Plus buttons and
beads was the 11th, and then you can combine them. So there's all kinds
of things you can do. I showed you how to
install the safety eyes. They'll have the stem that
goes through the fabric and then a little plastic backing
that puts it on there. And we also did a pair of
eyes that are just glued on. We also touched on how to position the eyes in
the middle of the head. And why focus or eye
contact is so important, and you want the pupils to be
a little offset if you can. On some of the eyes, though, that's not going to
be possible, but usually they're small enough
and close enough together.
8. Stuff & Close: Now it is time to stuff and close our little
pocket puppet. And if you've put wire in, you don't need to stuff
the arms and legs because the wire is going to fill it
out and it's fluffy fabric. So that's probably going
to be all that you need. But you still need to stuff
the body and the head. And if you did not use wire
inside your pocket puppet, then you will need to lightly
stuff the arms and legs. So to get started with that, I've actually got
a second one here. I'm going to show you
two different ways to close this one with
a needle and thread, and then this one I'll
do with a hot glue. You could use fabric
glue instead. And just you want to firmly
stuff the little body, and if you have wire, you
want to make sure that the stuffing gets in
front of your wire. And that's another reason
why I love having hemostats. Besides turning, you can
also stuff and get into all the little crevices and places that
are hard to reach. I'm going to give him a
little bit of a belly there, maybe a little more belly. That way, I can get it in
front of that wire armature. There we go. Yeah, it's a nice little dough
booy belly there. And we want to make sure that we lightly stuff the head but get all of the areas around here
so that the cheeks puff out. We don't want to overstuff the
head because that makes it harder to work the little
clothes pin or clip mechanism. Just start putting it in there. I'm just using regular
polyester fibrofll. Nothing fancy. And
this small piece might just be enough to
put in there, we'll see. And to test to see if
it's stuffed well, just kind of push around
on the edges and see if it feels hollow or not, especially those
cheeks, because if it looks like that
with real skinny, you might want to
go ahead and stuff more into those cheeks
to fatten them up. Just take the little
ball of stuffing and slide it up against the fabric to get it
into those cheeks. That'll really round out
the head better for you. Okay, so for this one, let's do the hot glue to close him up, and that's going to be
the fastest method. But it's not the most secure and it's not the most
how would I say, if I'm selling something, then I do hand stitch. If I'm demonstrating something, then I'll often use glue. But I don't typically use the hot glue if
I'm going to sell something because
it's just a little less sturdy. That way? For the glue method, I'm going to use some
kind of pin or needle or something like that that I
use. It's just a spare one. It's a dull needle that has I
use it to poke the glue in. And then my hot glue gun. So I'm just going to
put a little line of hot glue and then just kind of drag
the fabric over to it and pull it straight out. See like that, pushing in to that seam area until
that hot glue grabs. And that's how we're going
to do the whole thing. You want to make sure that
the stuffing is not going to interfere with the
pivot part of the clip. Okay. So I'm just pushing
it down and out of the way. I also need to make
sure that our fabric is gonna come all the
way to the center here. This is much easier to do if you have a fine tip glue gun. If you have a fat tip
on your glue gun, it's going to be much
messier and harder to do. So that's some people say, This doesn't work
for me, and it's probably the type of glue
gun that you're using. You could also use
something like fabrifix. This fabric glue is really
good for this, too, but you have to hold it with little clips until
the glue sets up, which is why I
like the glue gun, and I have fabric glue
sticks in there right now, so it sticks really
well to the fabric. I think we're gonna need
a little more there. This will give you a stiff seam, but that's actually
okay because it gives a little bit more structure to the puppet's body and head. Just hold that together
until it sets up. And then the last thing
that I like to do is I do like to glue the
fabric to that clothes pin or the clip so that we don't have stuffing that
starts coming out the side. Again, you want to make
sure that this is glued forward from where
the pivot of the clip is because if you
were to glue behind, then it's not going to
work the mouth very well anymore 'cause
you're essentially gluing your clip closed, and
you don't want to do that. This is just to
keep the stuffing from coming out through
the sides over time. And also, down here
at the bottom, I'm going to add a
little bit down there, too, so that my fabric is
touching that clothespin. It is a little bit messy. It's not the cleanest looking
thing you've ever seen, but it does work nicely. So now his mouth is still
going to move good. On this one, I did not move
the clothes pin far enough. The clothes pin edge
is actually here, and that's making his lip
kind of have a powdery lip, which is fine. I
still works good. Good. Real good. Okay, so that one's closed.
That one's good to go. We will embellish
it in a little bit. Now, if you want to
do hand stitching, that's a little bit
more complicated. But I will show you how to do the ladder stitch to
close up the back of your pocket puppet so that you don't have to
deal with the glue. Some people prefer
hand stitching, some people absolutely hate it. So I'm showing you both
methods just to see what you. About 18 " of strong thread. And when I say strong
thread, I mean, it's actually an extra
strong or button and craft, upholstery, something like that, because we're going
to be pulling up really hard on this thread. We want to make sure
it doesn't break. So a strong thread is
what we use for this. I'm going to start
down at the bottom, and I'm going to come out. Now I've got a knot already
tied in my thread there. And I will warn you
the arms and legs of your puppet are going to
be catching your thread. So try to get those out of
the way as much as you can. Just kind of get him up up
against the body or something. They'll keep him from
messing you up too much. Okay, so I've come out from
the inside to the outside. I'm gonna go right very close to where I was and go inside again. This is just to make a
knot to secure our thread. Now, you would want to
use a thread that is more closely blended with your fabric so that it
will blend in better. I'm going to use the white. Sorry, I should have
used something else. It might not show up
against the stuffing, but I want you to be able
to see what I'm doing. So Okay, now I've got a
nice firm knot there. I'm going to come up again about a quarter inch in the middle from that
end of the seam, and then just go
on the other side, and I'm taking a small stitch, about a quarter inch or
less for the stitch length. Okay. And you're gonna see the
pattern of this very soon. I'm gonna go straight
across to the other side. And again, take
about a quarter inch stitch on the other side, and it's parallel to
this opening edge here, the raw edge. And I'm going to take several
stitches like that so that you see I just keep going
from one side to the other. This will give us an
invisible stitch. It's called the ladder stitch. And you'll see in a minute
how it really blends in, and you won't even
see the white thread. So you see how it looks
almost like railroad tracks. Let me get one more stitch
in there and you'll see it. I'm not gonna lie.
Fuzzy fabric is harder to stitch on because you can't really see
what you're doing. You can't see where
the needles going in. When it folds over,
you can't even really tell that
it's folded over. It is more of a hassle, but it's so worth
it because it's just so cute to
have that furrinss. Okay, so I've got several
ladder stitches done, but I haven't pulled
my thread tight. See how that looks like a
ladder or railroad tracks. When I pull up on my thread, and that tightens up, and I'm actually going to
kind of push down and squeeze the edges together. You see how that
just disappeared, and you don't even see. That's the ladder stitch. And that's why we want to use the ladder stitch is because
it really is invisible. So I'm going to
continue all the way up to the bottom of my clip here and we'll
speed through that. You just do the exact same thing from the right side
to the left side, and each time you go across, you want to go straight across. So that the rungs of your ladder are even and not all wonky, because then you would
fall off the ladder. Okay, once I get to the
bottom of the clip, I'm going to go
ahead and just make another stitch. We're
gonna knop this. So from one side to the other and I'm going to
leave a little loop. This is how we make
a surface knot. I'm going to leave
one loop of thread, take it in my right hand and pass the needle
through that loop. Now I've got another
loop in my left hand. I'm going to pass the needle
through that left loop. And when you pull
up on the thread, it does help to put your needle in the loop there to hold it, and then pull up on that thread, and it will give you
a knot right down on the surface of the fabric,
and you can't even see. Okay, now I'm going to just
kind of weave my way over to the top because we got a little bit on the top that we need to stitch closed. Usually, I've got a little
bit more than that, but this one didn't have
a very big opening. And again, I want to
anchor my thread. I'm gonna do it at the very
top of that opening there. So I'm going to make a
surface knot up here. This is basically like cutting
the thread and re knotting it just without
the cutting part. And again, through one loop and then through the
second loop Oops. So now we've got another
knot that's going to hold this top
stitching in place. Okay. And we just do a couple of ladder stitches
on this top area. And that clip is kind of in
my way. It's angled upwards. And I'm not really sure why. Cause the wire and
the neck, maybe. So when you're closing
up your pocket puppet, you could either do the glue
or the stitch, either one, whichever you are more
comfortable with, whichever quality you want, it doesn't really matter. One thing I will say is, if you think you
might need to redo your puppet on the inside,
then do the stitching. Because the stitching, you
can just clip the stitches and everything is
just as it was. Whereas with the glue, you can undo it with the
hot tip of your glue gun, but it's gonna be really messy. So so if you think you might want to be redoing this later on, like, maybe, Oh, I want to change a
clip or something, then stitch it
because stitching is very durable but not
permanent very easy to undo. And then I'm just
gonna make another knot to finish this off. And then we'll buy the
thread on the inside. And you see how,
even though I used white thread, you can't see it. That's fuzz. That's not thread. You can see a little tiny bit of the knot right there,
but that's it. It really disappears,
especially in this fur. And then just poke the needle through and bring it out
an inch or two away. Pull on your thread kind
of tight, and then cut it. And now the threadtail
is buried on the inside, so we don't have any
threadtail hanging out. Okay, what do you think, dude? I like it. Look at
her cute little butt. Okay, cute little bud here. And you don't
even see the seam. It's just totally disappeared. So that's the latter stitch. Now, I will warn you there's nothing holding this
together on the sides here. And so I do like to
go ahead and glue just to the clip area because I don't like my
stuffing coming out. Just kind of poking
that stuffing back in. Then I'm going to put just
a little spot of glue. Again, we want it
below where that clip is where the pivot
point of the clip is. If you glue it up here, it's gonna be harder
to move that clip. So just down here, let that fabric bounce back up, and there we go. That's it. Just test to make
sure that it's still. Yeah. It moves very easily. He's cute. I love this shaggy red fabric.
That's just a sweatshirt. To review this lesson
about stuffing and closing, first, we stuffed, and you saw how using
hemostats can help you stuff those tiny little areas
and how you don't really need stuffing if you've got the wire armature
in there as well. When we closed up the
back of the puppet, there were two
different options. There's a glue option. You could use fabric glue
and some kind of pin or needle to use it as a tool to poke it into the seam there. Or you could hand stitch using the ladder stitch
with a strong thread. The whichever method you
choose to close up the back, I would recommend to glue just
a little bit on the sides of the clip so
that your stuffing doesn't come out those areas. And that's it. It's all closed up and we're ready to embellish.
9. Embellish: The last thing we have to do on our puppets is
embellish them because adding a few extra
details can really go a long way in bringing
a character to life. For example, these
guys are cute just with their big blue bug eyes, but if I add a little
turquoise nose to kind of bring out
the blue in the eye, it's much cuter, I think. A lot of times the nose
really makes a difference. And these are just
little pompoms. These are a 1 centimeter size, but you can go a little
bit bigger with Let's see. I have some here. I think these are some of these
are dollar store. Um, a little bit bigger. That works, too. I don't
like the color, though. There's a little
pink one. But I like the little tiny blue one that really brought out
the blue of his eyes. So I'm just gonna
glue that in place, fabric glue here again. Just a little spot of glue
on there is all it takes. You don't want to
put too much glue because then it'll
seep out and show. And I'm trying to get this
so it's not on his fur, but more on that backing. Just push that into
place. And yeah, he's good too good. So that's all I'm gonna do on this one is just
the little nose. I think that works.
It's really cute. On the blue one that
we've been working on, his felt eyes just don't
stand out as much. I think he needs maybe
a little bit more. So on this one, I've actually got some air dried clay that I just shaped into some features
here, and I've got yellow. I just had a little
tiny package of it. There's a big nose
that I could give him. That's kind of cute, or
maybe a smaller nose. Kind of like that
better. And then these are little horns, so he can have little
horns on his head. And I think that's gonna work. I think. Let's try it and see. You never know till you
do it, but, I mean, everything falls off, so
let's see what happens. And, again, this is
just a little bit of air dried clay or you
could use a polymer clay. And I just sculpted it by hand. This is something
that kids could do. It's really not difficult,
even for the horns. You just kind of
shape it. I twisted it to give it a little
bit of line there. Nothing complicated. Um, just some little craft store materials
is all this took. But when we're finished,
it looks cute. I got to get those
horns on straight. These horns are not symmetrical, by the way, but that's okay. I'm not gonna freak
out about that. Part of the problem
when we glue on to fur, it's gluing onto the pile
of the fur, the furry part. So it's going to have some play. It's gonna move
around, and that's okay on a small
puppet like this. But if you are going to have kids playing with these a lot, then gluing on an air dried clay is not going to be very durable. So I just warn you about that. But gluing on a pompom, that seems to work pretty well. This would be a choking
hazard, still, though. Even with the safety eyes, this pompom could come off
and be a choking hazard. None of these pocket puppets are really designed
for small children. I don't really design
anything for small children. I design for adults. Problem is small children want
to play with it. So you do need to be
careful about that, especially with the wire, and I'll add this to the
section about wire, too. You should never put
wire inside any kind of doll or puppet that a small child
will be playing with. It could poke through
and poke into them. It's more prone to
break when they're mishandling in it and moving things back and
forth a whole lot. So definitely anything with armature wire should be older children,
teenagers, adults. Alright, so we've
got our little dude here with his eyes. He
needs something else. I think he needs a
little bit more. And I'm going to
take my inspiration from this little dude here. This is just some of
that sticky felt, and I've cut it into
little arc shapes and given him eyebrows. And I like that. I think this little monster needs
something like that. Okay, I can't find
my sticky felt, but what I did find
is a little sticky, little sticky half circle. And that's going
to work just fine because I'm just gonna
cut the edges off. This is a little felt circle that goes on the
bottom of furniture. And now it's not
a circle anymore. But it's already sticky, so I can just give him
a little eyebrows. Okay. So that's very
simple, but it looks. I mean, I would buy
it in the store. I think he's super cute. I think I like the glass or acrylic eyes better or the resins or the
embroidered eyes. I'm not a huge fan of the felt, but I do like how this little
face turned out. He's cute. Other things that you can do, you can add a little sprig of hair. This is some faux fur. That I've just
glued onto the top, or if you wanted to, you
could sew it on the top. And he also has little eyebrows. His are made from a furry yarn, and it's a two tone yarn, and then I just trimmed off the extra little
fibers on the top, and he's got those
little sticker eyes. So he's a cute little guy, too. Cute. I like his little belly. We've got. What else can you do? Here's another example
of some faufur for hair. Not as huge a fan on this one, but his little nose is a
piece of foam makeup sponge, and I've just cut it in half and cut a little wedge off of it so that now he's got
a little pointy nose. You could also paint
these makeup sponges with acrylic paint.
It works really well. Here's another option
for This is, again, a curly fur yarn
instead of faufur. And I just took a little piece
of it and glued it on top. Really nothing complicated
or expensive there. And then your pattern does
have a pattern for a wig, and this one's not
attached right now. So the wig is going to look like this when
you're finished. You cut the edge here
and glue it to hem it. All of the edges are hemmed, and then you just cut out
around where the clip is. The pattern doesn't include
the cutout because without me knowing what
kind of clip you're going to use or where
you're placing it, I can't put it in the pattern, but once you put the wig on, you'll know you'll see exactly where you
need to cut it out, just cut a little slip for that. So that is an option, and it works well, especially
if you're not using fur. This is like a velvety
or mochi fabric that chibby dolls
are made out of. And when you use
that kind of fabric, it looks more humani and
then you put the wig on. That wig would also fit
on, let's say this guy. I mean, it's not
gonna look good, but, you know, it would fit on a monster furry
monster as well. Or this guy, maybe this guy. And now, he looks like a newscaster or something.
I don't know what that is. But if it's on this,
if you wanted to make clothes for them, all you have to do to
make clothes is take your pattern and
then lay your piece of tracing the stabilizer on top and then just draw
where you want the clothing. Now, you do have to kind of know what you want to do,
but for a shirt, I would just go right there across the
legs, get the arms. You're just drawing.
Here's a T shirt. Okay. Right about there. And then just a scoop
neck, something like that. So now I have a
pattern for a T shirt. And the way that you
would stitch that is put two pieces of stretchy
fabric right sides together, and then lay this on top. It's just like you
made your puppet body. You would want to
stitch, let's see, the shoulder seam up here, and then you would
want to stitch under the arm and the side. So you would stitch those
darker areas for the seams. And then for the neck
opening and the bottom hem, you could just cut it and leave the raw edges the way they are, or you could hand stitch
or glue or even use, like, a thin fusible tape to
hem those if you wanted to. But I didn't do it. When you're dealing with something
really small, a lot of times those
ms are just not as important because they
blend in so well. And knit fabric, which is the stretchy
fabric we're using, it doesn't fray, it
doesn't unravel, so you don't have to worry
about it coming undone. Also, not going to lie
the cuff of a sweater. Can just be wrapped around him
to make a little dress or, um, sock, fuzzy socks
or regular socks, cut that and use that. Sometimes it already has the banding that's really
nice and finished. And you can just use
that as a neck line. I've done that many times. You could even use a sock. This is not a pocket puppet, but you can see this
is just a sock, and it's a tube all
the way around, and I've cut a little
hole for the arms. So you could do the
exact same thing with one of these little guys, especially like a child's
sock would be skinny enough. It's an option. I'm just saying, It's always good to
try different things. So that's how you
could do some clothes. You have other options like
bows or flowers or eyelashes. If you have false eyelashes, you could do
something like that. Who needs a bow?
Do you need a bow? Here's a little bow
for you, Mr. Monster. That's not working
for me. I think she needs a flower right there. Oh, yeah, I see that would work. Just different options
of how to embellish. Maybe she needs the pink
bow. Where'd that go here? On her little wig. Maybe. But you get the idea. You can always do
things like that. You can tie things
around their neck. Again, just a little scrap
of stretched fabric, makes a nice little scarf. Another piece of furry yarn. Who needs a scarf? Who needs a pink scarf? Here, you got a pink nose.
How about a pink scarf? So you can do things
like that, too. Just do silly things,
whatever you want. I mean, they're puppets.
Puppets are silly. They're, you know,
informal and fun. So I've tried to
give you a lot of different examples here of
what these guys can look like, different ways to
embellish them, whether it's something
simple with just a nose, maybe you add the little
eyelids glued on, maybe you're going all out
with a wig and clothing. Or some clay features
and little eyebrows. There's so many
things you could do. I think this guy he needs
a little t shirt on. We'll have to work
on that later. Other extra step that you might want to do just
to kind of perk up your puppet a little
bit is if you have a lot of fur
caught in the seams, usually it's not so much at
the top, but on the bottom, use a pin to rub across there, and that'll get that fur out. You can pick it
out with the pin. You don't need any fancy
equipment for this, just a pin or a
needle or something. We covered a lot of
different ways to add a little extra personality to
your little pocket puppet. You could add noses made
of a pompom or some clay, a lot of different things
you could try there. You could add hair
from fur or yarn. You could make your own clothes by using the pattern that you already have and just create your own clothing
patterns from that. Even a sock works as a sweater. And then you could do
extras like horns or bows or brows or eyelashes, come up with whatever you want to do with your little
character and have fun with it.
10. Wrap-Up: You did it. We have
officially walked through the entire process of bringing a tiny
character to life. We have covered a lot of
ground in this class, from tracing and sewing
miniature pieces to mastering the mechanics of a
tiny moving mouth and little poseable limbs. And, of course, we've explored ten or more different
ways to create eyes and lots of other
embellishment ideas to make a charming
little puppet. The best part of puppet making is sharing them with the world. So please take a quick photo of your finished pocket puppet and upload it to the
project gallery. I check the projects regularly, and I absolutely love seeing the characters
that you create. Plus, your ideas might spark the next student's creativity. And if you enjoyed this class, please take about 30
seconds to leave a review so that other creative makers
can find this class, too. If you want to keep the
puppet making momentum going, come and visit me over
at ballyhocreations.com. If you want to try this project with your
embroidery machine, I have the machine
files available for sale there along
with a whole library of other unique
puppet patterns and other creative plushies
and dolls and other tools. While you're on the site, make sure to sign up
for my newsletter. I'll give you tips on
a more playful life behind the scenes of the studio, and you'll always know
when new characters drop. Thank you so much for
crafting with me today. Keep making, keep playing, and I can't wait to see your pocket puppets
in the gallery. See you later, folks.
Let's give a DVD by Bop choir, Muir. Ma. Hm.
 Luci Ayyat, machine embroidery, dolls, puppets