Transcripts
1. Introduction To Playful Watercolor: Hey there my creative friends. Welcome to my art studio. If you are intrigued
by watercolor, but you've been too afraid
to start than I have the perfect beginner friendly watercolor project
for you today. And even if you're
not a beginner, this is a super fun
project to do anyway, because it's very
experimental and it'll help loosen you up and gets
you out of a painting red. Together. We're going to have
a ton of fun with one of my absolute favorite
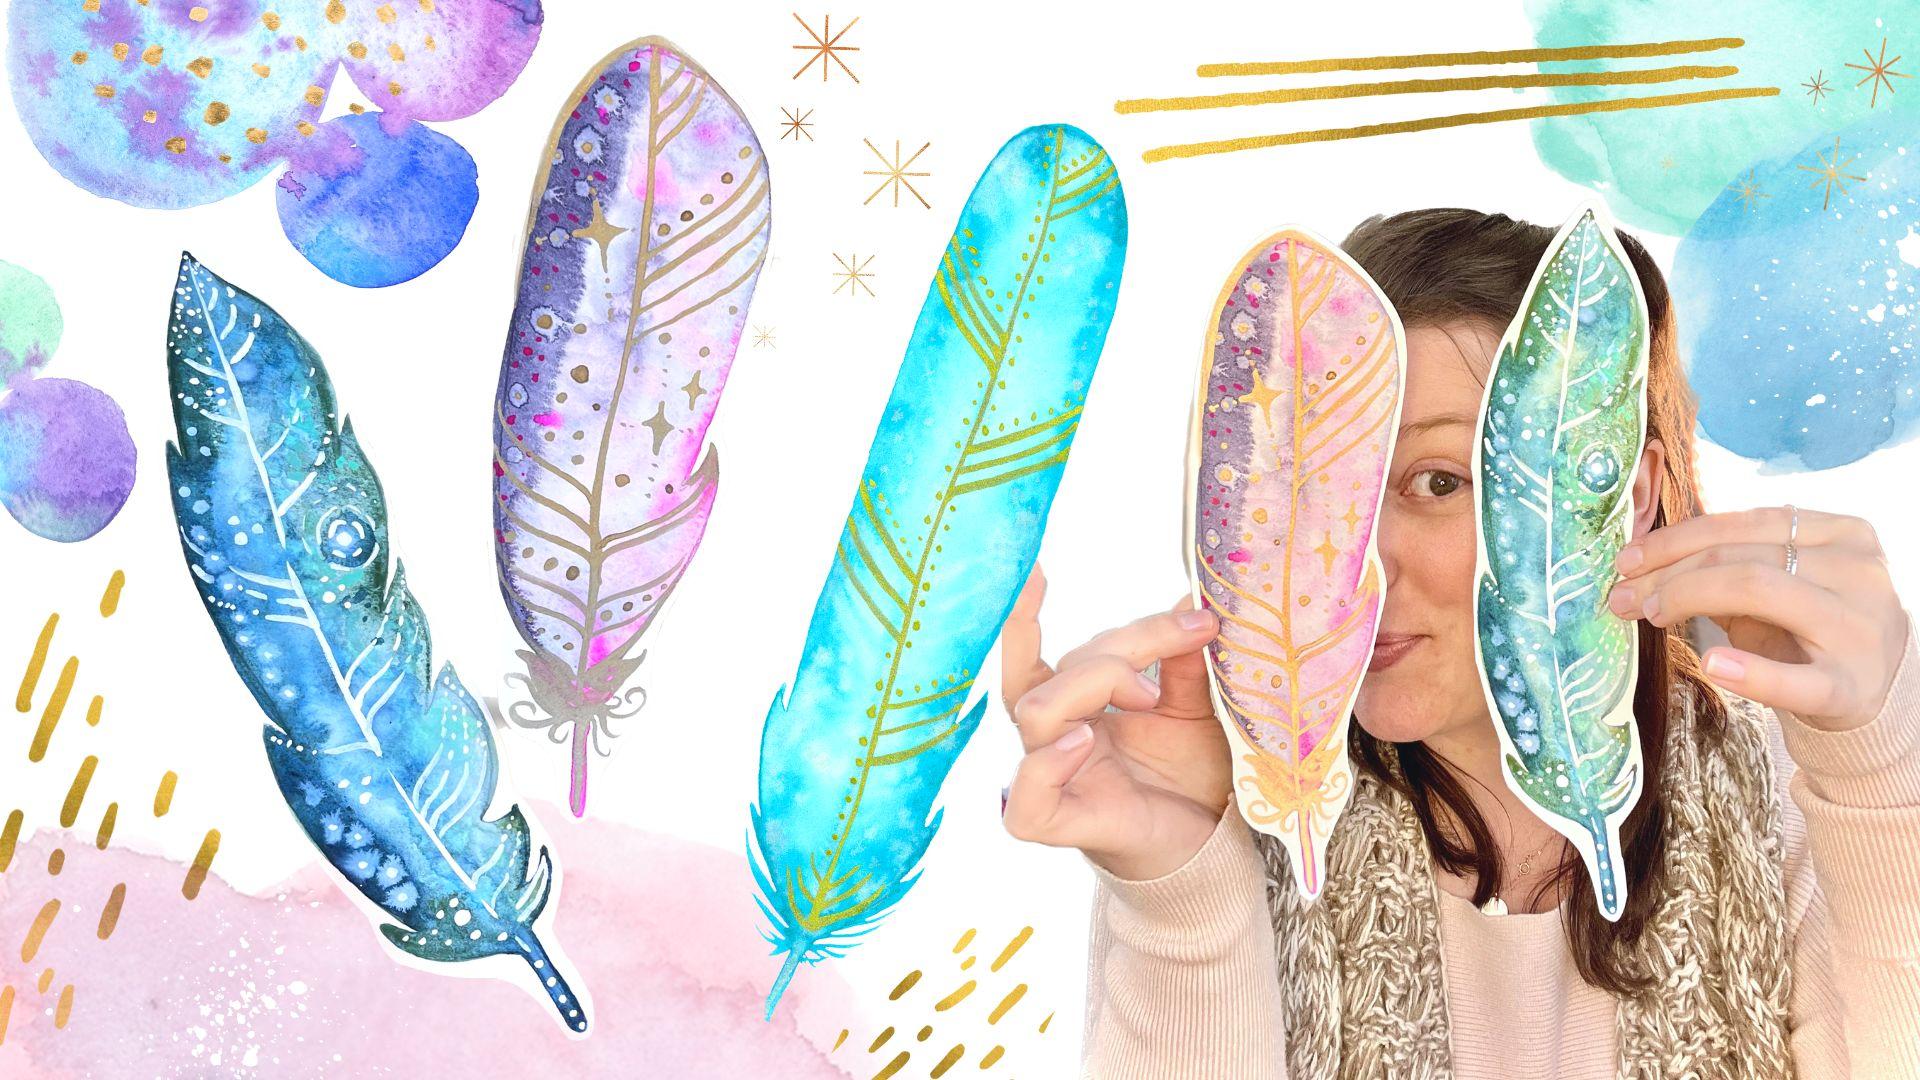
watercolor techniques. As we paint a super simple but very magical feather bookmark with your watercolors today. You can then keep
it for yourself, or then go on to paint a ton more and gift them to your
friends and loved ones. That's how much fun you're
going to have today. You're going to want
to make a ton of bees. This class is for anyone that
wants to try watercolor. We're keeping the pressure
way low and the fun way high. The technique is so fun
that it's just going to make you smile and it's
going to spark joy. And you're going to want to
make more and more and more. Hey, there I'm Melanie. I'm an artist and an educator. And really, I just want to be your creative cheerleader
here on Skillshare, I love to create
happy whimsical art. It's usually for picture books and coloring books these days. If you're looking for
more reasons to smile, follow me over on Instagram
where I share more happy art. And don't forget to follow me
here on Skillshare as well by clicking that green
Follow button up above. That way I'll never
miss an announcement about a new class for me. And for bonus points,
you can go sign up for my artists newsletter
over on my website. You will immediately get 23 coloring pages
just for signing up. And then I will send out the occasional
artists newsletter letting you know
about new products or new class announcements. No spam for you, my friend. So if you'd like to make a feather bookmark
with me today, then go grab your watercolor
supplies and let's dive in.
2. 2 Your Project - Make A Feather Bookmark: In today's class,
you are going to dive right into
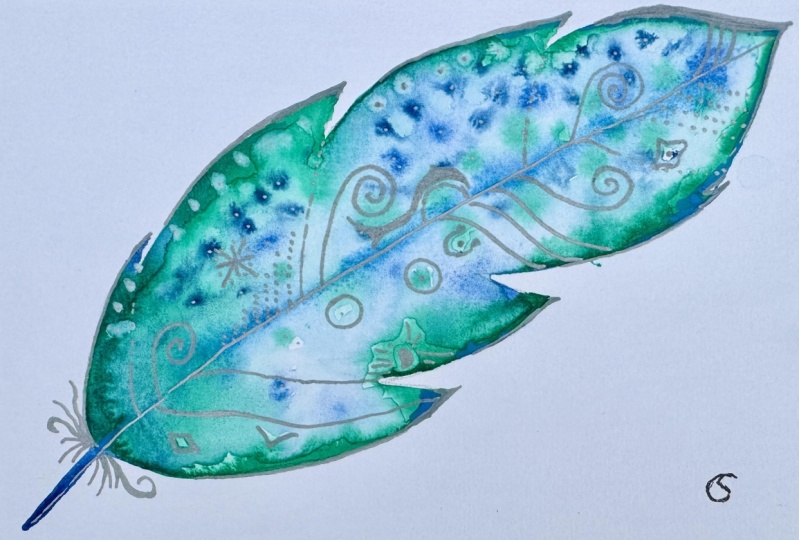
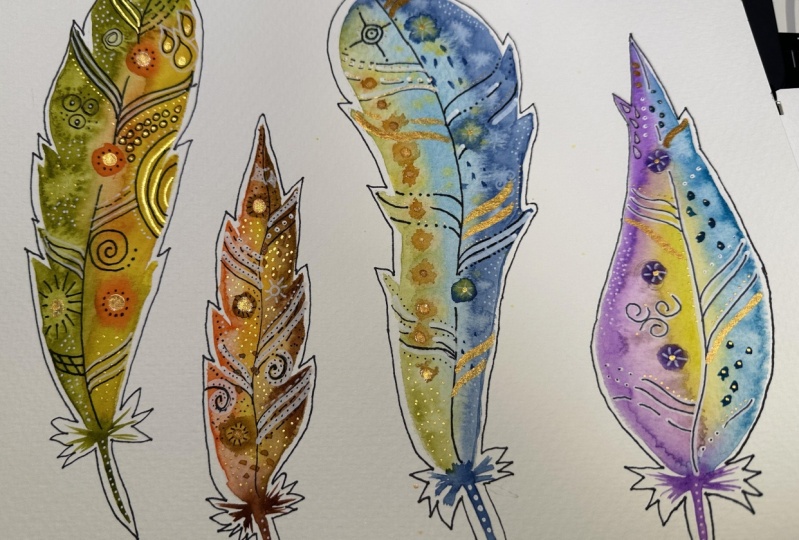
watercolor painting by completing a wet on wet watercolor painting
of a simple feather. You can then cut it out and turn it into a
one-of-a-kind bookmark. After you complete your feather, you can continue practicing
this watercolor technique inside any shape or
painting you would like. This is a great exercise
for getting to know your supplies and learning how different paints
react with water. When you are done
with your feather, snap a quick photo and share it with us in
their projects and resources tab because
we all want to see it. Alright, let's talk
about supplies.
3. 3 Supplies: Okay, So supplies for
this class can go from a super simple to follow on
watercolor painting studio. You can decide what the right supplies
are for you though. In their projects
and resources tab, I have attached a PDF
that looks like this. And it has clickable links
in case you want to know exactly what brands and
supplies I'm using most often. But you absolutely do not
need all the fancy gear. For today. I will be using two main paint brushes and
one tiny detail brush. I'll be using these
three brushes. I'll be using a super affordable
Canson watercolor paper, potentially some washi tape, maybe a palette if I
want to mix some colors, but I usually just do
the mixing inside of my watercolor tin because
I'm messy like that. A clicky pencil or any kind of sketching pencil
that you'd like to use. And you may want an eraser. You will want some
paper towel or even a cloth that you can use to dry and clean your brush. I like to have two
jars of clean water. One is used for putting
down clean water onto the paper and the other is used for washing my brush. I also like to use
a spray bottle of water that I use to
wet my entire palette. That's completely
optional though, and you can totally do
it with just your brush and dipping it in the water
and wedding the paint. And then of course, I use an assortment of
watercolor paints, whether that is a tin of watercolors or maybe you
have tubes of paint. We'll talk about that
more in just a second. If you are new to watercolor, then for embellishments
onto our feathers later, you can use whatever
you have on hand, whether that be an ink pen or maybe you have
some white gel pens. I really like this
opaque Copic white. This is linked in
the PDF as well. Metallic watercolor paints
also work really nicely. So whatever you have on hand, but you can use to make some really pretty marks on your feathers bookmark
after it has dried. There's no right or
wrong answer here. Okay, so if you're not
super new to watercolor, you can probably skip ahead at this point and get
started on our project. However, if you would like
a little more information about watercolors supplies, then stick with me for
a few more minutes and let's chat a bit more
about supplies quickly. Let's talk about paint. When it comes to
watercolor paint, we could talk for hours. So I'm going to
try and keep this as simple as I can for you. As a beginner. You likely have a set of pan watercolors and it might
look something like this. You might open it up. And there are these little pans inside of pre poured watercolor. And you'll need to wet
them to activate them. It may even have like
a mixing palette. On the other side, this set is a Winsor and Newtons
Skechers pocket box. But my first pan sets
came from Art Philosophy. I'll just put a picture up on the screen of what
they look like. They're actually my
favorite pan sets. I highly recommend the classic
set from Art Philosophy, that was my very first one. And it has a wonderful
range of colors. They're still vibrant. Now if you don't
have watercolors and a pan set like that, you might have them
in tubes like this. These are more
expensive usually, but they're also usually
more vibrant and explosive. Most of my two panes
are gonna be from Daniel Smith or
Winsor and Newton. Daniel Smith is my
favorite by a long shot because they have some seriously explosive and magical colors. I have an assortment of both
pan paints and two paints. And what I've done is
I've put them all into this massive tin of watercolors. So what you can do
if you've bought your own tube paints like this, you can buy a ten. And then you can also buy
these little pans and magnets that you stick onto the back of the pan and then stick them down to a metal tin. So if you have an
Altoid tin at home, you can buy some tube paints by a couple of these little
pans with the magnets. You will squirt the paint into the little tube after you've
already put them back in on, by the way, should've
said that first. We'll put the magnet on, squirt your paint in there
and let it dry and harden. And then you'll put
it into your pan and then you'll just wet it every
time you want to reuse it. So that's what I've done. A lot of these that
don't look super full. Our paints that I've put in here myself from my
Daniel Smith tubes. Now I also just want to say, to get into watercolor, you do not need all of this. This is what I've
collected over a period of ten years. I started out. These right here. These were my classic
colors from Art Philosophy. Now if budget is not a
concern and you do want some super exciting pains and go check out that PDF again. And it has my absolute favorites from Daniel Smith
and art philosophy. But the two paints
that I would say you should immediately
go add to your cart, our cascade green and moon
glow by Daniel Smith. These two paints are
straight up magic. If you have a friend that's
also into watercolor, what you could do is
the two of you could split the cost of this, get little pans and
split the pain. Alright? Okay, So paper, when you
shop or watercolor paper, you're likely going
to see two terms, cold pressed or hot pressed. To simplify this cold press
will have a bit more of that bumpy paper watercolor
texture you're used to seeing and it's going
to absorb water faster. But hot press paper is
going to be smoother. So this is gonna be one of those things that's going
to come down to personal preference and what you're trying to accomplish
with your painting. If you've had the
chance to try out both and see what you like. For simplicity sake, I'm going to cut to the
short of it and tell you that I always use cold
press because I want that classic watercolor texture to come through in my work. Again for today, I'm
highly recommending Canson watercolor paper for beginners for quick
projects like this, because it is so affordable. It looks a little different
than this now on Amazon, I believe the cover
might be black now, but just look for
Canson watercolor. And it should say cold press. I'm using a nine by 12 sheet. The thing about this Canson
paper is that it does not come on what is called
a lock of paper. A block of paper is
glued on all four edges so that it keeps the
paper from gaining to bend up and curl like that. This Canson paper is only
glued on the one side, which means it can
buckle and curl a little bit as we're using
more water and paint. Because with watercolor paint we are using a lot of water, which will then cause the paper to kind of bend a little bit. So to fix that, if it
is becoming a problem, you can always use a bit of washing tape and
you can tape down the sides like this to
keep it from moving. That's one way you can do that. Or you can always
tape your paper to your desk surface that
you're working on. The other thing you can
do is use some clips. I'm a foreigner. The only thing is this
will create a bit of a slope to your paper. If that's a problem, you
might not want to use those. You can actually buy
watercolor paper in blocks. And that's usually going to be a much more expensive paper
from a brand called arches. Are there are many other
Strathmore etc.. And those are my favorite papers
to work with and I worked my way up to using
those because like I said, they are very expensive. So for today we're
going to stick with a budget friendly option
of something like Canson. Okay, so for brushes, the main thing to know about watercolor brushes
is that you want a super soft brush that
can hold a lot of water. And when I say soft, I mean, you kinda look at this and
you see how well it bends. And then bristles can
really spread out and catch a lot of
water in there. That's what we want. We want a nice soft
watercolor brush. Whereas a brush like this is
meant for acrylic or oil, this is not meant
for watercolor. It would work just not as well. It's not going to soak
up as much water as something like this
chunky brush here again, I recommend you find a pack of round synthetic
watercolor brushes. The word round refers to
the shape of the brush. They should also have
a nice pointed tip with a larger middle, and that's where it holds all of the water and paint is
right there in the middle. But the tip is pointed so that you can get a controlled
line if you want to. I feel like the name round
is a little misleading here, but I didn't get to weigh in on that decision when the brush
gods were making the rules. I like the brand silver. It looks like this.
I've already, this brush is very old, so I've rubbed off
the name here. It's a size for silver is a
little bit more expensive, but it's just been a
really good brush. I love it. But you do not need to have
a name-brand by any means. This brush here came
in a large pack on Amazon with tons of different sizes and it's
got a great assortment. This would be a
good starter pack. I do have a link in the PDF or some round brushes as well as a link to the silver brushes. And the last supply you may
want is just some tape. You're going to want either
masking tape or washy tape. These kinds of tape will
release from the paper, whereas something
like scotch tape or shipping tape is going to rip your paper into bits
if you try to use that. So you want something
that has like a very soft hold to it, like washi tape or masking tape. I think that's all we need to
discuss for supplies today. But if you have any
other questions for me, just shoot me a message in the discussions tab and
I will get back to you. And again, check out that PDF. You don't necessarily
need to buy anything from that
PDF, by the way, if you're just looking
for information, but if you do buy
something from there, I appreciate you're
using the link. If they are affiliate links, I get a very small kickback at it costs you nothing
to use them. It just gives me a little
something extra if you do it, so I appreciate it and
advance of you do. But let's get to painting.
4. 4 Sketching Our Shapes : Okay, so for our project today, we're going to want
two pieces of paper, one for some experiments and one for our actual
feather bookmarks. By the way, I just
want to make a little disclaimer if at
any point during today's class you
can hear trucks driving by, I apologize. The reality of the
situation is I live on a little bit of a
highway in a small town. It's a logging town. It is what it is. We may hear some trucks today. I apologize. I'm gonna do my best to cut them
out when possible, but we're painting
in real time here. So go ahead and grab your
pencil and your paper. I just have again,
this clicky pencil. You can use whatever you
want to sketch with. You may want an eraser
and a word of caution. You're going to want
to draw very lightly because watercolor is
transparent by nature. So your pencil lines are
going to show through. And once we've
painted over pencil, watercolor seals it into place, you won't be able to erase
those pencil marks away. And if you try to, it's going to lift up some
of your watercolor paint. So that's just a word
of caution for you. Now you can always like
pink to the edge of a pencil line and
then erase it later. Or you can trace extremely,
extremely lightly. I will be tracing
much darker today just so that you can
see this on camera. For your sake, draw lighter
than I am on this first page. I have not taped it down. It's totally fine. This is
just our experimental page. And then I'm going to
go on to trace onto my second page of just a second, so I don't want it
taped down yet. We're going to draw
out six circles. Now, if you've just bought some fresh watercolor paints in a pan and it has like
eight or ten colors. Why don't you go ahead
and make yourself as many circles plus one as
you have pink colors. That way you can make
a swatch sheet for yourself while we're
doing this today because swatch sheets are so helpful
when you have new canes. Let me just show you here. Anytime I buy a new paint, I always make a swatch
sheet for myself of those colors so that I can
learn how they behave. This is so helpful
to get to know the personality of that color. What does it do when you add
more and more water to it? What does it do when you put
it into a puddle of water? Does it explode or
does it stay stagnant? What does it do when you just saturate your brush
with paint and then draw paint onto dry paper. So I would encourage you
to make a circle for every pink color you
have in your new pan set if you're using
new ones today and do this experiment with
all of your colors. That way you can really
get to know them. Plus, it's just fun, okay? Trust me. Okay, so again, I'm just going to
make six circles, five, we're going to just
be for plain colors. And the last one is going
to be kind of color mixing. So I'm giving myself
circles. That way. I make sure I don't
accidentally start painting one super big and then run out of room
for the others. So mine are nice and dark
so that you can see them. You're gonna make yours later. So that's our first page
for our color experiments. I'm gonna go ahead and
sign off here. Again. It's an experimental page. It's okay if it buckles and bends a little bit while
we're working on it. The second page is where
we're going to put our feather shapes
for our bookmarks. You can decide if you
just wanna do too. I'm just going to do two today. Or if you have your
paper this way, you could also do
for shorter ones. You can make them go this way and make two super long ones. You could do them diagonally. I might do them diagonally today just for filming purposes. But this is up to you. If you want to do
lots of experiments in today than I
would say make for. Now, I'm gonna put some
feather shapes up on the screen right now
for you to reference as you're sketching out a
very simple feather shape. We don't want a bunch
of tight details here because it's gonna be very hard to paint into
those right away. We're going to keep it
fairly simple and open. Then you can add those more like thin wispy, feathery bits later. Okay, so I'm just
going to sketch out two simple feather
shapes on my paper. You're gonna be nice and
large for you to see and much darker than what
yours is going to be. I'm going to start with
the end down here. It's okay to make some shapes that kinda curve
back in if you want. Just don't make them super tiny. I'm making this superbugs
and you can see it like this would
almost be too big for bookmark to be quite honest. But this is just so you
can see what I'm doing. Alright? There's one and then
I'm going to make another one that's just
a little more simple. Maybe just like a nice
big round tip up here. Alright, so I have to
feather shapes now. And then in these whitespaces, these could also be a
little experimental spots if you're still hemming in hiring about what
color you want to do or if you want to
practice in technique. It's nice to have a little
spaces on the edges of your paper that you
can play if they need to, or work up the nerve to drop
color in to your feather, I might just kinda refine
this a little bit. You can erase on watercolor
paper somewhat to an extent. But if you start
erasing too much, it will tear the paper
up a little bit. So just a little bit of a warning if you're
brand new to this, don't be surprised if you
are erasing a ton and your paper starts to kind
of like pill or pull up, that's going to happen. And that's okay. You're learning, you're
gathering information. So if you need to go ahead
and pause the video here, trace out your feather shapes. These don't need to be perfect. Release that pressure if
you've put that on yourself, just make some nice
simple feather shapes. Like literally it doesn't even need to have
any kind of detail. It can be a symbol, kinda teardrop
shape with a stem. I'm not sure what
you've actually call that part of the feather. Maybe I should look that up. Again. Pause this, trace out your
feather shapes and then we are going to get started
Next on our circles. I'll see you in the
next video where we start talking
about our paint.
5. 5 Quick Tip Before We Begin : Before diving into painting
with me right away, I wanted to offer a
quick suggestion. It might be really helpful to
first just watch and absorb the information and
technique and then come back through and watch
his second time while you paint with me. I know that for me. I tend to get a lot more out
of my Skillshare classes. When I watch the teacher
first applying a technique, then I come back and
do the technique with them the second time. Because as you're
watching me paint, you're picking up
other little things that I may not be
saying out loud, like the angle of the brush
and how I'm holding my brush or how much paint and water have I mixed up
things like that. That if you have your head down painting at the
same time I'm painting, you might miss those
little things, especially if you're a brand new beginning
watercolor painter. So that's just my little tip
before we dive in and truly get started on our experimenting
and playing together. If you're not new to watercolor, feel free to ignore this
advice and just go have fun.
6. 6 Experiment + Play With Your Paint: All right, This part of our
painting exercise today is great for beginners
and season two painters. When you need to learn how
your paints react and move, this is a great way to learn
because believe it or not, not all watercolor paints are
going to behave the same. Like at all. Some will explode,
some will granulate, some will separate
into different colors. Some will dry into a color, you never expect it. So this is why you will see artists make those swatches
like I showed you earlier. These kinds of experiments. They're important. They teach us a lot. So that's why we're going
to gather some information before we make our final
art piece, feathers. Now, with watercolor, there are two main ways that
I paint personally. I either use a wet on wet
technique or a wet on dry. Wet on wet means I will wet my paper first with clean water, and then I will use wet
or very watery paint on that puddle of water in my paper and it will move
about and do its own thing. With wet on dry, I will paint directly onto watercolor paper
with a juicy paint. The wet on wet is
going to allow for explosive or moving watercolor. Whereas the wet on dry, we'll keep the paint more controlled within
my stroke lines. And you can see why
the wet on wet is probably a favorite because it's just unpredictable and fun and it sparks joy and
it makes us smile. So today we're playing with a more fun of those
to the wet on wet. Okay, So let's dive in. First. Let's prepare our paints. I want to start by saying that, as you can see here, I do not keep my paint pans
pristine, nicely separated. I definitely have
like a bloody mess of a palette sometimes.
And that is okay. Try not to be too precious here or else you're never
going to want to paint. If you put that
pressure on yourself, you get another color
mixed into your yellow. It's gonna be just fine. It's fairly easy to clean that up and make
it yellow again, you'll get some clean
water on your brush and scrape up the
color that got a little crazy and repeat that process until it
looks clean enough. Okay, you'll see that I have
green and my yellow here. So what I could do is just get some clean water on my brush, kinda scrape away
some of that green, wipe it on my towel and just keep repeating that
scraping and cleaning process until it looks good enough again and again
keyword, good enough. Okay, the whole purpose of
this class today is just getting you to use these
paints and have fun. So if you have a pan
of paints like this, you can actually start by just spraying all of your paint
to start prepping them. Go ahead and give them
all a good spray. If you don't have
a spray bottle, get your paintbrush and
get clean water and just start dipping it into some of the colors or all of the
colors that you have. Now, I have a huge pan here, so I'm not gonna do that
with my paintbrush, but you can, if you
just have a small one, you're going to want all
of your paints to be nice and juicy because
we want the water to activate the color to get us to see what that
paint can really do. Now, if you have tube paints, you can either squeeze them
out into a palette and then mix a little bit of water and make a puddle with each color. You could do that in any kind of palette
that you might have. Just squeeze a tiny bit. It doesn't take much
with watercolor tubes, Like literally less
than a pea size. Also, just a quick note
about using paint palettes. If you don't use all of the
paint that you squirt it out into the palette in one
sitting or one painting, it doesn't have to go to waste. You can just cover that
palette with a little bit of like Saran wrap or
just a piece of paper. And then the next time
you sit down to paint, you'll just spray water
or tap some water back into those colors
to reactivate them. So feel free to pause here again until you
get all of your paints prepped and then come back and we're going to
start painting. Okay, so next we want to
use a large clean brush. And we want to load the
brush with clean water. And then we're going to
fill our first circle with a nice even sheen of just water. So here's my clean
water over here. Got my nice big fat brush. And I'm going to fill this
circle in with water. We want to make sure it's nice. And even so you may need to do like a head tilt fast at different angles to make sure that there's water
covering every surface. Of your circle and that
there's no large puddles. We don't want it to be too full. If you have a side of your circle that
looks like it's kind of swelling with water. What you're gonna do
is take your brush and tap it onto your towel. Whether you're
using a dish towel or paper towel doesn't matter. And then you're just
going to kind of soak up that puddle by just pulling your brush through it and
then tapping over here again to release
some of the water. And then we're just
going to come back and redistribute the water
around to make it nice. And even again, tilt your head all around and look
for the Schein. Makes sure your circle
is nice and shiny all over the place
as you can get it. Once we're happy with
our water coverage, we're going to choose any
color we like and load our small brush with paint. I'm gonna go ahead and use that cascade green color that I have been
preaching HIV out. Just to show you the magic of that color and show
you what it can do. So I'm saturating my
brush with lots of paint. I dipped into my
water here and I am tapping it into my
watercolor paint over here, which is hard for you to see because it's at the
edge of my palette. So I've just made a very juicy puddle and I am swirling my
brush around in here, really getting a lot
of paint on my brush. I'm going to show you
what that looks like. It is really nice and full. It's very, very juicy. And what I'm going to
start by doing is tapping color into the edges
of this circle. I'm just going to tap down up here and let it run
and see what it does. Not sure how well you
can see that on camera, but that paint is just moving. I paint took up. What did yours do? Did it run while did
it stay fairly still? If it didn't move through the
whole circle, that's fine. Now we can just drag around, tap color into other sections. I'm gonna get a little
more paint on my brush. I'm going to do a little more
water, a little more paint, and tap it into another area and let this just keep
running and exploding. That's making these very
cool vein like Marx here. This cascade green
has this deep, almost like a deep teal
color at the edge. And then as it spreads out, it turns into a sky blue. I'm going to try to
show you that up close. Clean my brush off a bit dirty. Then you're cleaning your brush. You're just going to gently
wipe it onto your towel. And if colors still coming
off when you're doing that, you know, it's not
quite clean enough yet. Okay. Let's see if I can show
you this color up close. You see the magic
of cascade green. I hope you can. That
was fun, right? Getting to Know that
color a little bit, seeing how it moves. Again, if you need to spread it around a little
bit, that's fine. You can add more color to it and just paint
within that circle. You can clean up the
edges if you want, but you definitely
don't need to. The next way you can experiment with this color a
little bit is to dip in your water again and make
a circle off to the side. It's fairly clean water. And then I'm going to make it bigger and bigger until I hit the edge of this. And it's going to start
to pull a little bit of that color into this circle. And we'll get to know what
this color does when it's extremely watered
down like this. The next little test you
could do next to it, It's just dip into your color. So I've got quite a bit of
paint on my brush right now. And I'm just going to make
another circle down here. That's actually just kinda
juicy paint on dry paper. So we can see what that
color would look like, fully saturated like that. And how will it dry?
What's it gonna do? What's the behavior? What's
the personality of the color? There's just so
much to learn here. Alright, I'm going to
clean my brush off. The next thing I want you to do now is if you have
a small palette, go ahead and do that with
the rest of your circles. Test out all of your pink. We want to save one
circle where we're going to try like two
or three colors and see how they react with
each other to see if we might like to do that
inside one of our feathers. I'm gonna go ahead and fill
up these four right here. And then I'm going
to save this one to test out some color. Again, clean water on
your big fat brush. Put down the clean
water into your circle. Get it as, even as you can. And repeat the process. Choose a different color. Maybe I'll use this hot
pink from Art Philosophy. This was one of my
recommendations where the classic colors
from Art Philosophy, nice, saturated brush here, lots of color in there. And I'm going to tap it in. Okay, So this is interesting because this pink color is not, it doesn't move a whole lot. It could be because
this color is simply just doesn't move
and explode very much. Or maybe I need to add
a little more water, do a little more mixing into the paint and see if that helps. Really stirring it around
within the palette here. And I'm going to try again. No, this color just
doesn't want to move a whole lot. Alright? And this is again where we
are gathering information. So here is where I would go ahead and paint
this in a little more. You can make variation
within this color by adding a little bit more
saturated paint into spots, dropping in some spots. A little bit more pink. That will make it darker
and more saturated there. You can leave rings of
light by not filling in the whole circle and
leaving a little bit of white paper always makes watercolor look a little
more interesting. Another thing, it can be a
little bit frustrating for people to learn is
that right now, these colors probably look extremely vibrant to
you on your paper. And when they dry, they're going to dry a little bit more dull. It's going to take away a
little bit of that vibrancy, especially with Pan paints. But if you know
that ahead of time, you'll know to add a
little bit more paint, you get a little bit more
saturated in the moment, a little darker, knowing that it's not going
to dry exactly as you see it. But again, that's
part of the magic. You're not totally
sure what to expect. You gotta kinda just let watercolor do what
it's gonna do. If at any point your jar
of water that you're using to make your paint is
starting to get really yucky. Go ahead and swap it out, go get some clean
water for yourself. It's starting to look like mud. Alright, next circle. Also, don't forget that for each of those circle
colors you're making, you can also do those
two little side tests like I did with the
cascade green color. So that top circle was
just a little bit of water and pulling
some of the paint in. And then the bottom circle was the fully saturated paint on dry paper to see how it reacted in those two
instances as well. So you can do those two
tests to I just forgot. I'm going to go ahead and
do that moon glow color that I was telling you
about, which is again, a far over here on my palette, is making a really
nice juicy puddle. With these Daniel Smith colors
that are super explosive. They need a lot of activating. And what I mean by that
is they really liked to be mixed with a lot of water in order to get them to shine and
show their true potential. So I've made this
super watery and full. I've mixed it around a lot. So now I'll go ahead
and tap this in. What I love about
this moon glow color, is it super dark at the edges. And then it pulls
into again like another bluish color as it
goes into the water here. And it dries so pretty. It's like the perfect
night sky color. Especially if you like
or if you want to get into painting kind
of galaxy scenes with your watercolors. This is just it's got the vibe. Now what I dipped into my water, I still have paint on my brush, but I added water
just to the brush. And I'm just going to tap
this in here into the center. And I'm just going to mix
this around a little bit. But I'm not going to
touch this edge because I'm going to let
that paint pen is separate out, pull around. It makes them interesting texture and variation
in the color here. Once my paper has fully dried, I will snap a picture
of it or show you on camera what my colors
ended up looking like. Alright, moving on
to the next circle, means a little more water. You will also notice
a difference. And you let the water really saturate or soak into your
paper a little bit more. So like you'll notice,
I just kinda keep painting over this a
little bit more and more and I'm letting that water soak in a little bit more to the paper because that also will help my
paint a little better. Okay, what color
should we do next? Let's see. Another one of my favorites is this teal color that I have, this dark teal blue. I use it a lot. I believe it's also a
Daniel Smith color. Fill this up. This one's not super
explosive either, but the color is gorgeous. I wish I could see what colors you guys are
painting with right now. I wish I could watch in
real time as you paint. That's why I definitely
want to see you snap a picture and share these in the projects
and resources tab. But I really liked doing is making a really dark edge with my watercolor and
letting the middle be like the playground where it just wild things
are happening. And the edges have
this super deep, nice depth to them
because I've made a really saturated
dark edge to it. That's what I like doing. But this is about what you
are learning about your pain. So see if you like that. If not, make it nice and evenly, spread it out even over
there, over the whole circle. I'm just going to tap in
some nice dark color. Another little
experiment for you to try clean your brush off and get just a little bit of water on
your brush and then tap in after this is set up
just a little bit, let the paint set and
start to dry just a tad. Get a little bit of water
on your brush and then just tap in into like a
dark circle like this. Tap into some water and watch how it makes
this really cool, almost greater effect
into the painting. I might still be
able to do it on this moon glow over
here. I'll show you. I just have water on here and
I'm going to tap it and it will push the paint away and
make a crater lake effect. This is a timing thing. It has to be done
at a certain point in order for it to work. That's just something
you learn by doing. Okay, There's no formula and I tell you it has to be
this exact amount of dry. Alright, I've got one
more circle to fill here. Before we try mixing some color. I'm going to use one of my
kinda pastel colors right now. Pastel watercolors are interesting
because they're not as transparent as most watercolor that you are going to
get to know and love. Pastel colors tend to have more of like a milky look to them. I'm going to use this pale
periwinkle color here. This color does have
a little bit of movement and explosion to it. It will probably be
hard to see on camera, but it is very beautiful. Thinking what I'm gonna do for my circle down here is
I'm actually going to try mixing my cascade
green with a little bit of this periwinkle color and
maybe a bit of this teal. So as you're painting
your circles right now, you can start to
think about this. What colors are intriguing me enough to try to
mix them together? What colors do I want to play
with in that last circle? Again? As you are painting
these circles, feel free to also do these
two little mini circles, these little mini
experiment circles on the edges as well. So that was again, one
little circle where it was mostly saturated
paint on dry paper. And then clean your brush drop. And do a little circle
up here where you pull some of the painting. That almost looks like nothing because that's such
a light color. Maybe what I'll do is just
tap some color into that. All right. I'm ready to move on
to my last circle where we are going
to play with color. Choose two or three colors. Do the same idea. Clean water tapped
or three colors in and see how they react
with one another. What do they do? Do they mix? Did they bloom
really nicely together? And more importantly,
how are they going to look when
they dry together? All right, I'm going to
start with cascade green. Oh boy, that was
a fun explosion. Holy cow. I had lots of water
in my circle that time. Oh man, so much joy guys. This is such a fun technique to do like on a journal page. Just to play. Wow, that one, but just
straight up magic. Okay. I almost don't want to
add anything to it, but I'm going to I'm going to do that dark teal
color on the edges. I'm going to tap it in here, spread it just a bit. If you don't want to fill the whole circle with one color, by the way, you don't
have to do that. You could have done
like just a corner over here with one color than a corner over here with one color. You know what I mean? Separate them out. I wanted to fill the whole thing of
cascade green and then see how these other colors
react on top of it. So now I'm gonna come to
this periwinkle color. And I'm gonna do something a little bit crazy here where I'm going to just kinda tap
my brush like this. It's fully loaded with paint. And I'm going to just drop some color drops
in here like this. Find. And then maybe up here, I'll just kinda make
a larger circle. So I know for sure one of my feathers is going
to have these three colors. And then I could come
back with one of the, either the cascade
green are the teal. And then I could do that
same idea and tap that into the, the pale color. Okay, So we're going to
let these dry completely. If you wanted, you could use a hairdryer to gently dry these. I tend to let my watercolors
just dry on their own. I'm that way I'm not accidentally pushing
paint into an area. I don't want to with the
hairdryer with our feathers. It's going to be absolutely key, making sure they are off thousand percent
dry before we tried to come in and add any marks over the top or cut
them or anything. So we're going to set
this one to the side. Because the paper is starting to buckle and bend a little bit. Especially in my experimental
one here I definitely, I had too much water in there. I can see by the
puddles that are happening that one's going to take quite a bit of time to dry. I could also though, one fun thing you can do with watercolor is you
can soak, paint up. I could get a small
piece of paper towel here and I could soak a
little bit of that up. It's going to get
rid of whatever I might have painted in
there intentionally. It's going to make
a cool texture, but it is going to lift paint
and water out of there. But that is something you can do if things got a
little bit out of control and a little too
soaked in, saturated in there. If I wanted to though, now that that's kinda
cleaned up a bit, I can come back in and add
a little bit of color. So that's an option.
Okay. I'm gonna go ahead and set this
one to the side. And in the next video, we are going to start painting our very beautiful feathers.
7. 7 Paint Your Feathers: Okay, we are ready to paint our feather
now that we collected information on our
pink colors and you possibly you chose
your favorite pink child. We are now ready to start
painting this feather. If you didn't, you
might want to get some clean water after all
of that experimenting I did. You may not want muddy water
for our pretty feathers. And this might be the time to
also go ahead and tape down this paper so that we get a little bit less
movement and buckling. So for me it's still
attached to my pad. And I'm just going to wrap some tape from the
front to the back. And it doesn't want to stick. Come on now. I'm not gonna be
too precious here. We're playing, we're having fun. If it comes undone, It's okay. All right. I hope you took a few minutes to plan out some colors
for yourself. But if you need to do
some more experimenting, I'm not going to stop. Yeah, go for it. What we want to do is this
same exact technique. We want to put down clean
water and then drop in some juicy wet paint into that water and let
it do its thing. Let the watercolor
be watercolor. I do want to assure you though, there is no right or
wrong about where you place your paint or what
colors you choose right now, we're letting this morph into whatever the paint wants to do. This is a freeing exercise and
it is meant to be playful. And if you don't love how
one of them turns out, make another one
and another one. Okay. I had such a large pile of these bookmark
feathers at one point that I eventually just had to start giving them away
and sending them out into male in the male to
family and friends. And then I even started selling
them at a local art shop. Okay. Enough talking.
Let's do the thing. Okay, clean water on
my big fat brush. I'm going to start with
this feather up here. So that way I'm not dragging
my hand through wet paint and I'm just going to roughly first put
down a lot of water. I'm not paying attention
to the edges just yet. I'm just getting some water
into the big space first. Again with your pencil marks. If you want to be able to
completely erase it later, then you're going to want to
carefully paint just inside your pencil marks
so that you can erase that later because you
don't want to paint over it. You'll leave a tiny space in-between your water
and your pencil mark. If you don't care, paint
right up to the edge. If you want, you could also erase away some of
your pencil line first so that it's even lighter. I'm leaving my nice and dark so that you guys can
see what I'm doing. Now. I'm just going to come
in here and refine the edge of my water shape, making sure that it's
into these spaces. And I'm not worried
about like the really to be tiny points here. I will refine those with my
actual paint. Right now. I'm just trying to
get a nice even layer of water in here. Again, do the head tilt test. Make sure it's shiny
all over your feather. And hopefully you
kind of started to learn a little bit
or gathered a bit of an instinct for how much water you want inside your shape. I think mine is
looking. All right. I see a couple of little holes, so I'll just fill those in. As I'm tilting my head. I can see a couple of spots, but now I think we're good. Okay, so for this first one, I will do the plan that I made earlier
with the cascade green, the dark teal edges, and then tapping in some of
that pastel periwinkle color, or maybe the sky
blue, one of those. So I'm going to prep my paint. I'm going to get the
color that I plan to use. Very, very juicy. When you get paint
all over my fingers. If you do not have any
paint on your hand yet, have you even been
thinking? I don't know. Okay. Nice juicy puddle of paint here. While I'm making this
puddle of paint, It's actually helping my
paper soak up some of that water so that my paint
can move a little better. So that's great. It's okay if it takes you a little
bit of time here. Watercolor is about timing, but don't let it be so much about timing that you freeze up and feel like
you can't do it. Don't feel rushed. You've got this oh boy, that's exploding and
looking so awesome. If anything, this
class is just going to encourage you to go buy
this paint, isn't it? Or you have found a paint of your own
that's straight up magic. And you should share that with us because we all want to know. I've filled that
in a little bit. Pick up a little more paint, tap it into another
area, and then drag. I'm using the tip
of my brush now to get right up to the
edge of my line. This is where it comes
in handy to have that nice pointed
tip on your brush. And I am not being super precious about my
pencil line right now. I definitely just painted
way over where my line was. It's all good. It's all good. We're not here to be perfect. We are here to
have fun and play. I know a lot of
people that have told me that they get afraid about art-making and painting because they are
afraid of messing up. You know what? This is not something
that you can mess up, okay, Let it more fun to
whatever it wants to be. Free yourself from those
perfection standards. I used to be a perfectionist
as a kid is crippling. That's what I love
about watercolor. I can't control it completely. I have to let it do
what it's going to do. I'm adding my own little
points in here now. It helps to have like not
a whole lot of water, but more paint on
your brush when you're trying to make
a fine tip like that. And then I pull towards
the tip with this brush. Hopefully that's making sense. I'm just going to kind
of spread this around. I have two more
little spots here. Then what I might for the end here is go
to my teal color. I find a tapping and
little dots of color. Because I know that these
little dots will make some interesting
textures when it dries. The other thing I'm
going to do is, I don't know how well
you can see this, but I have a huge
puddle right here. And that needs to go, alright, that's just going to take
way too long to dry. Ain't nobody got time for that. Let's soak some of that up. I clean off my brush and then wiped off some of
the excess water. Now I'm going to drag
that onto a paper towel, soak a little more up, tap it under the towel
and just repeat that until I get rid of
this massive puddle. Because since I know I plan to add a little more paint to this, there's just gonna
be more paint and water being added
to this puddle. It's gonna get bigger and
bigger and more out-of-control. I'm just soaking
some of that up. Here we go. I'll just kinda spread this
back around a little bit. Now as I was saying, I'm going to come
to this teal color. I don't have a ton
of water in there. It's a little bit of
water and a lot of paint. So that way I have a
little bit of more, a little bit more control. I'm going to take my
paper towel and wipe off some of the excess water. Just get the paint. And I'm going to paint the
tip of the feather here with that deep teal blue color. Whoops, and look, it's
already getting kinda messy. I did not have a
super controlled tip. They're changing the way you are holding your
brush can really help you get into those fines spots, little details, a little
bit more control. When I'm painting large areas, I tend to hold my brush
more of an angle. And then when I'm trying
to paint tiny details, it's more like straight up
and down almost and I'm using that super fine tip of
the brush to paint. Ok, so I'm going to tap in some dark teal into my edges just a little bit and this
has already started to dry. So I'm going to have to
blend it in a little more. Spread it back into some
of the water bits here. I'm going to add a
little more water and paint to my brush. Paint this in. I hope you're having
fun right now. I am. Anytime you're
putting paint to paper, it just makes you happy. Or should I go? Okay. Then maybe I'll do a little
bit up here at the top. Again, no right or wrong. Put the paint where you want. Keeping in mind that
it will probably dry a little differently than what you're
seeing right now. A fun thing to do is to take a dark color and tap
it into a light color. I'm gonna make kinda like
a little trail of beans. And then what I might do
is take them my pale, pale color and then
tap it back into that dark colors so that it almost makes like these rings. Remember from our
experimentation though, you can also do a similar
idea with just water. So you can make a dark ring. And then after it starts to
set and dry a little bit, then add in just some
water to that ring. And watch a kind of spread out. Alright, clean my brush off. I'm going to give this
just a few seconds to start to set and
dry just a bit. And then I'm going to add in this kind of
periwinkle color here. So I'm gonna go ahead and
prep that by getting it wet. I might actually take
my large brush and soak up some of this water here. It's gonna take a while to dry. There we go. All right. Now I have a ton of this periwinkle color
on my brush here. It's very saturated. And I'm going to just drop that in to a couple of
the darker spots. Maybe up here. And then a little down here. Maybe I'll actually paint
a little end right here. We are not making realistic
feathers today, folks. We're making them however
we want it to go. Okay, If I might just
put a little bit more up here on top of that
nice dark color. Maybe just a little
bit into this. Dragging it through. And I think I'm going
to call this good. If you want to keep
playing, keep adding. What might actually
be a little bit interesting in this
one is for me to add, like draw out some
of this green here. I don't know. You just can't stop me now. I'm just going a
little bit crazy. And I hope you are too. That's the point of this,
is to play with your paint. Okay, I'm really liking that. I'm adding some more
pale green in here. I'm going to make
this end up taking forever to dry, but that's okay. Alright, That one's done. It needs to dry. I'm gonna go ahead and
put in clean water into this one here and
choose some new colors. Alright, clean
water on fat brush. Fill it up. And my paper is
definitely starting to bow a little bit,
and that's okay. What is going to do though, is it is going to
make puddles in certain parts of the paper right now as I paint in this water. So I'm just gonna be a little bit mindful of that and look for it and get rid of them. With the technique I
showed you earlier by lifting up some of the water. Okay, head tilt test time,
looking fairly even. I'm ready to choose
some colors now. Let's see, should we go with the moon glow and
maybe some pink. I'm not sure I've ever combined
those two colors before. So this could be a lot of fun. I'll make a nice juicy puddle
of paint again and tap it in and spread it around. I'm gonna go ahead and paint
right up to my pencil line. Now because I'm painting
with nice dark colors. It's actually covering my
pencil line really well. Instead of picking
up more paint, I'm just going to keep adding
water to my brush now. So that way I have a
dark edge over here. I'm going to fade
to a light color. Again, just changing the
way I hold my brush to fix edges and get a more
of a controlled line. Pull some of this
paint and break that really cool line that
the paint made on its own. I'm going to break that
down here just a little bit to get some of my paint. And as I'm painting, I'm flicking water all over
the place and that's fine. Totally, totally fine. If it bothers you. Just take a little
piece of paper towel, clean spot preferably, and just go right over
the top and dab it up. And it will pick the paint right up. Alright. Moon glow is doing really
fun things on this feather. It's definitely pulling
out into its blues. Where I've added more water. Then I'm going to do little
drops of plain water up here just to make some
little light craters. Can you see that happening? I hope you can. That's really fun. It kind of like
makes these veins spider webby edges
when it makes it, which gives it that crater
like moon crater look. Besides just water,
you can also get a similar effect if you have a little bit of rubbing
alcohol at home, if you drop that
into your paint, it will also make these
really cool craters. Just a little fun tip for you. Now I'm gonna get a little
bit of my hot pink. Just add that into this
feather in a couple of spots. This might get really
weird and that's okay. We're fine with weird. We like weird. If you are too worried
about trying something out completely crazy like this
on one of your feathers. Like if you spent a lot of time drawing it out and you
just don't want to, you don't want to ruin it. You could do this
little experiment in these whitespaces or get another piece of paper and do a little experiment first, you, how the colors will behave before you put them
into your feather. All right, I'm going
to water this down a lot so that's not
super saturated and just tap in some very
light pink spots. So it's mostly water, not a lot of paint. More water. I think that's going to look really
interesting when it dries. And then maybe I'll do
some heavy on the paint, not on the water
spots over here. If you're having trouble doing
this kind of more water, less water within your palette
here in your paint pans. This is where you could
also use your palette. So over here on my palette,
I could get this out, put some pink on here, and make a couple
of different spots where one is a lot of water, not a lot of paint. And then maybe another spot on the palate is mostly paint, not a ton of water mixed in. So you should be able to see the difference where if I add
a ton of water over here, the color gets lighter
and more watery. And over here, the color
is more saturated. So if I want these more
saturated dots over here, I'd pull from that spot. Then if I want more
watered-down paint, I pulled from this
spot. All right. I think I'm pretty much
done for now with these. I'll give you a little
bit of a close-up. These are going to
take a while to dry. We need them to be
completely, completely dry. Okay. So go find something to do
for a little bit or use your hairdryer if you want or
come back to them tomorrow. And that's when
we're going to add some magical kind of Anki or metallic details to them to really make them
more enchanting. Alright, I'll see you
in the next video.
8. 8 Embellish Your Feathers With Fun Details: Alright, so both my
experimental page and my feather page
are completely dry. I can run my hands over them. Nothing's coming up. They're not shiny. I know my paint is 1,000% dry. We can add some details. Now, one of my favorite ways
to embellish my watercolors is with either ink or
metallic watercolors. So when I say ink, I mean
like ink pens or paint pens. Micron pens work really nicely. Again, my favorite white is
this copic, opaque white. Or I have some bronze metallic
watercolor that I liked. I liked making various patterns and shapes with a
metallic paint. And I like my white
gel pens or my copious white for making things
like stars and sparkles. I've added a reference
sheet of different kinds of marks or patterns you could
make to get you inspired. But please feel free
to put anything on your feathers that
makes you happy. You could even write your favorite quote
on it if you wanted to or use it to
journal on top of. You can do anything on
news that you want. If you're too nervous to dive in and start making
marks on your feathers, let's practice on our
experimental circles first. So I'm just going to show
you what a couple of these different materials
might look like. So here's the micron pen. You can use any kind
of ink pen you have. It probably be best
if when you use it, it doesn't react with water. Just in case, but
whatever you have, make the best of it. I'm just going to start by
making some playful marks. I tend to do a lot of
lines, dots and circles. That's what I enjoy doing. So hopefully, Let's see in here, let you see this
a little better. So I'm just going
to start making little patterns and playing
around a little bit here. So that's what my ink
pen might look like. Maybe I'll try it on one
of these darker colors. Okay, I see what
that looks like. Maybe if I try a different line, you can see how doing
this technique inside of a journal page would be
really fun because you can so easily right on the
top of it or doodle. Alright, so that's my ink
pen, the pink marker. Sometimes these
are hit and miss. Sometimes they work,
sometimes they don't. You've gotta kinda primum, dip them up and down until
the paint gets flowing. So these are just so stubborn. Sometimes they work
so beautifully. So what I might do
it this instead is use this inside my copic white. And what I do with this,
it might be Copic. It's who knows co
big topic, whatever. I liked his spray
water inside of this little jar and
make a puddle in here. You can either then use
that super fine brush, that little detail brush
I was talking about, or I could even just use
this white paint pen. And again with this, I kinda like to make like
little dots and stars, especially in dark areas
of the watercolor. I think it looks really
pretty, very whimsical. I tend to make this star
shape a lot in my work. It's just a stylistic choice. Again, if I wanted
to go back to this, I've got plenty of
water in there. I just kinda stirred
around in here. I could use this to paint
on some white details. So here we just want to loosen
up to the point where we feel good enough to do this
on our actual feathers. And you can start
experimenting with what kinds of patterns and shapes you might want to
put on your feather. All right, so there is a white. And lastly I will show you
my metallic watercolor. I'm starting to get low on this. Eventually I'll have
to buy some more. But with metallic watercolor, I find that they work best when you have plenty
of water in here. And even if you were to
spray this ahead of time to really get the
metallic activated. So I'm going to stir
this around a lot. Really get the metallic paint moving around in here
really mixed up. Otherwise, it just
does not pop as well. It doesn't show up as well. If I were to have just
like pull it over here. Just a tiny bit of water
and started painting. It would not show up nicely. You really need to work
Metallic Watercolor. Okay? So there's gonna kinda put in some
metallic stripes. And you will see that metallics
and white and ink will show up differently on different intensities
of your paint. So this metallic shows
up really well on the dark paint and it's a little harder to see
on the light paint. I'll show you on the
teal over here. Maybe. I really loved this kind
of metallic bronze. Here. There are several
different makers of that. By the way. If you just hop on your favorite art suppliers site and look for a
metallic watercolors. Several will pop up. Okay, so just
continuing to practice making marks on your
different colors to see what supply you like the best out of
what you have on hand. If you have crayons
or colored pencils, you could use those as well. Alright, there is
no right or wrong. Please don't feel
limited if you don't have any of these supplies
I'm using right now, use what you have. Almost everybody
has an ink pen at. And that works just fine. Okay, so now that I've kinda
played around a little bit, and hopefully you were feeling a little bit more confident. We're ready to go ahead and
do this on her feathers. So it just kinda show you
up close really quick. The playful marks that I made. Really pretty, huh? Okay. We're ready to dive in and
do this on her brothers. So again, feel free to pull up that reference sheet that I've attached with the
different kinds of marks we could make
different patterns, shapes, lines, patterns, quote, whatever you wanna
do here, okay? Whatever would make
you happy. For me. What I usually like
to do is paint in that middle line of
the feather that it would normally have kind
of like the vein of it. And then I go from
there and kinda spread out with my different
patterns and shapes. Let's see. For this one. I think maybe I'll do the white on this one and metallic
on this one because I think the metallic will show up better in this
lighter section of the feather and the
white wouldn't. Okay, I'm going to clean
my brush off since it had a little bit of
metallic paint on it. I'm going to open
up my little pot of white out a little more water. By the way, maybe this isn't how you're supposed
to use this paint. That's okay. That's
how I use it. If we're too precious
with our art supplies, then we won't use them. And so I've tried to
release that thought that I need to be perfect
and precious with them. So that way I will just actually get them
out and use them. I'm going to put some
little dots here. And then I think what I'm gonna do is just make some kind of broken lines throughout
this feather. Lines that kinda break off into these little dots
or partial lines. And then maybe every
once in awhile embellish these little
spots that I've made. So maybe I'll put little
white dots in the center of these patterns that I have going on within the
watercolor and kind of accentuate what happened there. We almost look
like little stars. And continue on with my lines. Now, if you're using
like a white gel pen, you might get a
little bit frustrated occasionally because it might be coming out with
really nicely. I'm looking great and
then when it dries, it looks super faded. That's just kinda what
happens with a white gel pen. One of the reasons I like
this little pot of white is because it does not do that as much as the white gel
pens I used to have DID. So. I would recommend if you can splurge a little bit to
get a little pot of this. Now I'm just going to add
in some extra little dots, almost like little
stars or speckles. Just make this Extra enchanting. Alright. Spirals can be really fun. I cannot wait to see
what you have done. What does your
feather look like? Okay, I think that one's looking great and I'm
going to leave that be I'll give you a close-up when I'm done
with both of them. So for the purple
and pink one again, I think I'll go ahead
and do the metallic. So I'm actually going
to go ahead and spray inside my metallic pot here because it needs lots
of water to activate. Mix it around. I'll do the same
thing where I start with a vein down the center. This one has a lot
of space to fill. Sometimes with metallic
paint as well. You kinda need to go
back over the line a few times or tap in a
little bit extra paint. If it looks like
it's kinda faded. And then let's see, again, I'm gonna
do some stripes. These ones I'll make
a little more solid, not as broken like
the other ones. And then maybe I'll
do some dots up here that I'll also
potentially put some little star shapes. So I'm going to turn
my paper a little bit. And then I'll fill that in. And maybe just make some
little spots coming up. I'm just kind of
intuitively painting here. I don't have a super, I don't have any plants. That's the honest. There. I'm just going for
it because I'm just letting loose and having fun. Try not to think
too much about it. Maybe I'll make another
star down here. Maybe like a cluster of stars. Some round ones sprinkled in. Then another thing sometimes, but I like to do is like if
I'm using the metallics, I'll paint the tips
of the feathers here. This is where you
could also add in some of those wispy or bits. So like this. So if I want these little pieces that are
coming off the end here, now's a good time to do them. When you can get a
lot more control with either a pen or very tiny
amount of water with paint in a very detailed or a tight detailed
brush that's very tiny. Maybe something like that. And then I will pull that down. Extend this up just a little bit so that it
blends and better. So that makes it a little
more whimsical and fun by adding those tiny little
wispy details at the bottom. The key here maybe
knowing like well, when do we stop, how many details do we add? And you know what? There's just not always a
perfect answer to that. All right. I feathers pretty full. I'll do the top here just a bit. And once again, once you're
done with this part, this needs to dry completely before you
attempt to cut it out. You don't want to smudge
your beautiful work. So while you're
waiting for it to dry, you could be sketching out
some more feathers to fill in. Just a thought. No pressure. Okay. I'm going to
probably call this good. You feel free to keep working on yours as much as you want. I'll give you a close up again. The other thing you could do is if you are feeling
just too much pressure, go ahead and give some either white paint or metallic paint or any
other colored paint. You could do the
splatters again. You could do like a splatter
technique across these and just make them
really playful. Alright, I just, I
want you to release the pressure while you
have fun with these. Okay, so it is time to go
ahead and let these dry so that we can
optionally seal them. You do not have to seal your
paint and then cut them out. I'll see you in the next video.
9. 9 Cut Out Your Feather Bookmarks: Now for the super easy part, if you want to turn
these into bookmarks, you will want to cut
around your feather shape. Before you cut it out though, if you do plan to use this as a bookmark or to
gift it to somebody. You may want to use a spray fixative on
it just to make sure your colors are set and cannot rub off onto your
books or fingers. I actually use this spray here. It's like a varnish and
I always use it outside. You'll want to do
a little bit of your own research though, onto what kind of
spray you want to use. This I get, I did
the same thing. I kinda Google looked around and saw other
artists were using, came across this cry line one. And it seems to work for mine. It does say non
yellowing protection for oil, acrylic and watercolor. So keeps it, keeps it from moving off
of the paper as much. And so when I use this, I go outside and I shake the
canned really well. I put this on a flat
surface somewhere and I do large sweeping motions about at least a foot away from it. Normally, you just don't
want to spray it super close and get a concentrated area
of that spray on there. You want it to be
large sweeping motions to cover the whole thing. Then I let that dry for 24 h and then I would go
ahead and cut these out. So that's optional. Don't have to do it. I didn't do it for
a very long time until I started kinda giving
these away and selling them. Okay, So really seem to tape. And I'm just going to roughly
cut around these feathers. I'm not going to worry about
it being super perfect. And I do leave
whitespace around it. I don't cut right
up to the edge. First. I'm just going to separate them so it's
a little easier. And I'll do one at a time. Again. It's very rough
around the outside. I don t do a perfect job. Okay. So that's that's about as
good as I will do for this. That's how close
I will cut this. I leave plenty of
whitespace around it. And this will kind of
start to bow because it's drying and curling a little bit. So if you want, you can
lay it between a couple of heavy books for awhile
to get it to flatten out. So I'll just cut my second one. Watercolor paper is super thick. So you are going to need a
pair of nice sharp scissors. You guys want to know a secret
that will make you gas. You're ready for it. Sometimes I use sewing
scissors. Don't tell anything. Right now. Mine are absolutely humongous, but I want you to be able to see really well on his videos. I made mine really large, but yours might be quite a bit smaller than this
and that's okay. But let's just admire
our hard work. Let's clean this space
off really quick. And admire our
beautiful feathers. Did you have so much fun? I
hope you had so much fun. So once they're cut out, be super proud of them
and show them off. Give one to a loved one, make another one,
rinse and repeat. So go get cozy with your
watercolors and just have fun. Okay, that's what
this is all about. Happy painting.
10. 10 Thank You : Okay. So did you have
fun? I thought so. Thank you so much for joining
me in this class today. I hope you feel a lot
more confident and more playful when it comes
to using your watercolors. Now, please, please,
please share your feather
bookmarks with us in the projects and resources tab. Snap a quick picture
and upload it for us because we all want to
see what you made today. And if you have a moment, I would really
appreciate your review. It helps not only me know that this was a helpful
class for you, but it also will help future
students know that this was fun and it'll encourage them
to come take the class too. Okay, Happy painting. Please go on to make some more. If you have any comments
or questions for me or if you want to suggest
a future class topic, just leave me a comment in the discussions tab
and I will get back to you until next time
I created friends.
 Melanie Bess, Painting By The Light Of The Moon