Transcripts
1. Natural Dyeing in the Kitchen: In the space between
science and art, the real magic happens. Hi, my name is Amy
Plan and I'll be teaching you the magical
process of natural dyeing. I'm a multi passionate, creative based in New England, and I've been working
with plant dyes for about 10 years now. My interest in this
art began in college when a year away from getting
my fashion design degree, I learned about the
horrific impact the fashion industry
has on the planet. After a minor existential crisis about what I would
do with this degree, I was about to get for
an industry that I no longer had any interest
in participating in. I started to explore sustainable methods of
working with textiles. My first experiments were in the tiny galley kitchen
in my apartment. I quickly discovered that
natural dyeing wasn't as simple as boiling beats
on a stove for two hours. But those early failures
didn't determine. I did my research and was able to achieve rich permanent colors on organic cotton denim for my final collection
in my senior year. In this class, I'll show
you that proper method so you too can achieve excellent
colors with natural dyes. As natural dyes, our art is dependent
on the seasons and what is available to
us to forage and grow. But even in the
depths of winter, you can find excellent
dye materials in your very own kitchen. In this course, I'll
show you how to brew eco-friendly dyes from start to finish using avocado pits, onion skins, and black tea. This course is
tailored to beginners. So whether you are completely
new to any form of dyeing or you're looking to make your current practice
more sustainable, I'll teach you all the basics
you'll need to get started. Natural dyeing is both
an art and a science. I certainly don't follow
all the rules and I'll share with you when
I break them and why. There's so much room
for experimenting and happy mistakes
with this craft. As someone who has used both synthetic dyes
and natural dyes, I can honestly say
there is no comparison. The texture, softness,
and depth of color of natural dyes is what
makes them truly unique. Another reason I love this process is that
nothing is wasted. The dye matters can
possible and even the water we use can be saved for watering the plants
in your garden. Natural dyeing is
the perfect blend of beauty and sustainability. If you're ready to create
luxurious fabrics from humble materials and simple
methods, come dye with me.
2. Class Project: Class project. In this course, I'll show you how to brew
three different plant dyes. I'm going to be dying
tea towels I've made. But you're more
than welcome to dye any other cotton item
or fabric you desire. Just be sure the fabric
is 100 percent cotton, is either white or off-white. In the downloadable PDF guide that accompanies this class, I've shared links to
fabrics you can buy online, as well as a full list of
materials you'll need. Be sure to check that out. Two out of the three
dyes will be making used food parts that would
otherwise go to waste, avocado pits and onion skins. Those will need to be
collected over time. The third dye, black
tea can be purchased. You can get started right away. I've made this course
as simple as possible. Whether you're new
to natural dying or have never dyed
with anything before, you should be able
to follow along. Natural dying takes patience. This process will take place over the course of several days, but there's very little
active hands-on time. It's not too difficult to
fit into a normal schedule. When I was balancing
working full-time while trying to get my textile
collection finished, I would get home from work, put my dye pot on the stove, and get to simmering. By the time I'd relaxed and
finished my cup of tea, I could turn the heat off, and let the fabric sit in
the pot until the next day. I find working in these
24 hour increments the easiest way to go through the dye process while still allowing plenty of time
to do other things. One final thing I want to
mention is that natural dying is not for anyone looking for
perfect results every time. As a recovering
perfectionist myself, natural dying has
taught me the art of letting go and embracing
the unexpected. We can try to fine-tune the science of dying
as much as we can, but when you're
working with plants, there's always an element
of magical unknown. Be open to the space and natural dying will always feel like an exciting adventure. Now let's get
started by learning all about dye
equipment and safety.
3. Equipment + Safety: Equipment and safety. Natural dyes are much
safer to use than commercial or
industrial grade dyes. However, it is
important to still exercise on basic
safety precautions. The equipment and
tools you use for dyeing should only
be used for dyeing. Never use pots or tools
that you also cook with. Most mornings and modifiers
are not safe for consumption. So it is essential that you
have a dedicated dye pot, stirring spoon strainer,
etc., for this craft. Secondhand stores are
great places to find affordable kitchenware
for dyeing. The basic equipment
you'll need includes a large stainless steel
or enamel-coated pots, such as a lobster
pot or stockpot, one or two large buckets, a large wooden spoon
or stirring stick, a mesh strainer, clean recycled jars for mixing
powders, and cheesecloth. I'd also recommend
measuring spoons and a digital scale to get
more precise measurements. You'll also want a good
particle filtering masks. Borodin's modifiers and
store-bought natural dyes will likely be in powdered form. You'll want to make
sure you don't breathe any particles in as
you measure in pour? Yes, get yourself
some kitchen gloves. I know it looks very
romantic dipping your hands into a pot full of
pretty avocado die, but there's nothing
romantic about scalding your skin or scrubbing die
out of your fingernails. Just be safe and practical. So let's recap
equipment and safety. The tools and
equipment you use for dyeing should only
be used for dyeing. Don't use things
you also cook with. To save money, you
can find most of the tools you need at
secondhand stores. Wear a face mask when
handling powdered materials. Use rubber gloves to protect your skin from
irritation and heat. Consult the PDF guide
that accompanies this class for the full
list of materials. Next, we'll go over two
different fabric types and the first step in
the natural dye process.
4. Fabric Types for Dyeing: Fabric types for dyeing. It's time to prepare fabric
for the dye process. But first, let's understand the different types of fibers. Natural fabrics fall
into two categories, protein fibers, and
cellulose fibers. Protein fibers come from
animals such as wool and silk. Cellulose fibers come from plants such as cotton and linen. In general, protein
fibers accept die more readily than
cellulose fibers, but you can still get great results with
cotton and linen. So don't let that
discourage you. Cotton in particular takes on beautiful textures
when dyed with plants and can stand up
to the rigors of the process without
needing too much care. Before you do anything
with your fabric, it needs to be scoured. Don't worry, you won't be
scrubbing over a washboard. Scouring simply means washing
the fabric of any sizing or starch in getting the fibers ready to accept,
mordants and dyes. When you buy cotton fabric, you may notice that
it has a sheen to it that keeps it looking
crisp on the bolt. This is what we'll remove
at the scouring stage. There are scouring solutions you can buy to add to your wash, but you can also just use an eco-friendly detergent
combined with soda ash, which is what I would recommend. If you'd like to machine wash, add two tablespoons
each of detergent and soda ash to your
wash on the hot cycle. To watch by hand, simply bring a pot of
water to a simmer, add two tablespoons
each of detergent and soda ash, add your fabric, and let it simmer for two hours or until the water
is very yellow, then rinse and hang to dry. For someone like me
who needs to go to the laundromat to do my laundry, it's nice to have
both options of either machine or handwashing
for this process. As you can see, I'm washing the entire length of my fabric
before I've cut into it. After this scouring process, you can expect
your cotton fabric to shrink up to 10 percent. So it's important to
factor that in beforehand. If you're working with a
garment or other item that has already been pre-shrunk,
you should be fine. Once your fabric is scoured, you can choose to sew it into
something or dye it as is. For my tea towels, I'm going to cut 18 by 28-inch rectangles and finish each side with a
double folded hem. I've made enough
to break up into three different groups for
each of the dye baths. If you want to see
step-by-step instructions for sewing a double folded hem, checkout video number
nine from my other class, one pillow seven,
sewing machine skills. We're ready for the next step. But before we move on, let's quickly recap
what you just learned. Natural fibers are
either protein, derived from animals or
cellulose, derived from plants. Before dyeing, the
fabric needs to be scoured to remove
sizing from the fibers. Scouring can be done either
in a washing machine or simmering water on a stove
using two tablespoons, each of eco-friendly
detergent and soda ash. Expect up to 10
percent shrinkage on cotton fabric and items that
haven't been pre-shrunk. In the next lesson, we'll learn a key part of
the natural dyeing process , mordanting the fabric.
5. Mordant Your Fabric: Mordant your fabric. Let's talk about mordants. Like scouring, mordanting
is a key step in the process of natural
dyeing so don't skip it. A mordant is a substance
that opens up the fibers of the fabric and gets them ready to accept and hold the dye. If you don't mordant
your fabric, your dye will wash out over time and fade under the
sun more easily. If you use a dye without tannin, it likely won't stick
to your fabric at all. There are many
different types of mordants but my
favorite one is alum. Now when you go to buy alum, you might notice that there
are two different options, aluminum sulfate and
potassium aluminum sulfate. Potassium aluminum sulfate
is more refined than aluminum sulfate and many dyers claim it yields brighter colors. However, I have a good
quality iron-free aluminum sulfate on hand so it's what I'll be
using in this class. It's up to you
which one you use, and I've included
links for where to buy both products in the PDF guide that accompanies this class. Another aluminum you'll come
across is aluminum acetate, which is the recommended
mordant for cellulose fibers. However, I'm not
going to use it here because it adds extra
steps and materials to the mordanting process
and in the interest of keeping this as simple and
accessible as possible, we're going to use alum. Alum on its own is not
effective on cellulose fibers, but in conjunction with tannin, you will see good results. The three dyes we'll be
brewing are all from plant matter that
is rich in tannins. Without getting too technical, tannins are naturally
occurring and facilitate the binding of
color to cellulose fibers. This means you can
get good results with these plant dyes without
using a mordant. However, for longevity,
lightfastness, and to get the best
possible pigment, I strongly recommend
you don't skip the mordanting step
for these projects. There is so much more
to say a mordant. If you want to learn more, I've provided resources and book recommendations
in the PDF guide. Now that you understand the why, let's get to the how. In dyeing, we do
everything by weight relative to the amount
of fabric you're dyeing. But I'm going to give you
approximate measurements as well in case you
don't have a scale. You'll want the weight
of your alum to be approximately 10 percent of
the weight of your fabric. If you are dyeing
a pound of fabric that will work out to
about three tablespoons. It can be difficult to know
the weight of your fabric, but when you go to buy
it either printed on the end of the bolt or written
in the online listing, it should say the
weight per square yard. You can use that as an estimate. It's okay if these
measurements aren't exact, just remember that a little
goes a long way with alum. Fill your dye pot with water and bring it to a simmer
on the stove. Essentially, you'll want the water to be
steaming and humming, but not bubbling or boiling. Once the water gets hot and wearing your protective
mask and gloves, scoop out a jar
full and dissolve your measured alum
into this hot water. By mixing this
concentrated solution, you'll ensure that the alum distributes more easily
in the larger pot. Once dissolved, pour
the alum solution into the pot and stir well. If you're mordanting right
after the scouring process, go ahead and put your rinsed
fabric right into the pot. If your fabric has since dried, you'll want to make
sure it's soaking wet before adding
it to your pot. Let the fabric simmer for an hour, stirring occasionally. After an hour, turn off the heat and let
it cool overnight. The next day, rinse
the fabric well. You can pour your
spent mordant bath on acid-loving plants
in your garden, but just be sure
to neutralize it with soda ash before
pouring it down the drain because
the high acidity can affect the pH balance
of septic tanks. We are almost ready to
get to the fun part. But first, let's quickly
recap the mordanting process. Mordants prepare the fibers of the fabric to accept the dye. The combination of
tannin and alum is an ideal mordant for
cellulose fibers. Use about 10 percent of the weight of fabric
for your mordant. Pre-dissolve your mordant before adding it to the
larger dye bath. Always wear
protective gloves and a breathing mask
when mixing mordant. Download my PDF guide for links and where to buy mordants. Up next, we'll brew our
first dye with avocado pits.
6. Dyeing With Avocado: Dyeing with avocado. Now that our fabric
is mordanted, let's do our first batch
of dye using avocado pits. But before you get
to the dye bath, you'll need to have
collected your materials. With avocado pits, you want to make sure
they are scrubbed and cleaned before drying
and storing them. As you're saving
your avocado pits, it's a good idea to
break them open before drawing them out so it's
easier to extract their dye. However, I never remember to do this and once they're dry, they become hard as
rocks and it gets too dangerous to try
to break them up. I find that the pits gets
scored with my knife anyway when I'm
slicing the avocado, and that is usually sufficient enough to get a good dye bath. In general, the rule of how much dye material
you'll need is a one-to-one weight ratio to the weight of the
fabric you're dying. But there's no need to get
too precise about this. This jar holds about a
pound of dry avocado pits. I usually eyeball it and aim to have enough
dry material to form a layer at the surface or bottom of the
bath at a minimum. For fresh material, you
want about twice as much. The more dye material you have, the more saturated your color. Remember to record your
mass as you go through the process to help you learn
how to get certain colors. We're going to start
the dye bath by bringing our pot of
water to a simmer. Once your water is hot, add your avocado pits. Extracting dye is
a loving process. We're using heat to gently coax the color out
of the plants. Therefore, we don't want
to boil the dye bath, but keep it at the
gentlest of simmers. I like to keep my
dye bath humming and steaming with very
little bubbles. Depending on what your
dye materials are, you may have to use a little
more or a little less heat to coax the color out. When you're working
with hardier material like avocado pits, tree bark, or plant roots,
you don't have to worry too much about
overboiling your batch. If however, you're working with fresh materials such
as flowers or leaves, you want to be extra careful
to be gentle with your heat. When I'm dying with
fresh flowers, I like to put them in the
pot while the water is still cold so they can slowly come up to temperature
with the water. The rule of dyeing
fabric is that if you want your
color to be even, you need to have
a big enough pot for your fabric to move freely. However, when I was dying in my tiny galley kitchen in
college, by necessity, I had to use a smaller pot and I discovered
that you can get some beautiful effects
when the fabric is folded and even crammed
into the dye bath. So my advice is yes, if you want as pristine
color as possible, make sure your fabric can
easily move around the pot. But if you want to
conserve water, space, or time, don't stress about the fabric being a
little cozy in the pot. Just embrace the unknown and the magical surprises
you'll get. After the avocado pits
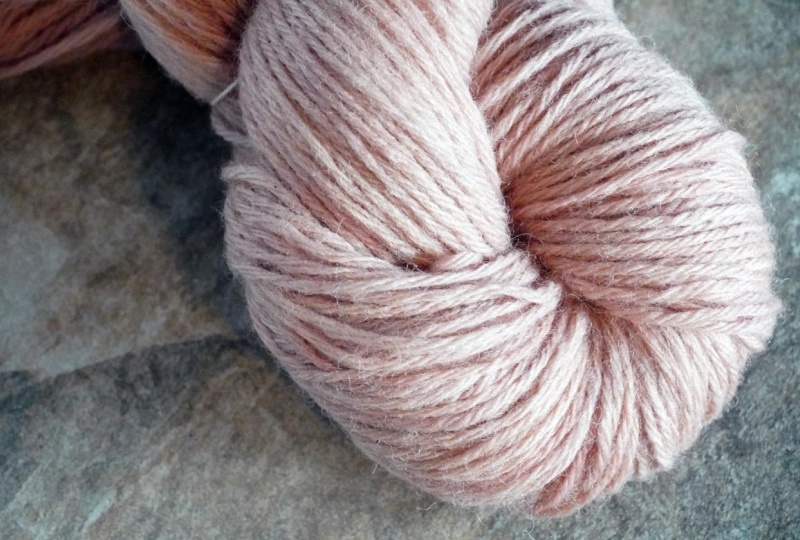
have simmered for an hour, your dye bath should be pink. I like to dip a
scrap of fabric into the pot to gauge the
color I've achieved. If you think your
dye is too pale, you can take the pot off
the heat and let the materials steep overnight
before straining, but this isn't usually
necessary for avocado pits. You should expect
a pale pink color. We can now remove the
pits from the dye bath. If you have lots of little
bits floating around, you'll want to pour
the dye through a cheesecloth-lined
strainer into your bucket. I've also just used a sieve to scoop out the dye material, but just be aware
that if there are any bits leftover in the bath, they could leave small
marks on your fabric. Please be very cautious
at this stage. The water is very hot and
can easily scald you. Pouring a large amount
of water is also a very messy affair
as you can see. So do this stage
outside if you can. If you're hesitant at all, wait until the bath
is cooled down before straining out
your dye material. After straining, if you're able, compost the avocado pits. You can now put your dye bath back into your pot and bring
it up to a simmer again. If you're dying back-to-back
with mordanting, your rinsed fabric
will already be wet and ready to go
into the dye bath. Just remember that your
fabric should already be saturated with water before
it gets mordanted or dyed. When you've put your wet
fabric in the dye bath, let it simmer for an hour, then turn off the heat and
leave it to cool in the pot. I like to let my fabric sit for at least a day before rinsing. Keep in mind that
the fabric will be several shades lighter
when it's dry. When you're happy
with the color, thoroughly rinse the
fabric to remove the excess dye and
leave it to dry. If you have the space, you can restrain the dye into jars and store them in a cool, dark place for later use. Otherwise, save the dye water to water your plants
and flowers with. This closed-loop system is one of the many joys
of natural dyeing. Unlike commercial dyes that
are filled with heavy metals, natural dye is safe to
return to the earth. Let's recap the dye process. Use roughly a
one-to-one weight ratio of dye material to fabric. Collect avocado pits
by cleaning them, breaking them up, and then drying them out before storing. Use a gentle heat and simmer the dye material for an hour. Strain out the dye
material and bring your dye bath up
to a simmer again. Simmer your fabric for an hour, then leave to cool and
soak until the next day. Rinse the excess dye from
the fabric and hang dry. Next, we'll do the
same process to get a gorgeous yellow
with onion skins.
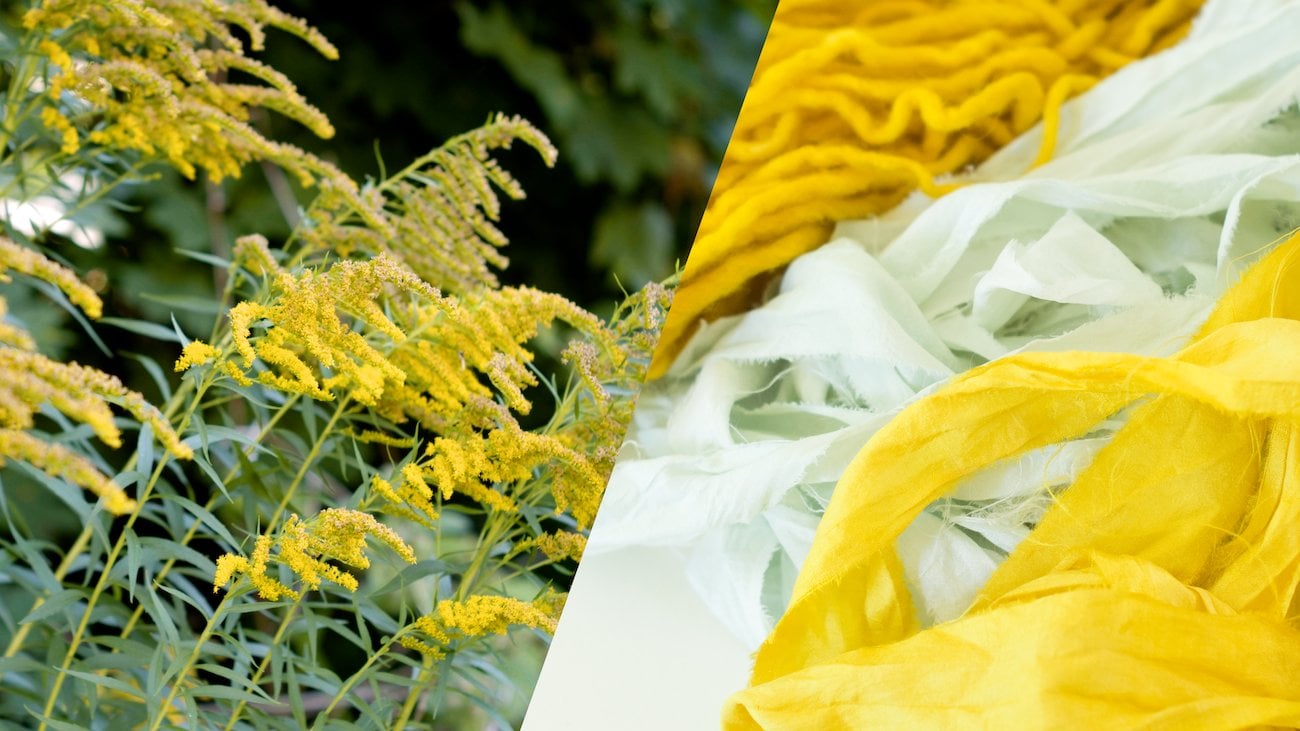
7. Dyeing With Onion Skins: Dyeing with onion skins. The process for dyeing
with onion skins is essentially the same one
we did with avocado pits. We'll be using the
dry outer skin of yellow onions
to make this dye. I like to collect the skins in a paper bag to allow
for a bit of airflow. It's fine to use red
onion skin instead, but just be aware that the color will be more of a brown color. It takes me a long time to collect a pound worth
of onion skins. But for the amount of
fabric I'm dyeing today, this bagful should be enough. As we did in the last lesson, fill your pot with water and
bring it up to a simmer. Add the onion skins and let them simmer for an hour
to extract the die. When you're happy
with the color, strain out the onion skins and then return the dye
bath to the pot, bring it up to a
simmer again and add your soaking wet
fabric to the bath. Simmer for an hour, then turn off the heat and
let the whole thing cool, soaking overnight or up to two
days for a stronger color. Always remember that
when the fabric is wet, the color will be several shades darker than it looks
when the fabric is dry. After soaking, rinse
the excess dye from the fabric and hang to dry. You can save this dye to use again or water your
garden with it. Before we move on, let's quickly recap how to dye
with onion skins. Use the dry outer
skin of the onion, storing in a paper bag. Simmer the skins for an hour, then strain for a
clean dye bath. Bring the dye back
up to a simmer and add your wet
pre-mordanted fabric. Simmer for an hour,
then leave to soak for up to two days. Be aware that the color
of the fabric will look several shades
lighter once it dries. Rinse the excess dye from
the fabric and hang to dry. So far we've got
pinks and yellows. Now let's add a sophisticated
tan color with black tea.
8. Dyeing With Black Tea: Dyeing with black tea. By now, you'll have
noticed a pattern to the natural dyeing process. Simmer for an hour,
then let it steep. This method may be
familiar to you in the form of brewing a
cup of tea or coffee. In fact, both tea and coffee make excellent
dye material, so for this last dye bath, we're going to take advantage
of the rich tannins of black tea to make a
lovely shade of brown. If you're a regular tea drinker, you can opt to start
saving your teabags to use for a dye bath
or you can go to a store that sells tea
by the pound to get the exact amount you need
with less packaging. As we did before,
bring your pot of water to a simmer
and add the tea. After an hour, strain out the tea to make a
clean dye bath. You'll definitely want to use layers of cheesecloth for this because any little bits left in the dye will leave
marks on your fabric. Don't worry too much though, let go of perfection
and learn to love the different textures
and patterns you'll get. After you strain your dye bath, bring it back to
a simmer and add your wet pretreated fabric. Once again, simmer for an hour, then leave to steep until you've achieved the
color you want. Rinse out the excess
dye and hang to dry. By now you understand the
process of natural dyeing. But let's go over a couple of important points about
dyeing with tea. You can use spent teabags
you've collected or bulk amounts of dried
tea to make a dye bath. Use cheesecloth to
fully strained out the tea to avoid
spots on your fabric. After cooling, continue steeping the fabric to deepen
and mature the color. Now you have three
different colors of beautiful textiles that you dyed with simple materials
from your kitchen. Depending on how hard or soft your water is and
hundred other factors, your color results may not
look exactly like mine, but that's all part of the
fun of natural dyeing. Please take a photo of
your dye results and post them in the project
gallery for everyone to see. Also, be sure to record
your dye process in your dye journal so
you can continue to learn and improve
as a dye artist. Since we properly
pretreated our fabric, these colors should
last a while, but be sure to only
wash them with eco-friendly detergent to
preserve their beauty. As with any dye textile, keep your fabric away from prolonged sun exposure
to avoid fading. With these simple care tips, you can enjoy your textiles
for years to come.
9. Just the Beginning...: Congratulations. You are now initiated into
the craft of natural dying. But this is just the
beginning for you. These three dyes are
only a fraction of the many colors you can
achieve natural materials. What you have now, is the foundational knowledge to explore this wonderful
craft on your own. Over the course
of these lessons, you learned how to build
your dying toolkit and stay safe as you work, as well as the very
important steps of scouring and warranting fabric
to prepare it for dying. You also learned how
to extract dye from natural materials and
brew colors from scratch, all while limiting your
environmental impact. Now that you've
learned the basics, get creative with blending
different colors together. Try doing different
types of kind to see how the wave
affects the color. Go beyond the
kitchen and research the wild plants or on where you live to see if you
can dye with them. Once you've dipped your
toes into this process, you will find yourself
looking around your environment
with fresh eyes. I'm excited to share
more dye projects with you in future courses. Be sure to follow me on
Skill share and find me on Instagram @art.witch_ so
you don't miss a thing. As always, keep in
touch and happy dying.
 Amy Plante, Multi-Passionate Creative