Transcripts
1. Enroll Now: do you want to learn, pig Select. Okay, get your own assets. Are so you want to learn pizza like toe? Add new skills into your pocket. If Yes, then you are in the right players. Welcome to the speaks alert in l. A before show for beginners. Course I am Masharqa Batista. I'm a Microsoft Certified Game developer and have been working in this game Element. And Katherine's is an industry for past five years and he still out. Also, I am Decatur off some of the world's most popular toughest listen and polluting courses. Put off her 100,000 plus is to dance all over the world on time. The instructor off thes course. In this course, I will use my four years of experience to teach all you need to know to Eastern making your own amazing pigs alert With four shop, you will go from zero to fully spit in no time. Put simple exercise in this course. At first I have talked about that important elements off big. You will also learn how to door I Semitic pigs a lot topical based flower street and burgers. Also, you will learn how to combat any image toe high quality pigs a lot with Easter by step guidelines. I also show you how to animate any pigs alert in for show and much more. So what are you waiting for? Big. He scores now. And I would get you guys, in fact.
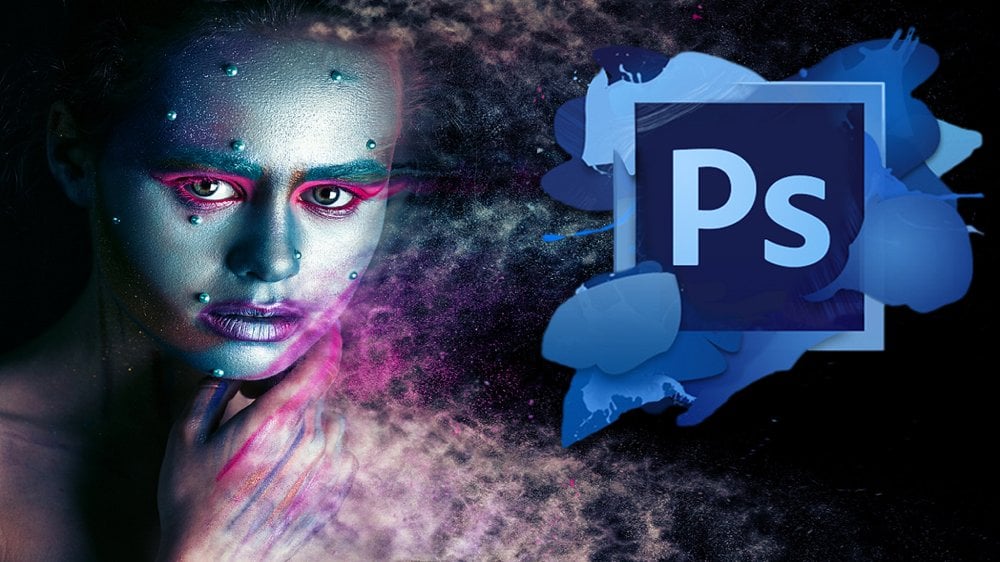
2. Get 7-Days Free Trial Of Adobe Photoshop CC: in our pigs lard begin our course. We will learn how to do pigs alert with out of the four to show off cc full meaning off CC is greatly cloud, and in this time it is the letters for the shop. Marcia. I already opened these out before the show's this election on my computer. But if you are using air predestination, then it's OK because all of the tools and techniques we're going to teach in the scores are same. But if you don't have 40 shop, then download the seventies free quest to dollar the simply open your browser and then type at it before the show frequent. Then click on the fast link and simply heat on download. Download free trial. After that, simply install it on his computer and it will get free seven days free crab I already had installed elevate for Social in my computer. That's why I just skip it and he now our next lecture. We were setting up our elevate for the shelves after two e start creating our projects
3. Setting Up Adobe Photoshop: So once you open up your alley before the shelf softer, you will see the softer interface now to create a new project. Are you Miss Document? Simply go to file and click new Now I said it started to pigs us and said height started to pig cells. Party to bite. Had to is great for pixel art because because our way to Ismael entitled to buy party to pig cells. And now I said resolution on 72 answered by gun color, white or black or whatever we want. And now to create a new document and you're simply hit on. Create on here. You can see our document is just great It now to doom in simply press control. Plus to drum in You can also June in our Ju Montreux document. My simply put your person this hair. All right, now to remove this Why Begum from these document from the left panel, I just simply a double click on these back down there and said to learn name. They're zero and heat. Okay. And finally, to remove this wild background, I just simply can't drink this layer visibility. And now, to create a new Leah I just simply click on this little creating new layer battle on here. You can see our new earlier Houthis called Larry Juan is just great. It now to draw a random thing. I just simply select brush tool and said my bra size in one pig cells and now I just simply draw it. And don't thing in this document, But here you can see this'll and is becomes fuzzy. Now, Tofik, this we need to select pencil tool to see, like this one. I just completely considered icon and hold it. And here you can see for different options. Now, I simply select Passel tour. Now to undo this one from my keyboard, I just pressed control jet toe under these. And now I just draw a random line and here you can see this line is pixelated. Now, if you want to eat or something that you have to select is that toe from the left tool? But I just simply select is a tool, Andi said. My either says in one pixels and is this? But there's all fuzzy again. Toe fix this. We need to change. This is a remote. Simply select. It is a tool. And from these drop down menu, choose fancy Now toe under these change, Just press control jet are just simply go to eat it and select is their backwards. All right, now these I just simply it is this'll it'll person. And now this is a tool seems to make perfect for pixel are because it is No, it isn't each pigs l Now, if you want to recess your picks alert our skill It up or down are repositioning it. You can easily do this in 40 shop from the left toolbar simply select rectangular mark you tool and dry addicting Got now to activate that transfer mood simply press control T And now here you can see we can move our selector Szilard, we can also wrote it it not only that, we can also scale up or down off our pigs a lot. Now one thing here you can see if I voted this this big Villar seems to me okay, but if I pay us enter Look, All of these are fuzzy again Now to fix this at first I just under this one and then to activate the transform will again, I just simply press control t and then from this interpolation drop down. Just elect. Never. It's never and heat on. Okay? No, it accurate that ransom or to gain. Now let's see what happens now. If I wrote it all. Is gil it up or down and heat Enter it. Is this in? Pigs are great, right? So this is all about the setting A 40 show for pixel art. You know, on X lecture, I will give you some. Shared in color and contrast IX four pixel. I see you in the next lecture.
4. 3 Tips For Pixel Art: now in this video, I'm going to share treaties for pigs Alert my faster Izabal shedding. So before you start with Brazil, er, you have to think about the life source off. It lives it. Our light is coming from this site from these direction than from these said on decide the shadow will be visible. So this will be the doctor spark. And this part off this object will be the lightest part. Same with the cube. There's Ah. If our life source is available in this direction, then this part will be darker on in these, it's best we can see a shadow a little bit. And this part off this guilt will be lighter. Same with the stoop as well. Light on top and I care on. And this part off this tube will be Jirka. And this part off this do will be lighter a little bit. All right, now to see the light preview off it, let's see in this picture in treatment and had you can see, like, come from the side. That's like we can see the light on the side on decide and shadow right here. All right. Same with the stupid lighter. It will be darker, darker and lighter. And same with this one as well. If the light is coming from the single than these two parts off thes side will be darker on this portion will later. Now my second dip is able to color. Sometimes you may be tempted to use light colors. This may be okay about some cases like these. These first image off cheese, it becomes very much unappealing because of darker color. So try to use let color like the second image this second cheese image. That means try to use bright color in pixel er and, of course, tried to keep it simple. And now, lastly, my cart, it is about contrast. Just see this example. This guy on the left has way too much contrast. Too much color is going on in this picture and on the right say, I would do the situation and reduce the contrast, and it looks much better. That is no harsh color contracting and no hash contrast. So these are my tree tips for shadow, color and contrast for pigs alert. In our next lecture, we will Easter descending pigs alert
5. Draw A Simple Pixel Flower Pot With Flowers: Hello, my dear students, in this lecture, I'm going to show you how to create a pig's l far part with flowers so we don't inform the delay. Let's get started now to create in your document, simply hit on creating new button or just simply go to file and like our new And now this time I just simply said who it started to a pig's ears and stared height hard to possess and said, Resolution 72 Callum would I choose to be a beat Magan color white. And now I just simply hit on create to create a new document. And here you can see our document. Our little document is just rated now to doom in. I just simply press control plus to jump in. All right now to change these background color from this letter panel Cheered and Mueller. And after selecting these new layer, simply select the Spain back a tool. Andi, click on this color on this team, I said foreground color in these grey on. After selecting these gray color idea simply hit on okay, And now click on this white document to at the background Calderoni, now from the left panel. I just rename this layer said this'll our name as a biggie. Who? Which is begging on there and to remove this right back down there. All right, on this, them I just locked it. This busy bag down there on because of that, you can to make any changes on this layer. Now, this time I draw a flower pot on this document. Now, to draw this wrong, these lepen in I just simply create a new Leah and then from the very left click and hold on this icon and select pencil tool on to make sure that your brush size in one picture and this time I see, like, these fast brush and change discolored. This time I see, like these brown color athlete on Okay, I just do My duke meant a little bit more and draws the impulse flowerpot using pencil tool . All right, now, to add shadow on the spot using these collapse occur, I just simply choose uh, choose the darker brown color on Click on. OK, on simply add a shadow on it. Now, these there I choose lighter brown color and said this'll like around color on the top off our flowerpot. Now, this time we'll add a simple flower on it. To add this, I just simply select these pants. Italy, gain and change this for Khankala. This time I select these green color on and simply dry tree. All right, now, to add a little bit Calyx variation these stem I just simply selectees darker green color. And that is Don Guardian Qala on this thought. Are you message three Now these their eyes choose thes being Kish car on the's. Gather on this tree like these on seeing this darker pinkish color on simply at industry. All right, so this is basically our flowerpot. Would the flower are You may sit three. So this is how you can easily and quickly draw much more interesting pigs Ilott with different collaboration. Interesting. Right. Thank you so much for watching. See you in the next lecture.
6. What Is Isometric Art? And Create Isometric Pixel Art: Now, in this lecture I am talking about what is I, Semitic art and show you how to create a Semitic pigs alert. Here you can see two different examples. One is prospective and another one is isometric. Look at this image. Human eyes See everything in prospective from very white do teeny on in asthmatic everything are in same size. That is no additional points. It's all like better in prospective. Here you can see it all goes out, but in a Semitic it stays the same. No matter where you put it, makes us right. But how to do this? Isolated pigs alert in photo shop. Let's see. It is actually pretty easy now to create a new for the short document. I just simply go to file Click New and said we and Height started to buy 32 pigtails, said Reservation 72 now to create a new document, I just simply heat on create. Now I just simply press control plus 2 June in to join this document. All right, now, these days I change these background color toe Do this from the very left. I just simply say that got pain back a tool on and select this color as it Daigle and heat on. OK, And click on this duke, a man to set our background color. All right, now, this time I just simply create a new earlier. And to create a isometric box, I just seem place select pencil tool and see it. My Pence's says in one pig cells. Now I just simply choose thes dark color band heat on. Okay, now I just simply draw a box on. It is quite easy, actually, to create an ice omitted look. You have to have an age and upper lines are too big. Just each like these. All right? And go to the other set and to do the same thing for the bottom pushing off this box. Awesome. So this is basically the outline off our box. Now I be a light together aunt, he don't okay. And food this color just in this place. Basically, I want to put thesis callus on the upper part off our box. It is actually quite simple. I just simply feel the upper part color off our box with this light cream color. Now, toe, feel these right side off this box I just see like this gonna and draw a straight line and feel the right said of her box. With this color. Now, I select a little bit more darker color and use discolor to feel the left part off our box . It is quite simple. If the light is coming from the site, then live part off. Our box will become darker. That's why I put a little bit darker color on the left part off our box. Now, to make the sites little bit better, I want to air slide it on to eat these. Their eyes just simply select. It'll be lighter color and see it it into the car. And for these dark, apart, over side, I just use a little bit more darker color and place it right into this corner. Now I want to add death into the box to do this. At first, I just simply create in Julia and the stent. I choose a little bit more lighter color and heat on. Okay, Now I draw a depth. Andi, feel it with this light color. Now. This time I changed the opposite e off the step toe. Do this from the left panel. I just simply select a lot, too. And look at this. If I said capacity in zero, it is completely invisible on If I said it 100 it is completely risible. This time I see it the step capacity in 40%. All right, on down. Finally, to make this isometric pixelated box more interesting, I just simply draw a whole on it. Toe Do this. I just create a new layer and shoes. It will be darker color and simply joy Hole. Andi, feel this whole with discover. If I zoom out, Look at these isometric regulated box. The's big visited box seems to me very cool. And, of course, feel free to change the size of the box. You can make it rectangle a different type off death hole and play with different color to make your own passion or feet. So this video would be helpful for you. Thank you so much for watching. And I will catch you guys in the next lecture.
7. Create A Pixel Based Cheese Burger With Photoshop: Hello. My idea is to death in this new lecture. I'm going to show you how to create delicious to never gone in for a shop. So without any further delay, alerts is starting. At first, we need to create a new document to create in your document. I just simply goto file and click on new and sit with and high top to toe pig cells. Said Resolution 72 column. Would I choose RTV eight beat and to create a new document? I just simply hit on Create Now I place Contra class to join these document. So this is our back down there now To change these background color, I simply select thes paint back a tool and click on this color on this time I choose thes gray color and heat on OK, and click on this document to say the background color all right from the Lebanon and make sure that your bag only is locked. If it doesn't, then CMPC like you layer and look honestly to lock pattern. If you look any layer that accidentally you wanted it it one thing I have to mention that it is very important to separate your pig Zillah in separate layers. There's a way to create a cheeseburger. I do create different layers now to create a new layer idea. Simply click on little weird Anu let icon on this time I said this landing bottom bun. All right, now, these days I will quit bottom bun toe Do this from the left. I just simply kick and hold on this icon and select Mansell to and said My pension says in one pigs us and click on this color and the state I choose this color. Before that, I just threw my document a little bit more. And now Ijaw the bottom part or for cheeseburger, I just draw a simple outline part This time these Bagram color seems to maybe a dark now to change these back don't color. I just see like these back down there, Andi using these Kala pick our truth, this exact same color and juiced. Uh, it'll be lighter color of gray. And now this time I just simply hit on okay? And click on these documents to change these background color. Now I see like my bottom manlier. And to make this colorful, I just select pencil tool on these dame. I see eg, these green color on feel this outline with this color, which is basically the bottom part off our cheeseburger. Now, to add a little bit shadow on it, I just simply she was a little bit darker color and simply add a shadow. All right, On this day, I just add a little bit lighter color in de Syria on choose kiss medium cream color on. Feel it like this. Now, this actually looks like a cheese off the top. Oh, some now to draw a top bun from the layer panel. I just simply created another new Leah. On this time I said this land name s job by all right. And using the scallop ical I choose thes color on draw burnout land right here. All right. Now to a regular just simply using these collapse ical choose this color on feel and feel Everything with this color hold. This makes sense, Aunt. In the same way, I just simply add a little bit shadow on these area on this time I add a little bit later color right here and finally to make these Toubon are you may say upper bun more delicious . I just simply add piece plants. All right. This time I will draw a meat for this cheeseburger guy. And that's why from the Lebanon, I just simply create in Julia Aun said this landing asked Mitt on, plays it Arab the bottom manlier On this time I see like this meat layer and still a gap until tool and from thes color, I just simply choose thes black color on this time I dry meat like these on feel this outline with this little bit lighter color. Now I dexter on it because of these Jews DiScala and and only ATF You Dexter Awesome. Now to actually is above it from the left panel. I just simply created in Julia. And this time I said this lending as jeez. Now to move the position off bottom bomb and meat from the Lepine and I just simply select bottom man Andrea, shift and select mitt and never get to the motor pool and click and move it down a little bit. All right, now, to draw a cheese, I just simply select this cheese layer. And now from these Kala Picca, I choose these these discala and heat on. Okay, Andi, Step I, G chef like these on now to make a little bit more cheesy, I just simply issue like this color. And today a little bit variation on it. No, I on ya. It'll be lighter color as well to make these more natural and to make it a little bit more religious. All right, Andi, we're almost done. Now. I select thes Trabant or bandolier and never get to the move to and click and drag down. All right now, from the lair Pinel and by simply praising shift, I just selectees for layers athletic on this movie icon and click and drag to the top to a set it in center. All right. Now, to dislike this one, simply press control e to de select on finally toe area shut on it. Simply see the color black on from the left panel. Create in Yulia. Andi Still, I move it and fit it right here and said this landing as shadow on the step. I never get to the pencil tool and for a shadow like these, and then I just simply said capacity off it in 20 in 20%. All right, and Yes, we are done. So this is basically our super delicious pixel art off cheeseburger. Hope you learned something new in this lecture. Thank you so much for watching. And I will catch you guys in the next lecture.
8. Draw An Amazing Pixel Tree With Apples: Hello Minor is to dance in this new lecture or you learn how to create an amazing regulatory in for shop. This thing is little bit advance, but don't worry about that. So we talked in further delay. Let's start now. I just opened my before the shops softer. Now, to create a new document, I just implicitly on creating new pattern. On December, I said my document and height a little bit bigger. 64 by 64 pig cells. All right, Andi, his time. I said Resolution 72 God, I'm would rgb and said Background color white. All right now my heat on create to create in your document. Now it appears controlled blasts to doom this document. All right, now, to change these background color from the left panel, I just implicitly these background there on select paint back a tool. Andi, using these kala picker, I choose a selector color which is in between being an Iloka. Mr My Sil Extras discolor and click on ok, on click on this document to change the background color right now this thing I joy tree trunk But before these from the Lepine in I just simply creating nuclear 40 chunk. That's what I said. This'll ending as drunk on now from the left side, I just simply select pencil tool and choose tree color. What color? Actually, on day click on. OK, now this new I quickly it scratch it to Canc. Now, this time I could Lee is graduate tree trunk on after completing teas. Do you drank outline? I just simply fill it with the same guy. Makes sense right now to add shadow. Just simply select. It'll be dark in color now I just simply add a shadow on the right part Off a tree trunk makes sense right now I have a little bit later color on the left part off our tank. Awesome! Now, this time I added leave off the street there. So right from the left panel, I just simply creating Julia and said this name s lives lives one. As now I hit and, uh, on using the scallop Icka, I just simply select dark green. Now, this time I just add shape of this tree. Uh, now I feel this outline with the same color. Okay? It takes a little bit of time to feel this now to add variation in this lives from the left panel idea. Simply create a new Leah. And this time I said this landing lips, too. Now, this time I just simply select a little bit more. Dr Green on simply trite like these feel these dark green color on this tree to add a little bit genuineness on it. So I hope this makes sense right now to add thesis leagues more interesting from the left panel. I just simply create in Julia Aun said, this land name as leaves tree. Now this I chul's it'll be lighter color of green on destroyed like these to make this more interesting. - Now , using the scallop ical, I just choose to start green color Andi simply at these little chefs on it. But this color since Tim, a little bit odd. Cool Genesys. I just simply open the scallop Icka and shoes thes darker green, and he's in the Spain back it, too. I just simply changed his color and change thes colors as well. All right, And now, to add shadows from the left panel, I just seem to create a new Leah and said this landing as shadow and click and drag it down to change this layer position. All right, now, I said color black on from the left. I never get to the pencil to now. This day, I just simply add shadow for thestreet. Now, to make the shadow more natural from the left panel, I just simply select shallow and decrease the opacity. Using these later, Mr Idea simply fit it in 21%. All right, now, finally the stem. I add a couple of apples in history to add this round 11 and I just simply cleared in. Julia, Andi said Thies Name s peple now from the left panel. Isa last week on this layer on drag it and said it in the head it up. Now I simply still a great color and draw a little apple ships. Now I add a couple of episodes in the ground like these and like so now, to add shadows on a pill, I just choose the darker color off red and simply at shadows in this all apples. Now, this time I select a little bit brighter red color on the's red colors. Right here in the left. Up off Avery a pells. All right, And yes, we are done. Now if my Jew Modi's took a mentor, a little beat. Look at this. We just that's really draw. An amazing bigotry. Awesome, right? Thank you so much for watching. And I will get you guys in the next lecture.
9. How To Export Pixel Art: Hello. My idea is to dance. In this lecture, you learn how to export any pixel art. So we thought any farther deal alerts started in our previous letter, we have created the's big sultry in the bottom left. Here you can see our being person teas. If I said it in 100 then here you can see our actual size off our pigs alert. Now, to resist this, I just simply go toe image and direct M essays. Now, this time to get this image with high resolution, I just implicit with and height at 6 40 p exists. All right. And make sure that to get the hardest big village make sure that you select nearest nearby hard age Upshot are just simply press alter seven. All right now I heat on, okay? And so this is our Desai's pigs alert to export these now, I just simply go to file export and select safe or where and underpay set from these drab Limeno. Make sure that you choose Jeopardy high r p nz this to my C leg j p e g Hi. And from these drop down menu, I choose quality. Yeah, that's never and leak on safe on this time I said my destination for lower deck stop and said Finally, big, guilty and dark J P G is our image format on now Like legal Say on how you can see our pigs A lot east axis will be stored in our deck Stop and Hurtis! So this is how you can easily export any type off. Big Select. True for the shop. Thank you so much for watching.
10. Export Pixel Art With Transparent Background: Hello, my dear students, In this letter we learn how to export our exhilarate with transparent background. So we thought any farther Dillards is starting to export any pigs a lot with transparent background from the left panel. At first, select your bag earlier and I'll take this visibility off these back down there and then seem to go to file export and select, say for web on this day and make sure that from this preset, troubled mental, you choose P and G 24 and off course. Jake these Transparency Upshur All right, and from quality drop down check this necklace never are. And now bleat on, say, on the stem I said this nation for the deck stop and said this finally being a tree transport it dark Benji is our file format. Now I click on save so are exporting is now complete on indexed Over here you can see this is our exploded eggs elements with just but in background on there it is So this is out you can easily export And if you're pixel art with transparent background Thank you so much for watching
11. How To Convert Any Image To Pixel Art [Step-By-Step]: Hello My dear historians in this new military you learn, have to combat any Met two picks a lot. So we thought any farther deal alerts started. I already have been boarded. A sample in it. Hearts with white background thes sample image in for show Now to combat this as a big seller. At first I just simply go toe image adjustment and select hue and saturation and then increase the situation a little bit and fit it in 50. Now I click on OK, now it leak on image A gain and under mood, this time in select indexed color and the sting from these drop down menu select from these T options. Select any of these This time I still act local selective and dick is the colors and said it in den and forced. This time I select not and until this transparency on option, select non and click on OK, now decrease the size of this image. To resist this, I just simply go toe image and select in a size. Now from this sweet to drop down menu, this time I select or to resolution and quality shoes draft and click on OK on this time I said would and hide 100 big Zests and said Resolution wanted itchy on re simple from these drug gunmen of the stomach Choose automated. Now I click on OK, now to join these documents, I just simply press control plus to jump in Now if you have colored my gun and if you want to remove that, then simply goto image moat and converted to artifical and from the left panel simply directly on this lot pattern toe. Look it Now I go to select and choose color range and using this gala pickle, I just simply flee contest back on color for our case, which is white. Now click on OK and now President to remove the background and to de select the selection simply, players control the now to export these pigs alert with high resolution. At first you need to decide these this time to resist this one. I just simply kowtow, image and select image precise. This time, I said would and hide 700 by 700 pigs else and from these drop down menu, choose now that's nearby hard edges and now I click on OK, now I place control minus to jump out and finally, to export this, I just simply go to file export and select, say, for Web and from these job done, you know, make sure that you select PNG to get transparent background And Jake this transparency up Sean. And from quality choose narrows never and click on, say, And this time I said this nation for the next up Aun said my file name Horse big There on how I click on say so are exporting is now complete on hair It is So this is how we can easily combat in emails to pigs l using for shop. Super cool, right? Thank you so much for watching.
12. How To Animate In Photoshop: in this little pool, you learn how to limit our pigs alert in for shock, actually tow any, make anything we need to use friends. So let's see how to do this. At first, I just simply create a new document I just said would started to pig's ears and said, High aptitude excels. All right, now, I said Resolution 72 Kalamata RGB and their gruntal at this tumultuous white. Now, to create a new document, I just simply hit on create. So this is basically our new document. I just joined this document a little bit more by simply pressing control. Plus all right, now I go to window and select darling. Now, from the timeline to create a new free ammunition, I just simply leak on this little icon and select create frame animation. And after that leak on this battle, create from enemy Sean on. This is basically our very first friend in template. Now, to make this white back on transparent, I just simply click on this magically Rizzuto and click on this document to make this transparent. Now, to add delay on this friend, simply click on this little Oerlikon by default. Zero Sagan that man's no delay is selected this step are just simply said it in 0.1 seconds . These friends actually, they're called our visibility and position off this document. Now let's see how it works this time from the left, I just simply select paint packet tool and see like these gray color and click on OK, and click on this document to change this background color. This day in my document here, you can see a few white lines to remove this. I just simply goto Bill. Sure and antic. Big feel Great. All right. Now I select from the very left select this pencil tool and choose color Black and now from the left panel, simply create in Yulia. And these time in these document, I just simply diaper wired, Let's see, is to make draw a wild high. All right, now, to create a new vim, I just simply click on this creating new from icon. These two friends are identical right now. If I see like frame to on using the smoke tool, simply click on this world and move it down. Then let's see. In these two frames, these were position is just changed Now, if you want to see this animation, then simply a C like the fast frame and place despairs super cool right now, it places busy gain to pause these. Make sure that you get this looping animation from these job done minnow Jews forever. Now, this time to make these emission more interesting. I just simply create a new frame and said Thies, work position right here and created another friend. Our city, too right here. Create another and place. It's just in this push on and in six for him. I just simply said it right here. And finally I just create a seven from and this day I just see him Play said it right here and from the left panel. I just had this one. All right. Now let's play this animation. But this time I played is just for once. That's where I just simply select once now to play this animation, I just simply place is best. It is just disappear in seven frame hope this makes cells. This is actually the basic off, creating animation in for sure the step. I just delayed all of these friends expect my fast from this time I will show you element it example with a little bar, that's where from the left panel. I just simply delete these dealer this'll, Irwan, and create a new Leah. Now, in this newly and I just simply draw a little bar like these. And like so now from Timlin, I just simply create a new frame. And using these moved all I just move it right here and create on their frame on move it right here and created another on said this position right here and for the feet trim. I just simply drag it down a little bit. And in the sixth Prem, I just said it. Writer, just write about the ground. All right? Now from the left panel, I just feared in Yulia on using the's Vancil tool. I just draw a line like these now for layer two, which is this line for this'll Eto inflame one. I just had these in frame two t four and five. I just had this line and forth Ease frame six. I just visible these all right? And for layer one in their six. I just had this layer one who's his cheese ball. All right, now Let's play this animation toe. Play this. I just simply place despairs. This ball is just game from the Perry. Two up, two down and flat it super cool, right? So this is basically the absolute basic off, creating any mission in 40 shop. You can actually do a little bit more album things by simply adding different friends and action. Hope this bill. It will be helpful for you. Thank you so much for watching.
13. Create A More Complicated Animation: Hello, my dear restaurants. In this letter you will learn how to animate thes dizzy bargain that we have created before Now, from time land is them. I just simply create a new frame animation Bob, before that from the left panel. I just simply select all of this layer and never get to the move tool and select and move it down a little bit. All right, now, from Tamblyn, I just implicated in new friend and said time set upon one seconds on these Them I get a new from again and said this done s see the 0.2 seconds and from time Lane, I just simply select bottom ban meat. Jeez, and our Bunia and move it down and move it down. Now to de select the selection, I just seem prepares control. Now these two ideas in Julia and select bottom Man and moved to the top for wanting using the up Iraqi and said the stent s 0.1 seconds on him will be top. Meet me clear for one time. All right. Now idea to another layer and c leg bottom man. And then we top more to the tough for one time. Move it to the top meat, cheese and Toubon. And now I care Teoh another friend. And from the left panel, see leg bottom man and moving to the top for twice for meat ones. Four cheese once and for Tobon as just simply moving to the top once easing my up a rookie now, like yet a new frame and more bottom man for three times mitt through dance. Jeez, pretense and Tom Ban five tense. Now for a new for him, I just simply moving to the top these bottom bun. Jeez, Far free dance meet far two times and bottom bun for one times. Now for new for him, I just simply bottom bun right here. More cheese for three times. Meet for free dance and bottom bun four or five times. Now, this time from the left panel, I just see in places like the Shadow Leah and select Mansell to to draw a fantastic shallow for this burger because off these are just simply using this color pickle. Choose this color and draw a shadow for these burger. All right. And to make the shadow, it'll be darker. I just simply increase the opacity a little bit. All right, now, this time I just simply never get to the frame one. And for the shad earlier in the same way, I just seem place it capacity in 45%. No, I just simply never get to My friends ate and changed this time. Aun said it in zero point increase against all right now like to get a new friend and then we get to the top but from the little Canel. And then we get to the mobile tool and using the down K, I just simply moving down for one time for cheese one time for meat one time and for bottom bun for two days on creating new from again. And for this frame nine. I just said dealings open once against and for TheStreet Dane. I just said it in the open once against all right. Now from frame den, I just move it down these bottom bun for twice meet for twice. Jese scored twice And don't But for once now I get a new friend. And for bottom bun, I just simply back down and for meat for five times for cheese five times and Toubon 45 tents like here to another friend and cheese. I suspect it down for one times and for Tobon for one times. All right now I care to another friend, and this time I just like bottom bun and moving down. Meet for one time, cheese for once and bottom band. For once. Andi, now I care to on their friend from that is Leon. I just simply moved down and from dubbed Bun more with down for one time and get another friend and see it Toubon and the top And using my top medal, I just simply moved to the top a little bit and dear to animate frame and move it down. We'll be down Dublin for wanting. Now let's see how these intimate a cheese ball looks like. I just simply said this. Look, play Lou for once and never get to the frame one. And to play this animation, I just simply press this best awesome right now, this time to make thes animation more realistic. I just make the shadow is smaller. One cheeseburger just bounce up toe. Do this. I just seem to navigate to the frame one on about the shadow, create a new Leah and said this learning s Ismael shadow Now to draw the shadow, I just simply high all of these other layers and never get to the chancel toe. Andi, step I choose thes dark gray color and draw a Eastman shadow for these like these And like so aun said Thies let up Asti at 40%. Now I care to Anatolia to draw a little bit more small A shadow. This time I said this land name Asbury Small, a shallow aunt Hide this small a shadow there on using these pencil toe. I just seen Pete draw a bear is Mullah shadow all right. And these day I also Dick is the opacity off. This very is Mullah Shadow layer. All right. Using these lighter idea simply, I felt it in 40%. Now I hide the Aylesbury Ismailia and visible all of these other layers. All right, now, if I play this animation look at these. Nothing is changed at all. Now, to make this Children s more natural. Inlay are seven. I just simply had these shadow layer and invisible the smaller shadow. And for eight from and again I just had the shuttler and visible Tihs is smaller Schadler And for nine I just do the same. And for tend I just had the shuttler and peaceable days Very smaller shadow. And for a live band I just choose thes shadow and the rest of these eyes as possible the Schadler. Now let's play this animation now I just simply never get to the frame one and Kristi Space to play these Awesome, Right? So this is how we can easily any madan and he picked the light in for show. Interesting. Right? Hold this will. You will be helpful for you. Thank you so much for watching.
14. How To Export Pixel Animation: Once you create your own admission, you probably want to export it before exporting. We need to change the sides off this actual image. We know this is our being person teas. If I said it in 100 then here you can see our actual size of the image. Now, if you want to recess this than simply goto image and select image size On this day, I said with 3 20 and said height to 20 pig's ears on from these Drop Limeno. Make sure that you see, like these narrows nearby to get harder is yes, Otherwise it will become fuzzy. Now I click on. OK, so this is basically our animated pixel art with higher in its resolution. All right, now, to export these simply goto file export and select say for web and from these job Domino, make sure that you choose Jeff and from looping nuptials from these job Dimino chose forever. If not, if you select once, then your g fell. We're gonna play for one time and he stopped. That's what I see like forever. Now export this I just simply hit on safe. Now I say it my destination for that index stop and finally I choose Animal cheeseburger door Jif Jiffy the file format on. Now I click on Save On now here you can see our file is successfully distort in our Dexter on charities. Awesome. Right now you can share this emitted, chief to your friends and family. So I address to you to create something interesting Pigs alert and admitted that in creative way this is the only way to become an expert. Thank you so much for watching.
15. Conclusion + BONUS: Thank you so much for taking this class on Escutia. If you really like this one than the it positively hell review means a lot to me and check out my other courses on the Scotia. If you are not a premium member on institution, but want to take one of my goals, then just send me a message. I will give you a free access off. My remember far free so far now black and white.
 Masuk Sarker Batista, Bestselling Instructor, 75000+ Students