Transcripts
1. What will you learn in this course & who is it for?: Hey, everyone, welcome to the photography masterclass in this video. We're going to cover who this classes four and ultimately, what you'll be learning throughout the course. So who is this course for? Really? It's anyone wanting to take better photos, whether it's taking your smartphone out for the night or taking a six month adventure around the world. You wanna learn how to take better photos and document your travels? Or maybe you're an amateur photographer and you already have some of the basics down. But you want honing your skills and learn what it takes to start your own photography business and really make money with your photos. This courses for anyone that wants to take better photos, learning skills that and learn to play with it, become more creative. So what are we going to be covering in this course? Well, first, we're going to be starting out with the basics of petard, give you a little bit of history, then won't cover understanding the camera and go through exactly how a camera works. We'll talk about purchasing a camera, and the equipment you might need as a photographer will cover that cameras anatomy dive deep into the settings within your camera so you can really take control of how you take photos. We'll talk about things like stabilization, composition, lighting, different lenses, all things that will help you take better photos and understand photography will cover different situations that you might be in whether you're taking photos of kids running around. If you're taking landscapes, skylines, silhouettes will take you into those situations and cover how toe photograph them properly . A fund section is going to be modern photography, where we cover how to take better pictures with your cell phone. And then we're going to dive into ways to make money with photography. So starting a wedding photography business or even selling your own photos online or in person. So that's what we're covering in this class. We hope you're ready.
2. Success! How will you succeed in this course?: in this video, I'm going to be covering how to succeed in this course. Goal number one is to understand how to use your camera in a variety of situations. Goal number two is to know how to earn money from your own photography goal. Number three is to take better photos than ever before, and our last goal for you is the most important. And that's just to learn something new and have fun with it. So if you're having fun, if you're learning something new, you have succeeded in this course.
3. Course Requirements - what do you need to take this course?: so there are a few requirements to this course, but they might not be what you expect. First off, let's talk about cameras. Any camera will really do. You don't need a DSLR point and shoots and iPhones work great. And for a lot of the things we're talking about, you'll be able to use those cameras to sort of see what's possible and learn more about what and why people spend so much money on more advanced cameras. That being said, I think it's really important to get your hands on a DSLR. If you want to become a photographer, there's a reason that most pros use it. And although you can do quite a bit with a pointed shoe or with a smartphone there, certain manual functions that you can only really achieve with a DSLR. So if that's a possibility, great. If not, we hope to cover enough things that you'll be able to still practice and still find ways to take better photos. Ultimately, this course is about having fun and learning a new craft. So we really want this to be engaging and to be fun for you, because photography is all about exploring something new. It's all about capturing moments and being able to remember those moments. So we want you to have fun with it. We want you to practice and be engaged. So we're always here for you. We're always here to help and let us know when you have questions or vain things unclear to you because we want to make this as positive as an experience of possible. So enjoy the course and we hope to talk to you sent.
4. Who are we - the instructors?: So before we started this course, we wanted to dive into who we are in the type of work we enjoy doing and where we come from . Phil and I actually attended the same university together, loyal may amount, and our first real time working together was over in Switzerland, working on documentary. Since then, we've both served on in separate paths in the type of work were doing. But ultimately, we've always come back to our joy of traveling, photography and filmmaking. Well, why don't you tell us what you've been up? Yes. So I some of you may recognize me from other courses online. I started video school online dot com as a website that helps teach people to be better creative. So I have a lot, of course, is related to video making, photography, design all sorts of things, even to have a brew beer and how to adopt Adopt a cat. So I teach about all things I love, and I was running out of topics to teach, so I wanted to bring in Sam because he is a professional photographer. He really knows this stuff, and we're going to dive a little bit deeper in this course than I have in the past. So aside from teaching online courses, I'm a video producer at UC Berkeley. That's my full time job, and I love it there. I get to make videos every day and in my spare time, I love traveling, taking photos, capturing moments and just really sharing life with the world through the lens. So that's a little bit about me. So, Sam, what have you been up to? So I actually just recently came back from Panama, where I was working as a documentarian, both video and photography helping a medical nonprofit group. But before that, I spent a long time traveling in South America and have experimented and painting and video and documentary making. I've also worked as a cinematographer on bigger sets on narratives and what not, but photography's always sort of been my passion. I started off as escape photographer, going around my home town of Santa Cruz with my friends and sort of just figuring out the camera, seeing what I'd like to do and sends that point in time. I've gone to travel across the world and taking photos of all sorts of different cultures, different people different environments, and it's taught me a lot of what type of images I don't wanna share and how I want to share them. So we're so excited to have you here. And I hope that us giving a little bit about ourselves as put a little trust in you, a little faith in the ability to teach this course go ahead and continue these videos. And we hope to really inspire you to fall in love with photography, to learn about it and to take the best photos that you've ever taken. So thanks for watching, and we'll see you in the next lesson.
5. Introduction to the Photography Basics section: hello photography students. I'm so excited that you are here with us for the first section of this course. Photography basics in this section will be covering a brief history of the typography. Where did the camera come from? Why wasn't invented? We'll talk about some of the most famous brands and people associated with photography, and then we'll talk about the modern world and where we are today with the target. Lastly, we'll be doing a quick comparison of an image taken with an iPhone versus a fancy DSLR camera to show you that it's not what you're taking in the picture with, but it's who's taking it and what knowledge you have. And I assure you, with this course, you will be taking great photos in no time. Thanks for watching and enjoy this section.
6. A brief history of photography: everyone today, I'm going to be talking about the history of photography. Now, this is something that you could spend your entire life or at least an entire semester in college, researching about and learning about. So two minutes of history isn't really going to do the history of photography Justice Next lesson is a text version of the history, which goes into a little bit more depth. But let's get straight into a brief history of foot RV. The very first camera, which has been around for centuries, was called the camera obscura, and this was actually a way for artists to be able to trace drawings. Using a pinhole type camera light from the outside world would go through a pinhole. It could be a box or through a wall, and then it was basically projected on the wall opposite of that pinhole, and artists withdraw and trace these images. But this wasn't really photography as we knew it. It was just the first type of camera, in essence, the first lens. But early in the 18 hundreds, two guys really took a hold of this whole photography thing. They were scientists Joseph Pepsi and Louise Digger, both from France. They created the first printed images using a copper tin and a photographic device that would actually print what was being seen by this camera obscura type thing. And they would call them dig arrow types after Digger. So early 18 hundreds, people started printing photos on copper tens. William tell baht. He was another famous photographer who invented the first paper photos. But at this time, photos were only for the rich. They were really expensive to do, and it took a lot of time to do them. You literally had to sit in a chair for minutes on end as the photographer, so everything up and make sure that you might be exposed properly. It's not like how we our trigger friendly now and just shooting photos all the time. Another thing to know is that these photographers were scientists. They weren't artists. They were just seeing how light reacted to different chemicals. In 18 89 George Eastman, which is a name you might recognize from Eastman Kodak, he invented the first film role so by this time, and invented a different type of printing images going from copper tin to having actually film being processed, but at this time there was no color photography. But people did he in colors to their photos, either to the negatives or to the photos himself. A Russian, Sergei Gorsky, invented how to use colors in the photos. Throughout the 20th century, the early 19 hundreds cameras got smaller and smaller companies like Nikon, Canon Olympus, Fuji Minolta, Hostile Blad, Thes Air All brand that started popping up throughout the century. New types of lenses were created, and everything got cheaper and cheaper so that more and more people could get their hands on a camera. It was really during this time, the 19 twenties thirties forties, when photography blew up because people realized you can use it as a way to capture life. World wars were covered with photos and images and people for the first time we're seeing the other side of the world. Newspapers and magazines got so much more interesting and started printing images with their stories. So if you can imagine a world where you had never seen a photo before and photos of the other side of the world animals, you've never seen countries you've never seen, people you've never seen, places even ever seen these things start popping up in your life. That would have been such an amazing experience. A couple more interesting points in 1986 Fuji events, the first disposable camera. And of course, if you grew up in the nineties, this was a very popular thing to Dio. Actually, the very first digital camera was invented in the eighties. It was huge, heavy, bulky. It wasn't something you could just carry around with you wherever you go. But of course, now, cameras are everywhere, and that concludes this really brief history of photography. I only hit on some key points that I thought were very important and kind of fun to think about. And now we can move forward to modern photography and then later into actually learning how to be a target for. But I always think, knowing the history of whatever subject, your learning is a really good idea. So I hope you've enjoyed this lesson and the photos that I've shared with you. Okay. Thank you so much for watching this lesson and I'll pass it on to Sam
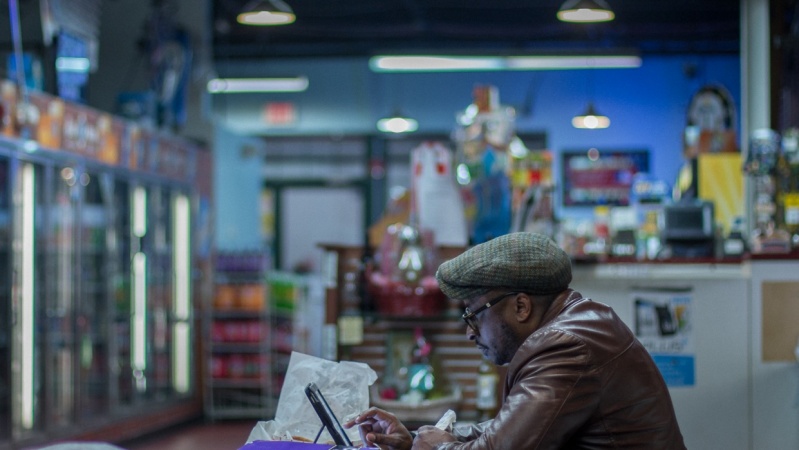
7. Modern photography - where are we today?: So today, digital photography is on a whole nother playing field that film photography WAAS There are cameras literally everywhere, whether it's in your phone, in the back of your car and your sunglasses. They're everywhere and really, you know, where aren't it's pretty exciting, and there's been some great things done with it. But there's also been sort of a damage to the art of photography because there's the ability to just keep taking photos, keep posting to social media or, you know, taking them and then, sir, forgetting that you ever took him and they're on your computer. So you know they're there, and maybe eventually one day you'll go look at them. But it's not art. It's more about documenting what you've done documenting your travels or documenting your night out with your friends. And there was a point where you had 24 shots in your film camera, and once you went through that, there's a whole process t even see if the images you got came out. If were they in focused where they exposed properly? Did you accidentally open your camera and lose all those images? Sort of overwhelming amount of content being created today. One of the things that we hope to achieve in this course is to teach you how to use your digital camera and not just set it on auto and sort of forget about the rest and just go take photos, but really get into the nitty gritty. Learn how to use your camera, learn what it's capable of doing and go through more of a creative process with it. And that really is one of the benefits to taking photos in the modern age. It's no longer a thing of luxury. It's no longer something where you have to really know the science. But you're able to test your able to shoot thousands of photos and find what you enjoy doing and how you can do it. And there's so many possibilities with it. And so that's what we hope you will take away from. This course is to ultimately learn how to use your camera and not just put on auto, but get creative with it. Try new things and whatever it is you're trying do, whether it's sell your photos or simply documented your travels, you'll know what you can do and how you want to do it, opposed to just being on auto and getting frustrated when your photos out of focus or when it's no exposed correctly. So we hope you enjoy the course and get ready to get your hands dirty and start taking photos.
8. From iPhone to fancy DSLR: the basic photographers toolbox: So we just wanted to add something in here about purchasing a camera and what's really necessary to take a good picture. In today's day and age, Most people won't be able to tell the difference between a photo taken on your iPhone for Instagram and a photo taken on $100,000 possible. Really, it comes down to what is a photo off and well granted. I've spent my fair share of money on professional gear. That's because that's my business. And they last a longer amount time where they have a sturdier builder, for they have certain features that I utilize all the time. At the same time. My iPhones, my favorite camera. I love how lightweight it is. It's easy to run and gun with it, and no one expects you to be a photographer on your iPhone. But realistically, it captures an image, and that's what it boils down to. There are a few things within our course where it would be useful to have a DSLR, but there's also a lot of stuff were just with their iPhone. You could learn composition. What is your camera capable of doing? And that is an iPhone that is a D s a lot. Whatever it is you if you know the limits of your camera, you know how to take a good photo with it. And that's what really blows down to. Some of my favorite images still are taken off my iPhone while traveling in South America and had I've been lugging around my DSLR there's no way I would have been ableto hike macho Peter with all my kids and sit on my iPhone. Got some great photos with it, and people can't believe those with. So don't go out and you spend all your money on a camera. If you really love photography, I would recommend getting a DSLR. But take this course first, practice with your iPhone, see what's possible and take it from there.
9. Conclusion - what did we learn in this section?: I really hope you enjoy this section on the photography basics, learning a little bit about photography history. And if you're interested, check out those books and links that we refer you to because you can dive a lot deeper than we were able to explain in this short course. So now we're in the modern age. I hope you've realized that it doesn't matter what camera you're using, and you're excited to jump into this course with whatever camera and equipment you have. Thanks for watching, and we'll see you in the next lesson.
10. Introduction to the Understanding the Camera section: everyone. Welcome to Sam's studio. We're excited to have you here for this section on understanding the camera In this section , Sam will be covering different types of cameras from SLR point and shoots and smartphones, and it will be covering exactly how the camera works. I'm very excited to jump right into this section because understanding what types of cameras are out there and how they work is the first building block to really becoming a better photographer.
11. Types of cameras: Hey, everyone. So to start off, we're gonna talk about the different types of cameras that are out there, which primarily fall under two categories one being film and the other being digital. Film cameras typically are more mechanical and their structure. These range from disposable cameras to toy cameras like the whole gah um in SLR is like this one, and there's still some being manufactured today, but it's less common for people to be shooting film. It's it's gotten a lot more expensive, but the quality and the look I don't think will ever go away on the other end you of digital. And this is really wide category, because in today's technology it's constantly changing. So we're gonna be talking about various types of digital cameras, everything from DS Lars two point and Shoot smartphones and some of the latest technology that's been coming out. We'll be covering everything from why you should use your smartphone when to use film. What's the benefit of buying a DSLR so the differences and the benefits of different types of cameras, So get your camera ready and let's dive right into it,
12. The Smartphone: all right, So the smartphone, this is the first camera we're gonna talk about. And really, it's one of my favorite tools to use because it's so discreet. No. One second guesses. If you're a professional photographer, it's just it's a phone, you know there's there's no law behind it, but it's revolutionized digital photography because it's so accessible, it's everyone has it. You have thousands of photos coming from a single event, and with social networking, you're able to connect all those photos instantaneously, which I think is really cool. Um, I also love that you know the resolution. The optics have gone so much better. So if you understand how to use a camera and a lot of the things that will be covering actually throughout this course, you can become a really amazing smartphone photographer. And it's just understanding the limitations of the phone itself. You know, some of the things are that you don't have as many manual functions and the battery life. Ultimately it is your phone. You know you're using this for other things other than just taking photos. But it's ultimately one of my favorite. Came is to use when, as traveling throughout South America. I used it constantly. This is actually a photo from March P choo taken on my iPhone and you know, I I hiked for days on end. It is just so much easier to use my smartphone, then pulling out my big deal Salar each time. So that's a smartphone. It's light way. It's discreet, and I think the technology is going to just keep getting better and better for these types of phones. Um, but you know, the reason that you're in this photography, of course, is to learn main able to learn. You know what is the other side of photography? And that's really getting into the next set of cameras.
13. The Point and Shoot: So the next step up from the smartphone world is the point and shoot camera, and this is a really broad range of cameras. There's been a lot of different changes in this and some more professional made ones and some very consumer based ones. But you know, there's some cool features to you now have waterproof cameras. You now have amazing zooms built into your camera, and it's really pretty interesting what they've done with this market. And if you're looking for something that's all in one you don't want deal with other lenses and all that, it's a good starting point to get into photography. Some of them do have better manual functions. A lot of them will use sort of scene modes. Very automatic just point and shoot. You know, it's nice and simple. Personally, I think that if you want again to photography, it's good to get a point and shoot. That has some more of the manual features. Some now even have, you know, manual focusing, and you know, this is really a big category. But the main difference between a point and shoot camera and a DSLR, for example, is that you don't take the lens off, the lens is built onto your camera and dependent on how you want to use it. There's a lot of different features, and you know, whether it's video recording or you're going into heavy weather, you want something that's weatherproof. So we've attached a couple links to some of the best point shoots that we think are out there. But this is constantly changing this love updates happening. So always do your research before buying a camera. And next we're going talk about dear Solares.
14. The DSLR: so digital single lens reflex cameras or more commonly known as DSL. Ours are really the industry standard. And what a law pro photographers use not to say that they don't use point and shoots or even smartphones, because those are more commonly used these days. But there's a few key reasons people continue to use. DS Lars Ah, I think when the biggest ones is that you have interchangeable lenses, so you're able to take one lens off and you quickly pop on another one. So dependent on your situation, you can have a whole range of lenses that you want to use dependent on the moment or the shot that you're trying to get. The other reason is that you're able to pack a lot Mawr, electron, ICS and computing power in the body. You're able to do a lot more with these types of cameras. I think the image quality is typically superior. The video recordings a little bit easier, um, and really gets down to thes. Bigger lenses just provide better image quality than a lot of pointing shoots or smartphones. I just You can't beat the type of lenses that you're able to get on a DSLR. So if you really serious about getting into photography, I highly recommend getting your hands on a DSLR. Thes. Cameras are extremely versatile now. They have amazing image quality, and you're able to change the lenses, which I think is a big part of photography. A lot of people will say You know all about the glass. It's not about the camera, but what you're putting in front of that sensor. Another decision in choosing a camera, or at least the DSLR, is which manufacturer you're going to go with. Because whether it's Canon, Nikon, Olympus, you're making a commitment there because it's not just a camera, but all the lenses you then by should work on whichever came where you've bought. You know it. No, you can always change the camera, but if you've invested money into glass into lenses, you're not gonna want to change that company each time because you won't be able to use those lenses with you. New camera. Um, I picked Nikon mainly because my father shot Nikon and I was able to get law lenses Ah, that he used back in the day and actually use them with my newer cameras But this is a decision for each person, and I really recommend going in and seeing which features you like and which cameras you like ultimately, because if you're gonna get into photography, it's a long process building your camera kit, but we'll get into that later. So that's a DSLR thinks we're joining everyone. We have one more type of digital camera to cover.
15. The EVIL camera: Okay, so the last section about usual cameras is going to cover electronic viewfinder cameras with interchangeable lenses. And this is really a pretty interesting technology and something that's gaining a lot of traction right now. The main difference between a electronic viewfinder and a DSLR is that a DSLR is quite quite large here. And that's because there's a mirror in here that allows you to look through the viewfinder , hit the mirror and then see through the lens. Um, what the electronic viewfinder cameras dio is they essentially get rid of that mirror and make it so that when you look through your viewfinder, you're seeing what the sensor saying, and in this way you're able to make much more compact camera. Um, a lot of them, you know, like the S seven are just so incredibly sensitive that having a small, lightweight camera that you can get really great video and photos with it's pretty cool. Um, no, it is on the higher end of the market. You are paying a little bit more money for it, but when you take the photo, there's less noise. So if you're looking into getting a new camera, these are ones to consider just because they are so small and lightweight and portable. But their price tag will typically be a little bit more and you're still gonna have to buy the lenses. And this is the biggest part where going from a smartphone or a point and shoot if you want to get into professional photography, if you want to really actively pursue this, I would recommend getting something with interchangeable lenses, whether it's an electronic viewfinder or DSLR. So I hope this was helpful, and next we're going to going into how the camera actually works.
16. How does a camera work?: we're now going to talk about how the camera actually works. And I think this is a really important lesson to learn and really the starting point for the rest of this course. I thought, This is a film camera and I think it's important to start with film because that's where photography all started. And if you look at this camera, so you have the lens, Um, you have a way of controlling the mound, like entering. You have two settings up here, one for shudder, one for your eyes. So and we'll get into all this stuff later. Um, and then you have, you know, the photo. But in the one that you used to take a picture, the important thing to understand with a film camera is that back here, there's no electron ICS. You actually have a piece of film going across here, and the amount of light you allow toe enter through your lens using your shutter speed using your f stop, you control how much hits the film, and the film itself is actually a light sensitive source. And this is what really makes films. So interesting is that those pieces of film are actually a bunch of crystals, and those crystals are sensitive to light. They're actually, they react when they're exposed to light, and whatever comes in, is burned onto them and then saved for later. And you have to go through a whole chemical process to keep that exposed image on your film . And that's ultimately what you'd created negative out of and what you would go and print a photo from. It's a very different world than digital photography, but it's a great way to understand how photography works. You have some apparatus that controls the mouth of light entering, and then you have a plane or ah, piece of film that reacts to that light and stores the image. Now, digital photography is very similar to film in the sense that you have a lens, you have a shudder, thes things, air controlling the amount of light coming in, and you also have eyes so rating. But instead of having a piece of film back here, you have a digital sensor, and that digital sensor reads How much light is coming in now it's still reacting to light . It's just in seven physical chemical process. You have a computer processing that image. And you can see in the last few years how far that technology's come because you're able to capture pretty stunning images through digital photography. And a lot of traditionalists will say that film will always be superior to digital just because of the quality. And the the real chemical process that film goes through is consider just higher quality. And I think digital has come a long way, and most people came and tell the difference. But a lot of the great photographers were real artists because they weren't just using digital where you can change so much after the fact they were shooting film. And it was the whole process going into the dark room and exposing your film and the possibility that if you screwed ups along the way, you lost everything. You lost all of your images and sure that's possible. Maybe drop your your memory card or, you know, ultimately water gets on your camera, but it's a lot more difficult nowadays. I think that the guys who were walking around with a big old film cameras The other big difference is that while film cameras had different amounts of crystals in the film, and that would determine in I a so rating. Well, we'll talk about that later. You have a digital sensor, which is ultimately reading millions of pixels. It's ones and zeros that are creating the image you're looking at and how that chip or how that sensor reads Light will make a huge difference in your photography, and this is constantly changing. This is something that is really exciting. You, when talking about what some of the full frame sensors are able to do nowadays. Um, a lot of people will still say film. You're able to do a lot more, and there's just a different quality to film photography over digital. Now that we've talked about the basics, let's dive in a little bit deeper.
17. Shutters and Sensors: Now that we've gone over some of the types of cameras out there, let's dive in to the camera itself. We're not gonna be talking so much about the lens right now, but more so. What's inside this camera on this camera? You you have a mirror on electronic viewfinder. You won't have a mere that's one. The major differences. But what you will have in both is a shudder in a sensor. The shutter is a key part in controlling the mouth of light that comes through your lens and it's your sensor. And ultimately what it's doing is it's moving up and down very quickly, and that's establishing you. How much light is allowed in to expose on your film or censor? Um, some cameras. You know, you go up to 1 8000 of a second. Ah, and it really is just you only want, like that really microsecond. Other times you'll do 32nd exposures, and these are all things we're going to cover throughout this course. So don't worry, we'll we'll get Mawr into that. But let's just go over the basics so the shutter moves up and down a certain speed that you set and that determines how much light enters and hits your sensor or film to expose it and take a picture. So now I'm going to talk about the sensor or film plain. And there really is a big difference here, because when you look at something like 70 millimeter film versus 35 millimeter film versus 16 millimeter film or eight millimeter film, you can see this size difference. And that's the same thing. When you go into digital photography, you have your full frame sensor camera. You have your A PSC. You have your micro 4/3. All of these sensors allow you to capture light, but each has its own limitation. Ah, full frame sensor camera is going to be able to capture a lot more light than a smaller micro 4/3. Just because it's it's larger, it's able to let more light in. These are things that will dive a little bit deeper into later on in this course, but it's important when looking at cameras, you know. Is it a full frame camera? Is it a crop sensor camera? Because that also changes. You know what type of lenses you put on it? It changes them out light that you were going to be able to use. So when talking about you know what's inside of your camera, it's really thinking about the shutter and the sensor. There are many other things going on around the camera you in terms of, you know, different settings and all that type of stuff. But when you talk about what's inside the camera, all those air show the key parts to focus on. So now that we've looked inside the camera, we're going to start talking about what happens after the fact, and then the next action will be talking about file formats.
18. File Formats: Hey, everyone. So now that we've talked about, the different came or types and what's going on inside the camera, you know, the shutter and the sensor? I wanted to talk about what happens next and file formats. How is that picture actually saved? And there's a couple factors that come into which file format you would choose to, you know, to save to. One of them is raw, and this is introducing some fairly complex things because raw is un compressed. And really, when you think of file formats, you need to think about compression because this is gonna be, you know, how is the computer inside your camera changing the image that you're taking because of raw images UN compressed? All the data that that sensor is able to save is being saved in a very big file and typically, the reason that you would shoot rise that you want to do some color correcting Or, you know, maybe you want to zoom in a little bit on the image you've taken. You'll have a lot more information when using raw and on the flip side you have something like Jay Peak, and this is more compressed. You'll be able to take a lot more photos because it doesn't take up as much space on your card on new memory card. But you also lose some information your shadows in your highlights, you're gonna have just less space to work with. I just want to introduce you to rob versus J Pig. Um, you know, compression and how that affects your images when talking about file formats. Typically, you're talking about raw. You're talking about J. Peg, the main differences being that, you know, one raw takes up more space. Jay Peak takes up less space. So when traveling, maybe you want take more J pig images. Um, but ultimately, if you want to be doing some of that tweaking in post, you'll need that raw image. Just because there's so much more data, there aren't everyone. So that's it for me on this section, I hope is useful for you. And just know that there's a lot of information when it comes to photography, whether it's how the camera works, how it saving the files and what you do with those files. So we'll be covering a lot of stuff in future sections. We're just getting started so don't be overwhelmed if all this seems like a little bit much to you, because we will be going over it in more depth in detail later on. So for now, thank you very much and he's felt.
19. Conclusion - what did we learn in this section?: Hey, everyone, thanks for watching this section on Understanding the camera. I really enjoyed what Sam had to talk about in terms of the different types of cameras out there, how they work. And now it's time to dive a little bit deeper and in the next section will be covering the anatomy and basic menu functions of a typical camera.
20. Intro to the camera Anatomy: everyone, welcome back to the photography masterclass. I hope you enjoyed that last section where Sam explained the basics of a camera, and how it works in this section will dive a little bit deeper. This is the camera anatomy and setting section. So in this section, Sam will cover what are all these buttons? What do they do? And we'll dive a little bit deeper into the menu in the settings so that you can actually get out there and start using your camera. While it would be impossible to cover, every single brand and model of a camera out there will be showing you some of the most popular ones, such as a Nikon and Canon DSLR, as well as a point into and smartphone. And this will give you a sense of what the modern camera can really do. So now I'll pass it over to Sam and enjoy this section.
21. Detailed look at a Nikon DSLR: everyone. So today we're going to be going over the camera anatomy. So this is covering a lot of the buttons that you'll find on a camera. Ah, the backside as well as a menu settings. Well, this is pretty consistent for a few features. There's a lot of things that change based on the brand that you have. So whether you're shooting Nikon, Canon Olympus, whatever it might be, um, you really need to dive into your manual and see some of these features. But we're going to serve focus on the key things that either are the same across the board or that we recommend you go and find a near manual so that you know how to operate your camera. It's a really important section, and this is sort of the last technical side before we get into more the creativity and art . So let's dive right in. So now we're gonna go into some of the buttons that you'll find and serve on any camera. This camera is a Nikon D 7000 but most of features will talk about in this section. Really, you can find on any camera, So first off is the shutter release button, and this is something that for most cameras is gonna be sort of industry standard. Typically, you'll find it where your right hand rests nicely. And the key thing here is that as you softly hold it down, you can see my lens adjusting. It's actually on automatic focus, and when you gently press it, that's when it finds the focus. Now you give a little firmer push, and it takes the photo. So again, lightly touch lightly pressed down and get focused will make a little noise to let you know that it's found it. And really, when you're looking through the viewfinder, you'll know that it's home. Focus. So find the focus. Fully press taking a photo now on the backside. Here you'll typically find this button, and it's a little rectangle with the play button triangle in it. That's your photo review, and pretty much all came as I've ever seen have this bun, and it lets you go through and look at the photos that you've just taken on most photos as well. On the back here you'll have ah plus in a minus sort of magnifying glass, and this is you. Look at your photo and then zoom in and look at, you know, was it really well in focus? Or, you know, maybe you want to go back and see multiple photos that you've taken, and it really is a great way toe to look through. The other thing that most cameras will have is this navigation button, and it changes in style. But the concept more or less the same up, down left, right, a select button deserve in the middle, and then, typically right next to that photo review. But you'll find a little trash can a little delete bun, and if you press it, nothing happens. But when you're in, the photo review will have your images loaded. And if you select that trash can you then typically have to hit it again to say yes, confirmed the the Delete that photo or you compress the photo review and it cancels it so this might change dependent on the camera you have. So you should look at the manual. But this is sort of ah, typical thing I've seen on night guns and cannons, at least from there. And this is something that differs on Nikon and cannons. But actually fairly similar is the white balance and I eso buns so you can see on the top. Here is a little WB. That's white balance. There's a I s Oh, and I also something will get into in later sections, but it's ultimately the sensitivity of your camera. It's It's a very key feature when taking photos and on icons, you have it back here on cannons. You'll actually have a row of buttons up here, and you'll have the white balance and the isso up there as well. Another great feature that is different on icons and cannons is this guy right here and on icons. You have a little a little light symbol. It's a button right here, and you click that and illuminates this section here so that during that time you can see what the information is on this screen on night cons you simply go from off to on and then sort of bring it farther over, and that turns on this light so that you can see what your shutter and F stop and different information is on this screen. For most cameras, this top screen along with this back screen, are where you're going to find a lot of the information of how you're shooting the different settings you have activated. Canon actually has a great screen back here that gives you all the information, and if you want, you can go into your menu and actually have that on your Nikon as well. But it's an option that some people like using. Some people don't. I personally don't use it cause that drains your battery just a little bit faster. The next key button is your flash, and most cameras will have this button serve on the front side of your camera, and it's a little thunderbolt looking thing, and that's ultimately to activate your flash. So if I'm in my manual settings, I click Flash opens the flash up. It's pretty simple. In depending on what sendings you've set in the menu, you'll be able to automatically have that flash pop up when necessary, or you'll have to turn it on yourself by clicking this button. So the next feature we're going to talk about is this little wheel right here. It's typically for your left hand to operate, and, as you see here, there's the M for manual, a for aperture Priority s for Shutter Priority and People program, and these are all things that you'll learn about throughout this course. But really, you should go into your manual and read up about how these features change for your camera on here. Also, you'll have the auto feature, which on a cannon is actually just a green rectangle on Nikon's. You'll have auto, actually, and as you get into professional photography that but actually will disappear completely. You'll only be able to choose manual after priority shutter priority on this camera. You also have user settings where you can preset your different settings on and then scene modes, which a lot of cameras have. Sometimes you'll have a little guy running, and that's for fast sports. Maybe you'll have a cloud, and that's for a cloud setting. And there's a lot of presets that you can t three eyes or D 5000 icons will have on here so that you can just quickly go and do that. But this course is really all about that little M and going to your manual feature and getting to know how to set all the settings on here. So next and This is really a feature of Nikon. I haven't seen this on too many other cameras. Is this little wheel underneath this other settings wheel where you're able to actually select? You know, do you want to a single photo? And then you have these two guys cln C H, which are continuous, low and continuous high. That's where you're taking multiple photos at one, so C L. I believe on this camera is three photos per second. C h is five photos per second, so it's really being able to do ah, burst photography and make sure you capture the photo. We'll be talking about that later on. In this course, though, then you have a couple other features here which a little more complex. You have multiple exposure of remote control you have timer. These are just different modes that you can select, which on a cannon you just have to go into your menu. But for Nikon, they've set up right here. So it's nice and quick. You can do your burst mode and then go back to your single and then you can go back to your timer. I mean, it's all right there and really accessible. So the next key future I want to talk about is this guy right here. It's a little little wheel independent on the camera you have. It can do various things, but typically this is your f Stop your iris or your aperture, and it's something we'll talk about a little bit later. But ultimately, it's one of the key things when doing manual photography. Well, the biggest differences between the Canon and Nikon is that on the Nikon here you'll have a second wheel, and this is for your shutter speed on a cannon. What you'll have actually is a big wheel right here, and that's where you select your shutter. These are both programmable, so you can actually change them if you want to. But it's really nice, you know, right here I can do that and then that. Then go take a photo. This does change based on your camera, so go into your manual. See how your came or operates. Typically, though, will be right here so you can do it just with your right hand. So there's a few last features we want talk about, and some of this has to do more so with video, but a law DSLR users are using to do these days. So I think it's useful. The first is the minute to mark, and this is actually a very classic photography thing. And four video is very important because this is actually where your sensor is. So if you follow this line across, you'd find your sensor right here in the camera. And this is important for focusing because it's from this point that you're saying an object is six inches away a foot away, 10 feet away. This is your focus, playing where that all is being measured from from there. Another key thing is the live view mode, and this is something that changes based on the camera you have but typically will be a little LV. And for ni cons, you go like that, and it turns on new live view. So you're able to actually look at what you're doing back here, and you can either do photos through here, but a little bit slower. Um, it's really meant for video so that you can do video recording and then your record by and will typically be a button with a red dot and that red dot means you're recording. When you hit record, you'll typically get a little red dot here saying, Ari, si or wreck recording on just lets you know that you're actually filming clicking again stops recording. This does chew up your battery a lot faster, and it also takes up a lot more memory. So know that when you're doing video, both your memory and battery life will go much quicker. It just requires a lot more energy in memory space. So now we're going to talk about some of the more physical things on the camera. Um, first off, you know you have your viewfinder. This is where you put your eye toe, look through and take photos. It's sort of key if you are nearsighted or farsighted. Typically, there's little doll here, and you'll be able to change that based off of your vision. So if you look through and everything is blurry, you might play with this little school here next year of the hot shoe. This is really for accessories, for flashes for different mounts on the bottom. Here you'll have your quarter 20 screw, and that is meant for a tripod attachment. When putting on tripod. You know, depending on the lens you're using, try and get it sort of centered and wait. You don't want it falling forward or backwards, so just because it's here, that doesn't mean that needs to be the center. Sometimes you'll actually want to move it a little bit farther up a little farther back, depending on what you have on there for most cameras on the bottom. Here, you'll have your bad report, and that's just, you know, where you put your battery in. Typically, they have sort of a curve shape or something that says you can Onley really fit the battery one way. You also have this little guy, which allows you to release it or it clicks in. Make sure that's shut, you know, don't let moisture in there. Also, this is more of an advanced feature, but some people will get a vertical grip or extra battery pack, and this is actually where you go and plug that in. Make sure not to lose this guy, though, because if you ever take that vertical grip off, you don't want that those electron ICS to be exposed and where your hand grip is typically you'll also find your card port, and this will be something that says Carter, maybe has a little card I Colin. So you just slide that open and you'll find the different card ports in here for this camera. It shoots on SD cards. Some cameras shoot on CF cards, and you know it's changing constantly what you're shooting on. But for the most part, with SD, you click it. It comes out, you pull it out to put in, you just click in and it holds firm for CF cards. Typically, there's a little button and you click that button. It pops it out. You push it back in. Really make sure your card is dry. Make sure you don't gain moisture in there cause that can damage your camera. And lastly, if you come over here to this side, this always changes what the options are here. But typically you'll find us be. This one has HD my for video recording audio video outs. You'll have just different connections and things. This really changes based on the camera you have in the different features. HTM Eyes becoming very popular for video recording and being able to have a monitor attached lastly, and this is really a Nikon thing. I think some other cameras have it, but it's on autofocus to manual switch, and this is basically because an icon allows you to use older lenses. So when you put on an old lens that, like this one, I can't select on the lens auto or manual focus. So instead I have to use this guy, which tells it either being manual mode or go over to auto focus mode. And finally, this is something that really changes based on the camera. But you'll have this button here, and this is your lens release. So this allows you to take your lens off. And depending on the camera you have for ni cons, you'll have a little white button here for cannons. It'll be a red button, and what you do is you line your lens up there will typically be a white dot or red dot on your camera. You attach it at that point, you test and it's locked in. So I know this is a lot of information. And to be honest, I've been shooting Nikon for 10 years. I've learned how their cameras are built learned a lot of features and seeing how they've changed as well do paying on the camera you get, you need to go into your manual. You need to do the research. You know, maybe watch this video a couple more times toe learn these different things because ultimately, when you go out into the field, you want to know Oh, I want to do this is in this and it's easy. It's second nature almost, and you really get to focus on the creativity. So ultimately, this is gonna take a little bit of time. But watch this course again, Read your manual, just practice, get to know all these different buns and and what they do. And really, it's going to be the most important thing for when you get out into the field because it'll be second nature. You won't even have to think about what you're doing.
22. Detailed look at a Canon DSLR: Okay, everybody. So in that last video, Sam covered the Nikon D 7000 which is a great camera to review, and now I'm going to be going over a cannon. As Sam mentioned in that video. Some of the buttons and settings are in different places, and so, by going over the cannon, I think you'll get a better idea of the most popular and general buttons that are featured on most cameras. And since Canon and Nikon are two of the most popular brands, we thought it would be great to show both cameras. So the first button, which is your main button to know about, is the shutter release button, and pressing this down will take the photo. Now, if you are on auto focus mode, you can press it halfway down, and if I do that, you will see the lens move, and that is getting the camera and focus. And now it's halfway down, and if I press it fully, it actually takes the picture on the back of the camera. Once you have taken a photo, you will have the image review button, which is a little button with a little play icon. So It's a rectangle with a little play icon. If you press that you can now review the image. If you want, you can use this plus and minus buttons so there's little icon, its's plus and minus, and that refers to these two buttons to zoom in. I know it's hard to see this but zooming in or zooming out of your photo, and that allows you to check your focus and really just reviewing your image to see if you like it below this image review. But in is the trash can icon, which is the button to delete your image so you don't like it, and you don't want it to take up any space on your camera. Right now, you can just click that button. There is an option that says, Cancel in a race, and you use this dial over here to go left or right to change from cancel to erase. If I want to erase it, you can just press this button in the middle of the dial to erase it, and then when you're done reviewing the photo, you just press the review photo button again, and it gets back to this main menu and on the cannon. This LCD screen gives all the information you need to know about the settings that your camera is on. Now. This is a lot of advanced stuff that will be covering in future lessons. But you can see your shutter speed, your F stopper, iris or aperture aerials the same name for the same setting, your eye. So all sorts of things. So speaking of settings, a couple of the main settings, you'll want to know how to change our your white balance and I s O and on a cannon. As Sam mentioned, you have buttons up here for W B, which is white balance, and it says, I s O right here for I s o now white balance that's away, that your camera reads the light and how warm or cool the light temperature is. Something again will cover in a future lesson. And then I also like Sam mentioned, is a way that your camera, how sensitive it is and so you can press these two things. And once you do that, press the button and options pop up on this back screen and you can use the dial again to move throughout your menu. And so this Dow again is very important because it's the way that you actually move throughout your menu. Back on top. Here you have this illumination buttons. So this little screen right here is similar to the back LCD screen, and it has information about your camera settings. And if it's at night and you want to basically look at it and it's dark, it will illuminate it for you. Right above these buttons is a dial up here, and this will change your shutter speed again. Another thing will be covering in a future lesson, but this is basically how fast your shutter is going, and this will change how you expose your photography, so just moving the style from left to right will change that. So hopping over to this other dial on the left hand side of your camera, you have this dial. That change is the way your camera takes photos from manual to different priority modes in auto. So the two things that will be covering right now are your manual, which is M and then this green box, which is auto. So if you want to take a photo without having to play with your settings at all. You just check it. Put this dial on this green box, and that's on auto mode. And again, there's a little white sort of line right here, and that's you. Just move your dial and whatever lines up with that white line is setting your on. And it also has some custom settings that you can set up in your menu, but again, that's very advanced. Moving back to the front of the camera, you have this flash button, so it's a little lightning bolt with an arrow, and you press that down and the flash pops up pretty simple below this flash. But in we'll talk a little bit about your lens. And so this button on the right side of the lens allows you to take on and off the lens, so pressing that down and then twisting your lens counterclockwise will take it off. There's a red button on your lens and a red button on the camera mount itself, lining those up. Turning to the right or clockwise will lock the lens in place. So on the lens itself, there is an auto focus and manual focus button. So switching this from one to the other will turn on auto focus or keep it on manual focus . Now, one thing that's great about this camera. The 70 is that it can shoot video, and this is a pretty standard feature with most DSL ours in the modern age and to enable video. There is a little knob right here to the right of this viewfinder, and on the top you have a little camera icon and a little video camera icon. And switching this little dial to the left will enable the video mode, and it also brings up the live view feature. So you're LCD. Screen on the back will actually show what is being seen through the lens, and you see that dispenses start stop, and that's how you record video suppressing this will enable record. So your cameras now recording you see a little red light in the top right corner of your LCD screen. So you know it's recording pricing that again, and we'll stop it now. This is how it looks on a 70. But even on different models of a cannon, these buttons will be in different places, so so depending on what camera you have, you might have to go into the manual toe. Figure out where your video mode is. So one thing that's a little bit different about a cannon is this que button, and this allows you to go into your settings, which appear here on the LCD screen and change them. And while there's a lot of different things that you change back here, this is where you turn on burst mode on a cannon. So if you press Q, you can use the joystick on the right side of the camera to move up, down, left, right. So using this little joystick on the right hand side, moving up and down, you can get down to you're shooting mode. And to change the setting of any of these options, you actually press the set button in the middle of this style to go into this deeper menu and then use this style to change. So this is where you can change it from single shooting mode to high speed, continuous, low speed, continuous longer self timer or a shorter self timer. So this is again burst mode is where you can take multiple photos at once such a shooting sports when you see cameras just shooting continuously to try to get the right shot, so those are some of the main buttons that you will need to know on your camera. So let's go over. Some of the other things that you will see on the top is a hot shoe, and this is where you can place an external flash. So instead of using the camera's flash, you can get a better flash where you can rotate it around. And that goes in there. And you can also plug in different things for video as well. On the right side, beneath your hand grip, you will see this little slot that you can open up, and this is where your memory card goes. This 70 shoots with CF cards, so there is a little button here that allows you to release it, and then you can just plug it back into the slot. Close it up on the bottom. You have your battery slot. Open it up again. There's a button that you take out. Put it back in. Here's a little screw hole where you place a base plate for a tripod or some tripod. You screw this directly into the tripod itself. And beneath this little plug thing is a slot for the vertical grip where you can actually ADM or battery power to your camera so it lasts longer. On the left side of the camera are a few more slots that have to do with a microphone so you can plug in a microphone a little USB out. HTM my out. So if you have an external monitor, you can plug in there and over here you have a little plug for adding in external remote control so that you can take pictures without even touching your camera. And lastly, on the back of the camera this is very important is the viewfinder. This is where you looked through to see what you're going to shoot, and on the right side is a little dial, which you can change depending on your vision. And if you're nearsighted or farsighted, you can sort of dial this back and forth to make sure that what you're seeing through the View finder is clear. So I know this is a lot of stuff, and you might be feeling a little overwhelmed right now. you might have to replay this video or the last one about the Nikon one more time to really get a better grip on all the different buttons and the anatomy of a camera, and your camera might be different, so you might have to go through the manual yourself and compare. See where your image review button is, where the delete button is, how your camera works. Thanks for watching, and now we're going to be moving into some videos about the menu.
23. Detailed look at a smart phone & our favorite apps: So now we're going jump into the smartphone and this will change to paying on the smartphone you have. But this is the iPhone six and a pretty popular choice. Um, it's one my favorite cameras. So I just wanted to go over some of the key features. First off on the left side. Here, you have your image review so you can go through and see what photos you've taken. This is your shutter release. Technically. So that's where you take the photo. You can then see that past photo come up in that thumbnail section and another option for your shutter release. Bine is your volume button up here and it's the volume decrease and you click that and it takes a photo. And this is a great way, you know, to take landscape photography. Maybe you don't have a free hand, and you're able to hold your camera just with one hand. So you go and do that and you take a photo. This is also getting into the selfie world a great way to go and take a selfie. Down here, you have different scene modes. So this is putting a filter on your photo. Typically I take the photo normal and then later on I'll do any tweaking to it that want on the right side. Here you have your flash on or off. You can select auto you conflict on the next year of HDR mode, which is high dynamic range and really, this is a pretty complex thing, but more or less what it does is it gives you more information in the highlights. More information in these shadows. I typically just have this on because I think having mawr image quality having more information is always a good thing. Next you have your timer button and you consent for 10 seconds, three seconds or off. And that's just to allow yourself as a photographer to get in this shot or just to have a countem. And next we have the camera flip, which allows you to take great selfies and, you know, see what we're doing over here. Those air. So the key buttons that you see here the next thing to get into his you know, you have photo video, you have slo mo. Now you have time lapse, which means it's going to take a photo every few seconds going the other way. You have square mode. This is obviously for Instagram. So you know what's gonna be in your frame and then you have panoramic, which is something will get into later on but allows you to take a series of photos and stitch them all together. This is really one the best cameras out there in terms of portability and to serve the ease of use, and that's a smartphone.
24. Practice: Play with your buttons!: everyone, it's Phil back with another practice session. In the past few lessons, Sam and I covered some of the basic buttons on a typical camera, and now it's time for you to go out and play with your own buttons because maybe you have the same model as us. Maybe it's a little bit different, and you really have to know your camera. You have toe really practice with it. So you feel comfortable quickly going into the menu, pressing your shutter release. But in turning on and off auto focus and all the other buttons that recovered in the section so far, so have fun with it, and we'll see you in the next lesson.
25. The Nikon Info Button: everyone. So now we did cover most of these buns in the last section. But there's one thing on the Nikon that is more of a screen thing. So I wanted to wait. It's this little info button down here, and when you click that similar to the cannon, you get all this information on the back. And personally, I always shoot with it off. But you can go in here and see OK, you know, my flashes off was my shutter. Speed was my f stop. Ah, eso rating. You know what is the image quality? So to go in here, you then have, you know, the side buttons. You have your quality I s o Y pounds. If you click quality, you can actually see they are able to select. You know, what do you want to shoot on? And so, as I talked about raw of 20 photos, raw and basic 19. Um, but then, like J. Paige finds 76 you can see how much space these different formats take up. Additionally, here you can go to your eye so and select what I celebrating. You want, you can see, you know, so graze everything else out and focuses on eso. From there you can see the White Mountains button, and you can select different options for white balance. These are all things will get into later. Whether it's, you know, cloudy or in your house. You know, custom setting Kelvin meetings. It's all stuff we'll talk about in future classes. You're also able to click this button again and then get into some of these other Dittemore detailed settings down here. Um, you know, movie quality. Do you want noise reduction for your eye? So grain, Ah, law, additive and things. You're also able to sign buttons on the front of your camera that are just function buttons . They're things that are customizable and it's fairly advanced. But this But this little button here, you're able to do so much with and really, you know, get a law information of your camera again. It does take more power, so typically, I keep it off, and a lot of things back here are actually the same as up here. It's all the same information just, you know, a little bit larger, and you ableto control a lot of features. So that's the info button. This is something new to Nikon, so not all night cons will have this. It's also a little bit different from the cannon back, so I again recommend going to year manual and looking at the different options there.
26. The Camera Menu - Let's go through it together - Nikon: so looking at the menu, you really just need to know that based on your camera, this is gonna be very different. And, you know, in this there's sort of based on what you're trying to do, different menus for each thing. So playback menu is really about the images that you're saving and how you save them. Shooting menu is more of the features of when you're actually taking photos, your custom settings, different things that you're able to custom in your camera. The set up money menu is really, you know, some of them or general information and things that you don't need to be changing every single day. But you can go and get some great information. You know, battery life information and different things like that, um, retouch menu and my menu. You can create your own menu, and then you have the retouch menu, which really is editing your images and something that I hardly ever use. I typically always do that on my computer, but sometimes on the go it it is useful. Um, and as you can see you serve, how this have the side menu where you go through these different features and then you can go into each menu and there's a lot of stuff here. I mean, you can just see there's so much information, and I highly recommend going into your manual in depending on what you're looking to do. You know, finding Where is it, you know, where's your image size, razor image quality, You know, going down you what is managed picture control. You know each of these will go in, and there's more and more features to Dio, and this is a really a great reason to get a DSLR is that you have all these features. You have all these options, and even at a more basic level, you can do a lot with your camera. So take the time to go through your manual to go through your menu and see what options are there. You know there's some things that before you go start shooting, you'll want to know how to do them. There's other things that to this day I've never used, so just explore you learn what's in there and have fun
27. The Camera Menu - Let's go through it together - Canon: So, lastly, let's dive into the menu of your camera, and I just want to show you how many options there are and really diving into your own manual going online. Figuring out what menu settings you have might be the best option for you to really get comfortable using your own menu. Scrolling through this menu, you will see different options for how your camera takes. Photos. Image Review. Protecting your images formatting your card. A lot of things we already talked about also basic camera options, which don't have to do with taking photos, but it's like setting the date and time of your camera itself. The last thing I want to mention about the menu is that going through this, you will see that there are just so many options. Some of these things I never play with, and I've never even customized myself because it doesn't really affect how I take photos. So the last thing I recommend is going through your own men. You see the different options, and if there's something that is confusing or you think you want to adjust, go into your manual and find out what it does. And lastly, if There's anything in your menu that you see and you're confused about, and you can't figure out from your manual or searching online, let us know and we'll get back to you with a future lesson.
28. Changing Image Quality on a Nikon: Hey, everyone. So now we're gonna talk about how you change your file formats, and this is something we talked about in the past. Section Robbers J. Paige. And if you go down here in a Nikon in your shooting menu, which looks like a little camera, you have something called image quality. As you can see, it's currently on raw, and as you go into this, you can select all different types of things, whether it's just shooting raw, gesturing a different type of J pegs or shooting raw and J pig. Um, all of these take up different amounts of size. About all of these also have different image quality. So, personally, I like shooting on draw because you get the most information out of it. But J pig Fine and J pig normal actually have a lot of information in there as well. Now, the main reason that you'd want to shoot raw Plus J. Paige is that you wanna have all the information, but maybe you need to get a client or be able to show someone the photo much quicker. And the way that you do this is by shooting both and really, you need a lot of memory space to do this because the raw and the J pig will take a lot of information. But something like raw plus basic is a great way to quickly show your client. Oh, here, let me send, you know, through Dropbox or through we transfer all the photos from yesterday, and you can show them just the J pig basics and then based off of the photos they like most , you can go to your raw file and doom or editing, and you just have all that information in there. And so that's how you select your image quality.
29. Changing Image Quality - Canon: Okay, so now it's time to dive into the menu of a cannon and show you some of the basic features that you will need to know to start shooting photos. One of the main things is choosing your setting or the quality of the photos that you're shooting. So to go into the menu, you just click this menu button so you'll see here at the top sort of tabs within your menu . And using the dial on the top right of your camera will allow you to scroll through that menu in each of those tabs. Down below are an assortment of other options, and using the dial on the right side on the back of your camera will go through those. So let's talk about image quality, and that's in the first tab and the first item under there. So just scroll down there and to dive deeper into each of these settings and change them, you press the set button. Then again, you can go ahead and scroll through with the dial. So, as Sam mentioned previously, you have different options for qualities such as raw and JPEG and with in Rock and J pay you have even more options of how big of a raw photo and how big of a JPEG photo you want to shoot. So to change how big the setting is, you just scroll through with the top right dial. And as you scroll through, you can see how big the image actually is and how many images left you have so up here in the top, right, you see, with basic raw, which is the largest file possible. You have 30 images left by school to medium raw. It's 43 small, raw, you have 60. You will see this little dash here on the left. And if I scroll over there, that means that I'm not shooting in raw settings at all. So when I take a photo, there won't be a raw image saved to my camera, and you might want to do that if you're just out and about and you don't really care about editing your photos. But I always shoot in some sort of raw setting down below. You will see your J peg settings, and so it's raw on top plus J Peg. And as Sam mentioned in his Nikon video, you can shoot both raw and J peg images at the same time. And the reason you would want to do this is so you can quickly send JPEG images to a client , for example, rather than having to edit your raw images toe look good and send online. And so, just like in the raw settings, you can scroll through these. But instead of with the top right dial, you use the dow on the back, right? You can go from large two, medium to small, and on the very far left, you see this little dash and again, this means that you won't be shooting a J peg image so you can just shoot in raw without JPEG. So that's the raw and J peg menu and how you changed the quality of your photos being taken . And once you're done, you just press the set button and there you go. That is how you change quality on a cannon
30. Picture Styles on a Canon: another option that we have in my canon seven D are different scene modes, and that's this little but in here with it looks like a wheel of rectangles, and you practice that it shows up as picture styles. And this is basically different options for how your camera reads light. And so, for example, you have a portrait mode, landscape mode, neutral, faithful monochrome. And this is just changing the way that colors are seen and so monochrome that's going to be a black and white photo. Or Canon has figured out that using portrait mode is nice win taking pictures of somebody because it makes their skin look better again. Landscape mode might change the way that landscapes look. Make colors more vibrant and sharp. And lastly, you have these customizable options 12 and three. This is very advanced, and you'll have to actually go online, download them and import them into your camera itself. But I have two of them Sinise style and marvels, which are two options that I use a lot when shooting video, because it gives you a sort of a very neutral look so that you can go in and color correct your images later. So basically, though, picture style will affect the way that your colors look and it might be something that you want to play around with.
31. Image Review on a Nikon: art, everyone. So we've talked about the image review button, but let's get to some of the finer details. So first off you can see what the image quality was. You know? How big is the picture? What time it was date stamped. This is all general information that comes up when you look at your photo, you can also see the image count and how many photos you've taken. So use this little guy on iconic. You can go through and you can actually see here that this was a video that was video. And this is a photo. So once you've taken a photo, you're able to use the plus and minus two. Really Check? No. Did I get it in focus? And a big thing to understand about this setting is that as you zoom n, you're losing a lot picture quality, so that actually might look better on your computer screen. But you can generally tell like that's not in focus, and the grass behind it is more clearly in focus. So as you zoom in, you'll get this little yellow square and it helps you serve sea where in the image you are . You also able to use this little dial here. So while left and right serve goes between the different images. When you hit up or down, it'll show love this metadata. And this is telling you, you know, what was the white balance? Shutter speed? F Stop eso You can see the settings where it was saved a lot of the information of the photo here, and it's a great way to see Oh, well, I took that photo. No, the shutter speed. Maybe next time we'll try something different. It also gives you information of the photo. How much data is in there? Sort of more complex stuff there, But we'll gettinto all these different features in future things. Um, if you get stuck on this, just know you click down, you go back to your normal photo can also click up, does the same thing. And that's the image review button
32. Image Review on a Canon: as we went over with the camera anatomy. We talked about image review, but I just want to talk a little bit more about that and how I use it. So once you have taken a few photos or one photo and you want to sort of review how it looked, make sure that it was in focus. It was composed properly. You just press this little play button on the back, left hand side of your camera. This pops up the image and gives you a little bit more information about it. And so you can see here this great photo of my cousin and my fiance is about when we were traveling around in Switzerland. On top, you can see information about the shutter speed and the F stop or aperture that this photo was taken at and the number of the image on the CF card. If you want more information, you can even press this info button, which brings up the quality of the image. So this was shot in raw plus a small J peg president again, and it gives you even more metadata the size of the image itself. The pictures style that we just talked about in the last video. I s O the type of focus that it had even the date and time that you took this photo. So give you a lot of great information pressing it again. You can get out of that menu and lastly, you can zoom in and zoom out with this plus and minus buttons so zooming in, you can see was it in focus and moving around with this joystick, you can sort of navigate the image itself using this little icon in the bottom right hand side, which shows you where in the image you are, in case you get lost zooming out, you can zoom out to the full image and then even zooming out further. You get a list of all your photos, you can zoom out and kind of scroll through faster, using this dial on the top, right, zoom in again to find a particular image and get more information about it. And so that's image review
33. Formatting Your Camera on a Nikon: So now let's say you've taken your photos, you've put them on your computer, and now you're putting in a you know, a card that you have the photos saved, but you need to delete that card or you need to format. That card is so the terminology that people use. So you're going here and, you know, within ni cons, you have your playback menu shooting menu custom and you and then you have your set up menu and you're going to hear. And at the top here you'll have format memory card. You go in there and you select which slot Some cards only have one slot, and you say OK and says all images on memory card will be deleted, okay, and you have to say yes or no. Um, once you do that, it will take a moment to format the card, and then all your photos will be erased. But you'll have a fresh memory card and you'll be able to go and start shooting. Now. One of the scariest things is that once you delete them, they are gone. And so you have to make sure that you have them on your computer. Maybe you have a backup drive, you know you've already done that. You know your photos are safe, and then you can go in here and format that memory card. Another important time to do this is that if you go from a Nikon to a cannon or you use that memory card for some other purpose, you might have things on there, but your camera won't be able to read it. So make sure that whoever's cardio using whichever card you're using, that you can format it and delete everything on there. And that's how you format a memory card.
34. Formatting a memory card - Canon: one other very important thing to know on a canon is how to format your card. So if you go into your menu and scroll over to this first yellow tab with a little tool icon, you'll see down below format. If you press set to go into a format, so we'll say format card, all data will be lost. It will show how much data is being used on your particular card, and it will have two options. Cancel and okay, scroll over toe. Okay and press set to format your card that will reset your card and everything will be lost. Or like I want to do right now. I want to cancel because I don't wanna delete all the photos from this car. Get. I want to make sure that they're on a computer, and that's my last piece of advice for formatting cards. Make sure that whatever is on your card is delete herbal and that you have it back up on your computer or an external hard drive, and that's how you format your card.
35. Practice - Choose your settings!: everyone, welcome back to another practice session. This one is about diving into your cameras menu. In the last practice session, I asked you to play with your buttons and get familiar with whatever camera you have. And in the same vein, I want you to check out your cameras menu and really get familiar with it. So grab your cameras manual and review the past couple of videos to see what Sam talked about and just get familiar with the different settings. Our in your particular menu. Have fun with it, and we'll see you in the next video.
36. Conclusion - what did we learn in this section?: everyone. Welcome to the conclusion of this section on the cameras, anatomy and settings. Salmon. I covered a lot of stuff in this section to get you familiar with the camera, and hopefully you've been playing with your own camera so that you know where the buttons are and what buttons you have, and that you dove into the camera menu and kind of know how to change your settings and set up different things. And now that we're familiar with the cameras, anatomy and settings, it's time to move forward and take it a step further. Get more into the art and creativity of photography. So let's go forward and move on to the next section.
37. Introduction to the Drop Auto section: everyone. Welcome to a new section Drop auto, Learn how to shoot manually. This is a huge section that I hope you're really excited for because we're going to be covering a lot of the basics. Basic knowledge that you need to take amazing photos. So what will we be learning in this section? Things like exposure aperture, I s O shutter speed. You might not know anything about these subjects. And that's why you're here in this class, because we'll explain it thoroughly so that you understand we'll be talking about focus, making sure you know how to get things and focus, but also using focus creatively to get amazing shots. We'll be talking about using your camera's light meter to get proper exposure. Will also be covering some situations like shooting fast objects, shooting in low light and even shooting at night. So these are some really interesting topics that I hope you're excited for. And now let's hand it over to Sam
38. What is exposure?: So today we're gonna be talking a lot about dropping the auto setting and going into manual , and the most key factor of this is to learn about exposure. So what the camera is doing is it's taking an image. It's taking the light that is reflecting off of everything out there, and it's controlling how much light comes in and hits your sensor. So there's two factors of us. There's what's hitting your subject. What is on the thing that you're trying take A photo of you can see right now is light hitting the side of my face. There's less light here, but there's still light. It's still reflecting off of something. The next factor is how you control the camera. How do you say how much of this light enters your camera and make it so it's exposed correctly. If you are over exposed, you have too much light coming in and you'll get a white image or things in your frame will be white whiter. Ah, if you're under exposed, you end up crushing everything. You end up getting a lot more blacks. You end up losing a lot of the information, and it becomes much more contrast. So basically exposure is controlling how much light is hitting your sensor? How bright is your image? How contrast E is your image? So they're three tools within the camera that control how much light enters and hits your sensor. There's the F stop shutter speed, and I eso will be covering these in the next few lessons.
39. What is aperture (aka. f-stop or iris)?: so the first step in controlling exposure is through your lens, and the only thing within the lens actually controls the MAV light. Entering is your iris or F stop or aperture. You'll hear all three of these terms thrown around. So what that stop does is it allows you to close down to reduce amount light coming through your lens. Now this has a lot of different factors. Many different lens makers have different techniques of doing this, and it's really a pretty incredible science. So in Muslims is on the front. Here you'll have a number that says one colon and then number, and that number is the fastest or the most open that that lens can go. Typically, these numbers go from 2.84568 11 16 22. Each of these numbers correlate to a way of reading light, and what it is is that with each number you're effectively cutting the light in half. You're reducing the Mount light coming in, and it's a little confusing because sometimes people say, Oh, let's stop down and then you're going to a higher number. But really, what you're saying is you're reducing the mouth of light coming into your lens. The easiest way to think of an iris is to think of your own eyes. Actually, the pupil is one of the most incredible lenses in the world. If you go outside and look into a friend's eyes, you can see that their pupils will be very small. You go inside the into a dark room, let's say, and the pupils will begin to open there, allowing more light in allowing you to see better in that dark. So although that camera lens is very similar to your eye and you're able to reduce the amount of light coming in, there's many other factors that come into getting a good exposure through our pupil. You then have the brain with the most sophisticated things in the world. And for a camera, there's a lot more that goes into getting that broad exposure. So another key element to your iris or your F stop is that as you open up as you have that lower number, your depth of field gets much less so, let's say, dishing out F 1.4. So if you look at this image, it's shot out of F 1.4. The depth of field is incredibly shallow, and although you're able to see in a very dark situation, it's really hard to get everything in focus. On the flip side, if you go down to F 16 much more comes in. Focus on your depth of field becomes me much greater, and this is really where the F stop affects your image, it says. How much is gonna be in focus? And how difficult is it going be for you to get what you want to be in focus. And while we're just touching on this here, we will be coming back to this in talking about how focus affects your image. How do you control that? And what are the other factors when getting things in focus? There's a reason that people say it's all about the glass. This is the first thing that light travels to and ultimately gives you the look that your camera is going to be seeing
40. What is shutter speed?: the last section we talked about the iris and how that controls how much light comes through the lens, and the next step that the light interacts with is the shutter. And what the shutter does is it allows light to actually hit your sensor because as you're looking through your viewfinder, you're seeing the light coming through the lens. You're seeing how much light there is. But it's the shutter that says how long that light will hit your sensor and expose to get an image. So you might have heard the term shutter speed and what that is. Is it the number given to how quickly the shutters actually moving? So let's say you're shooting Ah, 18 the second. That's pretty fast, right? The shot is moving up and down, but in terms of a camera that's actually really slow. And if you're holding it handheld, you might not get clean image. On the other hand, it's more typical to shoot closer to 1 250th of a 2nd 1 4/1000 of a second. And that's literally the shutter, moving up and down that quick. So shooting out 1/8 shutter speed is allowing more light in its, allowing your picture to be brighter, as opposed to a 1 4000 shutter speed where it's a really quick shutter and you're not allowing as much light in. The other factor with this, though, is that as you slow down your shutter, its possible that you'll start to get blurry images. Typically, if your handheld going under 1/60 of a second your hands, it's it's hard to keep it study and you'll start to get blurred images that 1/30 or blow that even. And so, depending on your situation to paying on how much light there is, you change your shutter speed. You decide. Oh, well, I want to shoot out enough. Four. So now I'm gonna, you know, crank my shutter speed really high because there's a lot of light outside. Or maybe you don't have any light, and so you're making your shutter move a little bit slower, allowing more light in. It's really important that you test that you take a few practice shots and see what you're capable of doing. Personally, I always like shooting out 1 100 I think that's really safe. Even if something's moving quickly, it will be crisp and clean and not blurry. But sometimes you're in a low light situation and you need that slower shutter speed. And so you have to find a way to stabilize your camera and get a shot that's not too blurry . This isn't to say that you shouldn't use slow to shutter speeds. There's a lot of ways that you can use it created creatively and actually get some really cool effects with it. One of my favorites is seeing the car lights at night. You have these long streaks of light moving across the freeway, and this is all done with a slow shutter speed. But ultimately you have to test. You have to go see what 1/30 looks like. What does one second exposure look like? What does a 32nd exposure look like? And this is the best way to go and see this for yourself.
41. What is ISO?: so after Iris and shutter speed, the final aspect of exposure is the isso or what they used to call s a The also has changed over the years, though, And what it was once for film has, in a way, trends translated into digital, but slightly different now. So the I s o were s a became a rating system to say how sensitive a piece of film waas now back in the day film was made of crystals and they were actually reacting to the light chemically, and you would go through the whole process of exposing that image in the dark room and securing that image into the film. Now 100 I s o meant that had the film had very fine crystals, that you'd have a very clean image. But it would also require much more light to expose that image on the other side. Let's say 1600 speed I e isso meant that you had much larger crystals and that you could take photos in much darker situations. But you'd also have much grainier image, would be able to see these crystals in the film, and a lot of people say that they love film because you had a texture. Because those crystals were random, they created a different look to them. Today you have the ISO principle in digital photography, but it's all created from a computer. It's all ones and zeroes, and you grit certain looks that you could only get with film that you don't get in digital nowadays. So today, in modern photography, digital photography, we still use the isso rating system. It's the same numbers. Ah 100. I so means that it will be less sensitive and require more light, and 1600 Aiso means will be more sensitive and you won't need as much light. The really exciting thing about today, though, is that cameras are going much more sensitive and you're able to shoot at 326,400 one cameras shooting 400,000 I s O and getting a fairly clean image. Dumb cameras can see better than our eyes at night. So as you increase your eyes, so in the digital age, you still have to worry about that grain, the same as you did in film, but slightly different today because it's a computer reproducing an image that isn't actually there, whereas the crystals were reacting to actual light. This is all dependent on the camera you're using and how it reads light, how it reads grain, how it reproduces grain. And ultimately, the only thing that I can tell you to do is go test. What is your camera capable of doing? Some cameras. 6400 still looks great. And you have a nice clean image. Others 6400 will look like red, green and blue dots. So another factor in this is your sensor size in How sensitive can your camera actually get ? Because although the I s a ratings always the same, a full frame camera versus a crop sensor camera is gonna have radically different sensitivities. What the full frame sensor allows you to do is have more light coming into your camera and a greater area for that light to expose on. When you look at an iPhone, for example, you have a tiny sensor in there, and it's pretty incredible images you can get. But the ultimate downfall is when you go into night time and it's really hard for the camera to see at night. A professional camera, though, like the Nikon D 800 has such a large sensor that you're able to see in very low light situations. So remember that although the iris and the shutter speed affect how much like come in your eyes so rating is going ultimately affect how sensitive is your camera? The best thing you can do is go in practice and see what your cameras capable of what I a celebrating. Do you prefer? But what do you okay to sacrifice? When is grain okay? And how sensitive are you willing to go?
42. What is the exposure triangle, and how does it work?: So now that we've talked about the exposure and was the iris, what is the shutter speed and was the I? So the real skill in a photographer is to take all three of those and put them together. Some people call this the exposure triangle the three main elements that affect how you're gonna expose your image when it comes to exposure. There's no set rule on what you're supposed to do. This is really something that you, as a photographer, get to decide what f stop Do you prefer what shutter speed? What I s o and dependent on the situation, you'll find yourself preferring a certain look to another. I personally think it's easiest to say, Oh, well, it's kind of bright outside, So I'm going to shoot I I s 0 100 because I know we'll have enough light for that and then I'll decide Well, I want to shoot at four, let's say And from there, whatever the shutter needs to be all just accordingly. There's other times, though, that say I go into a dark room and I'm like, Oh, man, I need I need all the light I can get. I'll take it to the highest I so that I'm comfortable shooting at Let's say I so 1600. And then I'll go down to, Ah, 1/60 shutter speed because that's the point where I know I could be handheld and not get too much blur and I'll open That stopped to where it needs to be and dependent on what my image looks like. I'll take this shot. Look at it, say, Oh, I need more light. Okay, well, I guess I'll take the f stop all, open it up a little bit more or we'll make the isil just a little bit more sensitive. Um, a big part of this is to practice. Take test shots and then import to your computer. Look at the image on a computer screen and see if you're able to edit the metal. See what you're able to do in the post production. That's a huge step in this. So when it comes time to shoot, you really need to be thinking about these three factors, and sometimes it's best to set your eye, so sort of, forget about it. Focus on shutter and aperture, or try taking one shot at eso 102 104 108 100,000 2000 and then later go look at them. Go see what they look like, what's the difference and decide what you like. Then try shooting at every F stop. This is really the best thing you can do with digital photography is take thousands of photos, just practice, practice, practice, see what you're I likes and find the exposure that's right for you.
43. Practice - Set your exposure for 3 scenarios!: is that time again is a practice lesson Sam has talked so much about. You really need to get out there and practice taking photos, practice getting exposure with aperture, changing your iris, changing your shutter speed, changing your eyes. So that's what we want you to do. So in this practice session, go out, take three pictures in three different locations and try to get them properly exposed. Once you have done that, you can post them to the U Timmy discussion boards and the rest of the students, and Sam and I will check them out and tell you how you did.
44. What is focus - depth of field explained: So now that we've learned the whole exposure game and the exposure triangle, the next step is to get focused. So it's not just about what's clear, sharp or crisp in your image, but it's also what's out of focus. And how does it fall out of focus? So when it comes to focusing, there's two main things that affect your focus. Plane or what is in focus and what is out of focus. The first is your F stop, and that is what we've talked about, how much lights coming in and how shallow of a depth of field do you have. The other factor is your lens and a telephoto lens or a longer lens will mean that Lessing's are in focus and that you're really honing in on a single object in making that one thing be the focus of your image. On the other hand, you have a wide angle lens, and this typically means that more things will be in focus, you seeing Ah, greater space and everything sort of there in front of you now, for me personally, when it comes to photography, I like to shoot things that are very grand, like a mountain range, Let's say with a telephoto lens now, typically you go up to the top of Mount and you shoot wide angle lens and you're able to see everything. It's really nice because you get toe, you see it all and it's all in focus, and it's all there. But when you throw in a telephoto lens and you step a little bit farther back, you're able to really see the details and have some things. Fall of fall out of Focus may be just the tree lines and focus, but the mountain in front of it's out of focus. And this is something that really you have to see the images to know because, like this image shot with a wide angle lens, everything's in focus, and you can clearly see that. Now, let's say you shoot that with a long lens at an F four. Still, you can see how much shallower that up the field is. So as you can see from these examples, focus is to have a creative process and really deciding what will be in focus. How falls our focus is where you become a photographer and get to decide what your image will look like in the next two lessons will be talking about autofocus and manual focus, because although it's great to think creatively, sometimes you need the technical skills to make sure you get the shot.
45. Getting in focus using the auto-focus mode: Okay, so now that we've gone over focus and what it is and some of the things that affect it, we're going talk about auto focus and manual focus of the two ways that you achieve a nice , clean, crisp image. So what a focus is more or less your camera's ability to sense what is in focus and upon pointing it at your subject, it automatically finds that focus. Now there is a little bit of work you have Teoh slightly hold down your shutter button. You typically hear a beep, which some came as you can turn off on, and it tells you that it's found something to be in focus and dependent on the camera. There's many different ways that this can be applied or used, or even settings that you can choose on how you want to use your auto focus. Typically on most cameras, where you'll find the auto focus or manual focus, election is here on the lens will typically say F and M f and you just like between the two and just like that, you are now on automatic focus. Some cameras also have the selection on the camera itself because they use older style lenses, but typically today, you'll find them on the lens here. So one Syrian automatic focus. There's a couple of factors that come into where it's automatically gonna focus. Where do you tell it to focus or where does the camera? I assume you want things to be in focus. So the cameras like this. The Canon five D Mark three have 61 points across your frame that are constantly served searching and figuring out, you know, is this the thing that's supposed to be in focus? Typically, it'll be whatever is closest to you compared to everything else, which is farther way, um, you're also able to go into the menu settings and select manually. Oh, well, I only want to use nine points of focus, or I only want, you know, this specific box to be the place that focuses on. So whenever I take a photo, whatever is in that one point, that's where it's going to be in focus. This camera technology is getting advanced every single day. Certain cameras air faster, seven cameras are slower and really it takes a higher end cameras to get the really fast, really sharp auto focusing capabilities. So while cameras like this DSLR is, you're able to use autofocus or manual focus, function a lot of the times on point and shoot cameras or even smartphones. The focusing capabilities becomes a little bit simplified. And it's not to say that's always automatic. Focus a lot of the times it is, but there's new technologies in face detection or being able touch on the screen and select where you want things to be in focus. There's also semi manual auto, um, features that you can do on some point and shoots that are actually pretty pretty fast. And the hardest thing is that it's the computer guessing what you want to be in focus. And at the end of the day, manual focus is really where sort of the creative I comes into play and really honing in what you want to be in focus. But as of now, these cameras, the technology is pretty incredible. What you can do with automatic focus, it's super quick. So if you're a sports game, where if you try and catch something on the fly, um, if you consent the settings right, you'll be able to get your picture clean focused every single time
46. Getting in focus using the manual mode: So now we're going to have to talk about manual focus, and this is really one of the great features of a DSLR is that you're able to choose what you want, be in focus. So right here, where it's the FMF. You just switch it over to the MF selection, and from there, as you hold us down, nothing's gonna happen. You have to use this ring and find out where's what is in focus and how far away it is. Most lenses here will have a a reading of meters and feet, and so, if you can actually say, Oh, that object is five feet away from me. You can go here to five feet, look in and when you know it's in focus. This is something that takes a lot of time and service, a real skill set that is not the easiest thing to learn. One technique that lives have adapted is a mixture between autofocus and manual. Focus all going find sort of my subject and see how far away it is. Use autofocus function, and from there serve, hone in with the manual focus to really decide what I want to be in focus Or sometimes I'll just get distance reading of Oh, that's that far away, and that's that far away and then from there, and serve no where my safe zone is for focusing. Some cameras allow you to do auto manual automatically so you don't have actually switch between the two and you can go in, find your focus, and then maybe you won't come a little bit closer a little bit farther away. Um, I really highly recommend testing focusing on a telephoto lens so something larger than 50 millimeters cause when you're in a wide angle, it's harder to tell what's in focus cause more or less. Everything looks semi and focus. But as you go to those longer focal links, you'll be able to really select out in pinpoint exact things that you want to be in focus. Another great way is to get really up close and personal to things and so role. You're focusing over it, and you can see the focus plane moving and get some really cool shots that way. Remember, you know, auto serve mechanical. It's the computer. It's how fast is you came out. Capturing it Manual is really just knowing how far away. Something is measuring it out and then checking 1/5 and focus so best of luck and happy shooting.
47. Using your camera's light meter: So the final tool in getting your photo exposed correctly and getting in focus is your light meter. And this is actually really great tool that a lot of film cameras 35 millimeter film cameras would use because it's a way of letting you know when is your photo exposed correctly? And you can do this without ever taking a photo, even because back in the day of film you didn't want to take 10 test shots. You could only take that one shot, and the light meter was a very important tool to make sure that you're exposed. Some cameras. You look at the light meter from the top here and there will be a middle mark and then a plus one plus two, plus three to the right and then a minus one minus two minus three to the left. Other cameras. You have to look through the viewfinder to see that, and some you can actually see on this back screen here. So the way that the light meter works is that it's basically telling you how overexposed or how under exposed your images, and simply by looking at it, you can no oh, I need to make my shutter speed a little bit faster or I need to open up my f stop. So as you go to take a photo, you conserve. Click the Prepa and I'll show you actually underneath. Where is your image right now? Is that over exposes under exposed and without even looking through the viewfinder? I can tell I'm currently too overexposed, which means it's two stops to F stops overexposed. So if I go and stop down, I'm now exposed, and that's all without even looking into it. So now I gotta take a photo, and it's nice exposed. So although the light meter will tell you when your images in the middle when it's properly exposed, that's not to say that sometimes you don't want it to be overexposed or under exposed. Sometimes when taking a photo of a landscape, you'll have some buildings or something that's really deep in the shadows, and it might be telling you it's under exposer. That's too bright, but then you go and take a photo and your sky looks great. But there's other areas in the image that are really dark, and that's no bad thing that serve your creative choice. But ultimately I wouldn't. You go and test see what it looks like when it's right in the middle. Maybe overexpose it, see what that looks like under exposing, Um, it's really useful tool. And as you get to know your camera better you'll be able to know. Oh, well, I'm taking a picture of a tree. I want to be a little overexposed because I know those shadows air going get a little too dark for me. So now that you've learned Will light meter is I would say that you should go out and practice. You don't take a picture where your minus two in your exposure. Take a picture away, your minus one and your picture. Take one way or plus three in your picture and see how those images differ. Now you might see that oval ones plus three. My camera can't handle it, and it's completely white image. Or you might see that Oh, plus three actually gives a really cool factor. I really like that look and that way, you know, the next time you're in a scenario where you're shooting and you're like, Oh, it's out plus too well, maybe we'll make even a little bit brighter and you go and take that shot and it comes out looking great again when shooting Digital test has test. But when shooting film, the light meter will become your best friend. I'm knowing whether or not your images exposed and whether or not you should take that photo.
48. Shooting fast objects: So now that we've talked about how to expose your image in how to get things in focus, we're going talk about a couple scenarios of how to put these really to use. The first subject we're going talk about is shooting fast objects and what it takes to get them in focus, but also exposed correctly. Typically when shooting fast objects you want to use of a fast shutter speed. What this allows you to do is capture the exact moment that that object move past you. If your shoulders to slow the object will move faster than your cameras able to process it , you'll get a blurred image. The other factor is the F stop. Typically, you want to stop down a little bit, maybe a F eight F 5.6, because what this gives you is a wider depth of field and more of a chance to capture what you're trying to take a picture of in focus. So one issue that does come up a lot of times of shooting fast objects is that first off your shoulders, moving really fast and you've decided to stop down your F stop, meaning you need a lot more like. But if you think about it, most times you look at a football game basketball game, extreme sports outdoors. They always have a lot of light. They always illuminated very brightly, and you know this partly is for the athletes, I'm sure, so that they can see the ball and they can see what's happening. But it also allows the photographers and for the filmmakers to get an image that you can see. But of course, the lighting won't always be what you needed to be. And maybe you'll need Teoh make that show to speed a little bit slow or that f stop a little bit more open, and the best thing you can do is practice and take a couple test shots and see what you're able to come away with. Sometimes you can get really great results from trying something new.
49. Practice - Taking pictures of cars!: Hey, everyone, we have another practice session for you. Sam just talked about how to take pictures of fast objects, and that's what we want you to do. Go out to your street corner or if you have kids or pets running around, try to take a picture of them and make sure that they are sharp and everything is in focus . Good luck and we'll see you in the next list.
50. Shooting in low light: All right, So the next scenarios shooting in low light. Let's say the sun started just set and you're starting to run out of light or you're shooting in your house and you only have as many lights as there are available. So there's a couple things you can dio. The first is opening up the F stop Now, if you're not comfortable with it being too shallow of a depth of field, you know, try setting it at 2.8 1st From there you go to your shutter speed, and slowing down is really the most important thing to do. But if you go below 1/60 know that you're going to start to get some blurring your image so may maybe start at 1/60 and then you choose your eyes. So how sensitive can your camera go before you start to get too much grain? And this is really all about testing because you won't know until you put it on your computer and you see what it actually looks like Now. That's not to say that you shouldn't go to hire I e isso where you shouldn't go to a 1/8 shutter speed or something slower than 1/60. It's just that you need to practice. You need to see what it looks like and decide as a photographer. Do you like that? Look, do you like it when it has that grain? Do you like it with that shall load up the field, or do you like a little bit blur? Maybe your father's really animated and moving his arms about and you take a photo and he is still Chris, but his arms air blurry. And that might be something you're looking to dio. And as you become more experienced, you'll be able to know. Oh, I remember taking that one photo when it was in that low lighting situation, and now I'm in a similar situation and I want to replicate that same look and you'll know the settings to go in. Achieve that look. So remember that when it comes to low light photography, the three things you need to do our bring up your eyes, so make your sense of more sensitive. Bring your shutter speed to a slower rate so it's closer to 1/60 or even less than that, and open up your aperture. Goto a lower number, the lowest possible, most likely so that you have as much like coming in as possible. Go out there, practice in the low lighting, and it's all about your creativity, ultimately experimentation.
51. Practice - Taking pictures inside!: a fill back with another practice session. Today's challenge is to take pictures in low light. Sam just gave us some awesome tips on shooting in low light and doing a night photography, So now it's your turn. So if you're in a building inside where there's not a lot of light or wait till it's nighttime outside, try to take some photos when there's low light but still have them properly exposed. Remember, though, you don't have to be afraid of having things fall off into the darkness. It's about being creative, and sometimes you'll want a picture where most of your images dark, get creative, have fun. We'll see you in the next lesson.
52. Shooting at night: So while my favorite types of photography is night photography and there's quite a bit of skill, but also a lot of experimentation that comes with this. So let's say it's a pitch black night and you came and see what you're trying to take a photo of. But you know that there's something there. There's a couple things you'll need. First thing is the tripod or some sort of stabilization, where you can click that photo button and not move the camera at all, because the second you move the camera is when you get blur and you don't get clean image, which again, you know, do do what you want to do. But for me to get that clean image, I like a tripod. Second thing you need to do is have a long exposure, meaning have your shudder be closer to one second exposure or 12th exposure. Even 32nd exposure is something I find myself doing constantly. The next thing, you have to know what you're taking the image of. If there are lights in your photo, then you're actually maybe going need to close down your iris, maybe go to F 22 so that as you do, that long exposure, there's not too much light coming in your lens. And ultimately you have to test even in the moment of taking the photo you want to take. You should just try a 32nd exposure at F 5.6 with a nice 0 400 And if it's really bright, which sometimes it will be, which is sort of surprising because it's it'll be pitch black outside. Um, you, then no. Oh, I should go toe. So no. 100 maybe 32nd exposures too long. Maybe try 22nd exposure. But what you're able to do with this is we'll a see the stars, which I love be all car lights, Any moving lights. Airplane lights will become streaks of light covering your entire image. And lastly, any people moving will become very blurred or water moving will become so this blurred, effective it can look really nice, and it's something toe to experiment with. Another key element to this, though, is if you can't see what you're taking a photo of through your viewfinder, you'll need to take that photo to know what your frame is. A few things that I typically watch out for are where cars are because a lot of times cars , actually, I'd really cool streaks. But if you do it for only a second, you'll have a small streak. If you do it for five seconds, you have a long streak. If you do it for 30 seconds, maybe you'll have a few cars passing and you'll get different colors of streets, which are really cool in my mind. The other cool thing you can do is look at the stars and really expose for the stars. Try and bring them out a little bit mawr. But also be wary that if you have city lights in your image, those will affect you because their lot brighter than the stars are. All I can say for this is go experiment, Go see what's possible. And be sure to bring some friends, maybe some hot chocolate, a warm jacket because a lot of times it gets cold at night and you'll find yourself doing this for a few hours. I know that I do and enjoy
53. Conclusion - what did we learn in this section?: Wow, that was a huge section. We just wrapped up the drop auto section and I hope you've enjoyed it. Really? Lots of things from exposure that included the exposure triangle of aperture shutter speed I s O. We also talked a lot about focused. How do you get focused? But also, how do you know when you want things to not being focused? How do things fall out of focus? Then we talked about different things, like shooting fast objects and even shooting in low light or at night. I hope you enjoy this section. We'll see in the next one.
54. Introduction to the Stabilization section: everyone. Welcome back to the photo masterclass. I hope you've been enjoying these lessons. This section is all about stabilization. So we're gonna be covering things like using a tripod mono pod for stabilizing your camera . Then we're also going to be talking about using your environment and things within your photo environment to stabilize your camera as well as give you some tips for better handheld shooting. Thanks for watching and enjoy these lessons.
55. Tripod Tips: everyone. So today we're going talk about tripods and other forms of stabilization. The general just of this is that you have three legs. Try pod and you have some sort of head on tripod. This is to help you pan the camera and to tilt the camera. Um, attached to that is a quick release plate which you actually screw on. And that's what allows you to take it on and off the tripod fairly quickly. So there's a few different types of tripods out there, and they all essentially do the same thing. This tripod has a fixed head and you have this little leveller here that lets you know when your base is nice and even on the on whatever surface you're shooting on when shooting, you want to make sure that you dig your feet in tight that they're nice and snug in the ground that they're secure. You want to make sure that you're not putting your tripod like that because once you put the weight of the camera on, it goes falling over. There are other tripods out there that have a ball head here, and what that allows you to do is even If this is still slightly off balance, you can adjust just the head of the tripod to be balanced, So there's a few scenarios where I love my tripod and love using it. One of them is in the studio where you can take the same shot over and over again without ever having to touch your camera. Well, my other favorite uses for a tripod is night photography. Well, all of the times you have to go to slow shutter speeds. You have to do long exposures, and it's near impossible to do that with just your hands. The tripod allows you to check your framing. Look at what the photos that you're taking and adjust. There's a lot of variety when it comes to a tripod. There's many different. Yeah, brands, different amounts of money she can spend on these things. And at the end of the day, it's three legs with some sort of head, and depending on your needs, you don't need to go spend a lot of money on this. It's something that, as you get more professional as you get better gigs, there's many different ways you can use this thing. Make sure that you put in a nice level ground, make sure you screw in the base, pay really tight, and that's a tripod.
56. Monopod Tips: All right, so this is a mono pod. It's a little bit more nimble than a tripod, and you could move around a little bit quicker with it during events and different scenarios where you don't want to be putting all three legs down. I really enjoy using these. They help you rest the camera so you know, holding it all day long and make sure you're nice and level. There's a couple different stances that are fairly typical when using these one is in front of yourself, using your two lakes of spread out your camera here and you're able to, uh, get right in there and have a nice, stable shot. The other one is if you're doing a little bit more movement, um, sort of setting your feet more vertically, having this next year side. And that way you're able to move a little bit easier, opposed to when it's right in front of you. It's a great tool toe. Have they have all different types of makes? This one actually has little legs that you can place down, which I really like because it's just an extra little little stabilization down there. That's a mono pod
57. Other types of stabilization: Well, my favorite types of stabilization is using your environment. A lot of the times when you're going off doing street photography or even at an event, you'll find yourself wanting to move quickly. Just handheld. But maybe needing a little support and using your environment is one the best ways to do that, whether it's rocks to get a clean picture of the birds. Whether it's a railing along ah walkway, you can get really cool perspectives and angles by using what you're actually resting your camera on. I think that a lot of times people sort of get stuck right here, and you need to realize that if you're taking a picture of a pathway, maybe you want your camera on that pathway. Move in your environment. If you want, take a picture of a tree. Maybe you use the base of the tree as as your stabilization. If you're taking a picture of a pathway, maybe use a railing. You can add another perspective to your photo and make it much more interesting. So in shooting without stabilization, don't be too concerned about moving within your environment. Using your environment, getting your hands dirty, getting your knees dirty laying on the floor, even it's really a great way to find a new perspective and get the shot.
58. Tips for better handheld photography: So now we're going talk about handheld shooting and most of time. This is how I shoot. Your hands are fairly stable, and if you have a lot of light out, as we do now, you crank up the shutter speed. And typically, just like this, you're able to get a faily clean shot. So let's say it's nighttime and you're needing to open up your F stop. Maybe you go to a slower shutter speed, and you're starting to get a little bit of learning to your images. A great way to go about that is using your environment or using your strap, um, the most. Like a tripod. The most stable way is having three or more points of contact. So here, without the strap, you only have two points contact. You're automatically going go like this and be dipping when you hold it. Here, though, you get 1/3 point of contact, which is really helpful. Another way of technique I commonly uses putting my shoulders and and that really helps you get a nice, stable shot with that you tested yourself, but you can go down to 18 the second even and still get a nice, clean image. Granted, anything moving in your image will have a slight blur, which can look really cool sometimes when shooting with larger lenses. It's really helpful to have a hand on your lens. It's actually a, um, not only good for your photo, but it's also good for your camera. This lens as a lot more weight to the mountain, and it can cause damage if you're holding it just from the back too much. So you want to hands on there, get the support and be able to get right in there. Another great technique is using burst mode or continuous shooting. It's where your camera takes multiple photos simultaneously with this allows you to do is make sure that you get the shot, whatever the moment is, and also get it in focus. Get the right composition, not spend time. Take one photo. Look at it. Oh, go Take again. Well, maybe your subjects left already, so using continuous really allows you to get multiple shots at once, and ultimately it gives you more chances that one of those photos will be sharp and B the photo that you wanted to get. So as you get into professional photography. You'll find yourself using nicer, nice and lenses and a really great feature that some of these lenses have is image stabilization or, as an icon calls that vibration reduction. What this allows you to do is shoot out much longer, lenses so 200 millimeter and still have a steady shot. Because a lot of the times when you get really tight, you'll serve. Be moving a lot, and he's basically reduced that movement and make a little bit cleaner for you typically hear on the side you'll have stabilizer on and off, and it's really useful to actually go and test that and see what the difference is with it on and off. So I hope you enjoy these tips for handheld shooting. And ultimately the best thing you can Dio is Go get tripod. Go get mono pod. Go get a nice long telephoto lens in practice
59. Conclusion - what did we learn in this section?: I hope you guys really enjoyed this section on camera stabilization. Sam gave you some great techniques and tips for using tripods and mono pods, such as sticking those legs into the ground. If you have a soft surface, making sure that you attach the lens to the tripod mount itself if you're using a really big lens also using a mono pod for events or if you want to do something like wedding photography, monem pods are great for that. So my favorite tips that Sam gave you about shooting with your environment were really changing your perspective. So putting your camera on that rock down on the ground or using a railing up high or just using your environment so that you can get some more creative shots. And lastly, he talked about handheld shooting, so making sure your elbows are in so that you have more stabilization using the strap as 1/3 point of contact with their camera. Those are all great tips that you should really be out practicing. The only way you're going to take better photos and know the tools that you like is to get out there and practice with them, so if you have a tripod or amano pot, or if you have a friend that owns one of them, borrow it, check it out, rent one, use it and see what you like. Do you like a tripod? Do you like a mono pod because it gives you more freedom? Or do you want to get rid of those and just use your environment for better handheld shooting and getting more perspective? So as always, get out there, take more photos, improve your own photography and we'll see you in the next section.
60. Introduction to the Composition section: everyone. Welcome back to photography masterclass. Welcome to a new section on composition In this section. Sam's going to be going over a lot of great things that will help take your photos to the next level In this section will be covering things like What is composition basic rules of composition, like the rule of thirds when to throw out the rule of thirds. How to use negative space and symmetry in your photos will also be talking about how to change your perspective on how that really takes you to the next level. We'll also be talking about things like choosing your backgrounds, choosing colors when they shoot black and white out of position. Your subject. All things related to composition. Thanks for joining us for this section here, Sam.
61. What is composition?: everyone. And welcome back throughout this section will be talking about composition, which really comes down to what is inside your frame and how are you framing your subject? So there's a couple of key things here and throughout this section will be going over the difference of rules that people have come up with and when you can break him when you want to use them. Um, really? The main thing here is to look through your viewfinder and so decide what is your subject and where's your subject and fame? Are they gonna be in small and fame? Are they gonna be very present and frame? And how do you frame the things there in the background in with them? Or are there multiple subjects? It's really, ah, fun, part of ours lesson because it's it's taking photos. It's deciding. What do you want your photo to be of? So, for me personally, I looked through the lens and I serves Decide Okay, I'm taking a picture of that person, and when I look at that person, well, what's on the left side of frame? What's in that left corner? What's in the bottom? Right corner and I really make a decision of all those different sections and come up with my photo. So for this, it's best not to just I'm here, so I'm going. Take a photo of them. Well, maybe you don't want that building behind them. Maybe you need to go across the street to get the photo. Maybe you want them to turn around and get better lighting on their face. So throughout this section, we hope to help you learn a couple tricks of the trade and how to frame your photos. What good composition is and really, how to break the rules. And when it's best to break those rules. So get ready. Get your cameras ready and yeah, here we go.
62. The rule of thirds: so the rule of thirds is really there to help you frame your subjects in a way that they're not always dead center. But they're also not touching the side of your frame too much as you can see in this shot. I'm currently on the left side of frame. I'm not too far to the left, and but I'm not dead center. And in this way it adds, sort of, ah, nicer look to it because it allows you to have another subject here. Maybe like this wall allows me to be, you know, have a little head room to have a little base behind me. But my head isn't dead center in the frame where all of a sudden there's a lot headroom. It's a really nice way of just composing. It's a general rule of thumb, but it's not something you have to follow. This again is a decision that a lot photographers have said, Oh, well, Using the third lines is really helpful because it keeps my image from being perfectly symmetrical, but also prevents it from being too much space to the left. Too much space, the right too much space above too much space below. It's just that sort of happy medium of the third lines. So when looking at the rule of thirds, there's a lot of different ways that you can do this, whether it's with portrait photography, landscape photography, really any type of photo, you can use the rule of thirds. So I'm going Passover, Phil, and he's gonna go through some examples for you and really show you the different ways that people use the rule of thirds. Thank Sam for that great definition of the rule of thirds. And now I'm going to show you some of my favorite photos so that you can really see how the rule of thirds comes into play. And you might even not notice this when you're looking at photos on a day to day basis. But start looking at photos and see how a lot of photos are composed this way. So this first photo we have this little danda lion, and it's a great example of how you use the rule of thirds, and you place a subject not anywhere on the third line, but at the intersection of vertical and horizontal lines. So that's really getting down to the nitty gritty of the rule of thirds. But that sweet spot is placing a subject and the focal point of your photo at that intersection, and it doesn't have to be the top left, the top right intersection like you might see in a standard portrait. But you could put it in the bottom, left or bottom right, and I think this is a great example of that. This next photo is another non human photo, but it's a great composition. Using the rule of thirds. We have this castle on the right side of the image that is really the focal point of the photo, and your eyes is drawn to it. And again it's on the third line. Here we have a child that is semi centered, semi to the left of the frame on, I would say, and my argue that if the photo was a little bit shot to the right and that the child was a little bit more to the left, it might be a little bit more dynamic. And if it was on the third line, it could have been a little bit more dynamic, dynamic but nonetheless great shot and the child is sort of leaning over towards that third line. We saw this image in a previous lesson, but this is another great example of putting an object on the third intersection, and this time it's in the top right with his coffee and overall gist. Amazing composition with the coffee beans just creating a great backdrop to the cup of coffee. Here is another amazing shot. The silhouette of a family at the ocean with both the family and the sun. On the third line, the sun is really more the focal point that your eyes drawn to, but the family as well is close to that intersection. Another great photo. Here's another one of a bird. You've seen a few pictures of birds in this course so far, and while the bird is centered, we have this bag of seed that is on the third line. And so I think this is a pretty interesting photo the way that it was taken. Maybe it would have been better if the bag wasn't in the center and the bird was on the right. But if I'm imagining that, I actually think this probably was the better shot, because if you put the bag in the center and the bird was on the right side of the image. It probably would have felt too weighted to the right or the center with that giant bag being in the center. So this is a different way of using the rule of thirds where maybe your main subject isn't on the third lines, but a prominent object in your photo is, and so that makes it a little bit more balanced. This is an interesting photo of three shoes, three Converse shoes that also follows the rule of thirds in a way, because the shoe that is most in focus this orange one on the left is on the third line and is very close to that intersection. So this is a great example of these shoes that actually, now that I look at it, they look like they are little key chain rings. Okay, so this is another great photo. You can see that the aspect of this photo is a little bit more square than a traditional foot photo. But again, the top of the bridge is the focus point in this photo, and it's towards the top left thirds line thirds intersection. And so this one. You've got lots of lines going on and different shadows and the great sky background. But still it's following the rule of thirds. And lastly, I want to show you one of my favorite photos of this butterfly and flowers. And obviously it's all beautiful. But the butterfly itself is the focal point in this photo, and the butterflies right close to that third line. These flowers actually are not technically centered, their closest center of the frame. But they sort of like go and wrap around those third lines, but really focusing on that butterfly top left, third intersection and a great composition. So I hope you enjoyed checking out these photos. And as we show photos in the rest of this course, and as you're walking around seeing voted throughout your day to day life, see, are they following the rule of thirds, are they not? And in the next video, Sam is going to explain When is it a great idea to break the rule of thirds
63. When to throw out the rule of thirds: all right. So now that you've learned what the rule of thirds is and how to use it, let's talk about not using it and the different way that you can frame things when you don't really need to use it or you don't want to use it. So when it comes to breaking the rule of thirds, I often find myself looking at their wanting to shoot a more symmetrical image, having everything be very, you know, on the cross hairs or the other one is using negative space and having a lot of headroom having my subject very small in frame. And there's a lot of ways that you can use that. And although the rule of thirds is really there to help you every now and then, try giving a little extra headroom. Try taking away the head room or just try symmetrical shot. It's actually pretty difficult to find perfect symmetry when shooting on the street, because things don't always line up. But that doesn't mean that you can't use those other things. Have multiple subjects in start framing your subjects with inside of frames with inside your frame. It's a whole another way to look at photography. And really, I think some really incredible photos have come from that. Go give it a shot. You know, try negative space, try symmetry and can't wait to see what you guys come up with.
64. Perspective: changing your angle: All right, everyone. So the next step in learning how to compose your photo is to break this stance. This is the most typical photographer stands. Well, I'm standing. I won't be comfortable. So I'm gonna take a photo from right here. So, really, the perspective of the photo can drastically change the mood of your photo and and really get you some more interesting things. So don't be afraid that when you're taking photos to crouch down or get up on a ledge up high, try coming around. Try moving where your camera is to find a new perspective that maybe the typical person wouldn't see because at the end of the day, if you're shooting from here, that's what you see every day. That's what everyone sees. But it's when you're on top of the building taking a photo looking down or that you get down on the sidewalk and you're looking up at something that you get different, feel, um, shooting from below. Typically, it makes you subject feel grander. It gives your subjects of this domineering sense of it. Um, really, you know, powerful when you're looking down and the perspective is that you feel small compared to whatever you're looking at, The other view is from above and really making things feel inadequate. Smaller, um, you know, having a overpowering sense over it. If you're looking up at Skyscraper, though, it's huge. It's grandiose. That's otherworldly. And this is really where perspective comes into play because you're deciding, well, how do I want? Make my subject feel. You know, this is a big reason that portrait's are taken from right here. You want to have your subject to be the main subject, and you don't want to take away from that. But maybe you want your subject to feel a little overpowering. I know for dance photography. A lot of times I'll go a little bit lower and make the dancers seem bigger than life. But it's really something to play with. Try taking a photo of one subject, but try it from different perspectives. Try shooting from blow above and right at their eye line and see the difference for yourself. Another important aspect of your perspective and choosing your perspective. It is sometimes you'll have things in the background that maybe you don't want. It's really important that you pay attention to everything inside of your frame because you want. Take a photo of Phil here and you go take a photo. But, well, there's a car there and there's a telephone pole. So move around. Try saying, Oh, well, if I move here all sudden, there's a tree behind him and I really like that treat. Maybe there's something there. You just need come a little bit higher so that it gets out of frame. This is, you know, a technique that takes a long time, and you sort of learn how to look at the world and say, Oh, well, I know I don't want that in the background. So let's move around like this. Let's move here. And it's really when the creativity and not just with the camera, but also with knowing your environment, looking around your environment, seeing what photos are possible in that position that you're in. So go out, try a couple of perspectives and yeah, can't wait to see what you come up with.
65. What's the Mood of your photo?: So the next thing to think about in this whole process is the mood. And, you know, you've learned some of the techniques and how you make your subjects feel, but it's really about the audience. It's about how the audience views your image, and this is a lot to do with color tinting composition. Ah, lot of factors come into this, but it's ultimately what do you want to evoke from your audience? What type of emotions do you want? Do you want it to be a really happy photo? Maybe you want everything a little bit brighter. You want your subject, you know in a happy place in frame. You want the the certain mood. Or maybe you want the feeling of a loan you want. Create a mood of your desperation of open space. And there's law things you can do with this. And it's really playing with your composition, playing with the angles of perspectives and all those things to figure out what that mood is. So here's a couple examples of what we think are really moody photos, and they evoke something special in each one. So take a look. Okay, everyone, it's Phil back with some more examples to show you. Now we're going to start from worst to best or well. It depends on what type of mood you are in. But from sadist to Gladys, I would say so. This first image, a black and white photo. We saw one a few seconds ago of a man looking outside of the window. And this one of this boy kind of looking off in the distance. You get this sense of loneliness or sadness, and it really makes you think about what is the story of this boy. What is the story of this photo? What is the photographer trying to say? I doubt that this boy just woke up on Christmas morning and is excited to open up presence more. The story, it tells me, is a kid who lost something, lost a pet, lost a parent, someone that's sad and so you can really tell by the dramatic lighting and also using the black and white. It's more emotional. This next photo has blue colors, so it's obviously a picture of ice and snow. But that blue of the photo the blue tent makes you feel cold. It makes you feel a little bit side. Here's another photo where you see these soldiers that are lined up and they're lined up in a way that they're very serious. And obviously if you're in the army or a soldier, that everything is serious. And there's not really any joking around, at least to the outside world. And so this is a great way to compose an image of these guys. You know, they're lined up in a row and they're serious, But the man is covering his face. The one man that is in focus is covering his face. And so that's really important, because if we could see his face, maybe we could see that he was smiling or serious. But we don't see it, so it draws the viewer in and at least asked me, What is the story of this photo this next one Very, very scary. You have these reds and orange colors, which sometimes warmer colors make an image seem happier. But obviously, in this case it's not. And you see the dark, ominous cloud pillow ing in the sky and then the dark sort of islands, and they're really dark. And maybe this photo would have been different if it was exposed a little bit brighter. And even though there was smoke in the sky, the island's weren't just silhouette, and the sky may have been more whites rather than this deep red. And so this is an example of where warmer colors doesn't necessarily mean happier colors. Speaking of colors, this is just a fun image. It's bright, it's colorful, and it's very obviously about colors of these pencils. But compared to the last photo, you just have to feel happy. And speaking of nice colors, check out this great photo of this plant where it has a nice blues, reds, greens and this image. It's nice and bright, and even though it's kind of hard to understand what is going on, if you don't know what this image is of, you still feel good. It's still happy and even brightening the colors a little bit more. Here's one of my favorite photos of myself and my current Well, she's my fiancee now. Maybe by the time you're watching this, she'll be my wife, Isabelle. We're here in Barack I and the Philippines, and you just have these bright, bright colors. The white, sandy beaches the clear blue ocean. And it would be a lot different if it was a dark California cloudy day with the dark Pacific Ocean behind us and Rocky cliffs. This is a wide open space, lots of bright lights, and obviously we're smiling. So you have a sense of what we're feeling in this photo. Anyways, I hope this kind of gives you an idea of how not only facial expressions but colors and taking out colors to make it black and white can really affect the mood of your photo. Thanks for watching.
66. Wide Angle vs Telephoto & Zoom: all right. So now that you've learned some of the basics of composition and figure out what that perspective is, another huge player in this whole thing is what lens are you shooting on? Are you shooting with a wide angle lens, a normal maybe 50 millimeter lens or a telephoto lens? And we've compiled a good amount of, uh, examples for you, too. So show the difference between these different lenses, as you can see on the wide angle lens. Typically, things are more in focus. You're able to see a little bit more, but a really great way to use a wide angle lens is getting up close and personal. Some of my favorite photos are portrait's taken with a wide angle lens. They had this sort of, you know, very personal, very close feel, but it still allows you to have that depth of field to make it a very cinematic, almost looking shot. On the other end of the spectrum is telephoto lenses, and this is where you really zooming in and and honing the audiences eyes on one thing. You're sort of focusing in on a specific subject, and the telephone is really great for crushing the backgrounds, making things everything out of focus. Except that one thing you want in focus and this again you know, when it comes to perspective, framing your background it as another layer to it. Because all of a sudden your background is typically more of a blurred or out of focus image, and you get a lot more colors. With this, you can create sort of a cool contrast by making everything out of focus. You can see in this shop, for example, that all you conceive really is the person's face. Everything in the background is completely out of focus. Um, but you really focus in on the character. You're really focused on their eyes and their features opposed to anything else in the background. So depending on the lens you have, make sure you always practice between using the wide angle using the telephoto. Different people have different preferences on what they like to use. Personally, I love my 85 millimeter. Some people they love their 24 millimeter, so it's really something of personal preference and what type of photos you want to take. One additional thing I wanted to throw in there is that you don't always need to take a wide angle lens to take a wide shot in a telephoto lens to take a close up shot. It's actually sometimes better to try the reverse. Take a close up shot with a wide angle lens, and then to go take that big landscape shot or take a big wide shot. Try taking a telephoto. The biggest difference is that you have to move. Instead of making your lens do all the work, you should move your perspective. Another practice for this is using a prime lens or fixed focal length, and this is where your lens doesn't zoom. You can only use that one focal length, and so you really have to move to get the shot. You want to get one of my favorite lenses. That 85 millimeter is a telephoto lens, but only use that for close up photography. I'll use that for landscape photography. We'll use that for almost anything. The biggest factor is I have to move myself. I have to go find the angle, the perspective, the background that's gonna work for that specific focal length. So go test out, see what lens you have a lot of kit lenses are great because they have a wide range of focal lengths and, yeah, find which focal length and you prefer in which one you really like.
67. Choosing a background: So now that you've learned a couple of rules of composition and how to find the right perspective, the next thing it's really learned about background and how background plays a major role in your photography. So as you go toe, set up your photo and you're sort of looking around your space, pay attention to what your background is and not just, oh, do I like the color green? Or do I like that? That looks out of focus. But how does that add to your photo? How does that say something about your subject? Maybe it's the classic photo of the woman in the red dress in a big urban city. You know it's not about the urban city, but it's the fact that she's in a red dress and she pops out so well from that background is the same as putting her in the forest. The colors are different. The contrast of it makes her really stand out, and maybe you don't want her to stand out. Maybe you want her in a green dress toe so melded in with the rest of the landscape. But this is really knowing your background, knowing what you're putting in your photo. But knowing that the background is a major player in your photo, it's a subject in itself. It shows. What are you trying to say? What is your main subject and what is your secondary subject? What is your background saying about your subject? Another thing I always look for when taking fotos is the antlers or is there something coming out of my subject that just looks a little strange? And sometimes you won't even notice when shooting the photo? But, you know, maybe there's a tree in the background and it happens to becoming one of the person's head , and it's really distracting once you're looking at your photos, but sometimes you miss it. Sometimes you're caught up in the moment, so be sure to be serve looking around what is actually behind your subject, and how does it mesh in? How does it meld with your your subject? So remember, the background is a major player in your photography, and it's really a secondary subject to your main subject. And if you want another example of, you know, I always think about model shoots, they put them behind white backdrops, and that's really to make them make you focus on the model. But if you're looking at a landscape, if you're trying, use your environment. Really find textures. Find something more interesting in your background that allows you to focus your audience on the subject that you want or use that background. Make that that background another subject in your photo and have it elaborate the story that you're trying to tell.
68. Panoramic compositions: so a lot of people today have guns, air fixated or have started playing with panoramic photos, and I think a huge part of this is the smartphone. A lot of smartphones today have the capability of taking pretty incredible panoramic photos , and that's why I want to start is with a smartphone. It's really all about keeping your smartphone or your lens really on the same plane so that you're not moving up and down. You're not moving too fast, and it loves it to capture nice, smooth image. Now fewer. Take that same concept and put it into your point and shoot. Or your DSLR, which actually some point shoots have the ability to automatically stitched together panorama. But most DSL ours don't have that feature, and it's not too difficult to actually do it yourself. It does require some post production, and I'm sure that later on in this course will be able to go through, actually editing your photos into a panoramic. But when taking the photos themselves, important thing to remember is keeping your lens on that same plain, keeping it level the entire time that you're taking the photos so that you're not going here and then dipping down or moving or changing your perspective. It's really about keeping it nice and flat in the same across the whole way. And there's two ways of doing this. One is so pivoting. So let's save a tripod or you're just standing. Take a photo here, Here, here, here. Make sure that whatever is on your right side, the frame here is that on the left side of him here as you go here, that right side of famous now this left foot side of frame. The other way of doing this is more linear, opposed to having a curve to it. You're walking and moving like that, and again, it's keeping your your camera on the same height, but also making sure that you have some overlap of the image so that later, in post, you're able to find that same line and match the images together. It's something that takes a lot of testing a lot of practice, but at the end of the day, you can get some really cool photos of combining 45 10 photos altogether and having some really awesome looks. So go practice, play with your iPhone. I wanted to bring up Photosynth, one of my favorite APS. It's taking panorama to the next level. It's allowing you to create a three D image almost of your entire surroundings. And it's something that you know. It takes him practice to learn how to do. But you can get some really cool looks with it, so go test it out, and you hope to see some panoramic soon.
69. How to position your subject: So now that we've gone over some of these rules of thumbs and things to pay attention to when taking a photo, the next is interacting with their subject. And there's a couple different factors that come into this because you don't always have control over where your subject will be and what the lighting will be. So when it comes to placing your subject, they sort of two scenarios with this. One scenario is that your subject is not gonna that your subject is where you have to move around it and decide, Really? Okay, well, where's the sun? Where's my light coming from? How do I want that to fall on my subject? What background do I want? Um, and what I really able to get because sometimes you might want the shot that requires you to be on top of a building. And more than likely, you won't be able to get up there. So it's really figuring out what you're able to do what you want in the background, and sometimes you won't be able to get it, and you have to make some sacrifices. The other serve scenario is that you're on an event and you don't have control of your subject and your subject going constantly be moving. And it's here where you really need to know your perspective. Know your rule of thirds know was in the background. No, your environment really? And in that way you can move around and know that Oh, well, I never want to show that area. So I'm always gonna be coming from that area. Looking this way to get my photo and dependent on rare subjects are moving. You'll know that you always have the background do you want and not looking in a direction that you don't want to look, Um, this could be really tricky because sometimes you can miss moments that you wish you had gone, But this is a big lesson to learn. You can't always have your camera. You can't always be in the place you want to be, and you have to let that go and get the next shot. Get one that may be surprises you. That's better than you thought it could be. And that's a big blessing, because I know there's been plenty of times like, Oh, man, if only I had been over there or if only I had captured that moment. But you can't dwell on that. You have to move on and get the next moment. So another situation that you can get yourself into is you get to choose where your subject is. You get to work with someone, interact with someone and say, Oh, well, let's try this. Let's try that. And it's those moments. It can be really fun because you get to decide. Oh, well, maybe she can get lower or he can get more to the rider to more to the left, and you can place your subjects where you want them to be. And this is really one of most difficult situations because you're making the decision. It's no longer you trying to capture a moment it's using. I want this photo and I want, you know, my subject to be here and here. And that's because of what? What is your reason behind that? And it's whether it's the lighting, the background or simply that you want one subject closer to frame in one subject farther away from fame, and this is really the big creative process where you get to make the decision and ultimately create a photograph and your own eyes. And also, when choosing where subject's gonna be, you have to give some direction. And this is a huge learning curve. And where law creatives, I've found have some difficulties because you have to really talk with someone and make them comfortable. You know, it's not the easiest thing to be in front of the camera. And if you're just focused on what is your photo and your camera settings and all these things, they're just sort of standing there, and you have to be able to interact with them and talk with them and make them comfortable so that they're not feeling nervous or anxious about being in front of the camera. So be sure to talk with your subject. Maybe talk about your inspirations. And you know what type of photo you're trying to create here and make them comfortable. And this is really, you know, an art in itself. And the reason that a lot of photo shoots you'll have the photographer and you'll have a director or you'll have a producer. You'll have someone else there to serve, talk with the subject and take their mind off of the fact that there's a camera pointed at them. So remember that when choosing were subject's gonna be or deciding where you're gonna be to capture that special moment, that you have your eyes open and that you're not glued here camera. But you're really using your environment, looking around, seeing what's around your subject, what you want to be around your subject and also what lenses. They're gonna be most beneficial for that space. If you're going to be an event and you can't get close to your subject, bring a big telephoto zoom. If you're gonna be working with people that you want to work with and being able to control the situation, find the focal length that you enjoy working with and stick that one on your camera. It's really about knowing your equipment but also knowing your environment and knowing what you're getting yourself into before you're there and you're wishing you had something else . So remember, move around, be personal, talk with your subjects and let them know what you're trying to achieve, because at end of the day they're the ones you're taking. A photo of
70. Focus on the details: so another type of photography and instead of another way of looking at things is to really focus on the details. And this could be something as broad as you know, paying attention. Toe what your subjects wearing paying attention to the smaller things in frame. Maybe there's a sign in the background that adds a little bit of humor toe what your subjects are doing. Um, and it's really these small details that can play a big part in your photo, so make sure you pay attention. You'll what is out there in your frame, and do you want it in your frame? Do you not want in your frame? The other way to look at the details is to do macro photography or very close up photography, and maybe you taking photos out wedding. And so you're focusing on Okay, there's the bride, the groom, the parents, the family members, um, the event space. But it's really about the details. So think about oh, maybe I should go take a photo of the flowers on the table. Or maybe I should take a photo of each of the cards on the table. It's really all about the details and those finer things that will mean a lot to someone when they see them. But maybe they would otherwise just be a small thing in your frame. So don't forget about the details. Make sure that after taking those wide shots and after getting the portrait shots that you go in and get some of the more detailed shots that they're gonna add to your story at your compilation and really expand your portfolio and the photos that you end up giving to your clients, it's really going to make a big difference. So don't forget about the details both in your wide shots and in your close ups.
71. Using depth of field creatively: so another great thing to play with is creative depth of field finding out. How do you want the focus to be a character or a subject in your photography? I find that sometimes having things out of focus can actually add a lot to my photo because it sort of makes the audience want to be able to see that character or that subject. And it's not always good to have him and focus. Sometimes you focus on a tree, even though you have three people in the background. And this is also where your creativity and sort of your knowledge of your camera comes into play, because if you throw them too far out of focus, you can't tell what it is. But if you have them just enough, you can still see that. Oh, I wish I could see that person in the canon and so adds another layer to your photography. So don't be afraid to have things out of focus, but have a reason behind it, and you frame for them so that it's not too obvious that you're purposely putting it off Focus. But you still have a subject in frame, and they're still unfocused, But there is that other thing in the background that you sort of wish you could see, but maybe you don't want to see. Or maybe you don't want the audience to know what it is, but really have fun with it. Play with your depth of field. Maybe it's taking a photo and having this front plane and focus and the trees out of focus and the trees. Really the Mawr prominent thing in the image, But it's out of focus, and really, you're focusing on this and letting that fall of focus for a purpose for a reason. Let your subjects be in focus out of focus, but have a reason behind it. And it can really add another layer, another dimension to your photography when you do it well. And you have, you know, one person in focus, another personality focused because it makes the audience want to see that person they want to know. What is that person doing it? Are they following the person? Are they friend? Are they a faux? Um so, yeah, have fun. Go practice. Go try taking photos completely out of focus. Try having just one specific thing in focus and and see what comes up with you might like it. You might hate it, but that's the joy of photography. It's experimenting and seeing what's out there.
72. Colors - think about how colors affect your photos: So when we talk about the color palette, this is really something that separates the pros from the amateurs and even for myself. I still find it to be one of most difficult things to really achieve in my photography. So what color palette is is It's deciding what colors are in your frame and ultimately, what that does to your image and why you choose to do it. Typically, warmer colors, reds, oranges, yellows are a little more energetic. They add a little bit more life to your photo, and it's a reason that a lot of people love the sunset. Golden Hour is that it has this warm sort of glow. It's really happy. It's romantic, it's beautiful. On the flip side, you have the cooler colors. You have the the greys blues greens, and these really add a sense of coldness. Sometimes loneliness maybe, Um, a little bit mawr emotional to them, but they can't have a lot of energy as well. But their love it colder and deciding, you know? Well, what type of photo do I want? And where am I taking the photo? What time am I taking the photo? So how do you work with the color palette in How do you start to form ideas of what colors you want to use? Ah, great way is to look at past photography and toe. Look at films even and see what colors they use and then go out and practice. You know, one, my favorite things is going out into the forest. It will all greens. You've, ah, Brown's La Blues, and it's very natural feeling. But then you put a subject in there that is willing red, let's say, and it just pops out so much. It's so vibrant compared to everything else and as another dimension to it. Another great way to play with the color palette is learning your complimentary in secondary colors. And these are colors that really meld well together but have contrast so blue, yellow, red to green, these colors sort of offset and add an extra served dimension to your photography. At the end of the day, the colors are another subject in your photo, and really, what colors you choose to have in your frame, both in the background and on your main subject, make a huge difference. As to the emotion in the mood of your photo. So be sure to pay attention next time and sort of make a conscious decision of Oh, well, I'm gonna go shoot in the forest. Do you want the character or the subject to serve, meld in and match the background? Or do you want them to really stand out and be a more vibrant subject? It's something that you can play with and, you know, as you get into fine tuning it and refining it, you'll find locations that you love to shoot at that you know the color palette, and you know that your subject that you're bringing into the environment is gonna work well . So go do some research. Go see what the different colors are. Go find out which ones oppose each other, which one's complement each other. And really look at how other photographers use these colors in their photography.
73. Black & White photos - adding emotion by subtracting color: So now we're gonna talk about black and white photography, which it's sort of a whole nother ballgame. And in digital photography, it's really easy to actually switch between color and black and white. All you have to do is take away the saturation. A lot of professional photographers and people you might have heard of, like Ansel Adams, have dedicated their lives to shooting in black and white, so there's no brighter wrong reason of when to shoot black and white photography. The main reason I got into it is because the shooting film and it's a lot easier to do the darkroom process with black and white film than it is color. But at the same time, when you look at certain photographers, there's amazing detail that comes from black and white. Someone like Ansel Adams has taken amazing photos that are all landscape, and they really have You focus on the details of what you're looking at, and you're able to see a lot more than just a pretty landscape. But instead you see the trees. You see the landscape in a different way. You're not distracted by the colors. At the same time, portrait photography is one my favorite times to use black and white because you're not focused on what the person is wearing, you're not focused on the background colors. You're focused on the person, and really everything falls into the same world. It's all black and white. There is no red dress popping out of the green forest, but instead it's a woman standing in the forest and you focus in on the smaller details. And I think this is a reason that people really love black and white Photography is that you're more focused on the subject and what the photographer is really trying to say, opposed to looking at pretty colors. And this is something that I find hysterical on Instagram. You have thousands of sunset photos, and really, if you look at a sunset photo, it's the colors. It's this amazing color spectrum. But if you put that into black and white most the time, it will be the exact same photo taken over and over again. So next time you go take some photos, try and you know when you're editing your photos, flip them over to black and white, or go and shoot in black and white. Take that conscious decision and say, I'm not gonna take these photos with any color. There's a option within most cameras to do that. And it really it adds a different way of looking at the world, and it's no longer about the colors, but it's instead about the objects in the subject that's in your frame. So go out and practice black and white photography. I think that losing the color spectrum really helps you focus on your composition and what you're putting in your frame. Some of my favorite photographers have taken Amazing Portrait's amazing landscapes all in black and white, and it's a great way to look at the world and has another dimension to your photography practice. You know, see what black and white photography does for you. Some love it, some hate it.
74. Practice - Go on a photo adventure!: everyone. I hope you've been enjoying this section on composition, and now it's time for you to put all the things you've learned into practice in this practice session. I want you to go out on a walk. We can call it a photo walk, go out on an adventure. It's one of my personal favorite things to do on a weekend. If I have some extra time this go out, explore your surroundings, take some pictures and really put into practice the things that Sam talked about, like changing your perspective, throwing out the rule If there is using the rule of thirds, picking a great background, choosing what you want in your frame and what you don't want in your frame and really just have fun with it, I'm going to be showing you some pictures of a recent photo walk that I went on right after this. But for now, your camera, go out and take some photos
75. Phil's Photo Walk - Let's look at his photos!: everyone Welcome Teoh Fun video where I'm going to walk you through some of the photos I took on a recent photo walk. I did the practice session that I just had you dio and I just wanted to share some of my favorite photos. So let's go through them this time. I'm checking out these images in I photo, which is a program on Mac computers. So let's just go through them. I actually really like this photo of this old VW bug. I crashed down low and try to get a cool angle. And it was lots of great colors in the background. Of course it has these power lines that are up there. I wish they didn't have those. But a pretty cool photo. One of my favorite photos is this one of all these trees and leaves of different colors. You got the bright yellows, the red, the greens, just it all kind of blends in tow. One nice image. And if it you look back and step back from it and just kind of looks like a watercolor or something like that, let's go through a little bit more So here I was trying to take a picture with a shallow depth of field. So I didn't do it as well as I could have because it has this red car in the background. Maybe I would have stepped a little bit to the left and angled a little bit down. So coming up a little bit with the camera so that the background was more just this grey street, but not a terrible photo. Okay, so this was a fun little area where I was trying to get a cool texture of this tree trunk and just had this bark that looked really interesting. And I think it came out nice. I mean, of course, some images. I'll just show you that didn't come out as nice. So I have this shot of a fire station looking across this from across the street, and it just didn't turn out that Great. Now this one over here zoomed in. It's more just a picture of a subject. It's not very artsy, but you get what it is. Okay, let's move forward against some textures. Do not enter. I was kind of doing a little angle thing right here. A little bit interesting. Not an amazing photo, though this was kind of interesting. This Hopkins street you can barely read here by this Hopkins Street wall. It was imprinted in the wall, and I just like how the background is blurred. But it has this really weird texture in the background, and it's just all a little subtle. You just you can barely see what it says, and it's very subtle, but nice. This was just a funny picture of a painting on the wall. It's for a game shop, I think, like board games. So this is an example of something where I took a wide photo and then a close up of this bush that had all these little white and red flowers really cute little flowers. And here I try to get a close up, but it's not in focus. Here are some street signs. So again, I tried to frame it so that all three of the signs from these shops were in frame, and it kind of goes well with lines of the top of this building going from the top to the bottom of the frame. So a little interesting. So and then this was This is one of my favorite shops and Berkeley Heat Hot Sauce Shop. I have been there a few times, and they have hot sauce tasting literally. You just have chips and hot sauce. It's awesome. So this is kind of a cool, symmetrical photo. I would edit it a little bit, crop it and rotated, So it's perfectly parallel and perpendicular to the sides of the image. But a kind of interesting idea go down a little bit. So okay, this one is one of my favorites as well, Just very shallow depth of field. And really, it wouldn't have been much of an interesting photo if everything wasn't focus. But now you really just focus on these leaves of the bush that are close to you. This is one of my favorite spots. As you can tell, I took a bunch of photos. I was trying to get back lighting and also a little bit of a lens flare so you can see here . I've got the lens flare, and I was trying to be creative with cropping out the end school zone, and I just left in school. Ha ha. Thought I was a little funny. This one's got the whole sign in it. But it's also got that lens flare, so that's pretty cool as well. So that was shooting directly into the sun. And I'm trying to remember if I shot any of these with a flash. I don't think I did, actually. So this is an interesting shot. So this is the tool library in Berkeley. Pretty awesome. You can just rent tools for free, and this is an interesting shot, but not really. But if I go here, I feel like that's a more interesting shot. More negative space, even though has these wires in the top more negative space. And you just see this tool sign at the bottom here. It's like just a standard building here. It's like, Oh, trying to be artsy with it. I don't know, maybe it's just me. And then here. Okay, Chain link fence is always something that's cool to take pictures of, you have another shallot up the field. I was shooting this on my I think I believe it was my Toki No. 11 to 16 Lens and so I had to get really close up here and pretty nice. Actually, I believe it was actually my can in 24 to 70. So there we get home to Zohra, my beautiful cat. And I got some great shots of her with the sun kind of shining three. Or you see these light rays. So that's nice. Farrah is a beautiful links point Siamese. There's my beautiful fiancee. So I will leave you with one of these photos of Zohra looking to those deathly beautiful blue eyes. So that was my photo walk journey. Please share your photos with us. You can post a YouTube video like I did here, talking about them in explaining what their process was, or just post a few photos as a discussion item on the course page. Anyways, thanks for watching. And I can't wait to see what you get from your photo adventure.
76. Conclusion - what did we learn in this section?: I hope you all enjoyed your photo walk and took some great pictures, and I really hope you enjoy this section. Sam has covered so many great tips in this section on composition, and if you put them into practice, it's really going to take your photography skills to the next level will be becoming more of an artist and taking photos that you are truly proud of. So thanks for watching and we'll see you in the next section.
77. Introduction to the Lighting section: Hey, everyone, welcome back to the photography masterclass. I hope you've been enjoying these lessons from Sam and Sam's about to get into some really interesting stuff about lighting. In this section, Sam will cover everything from the basics of what is like, what sources of light do we have, what temperatures of light are there, And how does our camera read that light and how to set your camera to read it properly? He'll also cover some creative ways to use light, such as using the flash on your camera, remote flashes and how to take silhouette photos. Thanks for watching and has always enjoy this section.
78. What is light?: So in this section we're gonna be diving into light. And this is a subject that you can honestly spend years, if not your entire life, sort of studying and learning. And especially as photographers. A lot of people will say that you're not just a master of photography, your master of lighting, and this is really where the art and a certain skill special skill comes into play. So first off, what is light light is part of a larger scale. Are larger spectrum of wavelengths going from gamma waves to radio waves and our light. The things that we see are very, really in a very small part of the spectrum of the light spectrum. And this is ultimately what the cameras able to see and in the upcoming sections will be going over. What type of lights existent are visible range, how to use them. And really, how do you become an artist with these lights to create dynamic photos to use the light available to you or to set up your own lights and take really amazing photos? So get ready and here we go
79. What types of light sources do we have?: So now we're gonna talk about the types of lights that are out there, and this is sort of falls into two different worlds. So the first is over the natural world. We have the sun, one of the greatest light sources in the world. Um, a lot times I'd like to use a son with clouds because it creates a sort of diffused look. The other type of lighting is you know, what man has created incandescent lights, L E d lights, fluorescent lights. These are all different types of bulbs, and they all produce a different quality of light that as you really fine, tune your skills and hold them in, you'll be able to tell the difference between these. So the major difference here is that incandescent lights are a warmer color. There they burn, actually a lower temperature. Where's the sun? Burns out a much higher temperature, and it creates more of a blue light. This will all be covered in upcoming lessons, and we'll be talking about the differences of these lights, how your camera looks at these lights and how you can use them for your photography.
80. Understanding light temperatures: all right, so now we're going talk about the temperature of the light, and really, this gets into the Kelvin scale. So on one end of the spectrum you have daylight or the sun, and that's anywhere between 5600 Kelvin and 10,000 Kelvin Blow that you have fluorescent lighting, which is typically around 4000 Kelvin, although it can differ depending on the bulb and blow that you have tungsten lighting, incandescent bulbs, even candlelight, which goes anywhere between 3200 Kelvin and 2000 Calvin. So when talking about these numbers, what do they actually mean when talking about the 3200 Kelvin? That's typically a warmer light. If you think of your incandescent bulb in your house, it's typically more of an orange of warm light. When you look at daylight, though, it's more of a blue light. If you've ever been in a movie theater and you walk outside and everything seems sort of blue, it's because that's the color temperature off that light source. And some of the fluorescent bulbs have ah, green look to them. And that's really just how the bold works itself. Not so much the color temperature of 4000. But its all important to know and really when it comes to photography, is how does your camera read that light? So in the upcoming section, we're going to talk about dropping the auto and going to manual settings for white pounds.
81. Setting your white balance properly: So now that we've talked about color, temperature and the Kelvin scale we're gonna talk about, how does your camera read that light and that comes into white balance and deciding what is the true white? This is something that could be a little complicated at times, but really, with low practice, I think you'll start to understand what it means. So most cameras you can use auto white balance, and what this does is that it looks at your image and whatever is supposed to be white. It tries to make that white and all the other colors air fall into place. So nowadays, a lot of cameras have really great auto white balance features, and it's pretty easy to just allow your camera to do all the work for you. But there's a couple of other ways for you to approach us and really learn what color temperature is. One of them is using presets. You'll see a lot of times that there's a little sun symbol, cloud symbol, a little light bulb symbol, and these are all presets to say, Oh, it's cloudy outside. That means you should be on this one if you want to get a true white. If it's daylight, you should be on the little sun symbol. And really, what this is getting down to is setting your Kelvin number. And this is one of the best ways for you to learn about color Temperature is going in and saying, I want to pick my own Calvin and going go to 3200 for incandescent but also go outside and shoot 3200 Kelvin in outdoor setting and you'll see that the image doesn't come out as white. Instead, it has this whole tent to it. And then if you go to 5600 it might not be perfectly white. Maybe you have to go to 6000 or 7000 Kelvin to get that true white dependent on what the sun's doing at that time. Go out in practice, set your color temperatures, see what the different light sources do, and if you have any questions, feel free to reach out to us. Otherwise, enjoy shooting and we'll see you soon.
82. What is three-point light?: So now we're going talk about three point lighting, and this is something that it's sort of like the rule of thirds where people use it on a day to day basis. But you don't always have to abide by this rules. What three point lighting is is basically using three lights. You have your key, your fill in your room light and what these three lights do. Our allow you to light a subject and always have seven. Nice look to it. The key light is your main source of light, so this currently would be the sun. It's the thing that's lighting me the most. It's the most present light on my face now. We don't have a lights out here, but what the fill light would be is the opposite of the key light. So while the key lights coming in here, the fill light allows us to be a little bit darker. But however much you want use of bring it up the rim. White is the final piece, which really separates your subject from the background, and that's a light coming from the back and sort of illuminating the side. Some of the best examples of this are looking at sort of the fifties sixties films. When you have the glamour shots, you have these beautiful actresses, and they just always had perfect lighting on them because they were the stars and you couldn't make them look bad.
83. Using ambient light: So now that we've gone over three point lighting, I wanted to talk about another type of lighting, which is ambient light or the available light that you can use on a daily basis. This doesn't require any setups. It's just what's out there, you know. Currently, we're lighting completely off of sunlight, and it's a nice cloudy day, so of a really diffused light. Another type of ambient light would be at night when you have a street lamp on the street corner and you can go and use that light for your photography, and it's a great way of you know you don't have any control over it, but you can move your subject and you can move your camera to get really great results. I think a lot of great photographers have used ambient lighting to their benefit, and this really takes everything we've talked about and puts it into. Okay, I'm on the street. I have this as my background, and I'm going to use this as with my light source and it works. Learning how to use ambient light is a big lesson and something that really does require you to go out and use the ambient light's he was possible with lighting. You know, it's not always gonna be Oh well, it's a diffuse sun so I can shoot any direction I want. Well, actually, currently the sun's behind me, and that's why I'm having a little more light here in a little less light here. That was a conscious decision that we made, because if I was like this, I have a flat, a flat light source, and it's it's not as dynamic as having a little bit more darkness on one side at the same time during night photography. Let's say, if you use a street post as your mean light source, you have to choose the background correctly because if there aren't any lights in the background, all you're going to see is what's under that street lamp. But if you have, you know, a freeway in the background, let's say it adds another layer to your photography. So really Indian lightings all about moving around in your environment, looking what the lighting's doing and utilizing that consciously making decisions of Oh, I want to shoot because it's no golden hour or I want to shoot because it's overcast or I want to shoot in the forest because it gives a great diffused look. These are all decisions that photographers make on a day to day basis. And they really change your photography because at the end of the day, taking photos is all about lighting and won. The easiest ways to do this is with ambient light, because you don't need to set up any lights. You don't need electricity. You don't need to go rent or buy lights, but you use what's available to you. And I think that's one. The great reasons that street photographers have come away with some of the most incredible photos just by walking around. So go out and play with an ambient lighting. I think some of the greatest photographers have you lies this light in amazing ways, and it really shows your creativity all post some of my photos using emit light, and I can't wait to see what you come up with.
84. Using the flash: so the final thing. We're going to talk about this flash photography. I think the most typical way that you'll see it is when you're out at night and someone wants to get a photo and it's too dark. So they use the flash. And personally, I think this could be sort of obtrusive at times because, you know, it's dark outside and you have a bright flashlight, but you can get some really cool facts with us. And it's something that pro professional photographers utilize all the time. Typically, people think of flash as the little thing that pops up on the top of your camera or the thing that's on the back of your smartphone. But really great flash photographers will use remote flashes, and this is when you're able to take a photo from right here. But you have a flash set up over there, a flash set up over there. They're set out different ratings, different intensities, so that when you take your photo, you're actually adding, so that three point lighting all from one spot, and this is a really portable type of lighting set up that's much easier than setting up big lights and you'll see some of the pros really utilizing this so personally, I don't like using the onboard flash. I think creatively flat image and the lighting is not very dynamic. So I would recommend going out and renting or purchasing an actual flash that you can use remotely or that you're able to just diffuse a little bit more. Maybe change the angle of the lighting. So it's not just a flat photo. There are times when using the flash will be really beneficial, and a lot of prose actually have switched over to using consistent light sources like led lights, which don't output any heat. And they consume very low amounts of power. And you can run them for long times in your studio and really see the light that you're shaping because at the end of the day, the reason you're using a flash is to create a more dynamic lighting set up other than just using your ambient light. One way that would recommend using your flash is during the daytime, and it's kind of counter intuitive. But if you think of the three point lighting set up, if you use the sun as your room light you also have a silhouetted picture, right? Well, if you use the flash, you're able to counter that and use the sun as a rim and have the flash as your fill. And all of sudden you have a more dynamic look. Now, I will say for the onboard light. I personally don't like it because it's coming right from where your lenses and it typically creates a very flat image. But if you're able to use a remote flash, you can use the sun as your room from here on. Easy remote flash from here, new lenses there and all of sudden you have this really dynamic lining set up. It's something that takes a law practice, but as you play with it, I think you'll find that controlling your light is the best way to take photos.
85. Practice - use your flash!: Hey, everyone, I have another practice session for you. Sam talked about using the flash in the last video. Now it's time to put it into action. And so, for this practice, I want you to go out and use your flash during the day. Typically, you think of using the flash at night just to create light and make sure that your photo is exposed properly. But Sam talked about a creative way to use the flash. Now is during the day using the sun as a rim light and using the flash as the film. So go out, take a picture during the day using the flash and push it to the course page. Thanks for watching and we'll see you in the next video.
86. Shooting slhouettes: So now that we've talked a little bit about lighting and different ways to use it, we're going to talk about a couple more creative ways to use lights. One of these is silhouette photography, and this is something that I think people find mistakenly when taking photos at sunset. But what is a silhouette photo? It's when you have your subject in between your main light source in your camera. It's really that your cameras exposing to the slight source opposed to your subject. But in that way your subject becomes over the silhouetted outline. And it's a really cool effect in the most common time that you see, this is at sunset when you have someone looking off at the beautiful sky, and there's so much light coming from there that all you get is a black figure in your frame. And if you frame it correctly, if you use your composition skills, you can create some really nice images. With this, go out and try taking some celebrated photos. I think it will show you that sometimes it's OK to not see your subject in that using their shapes and their body language adds a lot to your photo. So remember to take a silhouette photo. All you need to do is place your subject between your camera and light source.
87. Practice: Take a silhouette photo!: everyone fill back with another practice session. In the last lesson, Sam talked about silhouettes, and now it's your turn to go out and put it into practice. As always, post your pictures on the course page. We'd love to see your work. Thanks for watching, and we'll see you in the next lesson.
88. Conclusion - what did we learn in this section?: everyone that wraps up this section on lighting. It was a huge section where Sam talked about everything from what is light Teoh using light and creative ways. Now Sam, mentioned in one of the lessons about being a photographer, is actually being a master of light. And while it takes years and years of practice to truly become a master of light, I hope that the lessons in this section have given you the stepping stones to know how to use light more creatively and to take better photos. As always. Thanks for watching. This section will see you in the next one.
89. Introduction to the Lens section: Hey, everyone, welcome to a new section in the photography masterclass. This time we're talking all about lenses, so this is a more advanced section. So for all of you who are using DSLR is, this will be very interesting to you because changing the lens and the type of lens on your camera will really affect the type of photo that you can take. So now I'm going to hand it over to Sam, and he's going to explain all the different types of lenses, what they dio and what lenses are his favorite.
90. What is focal length?: hi, everyone and welcome back. So as Phil mentioned, we're talking about lenses today, and the first part to understanding the differences in lenses is to understand the focal length. Um, so I want to show you this lens right here is a 50 millimeter. And what 50 millimeter means is that basically from your sensor, You know, from that my new to mark from where your sensor is to the middle of the lens, that measurement is 50 millimeters. So what that comes down to is that the 50 millimeter is your middle ground. That is zero distortion. That is what the eye sees in in normal life. And it's really one of most popular lenses out there because it is so simple and look so clean on the wider side, that number starts to decrease. So you're 24 millimeter your 35 millimeter, your eight millimeter. All those air considered wide angle lenses. On the other side, you have telephoto lenses, and these are anything above 50 millimeters. So 70 millimeter 105 millimeter, 600 millimeter. Those are all telephoto lenses, meaning that from a very far distance you're able to see something up close. Almost optic technology is pretty incredible, and you'll see lenses being anywhere from $100 to $10,000 but it's the same 50 millimeter lens. So what makes it so expensive? It's really the amount of glass that's in there. It's the build, it's the quality. But to invest in lenses is really important as a photographer, because thes they're going to ultimately treat the look that you're going after. So now that we've talked about focal length and so what the numbers mean, we're going to talk about the to sort of categories of lenses, the zoom lens and the prime.
91. What standard lenses should you have?: so the two major categories, when it comes to lenses, are the zoom in the prime lenses. A zoom lens means that you're able to change the focal length just by spinning this ring, so this guy you can see is currently at 24 millimeters. As you go down, you're at 70 millimeters, so this is really midrange zoom. You can go pretty wide and pretty telephoto, but really not that wide and not that telephoto. It's just so the mid range. So the other lenses the prime lens. And as you can see, this is a 28 millimeter, and that's it. It doesn't zoom. It doesn't do anything else but the major differences. Obviously, you know the size and weight. This is much larger because you have this big zoom in there. They're both F 2.8, so you know they both are just as fast as each other. But typically these are really built pretty sturdy. You'll get nicer glass, and these typically just really getting down to the details. Um, law. Pro photographers really enjoyed shooting on primes just because of the look, and typically they're a little bit faster. You will be able to get F 1.4 prime lenses, and you really don't see that in the zoom lens world. And while primes are more lightweight young, you will have to carry around several of them. Because if you're an event, let's say you have to switch each time based on the lens you want to use. Prime lenses come in handy when you know what focal length you want to shoot at. And you know what type of photo you're going for, typically at an event, will use Zoom Lins just cause it's so much easier to be standing in one place and get the wide shot, zoom and get the get the close up shot. But say you're shooting with the model or you're really able to control the situation. You're not trying to get a bunch of coverage all, you know, spend entire time on one lens and either move my camera back, move my subject back. Um, and really, you know, use that one lens to keep the same look going throughout all of my photos
92. Depth of Field - Revisited: in the previous lesson. We talked all about primes and zooms, and I just want to give you a few more things and some more information about the differences between these and and also why you would pay so much more money for a particular type of lens. So one big difference is that with these primes, typically you're able to focus much closer. This is really important when you won't get close up on something and you don't want to, you know, be limited by your lens. It's a reason that I really like primes is that you typically have that closer focus, and this is really something that you'll pay for. As you get into nicer lenses, your close focus will keep getting closer and closer. Another really important thing I want to bring up is how the focal length affects your depth of field. So when you talk about a wide angle lens, ah, a lot more is going being focused from this point. Just serve. Everything's in focus. But that's also why you get primes. Is that you know I can get half a foot away with this lens and get an amazing depth of field with a wide angle lens, which is really cool effect on the other end. You know, let's say with this big telephoto, you're already so zoomed in. So how? How close would you really want to get? Well, this one can get a foot away and still be in focus. So at 200 millimeters, you can focus on something. Ah, foot away. And that's that's pretty remarkable. Um, but no to paying on which lens you have. You know, some stock lenses, they'll be more four feet away. You just can't get as close of a focus. Ah, which isn't a bad thing. It's just that's ultimately what you're paying for some of the time. And on some lenses, you'll actually have that close focus number right here on the lens, which is just a good way to know what what your options are when it comes to that lens. Uh, also, I just want to bring up on the other end of the spectrum when you talk about telephoto lenses like the 105 What that's effectively doing is doing things more out of focus, so you'll hear people talking about Boca and Bocas something you could spend days talking about. But it's really how do things look out of focus? So sure the photos about know that model. But what do the plants look like behind her? What do the lights look like at night when they're out of focus and people pay a lot of money for a nice Boca? So that's a little bit more information about lenses. You know how they affect your depth of field, typically a telephoto lens. You'll have a shallower depth of field. But it's also, you know, really important to pay attention to what is your close focus, and you know, whether it's a wide angle or telephoto, you can get shallow it up the field. It's ultimately, when talking about lenses, you have to think of how they're going to affect your image, um, your focal length and what f stop, how fast of the lenses it will affect your depth of field. It also effects. How do things fall out of focus? What do they look like out of focus? These are all things that, as a photographer, you have to pay attention to, and it's a reason that people end up loving one lens and it's really because it's that one lens that they've spent money on to get the nicest quality or the nicest make. And they just love using it because of the look. Just one example really quick is, you know, do you shoot a portrait with a 24 millimeter at 1.4 where you're right here with model very close up, you still see her whole face. You have a shallow depth of field. It gives a really cool look on the other side. You can use a 105 be a little bit farther away, but get pretty much the same shot. You just don't have the same distortion, and this is really your creativity and how you want to take photos. So go out research what other photographers shoot with and always look, if you can find the information on, you know, what did they shoot on? What type of lens? What type of f stop? Because that's their creative choice. That was a decision made for a specific reason. So now we're going to talk about some specialty lenses, fish eyes until it shifts, which had a whole another look to your photography
93. What are our favorite lenses?: now that we have served learn the difference between zooms and crimes. I just want to show you some of the different ones that I have in my kit. I have this guy right here. It's a ah, it's a like a lens, actually. And you know one thing just so you know, I don't think that because I have a Nikon you have to use Nikon lenses or because you have a cannon, you have to use canon lenses. Plenty of manufacturers will make lenses for a wide variety of cameras. So, you know, like a typically meant for, like, a cameras. But this one right here actually has an adapter so that you can put it on a canon camera. Um, this is the seventies into 10 f four. Uh, you know, while some people say that you always should get a 2.8 or 1.4, I knew that when I'd use this lens, I'd be outdoors where there's a lot more light and the F four was gonna work for me. And honestly, the glass of like a is just gorgeous. I love the look of this lens on the flip side of this guy, which is a tow kina 11 to 16. So extreme wide angle. And in all honesty, 11 typically is a little distorted for me, you know, as you go to those really wides. It's hard for the glass toe. See all that? But no. 13 14. It's a really great wide angle lens. No, again, this is F 2.8. It's nice and fast. You're able to, ah, get a shallow depth of field seeing lower life situations, and you know, this one's a cane and mount. My friend has exact same lens, but Nikon mounted, and it's really nice. The Takina makes lenses for both Canon and Nikon. Um, personally, I shoot Nikon four, a very specific reason being that this mount has never changed for their full frame cameras . They did just come out with a new camera that uses a different mount. Um, even for that, you can get the adapter to be on this Nikon on if you can really see this, but the difference in size is pretty remarkable. On the back end, the cannons are much larger. They have much larger rear elements. Because of that, you're able to put the Nikon on Canon camera with the with a simple adapter. Really, the greatest part is that this is a lens from the eighties. Uh, this is Len's from the seventies. They all work on my brain New D 100. No, I'm glad that actually picked up to the sleds. This is what my favorite lenses to use its a nick or 105 millimeter micro or macro lens. And so what? What is this line? So it's enough to point A. It's a telephoto lens. It's fixed focal length. No zoom, Um, and it's great for portrait. You can take a full body portrait and have the background completely out of focus. You can take a landscape and still have things out of focus. Even though it's a really wide shot, you just have to step really far back. But it's also a me crow or micro, meaning that it's a macro lens. It's meant for extreme, close up photography. So, as you can see, I can get down to you know that close and see the ridges on my skin. You can see just extreme detail in extreme close up, and it's a really cool lens. Because of that you know, it's almost two lenses in one, and that's why my favorite lenses. It is fixed Focal Inc But as you can see of my telephoto 105 of my 28 which is low, more wide angle and then have my 50 and that sort of covers a broad range of focal ings. And while I love my prime lenses, since I do a lot of video stuff on the image, quality of the prime is a little bit better. I do love my 24 to 70 in the 72 to 10 and really the great for events, because from 24 to 200 you've covered such a amazing range of focal lengths that you can get pretty much any shot you want all from one location. I mean, let's say you're out of wedding. You get all the people there, you see the scenery you throw on your 7200 and then you can zoom in and see the bride and groom kissing. I mean, it's all from one place, and that's why most pros you'll see walking around have a 24 to 70 and 70 to 200. But at the end of the day, it really matters what you're taking a photo of and what you're trying to achieve with your shoot. So maybe you want to go and take Portrait's. And just having that one portrait lens is all you need. Or maybe you're covering an event and you really want that 24 to 70 because of the diversity, it really matters what you're trying to do when it comes to which lens of use. Also, it's taken me quite a few years toe get all these lenses. And so just know that going in renting lenses is a great way to see. Oh, I love the 72 200. And even though it's expensive, you know, as I get more work, that's the lens I want to get next. Or maybe you want to get a really wide angle lens, you know, maybe something like a eight millimeter, because you love the look of them. And so that's a little bit of information about focal ing zooms and crimes. But know that there's a lot of information and love, research and science and technique into how people make lenses, and you should go out and research some more because there's a lot to say about what lens you use
94. Fisheye lenses: so earlier. I talked about the Hokkien 11 to 16 and that's an extreme wide angle lens. Even wider than that. You get something called the fish eye effect, and that's typically between, you know, 10 to 8 millimeter. And really, what it's doing is actually curving the glass in a way that you gets of, Ah, circular look. It's a very you know, your lines aren't straight. It served spent ever so slightly. And what this does is it allows you to. Seymour sees more of the world, but it also gives a cool effect. I mean, just looks interesting. Typically, you'll see this at a crazy dance party, you know, for event photography. Or you might have seen it on skate videos in a lot of times. For those extreme sports getting right up in close. There's a really cool way to see it. But you also want to see you good amount the world, so it's a cool effect toe have, and so that's a fish eye. It's a very distinctive look, and next we'll be talking about another lens, which is a very distinctive look as well, which is the tilt shift
95. Tilt shift (aka swing shift) lenses: So now we're going talk about the tilt shift lens, and this is a very unique lens and something that isn't commonly used, but it cannot have really cool effect to your photos. So the cool thing about the toll shift is that instead of having your focus be this plane, you're able to move it so that maybe you want it to be like this. Maybe you want it to be, you know, not necessarily the traditional back and forth. Um, and while that might seem like it makes no sense, really, What's going down to is that instead of saying what's four feet away from me is in focus, it's saying this line is in focus, so everything here, even if it's close, even if it's far, is out of focus. But everything from clothes to far is in focus here, and you know that line is three dimensional. So instead of here being in focus, this might be in focus or that might be in focus. And it just creates a really interesting look which is best explained or understood by looking at the actual images. So I hope those images help you understand you. What told shifts are and and so the look that they create. But ultimately you really should go on meant one. If you're interested in this type of photography, because there really on another level, when it comes to lenses next we'll be talking about filters. So I hope you enjoy this lesson and I'll be seeing you soon.
96. Polarizing, ND, and UV filters: So now that we've talked about lenses and everything about lenses, Ah, I want to talk about one last element that really could make a big difference on how your lens in camera works. On one side, you have the ND filter or neutral density, and what this is is it's a filter that screws onto the front of your lens. Here it just screws on right in front, and it's high quality glass, so it doesn't affect your image quality. But what it does do is it reduces the amount of light that comes through your lens. So let's say you want to shoot at an F 1.4, but you're in the out a midday sun, so that be just too much light for you. But you want that shallow it up the field that F 1.4 gives you. So what you could do is use the neutral density filter, and what that does is it reduces the amount of light that comes in. That all depends on which Grady picking, whether it's a 0.3 point 6.9 on and they even nowadays have variable Indies, where you can actually rotate the piece of glass, and you can choose how much light you want to reduce in your image. This is a great thing to use if you're interested in video, but it's also a good thing to use in photography. If you can't get the shutter speed you want, or maybe you want to shoot at something very specific. So and these are great waiting to reduce the amount of light on the other side, you have polarizer. And while these do a similar fact to the ND filter because it does reduce the amount of light coming in the real reason you use a polarizer, it's to change the refraction or reflection of light. Um, the best examples of this are looking at blue sky. Maybe in your image. It looks a little gray as you spend the polarizer. It allows that sky to really pop and become much bluer. Another way that use of polarizer is for reflections and say you are looking through a car window or you're looking at water. As you spend the polarizer, that reflection will disappear or become more present, depending on what you're trying to do in your shot. And they're all different types of filters to use but really in something I just have to bring up is the UV filter. And this is something that you know, as you can see here, Um, it's fairly discreet, but what it does is it protects this glass. Um, if you scratch your lens, I mean, it's cost a lot of money to replace that. So by putting on a UV filter, you're basically protecting that glass. It's clear it doesn't affect your image quality. Um, there are, you know, better makes and models of just clarity of glass. But for the most part, that pretty simple, and it just it helps protect your glass a little bit more, and I highly recommend whatever lens you have and for all your lenses toe, have at least a UV filter on there just to keep it safe. So that's filters. If you have any questions, please common or direct messages were happy to help how we can Ah, and now I'm going throwback to filled
97. Conclusion - what did we learn in this section?: thank Sam for teaching us about lenses. This is the conclusion of the lens section. And in this section, Sam really covered a lot of advanced topics that I hope you found really interesting. So a couple of my favorite things that Sam talked about were explaining what focal length is. You talk about times and zooms and what the difference between a crime and a zoom is. And he also showed us some of his favorite lenses. So thanks, Sam, for explaining to us a little bit more about lenses. I think we are all better for it. And as always, if you have any questions, let us now.
98. Introduction to the Situational Photography section: Hey, what's up, photographers? Welcome to a new section on situational photography. It's in the past. Many section Sam has talked a lot about the theory of taking photos, and hopefully you've got in a lot of tangible tips from that, and you're practicing your own photography. But now, in this section, we want to give you really short lessons, but packed with full of great tips. So we're taking different situations from taking landscape photos or going out in nature and taking photos or taking portrait's of family or friends. Or just Portrait's in general. And we're taking each of those types of photos and giving you five of the best tips to dramatically improve your photos right now. So they're very tangible tips their short lessons. So we hope you enjoy them because they're packed full of great stuff. So thank you for watching, as always, and we'll see in the next video. Okay,
99. 5 Tips for Better Landscape Photos: Hey, everyone, welcome to the situational photography lesson about landscapes in these lessons were just giving you five practical tips to improve your photography in whatever situation it may be . So today we're talking about landscape, so number one tip of the day is light is magic. Shooting at dawn or dusk will make your landscape photos absolutely gorgeous. So this is the first half hour to an hour where you start to see the sunrise and then half an hour before the sun sets. And then even after the sun sets and goes beyond the horizon, this creates some great lighting number. To tip is to use a polarizing filter that boosts sky saturation. So we talked about filters in the lenses sections to go back to that one if you want to find out more about what polarizing filters are, but what they basically do is create a more contrast ID and saturate did look for skies. Tip number three is when you're shooting a landscape, make sure that your depth of field is very wide so that most of the photo is sharp, so use a smaller aperture like F stop 22 or just a wide angle lens that will have a deeper depth of field. Tip number four is to use a tripod for ultra steady shots, and you can even have a longer shutter speed due to the smaller F stop like I mentioned before, and make sure that you reduce your I s o toe have a super clean image. But basically, tip number four is bring a tripod if necessary. And the last one tip number five, is to think about the lines in your shot, especially if you're shooting ah, horizon or a skyline. Or even though skylines not necessarily a landscape, but a mountain top or any sort of lines in your in your image. Think about it and you can use the rule of thirds and put him on that lower third line or not. You can put them really high or really low in your image, but just remember to think about the lines that are in your image. Okay, so that's your five tips for taking better landscapes
100. 5 Tips for Better Nature Photos: Welcome to the situational photography lesson about shooting nature photos. So five tips for shooting better nature photos. Tip number one is to go macro. So even if you don't have a macro lens, try getting really close up. Whether you're shooting plants, for example, flowers getting close to those pedals or that pollen or the stems or anything in nature just getting really close up using a zoom lens or even a wide lens and just sticking your camera a foot away from your subject really show those details. I think those are some of the best photos that you can get from your nature photography rather than standing five feet away and just taking a wide shot. Tip Number two is to compose your images cleanly, so try to change the angle toe. Have a clean background so the viewer can focus on your main subject. So, for example, if you're taking a picture of flowers, maybe you want to change the angle. Get down low, moved to the side so that it's not a background of a bunch of other flowers, but you kind of single out one flower in particular. Or just if you're seen a bunch of things in the background, different colors. It could be a little bit distracting, so try to, like, single out whatever your subject is against the background. Tip number three is to use auto focus when photographing animals that are moving, so it's really hard to get focus when you are moving your camera as an animal is running around, so have it on auto focus, and it will help you. Tip number four is to use a lens hood to cut down lens flare, or you can use a hat or a hand. This is another great tip for any time you are shooting towards the sun or ah, large light source. And if you don't want that lens flare, some people like that effect. But if you don't want that lens flare, you can use that lens hood or your hand or a hat that basically blocks that direct light source from shining directly into that lens. Tip number five is to be patient and wear something comfortable. Getting nature photos is really great. It takes time, though, because nature is wild and you never know when you're going to get a great shot, so be patient wear comfortable shoes. Bring a chair if you can and just be ready. Toe, sit down and be one with nature as you wait for a great shot to come to you. So those were five tips were taking better nature photos.
101. Practice - Get outside and take some pictures!: Okay, So we hope you enjoyed those tips for both landscape and nature photography. And now it's time to take action. So go out practice what we taught you, and please share those pictures that you're taking with us. Whether you're watching this on you to me. Skill, Pete. Skill showered. Wherever you're watching this, post it as a project or discussion item. And we would love to see photos that you're taking using our tips. So thanks for watching. And we'll see you in the next video.
102. 5 Tips for Better Portraits: Hey, everyone, welcome to another situational photography lesson. Today I'm giving you five tips for creating better portrait's. So tip number one is to remember your rules and frame subjects properly. So think about rule of thirds. Don't put your subject in the center unless you're taking a typical portrait image that might be for a school yearbook or something like that. But if you're just taking pictures of someone, put them off to the center a little bit. Even if their faces covering the entire frame and it's a head shot, you can put them slightly off center at least turn their head a little bit, so they're not looking directly at the camera. Tip number two is try to get a blurry background. When you have Portrait's, you're really trying to focus in on the subject and so having everything sharpen the image will be distracting. So rather, use a long telephoto lens or just create a very shallow depth of field using your aperture , opening it up wide to like an F 1.4 F two F 2.81 of those and get a blurry background. Speaking of backgrounds, tip number three is to think creatively about your background. So wherever you are, whether you have a backdrop or you're outside or indoors, think about having something that is more interesting than just a white wall. Now maybe you want a plane look, but maybe you don't want them to sit in front of the white wall. Put them in front of a few different objects that are out of focus, and it will create a cool effect. Tip number four is to try a serious pose so often when families air taking photos of their loved ones or you're just taking photos around. It's the automatic response, say cheese and everyone smiles. But if you're a photographer looking to create art out of your portrait, try to get your subjects toe look serious. And not that it has to be sad, but sometimes a serious look creates a better image and more interesting image than a smiling portrait. And the last tip, Number five, is to elongate the subject's neck, so have them stick their neck out a little bit, tilt their neck up. This is something you've probably heard when someone has taken a head shot of you as a kid or at your workplace, but it really creates a more three D look, and that's more flattering than if your face and your neck and your body is all just a flat two D two dimensional look. So having your subjects stick their neck out, look up or tilt to the side a little bit will help make their body and their face look more three d, and that will be a little bit more flattering for them. So those were five tips for taking Better Portrait's.
103. 5 Tips for Better Portrait Lighting: following up our tips for better Portrait's. Today's tips are five tips for better portrait lighting, and a few of these are actually different types of lighting. Try them out. Tip number one is to do split lighting, so this is where you put your light source about 90 degrees to the side of your subject, so it's very dramatic, and it creates lots of shadows, especially if the rest of the room or where of you are is relatively dark and it can create some great looks. But this it tends to be a little bit more of a masculine look, so sometimes it doesn't look as good on women. So just keep that in mind. Tip number two is to try to make sure that you have an I light or a catch light. This is something where you actually see the light source in your subject's eyes. It's a little glint in their eye, and it makes their eyes pop rather than being a little bit dole and lifeless So you can see in these images that there's the light source in their actual I reflecting, and it makes them pop. Tip number three is to try Rembrandt lighting. So this is a 45 degree angle from above light source, and it creates a trapped triangle on one cheek. And this is what the artist Rembrandt used to do in his paintings. And it's still a very interesting and semi dramatic type of lighting. Tip number four is to use backlighting, so we've seen a lot of different images of portrait's, and by adding a little bit of back lighting or rim lighting or a hair light, it's all one in the same. It really separates your subject from the background. If your backlight is, say, for example, the sun or something very, very powerful, you may need to fill the front of your subject's face with a flash, and this can actually create some very cool images. So is one of the times that we suggest using your flash if the sun or a major light source is right behind your subjects head. But remember, you have to position your subject and the camera so that the light sources actually behind their head, being blocked from view and not just over their shoulder, because then you're you're going to have a big, bright, overexposed sun or light in the top writer left corner of your image. Really make sure that the subject is blocking that light source. Tip number five is to get outside. So if you're outside and you're trying to figure out the best lighting, you might have to put your subject in the shade. Sometimes having the sun beaming directly on your subject isn't going to be the most pleasant lighting, so stick them in the shade. But make sure that the background isn't to sonny isn't too bright, because if your subject is in the shade and you're exposing properly to your subject and it's very sunny in the background, the background will then end up being overexposed. And typically you don't want much overexposure in your background and wool, and it will look a little strange if it's just your subject that is exposed properly and then just a very overexposed background. So try toe position, your subject and the camera so that both your subject and the background are relatively shady. And those air five tips for improving the lighting of your portrait's
104. 5 Tips for Better Photos of Kids (or Pets): everyone. Here are five tips for taking better photos of your kids. Tip number one is to get at eye level now. Sam mentioned in previous lessons about how, when we shoot Portrait's, the camera is best to be at eye level, because that's how we see other people. But we're always looking down at kids, but that doesn't mean that photos should be looking down at kids. So get down at eye level and you will see that your photos automatically become a little bit better. Tip number two is to shoot candid photos. Sometimes parents and I know my parents and I did with my younger brother were always trying to get the kid to focus on us. But some of the best photos that I have and remember are ones where we were just being candid and not posing for the camera. Not looking at the camera. Tip number three. So this one goes to all the parents with kids who would like to be silly. Well, just let them be silly for its take. A few photos come up with the deal. Hey, I'll take a few photos, make your silly faces, and then take a couple with a nice smile for mom or dad. I don't know if it's going to work, but you can try. Tip number four is to use natural and ambient light, not the flash. I know for a lot of people using, the flash is automatic and you just go to using the flash of your indoors. But if you can try toe, put your kids near the window. If you're taking a portrait that's not candid or if they're outside, definitely choose not to use the flash unless you're using the flash as a fill light with the sun. As a backlight of as we talked about in the lighting section, Tim Number five is to get in close again. This goes with being eye level. Typically, you just see your kid running around you but really getting close. Get a foot away, shoot with a wide lens or a zoom out, and really you'll see the fact that it really creates, um, great images. So those air five tips for taking better photos of your kids
105. Practice - Take pictures of your kid (or pet)!: Phil back with another practice session today. I want you to follow the tips from the last video about taking pictures of pets or kids and put them into place. So hopefully you have a kid or a pet or some sort of fast moving creature around that you can practice with. But use those five tips we gave you and again post those pictures to the core site. Of course, if you want us to see pictures of your kids or pets, most likely will want to see the pictures of your pets. But anyways, thank you for watching, as always, go practice and improve your photography.
106. Conclusion - what did we learn in this section?: Hey, everyone, thank you for watching this section where you really hope you enjoyed it and let us know what you thought of the sort of short, sweet lesson style that we came up with for this section. We thought that it would be good after some sort of long winded explanations of intricate topics, that we kind of cut it down to the basics and just gave you five simple. That's 10 by simple, easy to follow tips to improve your photos. So I hope you enjoy this section on situational photography, and we'll see in the next one.
107. Introduction to the Modern Photography section: everyone. Welcome to a new section in the photography masterclass in this section will be covering smartphone photography. We'll be giving you some great tips on how to take better images with your smartphone. Sam will be covering some of his favorite APS that he uses, and lastly, we'll show you how to make money with photos that you take on your smartphone. Now it's time to pass it over a Sam. Here he is.
108. Using our favorite smartphone apps: So when it comes to ABS, Although I'm a huge proponent of just using the camera feature, there are Tuapse that I always use of the first think instagram. Obviously, it's a great way to share the photos you've taken. I think they've really built in some great features in terms of photo editing you and I'm not talking about filters. I'm talking about changing their highlights. Who shadows being able to add contrast, brightness and really have that customizable settings built into the APP. I also for my own photography, have, you know, my social media following I like, you know, showing people what I'm capable of doing. But I only share photos taken from my iPhone. I just got into that way back when, and I don't really believe in, you know, taking my DSLR photos and putting them on to my instagram. Although I'm thinking of starting that soon. My other favorite app is Photosynth and this is so cool sort of panorama, sort of three D photo thing. And basically, what you do is you take a photo here and you move around and you slowly fill out the photo . Um, And while you know the whole concept is to have a three D image. I've utilized it to take really cool sort of wide angle looking shots. And I just want to show you a couple of these to show you. So the fact that Photosynth can give in your photos So those were some of my photosynth photos? Um, I think they had a really cool look, and I personally really like it. But to be completely honest, I'm somewhat of a traditionalist. I think you just using the camera. No feature on your smartphone is one the best ways because you're really focusing on, you know, your composition on the lighting on what you're taking a photo of your not focusing on what cool effects can you put on their cropping it and all the stuff. I mean, I get it. I get why people do annuals of the cinematic 2.4 to 1 ratio because it's that sort of anamorphic look or adding a white border. All these different things toe add the look. I just like taking the photos. And if I capture a cool moment, you know, that's what sort of all about for me, I also you know, I love Instagram and Photosynth, mainly because when I travel it's a great way to share photos and also to capture, you know, the entire landscape on one shot. You know, the panoramic setting on the iPhone photo thing. It is great, but you're able to see a little more up a little more. Down with the photos. Um, so those are two of my favorite APS. I highly recommend you downloading and deleting and downloading and deleting different APs trying them out, seeing what the different futures are, because I know some people love specific APS that I've never even heard of. So go out, see what's out there, and really remember that it comes down to the moment, the lighting and the composition.
109. How to take better pictures with your smartphone: Hey, everyone, and welcome back today we're going to dive into the smartphone a little bit deeper and really, how to take great photos with this. As I've mentioned before, I love using the smartphone. Um, you know this photo back Here's from what you ph you guys able to get into some really unique situations, be climbing all over the place and not too worried about having a big, expensive camera with me. But just snap it with my iPhone and you know, some of the things we'll be talking about in this section, um, is also social media and how I utilize it to really know on Instagram, all my photos are taken from my phone, and it's over point of pride for me because you're able to take really remarkable things all with this with this device. So when talking about smartphone photography, there's a few things you have to understand. First off is your limited by this lens. Um, you know, most of the time, you don't want to zoom in too much just because you start to distort your image, get more grain because it's it's ultimately a digital zoom and yours. Your lens isn't actually zooming in your just, you know, expanding the photo you're taking. So I always recommend you. Don't zoom in if you are only do it like 10%. And if you really want to zoom in later, you know, take a wider shot and zoom in. Once you've taken the photo, on the other hand, you have a very small sensor. So the dynamic range or the amount of light it can handles fairly limited. Not to say though, the HDR, the high dynamic range setting, has made it so these phones can actually get pretty good contrast in an image. So another good thing to pay attention to when taking fotos is your exposure and you know it is fairly limited. But when taking the photo, you just click on the screen and Okay, well, that's of a neutral. That's unusual. But how about the shadows? And you can see how much more light you need to expose to the shadows. And this is something you can change as you edit the photo. You won't have a whole lot of mange, but you can you can get something out of it. Um, some of my favorite photos have been taken really in the morning time or in overcast lighting, and this is a personal preference. But I like the morning light because you'll get a little more. You do get some contrast, but the lighting is a little more even and just has a nice feeling to it or cloudy photos. You know, you just have that nice, overcast, soft, diffuse light everywhere, and you really pay attention to what you're taking a photo of. That's what brings me to my next section is, you know, composition. This applies the same as normal photography. One. The biggest differences is always take a photo and landscape mode. This is just how my eye works. I don't like portrait mode. I like landscape mode, but I also typically pay attention to, you know, is this going on instagram? Because although your phone you can select square or landscape mode, I still take it as a normal photo and just know that I'll be cropping it later. For Instagram, it's just something I pay attention to. If it helps your I shoot and square mode shoot in instagram so that you know what your image is gonna look like ultimately, but in terms of composition. It's all the same rules that apply your rule of thirds your negative space. You know, these different framing techniques. It's all the same as your normal DSLR or point and shoot camera. One way to get more dynamic photos is to also use a close focus. You know these photos nowadays you're able to get really close and focus on on a specific thing. And again, that's all. By coming in here and selecting where you want to focus, you know you can't get too close, but you look right about there. Okay, have a little bit of depth of field in my shot. Now it's a little more creative looking, and it just you know, it always adds another dimension to your photo when you can use that depth of field in there. Uh, ultimately, I will say that the best way to use these photos is to get photos that people just don't see as possible. Some of those have been putting my hand outside the car. I always use a life proof case because I do a lot of work out in the water, whether it's, you know, sir photography or when I was in Panama using it down there and also, you know, walking out into the rain and getting shots in the rain. And Evans, it won't. Did you take your DSLR? There was like, No, I have a life briefcase and I was able to get shots in the water, and it just adds another layer to your photography. I mean to get a waterproof casing. Four year DS Lars thousands of dollars and you can just get this guy. You know, I think it was like 50 bucks and now waterproof casing for my camera. It's It's a really great tool to use. And lastly, I just wanted to say that, you know, when it comes to filters and all that type of stuff, you know, it's cool to add colors and toe, you know, maybe at the saturation contrast a little bit more thes are all things that you can do on your own and using someone else's preset like you know, by all means. If you think it looks cool or if it's your look, do it. But when it comes to taking photos with your smartphone, focus on composition. Focus on the fact that this is a really small, lightweight camera that you can take almost anywhere. Um, it's it's just incredible in that way, because you can get photos that you probably couldn't get anywhere else. So utilize your composition skills utilizing using this extra button here, you know, to get high up photos to get cool angles. Um, and the fact that's digital, you can take thousands of photos and pick your favorite one out of all those.
110. Tips for composing better square images & Instagram success!: So finally, I wanted to talk about Instagram. I mean, it's really probably the most popular social media, photography based app, and I know that they've gone into video a little bit. But photos, really, let's Let's be honest. It's the big thing on Instagram, and I think there's a few things that make certain Instagram accounts more interesting than others. Ah, one of them is You know, the images you post, obviously. So what is within your image and really? You know why? Why do I wanna look at it? Um, I think adding great depth, great detail having, you know, it's really ultimately having a dynamic photo. Because it's a square image. There's it's gonna be viewed on a smart phone. It's not going to be blown up, are really big necessarily. Um, and so is how interesting of a photo can you take? You know, in terms of composition, I think really having a focus is always helpful. Um, but also having you know, the description down blow adds a lot. Um, you know, currently, I'm looking at a photo from NASA. It's a picture of a moon. You know, we've all seen the moon before, but then you go beneath it and it gives a whole little description of, you know, this is actually one of Saturn's moons, and it is this far away, and I've, you know, just by sitting here and reading it, I've learned something about why this photos interesting. Um, I think a lot people take photos, and it's sort of like Look where I am. And it doesn't say that much, though, And I think that by informing people as to why is this interesting photo and a little back story adds a lot. Another great success story of Instagram, I think, is humans of New York. Um, you know, they take really beautiful portrait of people. They're not necessarily extremely dynamic photos, but the very honest photos of people and the photos are taken on DSLR. I don't think all of them are taken on an iPhone, but what they do is they share these people's stories and they interview the people. They really you learn a lot about people that live on the streets of New York or, you know, that just live in New York, and they all have such interesting stories, and it's a great thing that as you're scrolling through Instagram, it makes easier pause, and you look that image, read the description and then go back and look at the image for a second time. And I think something really unique on the Instagram platform. Another big thing that people utilize our hashtags and, you know law times will be sunset hashtag sunset. It's a little too easy that way. It's really about knowing trends out there, knowing what's going on. Is there an ad campaign? Is there some big social media campaign and you wanna be a part of it? And you're paying attention to that whole world so that when you go take a photo of whatever it might be, let's say the drought in California, maybe you go on a hike and you see something that really shows that and you go and take a photo. You share it with that account by hashtag ing it, and then someone goes and shares your photo and thousands more people see it. Um, I randomly took a photo at L. A X and Olson L. A X is photo account, shared my photo and it got a lot more followers. They got a lot more likes, and people do that all the time with different hashtags or social media campaigns. So the last thing I wanted to talk about is the square image and thinking of how you take this photo. And ultimately, how are people gonna view it? Um, most the time. If you're sharing something on INSTAGRAM, they're gonna look at it on their iPhone. Granted, you can share this to Twitter or Facebook, where someone might see it on the computer. But most the time will be on a smartphone or a smaller screen. Um, and so that square emidio, when it comes to his showing negative space when it comes to you know, some different types of composition, you know, whether you're using rule thirds or whatever it is, um, you have to think that you're not gonna have a lot of detail. You're not gonna be able to, like, really have a big image that you're seeing every last little thing. It's more about filling your frame with interesting things. Um, and don't get me wrong. You can do negative space, by all means. But I think some of the greatest photos have something happening in every corner. Um have you know, a lot of a lot of things that you conserve Look at and catch. That might not be really obvious at first. Um, and granted, you know, at the end of the day, this is something that you can take thousands of photos, share thousands of photos, and you don't need the greatest photo ever each day. Ah, you really just need consistency in your images. You know, maybe it's not the best. Teoh. Just share a bunch of photos of you parting if you want to be a photographer because those are going to the types of photos that people want to see, they're gonna want to see your photography. They're gonna want to see you doing creative and new things with your smartphone. And so just remember that when it comes to taking photos on your phone, that it's a great device. But really, it's all about capturing moments. It's still about photography. And if you want, take a selfie every now and then Great. If you want to share events that you're going to great. But if you really want to be a photographer, you know, start utilizing your smartphone, go practice taking photos just with this and see how you can take better photos with it and what type of moments you want to be capturing. I know a lot of people use DSLR photos on their Instagram accounts, and there's really nothing wrong with that. But I think there is something to say about a photo taken on your phone posted to social media that makes people inspired or makes people really be like Oh my gosh, how they get that photo and you concert around like, Well, actually, that's because I was on my iPhone and, you know, I was able to go skydiving with it, you know, or whatever it ISS. So now that we've talked a little bit about Instagram and how to take better photos with your smartphone, please feel free to follow me at Shimizu Jones on, and I'll be sure to fall you back. And if you ever have any questions, please reach out to me. I'm always happy to help, so get out there, start, you know, practicing with your smartphone and see what's capable of because, really, it's one of my favorite tools to use
111. Practice - Take your best smart phone photo!: everyone, it's Phil back with another practice session. Thanks, Sam, for giving us some great tips on how to take better photos with your smartphone, and now it's time for you to put it in practice. So in this practice session, I want you to get out there and try to take the very best photo that you've ever taken with your phone. As you can see behind me, there's a couple of great images that Sam took just with a smartphone. And this kind of proves that you don't need a fancy get up to take amazing photos. And so take some photos, share them with us, share them on the class page, will review them, tell you what we like, what we don't like about them. And ultimately, we just want you to have fun and know that you can take a great photo with any camera. So thanks for watching and have fun
112. Conclusion - what did we learn in this section?: everyone. I hope you really enjoy this section on smartphone photography. Sam gave us some amazing tips on taking better images with your smartphone, and he also gave us some of his favorite APS, and we also showed you some ways to make money with the photos you take on your smartphone . Taking photos with your smartphone is a great way to practice all of the other techniques we've learned in this class, such as composition, lighting and really understanding how the camera works. So I hope you enjoy this section, and now it's time to move on to the next section. We're all be showing you how to edit photos.
113. Introduction to the Photo Editing section: everyone. Welcome to a new section of the photography masterclass in this section. I'm going to be covering photo editing, So follow me as I walk through both Adobe Light Room photo shop and a few other free programs that I used to edit my photos. Now all these programs are both Mac and PC friendly. While I'll be editing on My Mac, you can definitely use these two programs, like Roman Photo Shop in both a Mac or PC and the rest of the free editing Softwares that I'm gonna talk about. I'll try Teoh, have a few from each Mac and PC, so get excited. This is really where we bring our photos life, improve little mistakes that we've made while taking them and really make art from our photos. So welcome aboard and let's get straight to it.
114. What is photo editing, and why do we do it?: everyone. Welcome to the photo editing section today. I want Teoh basically explain why we edit photos. Now Don't get distracted by all these buttons and what is going on in this application light room yet because we will be covering everything that you need to get started and edit your photos in the next few lessons. But let me just show you why we edit. And I think that's the best way to basically explain what we're doing. So bam! That is why we edit photos. Turning something like this, which is a great photo composed correctly, is of, ah, really great subject, this tall mountain. But we can make it better by editing photo editing as a way Teoh make colors pop to adjust the exposure of an image. If it's too bright or too dark, you can even dive into the specific regions of your photo to increase. The darkness were decreased. The brightness you consume elect specific colors that you want to make saturated or less saturated. That means make it more colorful or less colorful. There are ways to add vignettes and other creative effects to make your photos look even more interesting to the viewer to really draw in the eye of the viewer to a specific subject. And really, I think this just goes to show what the differences between these two images, the one on the left or now the top is one that is pretty interesting. But the edited one is now one that I really can enjoy. And while this photo is a little bit dramatic and the colors are very intense and the clouds more pronounced and you don't have to do, photo editing as intense is this for most of your photos, I think that most photos can do with a little bit of perfecting to make them look better. So I hope this visual representation of why we edit has helped you and has inspired you to take your own photos that might look like one on the left but can turn into one that looks like something on the right. Thanks for joining us for this section. I'm so excited to have you here. Now let's get straight to the editing
115. What programs do we like for editing?: I quickly wanted to just chat about which photo editors will be using in this course and which one I prefer as a photo editor. The 1st 1 is Light Room, which is theme, Most Robust photo editor, and it's basically that's its purpose. That's what it is there to do. It's there to organize an edit, your photos. It's an adobe product, and it's sort of an extension of photo shop. They call it Photoshopped Light Room now, and it's a great program. Photo Shop, on the other hand, is also a photo editor, and you probably think of it as the verb to photo shop. It's basically fixing images or manipulating images. And that's how I like to define the difference between why I use Light Room vs Photoshopped for photo editing. I think that photo shop is a great photo manipulator, but I think photo editing is better done in light room. It has a lot of features that make it more fluid and just a little bit more efficient, and so that's why I use lighter, amenable talk about that in the future. Lessons when I actually show you what I'm doing in light room and why it's better than photo shop. I Photo is the program that comes with all Macs, and it's free when you have an apple computer and it's a way to store your photos, and it has editing functions in it. And I put I photo and dot, dot dot because this really goes for any photo editor, whether you're on a Mac or a PC. If you're on your phone, any sort of photo editor will be able to do the same things. You're basically fixing fixing things on your photo like exposure like color correction, like adding saturation or D saturation. Maybe adding a vignette or a blur, sharpening your image a little bit. These are all things that you basically can do across the board. And so, if you know the theory behind photo editing, if you know what to do to a photo, then it really doesn't matter what software you're using. Most cameras come with a photo editing software, so if you have a canon camera or a Nikon camera, they come with some sort of application. When you purchase the camera, both light room and Photoshop are a little bit on the price. Your side you. Now, if you want to get the latest version of light room or photo shop, you have to pay for a subscription to Creative Cloud. Some institutions and schools actually have deals where you can get it for free. And I do through my job at UC Berkeley and all students at UC Berkeley actually get the adobe products for free. So you should check with your school or company in case they have a deal with Adobe. But I think the the the monthly charges about 20 bucks or so, which is not cheap. But you get a great product, and it's actually a better deal than purchasing light Rumor photo shop for a one time cost of like five or $600 then having to do that again every other year when they update it. So anyways, the point of this video is just to say that will be showing you how to edit in both light room photo shop and actually all three and I photo. And really, the theory behind editing is what I'm trying to teach you so that you can understand how to make your photos look better. That being said I highly suggest downloading a free trial of light room or photo shop. I'll teach you how to do that in the next video, and it's totally free. It's a 30 day trial, and you can test it out while you're taking this course. And if you really like it and you get more and more into photography, you should think about subscribing. I know for me and for all of my friends, professional photographers, Wedding photographer is anyone that I know who at its photos for a living, they use light room. So anyways, I hope this was very informative for you, and we will move on to the next lesson where I'll show you how to get a free trial of light room and photo shop, and then we'll finally move on to actually editing our photos. See you there
116. How to get a free trial of Adobe Lightroom & Photoshop: Hey, Ron, welcome to this lesson on how to get a free version free trial of any adobe software, so we'll be using both photo shop and Photoshopped light room in this section. So if you want to go ahead and try them out or Photoshop Elements is even here on the Adobe downloads page. So if you go to adobe dot com slash downloads, you will see all of the options. Click on any of them, and then you will see a download trial option. Or you can download Creative Cloud right here, and it installs a little application on your computer and through the application, you can download free trials of any of these software applications, or you can actually purchase them. Eso as you can see all of them have free trials, and this is any adobe products, so it's pretty cool. So go ahead and download Photoshopped and Light Room, and we'll get going in the next lesson with light room
117. Importing and Organization in Lightroom: everyone, welcome to the first lesson where we're actually going to dive into Adobe Light Room. I have picked a selection of photos from last summer's trip to Switzerland and Spain that I took with my now fiance. It's actually where I proposed to my girlfriend, and you'll actually see a picture of her soon. But just a quick note for all of these lessons with adobe light room and photo shop. All the editing lessons please wash in full screen and turn on the HD mode. I know HD is not automatically a mode on sometimes when you're watching videos, so make sure that you're watching both in full screen and HD and preferably on a desk top computer, laptop or iPad. If you're watching this on a mobile device, it might be a little bit hard to understand what's going on, and I apologize for that. But because most people will be watching this on a bigger screen, I wanted to create it for people who are going to be editing on light room because you can't really at it. Photos on smartphone. So, anyways, all that being said, let's move into our first lesson, which is going to be about importing and organization of photos within light room. So if you go at an open light room, which maybe you downloaded, you will get this screen on the top. There are different options, different tabs for basically rooms within light room. You have your library room, which is where we are right now and where you can import photos. You have the developed room where you can actually edit your photos. You have different options for types of saving your your projects and your photos, and that's pretty much where we're going to leave it for now. So on the bottom left, you see you have an import button, and what you can do is click that and then on the left, you have your source monitor, which goes into your hard drive and sees all of your folders so you should see your computer's files over here. I know that my photos that I am going to edit are in this photos to edit folder on my desktop. So as you can see once you click a folder that has photos, all of the photos will pop up here and you can go ahead and select all the photos by checking them on or off appear all photos or one at a time. If you don't want to select all of them or appear at the top middle, you can select all photos or new photos. So say you added photos to your light room at it library. And then tomorrow you added more photos to that folder and you try to import it. Light room will tell you if you've already imported ones so that you don't have to duplicate them, which is really awesome. Down here in the bottom left area, you have different ways to view your photos, and then you can really see if you want to include them or not by clicking right or left on the arrow keys. Utkan see all the photos that I'm going to edit. Some of them are great. Some of them have some issues, but that's what we're going to be covering in light room. So I think this gives us a good sample range of photos to work with. So there you have it. You can import by clicking that button button on the bottom rate, and now you're photos are in the library
118. Rating photographs - what is our process?: Now that we have our photos with in light room, let's go ahead and start ranking them. This is a great weight of filter the good images from the bad images. Now, I'm going to want to edit all of these photos eventually, but this is how you would do it. So first, I would open up these to a larger size so I can click this full screen button down here. Down here in the bottom, you'll see five stars, and this is basically a ranking. And you can kind of say to yourself, one means this to means this three means this. But basically what I do is five is an amazing photo best, you know, top photo that I love so much. Four is a great photo. Three is a good photo. And so three and above I'm going to edit to is a not so good photo. And I'm probably not going to edit it even because it's just not that great. And one is just a terrible photo that I don't even know what I was doing in that. So what I can do is go through and say I I like this photo. I was feeling very inspired about the textures that I was seeing on a particular day. And so what I can do is say I think it's a four. So I'm gonna hit that four stars or on your keyboard, you can hit the number 1234 or five. And that sets the rating to whatever you want. So I always suggest using the keyboard as much as possible. Minimizing your use of the mouse actually speeds up your workflow a lot. And I can use the arrow keys right and left on my keyboard to go to the next one. Okay, so this one is not that great. So I would probably rate it a two. Maybe I can edit it a little bit. Sharpen it up. But right now I'm just leaving at two. All right? Wow. This one is pretty terrible. Um, totally overexposed. But I'm going to be using it for an example later on on how to fix exposure. But that one is a one. Okay, I like this one a lot. It's looking pretty good, but I see it's not too sharp, so I'm gonna call that a three. So it's a good one. Okay, this is a nice one of my fiance, Isabel and I. This is actually right after I proposed to hort her. So you can tell in this photo, but we were crying, like, five seconds before this. So, yes, I am an emotional sap, but that's OK. I wear it proud. So I like this photo. I'm gonna give it a four. Okay. I really, really like this photo of the mountains in the Swiss Alps. I'm going to give this a five, because I think I could make this look really amazing. Something that I would want to even put on my wall. Okay, let's check out this one. This one's a pretty cool photo to a long exposure that we I took when we were shooting off fireworks on Swiss National Day, August 1st, which is basically the Swiss version of while the Americans Fourth of July. So it's their national holiday, so I'm going to give this one a three. That's good, but it's not my favorite photo. Okay? I really like this 12 I think I could do something very cool with this one, and I'm not gonna tell you yet, but I'm gonna give that one of five. Okay. I really, really like this one, too. I love the colors. Is this was of the cigarette? A familia in Barcelona and yeah, just amazing photos. So I'm gonna give that one of five. This was also taken there and kind of funny portrait of tourists. And I'm going to give that one a three cause I thought was pretty good. And this one, I think, is pretty great as well. I like the sun shining through, and I think I Kenbrell it in up those towers a bit to make it a really great photo. Okay, so there you have it. So what do those ratings mean? So if I go over to filters, so if I go filters off, I can then go down to rated or if I do filters off and you see here just to the left of it . There are different ranges. And as I click through over here on the image, you see that it says one star and higher two stars and higher three stars and higher, etcetera. And so that limits the amount of photos that are in your little dark down here and Why would you want that? Well, if I want photos that are three stars and higher and I don't want to even see the ones that are two stars or one star this is a great way so that I know this is These are the photos that I want to edit. It doesn't mean that they're not in the library. I can always go to filters off. They're in the library, but it is organized for me so that I can really see the ones that I want to edit. So that's how you rate photos in light room and as a great step for organizing your photos . And as you can see from the past couple lessons, I really love organization, and it really improves my workflow, and I think it will improve yours as well. So let's get straight into the editing. In the very next lesson for Adobe Light Room
119. Practice - Import & rate your photos!: Hey, everyone, welcome to a practice session in the photography masterclass in this photo editing section . So for this practice, I want you to import and start rating and organizing your own photos in Adobe Light Room. Now, if you're not using light room, you could skip this practice. But I think light Room is a great program to use, especially for professional Photographer is So that's you. Time to practice. So import rate your photos and organize them in the ways that I taught you in the past couple of videos. So thanks for watching. As always, let me know if you have any questions and otherwise we'll see in the next video.
120. Adjusting exposure: Now we have our photos all rated and ready to go. I've turned my filters off because I want to be able to see all of these sample images to edit. And in this first lesson, I want to talk about exposure. But first, how do we edit our photos and light room? We are now in our library. Head over to that. Develop, Tad, you'll notice Here on the right, there are some quick develop options, changing exposure, clarity, vier, vibrance. All things will go over in future lessons. But I want you you to go over the to the developed have because this is really the more advanced way to do it. And so first, don't pay attention to any of these crazy amount of options because we'll go over those. And all I want you to focus on is what this lesson is about. And that's exposure. And the main ways to change exposure are through these sliders Over here under there's these things. That's a tone and auto right here. And this is exposure. Contrast highlights shadows, whites and blacks. Okay, so then you have to change it to the picture that you want to edit so I'm going to go ahead and use this last one as an example for adjusting exposure. So as you can see, the towers are sort of under exposed. The overall picture is not to under exposed, but I think it is overall little bit under exposed. But the sky is not too bad, and especially here where the sun is. That's actually overexposed, But it's nice because it's the sun. It probably should be overexposed because it's looking straight at the sun. But let's go over how these things affect exposure. So this first slider, the exposure slider? Well, it does exactly that if you slide to the left or slide to the right and basically increases or decreases the exposure of the entire photo, I'm doing this. You will see up here in the top, right, the hissed a gram showing, Oops, that's contrast, showing where the colors and the brightness lie. So what's this spike is saying is that there are a lot of shadows. If I go to the right and you see this, these highlights these these mountains over here in these hills. That's all these highlights, which is this lighter area. And as I go down, you'll notice that there's more and more blacks or darks, and over here it to the full left. That's black, complete darkness. So, as you can see here, the towers are now completely black. If I go over to the right, I get a lot of whites so completely white, and that is overexposed, and you'll even see this red pop up when it's over, exposed. And that's not and you don't want that. So let me go back to the middle. And one way to get back to the middle is just to double click whatever slider you're working with. So the exposure slider is affecting the entire photo, which is something you might want to do sometimes down below contrast, this is just making the blacks blacker and the whites whiter or the blacks whiter, and the whites dark her, so it's kind of confusing. But as I slide through here, if I go to the right, you will see that the Little Hills and the sister Graham are moving further apart, making things wider and darker at the same time. And then if they go to the left, it's moving everything towards the middle and you can see that the photo because a little bit more bland. And now this is totally a preference of yours, whether you want it to be sort of a flat looking image and have not too much contrast or be a little bit more punchy and have more contrast. But that's not really the best way to actually change exposure. I would say that's more of a stylistic thing that I would play with after playing with the exposure with the exposure sledder and these ones below the highlights shadows, whites and blacks. Now what these do, you might guess, are affecting just that range of colors and parts of your photo. So the highlights. So that's everything that is sort of not pure white, but not dark. If I slide this up, it just affects that. So see, it's just affecting the clouds, where the sun is a little bit and the brighter parts of my image. So I'm just going to leave that one for now. Shadows that's going to affect just the shadows, the darker parts, but not the pure blacks, but just the shadows. And this is where my towers are and as you can see there. I can really get a lot of information from this photo because it was shot in raw, and so that's really going to help. Before I do anything there, let me just show you the whites. So the whites are the pure whites, so you have pure whites all over this image. But it's mostly concentrated around where the sun is shining and then the pure blacks again . That's also sort of where this light pole is, and in some of these other parts of the image where there's pure black and even can start to control the shadows if you bring it down a ways and seeing with the whites, it can start to play with the highlights if you bring it up all the way. Another way to sort of control These is if you have your mouse hovered over one of these sliders and press upper down on the your keyboard. It increases or decreases the value by five. So that's a good way to sort of systematically increase or decrease the numbers. Okay, so now that you know what all these sliders do, what would I do with this photo? Well, you can probably guess that I want to boost my shadows, so make them a little bit brighter. So I'm just going toe, hover my mouse over the shadows and pressed up until I like it. So something like that is pretty good. I don't want it to be completely bright, but I like something like that where you can see the detail in there and then maybe I want my shot highlights to be a little bit brighter as well. So something like that. But maybe I want my blacks to be a little bit darker. And so when I make my blacks darker and my highlights brighter, I'm effectively adding contrast like this slider does, but doing it in a customized way until I see what I like. I'm just going to up the exposure overall and see what it looks like. So if I go too far, the background gets to get blown out and what does blown out mean? It just means it's all white and it doesn't have any detail, so I don't want that. I like having the detail in the sky. You can see the clouds, even though it's kind of light. You can see the detail. And so I think something like that is pretty good. Actually, I can go a little bit more contrast, see what the whites tab does. I really if I want to drop the whites? Actually, it makes this guy a little bit more detailed and defined. But something like that is good. And what I can do to see what it looks like without the, um, effects that I just did. I can click this reset button and then press undue control Z or commands E on your keyboard to see what all the settings that you've set and see it original. So that is pretty cool. See how much it has changed and how much of a better photo it is. And that just goes to show the power of exposure. Now, this is one thing that I showed earlier in the class, if you remember. But this also just shows the power of shooting and raw. Now this image is completely blown out, completely overexposed. I think I had the settings for indoors, and then I just took the picture outside and was looking at the settings on this first shot . But as I dropped down this exposure slider. You can see that there's still a lot of detail in this wall over here. Even in Isabel's face, you can see that some of it is going to be a little bit too bright to be detailed enough. It's just too bright to ever expose. You can't find the detail in there. But if I dropped on the exposure a bit, if I drop down the whites and dropped on the highlights, you can start to get a somewhat usable photo. Now, this is not how you should take photos, but this is just an example of how exposure works in light room. Okay, I hope you enjoyed this lesson on exposure and we'll see you in the next video.
121. Adjusting color temperature (white balance): today we're talking about fixing the white balance of your photos or the color temperature with adobe light room Again, I just want to remind you please watch these lessons in the photography editing section in full screen in HD. And I hope you're having a wonderful to hate today. Okay, so I found a new photo that I haven't been using before That I didn't import from Barcelona , and this was a good example of improper white balance. And I forget if I was shooting this on auto white balance or not, but nonetheless, it came back and it wasn't proper white balance. It looks a little blue, and it's just not great. So in your developed tab, actually above exposure, what we were doing in the last video there is the treatment on how toe fix white balance WB . So there are different options. So if you just go where it says as shot, you can click that and go down toe auto or say it was cloudy or shady. See, it doesn't really fix it completely, so I tend not to use these options. So I'm just going to go back as a shot. Below that are these sliders. And so these sliders are what we're going to be using to fix white about so the first is the temperature. So this goes from cool of 2000 toe warm of 50,000 and so you can see as I get warmer, it starts to look a little bit more natural because it was cool. The picture was cool originally, and so making it warmer will make it look more normal. But sometimes when you make it warm, it's not just adding warmth to it, but you have to change the green and magenta. So these air this this tent slider, I could make it more green, but that doesn't look right, so I could make it a little bit more magenta. And that's starting to look like a riel, properly white balance photo so I can go back and forth, and I think that looks pretty good the other way to do this. So I'm just going to reset. Those is to use this eye dropper so I can click the eyedropper, then go into my photo and find something that should be white. So you should fighting something that should be perfectly white and say this from this car , which I think should be white. Click that, and there you have it. Your photo is automatically white, balanced perfectly if that van, in fact, was perfectly white. So say I find something that's not perfectly white. So even though these stripes on the ground should be white, they're mixed a lot with the asphalt already, so it will fix it quite a bit. But it won't be as perfect as if you find something that's white. So let's try this water so the chutes of water should be pretty white. There you have it, so all of them kind of works similarly, as long as you have something white in your frame. And so that's how you fix the color temperature of your photos in light room.
122. Cropping: today, we're talking about using the crop feature in Adobe Light Room to make your photos better. So here I have a photo of Isabella and I, and we literally just put this up the camera up on a log, actually with log that I proposed to her and then said the self timer and ran over and took a picture. And this is something that I often do while traveling because I don't lug around tripod or guerilla pot or anything that I can really use to take photos like this. And I don't have a selfie stick yet. So one way to really fix these photos is by using crop. And so, actually, it's not too bad of a photo by itself. But what I can do is click this little rectangular buttoned to the top right, and it has, um, dashes around it, and that opens up the crop future. So, as you can see around, the photo is a box, and I can click any side or corner and move it in. But say I want to make sure that it's the same aspect ratio, so the same with and height, or at least the ratio to the width and height. What I can do is holding, shift down, click and drag any side or corner, and that will keep the aspect ratio, which is always good. Unless you're really trying to do something different, I would suggest just sticking with the same aspect ratio that you shoot in. And then you will see that you can actually just click and drag the photo itself around this new box. And so maybe I want to follow the rule of thirds and kind of put us right there in the 2/3 line where it kind of crosses right here. So that's pretty cool. And then you can either hit done down to the right or does press enter or return on your keyboard. Another thing to Dio is to in this crop feature is to change the angle. So here you can basically turn the photo left or right and say it was a little bit tilted. So something like that, now you can see that the lines that pop up really go around our face more properly, and that is a more level photo. So something like that, another way to do that is if you put your mouse to the corner of the photo itself. You can click in drag and do the same thing for us. Enter and then you're done. Another thing in this crop and straight and tool is the aspect changing it. So over here to the right where it says aspect and then to the right, says original. And there's a little lock. You can lock it to that, and that's the easy way to lock it to that ratio instead of holding down shift. Or you can click original and change it to something custom A. And you can actually create different ones, or just something that standing so like one by one that would be like your Instagram Square . Or you can do something really wide, like 16 by 10 and make a really wide shot or 16 by nine or 1920 by 10 80 which is the pixel size, um, are actually that's not technically the pixel size. It's just it's there for reference because 1920 by 10 80 is and full HD screen, So 16 by nine is that aspect, and that would work good on, say, your iPhone, which has a 16 by nine screen or my computer or your television if it's 16 by nine, which is probably what it typically is for modern TVs, or you can go in and create something custom. So if you, um, hit that custom button, you can just drag this around, make sure it's not locked, or if you enter something custom, I can change it. So it's a I want something really, really wide, So it's something like 10 toe one. So that's going to create something that, like this just kind of a bar. And maybe I want something like that. I don't think I do, though, but maybe something like a little bit whiter, so may tend. Ah, three. That could be pretty cool, actually. So this could be I don't know exactly what the ratio is for, you know, Facebook cover shots. But maybe it's something like that. And there you have it. The last thing that I want to show you, going back to the angle, actually, so I'm going to actually switch this back toe as shot. But in terms of the angle, what I can do is click this little level thing and then I find something in the shot that I think I want to be level, or you can just make it up and then just drag a straight line. So this is great if you have a horizon and it levels it. So let me take you to another shot that might help this a little bit better. So I still have my level tool. So say, I want this to be level so something right here That's not what I want to do. I wanted to get my angle tool right there. So there it makes it level automatically like that. So it's pretty cool if you're taking pictures of sunsets or horizons that has a definitive line going across the screen, or if the ground is just doing that. So say, here, this one's pretty close. But if I go into my crop tool in an angle and then I have the bricks down below, so that's basically perfect compared to just slightly off. So that was a whirlwind of stuff in this crop tool, but I hope you really understood it and can now crop your photos for the better. So I'm just going to go ahead and crop these guys a little bit closer because I want to do it that way. Okay, so thanks for watching. And I hope you had fun. And if you have any questions, let us know otherwise we'll see you in the next lesson.
123. Sharpening: Welcome back to the photography masterclass today. We're talking about sharpening your images, and I want to preface this by saying sharpening is not a way to fix blurry images. It's just a way to enhance images that are a little soft but are mostly in focus. And again, you're not gonna make a blurry or out of focus photo in focus. That's not what Scharping's about. It's just really getting down to the details and making a little bit better. So we're going to skip some of these options for now and go down to this detail tab Truell down by clicking the little triangle to the right, and I'm going to use this landscape. It might be a little bit hard for you to see here, but I can zoom in to this landscape photo and you can see that it's not. Everything is not completely in in focus. While it might be in focus, the lens might just have been a little bit dirty, or it was a little hazy, and things just aren't as sharp as I wish they were. And so we can fix that by using these sharpening tools. So under sharpening, you have four different options amount, radius, detail and masking. And now this is going to get a little bit advanced in in detail, but I hope, literally in detail. But I hope this helps you an interest you because it can really help improve your photos, especially landscapes. Because, as we've talked about, landscapes are best take in when everything's in focus. Um, and while anyways wide landscapes, I would say I don't want to say every landscape is great when everything is in focus. But wide landscapes are great when everything is in focus, and sharpening can help that. So amount is basically how sharp do you want it? And it's just the general. If you increase it, things are going to get sharper. If you decrease it, it's going to get a little blurrier. And as you can see here, I'm sharpening it, and it starts to look a little grainy. Basically what sharpening is doing, its increasing the contrast between edges of two colors. So say, for example, we have this green tree lined up against this white and base building, all of the pixels that are touching the colors between the greens and the other colors by increasing the sharpening. It's actually increasing the contrast between those pixels as very in detail and probably doesn't make too much sense. But that's basically what it's doing. The detail is basically thinking about if the amount is just an overall paint job. If you're just painting over this, the radius is the size of the paintbrush. And so it's how far from the edge does the sharpening occur? So how many pixels? So I can go from 0.5 to 3, and as you increase, the pixels that are further away from the edges of things also get sharpened so I can increase that. And it's always good to sort of go back and forth to see what you're doing from zoomed into Zoom. Now, the details letter is even a finer adjustment of those edges. So as I increase it, you can see things are becoming a little bit more contrast ID very slightly. So the darks and these green trees air getting a little bit darker. What masking does is it differentiates parts of your image that have lots of edges, so things like where these buildings are from the sky that doesn't have lots of edges because maybe we don't want this guy to be sharpened as much because then you can really see this grain. So if I increase the masking, you'll notice that very slightly. I hope it's showing him the HD video of this tutorial. But trust me, the sky is becoming less grainy and sharpened, basically. But the buildings down here are still looking very sharp, and that's what masking does. So if you have an object in your frame that you want sharpen. But the background is a sky or something that's not as important to be sharpened than masking will really help you. So if I reset this and then undo, you can see a little bit from this image. But really, if I zoom in, you get this sort of blurry image, and now it's a little bit sharp. So that is what sharpening is another way to increase or quickly sharpen. Your image is through clarity, so I'm resetting all those and go back up to these tabs under presence. You have this clarity which basically sharpens, adds contrast as a little bit of saturation to your image, and it just makes things a little bit sharper. I can show you this more in detail with this photo right here. So this one's auto focus and it's not going to be in focus ever again. Um, so I can't fix it. But if I increase the clarity, you can see that things become a little bit. It tries to make it sharper. Things also become more contrast ID, but it tries to make things sharp so things are as blurry as they were before. So clarity is a quick way to add a little bit of contrast to your image and just to make it a little bit better. So let's go to this image or our face. And if I increase the clarity a little bit, some people like it. It has a cool effect some people want, especially with portrait's to be a little bit softer. So maybe I would soften it up a bit quickly decrease the whites on my cheek. That's kind of like a Rembrandt lighting right there I have is trapped triangle of light on my cheek, if you remember that from the lighting section. But anyways, clarity can go one of two ways, either blurring it a little bit, making images softer or increasing the contrast and showing more detail. If you're editing pictures of people, you might want to make it a little bit less clear so that all the details of my sweaty face don't show up anyways. That is sharpening in light room. I hope you enjoyed this lesson. I know it was in depth and a lot of information, but I think you can use it to your benefit. Thanks for watching, and we'll see you in the next lesson.
124. Brightness & contrast: Hey, everyone, today we're talking about using the tone curve. Add brightness and contrast. Brightness and contrast is a great way to make your images pop and a really creative way to improve your photos. And now you can do all of the things we're going to talk about in this lesson using these sliders in the basics. Ah, and the basic editing window over here in light room. It has a contrast, brightness and contrast bar right here. And it has exposure. So brightness contrast. Um, and you can do the same types of thing with these highlights. Shadows, whites and blacks sliders down here. But today I just want to show you how to use the tone curve and explain brightness and contrast in another way. So here on this little line that you have in the square, you have your highlights, your lights, your darks and your shadows. So as you go through these little regions down here, bright, bright in or or highlight are highlighted. And on this curve you have different things highlighted as well. You can just click it and drag up and down, so click is segment and drag up it down. You can see that I'm affecting the highlights. So the light areas, the bright areas in the sky and on the face of this mountain. So I can also affect that by just using this slider. If you want to do that, some people like playing with this curve rather than using the sliders. But on another way is to just type in a number down here. But whatever you prefer, you can dio I one of the biggest things. One thing you might hear about is the S curve, and that is a standard contrast curve that people edit with. And what that is is when you bring up the highlights and the lights, and then you bring down the darks and the shadows you get this s looking, Curb. I could make it really dramatic by doing something like this. And then, um, I could do something really dramatic like this, and you can see this s in the curve of this tone itself. But that's a little bit too dramatic. So I just want something a little bit less dramatic. And so say I have this, but I want I still want this contrasts created with the tone curve, but I want the darks to be a little brighter. I can still go up to my basic editing tools with my shadows. Bring them up. So the tone curve is an entirely separate editing tool so that you can still increase or decrease the contrast, but also bring up the shadows in another way. I know that's kind of confusing, and you're might be like, Well, why don't you just bring up the shadows here? And while that's a good idea, I still like having this s curve that as a little bit of contrast to my image. So that is how you use the tone curve. And that's how you create a more contrast ing image. Only me Just show you another image that will look really good with the S curve. So this one with the colors from Sig Adada Familia in Barcelona. If I make that little s curve something like this, it's gonna look really get again. I might want to increase the exposure overall a bit. Maybe the clarity as well to sharpen it up a bit. But this s curve is going to look really good now with this with this photo So if I undo these, you kind of have a semi bland photo. But if I increase the life decrease the darks really get that s going. That could be a very punchy photo That looks really good. So that's the S curve. That's the tone curve. And let me know if you have any questions.
125. Adjusting Saturation & Vibrance in Lightroom: in this video, I'm going to talk about saturation and vibrance or the two ways in light room or two of the ways to play with the colors and make some more vibrant or bright or a little less vibrant and more de saturated. So this is a cool picture to play around with. The saturation is letter, which is under your basic tools tab down here on the right and at the bottom, you just have saturation. Pretty simple. You increase it. It's more suits saturated Decrease it. It's less saturated. And if you go all the way tonight at 100 you have a black and white image. So let me show you a different photo. Just toe give you better idea of what this can actually dio. So I'm just going to take off the clarity there. And if this has no saturation, although I've added a bit of contrast using the tone curve, which actually adds some some saturation due to the contrast ing of colors, I haven't added any contrast in any saturation any other way. So if I take this saturation slider up, you can see that the colors become even more pronounced. Go down. This becomes still an interesting photo, but not as interesting as this photo, where these lights were just the light from sun shining through stained glass window. It's pretty crazy, so the difference between saturation and vibrance, which does a similar thing. So if I increase the vibrance, you can see this. Vibrance is basically a smart saturation, where it makes colors that it thinks are less muted, more vibrant, and the colors that things are already saturated and very colorful. It doesn't affect those. So, as you can see, it's really playing with these blues down here, and it's not as much playing with the greens up, above and again. If I go down even to 100 there's still some colors left, so that's not the slider that you would use to make it black and white. Let's go over to this one just to see what Vibrance does. So virus really pops those blues and the greens and the trees and our shirt colors, whereas if I do saturation, everything is increased and I don't want our faces to increase that like that. But with vibrance, it doesn't increase the saturation of her face the way that saturation does see it makes their faces red, so that's not good. But let me just go back to this photo because I think it's a cool way to end this lesson, which is a pretty simple lesson about saturation. I want to make it black and white. I'm going to increase the exposure. Ah, lot. Maybe even boost the highlights. Drop the blacks, boost the whites, drop the shadows. As you can see, kind of what I'm getting at is kind of cool. Very cool effect that I sort of thought about when I took this photo just with the statues and the shadows. I thought this would be a great black and white photo. Um, and maybe if I could get it on the T shirt someday, I think that would be super cool any ways. That is how you play with saturation and vibrance, and that's the difference. And go use it. Start playing with your own photos and playing with vibrance and saturation. Thanks for watching, and we'll see in the next video
126. Vignettes & blurs: everyone in this video, I'm going to show you how to add a vignette in adobe light room. It's actually really easy. So if you go down to this effects window down here on the bottom of your develop tab over here you have this post crop vignette ing. What this means is it will add a vignette after you have cropped it. So non post crop been yet ing will add a and yet to the original image. But with this image, we've cropped it quite a bit. Actually, we can crop it a little bit more even and say we want it like that. It will add it. Crop have been yet to this image, not the original image. So basically has a few different options but has amount which, if you go to the right, it adds a sort of white vignette. If you go down down toe left, it darkens to a traditional and yet midpoint well, increase or decrease the size of the circle. So say I don't want my face to be vignette ID. I want to make the mid point a little bit rounder a bit a bit bigger. Roundness will change it from sort of a square type vignette to around one, and I can really show that if the midpoint is smaller and if I have more of a vignette, so roundness again square, which is kind of a cool effect or round completely circle and then feather, you can see well with this sort of really crazy vignette is how much does it sort of bowler and blend with the black? So no feather at all, really, or a lot of feather. So maybe you want this sort of border type frame, white or black. That's how you easily do do that. But maybe you want sort of more of a traditional been. Yet something like that could be very cool. What highlights does is it basically allows the highlights to shine through this vignette a little bit more so that is post crop vignette ing or just regular vignette ing in light room. It's a really cool way to quickly make images a little bit better. Why would you, Adam? And yet? Well, I would say the main reason is to focus the viewer's attention on something so without of and yet still a great photo, but maybe been getting a little bit. It really draws the viewer's attention into the main subject. So I want to add a vignette toe all of your photos. I know for about a year I was like adding vignettes, toe every single photo that I ever took, but really have a reason for it and go forth. And then yet your photos, thanks for watching. And if you have any questions, please let me know. Otherwise, we'll see in the next video.
127. Exporting & saving: Hey, everyone, welcome to another lesson about Adobe Photoshopped light room. So today we're going to be exporting a photo for the first time. This is where you save it so that you can use it later, whether you are printing it or posting it online somewhere or just saving it on a hard drive. And I'm skipping some of these other more advanced topics, including just split toning some other lens correction stuff. Green effects camera camp calibration, which will be covering in future lessons. But I've covered basically everything that you need to know to fix your photos and make them look really great. Basically, all you need to do is fix exposure at a little bit of contrast, using the contrast and the other highlight shadows. Whites and blacks sliders playing with clarity, depending on what you're shooting vibrant saturation. Talked about that, or you can use the tone curve to do what Ah, you kind of did with brightness and contrast and then adding, Been yet and so there's lots of other things will cover in future lessons, but I wanted to show you how to export first. So say you X have one photo export or multiple. You select them down here in your tray, so I'm going to say I'm done with this one. If you want to include another one you can hold. You can click one photo and then go to the last photo that you want and you want all of them in between and click that while holding shift. So click the 1st 1 and then the last one while holding shift Or what you can do is holding down the command, but in or control. But it on a PC is just control or command. Click all the ones that you want so they don't have to be all in a row. But I just wanna export this one. So with that selected, I'm going to go up to file export. Or you can press shift command E or shift control E depending on what your If you're on a PC and this export module pops up with all the options that you need about exporting, so first you can export to hard drive email, CD or DVD. You're probably going to be doing hard drive, so under there you choose the location so you can export it to a specific folder, which is probably typical. And underneath this you can choose. So I'm going to say desktop photos, toe edit and I'll say, Choose, I'll put it in a sub folder within their and I'll say exports, and that's pretty much all you need to know there. Then you can choose to rename the file so I can rename it to the file name or a custom name or a custom sequence name sequence. You say I say Custom name and I want to do Europe and this is a sequence, so it will start at one, and when I save my next photo, it will be number two down below. You can choose your settings so you can save it as a J. Peg Photoshopped file a tiff, file a DMG or as the original image. So like the we're saving as a raw image. If we save this as original, I would basically suggest doing J Peg. For most cases, tiff is going to be a little bit higher resolution and higher quality. It's just going to be a larger file size, but you don't need that for most applications. So I would say J Peg quality slider. You can go from 0 to 100 but unless you're just showing a proof or a sample of your photo to someone, I would put it at 100. This next one is really cool, because you can limit the file size to a certain size so you can instead of doing the quality bar, which really you don't know how big it's going to end up. You can limit the file size to 400 kilobytes or 1000 kilobytes, which is a megabyte, and this is good if you are uploading online. Or you just know that you have a specific file size that you're limited to Imagery. Sizing is another way of changing not the quality but the actual size. So if you are posting online again, or have some sort of reason that you need your photo to be 1000 pixels wide or 400 pixels wide, then it will. It will basically save it as that that length there, that with and you can change it, depending on whether you want it to fit specific with an height, or if you just know you're long edge or your short edge. So say you don't care how tall it is. You just know that the with assuming you're exporting a landscape photo one with a whiter with the than height say you know you're with has to be 1200 pixels. Then you just click select long edge and 1200 pixels. You do my you might wanna make sure that you click this. Don't enlarge button because you don't want your picture to end up being larger than it naturally is as a raw image because, say, you shot the photo and it's 5000 pixels wide. You don't want to increase it to 10,000 pixels wide or even 6000 pixels wide, because that will start to pixel ate your photo. So resolution is another factor in how good of quality it is, and typically you have a range from 70 to 300 I would say, with 300 being super duper high quality. If you're printing out your photos, maybe set the resolution to 300 pixels per inch. If you're doing online work, I would suggest doing 1 50 even typically you can just go down to, like 70 for just posting online. I think that's fine. There's a last output sharpening option. You can choose to sharpen it for paper printing or for online, and you can change the amount. I wouldn't play with ease because hopefully you've already sharpen your image within your editing. I'm going to skip over it metadata, because this is a little bit more of an advanced topic, and it really has to do with organizing your photos. Basically, metadata is information that is stored with your image file, such as the time it was taken and even little location that it was taken, or the lens that it was taken with or the shutter speed. This is all metadata that you can add or remove water. Marking is another cool thing to do if you want to put your name or logo on your photos so that if you post online someone can't just steal it and claim it as their own, people will see the watermark on your image and know that it was yours. So you can actually create a custom watermark by editing them here going to edit watermark . And as you can see here, I'm going to increase the size of this so you can see you can create a custom watermark with different text. Two for an opacity, etcetera. So that's kind of cool if you want to add out Watermark. And the last thing is for post Brockett processing, this is just after it finishes exporting. What do you want it to do you want? Do you want your photos to pop up in Finder? If you're on a Mac or on a windows, it will probably ask if you wanted to show up in your computer documents or in another application. So I'm going to go ahead and export this and we'll see what it looks like. And up here on the top left, it will have a little progress bar. It goes really quickly if you don't have one image. And now I'm in this folder, the Exports Folder, which is under my photos to edit. And it was titled titled Europe One. The Dimensions as You See our 400 by 2 67 And there you have it, my 400 by 2 67 image. Let me just go back really quickly and show you something so say I have three images to export its do these three and I'll show you what happens when you export multiple. So again I'm putting in sub folders. File naming, rename to Europe Dash. I want to start with number two this time because I don't want it toe copy over the other image. This time I'm going to change the with 2 2000 So it's a little bit bigger. Resolution will say 300 and that's basically the same settings as before. So now it's exporting the image up here, you see it going to work and there you have it pops up. So here we have our export from last time, then our exports from this time which look really cool, actually. So I really love how that picture show came out. Actually, I might like, print that out and put that on my wall. Anyways, that's how you export from Adobe Light room. And if you have any questions, let me know. Otherwise, we'll see you in another video by
128. Practice - Improve your photos in Lightroom!: Hey, what's up, guys and girls, welcome to another practice session. Now this is a huge one. Practice is to improve your photos, using all of the techniques that I've talked about in the past few video. So there's a lot of them from fixing exposure, cropping, just making all sorts of little adjustments to make your photos better and make them a little bit more artsy, maybe with a vignette or a blur or something like tinting and saturation. So use some of the skills that I taught you in the past few lessons and improve your photos . Now I know you might have a ton of photos. What, maybe just start out with five or 10 to get the hang of it. So thank you so much as always. Practicing will make you better at photography and in editing, you will actually learn how to become a better photographer because next time you're out, you'll know what to look for its that you don't have to fix it in post production. Thanks for watching, and we'll see you in the next video
129. Hue, Saturation, Luminance controls in Lightroom: Hey, everyone, welcome to another lesson about Adobe Light Room. So today I'm going over this one little tab, Hue, saturation, luminant, which is a very interesting thing. Teoh, play around with and see what it does. Basically, you go into here and then you select hue, saturation, luminant sor all and it shows all three. But I like going just one at a time to make it easier. And this is very getting into the details of specifying a color and how do I change it? So if I take the oranges in this color under this huge tab, I can change the hue from being red to yellow. Now there's lots of yellows in there, too, so I can take this yellow and change it as well. There's lots of blues and purples in the sky, so I can change that. So this is where you can get really funky with your colors under saturation. It's basically the same thing. You're picking a specific color and increasing or decreasing the saturation, and this is the way that you can so low a specific color so that everything else is black and white except for one color, which is something you've probably seen. So say, Let's take Let's go back to this photo And I want everything except for the green to be de saturated. It can take all these down the blues, the purples, the magenta as the aqua is and maybe increased the yellow a little bit cause there's lots of yellow. But see, that's a pretty cool photo, actually in itself. So taking away the oranges and the reds was, and the blues took away some colors in the mountains. And then, if we want to do the opposite and just take away the green, you see how much it loses the color and then this yellow. Basically, you get rid of the entire photo with the yellow and the green. So that's what that saturation tab is. We'll go back to this one, and luminous is the brightness of a specific color. So here we have the yellows and the orange being very bright. So say we want to drop that down a little bit and it gets pretty funky pretty fast, but you can a just a just a little bit, so that specific colors are darker or brighter. Say we want these blues to be a little bit brighter in the background. Another thing that you can do with all three of these options is click this little icon to the top left, and then you can adjust the photo by clicking and dragging wherever in the image. So say, I want to let me reset all of these back to zero. So red, yellow, green, aqua, blue, purple. So say I take this little option and click within the image to this orange. And then I drag up or down, and you can see how it affects the luminous of both the orange and the yellow slider because whatever color I clicked had both orange and yellow in it. If I click this blue, it's got lots that blue, but also some purple. Let's go over to the saturation and I can show you this another way. So blue gets rid of the blue. You can continue from there on and kind of go through and get all the colors out, except for the ones that you want. So let's get into another photo and show you how this works, so let's go into this one. This one's kind of interesting. So say I click and drag where the green is. I could get rid of all that green or the blue. I can get rid of the blue, or I can increase the blue and increase the green. Or maybe I want to get rid of some of this yellow but increased the green. You could basically do anything, or under Hugh, you can do the same thing, but just change the color. So change the green to something Mawr aqua. She's the blue to the light blue or even a magenta color. So you would never know that this was actually a blue stain glass window. If you saw it like this or the green, you would never know it was orange if you saw it something like this. So these are some very cool things that you can do to play around with your photos, and I suggest just playing around with that tab.
130. Editing a RAW Photo in Photoshop: Hey, everyone, welcome to this lesson on editing photos in Adobe Photo Shop. So this is a if this is what you'll see if you open up a raw image within photo shop, it pops up this dialog box, and it says camera raw 7.0 or maybe has a newer version, but you basically have a lot of the same options that you do in light room. So as over here on the right, you have the basic same thing. So you color temperature that makes your image warmer or cooler tint, which makes it more magenta or green. You can also type in a number over here on the right. If you want to go that route exposure again, simply blasting the exposure of the entire image or darkening it, you can change the contrast, so make it a little contrast. E highlights. Boost the highlights or drop the highlights. Bruce the shadows dropped the shadows. I'm trying to make it a little bit more contrast. T right here now. Clarity, especially for landscape. This is good if you are doing Portrait's. As I mentioned in the light room lesson, you might want to go lower on clarity so that it softens the skin by rents. This is a smart way of increasing the saturation of items in your shot that need saturation , whereas saturation will disabuse the saturation of the entire image. So maybe we wanted a little bit more saturated. Maybe we want it a little bit warmer, so something like that is pretty cool. Um, then under these different tabs is the basic. You have different things, like the tone curve. So again very similar to what you saw in Adobe Light Room. The reason why this is not as good as light room, I think is because here you have to go one at a time through the photos and you can't really see what you're working on with Adobe light room. You have all these options, and I can quickly go from photo photo with light room. You can more easily copy settings that you've set for a specific photo to other photos. So, for example, if I wanted the same settings that you can just press, command, see or control, see, you can set or check all the things that you want to copy over a copy and then say I go to a new photo and then press command V to Paste and all of our settings are converted over to this new photo. And that's something that's a little bit more difficult to dio in Photo shop. So again you have your tone curve. You have your detail tab, which is sharpening now. I'm just skimming over these. So go back to the light room lessons if you haven't watched those because I cover what all of this is in that section, and it pertains to this as well. And then basically the same options that you see in light room with post crop vignette ng. If you want to add a little been yet and camera camera calibration, different presets and everything like that. And then once you're done, you can open the image, and that actually opens it up within lighter or within Photoshopped. Excuse me, and that's where you can go on to do any other sort of photo manipulation or editing with the other photo shop tools. But as you can see, you can actually edit photos within Adobe Photoshopped. It's just not as efficient because, say, I want to go ahead and open another one. Then I would do this open with Photoshopped, and it would open like this and otherwise in light room. It's already open. I could just scroll through my library and quickly go ahead and add it all the settings one after the other. So that is the basics of photo editing, raw images and photo shop. In the next video, I'll show you what you can do in terms of photo editing with JPEG images, because that dialogue box doesn't pop up with all of the options that you see in light room with your just editing JPEG images. So thanks for watching. And if you have any questions, let me know otherwise, also in the next video.
131. Editing a JPEG Photo in Photoshop: in the previous video, I showed you how to edit raw images and photo shop, and it was very similar to how you edit in light room. In terms of the options you have for editing with a J pig image, you don't have as many options, and in light room you can actually bring in J peg images and do all of the same types of editing that you do with the raw image. You just don't have the range and the depth and the information within that photo file to really play with the exposure or the saturation or different things like that. So with photo shop, if I go ahead and open up this image, which is just a test image, I exported the J peg by itself from light room. So I have this image as a J peg, or this could be straight from the camera if I was shooting J Peg plus Rock, and what options do I have? There's different ways to get to them, but either from this bottom, you can add adjustments to this layer, such as brightness, contrast levels, curves, exposure, vibrant hue, saturation. So it's a lot of the same things that you saw in the other menu. It's just a little bit more difficult to get to them. The next option is to go up to image adjustments and you have the same basic options. So let me just go through a couple of them to show you how it works. It's pretty self explanatory once you are kind of clicking around and since hopefully you've watched the light room lessons, you know what each of these do. It's just figuring out, clicking in and find out how to use it. So, for example, let's do curves. So this is going to open up a tone curve and you have the option to just drag and create an S curve. So again, maybe not something so crazy, but something like that for this image where I wanted a lot of contrast, and under here you can actually even customize it. Go into your reds and blues and greens says say you wanna add blue and red, but take a red and green and but take out blue, make a really yell image, whatever. So then you can go up to images adjust, and there's some different filters in Photoshop called the photo filter, So this is an easy way to a basically warm or cool or add different tints to your image. So say, I want this warming filter. You can increase the density to make it more warm or less warm. I'm just gonna hop over to like one of these cool ones, and so this can actually help you adjust the white balance by eyeballing it. Another thing that you could do. Actually, I'll go down here just to show you that it's similar. You can do hue saturation so saturation again will increase. Boost the colors for all the colors in your image. And here you can also do things like changing the hue or the lightness. So this is bright, making it brighter or darker. One more thing. Let's just go through while black and white. That will just make it a black and white image in one click brightness and contrast, So this is a little bit different, but you have a contrast slider, which is similar, and then you also have a brightness, so this is sort of your exposure, so this will increase or decrease the exposure. So that's one thing and then, lastly, to kind of come full circle and show you what you can do in Photoshop, similar to how we did it in light room, there is a crop. Now there's all sorts of different tools over here, which you can learn about in another photo shop course of mine called Photoshopped Tools. But this crop one is the one we'll talk about basically hit crop. Same thing happens as in light room. You have this edge pop up and you can click and drag this edge around. And by holding shift and doing it, you lock it to the aspect ratio that you originally have. So say I want something like this and I could move my image. And once you're done, you just hit, enter on your keyboard or return. There you have it. Click this mouse tool up here that move tool and you get back to just your standard mouse pointer. And so then, if we want to go add this black and white and then maybe add that curves so boost this s curve. We have a pretty similar photo to the one that I edited in light room. So here is the one, I added Edit in light room, so it's actually a lot brighter, so another thing we can do is levels. So this is another way to increase or decrease the brightness of the different ranges. So you have your darks, your mids and your highlights over here. So by boosting the highlights, boosting the mids and decreasing the darks, you get this very contrast he look, so those are always to make adjustments. When you're actually making these adjustment layers down here, it creates a new layer that's actually adjusting your image. So like this, if you have your layers selected and you go to image adjustments here, it actually doesn't add a new layer. It's actually editing the image itself, so sometimes it's easier and better to actually add an adjustment layer in case you want to get rid of it later on. Because otherwise with photo shop, you can't undo all of the things that you've ever done. Um, and you can't just go quickly back and undo a brightness and adjust contrast adjustment that you do up here. But by adding a an adjustment layer down here, you can turn on and off, okay, so I know this is a lot of stuff. I was kind of all over the place in this lesson. But if you have any questions, let me know and all go over other things that you can do in photo shop in future lessons. Have a great day.
132. Stitching together a panorama in Photoshop: way back wins. Sam mentioned in the lesson about panoramic images that I would show you how to edit panoramas in photo shop. And today is that day. So it's actually really easy to do so And I have actually sort of artificially recreated what it would look like if I was trying Teoh take a panoramic image. So I took one photo and I split it into basically two sections. And as you can see, I have these two sections and it could be as many as you want. But I just chose to and as Sam mentioned in the lesson, make sure that when you're taking pictures that they they overlap a little bit. So you see down here, this construction work and we over here, you have this construction work down here. If we go back, you can see that there's this building with this tall building with to sort of rectangles right here to white rectangles. Over here, you have it over here. So that allows Photoshopped Teoh really easily put two images together so it doesn't have to be this much overlap, but enough overlap so that Photoshopped can use the information from two images to to stitch them together. So how does that work? What's really easily? You just go up to file, automate photo, merge, and then you select your files, so just find them like both of them are all of them. It will add them to the source files, and then you can say how you want it to stitch. You could say auto and Photoshopped will do it automatically, or, if you know that it's going to be more of a perspective or a cylindrical. So if you were using like a fish, I photo spherical again if you're using a different lenses, and it really depends on different way that you were taking the photo. But I would just say auto and see if it works. So go ahead and down here, it says. Blend images together. Yes, you want that been yet removal. This might be necessary if the camera lens you were using was very wide and had a vignette . Sometimes when you're shooting with an older lens or lent, that's very wide. You get sort of a natural vignette ing that darkens the edges of the photo you're taking, and if you're stitching photos together, those dark edges will look really weird because then it will be in the middle of your image and you don't want that. And then same with geometric distortion. Correction. That's sometimes depending on your lens. It actually bends the photo ever so slightly, but it can look weird in a photo emerged. Panorama. Once you're ready, just click. OK, it's going to do a little bit of magic, so it's reading the photos, and it is basically putting it together. And OK, so there you have it. So this is what it came up with, and you can see it's not perfect, because just like when you're taking a photo, you're not going toe. Have a perfectly level photo with exactly the same amount of height or depth to it. And that's okay. What we can do now is with our crop tool that we mentioned in the last lesson. Just crop in to where you don't see this little gray and white checkable checkerboard in the background, because that's going to end up looking like just plain white or plain black background of your photo when you export it. So hit. Enter press, be to get your move tool and okay. You see that? I have a little sliver down here. I'll do that again. I'll just raise this a little bit. Something like that. And there you have it. I have an awesome panoramic image, and it actually looks very cool compared to the original image that I used. Let's see if I could find it. Alright, Right here. So landscapes are typically great for panoramic. And sometimes I don't need all this information, this guy or this information down here and the panoramic does just fine. So that's how you use photo merge and photo shop to edit your panoramas together. Let me know if you have any questions and please, please, please upload your panoramic images and share them with us. We would love to see the work that you're doing and just see what you've learned from this class. Thanks for watching. And we'll see in the next video
133. Get Rid of Blemishes in Photoshop - No more zits!: Hey, everyone, this is a fun lesson on removing any sort of spots or blemishes that you want to get rid of in your image. Now my disclaimer is that I highly suggest just going all natural and be yourself. Be your own beautiful self and the people you're taking pictures of, let them be naturally beauty. But a lot of people ask the question, How do I get rid of that mole or that zit or that acting or whatever it is on my feet so that it's not my photo. And so I thought, I pick Cindy Crawford because she's a beautiful woman and she has this beauty mark and there's no way she would want to get rid of it. And anyone one would want her to get rid of it. But it's a good example. We can pick a little bit of fun at her, so photo shop has a very, very simple way to remove blemishes. Let's zoom. And so by clicking on this zoom magnification, get in here really close now. This will really help if you have a high quality image. If not, it starts to get a little bit pixelated as you zoom in. Over here on the tool shelf, you have what is called the spot healing brush tool, and you can click and hold and see a bunch of them. But choose the spot healing your your mouse will become a little circle with a brush. Basically, all you do is make sure you change the size to the right size and then hover over whatever the spot is that you want to get rid of kind of drag over it. So it's all disappeared and then click. And there you have it. Cindy Crawford. The hair here beauty market is not there anymore, so that was really easy. So let's go through a couple more. Just get rid of some of these freckles. I don't know why you would never do this to Cindy, but there you go. Just click and gone. Click and gone and you know you don't want to go too crazy, but it's pretty easy to get rid of freckles. It's anything, and this is the magic of photo shop, and it's pretty crazy how well it works. So anyways, that's how you get rid of blemishes in photo shop. I hope you enjoyed, and we'll see you in the next video
134. Importing & Organization in iPhoto: Hey, everyone, In the next few videos, I'm going to show you how to use I photo to import, organize and edit your photos. So I photo is a great little program that comes with Max. So for ah lot of us, if you have a Mac, this might be what you will will be using. And if you have a PC, I'm sorry that this lesson doesn't really pertain to you, but the light room and the photo shop lessons definitely did, because you can use both those applications on a PC. Remember for everyone. Please watch these videos, especially in this section in full screen HD, preferably on a computer desktop or laptop screen, because you will have a better some time seeing what I'm doing. Okay, so I'm just going to go ahead and open up. I photo. And when you open up, I photo depending. If you've used it before or not, you will have a folder full of images. So you have all these images organized in different ways, so you can organ see them by events, which is basically by date or by places or by faces. So this is pretty cool by places it somehow knows where I took these photos and plus them there by faces. This is kind of scary that it can see See all the pics, pictures of me or a particular person. It tries to put it together or despite photos and then down here on the left. Of course, you can do recent your last important or different options, so to import photos because, say, I have all my photos from the past, but I brought in photos from a camera. Sometimes, if you just plug in your camera memory card, it will automatically prop you to import into I photo, and you might want to do that. But if you want to do it custom just goto file import toe library that will open up a module with your finder, and then you just go ahead and find photos that you want to import. So I'm going to say all import the same images that I imported into light room for those lessons so it will go ahead and import your photos, and it will most likely create a new event folder with these photos in it, and it might be date stamped. So let's see what it does now. All right, So now you can see it was your last import. And you can see them all here if I go to my events. So here we see them. They are in July 28th August 9th, and it grouped it all in one photo so you can double click there, and it's now an event, and you can see them with all these photos. You can open them by double clicking them. And you, Cantat, go through them using the arrow keys on your keyboard. And that's basically it for this lesson. I just want to show you how to import your photos. And in the next lesson, we'll be talking about how to edit your photos in I photo.
135. Quick Fixes in iPhoto - How to quickly make your photos look amazing!: everyone. So right now I'm going to dive into actually editing your photos with I photo. So here are some photos I took on a recent trip to Catalina Island in California, off the coast of Long Beach, Los Angeles area. And so let's just take one of these photos, for example, maybe something like this one. Ah, this is an interesting image that I was using Sams technique of framing your items in a frame in within your photo. So I framed these boats using the frame of this defense that was along the boardwalk. So when you want to edit your photos, you can hit this little edit button down on the right side, and you have some quick fit fixes so you can rotate. Obviously, I don't need to rotate. I can enhance, and it will automatically try to enhance the photo taken undue by pressing command Z fixing red eye, which I don't need to dio or you can straight in. So this is something you can also do in light room. But it popped up with this little slider where you can change the angle right now. I don't actually want to change the angle because I can see that mine is practically perfect the way that I shot it. Then you can crop, which is pretty standard for most photo editors. Unlike in light room, if you hold shift down, it doesn't affect the aspect ratio of your photo itself. You have to click constrain, and then that will keep it to the same aspect ratio. Or you can choose a specific aspect ratio that you may want. So they have presets for, like the D A DVD, a book postcard, really handy square image for Instagram, maybe, or even custom. So maybe, let's just go ahead and try that. So let's do a square. So something like, yeah, like those ones in the middle right there, done retouching. Well, get rid of any blemishes. So, like we showed you in the Cindy Crawford lesson with photo shop or light room, you can do the same thing. With these retouching down below, you can revert everything to the original, or you can undo So these air just that quick fixes within I photo and the next lesson will be going over effects. And then following that, we'll talk about this adjustment tab
136. Using the Effects Tab in iPhoto: everyone. So let's talk about this effects tab because an I photo, it really makes it easy to come up with some cool looking photos. This is sort of similar to the way that maybe Instagram works where they just have these sort of preset effects that you can just add. Now they are filters necessarily. But I'm talking about on instagram where you can actually edit your photos. It's very simplified, but very easy. So all of these effects basically do what they say. And the way that you use them is to just click them and then click them again and again and again until you're done and you can go undo. If you want dark and and again you can. Indio contrast again is adding contrast. I want it to be warmer. Just make it warmer or cooler. Make it cooler saturated, etcetera. Down below. You have these different options, like black and white. You just kick click it on, click it off. See, Pia antique So antique is kind of interesting. So some of these they have different ranges, so you can go from zero to all the way to nine. Nine is a little extreme but that's kind of a cool look. And then, for the rest is it's the same thing. You have a mat you can keep clicking it turn off, have been yet edge blur that will make the edge blurry, kind of cool effect. Then you have a fade, which kind of just fades out the colors for a boost, which makes it really dramatic and contrast e. Now, if you add a bunch of these effects but then say you don't like them, you can click this none button on the bottom right, and that will get rid of all of the facts that you've added. Within this tab, you can always revert to original here if you want. This reprocess raw will basically just revert the entire image to the original. Because as you're editing, once you save or exit, I photo. All these changes are actually saved within the raw file so that when you come back to I photo or even in if you're doing this in light room or Photoshopped, the raw file holds all that information so that it knows. Oh, I added warmth to it. Maybe I added a little been yet, and it still contains that information. Okay, thanks for watching this video. And then the next one will talk about this adjustment tab, which is getting more into the manual controls that we learned about in light room.
137. Advanced Photo Adjustments in iPhoto: Okay, everyone, this is the last editing video for I photo and we're here in the adjust tab. I brought up this other photo of me just toe provide an example of using the flash, so it's kind of hard to tell, but I was actually using the flash in this image, and it was a great time to use the flash because the sun was going down. But the background was still fairly bright and so to adjust, so that both I and the background was semi exposed properly, that using the flash was the right thing to do. But you can see that it's overall a little bit dark, and this is perfect because we can go into are just tab and edit. So, going from top to bottom, we have this hissed a gram, which is the visual representation of the light and dark tones, and we can edit the mids that highlights and the darks using these sliders. So dragging these from left to right will affect the separate portions of the photo. But you can already see that by just editing an iPhone photo. It's not as good as editing in light room. It just doesn't work as well. As soon as I bring down these highlights, it just totally gets overblown and doesn't look that great below. You have just your overall exposure so I can increase or decrease the exposure. So maybe I just want to increase just a little bit contrast. You can add a little bit of contrast. And one thing. When you increase your exposure, you lose a little bit of your contrast overall. So by increasing exposure and then increasing contrast, it kind of balances it out. Rather than having something that looks a little bit flat, you can have something a little bit more punchy. Saturation again is going to increase the colors and the vibrancy of those colors. And it has this cool little check box that says Avoid saturating skin tones and you can see it really works. If I drag that all the way up to 100 then click the avoid saturating skin tones. It doesn't saturate my skin as much, and they figure it out with their formulas that the skin tones air this certain color. And so it won't saturate those. But I think saturating this photo with that checked looks pretty good definition is going to be similar to your clarity and light room is sort of sharpens and makes things a little bit more contrast. E so with faces, this not isn't really good, but if you're doing landscapes or sort of more nature photography, I would add that definition. And as you can see, if you hover over all of these items, it gives you a good definition of what it does highlights. What it will do is actually decreasing the exposure of the highlights. So that's good. And you can see the hissed a gram going right there. Because even though I increased exposure here, I didn't want to increase the highlights of the sky too much because the color and that's guy gets lost. So may I want to decrease that a little bit so I can get that blue back in the sky. Shadows down here does a little bit the op cit of what? Adjusting the shadows up here does where appear makes it darker down here and makes the shadows brighter. So say you do have something in the dark that you want to see. You can bring up the shadows this way and that really helps if you have a raw image. Sharpness is similar to definition, but it doesn't add that as much contrast. It just sharpens the image a bit, so it's not a bad idea to sharpen a little bit. And then D noise will help if you take a photo at night with the high I eso. And as we know from all of our lessons, if you shoot in the high s so you get a lot of grain and so D noise will decrease that noise below this, you have your temperature so similar to light room. I photo actually has a lot of great tools. It just doesn't seem to do it as well as light room. But still you have your you could make your photos warmer, cooler. You have a tent, or you can use the eyedropper right here to select a color and white balance it that way. So you want to make sure that use like something that is white in your image and white balance it that way. If I choose something green, it's not going to look it at all, so you have to click something that's white and that is basically this adjustment tab. This is a very great way to edit your photos, actually, and for beginners, I would say there's not really a big reason to purchase light room right now because you have a lot of options right here within within I photo. So thank you for watching. In the next video. We'll be talking about exporting your photos so that you can share them with your friends from my photo.
138. Exporting/Saving Photos from iPhoto: Okay, Now we have edited our photos within I photo, and now it's time to share them and export them. So there are a couple different ways to export your photos or quickly share them. The first. I'm just gonna go over the share tab up of the top. You can easily share photos through iCloud messages. Email straight to Facebook. Flicker, twit, Twitter. You can set it as your backdrop photo on your desktop. You can also get to the share options down here on the bottom. Right? And there are actually a few more, such as creating a book, a card slide show, printing or ordering prints even. But so you just want to export the photos so that you can have control of it and not do any of these sort of automatic publishing things, which is typically what I tend to dio like exporting them myself. So if you go up to file export or shift command E this, this little dialogue box pops up, you can change the type. You can change the quality so we can choose from low medium high to maximum size so you can change it to a different dimension. So you can change the pixels to, say 2000 pixels, and then you can change your file name. So if you want Teoh, use a title that you want to choose. You can do that, or you can use sequential foul names like we learned about in light room. There are a couple other options here for exporting to a Web page and slideshow, but basically, I just want to show you how to do the basic export as a J. Peg image here. Then it asked you toe rename it So we'll say this Phil in Catalina, and it will export it. And then if we go to our finder and go to our desktop where we saved it, we will have a fill in Catalina. Photo 2000 pixels wide, which is what we chose. It's a J peg, 536 kilobytes large, and there you have it. You can take this print it share with friends posted online, do whatever you want with it, and that's how you export from my photo. And that wraps up this short little section on editing photos and I photo. There's a lot more you can do within. I photo and within all of these editing programs. So I I ask you to please just check them out, see what you can dio and play around. That's the best way to learn. And the best way I've ever learned anything is just playing around with the different tools that I have so things for watching and, as always, we'll see you in the next video.
139. Introduction to the Making Money with Photography section: Hey, everyone, welcome to a new section on making money with photography. So this section we're gonna talk all about the intro to basically, how do you find work as a photographer? So we'll be talking about the different types of work from freelance toe full time and within those two categories, all the different types of jobs. We'll talk about how to set yourself up for success with building a website, branding yourself and all sorts of things about pitching yourself to the public so that you can find work and lots lots more. So get excited. This is an exciting section. I'm really excited teach you because ultimately with photography, if you can make money doing something you love, then that's the best job in the world, basically, So I hope we can help you succeed in that. So thanks for watching and let's get on to it.
140. What jobs can you do with photography?: What jobs can you do with photography? Well, first thing about when was the last time that you saw a photo? Okay, well, it was probably within the past few minutes or so. Seriously, look around you. If you're sitting at your desk, if you're sitting at your office, if you're driving probably not. Hopefully you're not driving. But if you do drive around and you just notice posters all around you, there are photos literally everywhere. And so those photos were taken by someone who probably got paid for taking them. I categorize photography jobs in two different forms. There's one. You're taking photos for someone else and to your taking photos for yourself for in the category of taking photos For someone else, this could be wedding photography, family portrait. It's product marketing event photography, real estate, working as a photographer for a company. These are all situations where you're taking photos using your skills, but it's basically just for someone else. On the other hand, you have taking photos for yourself, but you can still get paid for it. But this could be fine art or like stock photography. So fine Art is really the true essence of taking a photo for yourself, but also combining it with getting paid for it. So you have to balance whether you're just taking a photo that's interesting for you, but also something that potentially could get sold and then stock photography. It could be something where you're still taking pictures for yourself. You're still just going around. But your independent, you're an entrepreneur, and you're just trying to sell your own photos that you took yourself now with either type of job in the photo world. Photography is a skill, and you should really get paid for it. If you're just beginning and you're going through this class, hopefully you've improved the way that you take photos and you're taking photos better than you ever did. And you've put in a lot of time and effort learning skills to improve your own photos so you should get paid for it. So in the next few lessons, I'm going to start giving some tips for how to brand yourself and how to get your name out and share your photos so that potentially someone can hire you
141. Branding yourself: Let's talk about branding. So I've had a lot of experience branding for both working at different positions as a photographer or a video creator for different companies, but also for myself, for my own brand video school online dot com. And actually, I would say that branding yourself the right way is almost more important. Then, knowing all the rules of photography, the different shutter speeds by hard the F stops, knowing all the new technology and gear that's coming out every day or so. But really effectively marketing yourself will put you ahead of most photographers. First, you have Teoh choose whether you're going to brand your company, because now we're going to really start talking about you doing this, putting things into action. Are you going to brand your company as yourself as your name or as a word or phrase? So, for example, I could have chosen to brand myself as Phil eb inner, and you could be taking a class that is from Philip inner dot com, and actually, I do have Philip inner dot com, and I do, I guess, have a brand that is Philip dinner. But that's more for my freelance work But for my online courses and articles and blog's and all my online teaching, I chose a different brand video school online. And there's some pros and cons for each of these. Branding yourself by your name. Well, this is memorable, and customers can really automatically connect with you as the person you're the face of the brand, and hopefully here's someone that they can trust. On the other hand, branding as a word or phrase not your name can make it seem a little bit more professional . So maybe someone coming to video school online dot com might think, Wow, this is really professional, and hopefully while it is so hopefully they think that. But if it's the same exact content on Philemon or dot com, they might think this guy's brand I don't know about him. You know, it's kind of business, just like a personal blogger or what. So having a non name brand could be good in that way. And lastly, if you're really serious about building a brand and growing choosing toe brand, your company after your name sort of limits you because, say it grow so big that you hire a bunch of other people or that you It's so big that you want to step down and just let other people run your company for you. It might be a little bit weird if the brand is your name and you're not there anymore. And so that's one more reason to choose. Ah, brand name. That's a different word or phrase, so that in case you want to hire their people and grow and expand in the future, you can do that. So I'm done with this lesson. But now you really have to start thinking about what are you going to brand yourself as what name are you in a brand yourself as and pick it and write it down. Write down the pros and cons and think about it.
142. Tips for branding yourself: in the last lesson, I talked about branding yourself and what that means in different ways to brand yourself. And in this video, I just want to give you five tips for how to brand yourself better. So the first thing is to look through your previous work so that you can familiarize yourself with with you so that you know exactly who you are, what type of work you dio because this will affect the type of branding you dio not necessarily your brand name, but just the type of company that or a type of photographer that you brand yourself as so look back and check out all your work on the second tip is Teoh. See, where are you? Different. Look at other photographers and see How are you different than that next guy or that next girl? Do you take better wedding photos? Or are you just a winning food photographer and everyone around you is a non wedding photographer or as a wedding for tire for What are you really good at? Are you really good at wide images or capturing emotion? Or you always have great depth of field? What are you different? How are you different than other photographers? The third tip with your brand is to try to evoke a feeling. So this is goes across all of your branding and the look of your website. The look of your logo, the look, the way that you talk in your website, the way you talk to people everything, but try to evoke a feeling with your brand. Now, if you are a fashion photographer than you want to try toe evoke a feeling of hip and sleek and professional, and maybe a little bit more like Business E. But if you're a wedding photographer, you want to evoke a feeling of joy and happiness and love, and now this can come across with your name and logo. And this is the fourth tip is to have a strong name and logo Now. I talked about choosing a name before, so whether it's your name or a name that you choose, try to make it strong, unique but also memorable. And with that, you have to create a logo. Now, as a photographer, you're probably pretty creative, but sometimes you're not that great at designing and so pay someone to create a design for you. There's a great website called 99 designs dot com that basically you crowd source your work . You can put up a proposal, and you'll literally get hundreds of people designing a logo for you. You pick the one that you like and you pay them, and it's pretty easy. Then the last tip is, once you do build a website, which will be talking about in the next few lessons, share your brand on your website and not just your name and your logo. I'm talking about What is your brand? Why are you Who are you and create like an about page? Sometimes websites, they don't have an about page, and I really don't like that. I like when, especially if you're, ah, freelancer and solo entrepreneur. You need to have an about page about your company about you as a photographer and express yourself your story and who you are and make sure that your brand comes across. So those air five tips for improving your branding
143. Tell everyone, everywhere: tell everyone everywhere. This is a new approach that I try to implement for my own brand, for my video creation and for teaching online. But it's basically popularized by a lot of people. It's not something that's really new, but one person, Pat Flynn, of smart, passive income. He sort of create this be everywhere approach, as he calls it. And what does that mean? It means that if you're an entrepreneur, if you're trying to create a business of your own, you have to be everywhere. You have to be, have a website. You have to have social media. If you're a photographer, you especially have toe be local. Yeah, your people in your community have to know about you, so that could mean advertising in local papers or on Yelp or Google in your area. Sometimes it's really difficult to keep up with everything, and even I am not perfect at this. I actually dislike social media to some sort of extent. It's just too much to do all of the platforms Facebook, Twitter, instagram, MySpace, face page, whatever you have, and wherever The next thing is, it's hard to keep up, especially when you're juggling. Actually working with having a non work life. So being with your friends and family, and so there is a balance. But try to be everywhere because if you just have a website or if you're just on social media or if you aren't online at all on your just local, you're not going to be as successful as if you have a little bit here. There. Now, as I mentioned, it's a balance because you don't want your efforts to be spread too thin, making one of those aspects websites, social media being local. You don't want to make one of the all of those terrible, but you have to make sure that all of them have a certain level of quality and they all balance each other out. So that's the be everywhere approach. So once you have your branding, done your name. Start doing it all started Social Media page by that website domain, which we'll talk about more in the future and start getting your name out in your local community. Thanks for watching, and in the next video I'll be sharing some of my favorite websites for sharing your photos
144. Sharing your photographs - our favorite sites: Now I want to share my paper websites for sharing your photographs, so I'm just going to go through a list of them. There are, of course, some social media sites that you want to be on as a photographer for the main one right now is instagram, which is a photo sharing application that you can download to your phone. And it's really cool because there's a lot of people on there and a lot of people trying to take great photos with their phones. So it's more about taking smartphone pics and sharing them. Then, of course, you have Facebook and Twitter, so Facebook on one hand, is more a place where you can create your own page. Or you can create a group or like a fan page and share images. Or you can just have a personal face book page, and you can create albums and share photos. That way, Twitter is a great way to sort of quickly tell people about your photos and shared whatever you're doing again. Not the best place for someone to really learn about you as a photographer, because there's no real way for you to them toe see all of your photos organized in a great way, but one sort of social media platform that I actually really like the way they lay out their photos is Google Plus, So I know don't laugh at me for using Google. Plus, it kind of was a flop, but their photo sharing is actually really great just because I like the grid that they used to share photos, and I just like posting them on my Google plus page, and it's easy to share albums with people that way. Then you have your more specific photo sharing sites. So this is imager flicker 500 pixels in folio yoga, while these are all places where you can create a your own profile and share pictures. And this is a photo community, which is great because, unlike Facebook or Google Plus or Twitter, this is just for people who are interested in photography. And so it kind of clears, Ah, lot of the clutter that you get from other social media platforms, and they all have their pros and cons. But basically you can upload photos, share them, group them in different ways, tagged them different ways. Some of them you can even edit within. So check out all of those. And again it's imager, flicker, 500 pixels and folio and yoga. While they're all really great, then you have a couple traditional photo Web sites like Shutterfly, photo bucket, Snapfish, thes air, all websites where you can post your photos and share them and create different websites with your photos. But also this is where you can print them, create calendars, create books. And, of course, there's hundreds of other sites that do. This is well, but those are some of the main ones. One website that is really interesting now and you might want to get into or on rather is etc. And etc. Has been around for a few years, and it's really popular now, so it might be getting a little bit competitive. But it's a place where you can create a profile and basically sell your work. So in a future lesson, we're going to talk about selling your photos through stock websites and making money that way. But I'm not classifying those as places you want to share your photographs and etc. Is a different too, because that's he's so popular and you can actually um, sell your photos through the website, which is pretty cool. And this reminds me of one more social media platform. And that's Pinterest, which is another place you should get on because there's lots and lots of people on there, and it's kind of got got that, do it yourself crafty vibe, and so you will probably find a good audience on there. There's one site that is pretty cool, called This Life it's actually put is a Web site that was created by Shutterfly. But it's basically all of your photos, organized and aggregated from different places. So you congrats photos from your Shutterfly, your Facebook, your instagram and all sorts of different websites, and it saves it right on this life, which is awesome because it's hard Teoh post to different places and, you know, share different websites with people. You, you either it kind of have to be on one or do it all. But if you're doing multiple, you can created this life profile and share your this life profile with someone and all your photos from Facebook and Instagram and Shutterfly and wherever else are actually shared there. So that's pretty cool, and you should check it out. Okay, So I know I just spewed a bunch of different websites at you, and now you have to really pause and check them out, create profiles with your brand name and start posting pictures on there. So have fun, and we'll see you in the next lesson.
145. Creating a website/portfolio: and this video will be talking about creating a website and or a portfolio. So this is another topic that could take an entire class, and so we're not going to dive too deep into the actual creation process. There are lots of other courses free and paid that do this, and I actually have a free one. So if wherever you're watching this search for my blue host a WordPress course, this will teach you how to create a great website on WordPress with hosting by Blue Host or really, whatever hosting you want. But it is a great way to build a customizable Web site. But there are basically two categories for creating your own website, free and paid. With the free model, you can start sort of a blawg, whether that's on wordpress dot com or blogger or Tumblr or countless other Blawg platforms . And that's kind of cool. If you want to create a blawg and a lot of these templates that people use nowadays, you can actually create more, more or less a website, and it's not just a blawg on, say, wordpress dot com. Um, but I think it's important to actually create a website that is a little bit more contained , and I actually have a little bit more advice about blog's in the next video. But what I'll just say is that it's hard to keep up and you might not want to have a blogger on your website. Two other websites that I would check out if I were you for free hosting and Web creation are Wicks W. I x dot com and weebly dot com. They have great templates, and it's really dragon drop and easy to use, So those are the free ways to create a website. There's countless others, but those are a few that I would suggest checking out now. I'm always about keeping things to a minimum budget, but really paying for a website, whether it's the hosting or the domain name or the template that you're using the theme of your website. I think that's a great investment, and there are different ways to do this. So there is the traditional way of creating website, such as going to go daddy dot com and purchasing Web space and a domain, and you can purchase templates there or another is what I mentioned my courses about WordPress and Blue host. So Blue Host is a hosting service. There's different ones like host Gator and lots of different different hosting services. But basically you're purchasing space on the Internet somewhere, and then you can plug in a website theme, which is basically the template, the structure of your website. And it's how it looks. And so you can purchase different themes related to photography, for example, that have great portfolios, and it just looks like a great photography website. You can purchase these themes from websites such as theme forest, dot net and again, countless others. And then you have tow Connect that theme to your hosting, using a service like wordpress dot org's. So I mentioned wordpress dot com, which is a blawg platform. Wordpress dot org's is a website platform that is really great because you can really customize your website. Add different plug ins that do countless things, like if you want to create an online store or a little social media page or you want to add maps to your website or anything you can think of that is going to be a plug in for that and going this route of self hosting a website through Blue Host and wordpress dot order. Something similar is the best way to do that. Okay, so that sounds like a lot of work. And that might not be what you're interested in. There's easier ways to create great looking photo websites. Three of them are Zen Folio, Squarespace and SmugMug. These air all sites that well, basically do everything I just talked about, but it's all done for you, and you basically just have to go in and, you know, upload your photos, plug in some information on your about page, create a couple different pages on your website, and it's a little bit of work, but it's a lot easier than the whole self hosting route. So check out those three websites and see if there is something that you like. I love going to different websites like this and just getting inspired. And of course, you'll get to see some other great photos as well. So those are the two ways to create a website portfolio free and paid. Now go ahead and figure out. How are you going to do that? And in the next video, I'll be sharing some website must have. So what do you need to have on your website? As a photographer?
146. What you need to put in a website: Let's talk about the things that you have to put on your website to set you up for success as a photographer. So where there are five key points that I want to bring up today, the 1st 1 is high quality images. Well, the this is kind of a no brainer, Phil. You know, we knew that we would have to have high quality images were photographer, but seriously, I have seen a lot of photographers not only put up not that great photos, but not that high of quality. And when I mean quality, I mean it two ways. Both awesome shots, but also large file size is basically and not compressed or not small, so that when people view them full screen or however they're viewed, they look amazing. And on your website, I don't know how you want toe present them. There are a few different ways, whether it's sort of a gallery, a list of images. Um, there are lots of different plug ins and different styles, depending on the website hosting and plan that you have, but make sure that people can open them up full screen if they want. Click on them a little pop up will open up something so that it is large enough for them to really see the details of your great photos. You want to show that off. So that's the first thing. High quality images. The second is a contact page, and this is basically the two things that you really need. But having a way for potential clients to contact you is really important. I don't know how many times people have mentioned on my side. Oh, thinks it was easy. Teoh, contact you Philemon or dot com because there's a contact but and right at the top. And that's basically the only link up there aside from the home page and then I know lots of websites that I visited where I'm like, How do I get in touch with this person? I want to hire them, but I can't. So make sure that you have a contact page and that's easily accessible, ideally with a link at the top of your page. I'm the whole website. The third thing that I think is great is to have an about section with your location, so the about section is a little space for you to tell the website visitor about you, about your photography, why you do it, how you got into it Now you don't want it to be a narrative. You don't want to take up too much time. But I would say a paragraph or two 300 words or so is probably as much. Aziz, you want to write about yourself, and people should get a good feeling for who you are and have your location. This could be a map or just saying where you are, because people might be coming to your website from all over the world and might want your photos or your photography skills. But if they're not in your area, then there's no point for them to try to work with you. So having that location in the about section is good. The fourth thing is more of a does general idea, but having easy navigation. So this is pretty August, but you want your website visitor to know how to get around. You want them to know Hey, this is where I look at photos. This is where I find out more about the photographer. This is where I contact the photographer and those are the main things that they want to find out, and so make sure that whether it's links at the top of the page or you right out sort of directions within the page itself on how to view your website that make sure that it's easily nag, navigate, herbal. Um, one thing that a lot of people are now are doing on their website is they have a home page . But then at the top there is a link for a start here page, and that could be the about page, and you could just name it. Start here, and that's where you sort of give the website video visitor More information about yourself in your photography and kind of how to navigate the page, what you're offering if you're offering to work or if you're offering stock photos or whatever, so make sure that your website is easily navigate herbal. And lastly, the fifth thing that I think you should have if you can do it, is a blawg, and I mentioned this in the last lesson about the pros and cons of having a blogging and blog's are hard. I've started more blog's and I've successfully kept up with, and I've actually only kept up with about two blog's consistently for more than a year. And so blog's are hard because you have to be consistent with it. You have to post regularly, and it's tiring to do that. And sometimes you don't have work at a certain time. And if people see that you are not working because you have it pushed it a blawg in a month or two, they might think, Well, this guy's not that great because they don't work that much, Um, so making your blood more of a general rather than oh, I did a photo shoot today And here's some photos making it more general on just sharing some awesome photos that are more timeless and evergreen. That is a good way to do it and just plan on posting once a month, I would say to start out with, rather than having a goal of posting once a week in getting tired and not being able to do it. So that's my caveat. Have a blawg if you can keep up with it. If you aren't going to keep up with it. I don't have a blawg because it will look bad on your website if you only have block posts from a year ago. I love simple websites. And so while these were five tips and overall, the overarching goal that you should have is to be simple, have a clean website, make it all about the photos that you're trying to share. So remember the five tips high quality images, a contact page that's easily findable and about page that shares your location, making sure your whole website is easy to navigate. And lastly, a blawg, if you can keep up with it. Okay, Thanks. And I hope these tips have helped you and good luck with building your website.
147. What should you charge as a photographer?: what should you charges a photographer? This is a question that I've asked many times, and I know Sam is asked himself loads of times as well. And when I do my own video freelance work, that's another question that I have to ask myself. And there are just so many factors that go into this. And so because of that, I don't have a clean answer. I can't say OK, well, you're a photographer. You should charge $40 an hour across the board because maybe used to charge more because you live in San Francisco and you need to pay rent. Or maybe you should charge less because you're just starting out. There's lots of different factors, such as the type of photographer re you're doing. So are you doing wedding photography? Which is very well paid and sort of incredible, actually, em getting married myself right now and going through the wedding planning process is insane. I wouldn't be able to hire myself as a photographer, so the type of photography. But on the other hand, if you're doing photos for a school or a nonprofit, you might need to charge less. It also depends on your experience. So have you been doing this for 20 years? And you're just re upping your game? And I don't know why you would be watching this course of you have been taking photos for 20 years professionally, but just for the example. If you're doing that and then you're going to charge a lot more than someone who is straight out of high school or college and just starting out there photography career, it also depends on the customer base. So who are your clients? So this has to do with types. But is your customer base families? Are you doing family portrait? So are you doing advertising our marketing photos For big corporations? The pricing is going to change. And then, lastly, the last factor is your competition, which is based on your location. So are there a lot of photographers in your area? This is something you can do by searching on Yelp and Google. See if there's photography companies in your in your area and also it just the different markets pay more for things. So, like Los Angeles and San Francisco in New York, people are going to get paid more, even though there are probably a lot more photographers in these areas, but people would get paid more because housing prices, arm or and food is more and people get paid a little bit more than if you're in the Midwest or in another country. So those are lots of factors that you have to deal with. But while you're figuring out those factor is the basic thing that you have to ask yourself on, how much should you charge as an individual is basically adding up, how much do you need to survive and then go from there? So if photography is your full time gig, then you have to basically figure out How much do I have to pay for a room and board and all your That includes all your food and toiletries and everything else that has you have to pay for in your day to day life. But then also, you have toe come up with an emergency plan. You know you don't get benefits as a freelance photographer, so it would be good to start planning for the future, saving for a house or a retirement or whatever you're doing. And so you have to add that all into whatever your base pay is. And the other thing is that you're not going to be working every day of the week as a freelance photographer because, well, it's just would be highly unlikely to get that much work. And because of this, your chart, your prices are going to be a little bit higher than the average daily salary. So that's something to talk about, Um, or explain to your clients if they're wondering about your pricing. So you basically add up all your cost of living at a little bit for saving and everything else and go from there. You really have to know when to walk away from a project, because I've been down this road where I just started working on a project and they didn't offer me a lot of money. But I took it just because and, you know, a week into the project, it was just too stressful and the money wasn't even worth anymore. And so you need to know when to walk away from from the money, and I guess it depends on where you are in your career. If you're starting out, you might have to do things for cheap or even free, and we'll talk about finding freelance photographer. You work in the next section, but in the next lesson, that is. But, um, you really have to know when to walk away from a bad deal. So I know that wasn't a clear answer, but I think the reason is because there isn't a clear answer for how much you should charge the photographer. You can always look online, though, and sort of search around for photography companies in your area. See if they have pricing online or see if you can reach out to them and pretend to be a client and ask how much they would charge and go stealth mode. So you could easily, semi easily find the pricing of photographers in your area. And you should charge a competitive price because you're putting a lot of time and effort into learning these skills, and people have to pay for that. Photography is a skill not everyone can do, and they don't have to. People aren't Onley paying for your time, but they're paying for the knowledge and creativity that you have. Ultimately, thank you so much for watching if you have any specific questions. Please feel free to message samurai and we will get back to you with a better answer. Thanks for watching, and we'll see in the next video.
148. Finding freelance photography work: So you have your website up and you have some idea of how much you should charge is a retired. For now, it's time to actually go out and find that work. So in this video, I'm going to give you my top tips for where and how to find jobs. So the first place is online website hunting, so there are lots of jobs you confined on indeed dot com, craigslist dot com, or even other sort of freelance places like elance dot com, freelance photo jobs dot com or i freelance dot com. And it's basically the same for all of those Web sites. You have to create a profile or you find jobs that are posted and you just respond to them . And the main thing is to be up to date, keep checking on a daily basis. I would set a time in the morning to, you know, just put in your five minutes of checking online for jobs because these jobs get filled up fast. I work at a university that sometimes hires out for photographers and other creative positions, and they put out the call, and within the first few hours, they have hundreds of responses. And so I don't want you to go crazy being online all the time. But I think that you should have original about checking online and send them your information. You don't have to send a huge, detailed email toe everyone, but send them to your website that has all the information they need. The next thing is to use social media. One way to do this is to add freelance or a freelance photographer or both as one of your interests, or have it on your about page, because sometimes people are out looking for these things, and they just search for a freelance photographer on Linked In or Facebook and maybe you'll pop up. Another thing is to follow different companies online and sometimes, especially on Twitter or Facebook. Companies will actually put out a call for positions. And so you can either follow companies or you can search Hashtags or just search on Twitter . Things like freelance photographer or freelance or photographer or freelance wanted freelance needed all these things to see if there are companies out on social media looking for photographers. The next idea to get freelance work is to work on crowd source projects. 99 designs is the website I mentioned that you can use toe create design for you, but there's also different types of work, like photography, and there's other ones, like design, crowd or crowd spring, and basically you see the project profile. You submit a sample or the real deal, and if they choose your photo, then you win that deal on you make money from it. Another way is to get listed in directories or resource pages. This is important if you're an event photographer and you've worked at a specific space before or doing weddings, you can ask the locations if they have a website such as the hotel or a restaurant, or wherever toe put you in their resource page. Oftentimes, clients will goto the these restaurants or or places that they're having their event, and they'll ask Who's a photographer that you know who will do a good job for this. So it is a great thing to do, and it's very localized and doing what I have said before about website hunting and social media is good, but really getting down to a local word of mouth finding people in your community to hire you is a better, more successful way. So then the last thing for finding freelance photography is to reach out to friends and family. I mean, this seems obvious, but you never know who knows who that is, wanting to hire a photographer for whatever, whether it's, ah, birthday party, a whore, a new product that they're launching at work. I've had people requests all of the above, and so reaching out to friends and family is a good idea and more than just a tweet or a Facebook message. But really having a conversation with your family and friends and saying you're launching your photography business, and if they know anyone that's looking for photography, then you're there. So those are some places to find freelance work, and then I just have some basic tips. One is to respond to emails as fast as you can. Now this seems obvious. But as I mentioned before, if you're finding work online, people and these companies that are hiring make decisions really quickly, and so you really need to be on top of your e mails. Next is to keep a list of contacts. Now. This is important because every year. Every so often you can do a blast email out to your contacts. One way to do this is at the beginning of every year. You should be increasing your prices with the year, and what you can do is send an email out to all of your previous clients saying, Hey, I'm really glad that I got to work on this project with you. I am up in my prices and I just want to let you know that I'm available to do work. And I'm now booking my time for this New Year and is a great way to really put yourself back in the mind of whoever you're emailing and potentially get work. That way. The next tip is to set a time for Web surfing. So as I mentioned before, when you're hunting for jobs, really have a time in the morning in the middle of the day in the evening, whatever it is, have a time. And don't worry about trying to look the rest of the day because you could go crazy looking for work for 24 hours a day. The next tip is to be creative and just go out and take photos. This is the key to being a successful artist, which I think all of you are as photographers, and you really need to just get out there, take photos, keep learning and learning the style's new tricks at new editing techniques, and you just have toe really be creating more content. And I've realized that all of the people that I know who keep creating content on are doing it. They are the ones that are most successful in the ones that are making the most money and finding the most work because they're out and about. And even if they're just doing it for their personal self, it people see it and people like that about photographers. And lastly, just be confident. It's hard being a new photographer. I know to sort of pitch prices and pitch to people and try to get clients. But it's like a snowball. Once you get one, it will increase slowly. But the more and more jobs you get, it seems like the easier it is to get even more jobs, and that's just a funny Catch 20. But seriously, once you have jobs, it's easier to find a job and the more people that you know and reach out to, I'm sure that you'll find work. So be confident. Okay, so those were some tips for finding freelance photography work. I hope you enjoyed them, and we'll see you in the next lesson where we'll be talking about unique ways to dive into photography.
149. 3 Unique ways to dive into photography: here are four unique ways to dive into photography, thanks to photo venture dot com. So the 1st 1 is to find your unique niche and sell on Etsy. So I mentioned etc. As a way to sell photos before but the best and was successful. Way to do it is to really find a unique niche. You can't just start taking photos of all the things in the world and try to sell them but find something unique. Are you really good at taking photos of sunsets, or are you really good at taking photos of stuffed animals? It doesn't really matter, and it's just easier to sell and create a following, starting out as a small niche. If you have multiple niches creating old whole etc pages, the next unique way is to throw a portrait party. So this is really cool to dio at a school or at ah workspace. Reach out to your community and say, I'll offer two hours Teoh Teik, Portrait of your employees and you can even have a tip jar if you want. But this the main reason is just to reach out, build contacts and build relationships with people, especially at a school or for, you know, sports youth sports, where they're taking pictures every year after year. If you can build up a relationship and show that you're a great person, nice to work with and potentially cheaper than their current photographer, this is a great way to get that foot in the door. The next unique way to dive into photography is to go local, spend today visiting local shops, restaurants and take pictures of everything from the stores themselves to the people working there. Of course, ask for permission and then Holden exhibit. If you can get some sort of Artspace or go to one of those places that you took photos and say, Hey, can I set up photos and try to sell them and maybe split the profits or give them free photos or something like that, or even asked them if you can put their photo the photos that you took on their walls and maybe try to sell them? But this is a great way to sort of again get local, meet people and build local community of followers. The last unique way is to help improve local websites. Now, if you go look online For all of your shops that are downtown and the schools in your area , you will probably find some terrifying images from 10 20 years ago, and these websites need lots of face lifting. So find those businesses and give them the solution of better photos. So go in, take. You can offer to take photos of the staff of their store. It is similar to the one before or their pro products. And this could be their four flyers websites, etcetera. And this is just a unique way toe be proactive about helping a company who might think, Oh, I don't need this. But if someone came to their door and was like Hey, I'm a photographer, Aiken, spend two hours here taking photos, and it would cost this much. Then they might take you up on the deal. So those were four unique ideas to dive into fit our. So those were four unique ways to dive into photography. Remember one, find a unique niche and sell on Etsy, too, through a portrait party. Three. Go local and spend a day visiting local shops and have a gallery. Four. Improve local websites with great photos. Thanks for watching, and we'll see in the next lesson
150. Landing a full-time photography job: in the past couple of videos, I talked about getting work as a freelance photographer, but there's a whole different side of finding work, as if dark for as a full time photographer. There are lots of different companies and businesses that need people to be on staff as photographers think about journals and magazines and newspapers, websites that are news related. These people need photographers. Teoh keep up with the content of the daily day to day. There's marketing and communications department at practically every single big company out there. And a lot of times they want an in house photographer because it's too expensive to go out to a freelancer or to another agency to do photography every time. And then one other place where I've found success is at local colleges and universities. My first photography full time job was at a college in California in So Cal, and it was in their communications department. It was a small college private school when we had about 50 workers and about 1000 students , but they still had a full time photography need. And so now I work at the University of California, Berkeley, as a video producer but there are two full time the tar for his own staff there as well, and they're hiring a lot more freelancers to do work as well outside of that, but there's to freelancers that are two full time workers that are doing photography all the time, covering events that take place at the school and all sorts of other things. And so there are lots of options for finding full time gigs. And again, you can find these on the websites like, indeed, monster, the typical places, but also by just looking at companies websites in your area and seeing what they post to their own job board. But the big question is, Do you want to work full time? There's lots of pros and cons to it. I mean, let's go over the pros. You have consistent work you get might get benefits. Your salary is consistent, so you don't have to worry about that. And you know you'll spend a lot of time doing what you love photography. But the cons air that maybe it's not as interesting as you would like to do. Maybe you don't like having to go to a 9 to 5 job Maybe you like working for yourself and you just have that entrepreneurial spirit. And working full time is tough for people like like you. So ask yourself that question. Do you want to work full time? And if you do reach out to companies in your area and really hit up those colleges and universities because a lot of them are looking for full time photographers on their communications team? Okay, so thanks for watching. And I hope you enjoyed this section so far and we'll see in the next video.
151. Conclusion - what did we learn in this section?: Hey, everyone, thanks for being with us for this section. I hope you learned a lot of great tips on finding freelance work. We're landing a full time job as a photographer, and now you can spend the next few days or a few months really putting together your website and started to brand yourself putting together materials, packages, pricing. Teoh really succeeded as a photographer. So if you have any questions, please let us know, because I know sometimes you're watching, of course, and you're like, Well, they didn't cover this or they didn't cover that. I would really like to know how a photographer like me or Sam did it, and we're always trying to improve these lessons and include MAWR things like interviews. And that's one thing we want to do as we move forward so you can get excited for that. We're tryingto set up some interviews with some other professional photographers that we know to really help. You guys and girls get jobs as a photographer so we can get some more inside scoop. So thanks for watching the section and let's move on to the next one
152. Introduction to the Sell Your Photographs section: everyone, welcome to a new section of the photography masterclass. Last section we talked about the basics of making money with photography. Now, in this section will be covering a specific way to do that, and that's through selling your own photos. So we're talking about both selling photos on stock websites, where you can basically sell photos of anything because people are always looking for images to buy further company for putting on their website or their magazine or whatever. But then we're also talking about selling your photo as fine art in terms of well, wherever you want to sell it. But that includes topics of like licensing on other things that we have to get into. So you really understand the basics of how to sell your own work. So thank you so much for joining us for this section. And we're really excited because in next, cool videos were telling you a great story about how one guy made $15,000 in one day on Instagram. So I know it's hard to replicate that, but who knows? It could be good inspiration, so let's get straight to it.
153. Best stock photo sites for making money online: everyone. Welcome to the selling your own photos section, and in this lesson, we're talking about making money with stock photos. And I'm here to tell you that there is no magic secret in how to make money on stock photography site. It just takes a lot of time and persistence because stock photography is a huge market. And now that anyone can basically pick up a camera, DSLR or iPhone, it doesn't really matter and take great photos. There is a huge amount of photography online, and you really have toe do some things that are special to stand out, and we'll give you some tips in the next lesson. But right now I just want to mention where you can sell your photos online. They're literally countless number of stock photography sites, but I'm just gonna go through a list of the ones that I like so that you can check them out on your own. So we have istock photo dot com shutter stock dot com fear dot com, alami dot com Big stock photo dot com getty images dot com corbis images dot com foe talia dot com rgb stock dot com morgue file dot com smugmug dot com, stock expert dot com, crease stock dot com and dreams time dot com Thes air All sites that basically all do the same thing. There is a library of photos. People go on them, purchased photos, and there are a lot more aside from these, and so you might have heard of other ones. But the main deal with these sites is you just have to have high quality and put your stuff out there. Typically, there is a set of rules for who can sell photos on there. You might have to be approved before you can sell photos. Or you might have to have a certain number of photos approved before you sell photos. The best thing to do is to go to each of these sites, see what's out there, see the quality level, see the types of photos on there and decide what you conduce. Oh, so in particular, look at the stock photo sites and see find a niche that there aren't many photos of on the site. If you're trying to do photography of a flower, there's gonna be billions of photos of flowers on these sites, so find something that's a little bit smaller again. We'll go into more tips in the next video, but I just wanna get you prepped. I would say before you move on, start looking at these sites and just see what's out there. And it's a great way to get inspired toe. Learn about photography, to learn how to take better photos and to plan for your next photo shoot. The other, I guess not. Really. Stock photography site is etc. And I've mentioned etc. Before. And there are other fine art photography sites. But Etc. Is a cool way to sell any sort of D. I Y. Project of your self. So you will find other handicrafts, anything you can imagine. Someone is selling on Etsy and a lot of photographers start a little profiling, etc. And end up making a decent amount of money because they find a niche and their high quality . And so there's not really much more to say about stock photography sites. You just have to go check them out, and some of them have rules like you can on Li cel On one site, you can't sell photos across other sites. If you're selling on this site, Um or it's like the revenue split will be different. And for all these sites, the revenue share will be different. So maybe you'll make 50% per sale, maybe 70% Purcell or maybe 20% Purcell. It really depends on the site. So start looking them up, start creating a profile and create the profile with your brand name that you created in the last section and go from there. Thank you so much for watching this video, and we'll see in the next one.
154. How one guy made $15,000 in one day on Instagram: I want to tell you a story about Daniel Arnold, a photographer on Instagram from New York who made $15,000 in one day selling his work on Instagram on. And I think this is perfect proof of ability to make money with your art, but also I need to have a fan base. Currently, Daniel Arnold has over 96,004 followers on Instagram, but at the time of him making $15,000.1 day he was just around 20,000. So it's not impossible to get to his kind of numbers, But his story goes like this. Basically, this guy, Daniel Arnold, he was in between jobs, and you just like taking photos So he would walk around streets in New York for up to eight hours a day, just taking photos. And he literally had $90 in his bank account on the eve of his birthday and he thought to himself, Maybe I can sell some prints on line to see if I could make some money to pay for rent. He then posted a message on Instagram that said Hello. I just turned 34 this second for one day. I am selling four by six prints of whatever you want from my Instagram archive for $150 each. I swear I will never sell anything this cheap again. If you're interested, send a screenshot of the photos to my email and I will invoice you through PayPal. And I will then send you a signed print. Easy peasy. Happy birthday. I love you. That was his message, and he got a tremendous response. He got over $15,000 worth of requests and even one person offered $1000 for all of his photos that had received 1000 likes or more. And so this just goes to show that making money online is doable with your photos, and it's kind of an untraditional way to sell your own photos. Typically, you think, Oh, I have to go compete with others and different stock photo markets. But even on Instagram, people are finding creative ways to make money. So I hope this was inspiring. This was actually taken from a Forbes article that I saw If you search for Daniel Arnold 15 k in one day on Instagram, it should pop up so you can read a little bit more. I hope it has inspired you to post photos on Instagram and maybe do something the same. Thanks for watching, and we'll see in the next lesson.
155. Selling your own photography: So now we saw that one guy was making $15,000 in a day on Instagram. How do you do that? How do you sell your own photography? What? We have three tips, which aren't easy tips to come by, but three tips that will help you sell your photography online, whether it's on instagram and you have the stock photo sites we mentioned or really anywhere. So the first thing is, you need a fan base. You can't just out of the blue with no one knowing that you're a photographer, put up a Web site and expect people to start buying your photos. Maybe if you start blogging and someone comes across your website, they might end up finding you somehow and purchasing a photo of yours. But that's actually, in essence, building a fan base. It's just that if you already have a fan base before you start selling, it will be better. Just like Daniel Arnold, who made 15 King in a day. He had 20,000 followers at the time when he started selling his photos on Instagram. And so what? Wherever you're selling it, try to build up a fan base and that's why it's important to get on Instagram to be present on social media toe have a website that you're sharing your work on like we talked about in the last section. So it's fan base. That's the number one rule. The next key thing you need to have force selling your own photos is quality. So after having a large fan base, having huge quality is so important. Nowadays, everyone can pick up a DSLR and go shoot amazing photos that could end up on the top stock photo sites. And there are so many photos out there, so many great photos out there because there are so many stock photographers, so you have to compete with all of those people. If you have subpar photos, then you're not going to be able to sell, and the last key thing will help you even sell more. And that's uniqueness. You need to find a niche within your photography so that you can be known as the X Y or Z photographer. So are you a sports photographer? Are you in action Sports photographer? Are you a skate photographer? So go down into those niches and find something that you're really good at. And we talked about this when you were building a brand and how this would be important. But it also helps when you're selling your own stock photography, because if you're on etc. For example, and selling your photos, it will help a lot if your profile is mostly of one niche. Because if you have photos from all types of different situations, which might seem like wiles person is really well rounded, I'm gonna probably by a photo from them. It's really, honestly not going to be as good as if you have all photos of flowers, because then anyone looking for flower photography, we'll go to you. So those are the three tips that we have for selling your own photo photography. First, you need a fan base. So if you don't have one, start building when now through social media and your own website, too high quality photos is a must and then three be unique. Find a niche. Thanks for watching this video, and if you have any other tips for the rest of the viewers, hit us up and we'll add them to the list
156. Understanding licensing: in this lesson, we're giving you the basics of licensing, basically talking about the three categories that you can license your photos, as the three categories are. Commercial editorial in retail Commercial licensing is photography that is used to sell or promote a product service or idea. So this is, for example, photography for ah, an advertisement or for even if you're a taking a picture for a school. But if it's used to promote their school, the second type of licence is editorial, and this is for educational or journalistic purposes. So if you are taking photos for a newspaper or to post on a blawg or same situation, if you're taking a photo for a school. But it's more event coverage or just covering some sort of news that's happening, then it's an editorial licence, and lastly, a retail license is commissioned or purchased for personal use. So this is if someone wants to buy your photography to put in their home, for example, and so the difference is not the type of photo but the actual use of the photo. The same photo can be used for different purposes. For example, you can cover an event, but It could also be used as commercial for the company or editorial for the newspaper. So you're covering an event. Let's say you go to the Super Bowl and you are taking pictures of the Super Bowl. It could be an editorial piece for a newspaper about the events that took place there. Or it could be used for the next promotion of the Super Bowl of the following year. Two different licenses and for an example, in retail photography, let's take wedding photography. It's event coverage, but the end use is personal. Unless it's some celebrity that you're taking photos about their Web wedding just for a newspaper or blawg, it's typically going to be a personal end use, so that makes it retail photography. The key thing to remember is that all three licenses are intellectual property. You created the photo, and you are the owner, and you have the right to sell it, keep it or share it however you want. So I hope this gives you an understanding of what licensing is and the types, and in the next video, we'll talk about actually how you license and what it really means, including things like exclusive licensing, non exclusive licensing, unlimited use or limited use, which are terms that you might have heard of. Thanks for watching, and we'll see in that video.
157. How to license your photos: in this video will be talking about fair use. So this is something that's very confusing to a lot of photographers and people wanting to use photography. It's basically the question of Can I use this photo for the purpose that I want to? So fair use is the exception to intellectual property rights. So a couple of videos ago we talked about the different types of licenses commercial, editorial and retail. Fair use is that exception that saying that you are allowed to use this photo and you don't need to have a license. You don't have to have a contract or pay to use this photo. And there are two ways that you can use a photo for any purpose. One is for educational purposes, so when you are teaching your class, you can use photos in your teaching or if you're doing student research. So if you are doing a research project, you don't technically have to pay for a photo that you're putting into your project. And then the second way is if you're making commentary and or criticism as a news report. So Jon Stewart of The Daily Show is famous for all of his rants and his social commentary, and he often includes photos of the people he's making fun of. And he's allowed to do this because he's critiquing them. He's making a commentary about them as a news report. And so this is why people like Jon Stewart or lots of bloggers and websites and magazines make fun of other people, and they don't get in trouble for using photos of them. Fair use is different than public domain. Public domain means that there is no copyright owner and that that photo, because there's no copyright owner, is free to use for anyone for any purpose. So fair use is different than public domain. And then Creative Commons is different as well, because Creative Commons is saying that this photo is available to be copied, modified and redistributed, and it can even be redistributed for money. But it's just a different thing is it's the photographer saying that you have the right to use my photo by giving you putting it in Creative Commons, and you can find a lot of Creative Commons photos on Wikimedia Commons. It's like a Wikipedia site for media, for photos and other things. Those are the three things in fair use that I wanted to cover. So remember, fair use is allowed for educational purposes. And if you're making a commentary or criticism as a news report, this isn't the same as public domain, which means that there is no copyright owner and therefore you are free to use the photo. And this is different than Creative Commons, which is when the photographer says, I'm putting my photo out there for free use. I hope you really enjoy this lesson. If you have any questions, please let us know because I know licensing and fair use is a tricky subject. So please let us know if you're still confused. Thanks for watching, and we'll see in another video.
158. Fair Use photographs: in this video, we're going to talk about what a license actually is and how you put it together and then different terms that relate to how a photo is licensed. In the last video, we talked about the different types of licenses. Now we're diving a little bit deeper. So a license is basically a contract between the photographer and the client, and there's no right or wrong way to do a license. It's basically like any other contract. You write it up. It has all the rules that both of you, both you and the client will abide by and then you sign it. So in your contract, it could say all of the photos that the photographer is taking on this date are our property. So that would be an example of a company hiring you to do an event photo. Or it could be that you're selling your photos online and stock photography and the contract or license between the client and you says I'm the client. I've purchased the rights to use this photo in whatever way, and then you have to spell out the different ways that the person can use that photo and that gets us into the terms that you need to know. So exclusive license is when Onley, a specific client, can use the photo. So it means that if you take a photo of the Statue of Liberty, for example, and it's really great and you're selling it as an exclusive license Onley that client can use it. You can turn around and sell it to another client. A nonexclusive license is where a photographer congrats multiple licenses of that photograph. So stock photography fee, for example. You've probably been online and seen similar the same exact photo on different websites or in magazines, because a lot of people use stock photos nowadays and these air nonexclusive licenses that the photographer has, and you can imagine that an exclusive license will be a lot more expensive than a nonexclusive license because the photographer is only selling to you. And then, aside from exclusive and nonexclusive, there is limited and unlimited unlimited use is saying that you the client can use the photo however much as you want, so you can use it on your website. You can use it on your magazine. You could print it out, put it on your wall and or you can put it in lots of websites. You can put it in lots of videos or our articles. It's unlimited use. There's also limited use, and this limited use can be however many you want. It just has to spell it out in the contract, but it could be one time use. So this is typical. When you purchase stock photography, you're only allowed to use that photo one time for one purpose. So if you use it on your website as a background for your website, then that's the only time you can use it. Or maybe there's 10 time use. It really depends. And these are the things that you need to know when creating a contract so that you and the client are on the same page and that neither of you gets into trouble for using your photos in the wrong way. So this is a little bit more about licensing your photos, and in the falling video we'll talk about fair use. But I think by now you have a good grasp of what licensing a photo means
159. Conclusion - what did we learn in this section?: Hey, everyone, I hope you really enjoyed that section on selling your own photos. So we covered all sorts of things from basically where you can sell photos. What type of stock image sites are there? We talked about some tips for how to brand yourself succeed as a stock photographer. And then we talked about licensing, very trade, all the technical terms that help you really set yourself up as a successful photographer who sells their own work. So we hope you enjoy this section as always. If you have questions, let us know we'll dive into the topics a little bit further if there was something that we missed, so thanks for watching and we'll see in the next section.
160. THANK YOU!: Hey, Ver one. Wow. What? Of course it has been first off. Just thank you so so much from the bottom of our hearts. We are so happy to have have you here learning from us to be able to give you some of our knowledge. But ultimately, we just hope that you took away a lot of tips that we gave you in this course and that now you're taking better pictures than you've ever taken. And please go up to the top on the review button and just lost No, a little bit. About what you thought the course if you liked us. Hopefully if you didn't like us, we're always looking for constructive criticism. How can we make this better for you? And if you still have questions, please feel free to reach out to us. We're always happy to help. Otherwise, we really hope you enjoy this course. I learned a good deal. Now it's time to get off your computer and go take some photos.
 Phil Ebiner, Video | Photo | Design