Transcripts
1. Welcome to a Miniature World: Hello friends. My
name is recovered account I message artist
and the videographer. In this class, I'll
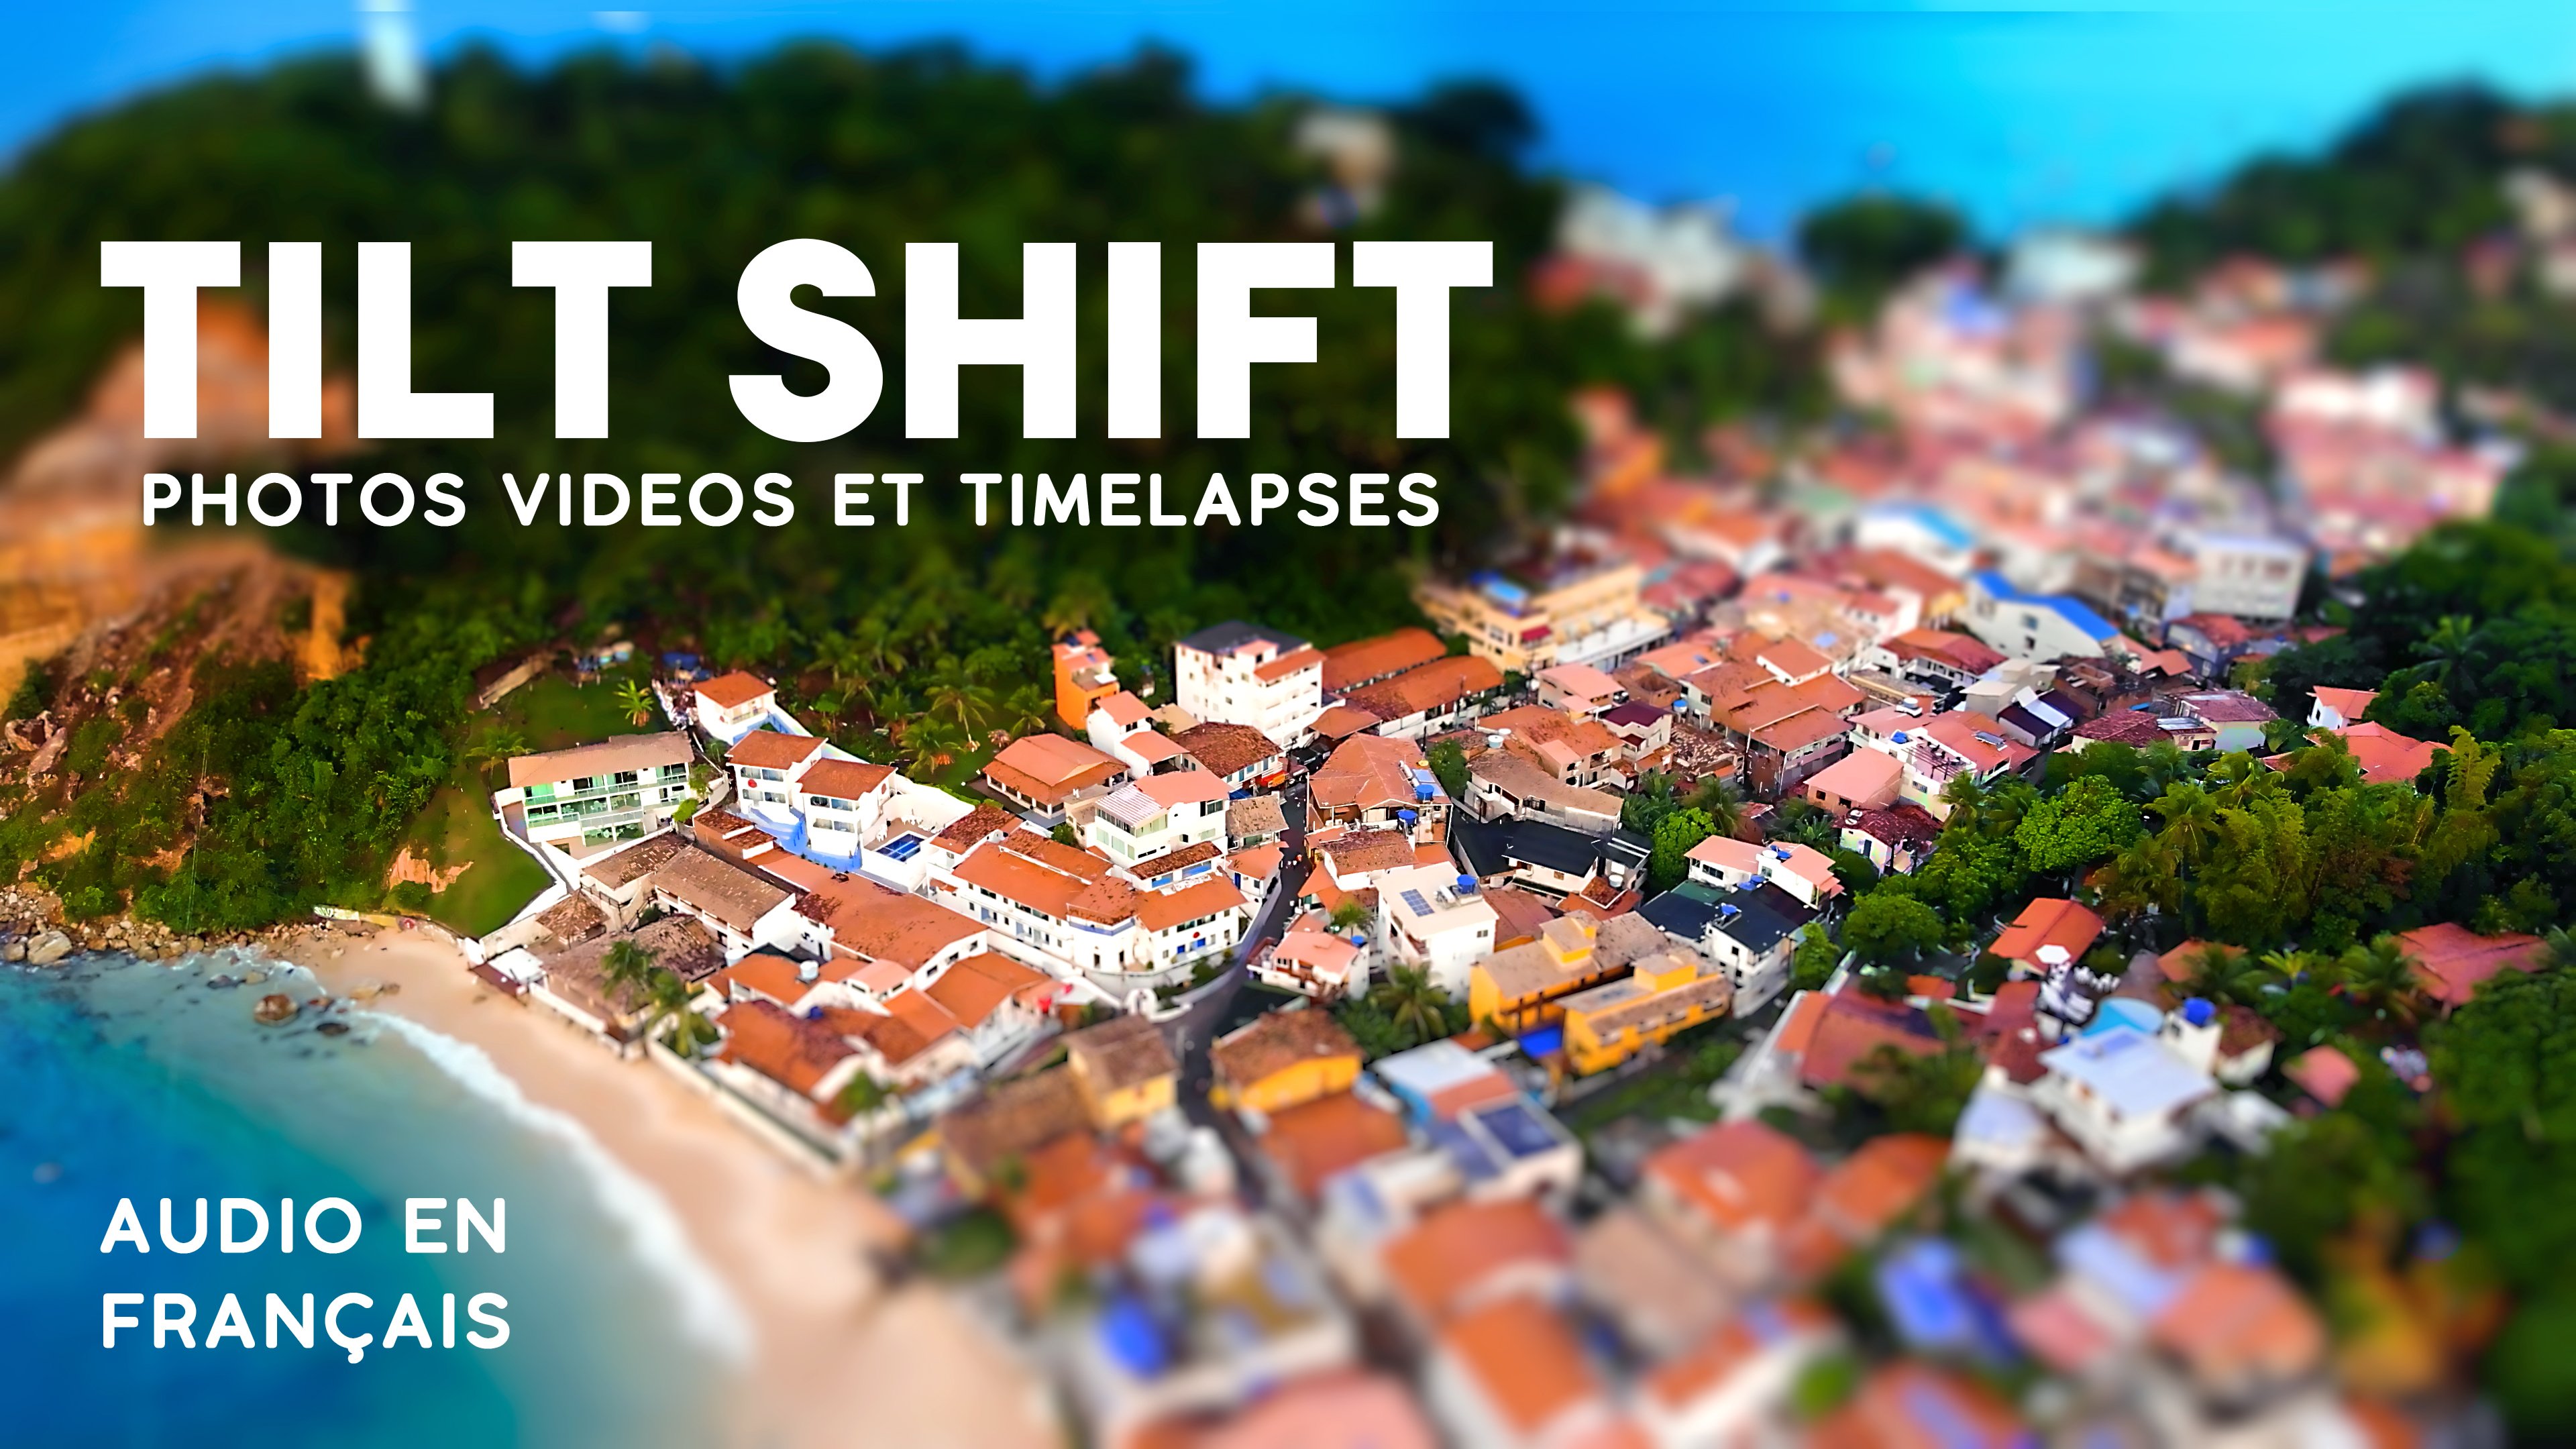
teach you how to create the tilt shift
look in post-production. First, I will help you understand the how but true
tilt shift lens works. Second, in a
step-by-step process, we'll capture emails, we heard standard cameras and lenses. Then we'll edit this image
in our favorite softwares. You will learn
powerful techniques to create this eye-catching
effects for your photos, videos, and thyme lapses. This class is aimed
for beginners, but also for experienced
photographers and videographers, CG artists and others, image lawmakers wanting to add an extra string
to their bowel. This is what you need
to follow this class. A camera or even a
smartphone can do the trick on image
editing software like Photoshop or
Lightroom After Effects premiere game,
nothing to resolve. Wherever software you're
comfortable with. And most importantly,
your creativity. In note that you'll
be able to easily achieve this amazing tilt shift look in your own projects. I look forward to
seeing you in class.
2. Tilt-Shift Class Project: Alright guys, to complete
your class project, you follow these
three simple steps. Shoot, take a picture,
make a video, or shoot a time-lapse
using the tips and tricks you learn here, edit, import your best
picture or a video into our favorite image editing
software, Photoshop. After Effects
Premier, et cetera, apply the techniques learned in this class to create an
awesome tilt shift effect. Share. Post your work in progress, collaborate with your
classmates projects, give and receive feedback from me and from other students. Last post your final result. Let's move to the next
lesson and start to understand how to create this eye-catching
tilt shift look.
3. Tilt-Shift Lenses and Theory: Okay, let's start with the
basics at tilt shift lens is a very specific type of lens that can change
its orientation. And position shifts with respect of the image
sensor of the camera. One of its primary uses is to minimize white
angle distortion or to straighten out the vertical lines in
architectural photography. Nowadays, the most
common application for this kind of lens is selective focus to create tight camera
style photography, making scenes look
like dioramas, people like fragrance, the
memorial, tilt your lens. This shallower
depth of field will be even with bigger
scenes or landscapes, you can have a very
narrow focal plane. The result is similar as if
you are filming is small. Objects are bugs
with a macro lens, okay, now we are thinking
this kind of lens is awesome. How much does it cost? Well, they are purely expensive. Canon, for instance, has some beautiful tilt
shift lenses that they can go up to $1,000.2
thousand. Do not despair. Here are the good news. You can achieve the same
kind of look with the gear. You already have all you need to learn the right shooting and post-production
techniques and most important, use your creativity. The goal of this class is
to help you understand what typifies this loop
and how to achieve it. Not with a $2,000 lens, but we've marked miniature
faking photography techniques. In the next lesson, we will jump right in
our first project, you will practice and learn the first rules to reproduce
the tilt shift effect. Thank you for watching and
see you in the next lesson.
4. First Tilt-Shift Photoshoot: Hello. I'll split this
lesson in three parts. The year, the subject, and how to shoot the year. For this shooting. Ious might Panasonic GH five, my Panasonic zoom lens, 14 to 140 mm, and my tripod. That's it. If you don't have a DSLR or
a micro four-thirds camera, you can completely use a compact camera or
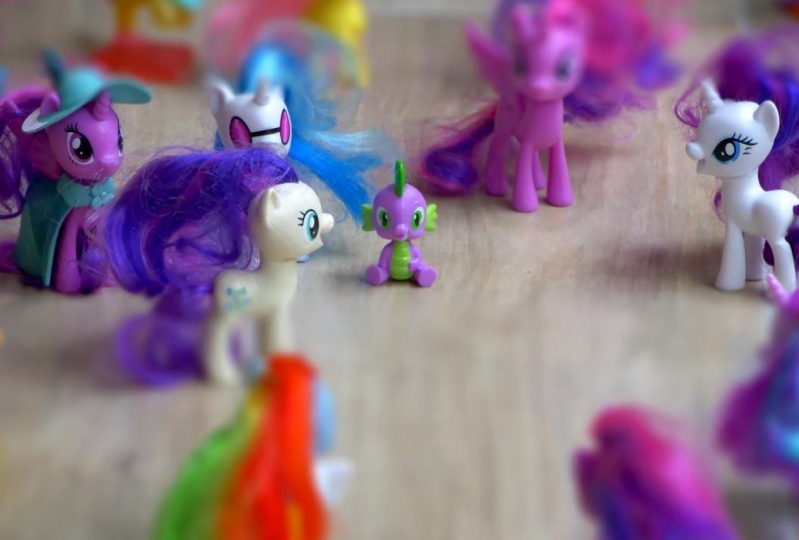
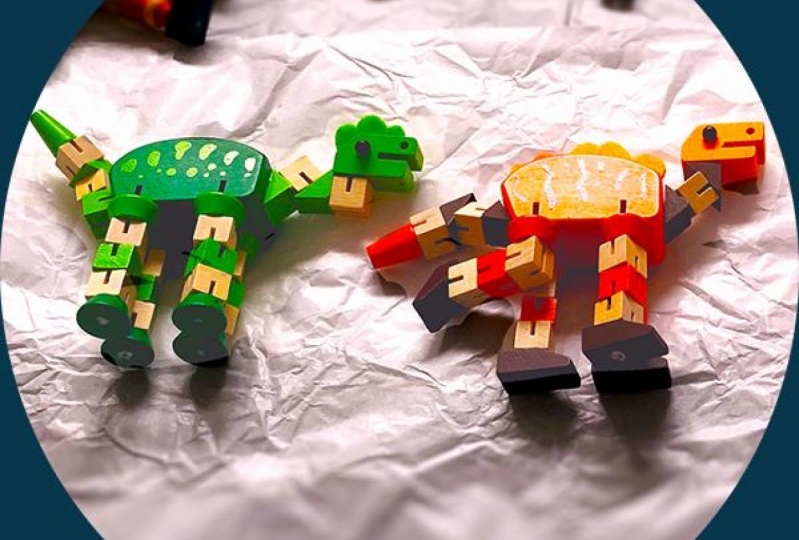
even your smartphone. The subject, the goal
of this lesson is to shoot a small objects
you have in your house. I'll take a look at all my Christmas
decoration and try to compose a beautiful
winter scene. Think about how you can
do the same at your home. Small declaration objects,
toys, bags, food, etc. Choose your tiny subject and
build a nice composition. How to shoot. The
most important thing to not forget about this
lesson is this skill. Have to shoot thinking
in postproduction. It will have to be careful plan, and compose your scene. When you're framing,
you already know which parts we will be
in an out-of-focus. For this lesson, I want
you to be higher than your subject at 45 degrees
angle should be enough. Your subject must be relatively small in the frame
in your composition, but all the elements you want to be in focus in
this same line. It will help later on to apply the tilt shift
look in postproduction. Take different pictures. It's always useful to have several options when you
are in post-production. If you can, shooting role, you will have more data to
work in post-production. Okay, Let's move
to the next lesson and do some magic
in Adobe Photoshop.
5. Using Photoshop Tilt-Shift: Hello, friends and welcome to dis class. Welcome to other be Footer Shop Here we are going to finish our first till Chief project. The last lesson who was about to shoot. Now we're going to edit our best picture. I want you to select the best photo you took and bring it here to for the shop. We're going to do some color grading and apply our tilt shift effect to eat. Let's get started. So the first thing I want to do it's you convert this layer into a smart object. It's always useful when I intend to apply filters to my layer and working a nondestructive way. But before that, I am going to do some color grading in this photo. It was a bit too dark, though, so I will use ah levels layer to make it shine and you contrast it just a tiny beat. Ah, we create the second levels layer to write right in that this area where we see the kids and there's no men, and right now this levels layer is affecting. The whole image is It's not what I want. So I banked. It's mask in black. So right now it's not effecting the image at all, but with the brush to Are you painting white Onley the areas I want to be affected by the layer. Okay, so the kids and there's no men are righter than the rest. I would corporatism ask with Ault and based it here in this vibrant slayer so I can give more saturation to their kids and twos into these Normans, its only effect affecting these area. And however I am going to create a second, vibrant slayer to give more saturation to the whole image. The colors are really vivid right now, and above that, I want you create Ah, foot off filter to give a bluish magenta tone to this picture. I wanted to have more off, um, winter magical feeling. So I think I was stick with this caller. That's okay. And you finish my core grading. I apply at Curves Layer and oh, come interest at a bit more This image now that I finished my color grading work, I can compare with my row version if they clicking this I with out pressed I can see the results before and after and now I can start applying the filters. I was started The elm sharp mask. I want you sharpened a bit more the teacher. So these values are already okay to me And lest and most important, I I want to use the tilt shift blur. It's really easy to use. I can move this circle to the area. I want to be in focus. Everything between these two lines were being focused Everything after the dash headlines we will be out of focus and I can dial the amount off Blur I want in here. So right now, I would try 30. Maybe it's a bit more 35 and I press enter to see the result. Yeah, nice. Now you have all the knowledge you need to finish your first deal. Chief Project. I'll ask you to post your working progress in the Projects page. I'll give you some feedback and some tips and tricks from the next lesson. We're going to start to work with videos and with time lapse, were jumping from Photoshopped to after effects. I hope you like it. This core grading until shift work flow here in for a shock to you in the next lesson
6. Timelapse Shooting: Hello friends. Now, we will shoot
our time-lapse. I'll recap the year. You need to
accomplish this task. Whatever camera you
have at your disposal, a tripod, a cheaper photo
tripod will do a gorilla pod. Or if you can fix
your camera over a table or other
surface and secure it, you can even do this
exercise without a tripod. But remember, in the long run, if you plan to shoot a
lot of timelapse and videos at tripod is
a very useful tool. An interval of meter. Okay? What is an
interval ometer? It's a tool that regulates the integral of which
the camera fires. I'll give you an example
of how to use it. If you are working in
30 frames per second, you need three photos
to have 1 s of video. If you want 10 s of video, you need 300 photos. Let's say you want one
photo of your subject. Cards, clouds, people wherever. Each 2 s to take 300 teachers, you will need 600 s or 10 min. Your interval ometer
can be on your camera, like in my GH five, or you can have an integral or meter like
this one in your smartphone. You can search for our
free interval ometer F. Now, let's talk about
camera settings. I will show you the ones I used for creating these knights. Time-lapse, very important. Turn every settings in your
camera in manual mode, exposure, focus,
white balance, etc. Otherwise, you will
have flicking issues. The camera I used a Canon 550 d. The lens I used
Canon 16 to 35 mm, shutter speed 1 s to capture the car's headlights weeks
without seeing the real cars, aperture F9, We've
longer shutter speed. My image was overexposed, so I had to close my aperture to bring
a correct exposure. Iso 250 depends on your
camera, but globally, tried to stay below 800 ISO to avoid
noise interval ometer 1 s total of features
300s for 10 s clip. If you can shoot him, roll all that set, you just have to push the record button and wait for the end of
your time-lapse. Let's see the result
in the next lesson.
7. Timelapse Tilt-Shift in After Effects: Hi, everyone. Welcome to this class. So, for this lesson, we're going to use a new image sequence J peg image sequence. So this is the result of these three time lapse we did in the last lesson, and I will create a new composition. With this sequence. This first image is blurred. That happened because I forgot to set a delay form the beginning off my time lapse. So when I pressed the record button on my camera shaking, I would just really dizzy mish and I between my composition to the near work area. Okay, let's change the composition settings. We just need Tiu have Ah, 10 80 p. Otherwise it will be too slow to work. So I changed the composition size, and now my footage is way to be so many early. I want to scale it down a bit more. Yes, And there you move it down on it. So we don't see too much this building in the foreground. Okay? Now I use an adjustment layer to grade the image, so I use vibrance effect, and I'll play a bit with the vibrance and saturation perimeter que I stick to these values and I will use a curves layer Do you contrast the image so I level up the media tones and level down the shadows So we have more contrast now and these would be enough for our color grading. You can see the result after and before, but I I will show you how to rendered this. So this is the time lapse and to be easier to work if you pre Orender this sequence you go to composition at to render queue here is choose our Kotick and we render But we're not going to do that because I I have already done it. So it just import our move and ah, I'm going to start to start forward from here So this is the move or a d render can see the effect So this is a time lapse We did together in less lesson So the light streaks are working fine as we shut in a very high angle we have our miniature effects So the streets, the cars, everything looks like a day ramen and I'll put everything I don't need in this folder and it can start over again. So I will select my footage and I have created a new composition. Right now this composition is in four K. I want to change the composition settings again. Otherwise it will be too slow to work for the lesson. So composition, composition, settings. And then we stick to 10 80 p. Okay, so now the footage is too big. I'm going to correct this with dysfunction and lay year transform heat you Kump so it will automatically resize my footage to the composition size. So now everything is in 10 80 p. We can start doing our mask so I'll create a new solid and I'll name it a mask. Here I'm using the rectangle to to create the mask so this stripe will be the area in focus . We will invert this later on, so everything in white will be out of focus and everything transparent will be in focus for now. I'm just adjusting the desk so before by here and I invert the mask so transparent is in focus and white is out of focus. I will blur the mask also. So here I apply a 400 value in the blurriness I clicking repeat edge pixels. I reply a levels layer also because I don't want to be. You have grey areas in the center here. I want to be transparent, so I will contrast this. A mask. You can see it here in the Alpha Channel. So they contrast his mask and thing. That's fine. I own this air to be completely transparently, so it will be completely in fortune. Okay, so the mask is good. I can create now. My first adjustment layer. I do the tilt shift effect here. So it will. It will be below the mask layer. I can deactivate the mask layer doesn't need to be visible. And I'll apply my filter the camera lens blur. So it's already working. But I want the Boca to be around this to be around. So I give 100% of better to the roundness and I choose my mask. And I say to the fields that use the effects in the mask so we can use the Goche, Ambler and the Legos. Right now, I I'm going to give a value off 22 the Blur radius. So we have more blurriness to the background. 18. Ok, that's fine. So now we're going to do some work all or grading to make the in focus area bumps even more . So I add this adjustment layer here. I'll use the inverted mask to control this layer so everything in white will not be affected and everything transparent will be affected by dizzily year. What I want is to control Onley my in focus area in here. I'm going to raise up the sharpness. Okay, that's that's fine. And I would give it more vibrance to this area. Awesome! Yes, that's That's nice. You can see the result. That's a big difference. And one less adjustment layer so we can give some more vibrance to the whole image. So I little up the vibrance and saturation here and you can see before and after I can show you with and without all the adjustments we did here in after effects and you can render our work and see as it goes. So here I choose my Kotick, I stick with Perez and click Orender. Okay, so it's looking great. I hope you like it. These workflow here in the next lesson we'll start from a drone, please. So stick with me. Let's have some more fun in after effects I receiving the next Listen Thank you for watching Bye bye
8. Drone Tilt-Shift Video in After Effects: Hi, everyone. And welcome to the second class on aftereffect. We're going to use the footage this time, not a time lapse. But you see, the techniques have used in less lesson. We'll be useful here. Okay, so let's get started. First thing we want to do it's to take our clip and create a new composition. The new composition will have the same resolution as the clip. In this case, four k. It's Wait, you too big for the dis class? I want to stick with 10. 80 p Right now the clip is corrupt. So you want to reduce its size to think 10 80 p also so we can do it here. Layer transfer and feature Kump are by using the shortcut control out F. So now you want to stretch it by four. So if you'll play four times faster than in the original file M. I trained the composition to work area. Now you can see a preview and you can see the waves. The people and the clouds are really moving fast. And this is exactly what we want. You our till chief to look. Okay, so right now we're going to start to building our mask. So I start the sold layer and I will mask It's with the rectangle Later on we're going to invert this mask so the white areas are out of focus and the transparent areas are in forges. So invert, I owe you. Use the Gershom Blur. Trebor does mask. Ah, a lot. Let's try to hunger. Yes, and to correct the edge. Issues are applique in the repeat badge. Big source. Okay, Right now I want you contrast this mask so the center is really transparent. Otherwise we're going to have some soft in in the area. We want to be in focus, so I just want cheap contrasts then esque. Okay, that's enough. And now we can create our tilt shift effect. So I own a mid tilt shift effect. But the name off the effect we're going to use It's camera lens blur. So I applied the camera lens blur to the adjustment layer I but 20 at the blaze rages. We have edge pixels problem. So we just have to click in the year and you ended. Boca should be around so 100% rounded us and they're going to select our layer so we to the mess layer. And you wanted to use the effects and masks that are in this layer. So right now it's working because it's selecting. It's using the go Schindler and the levels, but and now we can move on and create a second adjustment layer. Okay, With this layer, I want to grade on Lee the area in focus and give it mawr sharpness. So I put it below the mask, and I used a mask as Alfa inverted. So the transparent higher areas are affected and the white areas aren't affected. So I used the sharp mask effect. I would try one point point five in the radius of the sharpness. Um, maybe it's a bit too much. I want to see it closer. Ah, Okay. I I think I was stick with one in the radios off the in sharp musk. It's more than enough. Okay. And now I will give more saturation to this area with our vibrance effect. So I try 30 and then in this situation, okay, so you can see the difference and less thing. I'll use another adjustment layer Jamaica global grading to our video. So it's ah used the vibrance layer here also with the same para meters 30 in the vibrance and then in saturation so the colors will pop And are you contrast it also with the levels effect. Okay, I think we're done. Now we can render our work. You can see the difference before and after so they can render our work in here composition at your in their queue. Now we just have to select our Kotick and click Orender. I would stop it because I have already rendered this clip before. So show you the results. Hope you like it and see you in the next lesson. Bye bye.
9. First Projects Recap: So this first project I asked you to shoot a picture in your house. Using small decoration objects are toys. The goal was not to used tilt shift lenses, knee niedere, macro photography lenses. The goal was to use wherever equipment you have available to you. So this kind of large debt per field is completely normal. I used a wide angle lens in my Panasonic GH five to take this picture. The goal was to have a normal look and to achieve the tilt shift look in post production. So in this picture, we did ah, lot of color grading and we applied some Scharping and the till shifty blur effect in Adobe Photoshopped. So we passed from DS to these No, you want you to post your working progress or your final project in the projects and resource is beige, so I can give you some feedback. Take a look at other students projects too. So we started with this role result and leave our color grading until chief to look in adobe after effects. We achieved these results in here. We used the camera lens blur through achieved it'll shift look and it's working really fine . You can see the progression from in focus era to out of focus area. And you have this beautiful Boca in background and also in the foreground. It's working really fine. We have this feeling the city escape is on Lee. A miniature world we created. So what have we did? We speed that the clip. So now everything is moving fester. This kind of technique also helps create the till Chief delusions when people and objects are moving faster than in the real life. Apart from that, we did the same techniques we used in other projects. We did some color grading. We add the camera lens blur. We also did some sharpening in this area. And I'm pretty sure if you try these techniques with your own clips will be able to achieve the same kind of result. Now we did this recap. We can move to the next lesson. We're going to use our tilt shift techniques in another softer at their be light room. Thank you for watching and see you in the next lesson. Bye bye.
10. Tilt-Shift Look in Lightroom: high in the welcome to light room. So here we're going to create our killed shift. Look in this amazing softer the techniques we will see here. We'll look familiar to you. You'll see that once you get this workflow, it's easy to adapt it and to use it in another tool. I took this picture with a drone in Brazil, Drone imagery is perfect for tilt shift. Your camera is higher than your subject, and you can control your distance from it. It's easy to make people cars and even houses and buildings look smaller than they really are. So we we start us. We did in the other lessons were going to do some color grading this picture. It's to a overexposed. I bring the exposure down. This is the first thing after that I will bring up the meetings and they're bring down the blacks. This is my way. Ah, my fastest way off, creating some contrast. But you have several ways to do that. I would bring up the texture and the clarity, and I give some more vibrance and saturation also and one less staying. I will search for the sharpening butter meter. I will bring up the amount of sharpness and now my color grading is over. I can compare with the row image. If I click this button reset, you can see there's a big difference. You know, we can create our tilt shift. Look, you see, it's really easy. Ah, I used the radio filter to do that. I draw a radial mask and I bring down the amount of sharpness outside the mask. Everything is blurred. I'll create a second mask trembler even more the areas outside the mask. So I know the radio mask. I bring down the sharpness as we did before and one less time. So radio field her. I create the radio mask. I bring down the sharpness and one last thing. I will bring the also the exposure this time So I would create like a vignette ing effect. I bring the contrast up. Do you outside the nest. So the area where our characters are well put. Okay, so that's it. This is our final image core graded and with a tilt shift effect in light room. I hope you like this process. I see you in the next lesson. Thank you for watching
11. Tilt-Shift Look in Davinci Resolve: Hello, friends. Welcome to that inch of resolve. One of my favorite soft er's. You see that the logic in DaVinci result it's not exactly the same. Then after effects in here, we will work with notes in after effects. We apply our effects in layers, but at the end, the concepts we learned to create our tilt shift look do not change. We'll start in the media page in here. We can import the clips we want to use so we can take a look at this clip. It's a drone clip, and I think you two works perfectly for our tilt shift effect. Devin to Resolve Works With Paige The first page is the media page where we can import our footage. The edit page. It's to do editing fusion. It's for compositing, Caller for color grading, fair light for audio and the lever for render. Now we can move on to the our edits page in here. I move my clip to the timeline rounds. The timeline is created. I can move to the caller rating page. Here is where we are going to do most of our work. So in this first node, I'm going to step up the blur under a meter. We have just a tiny bit amount of blur in this first node and we will is a late hour in focus area with two radiant masks below the arrow. Everything is masked. So in front, off the arrow we have our sharpen area. I would create a second great in mask. So between the two arrows, everything is in focus. I can change this softness off the mask and we can see the result in full screen control F . So right now, I don't really like the result. I will move down the two masks. So the beach is morning focus and you can see the resulting full screen. Okay, that's better. Right now, the blur, it's not too strong. We will create a second node. So, as I said before, DaVinci resolve works with notes, we can create these notes these containers and put our effects inside. So, being this second node, I will give an amount of blur more important, and these second layer off blur well affect the areas far from the beach. So the blur here is stronger, and I'll also used the great into mask to limit the areas affected by the blur. So here they changed the softness and I would create a second grade and mask. Okay, so these one, we will be year. Something like this. Okay, that's working. Now we came render our work leap. We move on to the deliver page and in here we add our clip to the render queue. Click start to render. We just have to wait a few seconds. And now we can go search for our A file and see the result. Okay, That's working fine as you. So the main concepts we used another lessons are the same. Even if the techniques are just a bit different in The Vinci resolve since is a not based softer. I really hope you like it. This workflow. Thank you for watching and see you in the next lesson. Bye bye.
12. Tilt-Shift in Adobe Premiere: my friends and welcome to dis class. Let's finish our softer tour with Adobe Premiere, one of the most popular Softer is out there. We are going to use a drone clip for this class. This clip has a camera movement. We will honey made our masks so the tilt shift effect will work from the beginning until the end off the clip. OK, guys, let's get started. So the first thing I want to do it's to move my clip to the timeline. It will create a new sequence with the clip resolution. Right now it is four key. We don't need that for this lesson. So I really reduce the resolution to 10. 80 p. But now the clip is corrupt. I want you right Click in it and the Scalea to the frame size. Now sequins and sleep are in 10. 80 p. I will right click again and changed the speed off the clip so that people or looking on the harbor, we'll move faster. It helps with the till chief defect. Okay, Right now my clip is too small. In the timeline, I will zoom so my clip is bigger and it is easier to work. I move my clip to the second track. I want the first track to be free so we can put this collar Matt in it. I create a white color Matt. Then I call it White Mask and I'll put it in the first track. It will be hidden by our people. Now I'll nest my mask in another sequence. It's like a pre composition after effects Inside it, I'll create on second color Matt a black one this time, then I name it Black Mask. I'll put it above our white misc. I change its duration right now we are only seen Oracle or met Oh, are black color met? We have to mask it. I will use this to the polygon mask and I will reshape this rectangle. So right now we want to create a stripe. There is almost at the same place than our harbor and our characters in our clip. So here I'll give some figuring to them ask. I expended borders So they're featuring is not the visible in the borders. We go back to remain sequins and now we can apply the compound blur is the filter I using Premiere to do till 56. Right now, it's not working, and we have some edge issues. I want to scale up the clip and still select our mask in the compound. Blur. So here I select track video one. And right now it's working. But I want to move down just a tiny beat my mask and give it some more featuring. Okay, let's go back to this even snow. It's working better. And as I said in the beginning of this class, I want to animate the desk because the camera is moving. So in the last frame the mask. It's not where it should be. So I want to go to my nest sequence and in the first frame I create a key frame by clicking Ingles. Watch. I go to the last frame in my men sequence. I see. Where my harbor? Yes, I did last frame in in the year I move my mask so it follows the harbor. So this is working now we want to render our final work. I go to file export media in here I select quick time and for arrests as a Kotick tests several flavors are best equipped, is one and I don't need audio. So no, everything is said. I click export and we just You have to wait some seconds for the render. If we had four K sequence, it will take longer. But as we reduce our soup in size, you to go faster than we for key. Now it's finished. I can open my rendered clip. Yes, I like the result. I hope you like it. This lesson. Now you have the minimum knowledge. You need to use these techniques in wherever softer you want. Let's move to the next and last lesson. We'll see together. What are the next steps you'll need to take to continue to evolve? Thank you for watching. Bye bye.
13. Conclusion and Next Steps: Okay, friends, this is
the end of our class, but it's just the beginning
of this great adventure. You'll be able to shoot
for postproduction and to implement our lovely tilt shift look in your own projects. Try the techniques
you learn here in different images
and projects. If you haven't post
your class project yet. Now is the time. Thank you for watching and
see you in the next class.
 Jean Cavalcante, Compositing Supervisor, Teacher