Transcripts
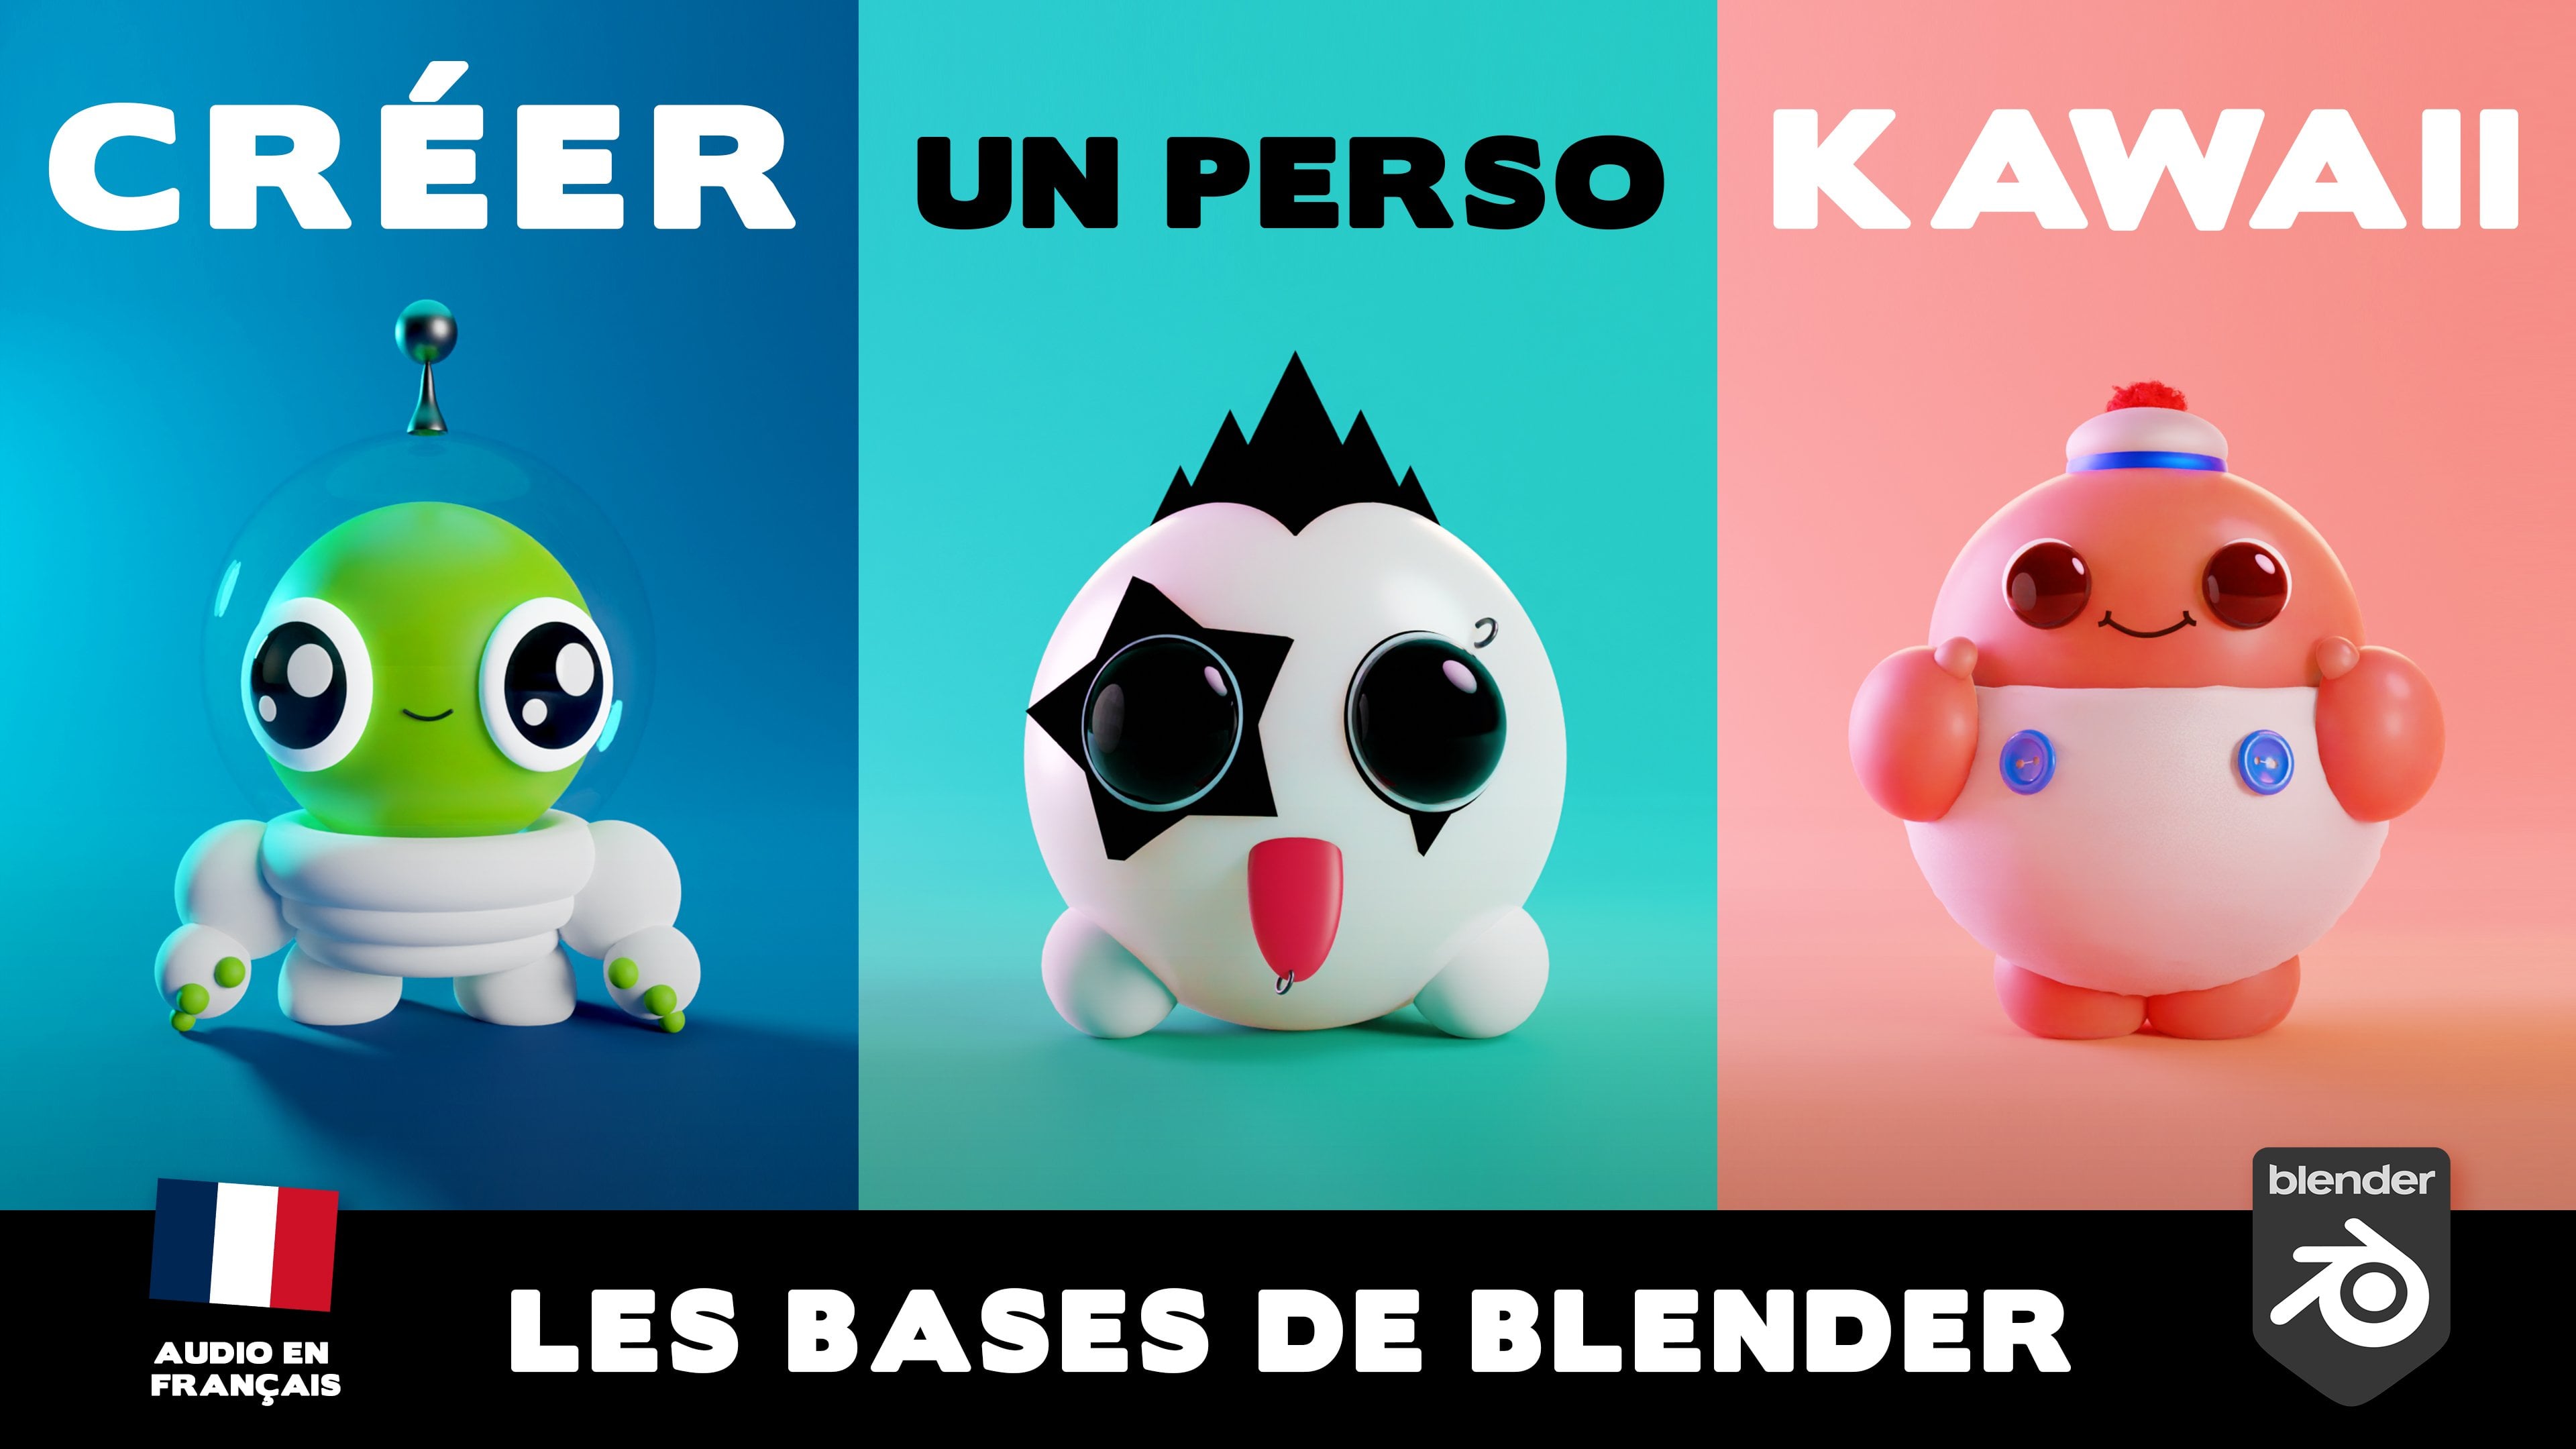
1. Welcome: Hello, my name is Zacavalcot
and I am a treaty artist. In this class, you'll
learn how to model and render your very Alka
character using blender. Whether you're just starting out or already know a bit
about treaty modeling, this class is here to make
blender easy for you. We'll go over the
basics and give you the tools to make a
super cute character. You'll learn how to use
lighting and rendering to make your character look
awesome in a lively scene. Come with me and let's explore the amazing world of
Three D art together.
2. Importing the References: Hello and welcome to
this first class. First, we delete
these three objects. And I take my reference image and I put in here in blender, I'm going to align
it with the Y axis. I'm going to push
it a bit back on the Y that I go to the front
view with the Numpad one. And I align the belly or
the feet with the ground. That's good for the
position of this card. I rename it with M. I create a new layer that I
call for reference. I do the same with
the side drawing. I put it in blender. I align it with the X axis. I'm going to center it and
push it back on the X axis. They're going to model our
model inside these two cards. And they're going to be
used as a reference. You can use your own
reference or you can follow with the drawer I
put on the resources page. We just a bit back
these two cards, so we have a bit more space. I rename this card side
and I put it on the layer. We're good to start
our modeling.
3. Creating the Body: Okay, let's create
the body shape. The bigger shape
of the character. I will untique the
selectable option here, so we cannot select
the reference anymore. With M, I create a new
layer that I name cat. We can create a cube here. It will be the shape we're
going to use to the body. I will add subdivision
surface modifier. Okay. And I will apply this
modifier so we can have a liquid on the,
on the modeling. I raise it a bit here and
we're going to start to, to move the vertices. We shifted Z. We can see through
the object and select the points that
are behind the geometry. Otherwise we're going to select only the points in
front of the geometry. I had another subdivision
surface modifier so we can see the final result. So as you are going to see, I switch every time between the shaded view and the
x ray view with shift Z. By the way, I'm going to put all the hot keys I'm
using in this class, I, putting them on a Word
file on the resources page. You can check the
hot keys in here. I'm using a lot, the G key to move the vertice. I'm using shift Z to see
through the geometry. When you want to move
something in Blender, you can press then the axis, we're moving your geometry
vertice edge faces or the whole object
I can press and X, so I can move the
vertisly on the X axis. And Z to divert only on the X and Y to
move the verts Y Xs. As you can see, the front
face is still not there. So I'm going to delete
all the vertice from the left side and apply a mirror modifier that I'm going to put before the
subdivision surface. Otherwise they're going
to have issues on the middle shift the Z. I
select all the vertices and I push them to the side to
cover all the drawing area. With control R, I
create a edge loop in here to have more T
verte all the middle. I'm going to shape the face, looking to the front
view all the time. I switch between
shaded and x ray mode, it's just a matter of trying
to match the reference. If I move this T to try
to find a rounded shape, this cute character is always nice to have
rounded shapes. In here, I press and Z to
move only on the Z Xs. If you want to do the opposite, you can press shift Z. You can move on, on
the X and Y axis. We're going to do that, shift Z. Move this vertices here. You can work with
your own model, your own drawing, or use
this one if you want. You can change it a bit. No, there's no problem here. I'm going to round the back
of the cat in the front. Here I press shift the Z. I can move this vertis
only on the x and y axis. I think we have a
nice shape to start, and we can move to
the next lesson.
4. Modeling the Tail: Okay, now we're going
to model the tail. We'll start with a cube. Also, I'm going to put it
here more or less where our tails in the drawing we are. I rotate the tail
and put it here. Okay, shift Z. I select all the vertex, those that are
behind the geometry. I try to align two verts here in the base of the tailing to
use DDsion surface modifier. When I pressfZ, I lost
all the volume I had. I started to do to
create some edge loops. With control R, I can begin to match the
contours of the tail. I create a nod, another
edge loop here, also with control R. Okay, let's move this
for this here too. You can find tune this
as much as you want. And do something different too. If you can post on the project
page to be a pleasure, to look at your project and
give you some feedback. If you do a character of your
own, it's really welcome. It's really nice to have different characters
and different projects. I think I would just delete these two faces here
to be simple to the subdivision surface to work so we can better attach
the detail to the body. Create another edge loop here, always with control
R. It's square now, but we're going
to give it around shape shift to see
the transparency, I selected the edges, then I press shift Z again. To come back to the shaded mode, the, I'll try to make this inner curve here
but I can on the drawing. Okay, look nice
in the side view. At least we are going to
check also on the front view. It's a treaty
model. Sometimes it works on one view but
not on the other view. I raised the division to two. In the front of view, we have
something that work at all. I hide my body, I rename the object tail. I do like with the body. I am going to delete
the vertices and add a mirror modifier so we
can work on only one side. Always remember to put the mirror modifier before
the subdivision surface. Okay. I take all the
vertices and push them to the side. Okay. Now the work is to try
to round the cheer tube. Get round shapes. Right now it's really square. So I'm going to push this
vertice bit with and X. I can push them to
the middle of the S. It's already looking better. We can do the tip of
the tail also with a different color to be easier to create two
different materials. Let's move on to
the next lesson. You can keep fine tuning
your tail if you want.
5. Back Paws: Okay, let's keep going
with the same techniques. We're going to create the pole. You see that we are only
creating one pole and the other ones will be a
copy of this first one. I already create my modifiers, the mirror and the
subdivision surface in edit mode tab To change
from object to edit mode, I move in x my object so
the mirror will follow. On the other side I will roughly place the back
left back pole in here. I'm going to use the drawing as a reference more
or less in here. The front view it or less here. To okay, tonight start, I'm going to apply this
subdivision surface, but I have to go to object mode, otherwise I can't
apply the modifier. And I create a new
subdivision surface just after the mirror modifier. Now we have a more
geometry to work. I will delete these phases. It's easier to attach
the pole to the body, the same thing we did
on the tail shift Z. To see the transparency, I select all these vertices. I'm going to push
the pole in here. Then the, I moved them
inside the cat body. It's already looking nice. Maybe I'm not going to make the poll as big as
in the reference. Yeah, it's cute like that. And x to move only
on the x axis. And you can move
on all the axis at the same time she to see the transparent select these two verts and move them. I'm going to move up the verts
here to scale them down. So I will flat bit this shape
in the bottom of the depo. I move the verts
inside the body. Again, I have to
balance with the verts, keep them at the middle distance
between the other edge. Loops start to look nice. Try to balance a bit the
position of the verts. We have a soft shape
around the shape, or nice, I push back a bit the
vertices to flat more the tip of the poll modifier. I put it in two. Now I can
view everything together. Still have some vertices
here appearing. So I move them into the body
I forgot to modifier to. Okay, let's move to
the next lesson.
6. The Pads: Okay, now that we have the poll, let's create the
poll pad in here. I'm going to use the UV sphere. I right away create a
mirror modifier with tab. I go to edit mode G X. To move away from the
center of the geometry, I scale only on the
Z. Xis, Z scale. On the Xs we have a
small object here. Right click shades. I will add a subdivision
surface modifier. I have to replace the
ped at the right spot. I'll move the poll here
to match the drawing. You can always keep Finny
tuning forever, her models. But at some time we'll
have to finish the work. Okay, I will match the
scale of the pad in here. I will position with
the side drawing too. As you can see, it's not
exactly the same size. So I did this drawing
just for the class. It's not really my, my strongest skill,
sorry for that. But it's enough to try to match some drawing you can do yourself or you can
find on the Internet. The goal is to understand the shapes and try to
reproduce them in tread. Something that we do all
the time to create models. You can do something by your
head without reference, but it's always better
to have a reference and photographs,
videos, drawings. And if you have
model sheets like this one with a side
view and a front view, it's always better to use them to match the,
match the reference. Even if at the end
you change the module and do something different or completely different,
you can do that. But starting from
starting point, it's always a good idea. Here I just create a
copy of the first one. With shift D, I can duplicate the object inside edit mode. I'm still on the same object, but we have the copies
of the geometry. We shift these so
we don't have to create new objects.
It's better like that. If you press L, you can select one sub
object entirely L to move. All the hot keys are
going to be on the file, in the resources page so we
can use them to your work. We have one less
spot to create now. It's just a matter of
tuning the placement and how much they go
inside the Po geometry. You can do as you want. You can change the
views to better rotate and better move the pads. They are matching the geometry. A good idea also always is
to do some work and come back in the next day
to see the result and see if you still
like what you did. Sorry, it's excellent. It's better than stay hours
in finny tuning something. Sometimes you take
a break, you sleep, and next day you
come back and to see I like this or I don't like, it's not exactly what I want. So I'm going to rework
this part of the model. One good night of sleep. It's really nice to change your perspective and
come in the next day and see if you really want to keep this road or
change something. Anyway, you can
keep fine tuning. And see you on the next lesson.
7. Front Paws: Okay, let's do the
front poles now. I'm going to hide the tail
and body for the moment, so I'm going to delete the modifiers
on the back poles to, it's not looking nice right now. What I'm going to do, I had a new mirror moodifier and subdivision surface. Okay. With shift D, I
copy the back pole, I rename the object front poles. I go to the edit board, I select all the geometry, I rotate on the z axis. That's it. It was really
easy to do the front poles, just a copy from
the back points.
8. Modeling the Ears: Okay, let's model the years. Let's start with cube again. Let's add the mirror modifier. Likely starting to get that we do always the same
thing to these objects. Simple modeling, we can
use the same techniques and really efficient
in the edit mode. I place my geometry where
I like the years to be. I use the front reference
drawing to place them, Okay, this is already
looking like ears. I will delete this face
here, the bottom one, so it's easier to make the
ears go inside the body. Now I am moving
these two faces so the ears is not as big
on the y axis, Frank. I right click and shoes
shade smooth so I can see be shape you hide the other objects so
it's easier to work. All the ears, well, let's move some verdict. See, I select the vertice
behind the geometry. I keep saying the same thing, but you've got the 0.0 and I'm going to match this inside
part of the years. Then we're going to
create the outside. We will need to have
a separation on the geometry here to create
different materials. It's easier since
we're not going to do complex stuff in the text side
just using simple shaders. Having a separation
with the modeling, it's better with control
R. I create edge loops, have more control
on the geometry. I keep moving the diverts
trying to match my drawing. In the side drawing, I can see that the ear is
not in the right spot. We're going to move. Then I
can rotate also the year. Okay, thank you. Should work like that. Now I select these exterior
faces in edit mode. Sorry I lost the selection. Select them again. We're going to extrude
along normals. Each phase will
extrude along its normal outward on phase. We can create this exterior
part of the years. I did a double ext, to have the separation I
talked about earlier. We have this cylindrical shape outside the first part we did.
9. The Eyes: Okay, let's create the ice. The ice is really easy to, this is a Y model, so we're going to add
the fake reflections. We start with this year like
we did with the bed balls. Like always, we are going to use the subdivision
surface modifier. Yeah, I did a mirror. Maybe I will delete this
modifier later. Let's see. Okay, so in here, in a separate part of the scene, I created the eyes and
the fake reflections. Okay, so the big
sphere will be black. We're going to have a bit
of physical reflection. The small spheres are the fake specular spots that
we have on the kai ice. This is how I do it. I make a copy of them
inside the object, I am inside the eyes and I have three geometries
inside the mirror. Will take these three
objects and copy them. We have this small reflection
smaller than the water on the two small spheres will be white and the
sphere will be black. You can do as you want. You can tune this directly, Sam. Okay, now let's place
it on the character. I rotate the object
on the x axis, R x and 90 degrees on
the, on the amped. So you can rotate an
object with an angle. You see the mirror. It's inverted. So it's not okay. I'll do it by hand later
on, so don't worry. You can do it on your side. You just have to copy and
rotate the right eye. This one I will not use
the mirror modifier. The object is inside the body. I have to place it here. I go to the side. The eye can switch the
views to try to find the right position
and the rotation of the eye inside the edit bode, I select this big sphere
and I created another one. This is the big white
part of, of the eye. I place it here. I select all and I rotate
all the elements together. It's easier than one by one. With all, I select only these three elements
and I will push them back to be on the surface of
the white sphere. Okay, I rotate,
rotate them again. You can switch reviews to try to find the best position to rotate your object
that I am doing. Okay, I think it's nice
you can tune on your side, maybe find tune it
a bit on my side, but this is the basic and
it's already working. Nice. We can move
to the next lesson.
10. Creating the Nose: As you can see, it places the
right eye between lessons. So now we can create the nose. We are going to use the
same technique, a cube. I'm going to place it
here to move it up. Then to skate it down, I'm going to move it
in the y axis with Y, then scale it with Y, Z to move it down. I think with time you are going to know the
hot keys by heart. If you use Blender every
day, you can forget them. With control R, I create an edge loop in the
center and I delete the verses so I can use
the mirror modifier. I will also add a
subdivision surface modifier with two subdivision
right clip shades loose. As you can see we do every time the same thing she to select these two vertices and I'll move them to the center
of the object. I move the two vertices
to the center. Right now it's a bit
like a triangle. I'm going to make an edge
loop in here with control R. Then I can round
a bit this shape. Okay? I'm not going to match
exactly the facial features. I'm going to do it
a bit different. I will push it back on the Y axis and rotate
on the X axis.
11. The Mouth: Okay, let's model the mouth. So this is not the first
time I model this character. And the mouth, I
can't understand why. But it's really something that I'm struggle every
time to do it right. Let's see if I can do
it the right way on the first time In the other Cai characters I did with the same
kind of mouth, it's always the same
thing I'm always to create is smooth mouth that interacts nicely
with the nose, like the two of them are trying to occupy the
same place in the space. Let's see, let's do
as we always do. Let's create a mirror modifier. Let's go to the edit mode
and we move it to the right. Let's add a subdivision
surface modifier. Okay, let's start to placing
it in the right spot. Tat a bit on the x
axis, shades move. We're going to add another
subdivision level. Okay, This part is easier, but now we have to
fine tune the shape. It's the hard part. To me, maybe you can come up with some solutions
or different moths. Free to post your
project to be really nice to see different
things on the project page. I'm going to use this point as much as I can before doing
creating edge loops. It's always easier to work with less points then adding
detail to the geometry. When we can't do anymore, I will create an edge loop
with control R in here. Right now the mouth
is really square. Can be, if you want to do something like
that, can be nice. Will move this
center point here. Now I'm going to find these two ones where we have the
transition with the nose. Okay? I have to push them
inside the body, so we can see the nose passes above the mouth,
that's the goal. We have to see the
nose entirely. The mouth can be a bit
hidden by the nose. Okay, now we have
to round shapes. Okay, starting to look nice. I will probably a
bit between lessons. You can do the
same on your side, or if you're doing
something different, go your model too. And we see each other
in the next lesson.
12. Mustaches: Okay, let's do the moustache. So I will do them differently than what I
did on the first time, but the technique,
it's always the same. I start with the cube, maybe rotate them differently, try to find a different shape or something a bit different
than the first model I did. I add a mirror subdivision
surface modifier, two levels. Right click shades. Moose, let's go to
Front View Edit mode, so I can push the
mode shape in a. Here I rotate the
mustache, the first word. I scale it down on z axis. And Z to scale an object
only on the Z axis, then rotating like this. Now Y to scale it on the Y axis, I placed them near to the body and we are
going to find you layer. Okay, trying to find
the right spot. Let's go back to the mouth. I think it's a bit too small. I'm going to make make
the mouth bigger. Okay. Now I had to work
all these to verts. Has to go inside it
and inside the body. So we can see the nose can
do a different nose too. You can work. Okay. The first most I
think I would put it here. I maybe bend it a bit. I had another loop at
the middle and bend it, t like this. Select this vert, trying
to find the right, the right shape here. As you can see, I'm
not following anymore, the drawing for the
facial features. You can follow the reference or trying to create
above the reference. Feel free to express yourself to let your imagination
do the job. Yeah, I think this
first mustache is starting to look nice. With A, I can select
all the vertices and shift D to duplicate them, so I create a second moustache. I'm going to press and Y to the, move it back on the Y axis so we can
touch the body with L. I can select this
whole mustache and G, Y to move it back. L to select all in this winner, I'm going to rotate
it a tiny bit. I don't know, I break
a bit. This band. I didn't hear. I'm going
to keep this like that. Yeah, it's working nice. We'll see you in
the next lesson.
13. The Eyebrows: Okay, this part of our
model, it's the eyebrows. Like always, we
start with a cube, scale it down S Y to scale it on the Y Xs
and scale up on the X Xs. Just find it turning a bit to have a starting shape
that's working already. Nice. Let's add our two
favorite modifiers, mirror and subdivision, with two level two
of subdivision. Let's go to edit mode
and place the eyebrows. The eyebrows, it all
depends on the mode you want for your picture
and for your character. I will do them a bit like
that to be surprised or sad. I think it's funny like that. You can do the opposite. The central vertex
are going down and the exterior
vertex going up. You have a cat that's
not happy like you want. You can see reference on the Internet for
official expressions. I'm going to keep them like
in the first one I modeled. You have the same challenge here to make them touch the eye, but you can put them behind or above
the eye like you want. I can try different
things I think, but it is really not a
difficult object to model. It's like a cylindrical shape. I have only 12 verts, so it's really easy to do. Yeah, thank you. Almost there, K, it's working nice Y. I move in the Y axis, the eyebrows, I can make them ticker with pushing this upper.
14. Lighting the Cat: Okay, let's start
My favorite part. As I am a compositing
supervisor, I always love to fine
tune the final image. Once the product is modeled, the best part is to create
the lighting and the image. Let's create a plane here
with the background. It's really not a big deal. We can do other
things if you want. You can create a scene
behind your character. You can put your character in a scene that already exists. I extrude this edge, I will move it up with and
Z. I create this shape. I will apply a bevel modifier. I use a lot of segments. Also the amount of the devil, We could already
use it like that, but a subdivision surface so it'll be easier to attract the attention
on the background. Don't want to see the
background should be there. It's not render above
a black background, the eye on the background. I create a camera camera
object with zero on the num. I can see through the camera. This menu view, I selected
the camera to view. If I move the viewport, now I'm moving my camera. I will center my
camera in the scene. I wanted to be really at
the center of the scene. Okay, let's create
a second window. If you go here, we can create a second
three D viewport. And I want to deselect camera to view so I can
come back to perspective. And I want to select
my camera and move it in this left viewport, I can move my camera
as it is an object. First I want to play
of the focal length. The longer the focal length, the more flat the
object will be, like it was a toy
or a small object. I like to use the
80 on this renders. Then I rotate a bit my camera, now you have to move a bit to the viewpoint,
the background. Why scale it? You don't want to see the
black behind the background. We can keep working on the left viewport
and the right one will use to see
the final result. I take the camera off the
layer and the plane also, maybe it's a right time
to rename the objects. It's always a good idea
to stay organized. This is the nose,
this is the mouse. It is the mustache. Sorry if I spelled
something wrong. English is not my,
my first language. I try my best, but it's always difficult to talk
and think at the same time. Here you have the menu.
All the menu is hidden. So if you can scroll the mouse so you
can see these options, this is V and this is
cycles to render the image. There are two render
engines in Blender. By default, we have V selected. We're going to go to Cyo, have a nice GPU, can use GPU Compute. We will click on Noise
for the final render. Are going to put in 60 seconds, but it all depends on
your PC, on your machine. The more the samples, the
less noise we're going to have the noise thresholds
to clean the noise. The less this value, the more blender we'll
compute to clean the noise. Let's start creating our lights. I will create a sun it to be
the main light right now. This is the result
of this lighting. I do first the lighting, then I created the materials, and then I adjust the lights so the lights can work with the
materials I create. But first, I create the lights with standard material
like this one. If I already have nice lighting
with this gray shader, it's better to not lose
the focus on the lighting. If you do materials
and lighting at the same time for this
kind of referenda, it's nice to work like that. It's very, it's a
nice way to tank, to work on each
parameter of the light. Now, I'm going to create
the secondary lights. I use area lights. The shadows are not
as sharp as the sun. I'm going to take the two
lights and create a new shader. Pressing M on the keyboard. I will name new layer
lights, have the Sun. This one will be the top
light, the area lights. The bigger they are, the soften the shadows are. This one I think I
it will be 5 meters. The shadows are really soft. I have the top of
the character is bright so we can detach
more from the background. I'll change the
colors on the lights. Right now you can
do on your ands and create something creative. But it all depends
on your materials. If you want to create a mood with more of
sunset of Surrise, you can use more pink or
orange tint on your lights. Maybe the few lights
like this one light. In creating the feel, we don't have two strong shadows on the opposite side of the sun. I forgot to deactivate
the camera to view here. Very important to deactivate. Otherwise, we're going
to move the camera. You have the lights that
are appearing here. I can just deactivate
the two icons, We see only the result
of the renders. We are doing a final render. We can see each light separate. This is the field,
this is the Sun, and this is the top light. This is really a classic
set up for light. You have the key light,
the light and all to create the edges to have brighter edge so we can detach the character
from the background. In movies you see
you always have a character, especially
on the hair. The character is really from
every detail behind the, I'm moving the back light far away from the
character so we can, it's impacted the
character but not as much. The BG flight, I will
do the same thing. Flight. It really
has to be soft just to not have stronger song
shadows on the character. This is the sun, the
sun, the main one. The key, the main or key light should be the stronger
light in the scene. I can play with the
angle of the sun. The angle is for
having softer shadows. For now, I'm using
for the strength. Maybe a bit too large. We will find tune all these lights once
we have the materials, but for now I'll
keep them like this. And top light on your. Yeah. Okay, I think we can
go onto the materials.
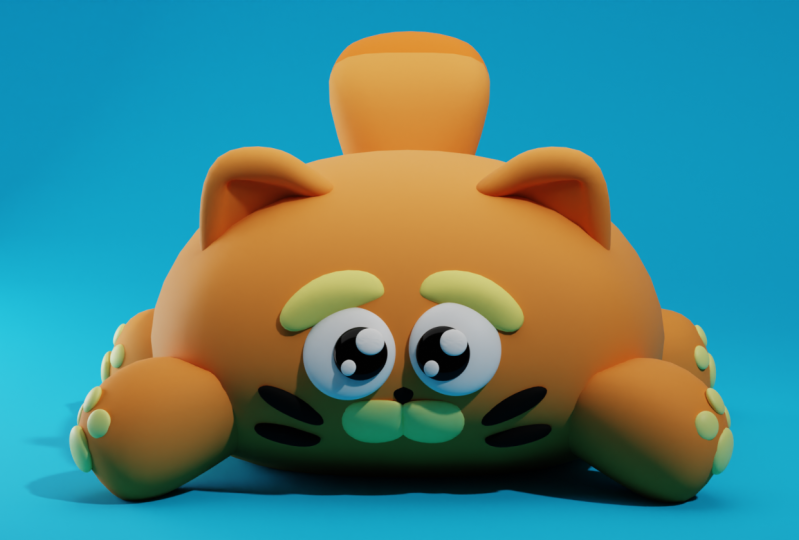
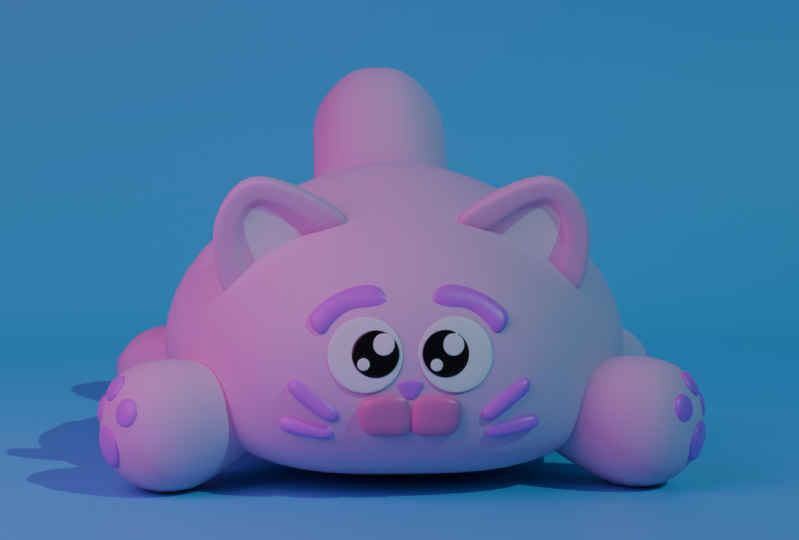
15. The Materials: Okay, let's do the
materials of this cat. You can really get created here. You can do whatever you want. You can use the reference
from the Internet. You can use the color pallets. They are easy to
find on the web. I'm going to do something similar to
what I did on the first, the one you see on the
cover of this class. Just changing the L, I will start creating
the white eyes material, desaturate the color, and
adding one to the value. So it's really 100% white. I can choose the material here, I don't need to
create a different, a copy of the material, can use the same material
on several objects. I will select only the
elements of the object. I misspelled the
white here, okay. I will create black material here with a bit of
reflections, okay? Black. And I'll
change the roughness. The roughness, the
lower the value, the more the sharp
the reflections. I'll do the same
for the right eye. You can see I put back the wire frame if I select
only the black part. And I will create a new material here and
I will assign the black, I come back to it more and I assign the black
material on the eye. The eyes are nice, I'm doing this material really simple so you
can follow along, but you can add texture, something you want other
features to the material. The background will do
it green to change. It will be a material. So not a lot of reflections. If I go down the roughness,
we have reflections. If I go up, the reflections
are really softened. So we don't see them, that's
what I'm going to do. I raise them a lot. The body, the body will
be like a pink up, pale pink at not reflect this render. I don't use a lot
of reflections. So I raise up the roughness, we are going to use
it for the poses. And the tail in here, the tail I just select
here, the pink material. Same thing for, the same
thing for the polls. Just don't, don't
forget the back paws. Okay, that's fine. China bit, the lateria. Now let's create
a violet material for the facial features. They all have the same material except for the mouth. The mouth. I want it to be a bit more
lighter than the rest. This would be a dark violet. With reflection this time I want to have some specular
on these elements. They are very
cylindrical it a bit of reflection here works
nice for the mustache, the eyebrows and the nose. Okay, let's do the
same for the pulse. For the Ped pulse, let's
activate the viewport again. Let's go to edit mode. Let's select only the Ped
pulse, add the material, and assign the violet
material here, Okay, it's a mirror and so did
it work on the right pole? Let's do the same thing
on the back pole. You can use the left side view
part to select the pulse. I'm struggling to
select the pad. I'll just select the, the pose and invert the
selection with control Y, I can select my head
pulse and do the same. Create a new slot at the
violet material and assign, assign it to the pose so
it's already looking nice. The green and the pink violet are two complimentary colors. You can say in the
comments if you want me to work on a class to
talk about colors, something that I really love, and we can use a lot of new tools to make
the work easier. Nowadays, you can create
color palettes from images. You can create our
own color palettes. You have a lot of
tools to create beautiful color color palettes. Here the main colors
are the green and the pink that are
complementary colors. The cat, it's really detaching
from the background. As I said, the mouth, I didn't on a lighter violet
or a darker pink.
16. Fine Tuning the Render: Okay, welcome to the
last class in here. I'm just going to find
a bit the render, assign the violet material to the ears and to the tail
will create a new one. Because as this is
the skin of the cat, I want it to be met. And not to have the
specular reflection. I want this part to be met. Let me just select
the right faces. Okay, I had to deactivate the subdilision to
select the right faces. Let's come back to the
material, create a new slot. Then I will create
a new material. Violet met. This will, will be a dark violet. But without reflection, I will change a bit. The heel. Come here to the violet side. I can turn on the
subdivision surface, I have to select more faces, otherwise it's a bit strange. Now I can come back to the edit mode and press
control to select the adjacent surfaces and assign this new
material for the. Let's do the same for the tail. We did the right edge loop here, so it'll be easy to
select only the, the tip of the tail. Create a new lot, assign the violet mat, and assign the material
to the selected faces. Okay, the materials are all created and assigned
to the right objects. We can go back to your object
mode and fine tune a bit. The render, you can do whatever you want
with this render. I raise the sun strength, we could use the
subsurface scattering. Let me comment if you want me to go deeper on the
shading part of blender. We can do nice stuff
with this character. I can take another character and we can work
only on the shader. Can only to talk about the
colors and the shaders, maybe a bit of
textures, the comments. This is something that you, you want in here. I can go to color management and work a bit on the contrast
of the image if you want to use the image
without past passing by another software like Photoshop or compositing
software like Nuke. After Effect Fusion,
you can do it. Your render straight
from Blender. Just raise the contrast, Here you have, the
image will pop more. That's it. Let's move
to the conclusion.
17. Conclusion: Thank you for finishing
this blender class. You now have the
skills to create your own cute treaty character. Please leave a review
and share a project. It means the world to me. And don't forget, keep learning and having fun with
blender. Bye bye.
 Jean Cavalcante, Compositing Supervisor, Teacher