Transcripts
1. Introduction to Photographic Lighting: Good day. My name is Warren Marshall. I'm a professional photographer from New Castle, Australia. And this class is all about photographic lighting. Light is fundamental to us as photographers because all the photograph is is a record of light reflecting off the scene. So understanding lighting is crucial to us as photographers. If we want to get better, if we want to improve our images. As I said before, the intro, lighting is fundamental to us as photographers. Whether we should portraits or landscapes, still lifes, any sort of genre of photography. Lot is critical to us. And understanding had a control, had to recognize and had a Manipulate. Light is a really big factor in the success of photographs. Now, light is light. Pretty much. It doesn't really matter if it's flash or it's daylight, or it's straight lighting or firelight. It all follows the same principles. Now, lighting is logical, it is science. It's not particularly a photographic principle. Light follows the laws of physics, and it's very understandable, it's very controllable and predictable. And you'll learn how to do all those things in this course. We're going to teach you the four fundamental characteristics of light. And once you understand that, it's going to be so much easier to control the light in your scene. Whether you're indoors or whether you're outdoors, whether you're shooting at night. It's going to make a huge difference to the way that your subjects appear in your image. And the, the emotion, the beauty, the impact, or the subtlety of your photographs. You can control all of these things by controlling the light in your image. So come along with us in this class, learn all about lighting. It's not boring, it's exciting, and it's going to change the way that you photograph.
2. Pleasing and Puzzling Light: Now there's a lot of information in this class. There's a lot of things we're going to go through and a lot of stuff that you go into here. Don't worry if you don't take it all in at once. There are critical points that I want you to get and I'll emphasize those as I go through. But there's no reason why you can't watch this class again, just to pick up things that you might have missed the first time. Now, as I said earlier, lightest fundamental to us as photographers. Light reflecting off things is what we record as a photograph. If there's no light, there is no photograph. That's just plain and simple. So I like to explain light. When I'm explaining it to people, I like to break it up into two distinct areas. One is pleasing light and one is puzzling light. Now, pleasing light is light that looks natural to us. When we look at a photograph, we're quite happy with the light in that scene. It looks natural. It looks like it could have occurred in nature. Puzzling light is obviously artificial light. It can still work well in a photograph or an image, but it's obviously artificial that's been obviously manipulated in some way to achieve the result that the photographer was looking for. We're mostly going to talk about pleasing light in this class because that's a sort of light that we generally use when we're photographing, when we're photographing people or landscapes, pleasing light is a sort of light that we usually use. Puzzling light is something that we need to manipulate and create yourself. So we're gonna talk a little bit about puzzling light towards the end of this class. When we're photographing in the studio, particularly when we're indoors, we often use Flash for photography. Now, the reason that we use flash is not because it's a particularly fantastic magical light source that makes everything look great. The reasons why we use flash, pretty much three reasons. The first one is that it is controllable. Every time we press the shutter, we get the same amount of flesh from our flesh and our exposures are all consistent as we go. Now, I'm, I'm assuming here that we're using manual flash, which we'll talk about in other classes, but you've seen other classes. I've talked about the reasons why we might use their flesh on manual, so it's predictable. The second reason why we use flash is because it's light is pretty much the same color as daylight. Flash. Color really approximates daylight. It's not exactly the same, but daylight varies through the day as well. Flashes generally a little bit more on the blue side then daylight, but it's pretty much indistinguishable in most of our images. The third reason we use flash is because it's cool, it runs cool, it's not hot like any other light source can be. So it's easier for us to have it on for long periods. And it gives us a really full amount of power. We can have lots of power with their flesh because it only happens in a short period of time. We can push lots of light into our image more than we can with any other light source. Now when we're at doors, we generally use sunlight or available light for most of our images. The sun provides light just about everywhere we are during daylight, and that's a great light source to be able to use. Now, whether we're using Flash or daylight, the principles apply pretty much the same. And we'll go through and teach you all about that stuff later on. Now I mentioned about pleasing light. Earlier. Pleasing light, as I said, is like that looks natural to us when we look at a photograph or any sort of image. Now brain expects a couple of things of the light in that image, and this is the key to understanding lighting in photography. Brian expects two things. The first thing that our brain expects is that the light comes from a single light source. Because in nature, the light comes from a single light source, which is the sun. Even moonlight is reflected sunlight. So our brains expect that light coming from a single light source to look a particular way. So if we're using artificial light sources and we want to produce pleasing light, we tend to use a single light source, or we manipulate our light sources to look like they are a single light source. And that's the skill for a lot of photographers using multiple light sources, but making it look like a single one. So if we use a single light source, we're off to a good start with our lighting. The other thing that our brain expects from light in an image is that it comes from above. Because most of the time the sun is above landscape or above our subject. And we used to having that light coming down on our subjects. Very rarely will the son be below our subject. Maybe if you're on top of a mountain or something like that at sunset or sunrise, you might get a little bit of light coming up onto a subject, but most of the time we want light to come down on our subject. That's why when we have light coming up on somebody, if we use Flash or we, we put light down below our subject, it tends to look a bit creepy to us. It looks a bit gruesome and it doesn't look natural. So it's not very pleasing for us. So to produce that pleasing light, the first two steps are use a single light source or what appears to be a single light source and have that light coming down onto your subject. Now when I say coming down onto your subject, you need to be a little bit careful, particularly when you're shooting people. Because sunlight, particularly in the middle of the day, or if we have our flash indoors up too high, we tend to get dark eyes because that sunlight and their flashes coming down at a steeper angle. And because our eyes are recessed into our skull now, eyebrows provides shade and those eyes, and it really gives us dark eyes. So a mistake that a lot of photographers make when they're shooting portraits is to have that light source up too high. We need that light source down a little bit lower. You generally are like maybe 10 or 15 degrees above horizontal. 45 degrees to me is way too much for most situations. But that 10 or 15 degrees allows that light to come down on my subject to look pleasing. And it still allows those eyes to be nicely lit. And I get that great catch light in the eye as well. So be careful about that. Having your light up too high. We'll talk about that a little bit lighter on in these classes.
3. Light Quality: Now the four fundamental characteristics of light, which is most important to us, are the quality of the light, the direction of the light, the intensity of the light, and the color of the light. We're going to be going through these characteristics one at a time to explain what they mean and to allow you to manipulate them in a particular way that you need to. Now the first one is the quality of the light. Now when we talk about quality of light, we're talking about hardness or softness of the light. You may have heard photographers talk about hard light and soft light. Now hard light tends to be light. That's very contrasty. You're out on the beach on a bright sunny day. The sun, which is a hard light, throws a direct shadow on the ground. You can see your shadow on the ground. It's very distinct. It's very dark and is a delineated by a sharp edge on the sand. Now, hard light comes from a small light source. The sun is a small light source, even though it is very huge in relation to us here on Earth, the sun is very small, and that's why it throws those distinct shadows. So hard light comes from a small light source. We have other small light sources that can produce hard light as well. Something like our flesh. The flesh that we use on their camera or off their camera is a hard light source because it's a small light, it will throw distinct shadows very similar to sunlight. Headlight also tends to show texture in surfaces. If it's coming on an angle across a surface, it will show texture. Hard light tends to throw specular highlights. So if you're lighting me with this hard light, I would probably have a bright spot on my forehead here and another one on my nose and other one on my chin. Where that oil in my skin tends to reflect that hard light and cause those specular highlights. Now the opposite of hard light is soft light. Soft light comes from large light source. So the larger your light source, the softer the light is going to be. Now, the ultimate large light source would be an overcast day. If you're on the beach on an overcast day, you're still lit by the sun, but the cloud above you is diffusing that light, which means it's coming from a lot of different directions. Your shadow is still on the ground, but you just can't see it because it's diffused and it's softened by that large light source. It's a soft light. Soft light from large light sources doesn't throw distinct shadows. It wraps around your subject a bit more. So it tends to be a bit more flattering. When we're photographing people, particularly, soft light tends to be more flattering because the light wraps around their face. It doesn't throw very hard no shadows or very hard shadows in the eyes or under the chin. So soft light is great for photographing people. If you want a flattering photograph, we can still use hard light on people. If we want to use Flash or light bulbs or something like that, some sort of small light source. But the problem is that it's going to throw those distinct shadows and it's a little bit harder to control properly. So this is why photographers tend to use soft boxes, which is another soft light source. This soft box over here and the one behind me. Our large light sources, so they give us soft light. Now, we can change a hard light source into a soft light source. And we doing this with the soft boxes, we've got a flash about the same size as this in those soft boxes. But because there is silver fabric inside there, the light bounces around all over it and it comes through that white nylon front as a soft light because it comes from multiple directions around that, that soft box. So it changes a hard light source into a soft light source. And that's how we control light indoors. Now, we can do that same thing in a number of different ways. We can use our flesh to bounce into an umbrella. We can use a photographic umbrella, such as this one, a silver one. We can aim our flesh into that umbrella. The flesh impinges on that umbrella and it reflects back onto our subject as a soft light source. We've changed a hard light into a soft light. And this is what umbrellas are great at. We can use white umbrellas, which we can shoot through, or we can reflect. Or we can use the silver type of umbrella, which just works as a reflective umbrella. It's softens a light source when we're photographing people. Another way that we can soften the light source is simply to bounce off a card, a white card or a gray card. We can have our flesh aimed at this card. And the light fills up. The light from the flash fills up this card and it bounces back onto our subject as a soft light. And extinction of these card would be a white wall. We can bounce light off a white wall and allowed that large pool of light from the wall to reflect back onto our subject. And that will soften the light on our subject. So there are multiple ways that we can use a hard light source and change it into a soft light source. Now there are other ways that we can use our flesh to soften light. We can bounce light off the ceiling from our flesh. The large pool of light on the ceiling will reflect back onto our subject as a soft light. But as we've heard previously, the problem with that is that we may get dark eyes in our shot because that fleshed light reflected off the ceilings coming down at a fairly steep angle. So our eyes maybe shaded by our eyebrows. That's why with most fleshes that we buy, the speed light flashes. We have this little card. Now, this little reflect the card allows a bit of this light that's going upwards to bounced directly forwards onto our subject, which helps just to light their face a little bit and allows those eyes to be lit more. It also tries a little catch light in the eye. You've seen other classes that we've done where we use this bounce card and we bounce light off the ceiling and use this card just to throw a bit of light back forward into our subject's face. So there are multiple ways that we can do that. Now, while we're on the subject of shooting with speed light flashes, as I said before, a speed light flesh such as this or a studio flesh the same It's pretty much the same size of light source. It's a small light source, so it throws hard light. Now, we can apply various devices, such as these little cones that will fit over the front of their flesh. And supposedly soften it there. And a lot of photographers use these. It doesn't do anything to soften the light because you can see that it hasn't increased the size of the light source. The basic principle of hard and soft light is that the softness of the light is directly proportional to the size of the light source. So this hasn't changed the size of my light source. The shadows are going to be exactly the same. The quality of light is going to be exactly the same. It's going to be just the same as if I didn't have this on. The only thing this cone does is it throws light around different directions all around the room that may bounce off a few surfaces just to soften that light a little bit. But using it outdoors is a total waste of time because there's nothing for that light to bounce off outdoors. Very rarely is there. So you're just wasting your flesh power by using one of these things. All side the little reflector that we get with their flesh, this little spread out that fits on the front of their flesh that doesn't soften the light at all either because it doesn't increase the size of the light source. All this spreader does is it spreads the light out to a wider cone to allow us to use a wide-angle lens if we were restricting their light in the corners of our frame, this will just spread that out to a wider area and fill our frame a little bit more. It will also reduce the power of our flesh and not allow it to project as far forward because we're using a lot of that, fleshed it out to the side. But it's a really good tool if you love shooting wide angles. Let me one more outdoors and we're not using flash when we're using available light, sunlight or overcast day or whatever we've got, we can change the quality of the light just the same. Now, it's not as easy as just putting it in the back of a soft box or an umbrella or something like that. But what we can do, we can move people out of the sunshine into the shade. And what we've done there is we've taken that bright hard light off them. And we've created a situation where we've got nice soft light coming in, not from the sun but from the sky or from an area outside that shade to soften the light on your subject. This is called open shade. When we move people under a canopy of a tree, for instance, the canopy of the tree stops that direct sunlight hitting your subject, but allows nice soft light to come in underneath their canopy to light our persons face. Now we can also do it with something like a veranda that has a roof over the top to block the light coming down onto our subject, but it allows the light to come in underneath that roof to lighthouse subject. A beautiful situation for nice soft light. Another great soft light situation is your garage. If you lift up your garage door, you've got a beautiful three meter by three meter soft light. We don't want the direct sunlight to come in. We want the Sun on the other side of the house. But that beautiful soft light coming in that large three meter by three meter soft box allows that subject to be latent in nice soft light way. So it's very flattering. Window light. We can place your subject beside a window, and that allows that light to come in in a nice soft way. Again, we don't want the sunlight coming through data. We want the Sun on the other side of the house so that, that nice soft light comes through that window and lots as subject beautifully. That's why you've seen lots of beautiful portraits taken by Windows or doorways or things like that with that nice soft light coming through. When we're outdoors, we can also manipulate that sunlight by reflecting it with a reflector back onto our subject, we can use a white reflector, which will diffuse that light a little bit. We can also use what we call a scrim or a diffuser, which is a large translucent white material that we can place in the path of the sun so that, that sunlight hits that diffuser and creates a large light source that falls onto our subject. So there are lots of ways that we can manipulate light, both indoors and outdoors to change the quality of that light.
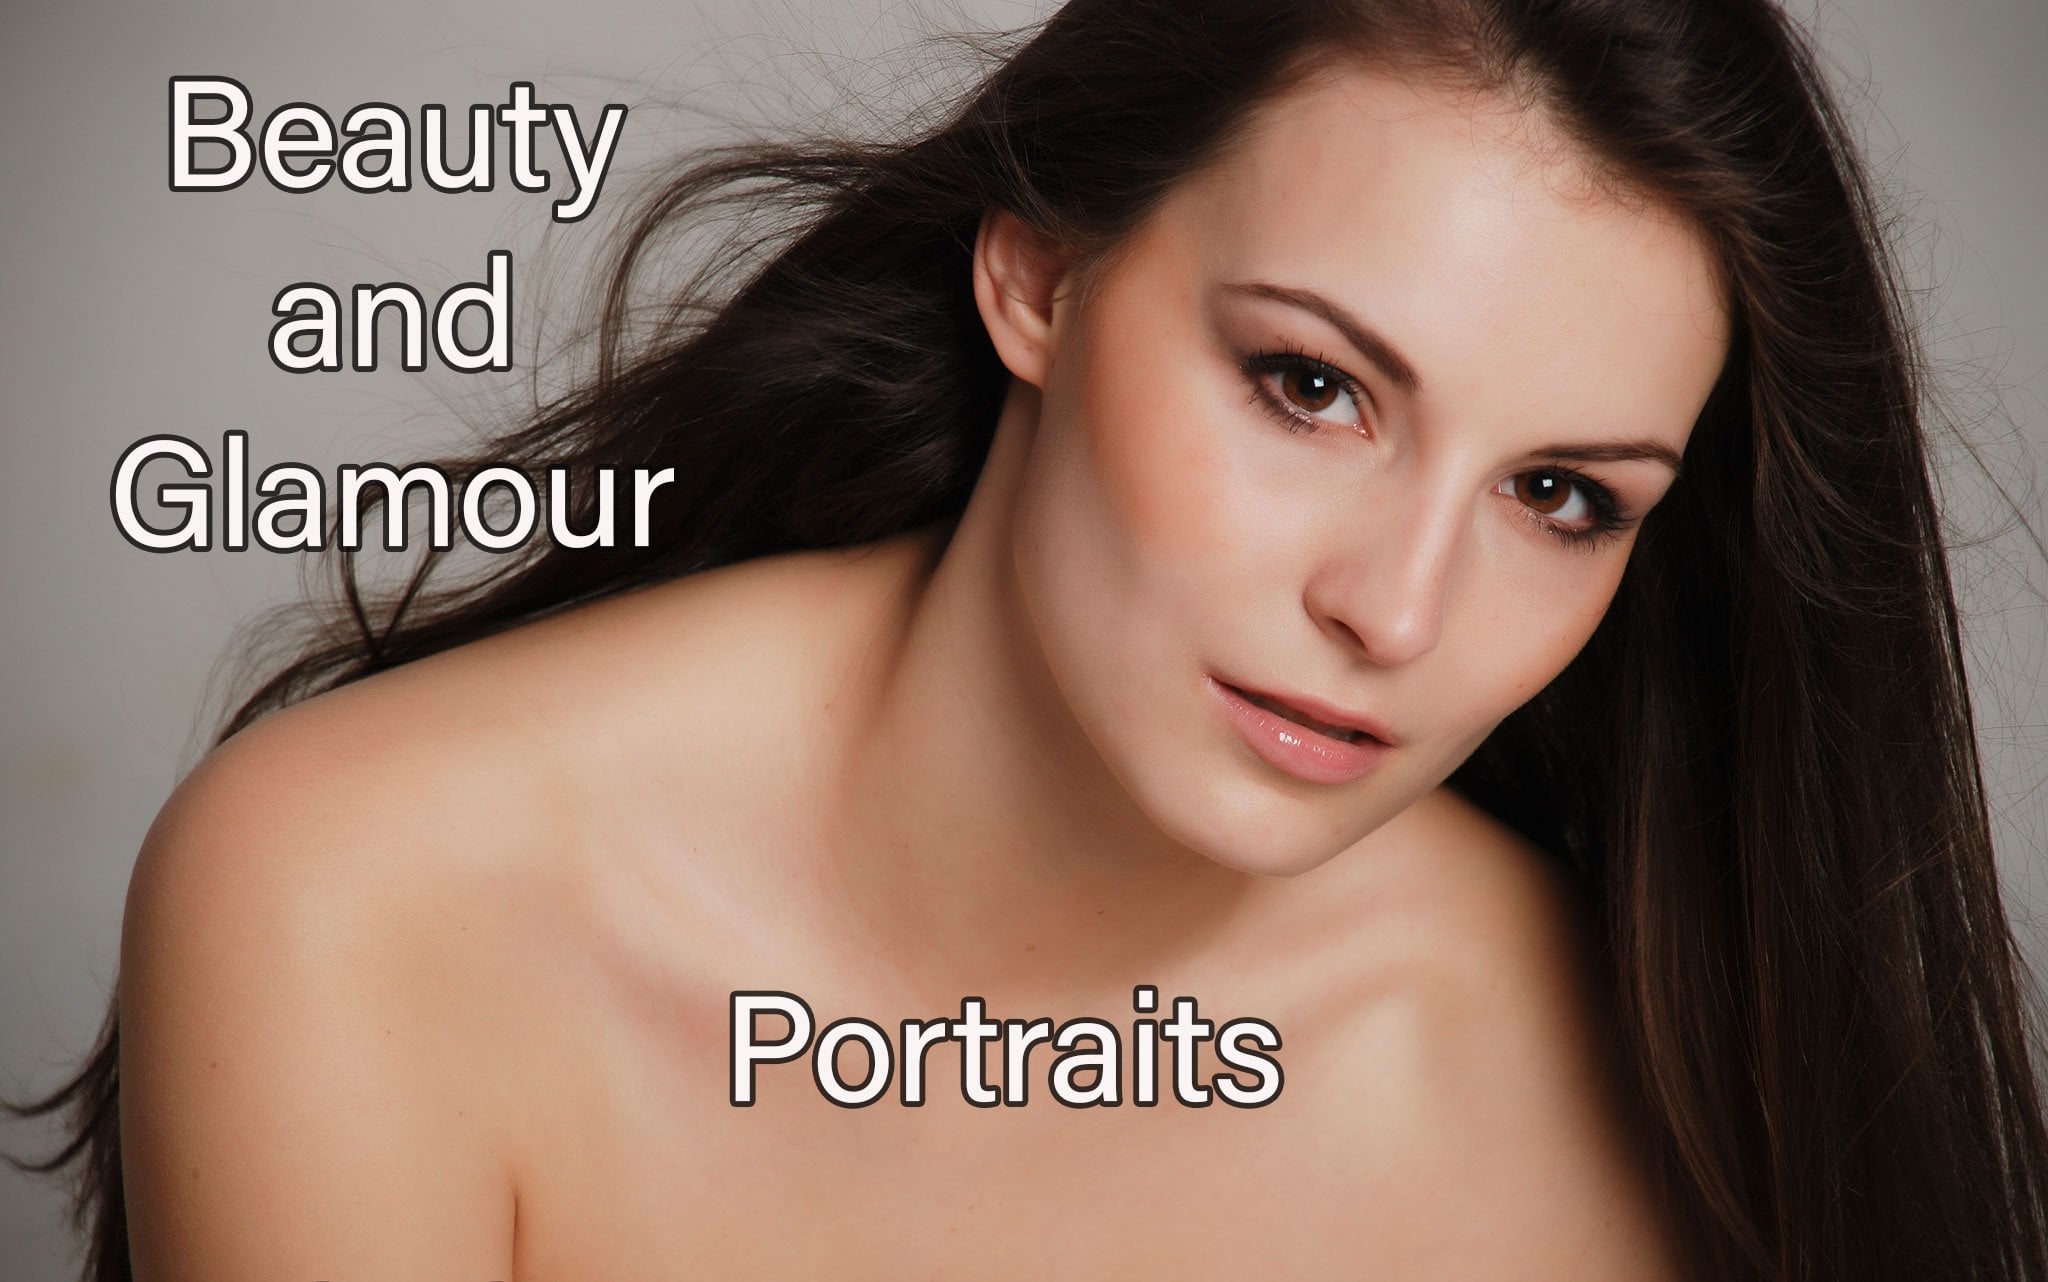
4. Directing the Light: The next characteristic of life that we want to talk about, and I want to teach you about today, is the direction of the light. Now we can manipulate the direction of our light in a number of different ways. We can move our light source around our subject to change how the light falls on them. We can move our subject around. If we have a fixed light source to change the way that that light source falls on them. We can move our camera position as well to change how that light falls on our subject. So whether we're shooting landscapes or people are still lifes, any type of subject. We can manipulate the way that that light falls on our subject. Now, because I shoot mostly people, I want to explain a little bit about light direction on faces. We have our model here, cherry. She's kindly volunteered to be a model for the day. Cherry was rescued by me from a dumpster outside, a hair dresses. Because as you can see, she's pretty much used up her usefulness as a hairdressing model. But I rescued cherry and she's been helping me with these demonstrations for the last few years. Now, I'm going to show the various directions of Lloyd on a face by using cherry. But there is a limitation here because Cherry has a perfect face. No one else in the world as far as I'm concerned has a face the same as cherries and every face that we photograph is a little bit different. But I'm still going to show you an approximate these different lighting situations with the direction of the light so that you can see how it falls on cherries face. And when you're plotting a face, particularly, you'll be able to understand these various different directions of light. Now to do this demonstration, I'm going to use this desk lamp because it's easy for the video to see. It is a small light source. So it's going to be more noticeable on cherries face because the shadows are going to be fairly hard. So each of these different light directions are going to be more noticeable for you. The same principles apply when we're using soft light. It's just that the soft light tends to not show them up as defined. So the small light source is going to help us to do this. Now I'll show you these different directions on share his face and will have stills to show you as well. So there's a little bit easier for you to see. Now when we're talking about lighting direction, we can use, we can talk about vertical direction or horizontal direction. So if we have this light up high above cherries face, you can see, as I mentioned before, even cherries face is with her very shallow eyes. Her eyes are dark because of that light source coming from too far above. As we come further down, cherries face is more evenly lit with this slide. It's up around about 20 degrees above her face. As we go down below cherries face, that law, it starts to come up on her face, which makes it look a little bit creepy. Arrow Bryan, stand like that light coming up. We can use it in particular situations, particularly if you're photographing someone you don't like and you want to make them look evil. But generally speaking, that applaud is not a good idea when we're trying to make people look good. Now, when we're talking about light that's around our subject, if we like cherry from the side, this is what we would call side lighting or split lighting. So if we didn't have any other lights in this room, we'd have one side of cherries face brightly lit, and the other side would be completely dark. So split lighting gives us one side of the face lit the other side dark. It doesn't give us great light in the eyes as well because cherries eyes are fairly shallow, it's going to show up here, but with a normal face, we would lose a bit of light in his eyes. As we come further around cherries face, towards the front, we start to get a little triangle of light on cherries opposite cheek. Now this slide is caused by the bridge of her nose, that light coming through there onto her cheek. Now this is what we would call Rembrandt lighting. Rembrandt lighting is designated by that little triangle of light that's on cherries shake. Now, Rembrandt lighting will give us direct light into cherries right eye. And it will give us a little bit of light in her left eye because of that reflection of light up offer shake. So it's quite a classical light to use. It's not one that I would use particularly to make people look good. But for a mile portrait maybe, or something for a bit of character, we might use this rembrandt lighting. As we come further in the front of cherries face, you noticed that that nose shadow breaks away from her cheek and forms a little loop of shadow on her left cheek. This is what we would call loop lighting. Now, loop lighting gives direct light into both of her eyes. But sometimes that loop, that loops shadow on her cheek and look a bit distracting, particularly if they're lats down too low. You can see how this looks really odd because that lot, that loop shadow is coming up on her cheek. So Loop lighting is a little bit more flattering. Dan, you Rembrandt's style, but it just depends on your subject, how you want to write them. As we come further down the front of her face, we have directly frontal lighting. We also call it butterfly lighting or we call it paramount lighting, depending on what country you're from. A lot of Americans call this Paramount or butterfly lighting because it was used by the old movie stars in the old days, the photographers you shot them. And also because it creates a little butterfly shaped highlight on the top lip. Generally speaking, when you're shooting a normal phase. Now, frontal lighting is pretty much the most flattering light that you can use. You've seen another video that we've done where we've done a beauty shoot using mostly frontal lighting or variations of frontal lighting. So frontal lobe is very flattering because it fills in any creases or lines in the face. It helps to make the skin look smoother because the light coming directly in lighting the whole face uniformly. So if I want to make somebody look good, I have this light coming directly onto their face. Now we can have frontal lot even though cherries faces turned a little bit to the camera. As long as we have her nose pointing directly towards that light source, It's still frontal lighting, it's still very flattering. Now, all of those different styles of light and nice to know and they, they impress photographers if you can talk about it. But generally speaking, they're not going to make a whole lot of difference to the results that you get. This next principle will. And this is the principle abroad side and short side lighting. Now, this principle works particularly when somebody's face is turned a little bit away from the camera. So if if you were photographing cherry from your point of view, her face was turned a little bit away from you. From your camera position. You can see more of this side of cherries phase then this side, this is what we would call the broad side of her face. And this is what we would call the narrow side of her face or the short side of her face. Now, if we like cherry from the broad side of her face, if we have the light up here and that light's coming onto that broad side of her face. Her face tends to look a bit fuller and a bit fatter. Simply because we're lighting that big, expansive cheek on that side. And it makes your face look fuller and fatter. If we come around this way and light from the narrow side or the short side of her face, it throws that other cheek into shadow, which tends to make her face look slimmer. Most people will benefit by having their face look a bit slimmer, and most people prefer it that way. So lighting someone from the narrow or the short side tends to get you better results in most situations. Now, we can manipulate these quite easily and remember this quite easily. Simply, all we need to do is if we're photographing cherry, she comes out, he or she sits down. She says, What do you want me to do? I'll say just sit down there and turn your face towards the light. As soon as cherry turns her face towards the light, we have short side lighting on her face. So that's the key. Just asked your subject to turn their face towards the light and you're going to get short side lighting. If you're working outdoors under the shade of a tree, look for where most of the light's coming, coming in. You might have a building behind the tree that blocks a lot of the light, but the light's coming nicely in from one side. You need to do is asked to subject to turn their face towards where that light is coming from. You get that short side light on their face and it looks much more attractive. So think about that. I often asking more models are asking my clients just to turn your face this way a little bit just so that the faces towards the light and we get that short side light on their face. Now, this is a great principle and it works a lot of the time. But the nature of photography means that we can be creative and we can change the way that we do things. So don't think any of these principles are written in stone. You can manipulate and change these principles anytime you want to for your creative purposes. But knowing what works and what may not work, the keys to the whole situation. Because if you can do it one particular way and you get a result that's not what you want. You need to know how to get back to the right way. So don't be afraid to break these rules, but it's great idea to know them first and to use them first and get used to them so that you can break them in an intelligent way.
5. Intensity: Now the third characteristic of light that we want to speak about is the intensity of the light. Intensity means the brightness of the light. So the brightness of the light has a bearing on how a photograph looks. The main thing that the intensity of the light determines is our camera settings. So if we've got a very bright light, very intense light, we might use a faster shutter speed or a smaller aperture, or a lower ISO for that matter. So the intensity of the light will determine our exposure on your camera. The intensity of the light can also affect the way the light falls on our subject. Because the further away our subject is from our light source, the less intense the light tends to be. There's a scientific law that allows us to predict this fall off in the light source. It's not really necessary for you to know it, although it will really impress other photographers if you can recite this law, it's called the inverse square law. Now the inverse square law states that the intensity of the light diminishes with the square of the distance from the subject. Which sounds very impressive. But basically what it means is if I'm one meter from a light source, so I've got a light over here. There's lighting me. I'm one meter from that light source. I've got a certain amount of light on me. If I move two meters from that light source, I have one quarter of the amount of light on me. So it diminishes by the square of the distance. The same thing applies if I move closer to the light. So if I'm one meter away from this light source, so I've got a certain amount of light on me. If I move to half a meter from the light source, I have four times the amount of light on me. So the light diminishes and increases greater than you would expect because of this inverse square law. Now, we can use this in our situation by placing your subject closer to our light. If we're using a window light, for instance, we can place our subject fairly close to that window where they're soft lights coming in. And we're going to get a lot of light, nice intense light on our subject, which is going to be bright enough for us to photograph. If we move that subject may be a meter or two meters into the room, that lot on our subject's going to be almost non-existent because they've moved that far away from that light source. So the distance from your subject to the light source is critical. Once you've established that exposure for your subject from the light source, try to keep your subject to random about the same distance from the light source. And that will make it easier for you with your exposures because there'll be consistent. Now when we're working out doors, we may be lit by the sun. We may have the sunlight lighting air landscape, or lighting our subject. Now, if we move our subject further away from a camera, from the position they started with, That's not going to appreciably change the intensity of the light because the sun is a long way away from us, it's very difficult to move our subject a great proportion of distance away from that sun. So whether they're here or where that there are a 100 meters over there, the light intensity from the sun's going to be pretty much the same. But if that sunlight is reflecting off a wall, off a house or something like that, this principle will apply because that light source is actually the wall. So the further they get away from that light source, the less intense that light will be. Now the intensity of the light will affect other parts of our image as well. It can affect how bright one light sources compared to another. Because often when we're photographing, we're not just using one light source, particularly when we're shooting people. We might be using flash on your camera or off their camera, but the daylight is lighting the surrounding area. If we're shooting at night, some street lighting might come into effect with their flesh. So we can vary the brightness of our background in relation to our subject, but changing the intensity of one or the other of those light sources.
6. Light Colour: Now, the last characteristic of light that we're going to consider is the color of the lot. Now, the color of the law it has a bearing on however, images appear normally if we're shooting in daylight, daylight is considered to be white light. So all the colors will look familiar to us. The reds will look red, the blues will look blue, and the grains will look green. If we shooting by any other sort of light source. For instance, these lights that I have here in the studio which a tungsten lights, then our image could appear quite warm colored orange because of the color of those light sources. Now we can use the white balance in your camera to allow our camera to change the color of that lot. What we might consider to be a normal color. Now, that's fine and it works really well in a lot of cases, but sometimes having a slightly different color in your image can work well for you to tell the story of your image or to set the mood of your image. A warm tone in an image. So a slightly orange color will tend to look a little bit more homely, a bit more safe for bit more friendly in the image. Whereas a cool color, blue or slight green tinge can make your subject look a little bit cooler, a little bit colder. Landscape photographers can use this quite well if they're shooting snow scenes or if they're shooting forest scenes or beach scenes. Just a little bit of color manipulation can make your image appear differently to the viewer. So you can use this color psychology in your photography. So various different colored light sources can work really well. We can also manipulate our image by using a few different colored light sources in our image. We can throw blue light onto one side of your subject and normal daylight onto the other side. We can use our white balance adjustment to set a tungsten white balance and color are flesh on our subject, which would throw a background into a blue tinge. But lighthouse subject in a normal way. There are lots of ways we can manipulate color in our image by using a combination of colored light and a white balance adjustment. Now science has put together a scale to help us to understand the different colors of these lots that we use or lights that are available to us. It's called the Kelvin scale. The Kelvin scale gives us various different values depending on the color of light sources. In the old days when we shot film, and sometimes nowadays too with digital, photographers might use color temperature meters to assist the color of the light in a particular scene so that they can balance it or manipulate it with regards to other light sources that might be there. So the Kelvin scale gives us various different values for the colors of light. Generally speaking, dialogue is around about the middle of that scale, which is about 5000 degrees Kelvin. Now 5000 degrees Kelvin, maybe daylight, but it tends to be daylight that is as wide as possible, which would probably be lot on the equator at mid day when the sun is at the equinox, which is the highest it can be in the sky. Because most of us live at different latitudes then we very rarely get that pure white light from daylight. So it does change a little bit. Now, on the Kelvin scale, these tungsten lights, which are quite orange in the studio here, will be given a value for random bed 3000, 3500 degrees Kelvin. A blue light, which has a lot of blue in it and it's a cooler light, might be given a value of 6 thousand or 6,500 degrees Kelvin. Now, most cameras allow you to set a particular value of Kelvin. Your camera to set your white balance to correct any light that you might want to use and your photograph. It's a very precise way of doing it. Not a lot of photographers choose to do it, but you may find that that's an easier way to get more accurate color rendition by using that Kelvin scale within your white balance to be able to set a particular value of Kelvin so that your camera will change the color of the light in your room or in your situation to that particular color that you're looking for.
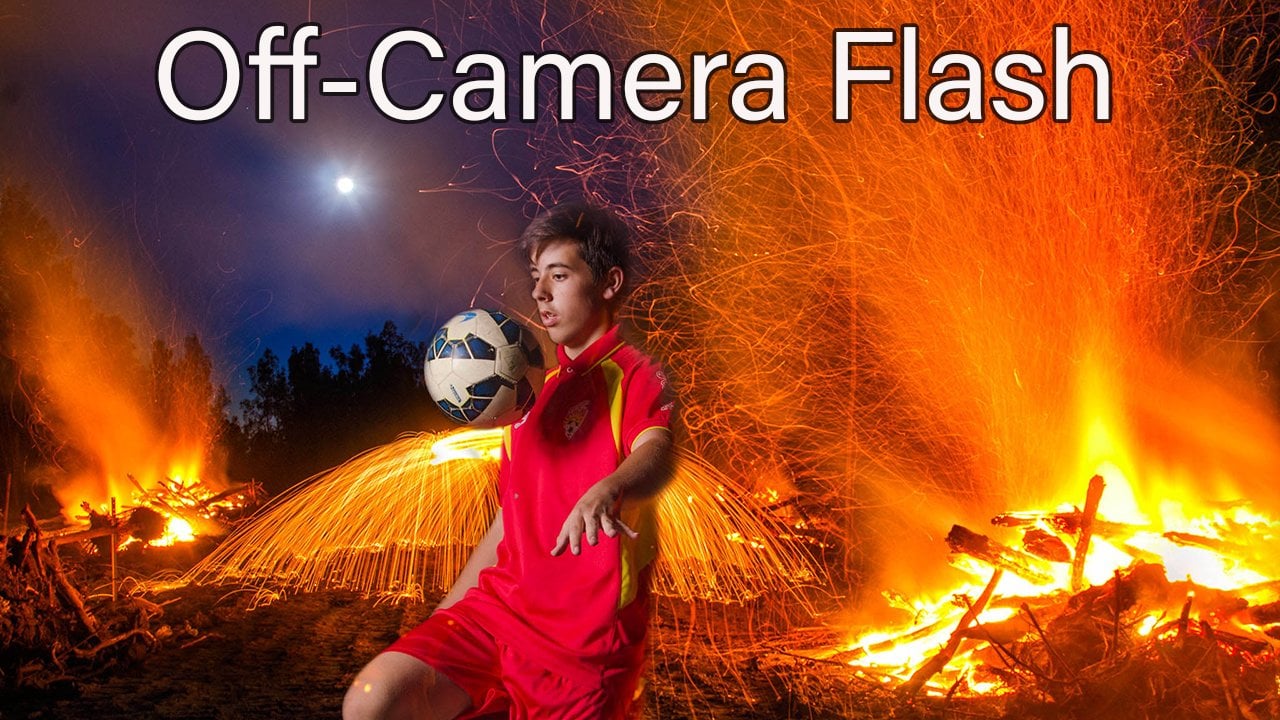
7. What is Puzzling Light?: So there we are, there the four main characteristics of light, or pretty much the four characteristics of light that you need to know about. The quality of light, the intensity of the light, the direction, and the color. Now the things that are most wants you to remember from those four videos that we've just watched. That soft light comes from a large light source. Hard light comes from a small light source. We can manipulate the direction of the light, how it hits your subject, and that will vary how our subject appears. We can show shape and form, or we can make things look different by simply changing the direction of the light and how it hits your subject. The intensity of the light will determine our camera settings. And it will also determine how brought our subject appears within our image using that inverse square law, we need to be careful that we don't move. They're subject to far away or too close to our light source, which will vary our exposure. And the color of light. We can manipulate our viewers perception of our image by changing the color of our light source. There are the four main points I want you to get out of those last few videos. Now. Up till now, we've been speaking about pleasing lot. As I said, light that looks natural to us like the dead brain enjoys to look at, because it looks as if it could appear in nature. Now, puzzling law, it is the other side of the coin. Puzzling lot is lot that's obviously out official. Now some examples of puzzling light would be foot lights in this theatre. Footnotes that come up from the stage that lot, our subject from underneath. We still see that law does being a theatrical type of lights, so we didn't notice it too much, but it is actually artificial light and it looks puzzling to us. Ring light would look like an artificial lot. A ring light that a lot of people use nowadays to surround lens on their Canvas so that they can shoot through it. It's a very flattering lot to use. It's quite an aggressive frontal lot, which is very flattering to skin tones, and that's why a lot of people use it. But it's obviously an artificial lot. When you look at it, you can think, well, that's been manipulated some way. It still looks good and it's still used for a purpose, but it's a puzzling light. Another topic puzzling lot would be light painting. I do a lot of light painting. I liked my subject with a torch in the dark. You've seen a couple of videos that are produced and I'm going to produce some more. But shooting in the dark, using a torch or a flashlight to launch your subject to paint the light on your picture. It's a great way of lighting any sort of subject beat a landscape, or a shed, or a house, or a person or group of people. I do this weddings, I do a portrait shoots. I even do it outdoors at night when I'm shooting landscapes. Sometimes. Being able to totally control your life by actually using your torch or your flashlight beam as a paint brush to paint that light wherever you want it to be in your subject. You can paint from various different positions. I can paint some of my subject from here and move four meters over that way. And pink from the other side, which really looks amazing in the image because your brain looks at that image and is amazed at it because the light looks so unusual and so different to what you're used to. So light painting is a great way to manipulate your image and make people sit up and take notice and put a lot of impact into your images. And to produce something different that not a lot of other photographers can do.
8. Your Project: Your project for this class is to produce an image using the lighting that you have tried to put together, using the principles that we've taught you in this class. Try to manipulate the light in your image to tell the story a little bit more. Think about what you want to say with your photograph. Whether it's a landscape or a portrait or any other genre of photography. Use the lighting principles that you've learned here to be able to produce an image that you couldn't do before. You can soften the light, you can use Hard Light. He can change the direction of the light in a way that's going to benefit your image. And please post your projects in the project section below. We'd love to see your images and I love to comment on them and to be able to help you out with any issues that you might have had. If you do have any issues or any problems, please post them in the discussion section and I can get back to you and help you out with any problems that you might have.
9. That's it!: So in conclusion, you've seen how light can be manipulated like, can be modified, like can be changed to suit the purposes of your photograph. It doesn't matter what type of photography you are or what type of subject you'd love to shoot. An understanding of light is going to make a huge difference to the way that you can portray your images and the way that you can show your subject off. So you can see how an understanding of lighting makes this stuff so much more exciting. You can get it out there and produce stuff that other people can't do. When you understand light, it makes you into a much better photographer. And it's not difficult if you missed some of the things in this video, just go through it again. You'll understand it and you'll have it for the rest of your life. Because these basic principles won't change. It's science, it's physics. That's the way light behaves. No matter what technology you've got, what sort of cameras, what sort of lenses use? The light is still going to behave in the way that I've taught you. So an understanding of lighting is going to make you into a much better photographer. In future videos, you'll see me manipulate light, and you'll see me manipulate my subject in relation to the light using these four characteristics that I've talked about. So get out there and give it a go, give the project together, play with the light. Make mistakes, you need to make mistakes to get better. Don't be afraid to make mistakes. But get out there and play with the light. Use the light as much as you can and you'll become a much better photographer for it.
 Warren Marshall, Passionate Photographer