Transcripts
1. Introduction: Welcome everyone
to this course on the fundamentals of
camera technique. And in this course,
you're going to learn the exact step by
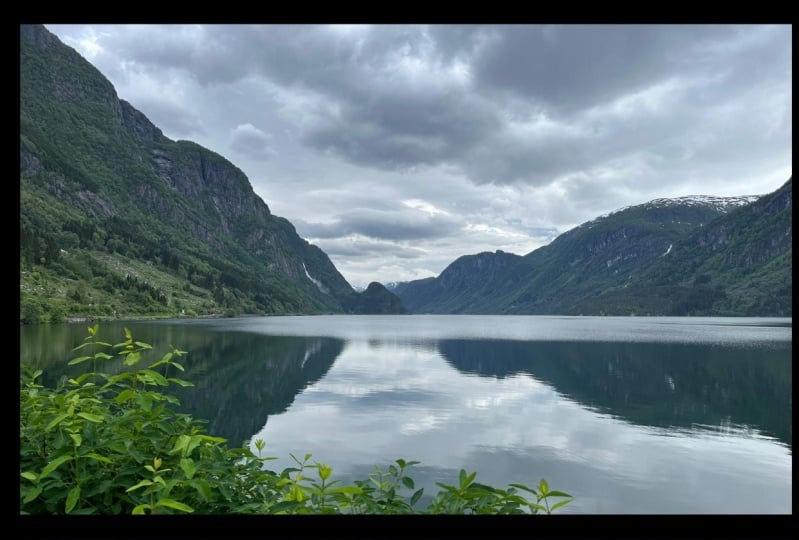
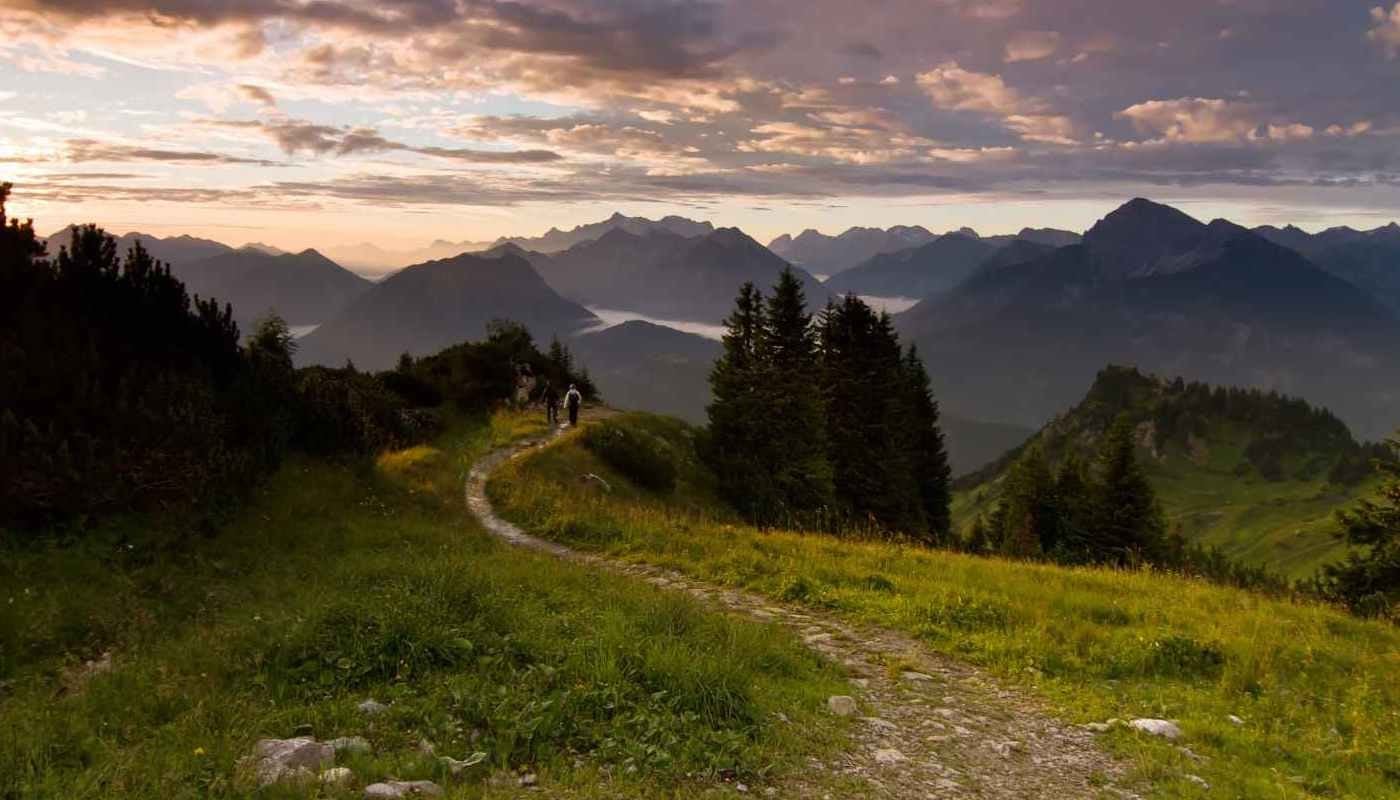
step framework or system that I personally use to capture almost every one of my landscape photography scenes. Whether that's a
grand landscape, like you see behind me here, or if it's a more
intimate, smaller scene. And I like to use
a framework that I call the captures It framework. And each letter in the
captures it framework stands for a different
step in this workflow. And I will provide
resources and guides that help walk you through
this entire framework, but we're going to
cover it throughout this entire course. And really, the purpose
of this framework is to teach you the exact
camera settings to use in any scenario so that you
can have proper exposure and an image that's sharp from the foreground all the
way to the background. Let's go ahead and start with the first letter in the
captures framework, which is C, which
stands for composition. So I will see you there
in the next lesson.
2. Setting up Your Composition: The very first thing you're going to want to
think about when you are making an image
is your composition. So composition is probably
the most important step, even though it's
the very first step of the captures framework, because as you probably know,
composition is everything. Composition probably has the
most dramatic overall impact on your final photograph. So before you even set your tripod down or
set your camera up, you want to think about
your composition. And what I highly
recommend is you get out your phone and just walk
around taking photos, looking at different angles, get out the camera
app on your phone, and experiment with lots of different compositions to see which one works best for the scene that
you want to capture. Because this is
going to give you so much more freedom to explore and to think
about composition. Get your phone down
to the ground, get it high up, move
left and right. The biggest mistake that I see photographers make is
they walk up to a scene, a really beautiful scene and
they just plant the tripod down and just set up their
camera and start shooting. But if you get
composition, right, if you really explore
composition first, it's going to take you a long way in
creating much better, much more compelling
photographs. So get your phone out, start experimenting and
then set your tripod up in the position that aligns best with the composition
that you found on your phone. So let's talk about
setting up your tripod. And I know a lot of
you are not fans of using tripods, of
carrying tripods. Trust me, I'm not either, but they come in handy in
so many circumstances, and especially if
you're a beginner, you're definitely want
to go to start out using a tripod for
landscape photography. So come take a look at how I
have my tripod set up here. And when you're setting
up your tripod, you really want to dig
the bottom of the tripod, the legs into the ground
so that it's very stable. The most important part is
that your tripod is stable. And you're also going to
want the top of the tripod right here to be level with
the ground, horizontal. And that's just going to create the most stability
for your camera. And you might be able to see
that I'm a little bit on a slope with the downhill
furthest from me. So the third leg
that you're looking at here is fully extended. But what I've done is I've
shortened the closer two legs to compensate for
that little bit of a downhill slope
that I'm standing on. Again, so that I
can get the top of the tripod level
with the ground. You can see if I try to
shake it, it's very stable. Once you have your
tripod set up, you can then turn
your camera on. And for this workflow that
I'm going to show you, I really recommend that
you use Live View, so you can see the
image that you're creating on the back
of your camera screen. It's going to be
easier to focus, find your camera settings, all of those things that we're
going to talk about later. So first thing, when you turn your camera on and you're
setting up your composition. So you've got your
composition dialed in, the next thing that
you're going to want to do is level your camera. So you'll have to find on your particular camera how
to find the camera level. Usually, you can just scroll
through these settings, and you can see here, I've
got my camera level out, and what this is showing when
the green line is lined up, which means that the
camera is level. So if I were to tilt
it to the side, you can see that that
green line is gone. So adjust your camera, make sure it's level
with the horizon. And then the next step is
to just take a quick focus. So I'll just take a
quick focus point so that I can really see
my composition better because if the image is blurry and you're looking at kind
of a soft composition, it's going to be a
little bit harder to dial in your focus settings, but also to see
your composition. So that is it for composition. We will talk about a aperture priority mode
in the next lesson.
3. Aperture Priority Mode: You set up your composition, the next step is to make sure
that your camera is set to a shooting mode called
aperture priority mode, which is the A in the
captures it framework. So aperture priority
mode is a mode that allows you to manually
choose the aperture, but then the camera will automatically select
the shutter speed. And there's really
five different shooting modes on your camera, and I explain all of these in the exposure fundamentals class. So if you haven't seen that, go back and rewatch the
shooting modes lesson. But for this lesson,
we're going to focus on setting our camera to aperture priority mode
because it really is the best shooting mode for
landscape photography, and 99% of scenarios. I just going to make your
life so much easier. If you want to set your camera
to aperture priority mode, you'll either see a
dial on the top of your camera or you'll have
in your settings menu, all of these different options, PSA M, and Auto. And so A stands for
aperture priority. If we go back to
our composition, you can see the aperture
or the F stop right here. And when I change the F stop, so if I make it smaller, you can see what happens
to shutter speed. So the shutter speed
is getting faster automatically to
balance the exposure. If you think about the
exposure triangle, which we discussed in that exposure fundamentals
master class. So if I go to a larger F stop, watch how the shutter
speed compensates automatically to get slower. So why is aperture priority mode better for
landscape photography? And the answer to that really has to do
with the importance of capturing a large depth of field in landscape
photography. So a lot of times or
most of the time, we want to capture an
entire scene sharp from the bottom of the frame or the foreground all the
way to the background. So we don't want the camera guessing what the
best F stop is. We want to choose an F Stop, which we'll talk about in a little bit in a future lesson. We want to choose an F stop will essentially
guarantee that we can capture the entire depth of field or sharpness
of the entire scene. If we put it in an
automatic mode, the camera would start
to guess the aperture. So we want to make sure that
we choose the aperture. But the thing is, we don't
in a lot of situations, we don't have to worry
about the shutter speed. We don't have to worry
about, you know, because our subject
isn't moving, you are a wildlife photographer, a sports photographer,
this would be different. But in most landscapes like
you're looking at behind me, we don't have to worry
about things moving. So we usually don't have to
worry about shutter speed. We'll talk about shutter speed towards the end of
this course because obviously there are times that we want to worry
about shutter speed, but we're going to
be able to change our shutter speed and choose a proper shutter speed
based on the amount of motion blur that we want
to capture or not capture. But we can still do that
in aperture priority mode. So we want to start by
choosing the F STOP. Again, we'll talk
about that next. We'll choose the FTOp, but aperture priority mode is the best mode for
landscape photography. Regardless of if you've
heard manual mode is better, it's aperture priority mode is going to make
your life easier, especially when
you're starting out. This is just a great way to
start shooting right away.
4. Focus Settings: Once you have your
composition set up and your camera set to
aperture priority mode, the next step is to
choose the point in your scene that you're
going to want to focus on. And the point of focus is the P in the captures
it framework. So before we talk about where exactly to
focus in your scene, let's talk about the
important camera settings, the focus camera settings
you're going to want to use to really ensure that you
get the most accurate focus. This is really important. The first camera setting
that you're going to choose is single
point auto focus. And what this does is
it allows you to choose a single point in your
scene to focus on. It's a type of auto focus, but it doesn't allow
the camera to guess, which we're always
trying to avoid. There's a lot of different
auto focus modes with multiple different
focus points. You don't want the camera to choose the focus
point in the scene. Want to use single point so we can pinpoint exactly
where we want to focus. The camera doesn't guess, and this is going
to become very, very important once
we start to work through our focusing technique. The next step, the next thing you're going to want
to do in terms of focusing settings is
you're going to want to set something called
B button focus. And I will link a guide that
tells you a lot more about back button focus and how
it works and why it works. But essentially
what B button focus is is it allows us to focus or auto focus using a
button on the back of your camera rather than focusing
with the shutter button. So let's take a look
at the camera so I can show you what I mean here. So typically, right
out of the box, when you focus on your scene, you focus using the
shutter button. Now, the problem with
this is that this button, and your camera comes
right out of the box, it does two things. It will focus when
you press it halfway, and it will shoot the image. It'll make the image when you
press it all the way down. Now this becomes problematic. So, for example, let's say you want to focus at that
point in your scene, all the way right there
where I'm pointing. And you've dialing your focus. You know, it's exactly
where you want to focus to maximize dep the field. Again, we'll talk about where you want to focus
in the next lesson. But, say, you've got
the point of focus, then you press the shutter
button to create the image, and the camera refocuses. This is a problem. We
don't want the camera to refocus once we
have our focus set. Now, what you can do is you can remove the auto focus from your shutter button so that the shutter button only
shoots the image, okay? So what I've done on my camera, and usually when you're
using back button focus, you set the AF on button to
be your focusing button. Here I've set the AF on button
to be my focusing button. So whenever I want to
focus in the scene, wherever I have
the little red box set on the back of my camera, when I want to
focus, auto focus, activate autofocus,
I press this button. It will focus at that point. Remember, because we're using
single point auto focus, it focuses at that single point
where the red box is set. I focus using back button focus. Then when I'm ready
to shoot the image, I press the shutter button. The camera will not refocus. So that is so important. We don't want the camera to refocus when we have
everything set. So that is the point
of back button focus, and it will allow you to get sharp images every time
you create an image. Now, setting up back
button focus might be different depending on
the type of camera you have. So, if you have an icon, I have step by step guide that
shows you how to do that. But if you have a
different camera model, then I recommend you go
through your camera manual, look at how to set up
back button focus. Googling your camera
model plus B button focus will usually lead you in the
right direction as well. So those are really the two most essential camera settings when it comes to focusing. So in the next lesson, we'll
look at exactly where you want to focus once you
have the setting set.
5. Point of Focus: Easy Method: Once you have single
point auto focus set and back button focus
set on your camera, the next step is to find the point in your scene
that you want to focus on. And the point you
want to focus on in order to maximize depth
of field in order to get your entire scene
sharp really depends on the lens that you're using and the type of scene that
you're photographing. So if you want a
general rule of thumb, if you're new and
you're starting out, if you're a beginner and you
just want a ballpark idea of where do I focus to get my
scene sharp most of the time. Then a good rule of thumb
is if you're shooting with a lens that's 150
millimeters or less, focus about a third of
the way into the scene. And if you're using a lens that's 150 millimeters or more, focus at about the
middle of your scene. Let's take a look
at what that means. So let's come back
to the camera. And you'll see the focal
length that I'm shooting with here is a little
over 28 millimeters. It's about 30 millimeters.
I have it set. This is a zoom lens
that goes 28-400, so pretty pretty large
focal length range. So when I'm choosing
the point to focus on, so this is the simplest
way to do this that'll work in most situations, especially when you don't
have something very, very close to your lens. If I'm shooting less
than 150 millimeters, then I'll focus about a third
of the way into the scene. So it's really easy
to see when you pull up the thirds grid, which you can usually
do by just toggling that display button that brought up your level
the first time. So we can see the
bottom third line, the middle line, and
then the top third. So when I want to focus, and I'm at 30 millimeters
at my focal length, I'm just going to focus right about here in the middle
along that third line. I'm going to put that focus
point box, that red box, which is probably a little bit hard to see in this
daylight here, but I'm just going to
place it in the middle of my frame on that third
line right about there. And then once I have
that point of focus set, I'm going to activate auto focus with my
back button here. And now I've focused at
a third to the scene. Well, let's say
that I'm shooting at over 150 millimeters. So I'm going to zoom all
the way to 200 millimeters. Now, what happens
when you shoot at a longer focal length is that you're going to have a more shallow depth of field. So what I'm going to do
is move that focus box, that focal point box right
to the middle of my scene. Yeah, my composition
has changed here. This wouldn't be an
actual composition that I would necessarily shoot. I might rotate the
camera so I can see more of the mountains
in the background there. But for the purposes
of this demonstration, we are just going to
put that focus box right in the center
of the frame, focus at that point
with back button focus. And now this scene should be sharp from the
bottom to the top. Now, we still have to
account for our FSTop. We still have to change our FSTop which we're
going to be doing soon in one of the
next lessons here because FSTop also
affects depth of field. But if you're choosing the
proper depth of field, which you'll learn how
to do in a moment, these focus points, either
at the bottom third, less than 150 millimeters or in the middle over
150 millimeters, that will get you in close range of getting
your whole scene sharp.
6. Point of Focus: Hyperfocal Distance: The previous lesson, I explained an estimated
good point to focus in your scene
if you want to get all of it or
most of it sharp, and it works in most scenarios, and it's a really easy kind of ballpark way to estimate
where to focus in your scene. And it's especially great to
use if you're a beginner. However, if you're a little bit more advanced photographer and you want to understand
exactly where in your scene to focus in order to maximize depth
of field that will help you achieve
sharp focus from the foreground to the background every time you make an image, then you're going to
want to understand a concept called the
hyper focal distance. And again, I will link
all the guides to hyper focal distance for
you below this video. So definitely go
check those out. As they go into much more
depth and will really help you understand and internalize
what this concept means. But the easiest
way to think about hyperfocal distance is it's the exact point in
your seene to focus on in order to maximize
depth of field. It's not an estimate so much as the last focus points
that I explained to you. It's actually a
mathematical point that you can actually calculate. There's calculators
you can find online. There's different
ways to actually calculate the
hyperfocal distance or the point in your seene to focus on to maximize
depth of field. However, I like to use a very simple method called the double the distance method, which will show you
where the focal where the hyperfocal distance
is in your scene or estimate where it is in your sN so that you don't
have to go through all of the thinking or the calculators or all the different tools that you could potentially use to find the
hyperfocal distance. So the double the distance
technique works by first, looking for the closest
object in your scene and then estimating the
distance between your camera lens
and that object. So here is how that works. And again, I will
provide resources that walk you through this exact double the distance technique. But the way it works, if we come back over here to the camera, if you look at this composition, you'll see that
there is quite a lot of branches and trees
in the foreground. So what I'm looking
for is an object that is closest to me in the frame
that I want to be sharp. So it could be the
bottom of the tree, the very base of the tree trunk. It could be this
little bush right here all the way at the
bottom of the frame. It's really the closest object
that I want to be sharp. Once I find that object, I'm actually going
to look out into the scene and identify
it with my eyes. So if I was looking at that tree branch right here that was at the
bottom of my frame, if I want that to be sharp, then what I'm going
to do is estimate the distance between
the front of my lens and that tree
branch that I want to be sharp or I guess should say that bush that bush right
there that I want to be sharp, the closest object I want
to be sharp in my scene. So I'm going to estimate that
that's about three feet. And one way you can do that is by it's a little bit
easier if you kind of come to the side
of your camera and then look out from the side
and kind of, you know, ballpark estimate how far that distance is just
from your camera, all the way to that
object, right about there. So I'm just going to say
that's about three feet. Now, what I'm going to do
is double that distance, hence the name double
the distance technique. And so that would be six feet. Now, that double
distance is going to be the distance I
want to focus on. That will be the estimated
hyperfocal distance. So I'm going to look out into
my scene and estimate what object out there is six feet away from the
front of my camera lens. And just by looking, I think that this little
little shrub right here. Oops. There it is. If I
let it focus out there, that little shrub is
about six feet from the front of my lens
to that little shrub. And so this does not have
to be super accurate. It can just be an estimate. You don't have to have
it perfectly accurate, it's okay if it's not
exactly six feet. But I'm going to look for an
object that's six feet away. So I'm just going to guess that that shrub right
there is six feet away. Then I'm going to go back to my camera and turn
back live view. And I'm going to
focus on that object, so I'm just going to put the
focus point over that shrub. And that is going to be my
estimated hyperfocal distance. I'm just going to back button
focus, focus on the shrub. And because I focused at the estimated
hyperfocal distance, it's going to be I'm going to maximize the
sharpness in my scene. I'm going to maximize
the depth of field captured in this image. And if you really
want to capture the sharpest images possible, thinking in terms of
where is my depth of field or how much depth of
field do I need to capture? Where is my hyperfocal distance? Finding that hyperfocal distance using the double the
distance technique. Again, just estimating
where that point is, placing your focal
point on that object, focusing on it, and
you're really going to ensure that most of
your image is sharp. So that's a little bit
more advanced technique. If that's too much
for you right now, just go back to the focusing either a third into
the scene if you're at less than 150 millimeters in
focal length of your lens or about the middle
of your scene if you're over 150 millimeters.
7. Focusing Technique: You determine the exact point in your scene that
you want to focus on, whether that's a third of
the way into your scene, halfway into your scene or even at the
hyperfocal distance, like you learned how to do in
the previous view lessons, then it's important
to understand how to focus at that point. So the actual technique
that will get you sharp focus every time you
go to focus at that point. We talked a little bit about
the best camera settings for landscape photography in terms of auto focus and how to focus. So we talked about
the importance of using single point auto focus and the importance of using back button focus to really ensure that you're getting
sharp focus every time. But let's talk about how to actually use back
button focus and how to properly focus at the point you've chosen to focus
on in your scene. Let's come back to the camera. And let's say in this scene, I determine that I want to focus one third of the
way into the scene. I just want to use
the simple method for determining the
best point to focus on. I'm using a lens that's
about 30 millimeters, so that should be sufficient
focusing right there, one third into the scene
to get most of this scene, if not all of this
seen in focus, given the depth of field. So once I determine that point, the next thing I'm
going to do is zoom in at that point, 100%. The way that I do that on
my Nikon mirror is camera, the z72, is I just
press the Okay button. I have it set so that
when I press Okay, it zooms into the scene at 100%. So I can really see
what's going on and I can really make sure
that the scene is sharp that I'm focusing on because we really want
to nail this point of focus in the field because it's hard to make any corrections
to this in post processing. And we'll talk
about image review towards the end of this course, as well, just to ensure
you got this point sharp. Once you've zoomed in at 100%, then you can really see if
you've gotten sharp focus. And what I'm going to do at
this point after I've zoomed in is I'm just going to press my back
button focus button, this AF on button. Remember from the back
button focus lesson, the auto focus settings lesson. We talked about
back button focus. Going to activate my auto focus, and then the camera will automatically focus
on the scene. And I can really see well
that it is quite sharp. When you are in a scenario
that might be a low light, if you're shooting
a composition or a focus point where there
isn't a lot of contrast, the camera might
struggle a little bit more to get
that sharp focus. So what you might
have to do is go to your focus ring on the barrel
of your lens and rotate that focus ring and just dial in that sharpness to your eyes watching the LCD screen
watching Live View, making sure that the camera
got that auto focus right. And I actually do this quite
often just to make sure that my focus is super sharp,
that it's tack sharp. And the camera, we, with
the auto focus button, the back button focus,
it'll get you really, really close, if not
perfectly close. But I do like to just
adjust that focus ring manually to ensure that I
got the entire scene sharp. So that looks pretty
good to my eyes. I'll go back Zoom, press that o button. And the next setting that I highly recommend that you use, especially when
you're using a tripod is a two to five second timer. Because what happens is, when you press the
shutter button, actually shake the
camera just slightly. And if you're using a
longer shutter speed, the shutter speeds
pretty fast right now, shouldn't cause motion blur if I press the
shutter button now. But typically, when
we're shooting in low light scene,
sunrise, sunset, twilight, shutter
speed is going to be a lot longer than 1/80. And just that little touch of the shutter button
can just shake the camera enough to cause your image to just get
a little bit soft. It might not be very noticeable, but if you really want the
sharpest images possible, use that two to
five second timer. So what I'll do is I'll
just go into my settings. Again, this is
probably going to be different if you have a
different camera model. But on my Nikon, I can just go into
my quick settings, go to exposure delay mode, and you'll see all of these
exposure delay timers. And here I'm just going
to select 2 seconds. And now when I press
the shutter button, you'll see it waits 2 seconds before it creates the image. And so when my hand is released away from
the shutter button, the camera has a
moment to settle, and then it creates the image, and there won't be
any motion blur. So those are really the best focusing techniques
to think about when you are creating
your images in order to get the sharpest
images possible. So as a review, zoom in to 100%. If you need to use the focus ring on the barrel
of your lens to just dial in that focus in a little bit more watching your live view
zoomed in at 100%, so you can see very clearly. Focus at a point that
has high contrast. It helps the camera really accurately measure
focus in the scene, and then set your camera to a
three to five second timer.
8. White Balance: Temperature of Light: The next step in the
captures framework is to set your white balance. And I like to use a white
balance setting called Kelvin, which allows you to dial in
your white balance manually. So white balance
really what it is. The best way to think
about it is it's the overall color cast
in your photograph. So that could be a
very warm yellow, orange color cast all the way to a very cool blue color cast. And Kelvin, what it really is, is it's a measurement of the temperature of light
or the color of light. Temperature is a term used to describe the color of light. And Kelvin, the Kelvin scale is what's used to
measure the temperature. So temperature,
which really stands for the T in the
captures it acronym, the temperature is what we
want to control in our images. So let's talk about how to
set Kelvin in the camera so that you can create accurate white balance
in your photographs. And just as a side note, if you're a beginner and
you just want to stay on auto white
balance, that's okay. That's a great place
to start when you find that Auto White
Balance isn't working for you or if you're in a low light shooting
scenario like Twilight, nighttime photography, or
if you're doing any type of more advanced photography
technique like focus stacking or
exposure blending when you're using
multiple exposures, you're definitely going
to want to use Kelvin. But there's nothing wrong
with auto white balance. Cameras these days
do a pretty good job with auto white balance, especially when you're
shooting in mid daylight, like I am today. But I recommend that you learn and use
Kelvin when you are ready to really start accurately setting your white balance
in your photographs. So let's take a
look at how to set white balance on the camera. What I'm going to do
here is I'm going to pull up my white
balance setting. Again, this will be different depending on the
camera you have, but usually finding white
balance is pretty easy. You take a look at your
camera model menu. And Kelvin, when you are
setting your white balance, you'll want to select
the K for Kelvin. And once you choose Kelvin, you'll be able to select
the actual Kelvin value. Now, Kelvin, the way it works, like I said, it's a scale. When you look at the scale all the way on the left side
of the scale towards 2000. So the scale really
goes 2-10 thousand. At least that's what's
on your camera. It's two to 10,000. When you're on the left hand
side of the scale near 2000, that's where the very warm yellow orange colors
of light are. When you go all the way to
the right side of the scale, when you get up to, you know, 8910000 Kelvin, that is the
cool blue side of the scale. Now, your camera actually works. When you're setting Kelvin, it actually works in
the opposite direction. So when I go to set my Kelvin, you can see I have these
numbers here 55, zero, zero. These just represent the
actual Kelvin scale numbers. And I typically only adjust
the one all the way on the left, the largest value. If you dial the Kelvin
all the way down, you'll see that the image
gets very, very blue. And so you might be
wondering, well, I'm looking at the
actual Kelvin scale, and it says 2000 is warm. Well, the reason it looks blue on your
camera when you set a very low Kelvin value is because you're basically
telling the camera, I'm looking at a
very warm scene. Say you're shooting
in golden hour. It's very warm light. It's a very kind of yellow, kind of orange color cast of light that you're
actually seeing. Say, for example, I was
shooting in Golden Hour, which I'm not now, so it's
not very warm right now. But when you dial
your Kelvin down, it's going to introduce
a blue color cast to compensate for the warm color cast that you're actually
seeing with your eyes. So the blue is an attempt of
your camera to neutralize. It's not the actual
Kelvin color itself. It's just it's attempt to
neutralize what it presumes is a warm color cast at the very low end of
the Kelvin scale. Well, if I go all
the way to the top of the Kelvin scale all
the way to the right side, if you were to
look at the scale, you'll see the image
gets very, very warm. So you would dial Kelvin up when you're shooting
in cool light, say Twilight or overcast or whenever you have
cool blue light, you would increase
the kelvin value, and the camera is going
to introduce a yellow, warm color cast again to neutralize what you are
telling it is the reality, which is that you're
seeing cool blue light. Now, you would never
really want to go all the way up to 10,000. That would be a little bit too yellow a color cast
in most situations. But as a general rule of thumb, I keep my camera usually set to about 5,000
or 5,500 Kelvin. And the reason for
that is because in most shooting scenarios,
5,000 will work. 5,000 works great. If I'm shooting in a scenario where there's
cool light, say, there's twilight, it's twilight, and it's very blue
light in my scene, I might increase
that six or 7,000. And what I'm doing
is I'm trying to match what I see with my eyes. To what I see on the
back of my screen. So right now shooting
in midday light, I'd say 5,000 works great. If I'm shooting in
warmer light, say, during golden hour, I might bring this down a
little more to 4,000. Probably not much
lower than that, or else it gets a
little bit too blue. But most of the time I
keep it around 5,000. If I really feel
like it's what I'm seeing with my eyes isn't accurate to what I'm
seeing in Leview, then I will go in and adjust the Kelvin and the other really important
thing to remember is that whatever you
set in camera for your white balance isn't it's not baked into
your raw image file. It's not permanently embedded
into your raw image file. So you can go back, you know, into Light room or
Adobe Camera Raw and adjust your white balance
using the temperature slider. And it's not going to
affect the overall image. So really, when I'm adjusting
Kelvin in my camera, it's really because I want to produce as accurate of a
white balance as possible. It just makes my life a little bit easier and post processing. It's one less thing to
have to, you know, adjust. If I want to adjust the temperature later
in post processing, it's usually more of a
creative adjustment. Maybe I, you know, artistically like
a cooler effect in a particular image than what I actually
saw with my eyes. So what you choose
in your camera can always be changed later. It's just a good practice
to use Kelvin to manually select your white balance so that you're not
letting the camera guess. If you remember we talked about not letting the
camera guess with your focus because the
camera can get it wrong. And we as a photographers
ultimately know where to focus, what the proper
white balance is, what all the proper
exposure settings are. And we don't really want
the camera to guess for us.
9. Setting Your ISO: After you've set
your white balance, the next step is
to set your ISO, and you're going to want to
use your camera's base ISO. And if this is a
new concept to you, definitely go check out that exposure settings
course where we have an entire lesson on ISO
and what base ISO is. But it's essentially
the lowest ISO on your camera in which your
camera is not amplifying light, and you will not see any
kind of noise in your image, noise being that kind of
grainy effect that is undesirable as we go to
higher and higher ISO values. So your base ISO is going to give you the cleanest
image possible. And if you don't
know what the base ISO is on your camera, just go and Google
your camera model, and it should easily come up. On my camera, if we
take a look here, my camera's base ISO is 64. So right now, I have
my ISO set to 100, and I'm just going to
dial that down to 64. And the importance of
this step is that it reminds you to bring your ISO back to base because a lot of times when
you go out shooting, if you're hand holding your
camera and if you are in a scenario where you need to change your ISO to a higher ISO, then when you start working
through this framework, you'll kind of mess
yourself up in the process if you don't
start at your base. Because later on we might change our ISO but in this
step by step workflow, as you'll see later, it's better just to start at base and then start to work your way up later on if you
actually need to. So we really want to keep
our ISO as low as possible, so we're not introducing
any noise into our image, and we're really having the
crispest best quality image we can possibly create.
10. Choosing the Right F-stop: All right, so we set
our ISO at base. Now it's time to set our FSTop. And as you learned in the
exposure fundamentals course, FSTop controls two things. First, it controls the amount of light that enters the lens. So if you remember FSTop
has to do with aperture. And the aperture is
just the hole in the lens that allows
light to go through. So we can stop that aperture down to make a very narrow hole, so less light goes through, or we can open up the aperture
to smaller F stops to let more light into our lens and expose our image,
make it brighter. So we also know that F Stop
controls depth of field. We were talking a little bit
about depth of field when we were talking about the point
in the scene to focus on. So we talked about
where to focus, ideally focusing at that
hyper focal distance. But just the point of
focus alone is not necessarily enough to get
the entire scene sharp. We really have to understand
and control our F stop in order to get our
entire scene and focus. If you remember, when we
move down to smaller F stop, so F 5.6, F four, we're going to have
less depth of field. And when we go to higher
F stop, so F eight, 11, 16, and even higher, we're going to have
more depth of field. Because we're
shooting landscapes, we generally want
more depth of field, so generally higher F stops. But when we start
getting to really, really high F stops, if we go F 16, F 22, we start to introduce an optical phenomenon
called diffraction, which will actually start
to soften our image a bit. We really want to stay in that
middle range of apertures, that middle range of F stops. And usually shooting around F eight or F 11 is a great starting point when you're shooting landscapes. I shoot around at least 90% of my images at F eight or F 11. And when you're
deciding between, do I shoot at F eight? Do I shoot at F 11, maybe even F 16, you're going to want to
choose the smallest F stop that still allows you to achieve all of the depth of field that you
want to capture. So, for example, if
I choose F eight, and I focus, but I still find that I'm not getting
my scene entirely sharp. Then I will go up to F 11. And if I find F 11 isn't enough, then I will go up to F 16. But I always want to start
and reduce my F stop. So that's the R in
the captures acronym, the captures I framework. R is for reduce your F
stop to the minimum F stop that allows you to achieve
your entire depth of field. And without having to think
about it too much, again, if you're a beginner
and you just want a quick and easy ballpark
F stop to start with, just start with F eight. It's usually the sharpest
aperture on most lenses, and it is usually
enough to get depth of field for your entire scene, especially if you don't
have something really, really close to your
lens in the foreground. So if you're shooting a scene that has massive depth of field. So if we're looking
at a scene like this, we have, you know,
all these bushes in the foreground.
We have mountains. That's a continental
divide all the way. In the distance there, we
might need to use F eight, but I'll show you a technique. At the very end of this course, when we're reviewing our images, where I'll show you
whether or not you need to increase your F stop
maybe you started F eight, maybe you need to move to F 11. Maybe you need to move to F 16. So really the important part here is choose the
minimum F stop or reduce your F stop to
the minimum that you can achieve your
entire depth of field. So let's take a look
at the camera once again and choose our FSTop. You can see that I have my
F stop here set to F 11. So what I'm going to do
is I'm just going to drop it down to F eight, and it appears that I'm getting
this entire scene sharp. Again, I'm not I don't
have anything very, very close to my foreground, and I'm also shooting
at 28 millimeters here. So on top of your F stop
affecting depth of field, your focal length affects
depth of field as well. So when you're shooting
wide angle scenes, when you're shooting
wide angle focal length, so say 28 millimeters and less, you're already
going to have more depth of field than if you're shooting at much
longer focal length, say, 100, 200 millimeters. So if I'm shooting at a wide
angle and I'm using F eight, and I don't have a subject that's very close to
me in the foreground, probably going to
have enough depth of field to shoot a
scene like this.
11. Refining Exposure: Now that we've set our FSTOp
and we've set our ISO and our white balance and many of our other important
shooting settings, it's time to balance
our exposure, and E is for exposure in
the captures it framework. So let's talk about
exposure and how we're going to want to dial
exposure in our images. You're probably
thinking at this point, Well, we've set our ISO, we've set our FSTOp, so that just leaves
shutter speed in the exposure triangle. Well, if you remember, because we're shooting an
aperture priority mode, the camera has already
set our shutter speed, so it's automatically balanced our exposure triangle
at this point. However, there's a few other things that
we need to take in consideration in order to make sure that we have
a proper exposure. And when I say proper exposure, really what I mean is an image that's not too bright
and not too dark. We really want to make
sure that we're not making an image that's so bright that we lose detail in the brightest
tones or the highlights or too dark that we lose detail in the darker
parts of the image, the darker tones or the shadows. So let's talk about how
we're going to make sure that we don't make our image
too bright or too dark. And we're going to use a
tool called the histogram. And again, we covered
the histogram in the exposure
fundamentals course. So if you're new to histograms, go back and rewatch
that before watching this lesson so you
really understand what histograms are
and how to use them. Because we're going to pull
the histogram up on my camera here and look at
how to balance it, how to adjust it when we are
shooting this photograph. So let's take a
look at the camera. And I'm just going
to pull my histogram up by going through
these settings. I'm just going to use
the display button. And again, this might be
different on your camera, depending on the type
of camera you have. Just Google how to pull up
the histogram on your camera. So now we have the
histogram right here. And if you remember, from the exposure
fundamentals course, the camera is reading the light
coming in from the scene. The cameras meter
the camera meter is evaluating the light. So I've got my camera in
matrix metering mode. It's just evaluating the
light in the entire scene, and it's choosing
a shutter speed that's balancing
out this exposure, and it's popping
out this histogram. So this histogram is showing the darker tones
all the way on the left, mid tones in the middle, and the brightest tones
all the way on the right. So we actually have quite
a lot of darker tones. You can see represented by
really the midground here. And if you also remember, the camera meter doesn't
always get it right. So even though it's
showing that one 60th of a second is the
proper shutter speed for a good exposure
in this image, it's not always accurate. And we can use the
histogram to check and make sure that we're not over or
under exposing our image. You remember from the histogram the histogram lesson in
the exposure course, when the histogram is touching the right
edge of the graph, it means that our
image is overexposed. It means that there
are pixels in this image that are pure white. And once we start touching that right edge
of the histogram, that right edge of the graph, we have blown out our image. It means it's pure white. We've lost detail in the brightest parts
of the photograph. Now, when we're looking
at the histogram, we want to make sure that the
right edge isn't touching. So right here, it actually does look like it's
touching, just barely, but I want to darken it down a little bit so that the
histogram shifts to the left, and we're not
overexposing the image. And the way to do that is to use your tool called
exposure compensation. Again, go back watch
that lesson on exposure compensation
to understand what it is and how it works. But as a refresher, it's just a button
on your camera. It's usually a plus
or minus button, like you see right there. It allows you to brighten and darken the image
without you having to change manually go in and change your FSDop
shutter speed or ISO. So I'm just going to
press that button down. And then when I dial it down, so I'm using a negative
exposure compensation, you can see the camera
meter showing me that I'm going below zero, which means it thinks I'm
darkening the image too much, but I know by looking at
the histogram I'm not I'm going to pull it down
just so I can see the right edge of
that histogram. Now, what I'm
doing, I'm going to bring the exposure
compensation back up all the way until
that right edge is right before it
touches that right edge. So right before it
blows out the image. And this is a technique that you'll hear called
exposed to the right. It just means bring the histogram all
the way to the right just enough that you're not overexposing or
blowing out your image. And sometimes when you
expose to the right, your image might
actually look too bright on the back of your camera screen, and that's okay. It's overexposed, you
could say in the moment, but in post processing, we're going to bring it
back down a little bit. Reason we want to
expose to the right and maybe increase the
exposure a little bit more than what actually looks natural without
losing detail without clipping or blowing out the
highlights is because we're going to retain more
information in the shadows. It's going to give us more light information
and detail in the shadows than if
we had exposed for what actually looks
natural with our eyes. Key here is we don't
want to go too far. Again, we don't want to push
that histogram too far to the right where we lose the detail in the brightest
parts of the image. If they become, you know, we have pixels
that are all white and there's just no
highlight detail. That's something that
we can't recover in post processing. So if we look again
at our histograms, you can see right here, the histogram is almost touching that right hand
edge, but not quite. And we can see that
we've captured pretty much all of that
detail in the left because that left
hand edge that left hand edge of that histogram isn't touching the left
edge of the graph. Doesn't always
work out that way. Sometimes, even when you bring your histogram all
the way to the right, you still might be clipping
some of the Blacks. But if you have to
choose between clipping the whites or the
brightest tones or clipping the darkest tones, choose to clip the darker tones. Unless you use some of these
more advanced techniques like exposure bracketing, which is something you
can learn down the road, always opt for clipping the Blacks over
clipping the whites, the highlights, if you have to choose between the two
for a single photograph. I also want to point out
that the other really amazing thing about
aperture priority mode, it's a point that you'll
be able to understand now is that if the light
in my scene shifts, the camera will automatically maintain the position
of the histogram. So if the scene
darkens down, say, the sun goes down and
I keep my composition, and it's much darker light
coming in through the scene, then the histogram
is still going to maintain this exposed
to the right position. This is one of the benefits of using aperture priority mode is that you don't have to keep continuously adjusting
your settings. The camera is going
to automatically keep changing the shutter speed. If I were to example, put my hand right here, you can see the shutter
speed is going down, and it's changing because
my hand is moving, but it goes down to
one 50th, one 40th, and then back to 200, but my histogram
maintains its position. So that's, again, really one
of the advantages of using aperture priority mode
over just manual mode, especially when you are working through this landscape
photography workflow.
12. Determining Shutter Speed: At this point, we
are almost ready to press the shutter
button and make our image. But the last thing
you want to consider before snapping the photo
is your shutter speed. We've talked a little
about shutter speed, and we've talked about how when you're shooting an
aperture priority, that the camera will
automatically meter the scene and then choose
your shutter speed for you. But sometimes we actually need
a specific shutter speed. So we need to understand
what to do in a scenario where we need to actually change the shutter
speed depending on, you know, whether we want motion frozen or motion blurred. Now, in a scene like this, where I have my camera
on a tripod and there's nothing really moving except maybe some
branches in the wind, I could probably get away with the shutter speed that
the camera chooses, especially in between breaks and the winds when it's very, very still, there's
nothing moving, then I could go ahead
and shoot this photo. If there is something
moving in the scene, I need to make sure that my shutter speed is fast enough that when
I make the image, there isn't going to
be any motion blur. If Augusta wind comes through, and you can see some
of the branches on the trees here can start
to move pretty rapidly. The shutter that
the camera chooses might not be the
best shutter speed. So when I'm looking
at this scene, and let's say we're
in a scenario which is actually
pretty breezy today, kind of stops and starts. You might see this tree
branch right over here. It's actually waving pretty
heavily in the breeze. If I shoot this scene, let's take a look at
our shutter speed. It's one 200th of a second. That may or may not be fast
enough to freeze motion. So let's say that it's not. How would I increase my shutter speed without
being in manual mode? Well, the answer to
that is very simple. All you have to do is
increase your ISO. So if I just press my ISO
button and increase my ISO, say something like 200 ISO 200, you can see now my
shutter speed is one sixth 40th of a second, and that should
be plenty fast to freeze the motion of this tree branch
flowing in the wind. Now, sometimes you might
want a longer shutter speed, then your camera
automatically chooses. So let's say in a
different scenario, I'm going to go
back to base ISO. So our shutter speed
will get longer. But say we want a
shutter speed that's longer than one
200th of a second. Well, in that situation, what we could do we could
actually do a few things. So we could grab our exposure
compensation button. We could brighten the image up, and you can see that
the shutter speed is getting slower as I
brighten the image. And obviously, it's way
over exposed because our histogram is just
really piling up against that right
edge of the graph. So we have lots of blown
out pixels in the sky. We're losing detail in the sky. But that is one way that you could slow your
shutter speed down. Other option, if we're thinking about our
exposure triangle, we could go to a higher
F stop because remember, higher F stops will allow less
light in through the lens, and then our shutter speed will automatically slow down
to compensate for that, to allow more light to come
in and expose the image. So if I go, say, to F 16, now my shutter speed is
one 50th of a second. And F 16 is a great way to go if you feel like you need to lengthen
your shutter speed. You're not going to probably
see too much diffraction. It's probably not going to
be too much of an issue. Eight is really ideal, but F 16 works if you need
it in a specific situation. So. To sum that up, if you need a faster shutter
speed, increase your ISO. Increase it enough
to where you get a shutter speed that freezes the motion that
you want to freeze. If you want to slow down
your shutter speed, then go to a higher F stop. Those are the two simplest ways to change your shutter speed without being in manual
mode and having to go in and manually change
your shutter speed. So really, the two ways
that I want you to think about your scene when you are thinking
about shutter speed. So when you're at
the very end of this captures it framework, right before you
shoot the image, I want you to think
about whether there's something moving
in your scene or not. So if there's nothing
moving in your scene, that includes your camera. Your camera needs
to be on a tripod because if you're hand holding, then yes, something is moving in the scene,
your camera's moving. So if there's nothing
moving in the scene, there's no trees blowing, there's no water moving, there's no flowers
blowing in the wind. Then you can just go ahead and shoot the image right after
you adjust your exposure. If there is something
moving in the scene, if the answer is yes, there is something moving, then you're going to have
to think in terms of, do I raise my ISO and increase my shutter
speed to freeze motion? Or do I keep my ISO at
base and then go to a higher F stop in order to
lengthen my shutter speed? Maybe you want to
capture flowing water and you want a
longer shutter speed to capture kind of that beautiful soft motion
blur in the water. So that is really how to think about shutter
speed when you're at the very end of this framework right before you
capture your image. So once you get the shutter
speed that you want, either by adjusting
your ISO or adjusting your F stop or maybe
you don't need to adjust anything at all, then press the shutter button
and create your image.
13. Image Review: All right, now we've
made it all the way to the end of the workflow
before we create our image. We have our exposure
setting set, our F Stop, shutter speed, ISO. We set our white balance, our focus point, we focused. We did everything we need to do before we create the image. So here we're going
to snap the photo, and then we're going to review the image in image playback. This is a really, really
essential step in this workflow because I know you've all been
there where you go out, capture something
really exciting. You're really excited
about the photograph, and then you get home
and realize that maybe the whole scene isn't sharp like
you thought it was, or maybe you
accidentally blew out the sky and lost a
little bit of detail in the shadows or something
went wrong that you didn't notice
until you got home. So reviewing the image
or image review, which is the eye and the
captures it framework, is going to help
prevent you from making mistakes in
the field and then not realizing it
until you get home. So let's go ahead and snap our photo that
we have all set up. So we have all of
our setting set. We're at Base ISO F eight, shutter speed, one
60th of a second. I'm just going to go ahead and press the shutter
button, snap the image. So let's talk about
image playback. So most of the time
on your camera, you'll have the
little play button, which will allow you to review the image that you just shot. When you're reviewing
your image, I want you to remember something that I
call the 341 method that just helps me
remember what I want to check in
my image review. So three in the framework in this method stands for
three focus points. I want to check three points
of focus in this photograph. First, I want to look at the point that I
actually focused on. So I'm just going
to press Okay here, and this will allow me
to zoom in to 100%. And this might again be
different on your camera, but find the button that
allows you to zoom in to 100% on your camera so you can really see if you've
got your focus accurate. So I'm looking at the
point I focused on. This was the hyper
focal distance and the lessons on focusing. And because this is sharp,
I'm going to move on. If this wasn't sharp, I would go back and just reshoot the photo because if the point that you focus on isn't sharp, the other areas of your image probably aren't
going to sharp either. So I would just stop right here, go back and remake the image. Now, if your first
focus point is sharp, the next point to
look at to ensure is sharp is the bottom
of your frame, look for the closest object
and see if that is sharp. So I have all these
bushes in the foreground. I just want to go make sure
that those are sharp as well. So that is the second
point that you want to ensure is sharp. And that looks pretty
good to me here. The third point you want
to make sure is sharp is whatever is the furthest
object in your scene. So in this scene,
the furthest object are the mountains
in the background, the snow capped mountains, the continental
divide back there. And I'm just going to
look at those mountains and ensure that they are sharp. And they do indeed
here, look quite sharp. So I was able to focus or
use an F stop of F eight, still capture the entire
depth of field in this scene. If one of these
points wasn't sharp, there's a few things
that I could do. I could go to a higher F stop. I could go to F 11 or F 16, try again, see if the foreground in the
background or sharp. Or I could change
my focus point. I could refocus a little bit closer or refocus a
little bit further because maybe I didn't quite get that hyperfocal distance quite as accurate as I thought I did. But in this scene, it looks like the
closest object, the furthest object is sharp. And because those three
points are in focus, I can I can say that I captured the entire depth of field in this scene sharp. If we capture the closest
and furthest object sharp, then everything in between
is going to be in focus. I nailed the depth
of field here. So we got the three focus
points in the 341 method. So what is the four? Four stands for, go
back to Image playback. Four stands for check
all four histograms. So right now, my image playback isn't showing the histograms. I'm going to scroll through
my image playback menu. I'm just going to
press the down button. If you're using a icon, it's also probably
the same on yours. I'm just going to press down, and it pulls up four histograms. You'll see the top histogram
is the white histogram. Really, what that is is
it's the RGB histogram. But really, what I want
to do is I want to make sure that none of these histograms are touching the right hand edge of
each of their graphs. So in other words, I don't want the RGB
histogram touching, and I don't want any of these three color
histograms touching. I won't go into too
much depth about what each of these
histograms are. Definitely check
out the resources that I attach to this video that explain each of
these histograms. But basically, what
they're showing are the individual color channels. And you can see,
hopefully you can see, I go back here that
the blue histogram is actually touching the right
hand side of the graph. There might be a
little glare there, but the blue histogram is touching the right hand
edge of the graph. So what I'll probably
have to do is go back to the image and using
my exposure compensation, darken this image down
just a little bit. Then I'll retake the image. We already know it's sharp, and I'll check that
blue histogram again. And there it actually
looks a lot better. I don't might be
touching a little bit, but we'll just call
that good for now. I'm just going to darken it down using exposure compensation until I'm sure that none of these histograms
are touching. Now, if I'm sure that
they're not touching, then I can move on to the
one in the 341 method is one last check of
exposure using the blinkis the exposure blinkis
and exposure blinkis just another word for
highlight warning is just a setting you
can set on your camera. If you just Google your
camera and highlight warning, turn on the highlight warning. What that does, I'm
just going to go back so we don't see
these histograms anymore, is it will flash or blink, hence the name
blinkis the areas of your image that are overexposed. So what you're seeing here, actually, it might be a
little bit hard to see, but there actually are
some little pixels in the back by the top of the
mountains that are flashing. So what that means is the pixels that are blinking
are overexposed. They've been blown
out. I'm actually going to make this
more obvious for you. I'm going to use
exposure compensation to brighten the image
up way too bright. Can see we're really blowing out the image off the right
hand edge of a histogram. Just going to create that photo, and now you can really see
those blinkis flashing. And you can see it in the snow. You can see it in the sky and
the snow on the mountains. This image is way over exposed, and we've lost detail in all of those areas that
are flashing at us. It just means that those
pixels are pure white. And if we were to go home
and edit this image, we wouldn't be able to
recover any of that detail, and that really is a problem. So what I'm going to do,
I'm just going to darken this image down again,
exposure compensation. Really gonna bring it down
more than I think I need to. And I will create this image. And so my one last
check right now, I've darkened it down enough, I do not see the blinky. So this is what I would consider a well balanced exposure that's going to maintain all of
the details in this scene. So as a review, when you are
reviewing your image, remember the 341 method
or the 341 rule. Check your three focus points. You focal point you focused on, closest object, furthest object,
make sure they're sharp. Then find your histograms,
check four histograms. Make sure they're not touching the right hand
edge of the graph, both your RGB histogram, your red histogram green and blue color channel histograms. And then one last
check of your exposure with your blinkis ensure that your blinkys aren't flashing
anywhere in your scene. And you can be pretty confident at that point that you have dialed in the proper exposure
for this photograph. So once you've reviewed your
image using this 341 method, you've ensured that
everything is sharp and you captured all of the tones
in your image properly, so you're not blowing
out the highlights. That is really all
there is to it. We started with our composition. I walked you through this
entire workflow step by step. You can use this to
set up scenes from grand landscapes
like you're looking at here to intimate landscapes. It will really give you a
solid foundation so you know what to do in any
shooting scenario, no matter what conditions you're facing and really understand when to choose specific
settings and why without ever wondering or guessing, am I doing
the right thing? Am I choosing the
right settings? Hopefully this really
helped you out. Hopefully this gave really a solid understanding
of how to set up your camera and move
confidently and systematically through your
camera shooting workflow. I hope you enjoyed this course. Thank you again for being here. I look forward to seeing you in the next course
soon. Thanks, y'all.
14. Complete Workflow Overview: That you've made it through
this entire course, let's put everything together. I've walked you through
the entire step by step captures it workflow. But let's review this framework and work through a
scenario together, putting this entire captures
it framework together. Again, this is the
system that I use to approach virtually every landscape photograph
that I take. Let's head over to the camera, and you can say hi to lamb chop, by the way. Hey, lamb chop. My adventure buddy here helping me out with
this course today. Alright. So for this image, I've set up a little bit of
a different composition. I've zoomed in a little bit to, let's see, 105
millimeters on my lens. So I've tightened up this
composition a little bit. You can see the mountains in the background a
little bit better. So C for composition, I've got my composition set, and I made sure that
my tripod is stable. I've leveled out the scene. I brought out my camera
level so that green line lines up horizontal and
I know my camera is level. The next step A, is to make sure that the camera is in
aperture priority mode. So like I always have it set. I pretty much never take it off aperture priority,
maybe manual sometimes. Aperture priority is set. Next, we need to find P, our point of focus. So for this scene, I'll
probably focus since we're at less than 150 millimeters. I think I'm just going to focus about a third of the
way into the scene. That should give me
enough depth of field, at least to start before
we start changing our F Stop in a moment here. I'm going to move my focus point up towards a third
into the scene. There it is.Times it's
hard to see in this glare. So I've got my focus
point set right there, one third of the
way into the scene. The next thing I'm
going to do, and again, remember, I have B
button focus set. I'm on single point spot focus. And next, I'm just
going to zoom in 100%, activate autofocus
with my back button. And it looks pretty sharp to me. I can mess with the focus ring
on the barrel of my lens, just dial that in. So it's as sharp as possible. That looks pretty good.
I will zoom out of 100%. The next step is temperature, which really just
means white balance. We're going to set
the white balance since T works better
for the acronym. So to set the white balance, I'm just going to go into my camera settings where I
can access white balance. I'm going to go into Kelvin. We see that Kelvin scale here, and could maybe go down to 4,000. I think
that's too blue. If I go up to six, I think that's too warm. Really when you're
shooting in daylight, I'm shooting pretty much
in the middle of the day. 5,500 works great, so
I'm just going to keep it at that. All right. So the next step is
U for US base ISO. And right now, I am at ISO 64, which is the base
ISO at my camera, but I always just like
to double check that I haven't increased in my
previous photo session. Maybe in the last
time I was shooting, it was up at 4800 or
something like that. But right now, I already
have it set to base ISO 64. Our next step is R, reduce your F stop to the minimum F stop you need to achieve the entire
depth of field. In order to achieve the entire depth of
field in this scene, I'm probably going to
have to start at F eight, and then likely move to F 11. I would probably even just
based off my experience, move to F 11, but we'll just start at F eight. If I was going to go to F 5.6, I would not have enough
depth of field to capture this really big depth of field
from the tree in the back. All the way to the
mountains in the distance. So I'm going to keep it F eight. Again, I recommend
usually choosing F eight, but that's going to be
the minimum F stop or the reduced F stop
needed to capture this entire depth of
field, at least to start. The next step in the captures
it framework is exposure. So we want to look at exposure. We want to refine
exposure to make sure that the scene isn't
too bright or too dark. And what I'm going to do is I'm going to pull
up my histogram. I'll just go through my display settings until I
see the histogram pop up. And you can see there's
just a little bit of bright tones bunching up on the right hand edge of
the histogram there. So right away, I'm going to use my exposure compensation
just to darken this scene down because I
really want to bring it down enough so that I can see the
right edge of the histogram. And once I feel like the entire histogram or at least the right
edge is visible, there's nothing hiding out. Sometimes these pixels will hide on the right hand
side of the graph, and you really have to darken
it down so you can see, you know, all of the tones
appear in the histogram. Once I can see all the
tones on the histogram, then I'm going to, again, use my exposure compensation and dial that
exposure compensation up all the way until that right edge just before it touches the right
hand side of the graph, again, once it touches the
graph, we've overexposed. And this is a great scene
to demonstrate this because a lot of times the
snow can be tricky. We think we have all
the detail captured, but because snow is white, it can kind of elude us, sometimes actually be
overexposed and we can lose some of the
details in the snow. So I think something
right there is good. But again, well in image review, make sure that we
didn't blow out any of the highlights there
in the snow or the sky. Our next step in this workflow is to
check our shutter speed. So for a scene like this, again, there isn't much
moving in this scene, like we discussed before. If we take a look at the
scene in front of us, the only thing that
I see moving are the branches in the trees over
here and on the left side, as well, the branches
in these pine trees. And that could become
problematic if I was shooting in lower light, if the shutter speed
was much lower, if it was, you know, one 50th of a second or lower, I might see that motion blur of the blowing tree
limbs in the wind. But there are quite a few breaks in the wind going on today. So I really would
probably just wait for the wind to stop
before I shot the image. So I do think 13 20th of a second is plenty fast to
freeze motion in this scene. Again, if there was
maybe running water, I might move to a higher F stop. Or if say, the trees are blowing wildly in the wind and my
shutter speed was much lower, I probably would increase my ISO because as
I increase ISO, that shutter speed would freeze. But the settings
as they are now, that should be fast enough to freeze the motion of the
branches in the wind. So we've checked
our shutter speed. The second S after shutter
speed is to snap the image. So I am just going to
press the shutter button. We have everything set. And remember, I have
a two second delay. So the image waits or the camera waits 2 seconds before it
fires off that photograph, and then we have our
final exposure here. Last part of this workflow, the I part of the captures it
framework is image review, and then try again if necessary. So let's talk about
reviewing this image. So we want to go
into image playback. Automatically pops up on my
camera that you'll press that play button on your camera
to review your image. And remember, we discussed the 341 method or the 341
system of reviewing your image. So three stands for
three points of focus. So I'm going to zoom in 100% to view the focus point
that we focused on about a third of the
way into the scene, and that looks very
sharp to my eyes. The next focus point
I'm going to look at is the point at the
very bottom of the scene, the object that's closest to us. And if I look around
through the scene, it does appear that
that object is sharp. Looking for other objects
that might be closer, as well, and that
looks good to my eyes. And the third point is the object that is furthest
away in the scene. And those would
be the mountains. I would say that the mountains look a little bit too
soft for my eyes. But what I'm going to do is
I'm immediately going to try again the last step in the
captures it framework, the Try again if you find in your image review
that you didn't quite capture what you
wanted to capture. So what I'm going to do in
order to increase the depth of field since those mountains were a little bit too soft
in the background. What I'm going to do is
move to a higher F stop. So I'm going to go to F 11. I'm just going to go one stop. And you'll notice what happened because we're in
aperture priority mode. The histogram stays the same. The shutter speed got
slower to account for that. So I still think 1/1 60th of a second is going to
be fast enough to freeze the motion of the trees blowing in
the wind back there. But we can always check that
in image review, as well. So let's go ahead. I'm going
to create this image again. And we'll do that
check one more time. I'm going to zoom in,
check the focal point, zoom down, check the
closest object that I want to be sharp.
That looks good. And then I'm going to
check the background, and that definitely looks
sharper to my eyes. I definitely looks sharper. So I'm going to keep F 11. I don't think I need
to go to F 16 here. The next step in the 341
method of image review, we're going to check
all four histograms. Now, just looking at these
histograms here, remember, RGB, then we have
the red channel, green channel, blue channel. They look good to
my eyes right now. I did darken down this scene a little bit with
exposure compensation, but I don't it doesn't look like any of these histograms are touching the
right hand edge. And even looking at the left
hand side of the histogram, it doesn't look like
the left hand edge is touching the left side
of the graph as well, which means that I didn't
clip any of the blacks. He's trying to pay attention
to the highlights, the whites first because it's a lot more noticeable
and it's a lot more problematic later
on when we process the image if the highlights are clipped than if the
Blacks are clipped. So highlights look good. The darks, the
shadows look good. This looks like a well
balanced exposure. Now the last thing
I'm going to do the one in the 341 method, I'm going to take one
last check of exposure. Go back to playback. One last check of exposure
using the blinkis. And I do not just
looking at this image. I don't see any pixels blinking. I don't see anything
flashing to my eyes. So I can confidently say that I didn't blow
out this image. I didn't clip the brightest
parts of this image. And that's really
important before we pack up and leave this scene. So that's it. That is all there is to it
in the captures framework. The more you follow this system, the more intuitive
it will become, you won't have to stop and
think so hard about each step. It'll just come
naturally to you. So I hope all of
that helps you out. And, yeah, that's it.
Take care of you one.
 Meredith Fontana, Landscape photographer & educator