Transcripts
1. Trailer: In this lesson on two
point perspective, we're going to take a look
at what we can do to not only make our compositions
look more dynamic, but also gain
greater control over how we size and place
objects in a scene. Throughout this
lesson, we'll cover topics like camera movements, how to create repetition, and also how to deal with
both even and odd placements, all the while creating our very own two point
perspective scene. At the end of it, there will be an assignment for
you to complete. If you've learned the basics of two point perspective and want to take the
next step forward, then this is the class for
you, so let's get going.
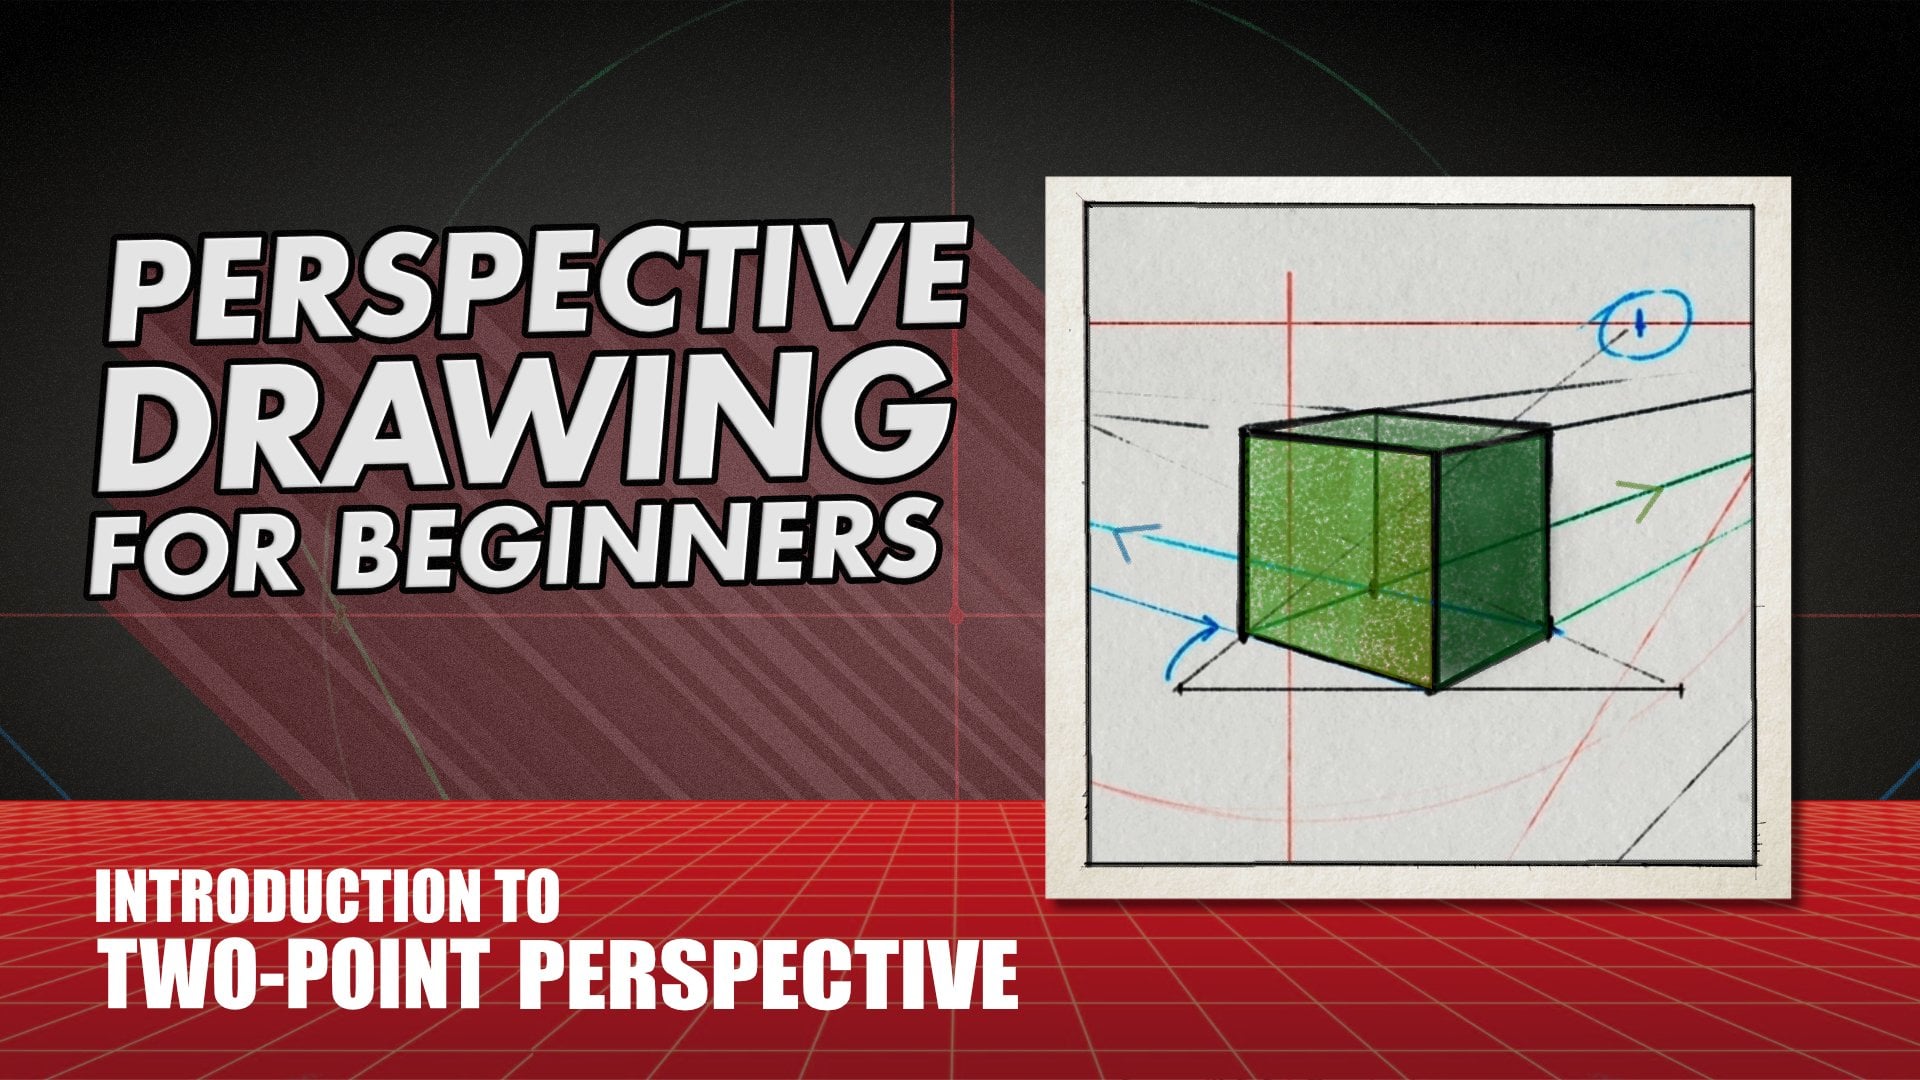
2. Basic Differences Between One and Two Point: Okay, let's just do an overview
of the basic differences 1-2 point perspective
before we begin. In one point perspective, all objects in now
seen will converge to a single point along the horizon line called
the vanishing point. Our objects will always have one plane running parallel with the imaginary picture plane
with the objects movements limited to up down left
and right positions. In one point perspective, all horizontals are
truly horizontal, and all verticals
are truly vertical. In two point perspective, our object will diminish to two vanishing points
along the horizon line. The moment an object rotates, even the slightest amount
will shift it from being a one point to
82 point perspective. We no longer have
true horizontals, but we do retain true verticals. So that's the basic difference that we need to
understand first. Now, this lesson is
going to build upon the previous introduction
to two point perspective, where we covered these
basics in far more detail. What this lesson is going to do is introduce to us new concepts that will allow us to create far more dynamic and
interesting compositions. We'll learn not only to be more in control of
positioning things, but also in our
measuring as well. Now, if you haven't watched
the previous class, you'll still be able to follow along with this one because we will be recapping what we learned there as we go along. But if you want the fest experience with the
subject matter, it's recommended you also
watch that class as well. But there will still be
a lot to learn here. So let's start with setting things up for our
perspective drawing.
3. Demo Part 1: Initial Set Up: So we always start
with our horizon line in perspective drawing. This also doubles as our viewers eye line in one
and two point perspective. They do separate in
three point perspective, but we'll cover that
at a later date. So I've just marked
that down like so. Now, we need to put in our center or vision line,
so I'll grab the ruler. And this is going to run perpendicular to
our horizon line, so I'll just straighten
this up like so. And just somewhere roughly
in the middle here, just put in a nice straight line up and down just like so, and we'll mark it as such
as our center vision line. It's always good
practice just to mark things as you go along
in perspective drawing, just helps make things
a little bit clearer. So we've got that down below
we've got our station point. And we'll just reiterate
again, what this is, the station point is a two
dimensional representation of where our viewer is standing relative to the picture plane. So if our viewer is standing 15 feet away from
the picture plane, this is the equivalent distance just in two dimensional form. And this is also useful
because it allows us to create accurate depth and
rotation in our images. So we've got these two
lines intersecting here now if we imagine
ourselves as the viewer, this cross section follows us around the entirety of our life. So wherever we turn ahead, that cross section follows us. Now, we need to establish
what's called our c of vision, and we'll need a
protractor here to help us out because
what we're trying to do in this setup is to try to simulate an image that is as close as we can get to how
we as humans view the world. So what we need to do
is mark out an area here out to our horizon
line from our station point of 60 degrees because that's approximately the width
that we see the world in. So just like so, all the way up to
our horizon line. And just to help make this
area a little more obvious, we'll go up here
and grab a compass and encircle the
area just like so. And I'll mark that down, so it connects all the
way around like that and put this down as
the cone of vision, which as mentioned is 60 degrees total from
our station point, or you could also say that it's 30 degrees either side of
our center of vision line. So I'll just jot that
down here as well. So 60 degrees there or
30 degrees either side, whichever it works best for you. Now, this isn't an
exact measurement, but it's as close as we get to the approximation
of human vision. Now, we're not
actually limited to this width for our
station point. We can change it to
really anything we want. It's going to produce
different results in the same way that Using different camera lenses
on a camera is going to give us a different depth
of field to our image. So we've got full control over illustrations in the
same way that we can control our camera settings. Now, the reason we want to mark this area down is because
inside this circle, things are going to look as
we would expect them to. But outside this area, we're going to get
distortion taking place. We can't actually see
this distortion because that con of vision follows
us around like that axis, but we can get an idea of what things would look like
outside this area. So, for instance, drawing a box inside our con vision would make the box
look pretty normal. That same box being placed outside in this distorted area. We'll suddenly start to
stretch and warp in its shape. Now, we don't have
to stay inside the con of vision for
illustrations and paintings. If we really want to get
dynamic with our work, we can very much start
to draw outside of it, but we do want to be
mindful of where it is. Consider this cono vision area a little bit of a safety barrier that we can then crop off to whatever canvas
size that we want. So just be mindful of
that when you're drawing. So this is our initial setup. Done. Let's move on
to the next part.
4. Thinking Like a Camera Man: One of the things that we
want to be aware of with perspective drawing
is that we're essentially replicating
what a camera can do. And so if we're
replicating a camera it means we have full control
over how it's positioned. Essentially, we really want
to think of ourselves as being our own cameraman when
setting up our compositions. We've established we have a cross access in the
middle of our sight that happens as a result of our eye line and our center
vision line intersecting. Now, normally, when we start learning two
point perspective, we naturally gravitate towards drawing structures
within these guidelines, and for good reason because
it's an easy starting point. But this point of
view is not always conducive of dynamic and
interesting imagery. So what do we do about this? Well, we simply rotate
our cameras position, and we do this by establishing our initial construction outside the center line of vision. By placing this initial landmark to the left of our
center of vision, it means we've rotated our
camera slightly to the right. And we can prove
this with ourselves. If we close one eye and
hold a pencil up to our open eye and turn our
head slightly to the right, we'll see that the pencil
shifts towards the left. So this one little change in positioning has made things
look a lot more interesting. And if we combine this with both the vertical and horizontal movements that
we've already learned, we get even more
dynamic compositions. Now, it's not just
placing things off center that can make things
look more interesting. We can use the area
outside of our cone of vision to help create some
more dynamic imagery. As mentioned, the con of
vision is a little bit like a safety barrier for making things look
natural to our eyes, but we can step
outside that area. For instance, if we're
doing some comic books and we've got some superheroes
fighting the big bad guy, setting things outside the
code of vision can really make the action look a lot more
dynamic and energetic. We do have to be careful a little bit here
with how far we go, but we can still create some really dynamic compositions using this distorted area. Another tool at our disposal
is simply framing things. If we're not 100% sure
how our scene can look, we can simply test
out a couple of cropping options to see which works best for
our composition. So when setting up our scene, we want to think a little
bit more like a cameraman.
5. Demo Part 2: 90 Degree Vanishing Points: So we've reduced the opacity
of our initial setup, and this is the
area that we've got framed that we're going
to frame our image in. There's not going to be too much distortion
taking place here. We're well inside the d of
vision for most of this. So I wanted to establish now
our two vanishing points, and this first choice
is going to be a random place along
our horizon line. But because we want those genuine 90 degree corners
in our image here, not just guesswork,
we need to put our second vanishing point
in a specific position. So by virtue of us putting
this vanishing point here, we automatically know where vanishing point
number two has to be, and it has to be 90 degrees, exactly 90 degrees from
our station point. So we're going all the way down from here for our first
vanishing point now. If we align our ruler, exactly at 90 degrees
from the station point. This is going to
give us precisely where vanishing point
number two is going to be, or vanishing point right, and we'll label them as
vanishing point left and vanishing point
right respectively. So we are 100% committed to this right vanishing
point the moment we go through our station
point at 90 degrees, because what we're doing
here is we're translating this flat square area up into
three dimensional space, and that's going to
give us those genuine 90 degree corners in our image.
6. Off Page Vanishing Points: No doubt, one of
the questions that comes to mind with
perspective drawing is, what do we do when
the vanishing points are well off our page? Well, there's a couple of things we can do to work around this. The most obvious
thing that we can do is simply add width
to our canvas, either by sticking
together a couple of pieces of scrap paper
if we're working with pencils and rulers or increasing the file size dimensions if
we're working digitally. This isn't always a
practical solution and sometimes just ends up being a bit more trouble
than it's worth. An easiest solution is to simply create a reference
guide for ourselves within the Canvas dimensions
that will point to a vanishing point far
off into the distance. It's a pretty
straightforward thing to do. So here we have our horizon line and our center vision line, all of which has been
cut off by our border. Our goal is to place
a vanishing point way off into the distance
outside this border. So how do we do this exactly? Well, first, we need to subdivide our center
of vision line into equal units from its bottom edge all the way up to
the horizon line. We preferably want to use an
even number of units here. We can use odd numbers, but it just takes a little
bit more worth to figure out, so even numbers are
always your best bet. Once our center vision
line is divided, we want to establish a
single diminishment line at its base to the direction we want our vanishing
point to be. This can be any
angle that we want. We just need to
establish something that points towards a distant
vanishing point. This will create a
new landmark for us on the vertical
edge of our canvas. From here, we want to do the
exact same thing that we did with our center of
vision line and divide it into equal units. The end result will be
this new reference line in our center of vision line, both having the same number of units that are
proportional to each other. All we have to do then is join these respective measurements
up with each other, and that's going to
create guidelines that will meet up at our
distant vanishing point. If we want to get more refined
with these guidelines, we can subdivide these
units even more, or if we're confident
enough with ourselves, we can just eyeball things and make extra
marks if required. If we want to take things
above the horizon line, we simply need to extend these same proportional units above it and measure
things from there. If we want a second vanishing
point off the page, we simply have to duplicate exactly what we did
on the opposite side. Now, how far or near the
vanishing points are going to be to the Canvas
border is entirely up to you. You just have to ensure that
your vertical references are all split proportionally into
the same number of units. So for instance,
if your center of vision line is split
into six units, your vertical reference
edges also need to be split up into six
units proportionally. This might be a
convenient solution to our canvas problem, but it still has a
lot of drawbacks. Mostly that there is
still a little bit of guesswork as to just
how exact we are being. So, in most cases, the best solution for dealing
with vanishing points often to the distance is to simply do smaller thumbnail
sketches first. And once we rough out the distances and
positioning of things, blow that up to a
much larger scale.
7. Demo Part 3 - Measuring Lines: We're going to create something that's a
little bit off centered. Our camera is essentially
turning to the right here, and this is going to be our
vertical measurement line or our true height line, as you could also call it. This is going to be the corner of a room that we're
going to create. What we want to do
now is to establish some some units of measurement, and I'm just going to use half a centimeter increments here. You can use whatever
increments that you want. We've got four units of
measurement down here. This is going to be
our ground plane. This is going to
help us establish not only the measurements
for the rest of our room, but also the measurement for
the camera's height as well. I just want to extend
these same units of measurement above the
horizon line as well. It's always good to
go just a little bit further than what
you actually need. Your measurements,
just like that there. So this is our ground plane, and so I'm going to declare these units as being equal
to 1 ft in measurement. So if we go back to
our ground line and count down by four, well, if our horizon line and our
eye level are the same thing, it means that our camera is being positioned four
feet from the ground. Now using feet, but you could use meters, yards, millimeters, whatever you want, really, it's a completely arbitrary
decision that's up to you. So we also need though a horizontal measurement line that that's equal
to our vertical. So just lightly putting in
a line there and again, using half centimeter increments all the way across there, and just going a bit further than probably
what we need to again, and all the way on
the right as well. So it's super important that whatever we measure vertically, we have to replicate that
horizontally as well, all the way across there. Again, if we are declaring that our vertical measurements
are 1 ft in height, that means that
these measurements here are also going
to be 1 ft as well. This is our initial setup
for our measurements, but at present, things are still in a
two dimensional space. We need to swing this stuff out into a two point perspective. Let's look at doing that next.
8. Demo Part 4 - Measuring Points: Okay, so we need to start
establishing our environment? We're creating a room. So I'll just go from our
first vanishing point over to our corner landmark
and line it up and draw it over and criss cross things over on the
left hand side as well. Our goal here is to take that horizontal
measurement line and to translate it
onto these planes. So we'll take a
little bit of work, but it will be worth it. Now, how do we translate
the units along our measurement line onto these new planes in perspective. Well, we have to go
through the station point. If we take the
measurement between our station point and our
right vanishing point, which in this case is 18.8. And what we're doing
here is that we're taking this two
dimensional measurement, and we're swinging it up
into a three D measurement. So we're going from our
right vanishing point, taking the exact same
measurement that it is from the station point and swinging it up to
the horizon line, and that's going to give us
our measuring point right, which is the equivalent distance to our vanishing point
right to the station point. So we're swinging that up from a two dimensional viewpoint into a three
dimensional viewpoint. And we want to do
the exact same thing on the other side as well. So we're taking our
left vanishing point, getting the distance there
to the station point, which in this case is 19, which is an easy
number to remember. And again, taking that
exact same measurement from our vanishing point
along the horizon line, and I'll just zoom in there
to make it easier to see, marking that down,
and we'll mark that as measuring point left, which is the exact same distance as vanishing point left
is to the station point, we've just taken it from a two dimensional perspective into a three dimensional
perspective. So we're going to take
these horizontal units and through our
measuring point right, we're going to strike
them through until they hit the respective planes. If we line that
up, just like so, and we want to be careful here. So each time that we move across from our
measuring point right, We are shifting over those
units onto this plane. Just one at a time and
take it slowly here. As you can start to see, They're gradually
getting further and further apart
from each other, which means they
are intersecting precisely with that right plane, which is exactly what we want. So we've shifted
those units along the two dimensional
horizontal measuring line onto our three d environment. And that's going along
the right plane, which, of course, is going all the way back to vanishing point right. So we want to do the
exact same thing on the other side off to our
left measuring point. And again, just
taking it slowly, shifting these units
one at a time across. You can draw guides all the way back to the measuring
points if you want or you could just let the
ruler do most of the work. There's less clean
up afterwards, and just gradually go
one at a time across, making sure we don't
miss any as well. Very easy to do sometimes. As we declared earlier, those
initial measurement lines are 1 ft increments, which means that we
are now shifting those 1 ft increments
into three D space. We only have to worry about the horizontal measurement
line here. The vertical one we keep as is because in one and
two point perspective, verticals are always
true verticals. Anything off that, and we're
in three point perspective, which is a lesson
for another day. So just finishing this off here. Now, how accurate you want
to be with all this stuff, it's entirely up to you don't
necessarily have to go to this level of precision
for your art. If you want to ye all things, by all means, do it here, but what is important
is knowing that the option here
exists for you to be able to do this level of accuracy in your
drawings if you so wish. So that's our measurement line
shifted into perspective. Let's now start to
draw some things up.
9. Advanced Measuring: Okay. In our last
perspective class, we learned how we can
use the measuring line to be able to draw a
grid for ourselves. If you haven't watched
that demonstration, go and check that
out for more detail because it is
important to learn. Now grids are great because
it makes our lives a little bit easier when it comes to
constructing our scenes. If we need our environment
to have exact measurements or need objects to be in
a specific place or size, we simply refer to our grid
and mark things accordingly. Grids are definitely
something worth practicing, especially if you're
just starting out with perspective drawing. So don't skip out on
practicing grids. But no doubt, we
want to eventually get to the stage where
we're able to do things a little more informally
and not have to contend with a page full
of criss crossing lines. But how do we keep
things informal whilst also keeping
things measured? What can we do
about that exactly? Well, luckily, we can do this. We simply bypass the grid by using our measuring line
to create our landmarks. In our previous two
point perspective class, we briefly touched on
creating a box with a specific size using only
the measurement lines. We want to expand
that now to create objects of not only
a specific size, but also place them in a specific position within
our three d environment. So after we've shifted our measuring line
into perspective, let's say we want to have a square plane
measuring 1 ft by 1 ft, that's positioned
two feet out from the right wall and three
feet out from the left wall. Instead of creating a grid, we want to work with
both the measuring line and the vanishing points. So if we're moving our plane
two feet in this direction, we first want to count one, two spaces across like
this and mark it like so. Then if we're pushing it out three feet from
the other wall, we want to do the exact
same, so one, two, three, in this direction and
mark that down as such. From there, we want to go
to our vanishing points and we can eyeball things
a little bit here, and criss cross these
landmarks together, and that's going to give
us the corner marker for our square plane. Now, we have to
remember that this is going to be the back
corner to our plane. To create the actual
square plane itself, we have to go back to
our measuring lines. And if we're doing a
1 ft by 1 ft square, we simply mark 1 ft across from each
side, just like this. And then once
again, move over to our vanishing points and
criss cross things over. And just like that, we have the ground plane
exactly where we want it to. So without any grids, we've got the exact
location that we want. And of course, if we wanted to, we can build a box from here. So let's just say, for instance, that we want this box to
be three foot in height, So we'll go back to our
vertical measurement line here, count one, two, three up. Align our vanishing point up to that marker,
strike it through. And so what we're
doing is we're moving this height measurement
over to where our box is. That's our vertical landmark for our boxes height
that we've moved. Now we need to bring it
forward towards the camera, so we'll align it up to our
left vanishing point now. Strike that all the way through, and I'll just draw it lightly. Don't have to draw too dark. Then we just go to the
front corner of our plane, draw vertical straight
up from that, and that's going to give
us all the info that we need to now complete our box, and we can just put in the additional planes
here to finish it off. So we're able to put
exact landmarks down, that still allows
to create accuracy, all the while not having to put our full grid in the scene. Now, it is important to remember that this isn't
necessarily a short cut, but rather a slightly
more advanced way of building a scene
out accurately. So it is recommended
that once you get into the habit of
building grids out, give this a shot yourself.
10. Demo Part 5 - Room Construction: This is a little
thumbnail sketch of the room I plan to
put together here, so it may look
exactly like this so. Somewhat like this, we'll
figure it out along the way. The first thing I want
to put into this scene, and this is our corner
landmark, of course. That's the corner of our room. We'll put a door
in first and we'll make it three feet
out from the corner. And so I need to establish how tall this door
is going to be. We'll just put a line
up here for the moment. And I think we'll
say that the door is approximately about
6.5 feet high. We'll just eyeball
things here and split the difference between
these two landmarks. We don't always have
to use them exactly. Just strike that all the
way through like this, and that's going to get us
6.5 feet for our doors. Height. It's probably about
average for a door size. We'll say it's about three
feet across as well. That's a nice easy number
to put down there, and we'll just put a bit of a framing around the
door as well and align that up to our
last vanishing point and there is the position
and size of our door. We'll move on to something else, and we'll just write this
down actually 6.5 by three. That's the size of our
door. We'll put a bed in. That was one of the
objects in the sketch, we may as well add that in. Now, the size, we'll make it a pretty big size bed, I say. We'll make it'll
say six foot across here because it's a fairly
large room we've got here. It's probably a master bedroom. You'd want a master size bed. We'll say that six feet by six feet actually a
nice big square bed. I'll just go from our right vanishing point first
and we're going to get the overall
plane for the bed, and we'll build the rest
of it up from there. So just aligning that,
six feet across that way, six feet across this way, and then we'll criss cross that over just like that,
all the way back there. That's the corner
landmark for our bed. We're going to encompass the frame of the bed as well
with these measurements, and then we'll just
refine it as we go along. That's essentially
the silhouette of our bed there really
if you think about it, we need to now build the height and just looking at my
own bed as a reference. I think it's about
a foot and a half. We'll say that this bed, along with its frame is
about 1.5 feet high. So just measure it up like that, and this will go across
the back wall like so, and that gets us the height of both the bed and the mattress. And just up like that
and measure across to our other vanishing
point here and get the height of the corner
closest towards us as well. So we'll just slowly build
this up as we go along. Now, as mentioned earlier, how accurate you want to be
with all your measurements, it's going to be
entirely up to you. There will be instances
where you may want to get this precise with all of your objects
in the environment. But there will be
other times as well. We just want to have
a bit of fun really, not be bogged down by
having to count things out because that does slow
things down considerably. But some of us who become artists really do
actually love this more mathematical and
constructional of doing things. So that's our bed. That's going to encompass as
mentioned the frame as well. So let's figure out now roughly where the divide between the mattress and the
frame is going to be. I'm just going to eyeball this. And I'll say that the
mattress is going to take up probably about two
thirds of this size, and I'll put a little bit of space down the bottom
here because we want the legs of the
bed to show as well. So we've got space
there at the bottom, where we can put some
legs there for the frame, and now we want to do the exact same thing
for the other side, so all the way over to
our right vanishing point line it up to where we've marked our mattress
line and where we've marked the line
for the frames legs. So things coming
together nicely now, so we can just start
to add a few details. So we'll round things off a bit. It's always good to
start with square shapes and boxes and sharp corners first and then
soften things off. So here's our blanket
over the top like that. So we want to put a
bedhad in here as well, and it will expand the
same width as the bed. So we don't have to do too much more measuring
in this instance. And again, I'm just going to
eyeball this a little bit. That's probably about
about just under 2.5 feet from the ground plane and just straighten things up like
this vertically like that. There's going to be
a little bit of a top plane here as well. We have to remember
when we're constructing things that there are
always planes present. And sometimes those planes are going to be very, very thin. So as things get closer
to the horizon line, they can press
together a lot more. But they're always
present there, so we want to be
mindful of that. That's our bed now door done. Now, a good thing to do as you're drawing or at least
I like to do it this way. I like to clean things
up as I go along because occasionally with
perspective drawing, you get so many
lines coming across the page that it becomes difficult sometimes to
see what's coming on. Although I'm using a
pretty dark pencil here just for the sake
of demonstration, but normally you'd want to use something that's a lot
lighter than this. If you're working practically, you'd want to use say a H two
pencil that's very sharp, or if you're working digitally, working on a really
low opacity pencil or low opacity layer. So I've got our bed
and our door done. So what else can we put in here? Well, we might put a rug
in, I think, as well, we'll put a nice big
rug under the bed. And I think I might put it about two feet out
from the wall. So let's see what size
can we make the rug? Well? Let's make it a little
bit bigger than the bed, but we want the length
to be roughly the same. So I'll say it's
about a six foot rug. So about the same
size is the bed, but two feet out from the wall, which means that
if it's six foot, we want it to come
out right here. That's eight feet out
minus two equals six, so we've got six
feet in total there, straight across like that, and we'll make it a little
bit wider than the bed. I'll say it's eight feet
in total, eight feet wide. That means one extra foot
either side of the bed. Once again, going
to our landmarks, our units of measurement. All the way across here,
so that's 1 ft that way. Straight across another
foot right over here, Striight across like
that, and that's going to give us the size of our bed. We'll put a little bit
of a decorative feature just on the side there to make it look a little
more interesting. We've got our door in,
we've got our bed done. Just clean things
up a little bit. We've got our rug in. So
this is a pretty good start. Let's move on to
the next section.
11. Doubling & Even Spacing: So doubling is exactly
what it sounds like. We are simply creating a
duplicate of something, a plane, an object,
anything we want, really. There's a couple of
ways to do this, but we're going to use a method that's probably the
most widely taught. To help make this
process clearer, I'm also going to throw up a two dimensional graphic just
to help things out. So I've got both top
and bottom lines running parallel to
our vanishing point. And so what I need to
do first is just to draw in a random plane
size just like that. We next need to find the
center point of this plane, and we'll do that by using
the criss cross method. So going from one diagonal
corner to another. And then from this center point, which is the exact
center of our box, we want to draw
another parallel line diminishing all the way back
to our vanishing point. Now we want to place
a mark down at this intersection
between our center line and the edge of this plane. This x that we've got
now is going to become important later on, so
we'll come back to that. So how do we create another
plane of equal width? Well, if we draw a
diagonal line from the top left of
our first square, straight through
the center landmark and strike it down
to the bottom. We'll get the starting
point for our next plane. All we have to do then is just draw a vertical line
up from this mark. And all of a sudden,
we've got ourselves a brand new plane of the exact
same width as our first. We can see this in the
two D graphic as well. We've got the exact
same distance, the exact same size rather
between both of them here. Just like that, we've
got our second plane. If we want to continue this
on, we can do another one. Let's do a third plane again. Again, this time again from the top left corner
from plane number two. Straight through
that center landmark down onto the ground plane, and then just draw up from that, and that's our third
plane of equal size. And if we want to do
more planes as well, we can just keep going
on with this sequence. So top corner, center
landmark, bottom plane. This is great for
establishing anything that we need that's
equally repetitive. So tall buildings,
electrical poles, street lights, fence posts,
rather, anything like that. So that's all in great if we want things right
next to each other. But what if we want a little
bit of space in between? What if we want to create
some gaps between our planes? There's a couple of
ways to do this, but we'll do a method that makes use of our setup that
we've already got here. First, going back to that x that we created in our first box, where we want to establish
some space between here, we're going to
create a gap here. So I'll just draw it in a random vertical
line to indicate the area where I want the
gap to be just up like that. So you want to
imagine this as maybe being the street between
two city blocks, for instance, if that helps. Now we've got that in
place, but how do we duplicate this gap
across the other planes? Well, this intersection between this new vertical and
our top right diagonal, that's going to give
us the landmark we need for our other gap. So what we want to do
is that we want to draw a diminishment guide from this new intersection all the way back to our vanishing point? And once that is done, move over to plane number two. And draw another diagonal from this time its
top right corner, Criss cross that over. Again, where this new
diagonal line and this diminishment
line intersects is the landmark for
our second gap. So another vertical straight through there and just
to finish it off. And of course, we can do it
for our third one as well. So top right intersection there, and there we've got another
vertical for another gap. Previously, we were adding equal amounts of space
to form new planes. Now we're subtracting
equal amounts of space between our planes. So a little bit
of work involved, but it gives us a
relatively easy way to create city blocks, windows, kitchen cupboards, anything
that needs any type of repetition or equal
space in between.
12. Demo Part 6 - Ceiling and Walls: So I just realized that I
forgot to put a ceiling in. Our bedroom is not going
to be much good to us. If we don't put a roof
over the top of it, otherwise, it's going to
be exposed to the element. So I'll say in this instance that ten feet is probably
a good size for a ceiling. So just jot that down here. And we'll just use the
vertical measurement line to count all the way
up to ten right there. There's our landmark there, and we'll just draw that in. What we really find if
we're used to drawing with a lot more expression is that perspective
will slow us down. So we have to be mindful of that and be a little bit
patient with ourselves, especially if we really
want to get good at more architectural things or maybe if we want to do work in sci fi films
or something like that, where we get to design
cool cars and vehicles and all sorts of cool
technology like that. There's going to
be a little bit of a slow down here than
what we're used to. But if we stick with it, we're going to find
that it's going to be super beneficial
in the long run. At the end of the day, we want the perspective
to work for us, not the other way around. So just keep at it and
you'll get there in the end. So what I'm going to do
now is that I'm going to put some wall paneling
on this back wall, which I added in
the concept sketch. So I'm going to use
the doubling method that we learned earlier
on to put that down. I'll probably be about four or five panels at the back here. So these are all going to
be the exact same width. So like we saw in the lecture, we want to first establish where our first panel
is going to be, and I'm going to intersect it a little bit
with the door here. We don't want it going
right up against the door, it will make it look too boring and too much of a tangent there. So we'll criss cross things over, like we saw in the lesson, so corner to corner, just like that, and to
the other corner here. Just like that. So
that's going to get us the exact center
that we want, and then I line that up
our vanishing point, strike that all the way across, and just do it very lightly. And from there, we can now start to build the rest of
our back panels going from that diagonal top to the center landmark
straight through there. We'll line that up
like so, and that's going to get us our first panel, and we can repeat that several times until the wall is filled with those
equally sized panels. So it's a great little shortcut for us to be able to do this. We could do it with the units of measurement that we've
got on the ground there, but this is just a nice
little shortcut that's going to get us the
exact same result. We always want to
take the path of least resistance with
perspective drawing. If we can avoid drawing
in all guides and other diminishment lines and things makes our life a
heck of a lot easier, and just means less clean
up afterward as well. Another one going through there, straight up there and
that might do with here. There might have
room for one more, but it looks good enough now. That's our paneling on the back. We might just put a little bit of spacing in between as well. We're not going to worry
about getting exact spacing. So just eyeballing things,
which we're free to do. That's ultimately the stage
that we want to get to, so a little bit more spacing
here at the bottom there. And that's going to be
our wall paneling there. So I've got an
awful lot of space here on the left hand
side of the bed. And in the concept sketch, I've got a little night stand or a little table
or set of drawers, whatever you want
to refer to it as. So I'll put that in next, and we're still inside
the of vision here, but we're just very much
on the border of it, so the night stand might start to look a
little bit warped, but that should be okay. And I'll say it's about two
foot by 1 ft, two feet wide. Now you might very well be saying to yourself, here, well, it's all well and good doing all this measurement
and whatnot, but is it ever actually
going to come in handy? If I'm not actually doing
any architectural work where we do need
precise measurements. Surely, as an artist, then I don't really need to
go to this level. Well, it's not so
much about having to use these type of
mathematical settings, but it's knowing that they exist is the
important thing here. If we know to set up
two point perspective, if we know about our
vanishing points and our station points and center
vision and all that stuff, all of a sudden, we become
a more valuable artist. We can work with a film
director and capture exactly his cool
sci fi epic story that he's got in his
head into a frame, draw exactly how the
camera would see it. If we can draw in the
exact focal length and framing and all of that, then we are one step
ahead of everyone else. So as you can see, I increase the size of the night
stand a little bit. It was just a little bit
a little bit too small, and that's just
finishing it off now. So what I want to do is add
a couple of drawers in here, and the easiest thing to do with that is just do
criss cross from one diagonal over to
the other to get the center point
once again and align it up to a left vanishing point and that's going to
give us our drawers. Just like that, a little
bit of a gap there as well. So again, eyeballing things, and of course, we need
the handles as well. So may as well put
that in there too, just making sure that
that's aligned as well. So if we are working free hand, we do still want to
be mindful of where our center points are and where our vanishing
points are going. So let's stop it here and
move on to the next part.
13. Uneven Divisions & Irregular Spacing: Dividing things in two is
relatively straightforward. All we have to do is criss
cross our diagonals over, which gives us the
center point for which we can then divide
our object in half. And we can continuously do
this until the cows come home. So any division of two
is relatively easy. What about odd numbers, however? Well, we could do some
complicated subdividing if we want to make our
lives more difficult, or we could take
the easy option, so let's try that one first. L et's say that we have
a wall that we want to divide into five columns.
How do we create that? Well, first, we
start with dividing the height of our wall
into five equal units, and then create a
diminishment guide all the way back to
our vanishing points. From here, if we draw a diagonal line corner to
corner within our wall, we'll find that each of
these intersections between the diagonal and each
diminishment guide will create the precise vertical
landmark that we need to create equal spacing. We need only draw our
verticals through these landmarks to finish the division off
and just like that, we've got our five columns, each equal in its width. And the beauty of this method
is that it can apply to whatever number of divisions
that we want, odd or even. So if we need six,
13, 47 columns, however many we want, we
can put it all down here. Now, we've taken a look at
even spaces between objects, but what about uneven spaces? What if we've got a row of skyscrapers that
are oddly spaced or pieces of wall art at various distances
from each other? Well, we can work that out too. This does take an additional
step or two to put together, but it is worth
the extra effort. So let's try this out now. The first thing we need
to do is actually do a front two D view of
our uneven spaces. In this instance, we've
got a front view of a house with a door
and two windows, and there's an uneven
space between them all. Next, we need a scrap of paper or a separate layer if we
are working digitally. And what we're going to do with this scrap of paper or layer is we're going to mark
down the widths of both the door
and the windows, as well as the overall width
of the entire two D graphic. So this is our
house's width here. These are our doors width, and our windows width. Our goal is to transfer these measurements onto
our perspective box here. We only need to
transfer the width. The height can be really
whatever we choose it to be. So how do we make this transfer? Well, if our scrap of paper is the same height as the
nearrest box corner, then we simply rotate it to its side and translate
the measurements over. Most likely, however,
our scrap of paper layer will probably be a little bit
bigger than this. We need to somehow get
the same measurements across. How do we do this? Well, first, we need to draw out a parallel line from the
top of this near corner. Then with our scrap line to
the bottom corner of our box, we want to rotate it until its opposite end meets up
with this top parallel line. From here, we want to run parallel lines from
these markings across to our vertical corner. This first marking that I'm
transferring across now, this is the exact same width as Window number two that we see
here on our two D graphic, and we want to do the same
for our other measurements. Another set of parallel
lines across here for our second window,
just like that. And then one more for our door. So I've got all these framed
measurements going across, and just like that, we
have the spacing for our doors and our windows
running vertically. Now, you're probably
saying to yourself, well, these are width
measurements, but they're running on
a vertical planar. So how do we flip these over? Well, we once again go back to our good old
diagonal friends. So once again, we go from
the top corner of our box, all the way to its
bottom corner. And then we take these
measurements back, these new measurements here, all the way back to
our vanishing point, just like we did in
the earlier video. So striking each of
these all the way back. And you might be one
step ahead of me here. Once again, we've
got a whole lot of intersections that are
happening as a result. And just like before, we want to run verticals
through each of these. One at a time. So nice and
vertical all the way across, and this will result in a
whole lot of unequal columns, which is exactly what we want. Now, this looks a bit confusing as to where our
windows and doors go. Well, we simply have to refer back to our original
two D graphic. So if this area here is
empty in this two D space, then it means that
the first column in our three D space
also has to be empty. If this second area is
where Window number two is, then this second column has to be where we
place that window. So I'll draw that in here, so that's Window number two going into that second column. This third section is
another area of empty space, which means column number four has to be where Window
number one goes, and so on and so forth, and I'll finish it
off by adding in the door in its
appropriate place. So you just want to refer
back to the graphics. Essentially, we've
sliced the whole graphic up and now we're sticking
it all together again, in a perspective form. So a little bit
of work involved, and you'll probably
have to practice it up a lot more to
get the hang of it, but it's an extra effort
that is well worth doing.
14. Demo Part 7 - Window Divisions: All right. I just realize that my ten foot ceiling is
only nine feet high. This is why it's a
good idea to double check measurements before
committing to anything. So we'll just continue
on regardless, and we're going to
put a window in now, so let there be light, and we'll make it two foot
down from the ceiling. Just measure that down one, two, strike it across there, that's going to be the
top of our window there. We'll make it about three
feet in from the corner. Just like that, we'll
measure it up there, that should ensure that the door doesn't accidentally
hit the window. Always good when
we can avoid that. Measure that straight up
from there, just like so. It's going to give us the
first corner landmark. We'll say that the window is about five feet by
five feet internal. A nice square window, I
think in this instance. We'll measure that across there, grab our ruler,
measure up from there. That's our second vertical. So now we need to count
five feet down from here, so, one, two, three,
four, five, there we go. Straight across, that's
going to give us the size a full size
for our window. So again, we are two
feet from the ceiling. We are now two feet
from the ground, five feet in total by five feet, and that's going to
give us our window. Now, what we're going to do is we're going to split
this into three. So we're going to use the same method that
we saw in the lecture. Diagonal across
corner to corner, and from there, we're just going to eyeball
where the divisions are. We need two divisions in this instance to give
us three columns. Straight across there,
straight across there as well. That's going to give us
the landmarks we need, the intersection
between those diagonals and those diminishing lines. That's going to give us the
structure that we want to be able to start designing
our windows with. A perfect division
of three columns, each of which is the same size, which is exactly what we want. As mentioned in the lecture, this can be any size
that we want as well. So any number that
we want rather. So three, six, nine, 57, what do we want? I'll just put a bit of
framing around the window. Now, just to design
it up a little bit. When we get to this stage, where we've got all
these landmarks in place and these gritted areas, it means we've got
the foundations in place to really
start designing. So I'm not going to do
anything too fancy here, going to keep it
pretty well cornered. Make the split here
a little uneven, just to add a bit of
interest to the windows, and just doing a little
bit of guesswork for the framing here as well. If we are guessing for
something like this, this type of framing or
poles or anything like that, anything that's diminishing
often to the distance, we have to remember that
things are going to start to compress together further they
get away from the viewer. So the more something goes
towards the vanishing point, the more compressed, things
are going to become. Just going to finish
off the paneling on the other side of the wall, and I'm going to take a
little bit of a shortcut here instead of doing the
ing and doubling thing, if I measure a
straight line across from our first panel here
to the opposite side, we're going to get roughly where the start of this
new panel should be. I'm just going to move it
over a little bit though because it looks like it
might form a tangent. And we do want to
be aware of that sometimes if things are
going to create tangents, where there are lines that are intersecting each other
that really shouldn't be, sometimes a good idea just to nudge things
over a little bit. So we can cheat a little bit
with our perspective if it ends up making the image
look a lot better. This might do us here for
our uneven divisions. Let's finish it off with
some irregular spacing.
15. Demo Part 8 - Uneven Wall Art: All right, hopefully, no more ceiling issues in our last part. So we're going to put
some wall art in into roughly this area above the bed. So the first thing that
we need to do is just to establish where our wall art is going to be
because it's going to be irregularly spaced. And the height can really be whatever we want it to and make adjustments accordingly
because when we shift over our uneven spaced objects
or our irregular spacing, we're really only
concerning ourselves with the width of what we're
translating over. So a little bit of an
odd concept at first, but the more you get used to it, the more you practice it up,
the easier it becomes so. Again, we need that parallel
line first across the top of the area that we're transferring our measurements
onto, just like that. I'll grab the measurement that I've already
figured out beforehand. We're going to have
space here for three pieces of wall
art and rotating this. It's roughly aligned, that's good enough for this purpose, and just measuring these
units across as such. Again, you just need
a scrap of paper for something like this if
you're working practically. In a new layer if you're working in the
digital environment. Now it might seem like a bit of a tedious thing to do for
irregular spacing because well, we can just arbitrarily
choose areas that we want. Value to this is that it's going to actually add
more believability, especially if we are working from things from imagination. So if we're a fantasy artist and we want to do that
cool epic castle, and we want it to look right. Well, we'd want
to map things out first in that two
dimensional plan, get the face of that
castle looking right, get those distances between the windows and the drawbridge
and all the turrets, get that right and
then translate it over using this method. And that's just
going to add a lot more believability to our piece. There's one thing
that we find when we start learning
perspective is that we're not particularly good at judging distances until we start to
practice it up a lot more. And this is just another
useful practice tool for helping us develop a
better understanding of how things be looking, how they should be overlapping, how far things should be
spaced apart from each other. So, it's a little
bit more work doing out irregular spacing like
this, but in the end, it's going to be worth
it because it's going to result in a much better outcome. So I've got my spacing here and just putting in the first image, the first picture frame,
whatever you want to call it, and the second one over here. As mentioned, the height for these can be anything we want. I'll make this one a
little bit smaller and I'll push it down a
little further as well. So we're only really concerned
with the width of things. We've taken that little scrap of measurements, rotated it, and transferred it onto our two point
perspective plane here. Like that, we've got our image
is done for our back wall, our wall art there and
could be anything here, a couple of portraits,
maybe here, and a nice landscape, mountainous landscape
in the distance, something like that. Okay, it's still looking
a little bit empty here, let's just do a couple
of pieces of furnishing. And I think the first
thing we might do is we might put a plant
over in that corner. That's a good place for a plant, and we'll make it quite
a large plant as well. So maybe about three
or four foot high. Something that needs
a lot of water. It's going to get a
lot of sunlight too with that big old
window there as well. So just rounding that off there, get that cylinder shape in for our pot and just draw
our plant up here, all these big leaves just
poking out like that. Nice, a little bit of furnishing just to decorate the room. And that will do nicely. We might finish this
rug off as well. We put a little bit of a
pattern on one side there, but we left it blank
on the other side. So let's just run
a little bit of a pattern all the
way through just like that just
eyeballing this as well. That looks about right and
on the other side too. Now, we've got a
little bit of space here as well where
the night stand is, and a night stand isn't
particularly good for we don't have a
light source, I suppose. So let's put in a small little lamp feature
just to finish it off. Actually, we'll
first do the door because we don't
have a door handle, so we'll need to add
that in as well. So we'll put the door
handle in and then we'll finish off with
the lighting fixture. Now, just going to estimate
where the cross axis is here. And just imagine actually that my pencil is being pulled in to the directions where
the vanishing points are. A good little bit of
practice you can do is to imagine that your pencil has got two pieces of string tied to it, each of which is going to the left and right
vanishing point and you're constantly being
pulled in either direction. It sounds like a strange thing to imagine as you're drawing, but it really helps
to keep your pencil in lined with the directions
of the vanishing points. That's our scene
done here, I think, just about all we
can do for now, let's leave this off here and finish off with the assignment.
 JW Learning, Drawing the Body, Head and Hands