Transcripts
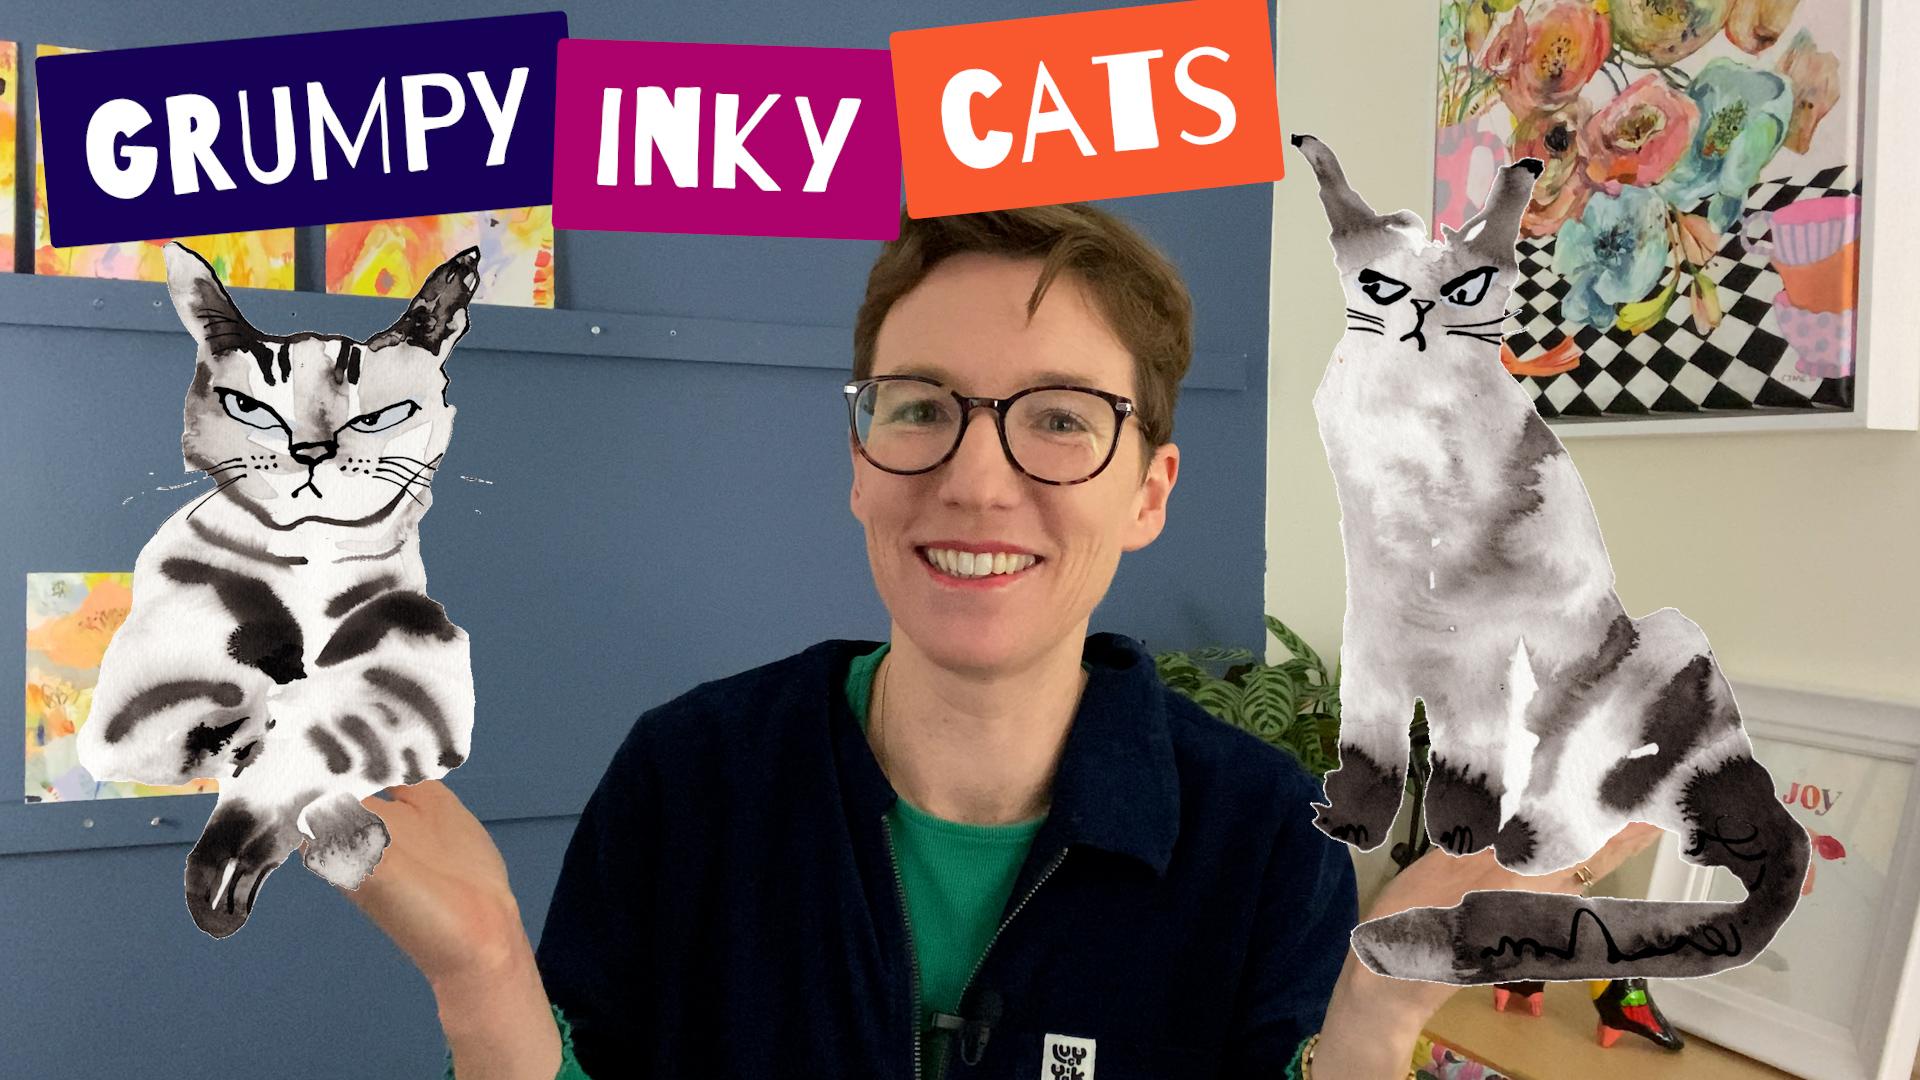
1. Introduction: Today, I'm going to share
something that is so much fun. I just couldn't
keep it to myself. I call it grumpy inky cats. The thing about these cats is that they're so darn grumpy, they just make you feel better. The problem is, they have a sneaky habit of multiplying
and sneaking up on you. Until before you know it, your desk and table and every other available workspace
is covered in inky cats. But if you don't mind this. Wow. And if you're actually
quite fond of cats, and even if you have no drawing or painting skills whatsoever, grab your ink and a
little bit of paper and every other bit of festive crafty bling that
you've got lying around the house because we are going to make ourselves feel better and paint some
grumpy, inky cats. I'm Catin Jennifer.
I'm an artist and top teacher on Skillshare, and I love helping people to
find the joy in creativity. So I hope you will
enjoy this class.
2. Project: So we are going to paint some inky cats and
then bling them up with any bit of crafty festive stuff you've
got lying around the house. There's only one rule, and that is put your favorite music on, grab a festive tipple
because we are going to have the
best time doing it. You can add bling
with actor stuff like felt and bells and
tinsel and glitter, or you can bling in Procreate.
It's entirely up to you.
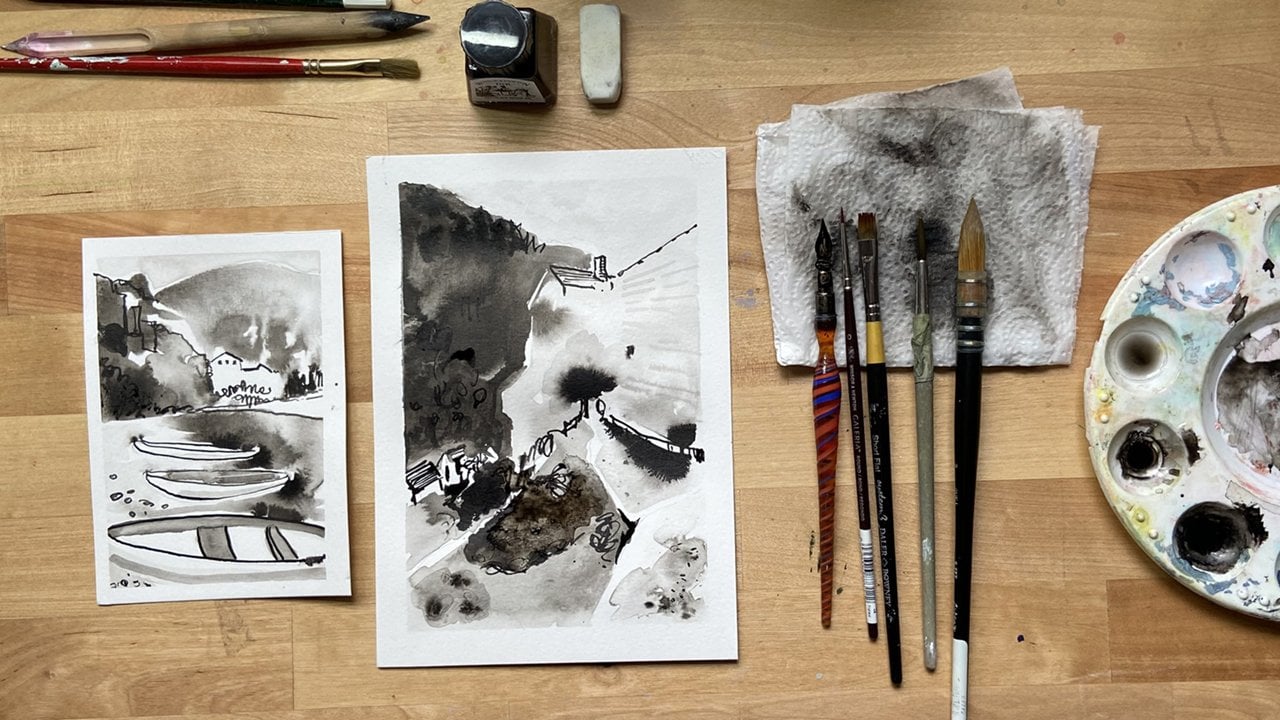
3. Materials: All that you need to
do this is some ink, a paintbrush, a dip pen, and some smooth paper. For the ink, I'm using Windsor and Newton
lack Indian ink, and the thing about this is
that it is water resistant. I might also throw in a bit of sunshine yellow
and peat brown, but we'll see how it goes. For paint brushes, this is just quite a big soft
watercolor brush. I might also use a
smaller brush like this. This is a flat brush
quarter inch size, and I've got a dip pen. This is a fancy glass handle, but the nib is just
a bog standard nib. And the thing to know
about dipens is that if your den doesn't
work really well, try a different nib because some nibs are just not
as good as others. For paper, I'm using Dala brownie aquifine
smooth watercolor paper. It's 300 grams, and
it's hot pressed, which means it's
nice and smooth. I recommend a smooth
paper if you can get one. If you can't just use a cereal box or
whatever you've got. Then I've got a palette with
some wells to hold my water. I've got a bit of kitchen towel. I've got two jars of water and a spray bottle.
And that's all you need. Once you cat is painted, you also going to
need a white Posca pen or white acrylic
or white ink. Then once you've
painted your inky cat, grab any crafty bits you've got around the house
like cotton wool, tinsel, tinfoil,
felt, bells, glitter. More is more with this project.
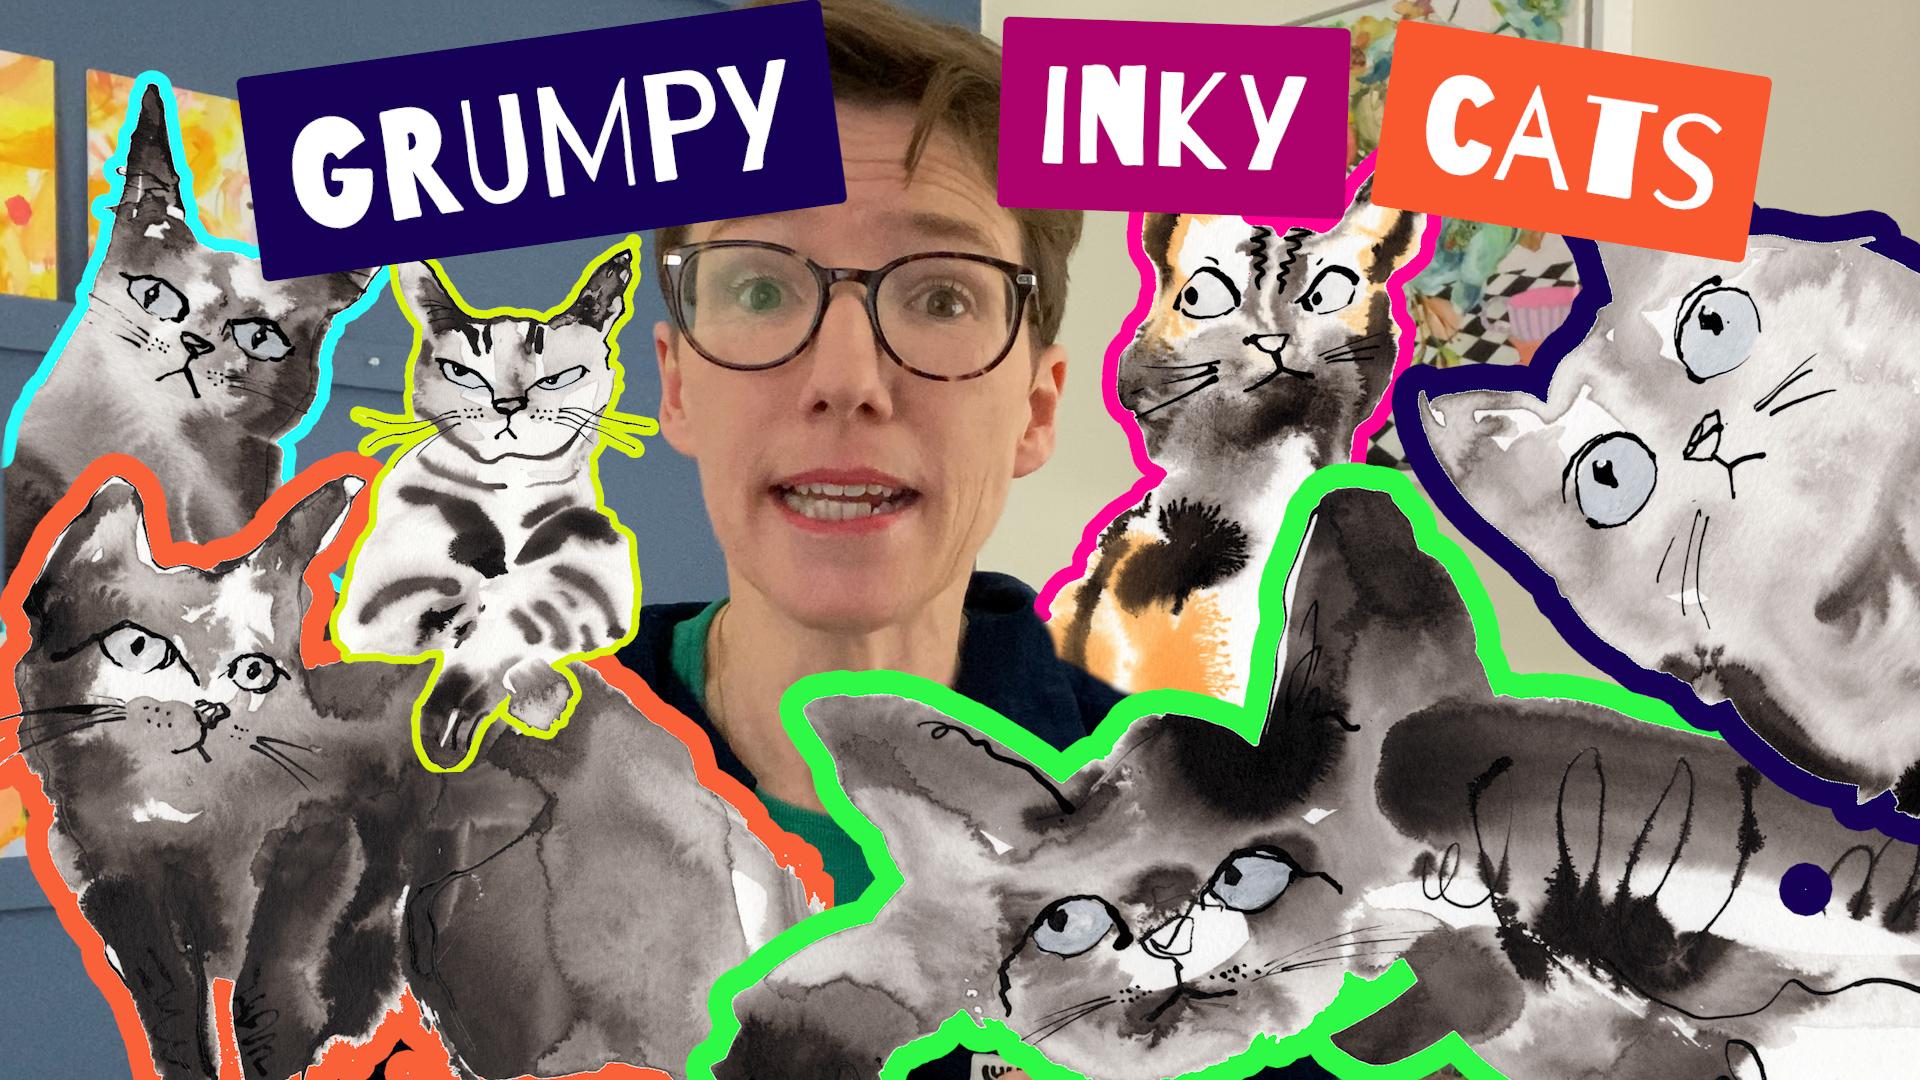
4. Grumpy Cat 1: Painting the cats is actually really easy and
happens in four steps. Step one is pure water. Step two is painting with ink. Step three is adding
the whites of the eyes, and step four is adding detail to the eyes
using your dip pen. It's a good idea to paint
a few different cats at the same time and then choose the best ones to take
to the next stage. For my first one, I want to
do something quite simple and easy just while I
get into the flow of it. So I'm going to
start with this one. The first step is
just using water. And I'm just getting
my brush nice and wet. I'm going to put some water into these little receptacles
ready for my ink. And all I'm going to
do now is roughly map out the shape of the cat
using water on my paper. I want to make sure I leave white dry paper where I
don't want the ink to go. And I want to leave
some space for the scent hats that I'm
going to add afterwards. Instead of having the
tail going backwards, I think I'm going to bring
the tail around the front. And hopefully, you can see
there's a bit of a sheen on the paper with the
shape of the cat. So that's great. Now I'm going
to dip my brush in my ink, and I'm just going to start
with some simple adding ink. I'm not too worried about following the cat
photograph exactly. I'm more interested in letting the ink work its
magic on the paper. I want to actually get a
thinner stripe in there. So I'm going to use
a smaller brush. This is just a small brush, which for detail work, and I'm going to come in with a couple of
lovely little stripes. Isn't it wonderful watching how the ink reacts
with the water, and I'm going to wash
that off and then just come with a very light
wash up this side. And that's all I'm going
to do for this cat.
5. Grumpy Cat 2: For the next one,
I'm going to do this beautiful little
cat with massive eyes. And again, I'm just going
to start with water. Sometimes it helps
to tip your page if you can't actually
see where your water is. If you feel like your
shape goes wrong, just dry it off with
tissue and then go again. It's good to think about
how much water you're putting on the paper. So you don't want
a swimming pool, but you do want it
to be nice and wet. So you're looking for like
a sheen on the paper. And, of course, it
dries quite quickly. So just keep in mind
a nice coverage, but not too wet and not too dry. Sometimes it helps to come
back to where you started and just wet that again. This time, I'm going to come in with some yellow ink first, and I'm using two
separate brushes for the two different ink colors just for fun and to
see what happens, I'm going to put a bit of
yellow in there and there. Not too much. Now I'm
going in with my black, and I'm going to make
fairly bold marks. And I'm going to stop there
and see what happens. You can't judge your drawings until they've actually dried, so we'll put it aside and
move on to the next one.
6. Grumpy Cat 3: This looks like a
fun one to do with lots of lovely marks
and a lovely shape. I'm going to use a bigger
sheet for this one, and I'm going to
come in with water. So I know I want some space
for a Santa hat about there. So in this instance, I'm going to start with the
ears and a little face. Nice big ears on this cat. And then bring the body down. My brush is still a
bit loaded with ink. As you put the water down, just beware of the relative
proportions of your shapes. Like for instance, the paw
of this cat comes up to almost the chin if you were to imagine
a line going across, I just adjust that a bit and think about the angles of each shape as you put them down. But you can also play
with the proportions and, you know, elongate things. What we want is
for our cats to be really weird and
kooky and different. So we don't have to be constrained by
reality. There we go. Now, I can see there's a large pool of water
just there on the poor. So I'm aware of that. I might just let that dry a bit. I'm going to come in with
some black it's fun to make quite bold marks with your black ink because then you get more
interesting results. So it's that mental thing of separating the
reality of the photo from what could happen if you play a bit and if you make
other sorts of marks. There's a beautiful
stripe under that chin, which I want to be
quite bold about. Lovely. The way it moves in the water will depend on how much the water
underneath has dried. So it's something
you can't control, and that's why it's good
to do loads of these so that you can choose the
best ones at the end. Okay. I'm going to let the
water dry a little bit here before I put the
next bits of ink in. It's similar to watercolor, in that timing is
quite important. So you're timing
when you're adding your ink according to how
wet or dry the page is. Just like with the
landscapes class, it's good to be
aware of trying to create three different
tones of ink. So a light tone, a medium tone, and
then a very dark tone. So it's getting dry. So what I'm going to do now
is just add these last Marks. I'll let that one dry a bit
more before I go any further. So now it's a little bit drier. So I'm just going to
come and do these marks. Let's see. Yes. So you can see how if you come back in
with another layer, you can add a new feeling to it. Perfect. Add a bit
of definition. You can do this
with your dip pen or you can do it with a brush. I liked these squiggly marks that I got with
my little brush, but they've kind of dried
quite a lot and faded. So I'm just going to go
and bring them out again. Perfect. Knowing when to
stop is important. That one is working really well.
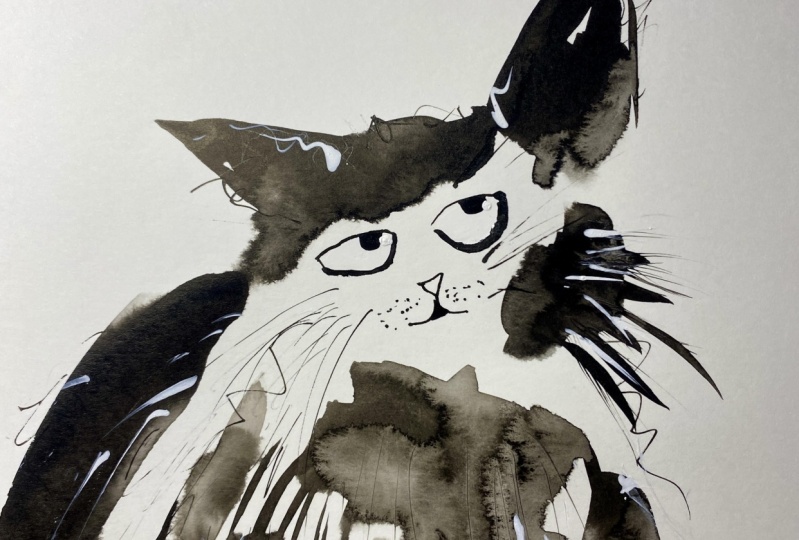
7. Grumpy Cat 4: So this one's quite
interesting because it's got these long furry
bits under its face. So let's have a go at that. Once again, I'm
starting with water. Now, in this instance,
I think my Santa hat might come down
over the cat's head because there's a kind
of movement there. So I'm going to plan
out where I put this on the page, bit like that. And I'm going to start
with the dark bits, which I'm just wetting nicely. Then we've got a very sharp
ear coming off there. Half of the face is black, and the other half is white. So going to just leave
it like that now. I'm thinking about
how to do this fur, and I'm thinking maybe
long strokes of water. I don't know if this will work, but we'll see coming down. And then I want the
dark under the face. Okay, so let's see what
happens with the ink. So, nice and bold for this
bit, bold for the ears. And then we can have it
running up and running down. I'm going to take out
a bit of the ink from the bristles for these because I want to see if I can
get a different tone. I'm going to take it
out again and just see what happens if I do this. We don't know until it dries, so I don't want to get
too worked up about it. Let's put a little
bit more in there. This eye, cavity. And that bit. Okay. I feel like this will maybe benefit from some deepen. So let's see. Okay, I'm gonna stop there and
see what happens.
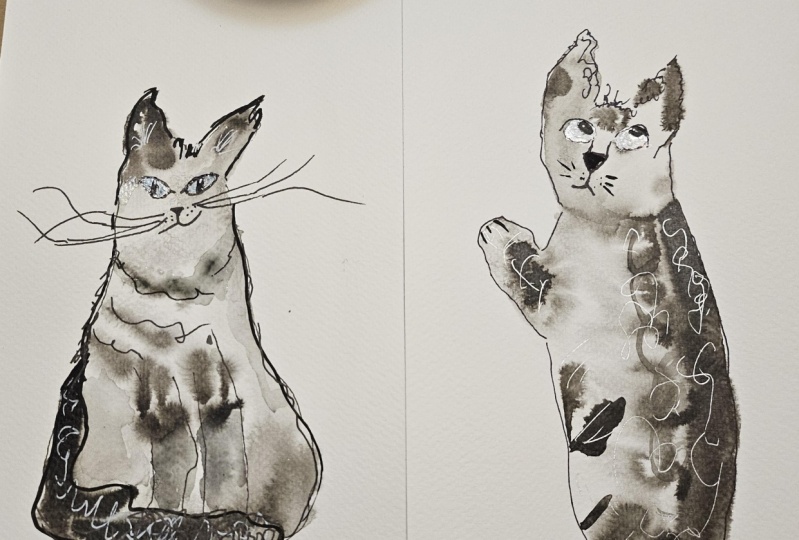
8. Grumpy Eyes Part 1: So now my ink has
dried completely, and I'm going to
choose the best ones to take through to
the next stage. We'll do it in two steps. First, we'll just paint
the whites of the eyes. And for this, I've got
a white Posca pen. I've also got some white ink, and I've also got a little
bit of white acrylic paint. Any of these will be fine. And once we've painted
the whites of the eyes, we'll let it dry completely, and then we'll go in
and paint and draw the black bits and the
noses with our pen and ink. So some of these drawings have
worked better than others, and I'm going to look through
and choose the best ones, and then I'm going
to first practice the eyes on the ones that I
don't like quite as much. For this one, I'm just
using white acrylic. And actually, when
I did the eyes, I found that white acrylic
worked best for all of them. You don't need to worry about getting the whites
of the eyes in exactly the right
place because you're going to draw over it
anyway with the dip pen. So don't let this part
stress you out. Next one. Now, these eyes are
actually a different shape. They're coming more down. They're more slanted and
slightly evil looking. Next one. So this one, the eyes are This
one's quite in shadow. And probably all I need is that. And then this one
it's about there. That's a little bit there.
Simple, very simple. And then the last one, which is also my favorite one, this eye is higher
than the other one. Like that. And we're going for weird and kooky
and a bit squiffy. So just pop it in and
don't worry about it. They're not meant to be perfect. They're meant to be a bit odd. There we go. That's the eyes. I'm going to just look
over them and see if any of them need a second coat. So now we're gonna let those dry and then come back
in with our dip pen.
9. Grumpy Eyes Part 2: So the white of the
eyes has dried, and now I'm going to add detail to the eyes
using my di pin. Go to just do straight
across the top. And he's gonna look that way. He's got a funny face. Let's see if I want
to add anything else. Maybe just um, A
couple of lines here. Maybe some nails, maybe
something like that. Next one. If you notice something
about the eyes that are slightly different,
then accentuate that. So these ones are quite
rounded at the top, and they've got quite
heavy black lids, so I'm making more of
that as I paint it. So this one I'm going to have looking that way. Add something. There we go. That's fine. I might just give the underneath of the
eye a bit of something. There we go. And give him
two little things like that. So this one has got quite a lot of dark
underneath his eye. He's got this very
dark eyeball here. Little scruffy triangle. And with these, I might
just have a bit of fun adding something new. Obviously, a cat
doesn't look like this, but this is the joy of drawing. Is that you get to do
whatever you want. That makes it a bit
more interesting. And then down here, So you just, you know, go back in
with your dip pen and add some lines. Think about the energy that your lines are
adding to the piece. And just enjoy
having fun with it. I kind of wish I hadn't
added that line, but it doesn't matter. What I might do is see if I
can take it out, lighten it. And then with my clean brush, it's just going to soften it. We'll see what that looks
like when it dries. Okay, and then the
last one is this one. And I want to have this eye, but higher than the other one. Nice. And I want him
looking at this, so it's fan of that there. And there. A couple of goods. Last thing I just want to
add one little line there. There we go. So our
cats now all have eyes. There's one final thing to do, and that is just come back
in when that's dry with little pin pricks of white for the light
bouncing off the pupil.
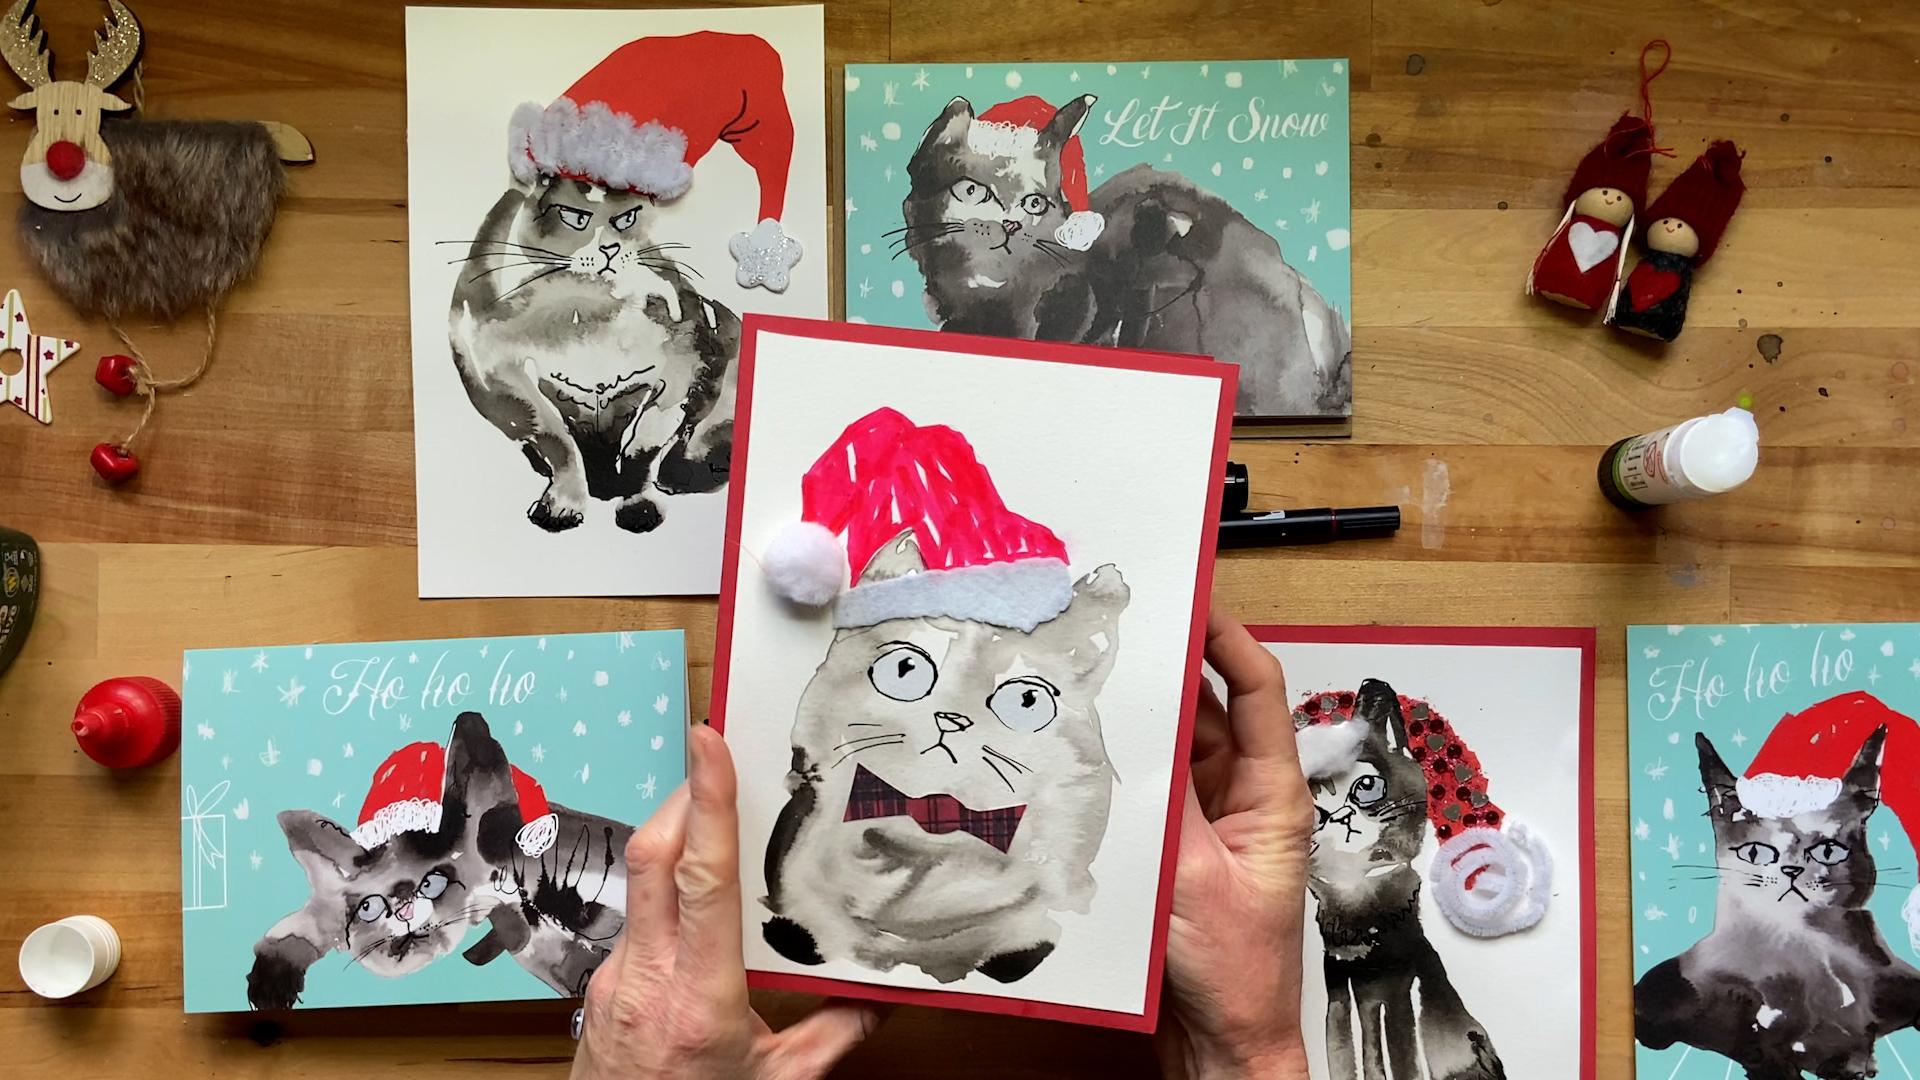
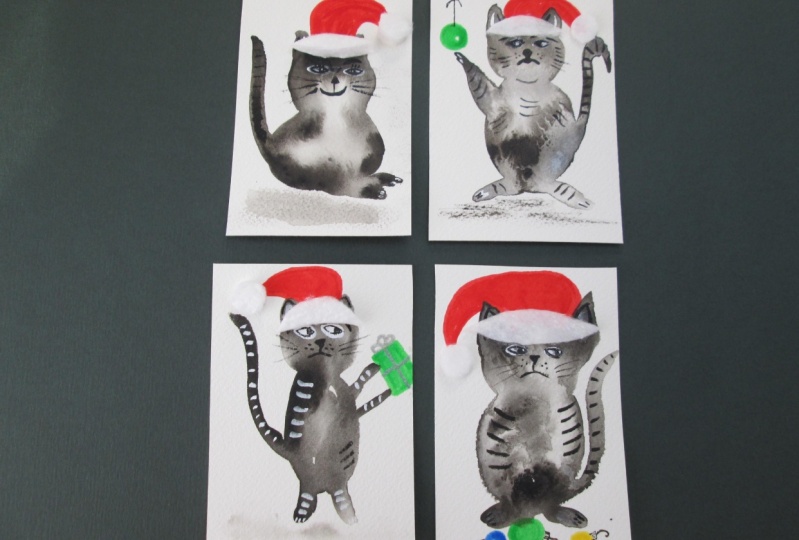
10. Adding Santa Hats: So our grumpy inky
cats are done, and now it's time to
add some festive bling. I've got a few examples here just to give you some
ideas of things you can do. So this one, I've added some cotton wool
and a pipe cleaner, and then I've collaged a little sent hat with cardboard
and added some glitter and some silver hearts and
ruby gems so that it sparkles. And then I've just
stuck it onto a card. This one, I've added a
Santa hat in red card, and I've got a pipe cleaner, which I've just made
into squiggles, and I'm going to stick
down over there. I'm going to use wood glue because this kind of glue
probably won't work. When you come to do your
Christmas bling, more is more. So we want completely over the top, whatever
you can think of. And I'm going to add
a little bit of foam. This is just foam
with happens to have some glitter on it.
So pop that there. For this one, I've drawn the
shape of the hat in pencil, and I'm just going to
use my tombo marker. I want it to look
quite rough and ready, so I'm going to use some
quite vigorous marks. Everything does not
always have to be perfect and sometimes less
perfect is better. You can sit around your
dining room table with your kids or with your friends and have a really
great time doing this. This is just felt, I think, white felt, and I've cut to the right size, and I'm going to
pop it over there, and I'm going to add a
little pompom over there. There we go. You could also have some different eyes if you
want big ones or smaller ones. But I think I'm going to leave these eyes just as they are. But I'm going to
give him a nice, smart bow tie. That one done. It's really nice to use actual materials and do
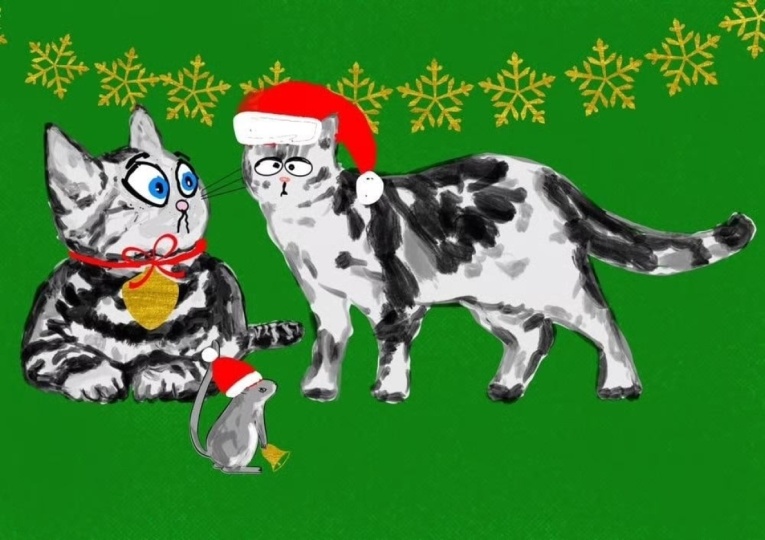
things with your hands. But you can also bling up your grumpy cats
using procreate. Procreate offers so much, and you can use it to play on the ookiness of your inky
paintings by adding contrast. So this is one of my designs that I've
taken into procreate, and I like this because
it means I can contrast some of the kooky weirdness
of the ink drawing with, you know, very clean
graphic white lines, some textures, and just
add other details. Here's another example
where just some very clean graphic lines and playing around with some hand
lettering, as well. And here are some
of those actually printed as greeting cards. So that's really fun to do. But if you don't have Procreate,
don't let that stop you. You can have just as
much fun, if not more, using actual crafty bits and pieces and making
your beautiful, weird ink drawings into unusual and unique holiday cards to send to someone special. While I was doing some
of this collaging, my kids were sitting
around the table, and these are some
of their drawings. We've got a cat attacking Santa. We've got another cat attacking a rather fat center,
and then Mm.
11. Conclusion: So there you have all
the steps you need to make your own
grumpy inky cats. But don't do it on your own. Get your friends around, have a grumpy cats evening or
get your kids involved. The joy is that it's fun, it's fast, and anyone can do it. If you'd like to connect
with me on Instagram, I am at Catherine Jennifer
Designs, same on Facebook. And you can also find behind the scenes videos and other
interesting stuff on YouTube. If you never want
to miss a thing, then sign up for my
newsletter via my website. This is where you can find
out about my art club as well as other workshops
and classes that I'm running. And I would love to
see what you make. So don't forget to upload your project to the
Skillshare Project Gallery. And also, if you
enjoy the class, I'd be really grateful if
you could leave a review. Until next time, thanks for watching and happy
grumpy cat painting.