Transcripts
1. 1 Introduction: Hi. Welcome to my online course. I'm Caroline Beratlis, founder of pure Pattern cutting dot com on beratlis dot co dot UK spelt b a r u L i s I've been a pattern cutter and pattern maker for over a decade, working for some of the best luxury fashion brands London and overseas has to offer, and it's now my time to share my skills with you. I feel pattern cutting is an essential part of the fashion industry turning a to D illustration into a three D form, and I look forward to showing you how to do it.
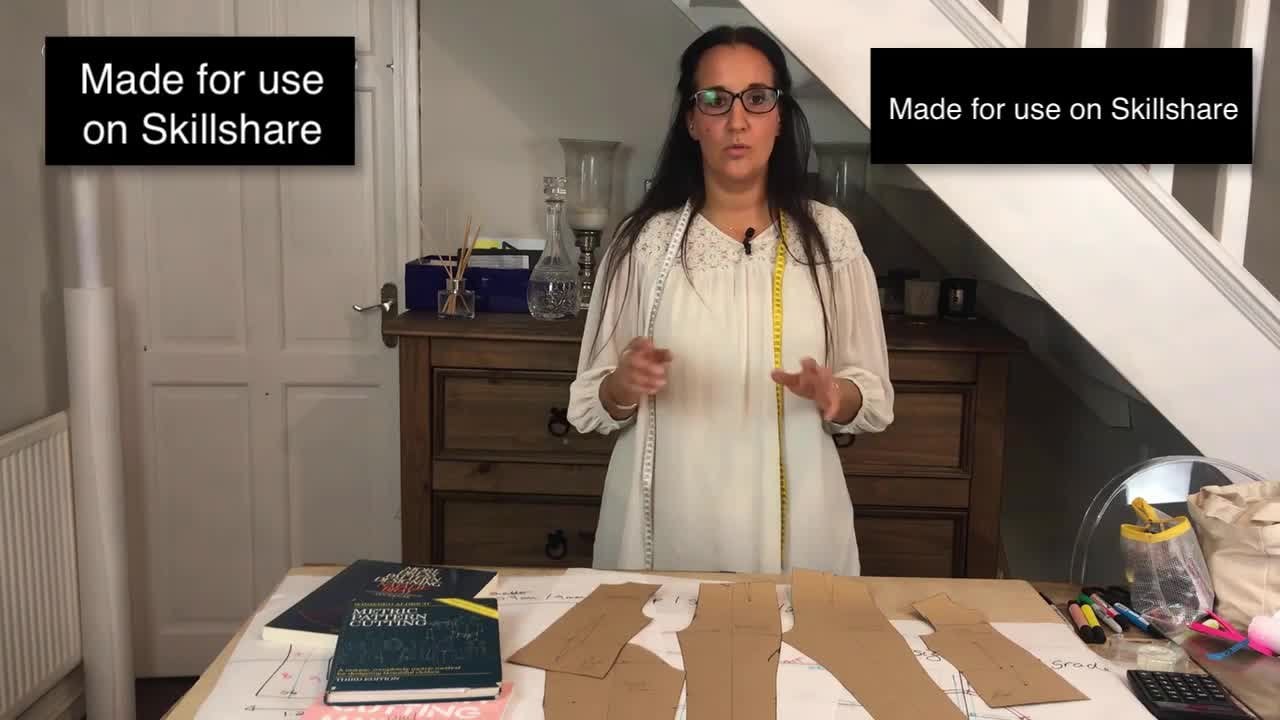
2. 2 Tools and Terminology: Hi. In this lesson, I'm going to talk about the tools and equipment for pattern cutting and pattern making. If you're passing cutting from home, I would suggest getting a piece of softwood cut from your local hardware store. This piece I've got, for instance, is a meter squared, but you can go bigger. Just think about where you're going to store afterwards. Mind. Just slot right underneath my bed. Um, you don't want to be ruining your nice dining room table at home or floor. Whatever surface you have, this is pattern paper. It's this one particularly called spot and Cross, and if you can see, it's got tiny spots and crosses all over it, and they come in centimeter or inch spaces, which is brilliant for drawing grids or straight lines or anything like that. These are my two rulers of choice. This one's a pattern master or a French curve. It's good for drawing armholes or curves or anything like that on this is my grading square or set square. This is my favorite tour because I I was taught with this, and it's just what I prefer using. As you can see, it's quite worn, but I'll be using this tool for most of my pattern cutting. I'm based in the UK so a lot off my tours and equipment here I get from a shock cord more plan, which is online. But there are lots of other online or other habitat stories out there that do pattern cutting equipment. This is a meter rule or a yardstick, which is very good for drawing long lines. Or if you're going right the way down a gown or something like that, it gives you a nice, long straight line. Get yourself a decent pencil. I've got one of these cliquey pencils because I don't have time to sharpen my pencil every two seconds. So I've got some of the leads that go in the end. My preferences hate be just cause I'm quite heavy handed, and I like to get mine lines nice and strong, Um, and again I get yourself a route a rubber because we will be rubbing out a few lines along the way. My pattern. Cutting scissors get yourself some very sharp pattern. Paper. Scissors thes are quite small just because they heavy the big ones are hurt. My hand actually pattern gatting for seven hours a day. I can't take the weight off the big scissors, so these are my preference. These aren't expensive. Um, you can get them from any stationery shop you find on some nice, decent fabric. Scissors thes are called fisker hours. Fabric, scissors, and they're nice and long. Get some nice cutting action going on with these. Keep these nice and sharp. Some pins Long, thin pins are really helpful for pinning bits of fabric or pattern pieces together. I keep mine on one of these useful magnetic moment pin holders, which is good so you don't get them all over your floor or in your husband's shoes. That happens in my household, which doesn't go down very well. That's very helpful on a pincushion you can put around your wrist or something like that when you're fitting things or moving around. This is incredibly helpful for pinning fabrics together. This is called tailoring tape. As you can see, it's got centimeter gaps, which is good for measuring out things. It comes on a roll of sticky tape, and you can pin it onto your calico twelves or mannequin to see lines or style lines or pocket placements or things like that is very helpful to use, and it just snaps off really easily like that so you can place different bits of tailoring tape. If you want to move lines or see what different shapes looked like or anything like that, get yourself some sello tape or magic tape, which you can draw over. Um, we will be sticking pieces of pattern pieces together along the way on masking tape. This is good for covering up holds or notches, or peeling off a piece of paper that you just want stuck. You know, not forever. A calculator as very useful is quite mathematical. Pattern Cutting says, is very helpful. Tool indeed on these three tours here, a very important for pattern cutting. This one here is a tracing will on. It's got lots of little sharp points along it. So when Hell's down, Andi drawn along the line, you get lots of little holes you may not be able to see from there, but you get lots of little holes along if you're tracing something off. If you go lay pattern pieces over each other and you can see the lines underneath because it is quite see through this pattern paper so you can trace over the lines, and it makes little dotted lines, so you can then go over it with a pencil afterwards. This is a pattern nacho. It makes little holes or grooves in the side off the pattern pattern paper woods. So you condone. Put it over the edge of the paper and clip a little line in the edge there. So when the pattern is lifted off the fabric after you've cut it out and you've nipped little line, then you can see which bits to sew together Afterwards. Um, on this hair is my drill Onda, and it's got different size Nibs that you can put in the end here. Mine's got a three millimeter near because I like the holes in my patterns quite small and tidy on these. When put onto the pattern, they indicate the ends of things like darts and internal points that you need joining together on your patterns. And if you just place it in your palm of your hand like this and you have a whole are marking on your pattern, you could just give it a twist like that, and it will make a nice, neat hole in the middle of your pattern again. When you lay your pattern on fabric, you can chalk into these holes or tack them on. When the patterns lifted off the fabric, you can see the markings left on the fabric. This was a little map that I've been using. Actually, it's a little rubber mat again you get from any stationery shop this I use for my drilling , all my tracing just to protect any surface. You see, it's got quite a lot of markings going on and that what? That's what will happen to your table. If you don't use that, get yourself a measuring tape. This is my standard look at work inches in centimeters. However you works, Um, these are my set of blocks or slow payers, as they're also called. Now these are really basic a bodice plan that I used to for I will use a lot for my pattern cutting. I have a sleeve block as well, and it's just a very basic guide for my UK size eight to get my shoulder on my waist and my hip alignment so I can check that everything's in proportion. This is called calico or Muslim comes in lots of different weights, its unbleached so you can draw on it or trace on it or do markings is very good for trying shapes out or mult molding things on the mannequin or trying twelves out. As you can see, you can pin it, Andi markings on it and pencil. You can see all the lines, and then you can always trace that back onto your pattern piece or make a 12 off it, Which is this which is like a prototype off your garment, and you can see all the lines and markings on it. You can just check the fit of it on gets very, very helpful to use if you just need to work with a bit of fabric that's not very expensive on. This is my one of my favorite books. You can see it's all worn and I've had it for many, many years. It's a lady called Winifred Audrey. She's got a huge range of pattern cutting books out there. This is my one of choice. I referenced it all the time on by suggest maybe getting one of her books. They're incredibly easy to follow on good on. They cover lots of different ranges from tailoring Children's where things like that, so it's very helpful. And if you can get yourself a manic and this is a very decent tool on, actually an essential tool for me for pattern cutting, I got this one off the bay that I use at home. At work, we use que En el brand, which is one of the best in the markets on you, get different sizes of variations and maternity ones and Children's ones and men's wear. So you can. Then whatever you're making maker the government and put it on the mannequin so you can see what it actually looks like. Thanks for listening.
3. 3 Basic measurements and How to measure : Hi. In this lesson, I'm going to show you how to take basic bodice measurements. I'm going to show you on my mannequin, but this is also the same four measuring a human body. The tools you need for this lesson is a measuring tape on a pencil and a bit of paper to write the measurements down. The 1st 1 I'm going to show you is a basic bust measurement. This is right around the nipple area off your bodice. So you take the measuring tape and don't pull the measuring tape too hard. You don't want to squeeze your your body into this top or whatever you're making and make it too tight. So you want a kind of nice reeled up relaxed measurement on this? That's where you measure your bust measurement. The next measurement is your waist is kind of the smallest part of your bodies. If you don't know where your waist is on your body, it's the simple exercise that just naturally put your hands on your your natural waist. And that really does give you the basic area of your waist measurement. So again, put your measuring tape around your again. Don't pull it too tight. Make sure you're not measuring over jeans or waistband or anything like that. That lad extra bolt could make sure it's, um, the quite an accurate measurement. So that's where you would measure your waist measurement. The next one is your top hip measurement. This is approximately 10 centimeters down from your waist measurement. So if you measured 10 centimetres down, which is approximately there and then take your measurement your measuring tape on measure around your mannequin or your body. The next measurement is your low hit, and this really is the widest point off your your your body. This is about 20 centimeters down from your waist. So again, measure 20 centimeters down and then give your mannequin a measure again. Don't pull it too tight. This will go over your bottom, where it you would want to. Maybe put a bit tight, but don't. Don't pull your measuring tape too tight on this one. Give it a nice, relaxed fit. You don't want your garment squeezing in in the wrong places. Um, another good measurement is if I just turned my mannequin round. Is your nape to waist measurement? This is the bone area on the top of your neck here or the bottom of your neck. It's really at that point at the top of where your natural neckline or bodice would start. So it's used the seem line on your mannequin and then measure right down to your waist. And that's your nape to waist measurement. Your cross shoulder is a very good measurement. If you've got a garment with sleeves or a jacket, this really does go from edge to edge right away across the back, right to the edge of your shoulder. Point to shoulder point. Another very good measurement is your the cross back hair. It's approximately 15 centimeters down from the highest point of your shoulder or your hate SP higher shoulder point. Put your tape measure right and then the crevice of your neck and it really where is where your neck makes your shoulder point here to put your measuring tape here, measure 15 centimeters down and then measure across the back here and it's where your arm hole is or where your sleeve join would naturally join on your bodice. So somewhere around here on my borders again, you can repeat this for the front area. This is a very good measurement to have across your front. If someone's particularly narrow or you want a particularly broad shoulder on your garment again, it's quite good to have these variations. So go to your hate chest P and go approximately 15 centimeters down on your bodies and then measure across again. It's arm, hole, toe, arm, hole, and that will give you your measurement again. It's this area here where my sleeve would join right the way across my chest hit another good one is a sleeve measurement. It would be really where your seemed joins. Get your mannequin or your model to stand with their hand on their hip like that, so you get the most the biggest length, and it is the measurement that goes from your sleeve. Join or your most outwardly point on your shoulder if you just give a nice measurement right the way down the outside of the arm over the elbow until whoever wherever they want the length off thesis leave to finish, they might want a short sleeve like this, or she'll making a full length sleeve. Make sure you get the whole length off that wrist and then when they dropped their arm, you can also give a measurement like that to see where they want their natural length of their sleeve to finish. Also a bicep measurement. This is about two centimeters down from where you're your armpit is really It really is kind of around this area on the mannequin. You just give a light measurement around your bicep. Here again, they might want something quite loose, But don't don't pull the muscle to tie. Otherwise they wouldn't be out to move their arm. Just give a nice, loose measurement around here just to get their muscle measurements on again on measurement off their wrist again, Don't pull the measurement too tightly. Went there to get their arm in. Just give a nice measurement here, depending on what they're making. You could vary the with off the cuff later on, Aunt to get some lengths in the garments again, depending on what the government is your making. If you're making a dress, for instance, Ah, very good measurement is to get your waist measurement to your knee area. Just feel where the knee area is on your model, or approximately about 55 to 60 centimeters down from the waist is on average knee area on a government. So just hold your mannequin. Hold your measuring tape on the waste a measure down to where the knee area is on your on your client on. Then if you're doing a full length gown, you put the measuring tape on the floor. Check. If you're your model, is wearing heels or going to be wearing flat shoes. This will vary the height off your body's. If you're doing a wedding dress, for instance, what kind of hell are they going to wear and get your model toe? Put the shoe on or the heel height on that will give you a more accurate reading. You put your measuring tape right so it just touches the floor or wherever they want. They the dress to finish on. Then measure again up to the waist measurement, and that will give you your waist to floor measurement. Thanks for listening
4. 4 Blocks and Slopers, what they are ans why we use them: hi. In today's lesson, we are going to be talking about the basic bodice block, or Sloper, as it's called. You may have come across this terminology on not really understood what exactly it means. It really is the outline or the shell off your body's or any shape that you're going to be working with. And it's really is a stripped back version off your body's shape. As you can see here, I've got my basic bodies block. I'm going to be using a UK size eight average bodies block as you can see up, changed it along the way and added additions. This is okay, but it really is just a starting point off any kind of pattern cutting that you do as you can see here. I've got my back bodies block my front bodies block on my sleeve block on. They really are just a starting point of any pattern, cutting of only working on 1/2 off the block. It's got no seam allowance or any fitting or style lines or anything like that. These could be changed and added along the way. As we develop our shapes or garments a Z, you can see they've got dart positions along the way. And once these are stitched up there that what adds thesis oppression or the shaping around the bodies on adding a waistline, this will get stitched together, and that will give you your defined waist line up here. This area here is my bus start, and that will create the shaping around the bust area. This here is my basic sleeve block. It's a short sleeve at the moment. This again, congee added, and taken back to create a short or long sleeve. This sketch here is what it will actually look like if you fold out the front and the back half. So as you can see here we have my bust dart here, which is this one here. Then, after it's stitched together, you have these vertical lines creating the way shaping that go down towards the hip area. This is my sleeve block now in industry, it's quite you universal that indicated you have the one notch here, particularly on the arm hole or bodies on that will indicate the front of a body's Anybody that then is stitching your garment are poor. You're stitching up afterward and you lift your pattern off of the pinned and cut out fabric. You can use this as a guide to know which is the front off your garments on. Likewise, at the back, you would normally have a double notch here on that would indicate the back of your bodies . Blocks come in all different shapes and sizes. You can get bodice is skirts or trousers. You can get them in a lot different shapes and sizes. You can even customize them to your own body shape so that every time you work into one of these shapes, you know that is going to fit your body shape. Now I'm based in the UK You can actually buy a really good stack of blocks from all the different UK sizing from a company called More Plan. You can buy this online or in their store. I'm sure that there are other various online shops. You can get these four. If you can get hold of a good, decent size or feel making garments for yourself, you can get one. That's the closest measurement to you, Andi. You can customize it like I've added into my sleeve head here over the time Andi you can put them on card like this because you will be tracing around these shapes a lot, so you need them to be quite durable. It's also called in Manila. Card on. Really? These are quite good. Just a template for what you will be working into if you want to, then create a shape that is maybe an asymmetric garment. You can use one of these shapes usual center front and flip this over to create the double or the full front of your bodies. And likewise with the back A. So you can see I've got my bust area here. This is my waist on. This is my hip on. This will be my backbone and my starting point for quite a lot. Off my pattern cutting. Thanks for listening.
5. 5 Basic bodice block: Hi today. Listen, we are going to create a basic bodies pattern for this lesson. You need your person, paper or your spot on cross your basic bodies block or Sloper, your ruler. Whichever one you decide to choose your your grader or your and pattern master. I'm going to use my set square here. A pencil. A rubber onder later on scissors, Right. Need those final day? This is going to be the design off the basic bodies pattern that we're going to do today. I've drawn it just in small scale for you to see here, so it will have a bus start that will give you the shaping around the bust. It will be fitted so you, after the dark will be stitched together. This will give you some suppression or shaping around the waist area towards the top hip and low hip on. Then it finishes here around the hip area. This is what it would look like after it stitched up on the on the body form on. It also has a short sleeve on it, much like this. So it's a very close fitting, simple T shirt style, fitted bodies, pattern as you can see. So let me just start. I shall get my front off. My body's here. Now start by drawing a vertical line using your spot and cross draw a line just straight down your paper like that. Um, then more corner where your waistline is going to bay using again the spotting cross to get this right angle like this. Mark, this is your center front line. This really is the exact center off your body's block. We're assuming at the moment that your body is symmetrical on your, um, you're figure is a symmetrical shape. So let's just place this body's on your center front line, making sure that that is lined up on your center front at the top on on your waist like that, a complete right angle. If you're not very steady, you can wait this down with whatever you have away Tora account of beans or whatever you like. You can just put something on this to weight it down, but I'm just going to quickly use my hands. But on this a few times, as you can probably tell. So I'll just quickly whip around this. Make sure you do mark in your dark points there on your bust area, making sure you get all the very important points. Because afterwards, when you I want to cut your garment out and stitched it together, these are the very important points that you'll want to know where to. Join up your pieces. Make sure you mark on or your bust points here just with a pencil like that on, then what I would normally do if I have a symmetrical garment. I do normally just work on 1/2 off the body. I normally work on the I have a right side of the body to because I'm right handed. I find it easier to work into my right that you can have a block you conflict over on the other side if they find that easier. It's just whatever suits you, and so I wouldn't only work into just half off the bodies on then. A good trick is when you're cutting out, you can just fold your along your center front line. Just put a couple of pins, and it so doesn't slip around and cut around that peace, making sure that you'll know it's guaranteed to be symmetrical. But I will just trace this out on the other side just to show you exactly what the full shape will look like to just flip that over like that. On the on the centre front fold line again. Markinor your points. Now don't forget, this block hasn't got any seam allowance on it whatsoever. So I really am just drawing out what would be the stitch line or the net edge off your garment, and I find it a lot easier to work into the net shape or the shape that would be your stitch line, creating your outline of your shape. And then after you've got your feet, that's when you can work into it and add in all your semen balances. And that's your extra piece of semen outs on the side that will end up being the bits that you stitched together. So just then marry all your dark points up. Using your rule are keeping it nice and straight. This you can keep your ruler what they're saying or just toe kind of save time again. This is a UK size eight, but this this is all relative to all bodies, blocks wherever shape or size. This would all be the same techniques that you can use depending on the what size garment you're making hopes is to join that. So that is your front bodies. And again, this is completely net of all seam allowance, which is working on the outside structure for the minute. So this is your front neckline here, This would be create your shoulder, your front arm hole with one notch to indicate the front. Don't forget, this would be your side seam in the side that runs right from under on point right down here, right down to your hit. So this then becomes your waistline on your bottom hip area here. So after these darts here are stitched up, that is what then creates your shaping along your bodies, as you can see there in small scale. So those lines there will eventually get stitched up to this point here, which the end of your dart point and these ones here will become a vertical seem line which will shape in your waist on down to your top hip area. I'm going to repeat exactly the same process on the back. Just move this along a bit. So get your back bodies again Repeat exactly the same process. Were drawing first of all, your vertical line again down your paper like this, using the same kind of waste area as your front bodice you don't have to do, but it's just quite an easy guide to see. You know your proportion again. Lay your if your back bodies. So it's a right angle on your waist is her Markinor your points again, and then just give that a, uh, a drawer around here, making sure it's all very Kara. Sorry, I was covering it, covering a bit, drawing down here, my side. Same and then down to my hip area Here and again, I would normally work on 1/2 if I'm assuming the government is a symmetrical garment. But again, I'll show you what it would look like when it is a full pattern, such as flip that over when you're center back line. Mark that line. There is your center back. We can abbreviate to C, B or C F for center front and center back. It's just easier. Suppose it saves time. If you're in a rush. Aura. You need something quickly to get off to a factory or something, and then this is your back arm hole here with your double notch. Can the shit'll marry up with your slave down here on your hit? Nice curve there and your low hit again marking for your drill points here with a pencil. Now just lift that off their on again. Just using your ruler. Just make sure you join all of the's points together here. If you've got a good block or you've invested in a good shape or you've customized one, you just need to make sure after you've done after you've drawn around that looking at your front and back together, you just need to make sure after your dark is stitched up that this length here and this length here will be exactly the same length on exactly the same with the waste to the hip, making sure they are exactly the same length. You don't want them different lengths, or you'll have a different length T shirt or top wherever you're doing. And again, make sure your shoulder lengths are exactly the same length this is. Then your back arm hole your back neck, your back shoulder, your side seam on your side seem going down to the hip area here, and that would be your waist on again. Looking at this sketch here like this, this is what it would look like after the darts have spin stitched together. You get a vertical seem line like that on that would close up, making it quite fitted along there on your waist. I'm just gonna do the last piece for you, which is your short sleeve for your T shirts going to move now again, Using your spotting crosses, your grid and your ruler just draw a vertical on. I always start with my line. That would eventually maybe be my grain line, and that is the direction off the pattern. So then get your actual drawer a line across here. She's quite a good guide, has lots of angles and right angles involved in a pattern cutting. So make sure you get your pattern lined up with this. And then what we're going to do is, um, just drew around your pattern, lining up your vertical line with your under arm line. Then she's draw groups. Excuse me. Just need to change my pencil or pen. So just drawing around this line hair again making sure you've got in all your not cheers. You can see I've adapted this sleeve Over time I realized that needed a little bit more high in my crown. So I just added a little bit of card there. You can adapt your blocks along the way. If you find that you kind of keep getting the same false time and time again, you can customize them a stick bits on like I've done here. Just trace around that like that. Lift that off and there you have your basic front sleeve. Your sleeve block with your front here indicated by one notch and your back sleeve indicated with a double notch that over time again. Once it's stitched in your bodies, it will end up looking like this and it will end here around about the bicep area Onder that will be stitched in. You can see around this arm hole here, making it a close fitting bodice pattern. Thanks for listening
6. 6 Pattern labelling, seam allowances and cutting instructions: Hi. Today's lesson is about pattern labelling and seam allowances. I'm just going to show you how to label a very basic bodice block thing is what it looks like in small scale. So it will be just a simple front bodice block shaped like this with a bus start Onda vertical dark, giving you some shaping a back bodice on a short sleeve. And this is what it will eventually look like once it's stitched up. Now you want to trace around your body's blocks on, but I always find it very helpful to only trace around the 1/2 off the bodies brought using my center front line as my guide for my block. I fight very helpful to have a right handed side of my body's. Assuming that this bodies will be a symmetrical pattern at the time which we know it, it is going to end up being. So what trace around your your body's block, making sure that you mark in all your drill holes here again, this is a net block with no similarities whatsoever. So this really is your basic guides on where you would eventually do your stitch line. So we're assuming that our top is going to stay in this shape. I just show you now in industry. What is quite it's fairly standard is how to put seamounts is on on a label up your garment . So which is going to work into the 1/2 of the government again, assuming it's a symmetrical garment at this stage. So as you can see here, we've got a vertical line here, which is a right angle to my waistline here. Now, this will eventually be my grain line on. What that means is that this line, when it's laid onto fabric, needs to be exactly parallel to the salvage or the edge of the fabric role if you don't know what this is, if you have a long roll of fabric and you roll this out in a long length, often have little holes along the edge of the fabric, indicating where it's been on the loom and where it's been cast off at the end and this is called your salvage of the fabric on this line here will become exactly parallel to this. So when you're pinning it on your fabric, just get a measuring tape. A measure from your center front line here to the edge off the fabric after it's pinned on . That assures you that the fabric will stay exactly in one straight line and you won't get it twisting or twisting around the bodies or anything else. So what we want to do to indicate where our grain line is again on different garments. We do have different directors of grain lines, but for now, which is going to keep it down the centre front. So the way we can indicate that is just put an arrow on it like that and just maybe doing arrow on one end. This varies. If you have different fabrics like print or one with a pile on like velvet. You always know that they're going to be lying in one direction once it's stitched up. You don't want to have a top with a flower growing up one way and on the print, and the maybe the flower going in the wrong direction on the back doesn't look very nice. So to keep it all laying in one direction, just indicate where the arrow should be away. You want to the bottom of the government to be and that becomes your grain line. So it may be just write that on there so anyone can see now, As you can see, I've abbreviated my center front to see if that's quite that's quite acceptable. We can abbreviate. So what we want to do is you want to write on here. What are pattern piece is so our pattern piece is our front bodies. Just so for future. If you ever refer back to it, you know what it is, or if it goes off to a factory or somebody else's stitching up for you, they know exactly what that pieces. Now, if we're working with one style of fabric, we're assuming with that we will for this garment. We normally call this main fabric the self fabric on, as we are going to just have one front. We want to cut one self as we only want to cut one of these pieces in the self main fabric , and it might be quite a good idea to put what size the garment is. So this, for instance, is a size UK eight. Again, this is very helpful. If this ever goes off to a grading company afterwards, they know which size it is, or if you ever refer back to it. If you've got a block or a pattern that's customized to yourself, you might want to say, you know Caroline's bodice block or something like that, So that's quite helpful labeling. So if you ever need a reference back to your pattern afterwards now what we need to do now is we need to add two seam allowance on this. Seamounts is the extra bit of fabric that will get then stitched together so you don't end up stitching inside of your line, making a garment very small. This would be eventually the net edge or the stitch line off your actual garments. So we want a little bit of extra fabric that goes inside of your garment so that this stays exactly the same size. So a good measurement for me if I work in centimeters, so a good measurement for me is putting a centimeter seam allowance. You could do 1/2 inch C max. This is quite acceptable if you might want to alter your garment later on, I suggest adding a a roomy seamount so that you've got room to adjust the garment at a later date without having to re cut another fabric. As you don't want to be re cutting the fabric again and again, it could be quite expensive. And so I'm just going to show you. I use my ruler as a guide. It has a centimeter guide on it for me. So I just lay lay in line with my side on add a centimeter seam allowance all the way around the outside added on the bottom is this will become our hem of the government. So we want to have a little a nice finish on the bottom of the government without losing any length in our bodies. I never sent to me to to the shoulder line, depending if you've got a sleeve or what kind of neckline you can do a slightly smaller seam allowance of not 0.6 or 1.7 cm seam allowance on your arm holes or your outside edges if you like, as you don't want them to become too bulky. But we're going to be putting a sleeve in his arm hole. So again, add your centimeter seam allowance. You can always when you're stitching, trip away your semen ants. If you're worried, it's going to become too bulky once that's all turned inside, so keep it easy. Keep it simple. I will add in your one centimeter seam allowance, and that's what it looks like. So I just working the 1/2 off the bodies. Now this is a little trick, and you always guarantee it's going to be a symmetrical garment. Hold your pattern piece exactly down the centre front line, making sure it's all lined up like this, making sure you get all your spot and cross. You can use those as a guide to fold that in half. Put a couple of pins along your seam. Allowance of the fabric is just to stop it moving around just a couple every every 10 or 20 cm along the just to stop it moving because we're going to be cutting this out. Just a couple of pins in like that, just a stable either. Get your paper scissors. Make sure they're nice and sharp, so you want to cut now around the outside off this edge, making sure you're very neat. It's Heidi. Don't don't go anywhere inside of these lines when you stitch it up you can use this extra seam allowances, a guide you're stitching. Then you always know that your garment will be on that line. There will become exactly the right size. Go easy around the home. A nice don't forget to recycle your paper after it gets for quite a lot of paper in this industry, go around an arm hole on the neckline, making a nice curve like that. So eventually you have your shape that looks like that now, while it's still pinned together because we know we want a symmetrical garment. Get your little cutting. Mount your little rubber mat and get your drill. Just put it under like this. Just do a little twist of your drill here to mark the end of your dark point. And that makes a little hole in your points of your dark so that when you're putting this on the fabric, you've got these darts. These holes indicated you could mark onto these holes or tackle into these holes, and you know that that's where your dark points will be. A. So that's what it looks like and then steal wallets, pin together, get your notches and go around the corners and she's not your little notch into the edges like this. And again, this is incredibly essential for when you're then stitching your garment up, especially on positions like this, which is your dart, so that when you've got this off the fabric that will eventually close up like that, you know those points joined together here, and that will indicate your dark position and your suppression without your pattern being on the fabric. Don't forget your your arm. Hold notch that will get your sleeve in nicely. Go around all your points here again. This will help you incredibly when it's being stitched together. So the machinist or yourself will know how much seam allowance it actually has. So that's your finished garments, or what you need to do now is just take these pins away. It is your front for this now unfocused. And then there you go. There is your front bodice piece on. You always guarantee that that is going to be an exact symmetrical bodies piece. You can always go back to your block and check that it deals in the fact match up. And yes, look at that. See, that's where we guarantee we know that we've got a symmetrical bodies piece and that will become the front off your bodies like this. Now what you want to do is repeat exactly the same method on the back again. Back bodies, cut one self fabric. Onda indicate the size, if that's necessary of a sleeve is slightly different only in the cutting instructions. Because, as you can see in the sketch, we actually have a pair of sleeves. You don't wanna have a T shirt with just one sleeve. Well, maybe you do, but we're assuming you've got a ah symmetrical body shape. So instead of saying you want to label it sleeve for a start, there you go. Don't forget to add in your grain line. We're gonna put this right down the center like that so that we know that that is always going to lie parallel with our salvage and that the fabric will lay or nicely down. If you've got a nice print or a check or something like that, that you'll make sure that that always runs in line. But instead of labelling it cut oneself. We want a pair. So we're saying cut one pair self so that when we cut it out, we No, we want one like that on then one on the other side. And that means we do get an exact pair of a sleeve. Make sure you don't write cut too, because what a lot of people do do is write cut to and then you end up with two left sleeves, and that's no good for anybody. So make sure it is cut a pair When you cut it out, you could fold the fabric in half and lay that on, and you guarantee that you've got cut a pair. So we'll right size eight on here. So we know it joins up with my front bodice again just at UFC Malawians. Oh, the way around here, I'm just using one centimeter for now just to keep it simple and this is quite normal. And then had you seam allowance there and then that is your front sleeve ready to cut out. So you just need to cut that out afterwards. Remember to add in your notches here and on the corners on that's your from your sleeve, ready to marry it with your garment. Thank you
7. 7 Basic dart manipulation: Hi. In today's lesson, we're going to do a bit of dart manipulation. We're going to move the bus, start to an under arm dart. Now, I've just drawn out in small scale here a simple bodies block of front bodies. As you can see, this is our Bust Dart here, which is the same as our block that we have here. This is an optional dark. You don't need to incorporate this. This is the dark that will give you your way shaping. We will involve this in this block. But you don't have to put it in if you want a loose if it But the main idea of this lesson is to be able to move around the style lines of our dark, always keeping a bus shape on when that dark is stitched together, it will give you that suppression and shaping around your bust area. But we will just be changing the direction and the style line off that dart. So what you need for this lesson is your front bodice block your ruler of choice and your pencil and you're spotting across paper, so we will just leave that there is your reference. So you can have a look at that. What we need to do is just draw your center front line. Now again, I'm just going to work on half off the bodies, assuming that we have a symmetrical bodies as we know there. And then later on, when you come to cut this out, you could just cut fold right along that center front line, ensuring its a symmetrical government. So which is going to work on the upper bodies? For now, This is our waistline here, which is this line here. So what is going to draw a line along here, making a right angle for our center front or CF? Seem not. Just put your block. Eso It's in line with this grid in front of your block is in line here. Don't worry about the bottom half, which is concentrating on this area here. This is your waistline here, so just concentrating on this area here. So, as you can see, we have a simple bus start here, which is like this in image one. Here. We want to move it to the underarm. So on your block you can draw on there. You can rub it out afterwards, it's up to you. So just use this as your bust Point here on your block Move. Draw a new line of for instance, I'm going toe. I don't know. It's again. It's up to you. We're gonna draw relying round about here going from my bus point to the side seam Just so it looks something a little bit like that when it stitched up. So then what you want to do is draw around your body's block, so make sure you've got your points in here like this. This is your dark here that will give you shaping under the waist. What you want to do is just draw up to this point here. Just draw a little mark here, just finishing on that point. Make sure you mark in your boss point. That's a very important point. There interest rule around the rest of your body's block, making sure you get all your important points. Now it's this point here that we want to change, so just draw down to your sides. Seem what we want to do is close up this star on Open out one here so we have our new indication of where We want our new dark to start and finish, which is Mark the opening at the top of that dark here. And what you can do is use your finger or use a pin to put in your little drill hole here and just pivot this dark around like that. And so you close up that dark to that point. You see that movement there? How Go back again so you can see. So I just had my pin in there. We want to close up this area, so turn it anti clockwise and just make sure you close that dark. Making sure that that one now that would be closed is on that dark point there at the end to take that away. What, you want to do it? Continue that side seam line there on. Then mark your new dart position. Now, this is where it gets interesting. So take your card block off. What you want to do now is now drawing your lines so you can draw up to that dark point from your new style lines. You can. This is an optional Dar says, depending on if you want shaping in your waist or not we'll put it interest for the sake of the sketch that you understand on. There you have it. That is your new, um, under bust Arm hole dart. You're under around out there. So this again is your side. Seem this will match up back to your back block afterwards, but you just have a new shape on that area. There is exactly the same area that we closed out here, making this exactly the same shaping. Thanks for listening.
8. 8 Necklines: Hi. Today we're going to create a V neck front of bodies pattern using our block standard block that we have here a ruler of your choice A pencil, your rubber on your passing paper. As you can see, I just again drawn up in small scale here, which is going to work into the front bodice. This is the shape of your block that you have already a nice around neck which is going to change into a nice V neck for you here. So if I just move that aside so again, I'm going to just work on to the 1/2 of the bodies, assuming that we've got symmetrical bodies and then when you do cut your pattern out, you can just fold it along the centre front line, ensuring that you have an identical other half in a symmetrical right half. So just stop again by drawing down your spot across paper. Using your dots is your vertical line, which is going to create our waistline here. So just go across on your spot across again, a right angle to your center front line. So mark this C F center front. So we're going to trace round, which is going to work into the top of the bodies again for this one. Don't worry about the bottom half, which is going to be changing the neckline. So we just want to concentrate on the upper bodies such as trace around your block again, making sure you get all their important points here, which is going to keep the same darts is the block trustful room for the sake of for is so which is concentrating on the necklines which is remarkable. Your points like that lift your body's off and then just roar back in your dark points here again at a later date. These can be moved around or manipulated, but we're that's concentrate on this neckline. So this is your round neckline here that you have here when that's folded out onto the other half creates quite a nice round neckline, but we want to make a V neck here. So we're going to go from our highest shoulder point here, also known as H S P for short. So we're going to use the full length of our shoulder. You don't have to, but we're going to for this exercise. If you want a more open neckline. You can open out on the shoulder, but which is going to draw a nice V neck using our higher shoulder point, and that will ensure that we really are up in the corner off our neck there to get a nice straight line. So go from your highest shoulder point. Get your ruler on a kind of a nice measurement to make sure you again. We This block here is a standard UK size A. So it does vary. It really is up. Teoh whoever you're designing for or which government you're doing. But a nice, easy measurement to make sure that you do cover your bust in your bra area is from your highest shoulder point here measuring a straight line here, measuring about 25 centimeters. Make sure that point hits right on your center front line here, and just mark that point there. And as you can see, it is above your bust area there, so it will ensure that you cover your broad area. Then just simply draw these two points together in a nice straight line like that. And then when you cut this out, you can fold down your center frontline, ensuring that you get a nice, symmetrical the half. And you can rub this old line out like that. Not that one out. And there you go. You have your nice V neck shaped neckline. Thank you.
9. 9 Vertical or Princess lines: hi. Today we're going to be adding a style line into your front bodice. We're going to be moving the bus start into a vertical dart here, As you can see in the image, this image is off basic block front blockers. We know we've got our bus start here on day, an optional waste adult that gives you shaping the waste what we're going to be doing it moving this line vertically up into the shoulder, merging these two lines, creating a vertical seem line otherwise known as a princess star line. There are variations of the Princess seam line. You don't have to have it going up into the shoulder. You can maneuver it so it goes into the arm hole, putting a slight curve on it there. But we'll keep it simple, and we're going to run straight from our under bust seem line there, joining the two seems together on then moving the bus start into the shoulder. They're creating this vertical seem so you will need your pattern paper, your front bodies block your ruler of choice and your pencil and potentially a rubber, which I often need. Okay, so we will start again by I'm going to just work into half of the front bodies. Assuming that we do have a symmetrical front bodice than when you do get to cut your front bodies out, you simply fold it along L center front line, ensuring that you have a symmetrical front. The case I will stop. I always start by your drawing in my centre front line, using your spot and cross as a guide, and then we're going to just work into the top of the body. So I'm just going to mark my waist line. It's just a right angle to my center front line here, Mark that cf your center Francie always know where that line is, and that is your right angle there. So line up your body's block when your centre front and your waistline they're making sure it's all lined up top and bottom like that. Now we are going to be moving this bus start here. We're going to be moving it up into the shoulder. We're going to use this bus point here is our line. So on your block, let's say we want our line again. This is a design feature, so it really is up to the wearer or who you're designing for. Where exactly you want this line? As long as you keep your you're fit exactly the same. It really is. Optional was toe wear your style lines and darks go. It really is. That's where creative flair comes into play. So we're going to do a new style line. They go somewhere in the middle off the shoulder, so roughly get the middle of your shoulder. We're going to go from this point. Yeah. You draw a line on your block up to that point there on, then what we're going to do is mark in your under bus. Seem lines here, mark in your point there and draw around your front neckline when you get to the point where you just drew your new line. Just do a little mark there. So you know where your line finishes. We're just going to leave that there for a minute. Co carry on round to the other side, draw up your side, seam. Here. This is the dark. Now we want to close. I want to open one out here. We want to move this line here to your shoulder line so make do a mark like that there. And then again, get your piano, your your pencil or whatever. Just put a little pin in that hole there. What we're going to be doing is moving this block around. So we basically want to close this dark on. Open out less if you pivot your block clockwise so that this point here marries around that when I just turn that back so you can see that one more time. So we're going to close this subsidy. Want to turn the block it down enough so that that point touches that on there. So I'm just gonna pivot that long round like that on that is your new position, removed that pin like that and then continue around drawing the rest off your block in that , your side seam there. Go up now to your shoulder and then marry it back around to your new position in your shoulder. Now, when you lift that off, you'll see something interesting here. So we have now, which is draw in our new lines here. Style lying and princes seen bodies. Hi. Today we're going to be adding a style line into your front bodice. we're going to be moving the bus. Start into a vertical dart here, As you can see in the image, this image is off basic block, front block. As we know we've got our bus start here on day, an optional waste adult that gives you shaping the waste. What we're going to be doing is moving this line vertically up into the shoulder, merging these two lines, creating a vertical seem line otherwise known as a princess star line. There are variations of the Princess seam line. You don't have to have it going up into the shoulder. You can maneuver it so it goes into the arm hole, putting a slight curve on it there. But we'll keep it simple, and we're going to run straight from our under bust seem line there, joining the two seems together on then moving the bus start into the shoulder. They're creating this vertical seem so you will need your pattern paper your front bodies block your ruler of choice on your pencil and potentially a rubber, which I often need. Okay, so we will start again by I'm going to just work into half of the front bodies
10. 10 Shift dress/lengthening a bodice block: Hi. Today, we're going to be creating a basic sleeveless shift dress from our bodice blocks. As you can see here, I've drawn Ah, little lady here. So this would be our basic bodies block as we know it on the front. Where? What? We're going to do it. Extend it down to create a dress version off our off our bodies. So you need a nice Pete big piece of pattern paper spot on. Cross your body's blocks. Your meter rule that we're going to go a little bit larger on our patterns this time your other ruler of choice on your pencil and rubber. Okay, let's get started. So which is going on? Which is going to show you the how to do it on the front, And then it will be exactly the same what I do on the front as to the backs, which is gonna concentrate on working on the front bodies for now. So start again by drawing your center front line. Used the spot on cross to get a nice straight line egg. A nice flat surface under their lineup, your spotting crossing and nice line all the way down. They're gonna shift that off a bit and continue that line right the way down the piece. There, this will become your center front line. The exact centre front off your body's again. I'm just going to work into 1/2 of the bodies, and when you cut your piece out, you simply fold the center front line over putting a few pins in cutting it out, and then your guaranteed that it will be exact symmetrical bodies on the other side. So I'm just going to work on to the 1/2 assuming that we have a symmetrical bodies for now . So this will become my center front line like that, not just mark in your waist. It is always a really good indication on your pattern for reference. Back on. What we're going to be doing is extending our bodies, so this is a very important line to have on here, so this will become our waistline. So marry up, your body's on. Your sense of front line on your waistline on your body is making sure that everything is all in line, so we're going to keep the dark. Position is the same as the block just forties, but these again can be manipulated. These are designed feature. So we're just going to keep a very basic. These are the darts that will give you the shaping through your bodice. Your bus start. This is the most important one. If you wanted a little bit of an easier shape shift dress, you don't have to have this start here. This is the one that then gives you your waist definition here, once the order is closed up and down onto your hip here. But if you wanted a very a looser shape, you can avoid that dark there and just have the one that shapes around your bust, which is going to keep it in. So it's just marries up with our sketch here. Okay, So just drew around your whole bodies here. That's your shoulder, your front arm, hole your side. Say make sure you get all your notches and you don't want to forget those. When you're cutting it out, you want to know where you stitch or the pieces up together again. Make sure you get your bottom hip line in there to draw in all off your bust on dark points like that. Lift that off And then what you want to do is just join or your dark points back up again like that. So it's exact replica off your bodies block there. So it's always going to be exactly the same measurements going forward, especially for, um, this is a UK size eight bodies, so we always know it's going to be exactly same measurement. Now. This is our hip area is a roughly about 20 centimeters down from our waste areas. A very good guide to get your head on the measurement that we've got here, which is indicated by our block. It is a 22.5, but again they all very blocks come in different shapes and sizes. But if we just get that measurement off our hit as a very important a measurement there, it basically is the widest point off your bodice. If you got a slightly bigger hip, you can take that line out a little bit, and that's absolutely fine. So what we need to do is get that measurement there on. We're going to just extend this for this block from the waist down. Now what kind of an average measurement for a nice shift which sits above the knee is approximately 50 centimetres, or 55 centimeters. Something like that, down from all waste measurements. So what we want to do just going to shift this piece up, so find your waist measurement, which is this one here. This is your waistline. Go right the way down from your waist with your measuring tape for your ruler on measure, which is going to go 50 centimeters down there and then do it again somewhere across like that. So you get your measurement like that, and that's 50 centimeters down. If you start going below the knee area, you might have to start putting in a split or event, because otherwise this circumference around the knee area gets so tight that you can actually walk or bend your knee. So it's quite a good idea to keep this shift dress above your knee area so that you don't have to add in a split and you can walk, which is absolutely fine. So get your route and go on a right angle. Your center front seemed. Just join up those those points and square square that across, and that will become the bottom hem line the stitch line off your shift dress and then new outward point of your hip. We, uh, get that point, I think he said. It was 22.5. It's just given a rough measure. See what your outwardly point of your hip is on your front and just mark that. Just get that debt measurement there and measurement here and just kind of do a few points all the way down the side, going from your center front outward. So you get a few dots all the way down off the same measurement, and then just join again, those dots up all the way down to the head like that and you get a straight line, and that really is, quite simply, your basic shift dress. It really is just extending your bodice block down again. This is optional. You can have a looser fitting bodice Brooke, if you like on what we need to do, we would do exactly the same to the back bodice, and then just ensuring that however long or much you grow this down by on the him, it's exactly the same on the back. Ensuring all of your side seems marry up when you're stitching it together. And there you have a nice little shift dress that you can wear out to your party in the evening. There you go. Thank you very much.
11. 11 Creating a pencil skirt from block: Hi. Today we're going to be creating a basic pencil skirt from our bodies block, which sounds crazy, but it can be done. And it's a very simple way of creating a nice fitted pencil skirt. As you can see in my sketch, this is what my body's brought. My front bodice block looks like as we know it's We have our bust, our on our vertical line going through our waistline. They're giving us some shaping, and then it stops around about the hip area around here. Now what we're going to do is actually just work in the bottom half off our bodies block and then extend it to make a nice fitting pencil skirt. So you will need your pattern paper and your front and back bodies. Brock, your ruler and your pencil and a measuring tape. Okay, so we are going to start by drawing our center front line, which is always a great starting point. I just use your spot on cross paper here to just roll right down the center of the spot on cross to get you a nice straight line here. Now, as I mentioned, which is going to be working the bottom hawks were working in or into a skirt. So we don't need all of this up here. This is our waistline. We're going to create a pencil skirt that finishes on our waistlines. So this really is all good Indication off where our skirts starts. So let's draw a straight line up here going to go straight across the, uh, straight across the spotting cross. It cuts right through a right angle to my center front, able that center front again. I'm just going to work on the half off the garment because when you cut your pattern now, you can simply fold along your center front line, adding a couple of pins into the other side when you cut out. So when you cut out, you know it's always going to be a symmetrical pattern piece. So working on just the 1/2 always ensures that you get an absolutely symmetrical piece in. Ah, we're assuming that we do have a symmetrical skirt at this point. So which is going to use all waste line there and lining up on our new line that we have Here are new waistline here. Just line up your center front and your waist along this line here, ensuring it's all on straight. You can wait this down, but it's going to use my hand to hold this and make sure you mark in your waistline dart there on your bottom dark. Here. I've got two different star lines on my block, but you'll just probably have the one I don't know that confuse you just for different fit purposes. But just put in the one marking their of the bottom of your dark there and then feeling the side off your bodice like that, and that is your hip line there. So if you live right off, you can join up your dollars to your waistline here like that. So you have your waistline here in your center front, running straight down there, and this is approximately your hip line, which is about 20 centimeters roughly down from your waistline. Now again, your blocks can come in different shapes and sizes. Mine is a UK standard size eight. So my front hip measurements, um, again, this is net on the body, so I've got something roughly about 22 a half cm. It will very different sizes, different blocks, but if you just get your most outwardly point of your hip there, see what measurement that comes to mind is 22.5. You have a bigger hip. You can add into this. They will vary. But if you just measure your most outwardly point of your front hip measurement on what you want to do, go down with your ruler along your center front line and making sure that you have the same measurement. 22.5 or what ever your measurement you have. Run your ruler down your center front every 10 or so centimeters. Just do a marking there that will indicate your side. Since let's just get a few Mark's going down there on then what we want to do is just join up those lines, joining it back up to the hip with your ruler like that, and that will lengthen your side. Seem now we want to get the length of your skirt Now using your waist, um, measurement on your client, you could measure where they want the particular skirt. Finish as a guide from your waist down, Let's say, on average height person, Um, maybe 50 or 55 centimeters is quite an average above the knee length shift dress. This will just sit above your knee. I think if you go anything below this, you will start to get a very small knee cirque circumference, and you might have to add a split or event in to be able to walk. Andi. Maneuver your knees if you go any longer than it, so I would advise maybe keeping above the knee. If you do want to avoid adding a split or event. So get your measuring tape and lie it on the top there, right by your waist measurement, and then measure all the way down your center front line the and just put a mark there. I'm going to go 50 centimeters again after you've made this up and it's too long or too short. This is when you convey, vary it and add a little bit. Length will take it awful. Whatever you want to do, you just go a little bit longer further down your waist and just do exactly the same, just so we get a couple of points so we know it's going to be accurate. Mark. 50 centimeters, also down from your waist and then again using your set square or your ruler line up on your center front line. Andi, those like points or should line up when you just want to square that off at a right angle and make sure join up all those lines there. Drawn that a little bit long, that line there so we can just take that extra bit of length off on. That is basically the 1/2 off your front shift pencil skirt. So what you can do when you cut this out is when you add your semen. I want zone you have sent to me two seam allowance again. Fold along your center front line and cut out, ensuring that you always get a symmetrical front. Now repeat exactly the same method on the back, ensuring that whatever length you add down from your hip, you get exactly the same on your back as you do on your front. Find the widest point of your back hit and then just square it down. So this is a right angle on parallel with the floor on again. Parallel a right angle for your center front and center. Back on that, there's your little pencil skirt ready for work. Thank you
 Caroline Barulis PurePatternCutting, Pattern Cutter & Maker