Transcripts
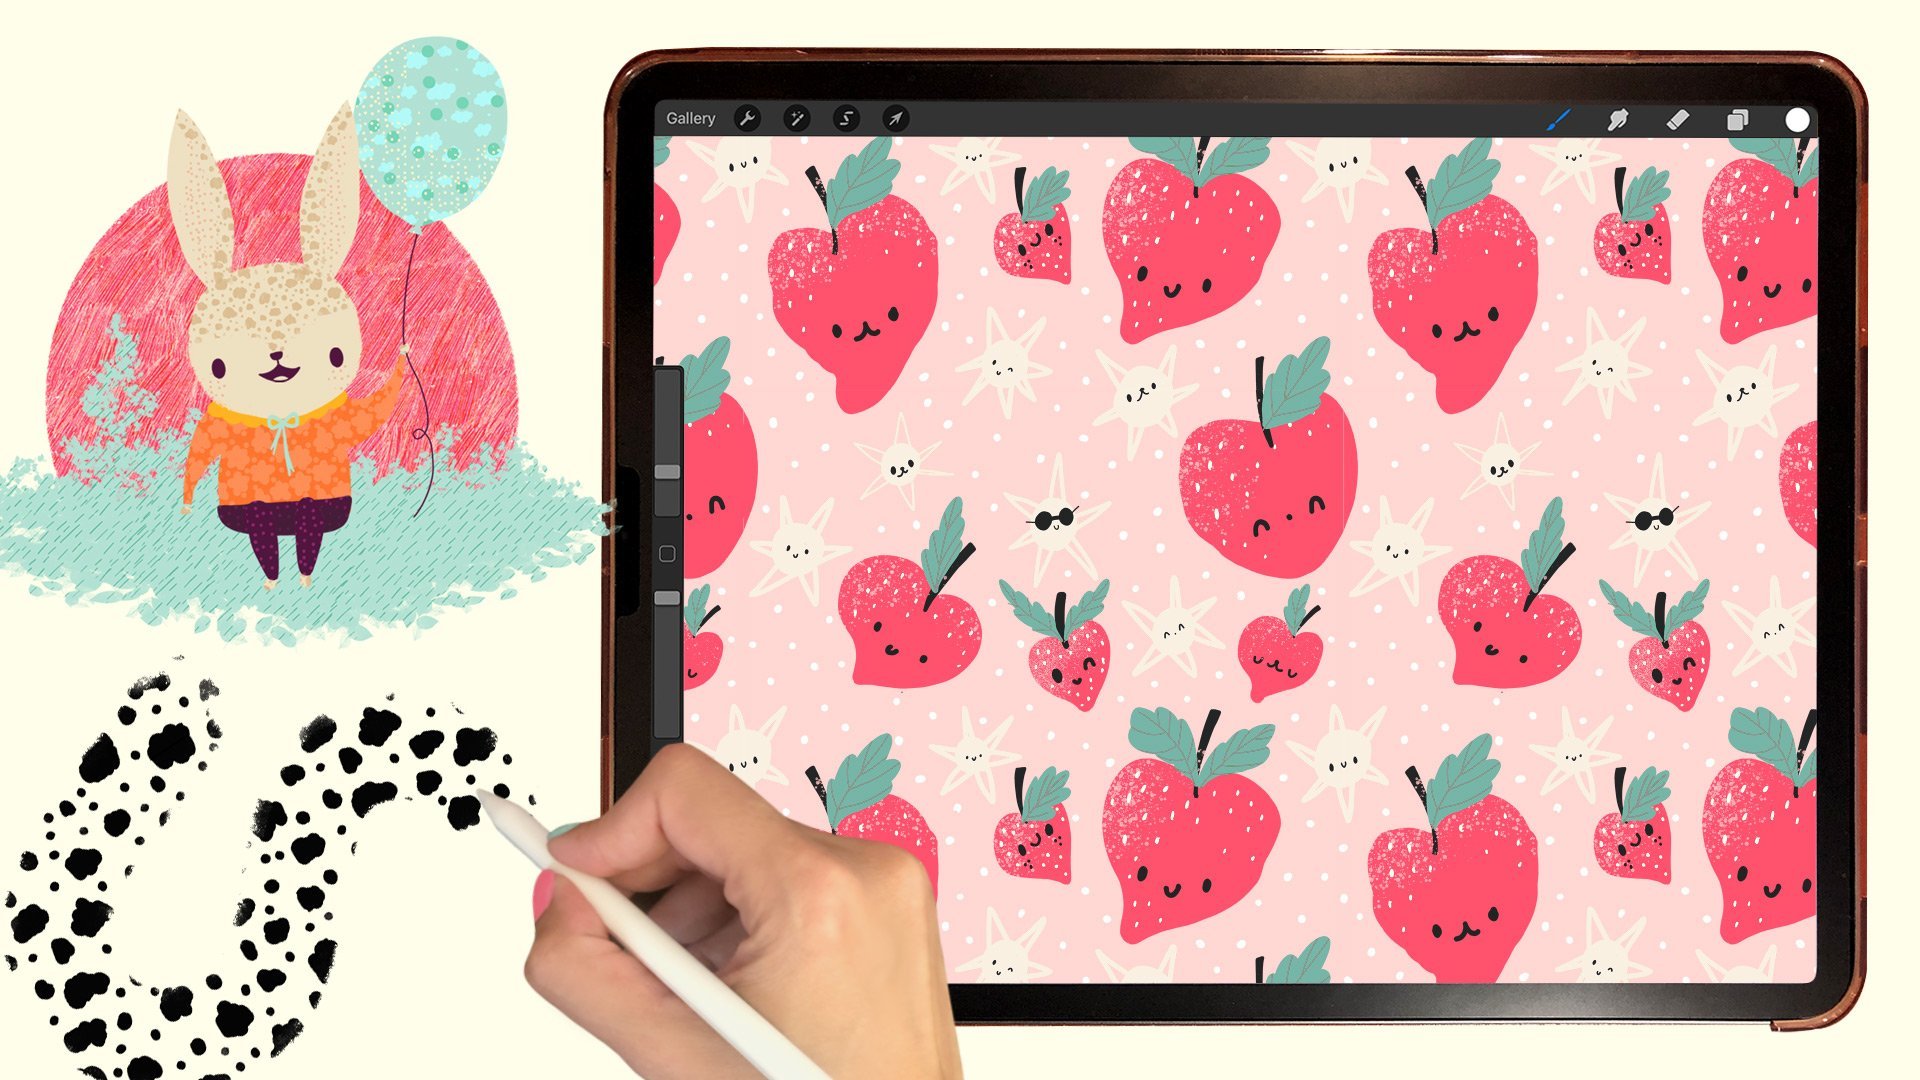
1. Intro: What designing
cute characters in Procreate wasn't about
drawing perfectly, but about making confident
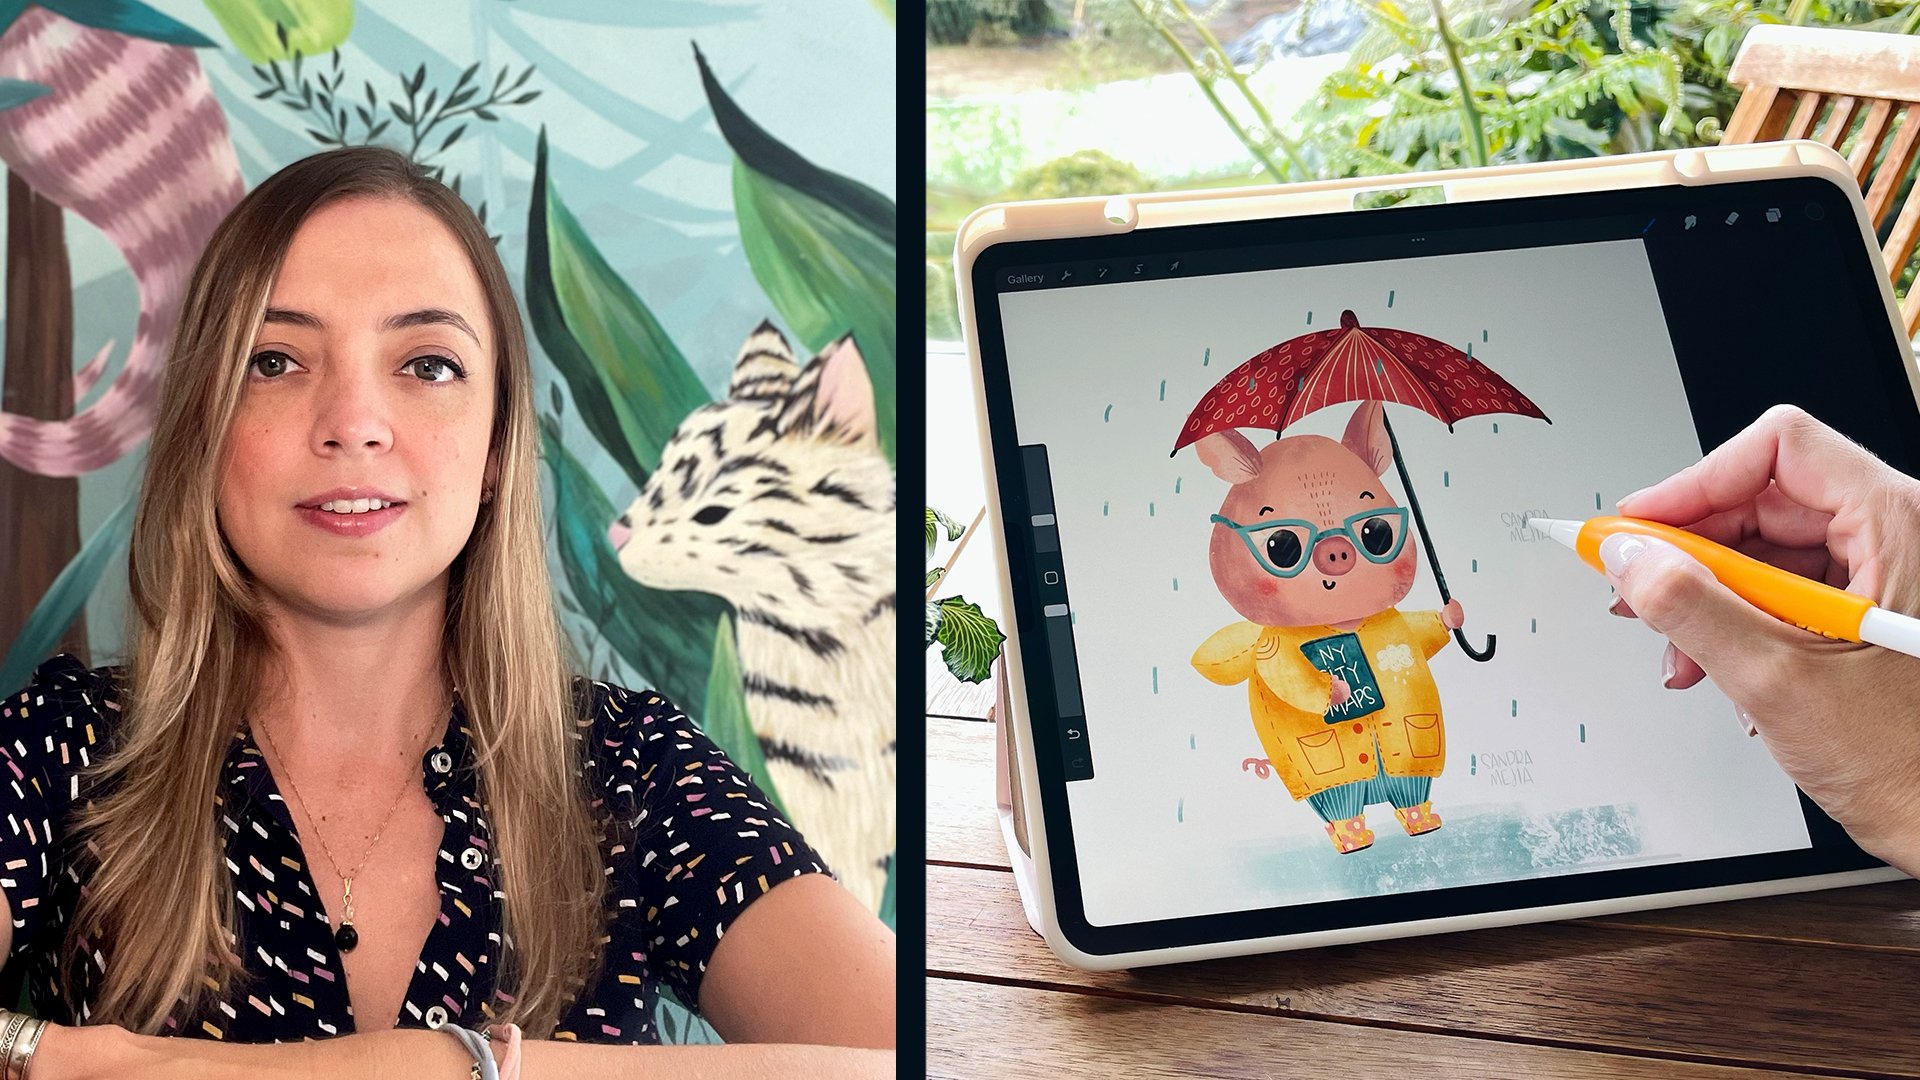
and clear decisions. Hi, I'm Sandra Mea. I'm a top teacher
here in Skillshare. I'm an illustrator
and pattern designer, and I have taught thousands of students how to use Procreate. Characters are everywhere
on children's books, movies, stickers, video
games, you name it. And being able to
create your own characters is a superpower. And in this class, I'm going to show you how to
design characters in procreate step by step
and in a very easy way. Together, we'll design
this super cutuoa. I'll guide you every
step of the way. We'll begin with a back story
that shapes every decision. Then build the character slowly through silhouettes,
features, linework, color palettes, turnaround,
creating a pose, and a polished
final illustration. Everything stems from the back
story and its personality. So instead of second guessing every decision
you have to make, we're going to use
that information to design with intention. And this class is extra special. While I was designing
this character, I kept wondering, how would
it look like in three D? So I decided to take
it one step further, and I reached out to my
favorite three D designer, the super talented Dave Red. Dave, what do you look for in a character illustration when you're turning it into three D? Hey, Sandra, what's up, guys? So what I look for in a
great character design that works for
three D is firstly, simple shapes and simple forms. Secondly, you want a
strong character design. Thirdly, you want
to turn around. So this will help you understand the character from lots
of different angles. If a character works
as simple shapes, it'll translate beautifully into three D. All right. Back to you. Perfect. That's what we
have done in this class. So this is part one
of a two part class. We here we build a character in two D using Procreate,
and in the second part, they read takes this
exact character and teaches you how to
bring it to life in three D using
know what's called. So once you finish this class, make sure to check out that one. Look how cute. Now
grab your iPad, open Procreate, and
let's start designing.
2. Class Project: For the class project, you'll
design your own character, following the process
that we covered in class. You can start by downloading the character back
story worksheet from the class resources. You'll also find
the paper, text, your brush, and the
color palettes are used. You class project is to come up with a character's
back story and then design your character
in Procreate using simple shapes, following
that backstory. You can share
anything you want in the project gallery,
from your sketches, your back story,
your turnarounds, your silhouettes, the finish character,
whatever you want. Remember that this project
isn't about perfection, it's about having
fun and bringing the character that you
have in your mind to life. Make sure you have
fun with the process and I can't wait to
see what you create.
3. Backstory: Before we draw anything, we have to start
with the back story. I want to say this clearly. This doesn't have to be
anything super complicated. You don't need a full
novel here, a full movie. You just need to make some
intentional decisions that will guide all your
process from now on. So please don't get stuck here. Don't over complicated. Just jot down any idea
that comes to mind. The idea is that you
start practicing, it will flow easier
the more you do this. Just bring your
character to life. Don't get stuck here, please. For example, for my character, I just started with one
simple mission or purpose. So your character is
going to do something. I decided to create a character
whose mission is to help others feel more connected
and feel less alone. So that's the only idea I had and that's where
everything came from. Then you start to
relate that mission and purpose of your
character to an object, an animal, a fantasy
creature, a human being. So what thing, person, human, animal, whatever, can bring
to life that purpose. And this doesn't have
to be super obvious. It could be a little
tiny dog being super brave and fighting a
war. It doesn't matter. It just has to be for you, what do you see the character being that will bring
that purpose to life? So to me, I got inspired by
my super loving chihuahua, so I decided from the get go, it had to be a little chihuahua, and my chihuahua tongue is
sticking out all the time, so it had to be a
little chihuahua with its tongue sticking out. If your character
is on a mission to do something really
brave and it's on a quest, then if you choose
a little chihuahua, you wouldn't make it all
soft and fluffy with super cute eyes and just
being soft and gentle. Even if you chose a chihuahua, you'd make it a little
fierce chihuahua, those that have
strong personalities like my other chihuahua, then that would change
the whole thing, even if it's the same animal. And then you can
even choose objects, you can send a sword that's going for a quest or a
rock or whatever you want. It doesn't have to be a living
thing. It can be a plant. Then we're going to choose one special feature or
quirk or magical power. In this case, I
chose that it has a magical flower that gives him powers to send messages
to loved ones. Why did I choose a flower? Because I thought it
would be something cute that she could carry around and grab it when she was going
to use her magical powers. I made that decision because I thought it would fit
in with the story and fulfill the purpose of it being able to send messages. I figured it would need a magical power to
send those messages. Find its special power, special feature,
and write it down. Then we're going to define
a few personality traits. Again, just a handful. Don't go over here writing a
treaty of its personality. We just need some basic traits. Unless you're
creating a movie or a video game or a whole
novel for your character, just four or five will do. For this character, I'm
thinking it has to be gentle, very loving, going to be cute and playful
and always happy. It'll be bouncy and cute
features and stuff. These traits that you
have defined will affect everything you
design from now on, from the silhouette
to the size of the features to the
size of the head, the body, the size of the eyes, the colors I choose,
the poses I put him in, the way he carries
his magical object. Everything is going
to be influenced by what we just wrote down. This is why the
back story matters, and this is why the
back story will make all your decisions super
easy to make from now on, because you're not guessing, once you know who
your character is, what it's going to do, and what its special feature
or superpower is, then you're just filling in
the blanks and responding to that story and not making up a bunch of features and
things without any guidance. We're going to build
this character in a very playful way, no pressure to draw perfectly
we don't need any of that. We just need to bring
this character to life. You'll see that
everything starts with very simple shapes
and we'll start refining it as we go
along the process. Now that you have
this, let's move on to the next lesson
where we're going to start bringing
our character to life by defining it silhouette.
4. Silhouettes: So now that we know
who our character is and what he's here for, we're going to start
defining the silhouette. This is where the
backstory is going to start influencing the design. You'll see as I go along how it influences the
choices that I make. I'll have in mind that
my chihuahua is on a mission to comfort
and send love. I'll choose very rounded shapes, no sharp points,
silhouettes that feel soft and gentle
and comforting. We're going to explore
a few options, keep it playful, and let's start creating
our silhouettes. Just create a new file and I like creating 12 by 12 " files. So I'm going to
go here 12 by 12. And then I'm going to
name it here 12 by 12. I have the preset
s for next time. Here, I know I have
47 layers available, and if I go to color profile, I always work in this
profile in Procreate. When I click here, it will
create that new file. If you go to your gallery, and you go here to
create a new canvas. You will see that that
preset is saved here. If you want to create
another file like that, you just have to
tap there and then it's super easy to
create new files. I'm going to delete this one and we're going to
work in this one. The first thing I
want you to do is, don't worry about colors, don't worry about brushes. Grab a brush that's
big and blocky, so you're not drawn to creating too many
details at this stage. Let's choose one from I'm
in the classic library. If you're not in the
classic library, you can go here to
pack to libraries, and you can go to Procreate Library and choose
whichever I'm in markers. Let's say it is paradise. So let's choose any dark color. I'm choosing a black. Now let's see how that paints.
That is perfect. If you don't have that
procreate library, everybody should have it. But you can go to the
classic library and go to painting and grab
the Nicole brush, which is also very cool. It just has a bit more texture. So I'm going to go back to the libraries and in the procreate library,
I'm choosing paradise. I'm just going to start drawing. If you don't know how to draw
or if you know how to draw, don't overthink it, start
thinking of shapes. My character is a
chihuahua and it's very cute and it's very soft in
personality and very magical. You already know the story. I'm going to be thinking
of that while I'm drawing. If it's a very cute character, I don't want pointy
shapes like this because that is an aggressive character that in no way will
be a cute chia. Having that in mind, I'm going to create very
rounded shapes. If your character is
aggressive or has to be scary, for example, then think
about bold, scary shapes. That's the only thing
you have to think here, but not overthinking
the drawing. I'll just start
making basic shapes. Let's start with a
circle for the head. I'm thinking that if it's cute, big heads and tiny
bodies are really cute, then maybe it has
tiny little ears. And then I'm going to make
this a bit smaller so I can draw the limbs easier
and see what I'm doing. I am not thinking about
drawing anything pretty. I'm just laying down shapes and we're going to do this
as fast as you can, so your brain doesn't
come in and overthink it and make sure you make
your brush bigger or smaller, so this is faster. I'm making this a
bit more rounded. Then an oval for a body. Chihuahuas always have those pointy ears that are very big. Maybe I make a smaller head
and then a bigger body. I'm making a chubby chihuahua, or like a pug and maybe a more square face. And I like a little body. M Let's try one
with a long body, but maybe a round head, totally round because this
one is square, let's see. Round head, long body, super skinny chihuahua,
then bigger limbs. And then I can even try one because these
ones are all standing up. But what if it's a
normal real dog shape? Maybe like this and small legs. Then this one maybe you can see the tail because this one, the tails in the back so you
can see it from the front. Let's do that same thing, but smaller round
head, and longer body. Then the tail. You can do as many as you want. I'm going to stop here for the sake of not
making this last super long and because I already found something
that I really like. So as you draw this, you'll see things
immediately that you say no, this is
not my character. Your character will
be speaking to you, so just listen to
your intuition. It works. For me, these two are my favorite, and I think when I
imagine my character, that's what I imagine
something really cute. I'm going to save this one for next time because I want my
character to be standing up. So I'm going to choose this one and you choose
whichever one you feel you like best
and you go here to the selection tool and I'm
going to select that one. I'm going to swipe down with
three fingers and duplicate. You'll see the character is there and if I turn off
this layer, it's isolated. Now I have it separate
from the other layer. All my characters
are still here, but I have this
little guy alone, and I'm going to
move it up here. If there's something you
don't like about it, you can draw on it or you
can erase parts of it. I can erase this little
corner here maybe. But don't be too picky about it. We just need the basic shape. We have our silhouette
of our character ready and in the next lesson, we are going to start
defining its features.
5. Features: So with our silhouette chosen, we can now concentrate on the
features and proportions. This is where the personality is going to really
start coming through because obviously the face of the character is going to
be what brings it to life. So every decision here again, connects to the
back story because my character is soft
and loving and cute. I'm going to have
that in mind as I draw the face
and the features. And remember again that we're still drawing simple shapes, no need for perfection here. I am very emphatic
on this because I know how much we try to make everything perfect from
the get go and we want our sketches to be super
pretty, and we don't need that. At this point, we just need
to bring this character into the real world,
into our iPad. We will concentrate on refining those details and
making it nicer later. Now that we have the
silhouette there, let's go to the layers
and I'm going to rename this one just so I
have an organized file. We're going to work on this one, and I need six of these. I'm going to duplicate this
layer and grab it here and move it and I go to the
layers and do that again, duplicate it, and grab
it and move it here. Now I can merge those three, so they're in one layer. Now I duplicate that layer
and I drag it down here. That way, I have six little
bodies that I can work on. I'm going to merge
those two also, and if I tap on the end, I can reduce the opacity. And that way, we will have the shape of the
body in the background, but we can start drawing
our features on top. Because here we're going to do exactly the same thing as
we did with the bodies. We're going to draw a lot of options without
overthinking it, and then we're going to find
the one we love the most. I'm going to create
a new layer on top. I'm going to go to the brushes and in the classic library, I love working with
a brush that's in the calligraphy section
and it's called monoline. It's a very straight brush. And if you tap on it, you can go to
stabilization and you can modify the amount of
streamline and stabilization. Here, you'll see that
I'm drawing that line. If I increase the streamline, it'll make it smoother, but if I have it too high, I will lose the detail. I don't like having
that too high. Same thing with the
stabilization, see? That doesn't look at all like I drew, don't make it too high. Maybe like that. You
keep your shaves, but it's easier for you
to draw smooth lines. Tap here and that's your
modified monoline brush. The reason why we
created that layer is because let's
say I draw some es here and then I
draw the eyes here, and then I draw the eyes here. If I have that in the
same layer as the bodies, that is attached and I
cannot move the eyes around. But if I have it in
a separate layer, I can go here to
the selection tool and I can grab the eyes, for example, and move them around because they're not attached to the
layer of the body. This is why I like working
in separate layers. Let's undo all these and
start by drawing some shapes. Let's start with big eyes
because big eyes are so cute. If I create a shape
and at the end I hold it you'll see
that this comes up. If I tap circle, it will create a totally perfect circle and I can even modify it from
this point or an ellipse. And then tap circle and it
will create a perfect circle. That's great for making eyes. I'm going to leave it
there and just tap here and I'm going
to fill it in. Now I want to grab
the selection tool, select around it,
three fingers down, duplicate it, and now I
duplicated my eye really easily, so I don't have
to draw it again, and I'm just going
to release it there. But if you go to the layers, you will see that it's
two different layers. I don't want that, so
I'm going to merge them. I'm going to create the nose. Here I think a small nose and let's reduce the size of the brush and I'm going
to make a little mouth. I'm going to make this
bigger and I'm going to add some little cheeks and eyebrows and then something
here for the ears. Again, I am working really fast and not overthinking this. I think I'm going to raise a little light for the eye here. Now I'm going to
move on to the next. Let's try something different. Let's try again round
eyes and fill them in. Then I'm going to
do the same thing, selected, three fingers
down, duplicate, move it here, and
then release it, and then I'm going to merge those they're in the same layer. Let's try with a
tiny little nose. And then bigger cheeks. Then maybe let's give
it some tiny eyebrows here and maybe a little
rounded triangle here. Let's fill this in. Now let's
move on to the next one. Try different shapes. Let's try some eyes
that are irregular. If I press continuing
feeling here, I can tap here instead of
having to drag the color in again. Let's go to the brush. Maybe this one has
a little snout and the nose and the mouth, maybe this one has
little whiskers and eyebrows like this
and just a line here. Let's make the light
of the eyes here. And then continue. Let's try a little
tiny eyes, separated, and a bigger nose, bigger mouth. Let's add the cheeks. Now big ears here. Then let's go to the next
one and try a big nose. Then two small eyes close to
the nose and a little mouth. It's looking like a koala. Then some little
eyebrows up here. Now let's get a cheeks. Maybe the whiskers are in here. Maybe it has a heart
here for the ears. Et's make one with big eyes like this and then make the nose here on long whiskers, then the eyebrows, Then let's erase
the lights here. Now I try different things
and I'm going to see what I like best and I really
like these too. I might save this
one for next time, but I'm going to
focus on this one. Right now, I'm seeing that I really like
the little whiskers, but I'm going to try them
like this but smaller here. I'm going to add those there with the brush because
the eraser doesn't paint. Now that I know that this is a character I want to work with, I'm going to go to the
layers panel and I am going to group these layers,
the body and the head. And I can rename that two features just so
we're super organized. I want to duplicate that group by swiping to the
left and duplicating. I am going to toggle
this one and go to this layer which has the features and
select my character, swipe down with three fingers
and duplicate that and then go to the layer that has the bodies and
do the same thing. Selected, swipe down
with three fingers, duplicate and now I'm going to move that up and I'm going to delete these two
because I don't need them. I'm going to hide
the features group. Now we have the character there, but because we duplicated him, the opacity went back up and we don't want
him to be that dark, so we're going to
touch the N and reduce the opacity again so we can actually
see his features. This is great. This is the
base of our character, and in the next lesson, we're going to refine some of his features and create
our final sketch.
6. Refining + Final Sketch: In this lesson, we're
going to refine our character to create
our final sketch. We ended up last lesson
with our character here, the feature separated
from the body. What I'm going to do is I'm
going to make this bigger just because I want to create
the sketch a bit bigger. It's too small, and I'm going
to put him in the middle of the canvas just because that's how I like it.
You don't have to. What we're going to do now
is use a liquefied tool and a selection tool to move things around
until he's perfect. So. If you've never used a liquefy tool before,
this is super cool. I'm going to go to the body, and here in the adjustments,
you'll find liquefy. There's different effects
of the liquefy here. But the one I like
to use a lot is the push and here you
can change the size. If you make it really big, you're going to push a
huge area in or out. I'm going to undo that. If
you make it really small, you can push smaller areas in or out. This is really cool. Just play around with
all of them, there's, for example, expand where
you can make things bigger. See. Or pinch, which
is the opposite. If I want to make
this year smaller, play around with those. I'm just going to use
the push right now. I'm going to make
it a bit big and the head is a tiny bit big. I'm going to modify it a bit just a tiny bit,
moving things around. Maybe the years if you
want to move this around a bit like this to make
them pointier here, and then have a little bit more shape,
not just a triangle. This doesn't have to be perfect. This is just for you to have an idea for when
we do this sketch. Let's say that's good for me, I'm going to go to
the features one, and then I can do
the same thing. I can use a liquefied tool or I can use a selection tool
to move things around. For example, I'm
thinking the eyes are a bit too big,
like all the features. I'm going to select
them and grab them and make them a bit smaller and I think
they're a bit tilted. I can rotate them here. I think that works much better. I'm going to release it. Now I'm thinking the body
is a bit too big. I'm going to go back
to the body and select this, the body. Again, don't be too
precious with this. I'm going to make it smaller. And here I have uniform, you'll see that you cannot
make it thinner or longer. It just goes up in size
or down proportionally. If I press free form, I can actually alter this shape, which I think
that's much better. I want it to be more condensed. Now I can make it smaller this way and also
smaller this way. And release it and I
like that much better. Just play around with it until you find
something you like. Because this is inspiring
in my chihuahua and her tongue is
always sticking out, I'm going to go to the face again and with my monoin brush, I'm going to draw
her little tongue. Maybe a smaller line here. The nose is crooked, so I can move it around and place it in the
middle of the eyes. I want to play with
the head shape again and do the same thing I did with the body
and squish it. I I'm doing this in real time so you
can see what goes through my mind when I'm
designing a character. There's a lot of
experimentation. I really like that, but
it's a bit too square here, I'm going to select my
eraser and delete a tiny bit here and we're going to make that perfect
when we make our sketch. But I'm liking that
so much better. Now I just have to go
to the face and use a selection to move these
ears to the middle here, and then the other one and then I need to move the whiskers because now they're floating. Just use the selection to move things around and
to change sizes. What I want to do now is go to the layers and now I can tap on that group and flatten it because now I don't
need it separated, and I'm going to
reduce the opacity. I'm going to create a new
layer and in that layer, we're going to
create this sketch. For sketches, you
can use any pencil, but I love the
sketching six B pencil from percrate and use a rotation in the canvas to your advantage because if you're drawing this shape this way, for example, to me, that's really hard on my hand. But if I rotate it, it's more natural for my hand
to draw the shape. Rotate the canvas a lot
when you're drawing so that you can find something
that's easier for you. Here I'm just going to go
around the head don't worry. For example, there,
my hand moved, so it's not perfect. Don't worry because now
we go to the liquefy again and with a small size, we're going to fix these lines, they're exactly where
we want them to be. There. That's perfect. Now let's go back to our
brush and add the ears. If you want the ear to be
exactly the same on both sides, just grab this and then swipe
down with three fingers duplicated and then here you can flip horizontal and
then move it here. Perfect. Now I use eraser
to erase these things. Now you can go to your
layers and merge them, so they're one layer. While we're there,
I'm going to erase this part that overlaps here because I don't want
it to be divided there. I'm going to continue drawing. Then the little arms, I'm going to make them down
so it's not like that. Again, don't worry
too much about this. This is not the final drawing, so it doesn't have to
be absolutely perfect. Now I'm going to
create the features. Again, for the eye is just go
around and don't release at the end and tap here and circle if you want a
circle, obviously. I'm thinking I don't want
the eye to be so solid. I wanted to have a
white area here on the side so that you can see where the
character is looking at. I'm going to just fill this
in like this because if I fill this in like this because this brush has texture,
it looks ugly. I rather color it in like this really fast so that everything looks the
same, very sketchy. Don't be scared to
make these decisions while you're sketching. At any point of the process, if you don't like something
or you get a better idea, just do it because
it's your character. I'm going to erase the little
light here in the eye, and I'm going to draw the
eyebrow and the little cheek. Now I can use the selection
tool to select the eye. I've done with three fingers duplicate it, and
just move it here. And then release
it. Now I can draw the eyebrow and
the little cheek. Here I'm going to draw the nose. I think that's a bit big, so I'm going to select them
and make it a bit smaller. I know some whiskers
and the ears, I'm going to try to
follow the shape of the ear and I'm going to make my brush really big so I can color this in really fast. Now I go to the layers and
I'm going to merge these two because I painted the eye and the ears in a separate layer. Now I can hide the
sketch we were using in the back and I'm going to
rename this layer to sketch. And there we have it. Look
at it, grab this tool, flip it horizontal, release it there and
see if it looks weird. To me, this is looking weird. I'm going to grab
my selection tool and make this a bit smaller. I'm going to select
free form so I can move it a bit like
this. That's better. The mouth, I'm going
to draw a bit in here. This is a good tool
because your brain is used to looking at
it without flipping it. But when you flip it, you see things that are not working. I'm going to go back and flip it again and that's perfect. Now that we have the
sketch in the next lesson, we're going to design
our color palette.
7. Color Palette: In this lesson, we're going
to choose our color palette, and again, this is all influenced by our
character's backstory. Think about what colors match your character's
personality and backstory. For example, with
these characters, which one looks more cute,
caring, and playful? See, color is super important in what story your
character is telling. I'm going to show you how I
chose my palette and how I try different colors within that palette to find the
best one for my character. We ended last lesson
with this sketch, and now I am going to duplicate that sketch
and hide this one. I always like keeping
my whole process. I am going to work with
this one for the colors. I'm keeping the
sketch here just so I have it in case I need
it for something else. I'm going to move
this one up here. And make it a bit smaller
because I'm going to try three color ways
for my character. Try as many colorways
as you want. I'm going to
duplicate this again, move it here, and then this
again and move it here. Then if you're like
me and this is bothering you and you
want to center this, just go to the layers and
select them all by swiping to the right and now you can move the three
of them at once. Let's place them there and
I'm going to merge them. So the t are in one layer. I'm going to create a
new layer and drag it underneath so that I
can add color in there. Here I'm going to be using
the monoline brush again. If you don't know how to
generate color palettes, I have a class on creating your signature color
palette in procrade, but you also don't need to do anything very complicated
here. It's very simple. We don't want to add too many
colors to our characters. Think about your story, what
your character represents, what his personality is. For example, mine is very cute. And happy and magical and it has a magic flower
that I wanted to glow. So I want to be using colors that allow me
to tell that story. So I want him to be like
bright colors because if I ever put him on
a dark background where the flower is glowing, I want him to send out her,
I want her to send out. And I'm not making her
muted colors, for example, because that doesn't go
really with my cute story, at least with my cute style. So if you're making a
character that's a villain, he's probably not going to be all cute pink and purple colors. He's going to be
something or moody. Think about your character when you're selecting
the colors. I have some muted color palettes like these ones, for example, I am going to add
this one earthy to the class and the soft botanicals also to the class,
so you can download them. This is my favorite colors, so I'm going to use this one. If your palette doesn't
have this blue icon here, let's say you want
to use this one, you just tap the three dots
and you set it as active. That way, when you
drag your palette out, that's the one
you're going to see. This is really useful because
it's really easy to see your colors and
choose your colors from here without having
to go here every time. I'm going to start
experimenting with some of these colors that I think
will suit my character. So I'm in that layer
underneath the sketch. Again, I'm not going
to overthink this. I'm just going to start
experimenting with some color markings in the face and different
colors for the body. Let's start with this purple. I'm going to make this bigger. Maybe it has a marking like this and I'm just
going to go around. It doesn't have to be perfect. I can go outside the line and
I'm going to fill that in. Then maybe with
this light color, I can feel the rest of
the head and the body. Let's lift the
limbs out for now. Maybe the limbs can have
a bit of that color here and then some of
that purple at the end. Just because that's how
AI it has little boots. Then maybe start thinking
of textures or markings, spots, things that will make
your character very unique. Maybe I'm going
to add this color and but if it has a
heart here, that's cute. You can also paint the
ears, for example. If you go here to the sketch and we swipe to the right and
we activate alpha log, you'll see that it has
a checkerboard there. That means that when
I color over that, I'm only covering in the
areas that are painted. That makes it way
easier to paint. Now let's go back to the colors and I can add some purple
underneath the eyebrows too and some pink for the
cheeks and the tongue, and some actual white for
the white of the eyes. I don't have white
there, so I just stop here and select real white. And then here I go
back to my palette. Good. I think that's
a good first option. Now I'm going to another option. Here I'm going to try this
orange and maybe I do something similar to
that, but like this, Again, I'm thinking of my
character's personality and backstory and I'm trying to
make him look very gentle, somebody that would be
very loving and would want to send messages
to his loved ones. That's why I didn't give
him fans or anything scary. I want him to portray my story. I'm having that in mind as I choose the colors
and the markings. What if the body has this? Then this could be a light pink. What if the ears have stripes like raccoons tail. Let's see. There's no right or
wrong answer here, maybe some dots here. I'm going to go
to the sketch and paint these areas
with a darker orange. I don't want to add
too many colors to it because then it would be too complex and I want to keep
him as a simple character. This way, when you add
accessories, clothing, props, background, it doesn't look
too convoluted, everything. I'm going to paint the
eyebrows this color too, and now go back to the colors and maybe I want
to add very light cheeks, this pink, and the tongue. Again, I'm going to
add the white of the eyes and go back to
my palette and that's it. Finally, this last one, let's make this one pink. I'm just going to go ahead
and make everything pink. And then add some
white markings. Maybe here he has a heart that you can see from
the top of the head, it forms a heart and maybe white in the eyebrows
and white around the eyes. Maybe here it has something that resembles a little cloud. Then I really like
this in the first one. I'm going to do that here. Maybe this one has a
snout. That's cute. Now I'm going to do
the white of the eyes and I want to add some
darker pink details. Maybe the tips of the
ears are darker pink. Maybe here it has some markings, and the cheeks and the tongue. Then I'm going to go to the
sketch with that light color, fill in the ears,
see how that looks. And I'm going to make
the eyebrows dark pink on the border
with the cheeks also. There you haven't make
as many as you want. I am between these two, but I think I'm going to
have to go with the pink. It's so cute. I'm going
to go with the pink. In the next lesson, we are going to create
our character turnaround.
8. Turn around: Now we're creating a
turnaround and this is one of the most important steps to understand their
character completely. We're going to think
about the characters from different angles to make sure that the
decisions we make in designing it make sense
from every angle. Also, if somebody is
designing it in treaty, it'll be very helpful for them. Let's go through this
chihuahua from other angles. So because I like keeping
all these organized, I am going to swipe
to the right, group these two,
rename this group, and call this color. And now I'm going to
minimize that group and here we're going to work with
the sketch, not the colors. We had the sketch here and this is why I like saving my stuff. I'm going to duplicate that
layer and turn it on and I'm going to drag it to the
top on top of the colors, and I'm going to hide
the colors for now. If your iPad doesn't
have so many layers, then it's better to
create a new canvas. What you can do now
is you can go to your gallery and you swipe to the left and you
duplicate this canvas, and then you go in here and then you can delete all these. That way, you can
work in this canvas. But my iPad still has
some layers left, so I'm not going to do that, and I'm going to keep
working on this one. See, it has all the layers. For creating a turnaround, I'm going to go to Canvas and
turn on my drawing guide. Here in Edit your drawing guide, you can change the grid size. You don't want it to be too
big because you want to be able to guide you as to where you're
placing every feature. Something like this would work. Tab here and I'm going
to move it up here. I want three of them to fit
here because I'm going to have her face in front and then to the side
and then to the back. I need space for t, so I'm going to make it smaller. I'm going to go to a new layer
on top and with a color. I'm going to turn
this like this. I'm going to draw some lines. For example, here,
sport the ears. I I don't release my
pencil at the end, then that line is
straight and you will be guided by the guides
so that it's straight. Now one for the top of the head and then one
here for the neck, basically draw some lines where the major features of
your characters are. Top of the head,
bottom of the head, top of the ears, if it has ears, then the bottom of the body, and then where it's standing
where the hands end. As I was going to put the
lines here for the eyes, I realized they're too in
the middle of the head. I want them to be
a tiny bit lower. You can still make
some changes here. I'm going to go to
the sketch layer and use a selection tool and just select all the face features and I'm going
to lower them a bit. Yes, I think that
looks so much cuter. Great. Now I can continue with my lines and add the one
for the top of the eyes. And for the bottom. Great. We have the
grade in the back, but I like doing this because
it's easier for me to use these guides and then the
back guides just as a backup. But this way it's more visual for me. Maybe you
don't need this. I'm going to tap on the end and reduce the opacity
of those guidelines, and I'm going to drag them
underneath the sketch. This sketch doesn't have
any of the markings that we created when we decided how the character is
going to look with color. I want to bring in the colored character
here just to have it as a reference and to add those
markings so that then I can decide how they're going to look on the side
and the back also. So let's go to the layers, and here we have our colors. I'm going to sort
to the left and duplicate that and I'm
going to turn it on and tap it and flatten it so that the three of them
are all in one layer. I'm going to bring
them down here and I don't really need these two because I just need this one. If I take them
outside the canvas and I drop them there,
they disappear. Now I have this little girl here and I will leave her
there for my reference. I'm going back to the sketch, and I'm going to
choose a six B pencil. And I'm going to leave
this pressed so I can grab that same color and I'm going to add the
markings to that sketch. Here she has these markings
in her head I said it's a little heart and
then a little snout. And then the markings here, she has the darker here. I'm just making the big ones. I'm not making these ones
here because if I draw that, it looks very weird and I still want my
drawing to look cute. I'm just going to
draw this cloud here and then these ones. Now we have our sketch
ready for the turnaround. What we're going to
do here is cheat, so it's easier for us. I'm going to duplicate that sketch layer and move
it here to the middle. Now I'm going to grab the
selection tool and select rectangle standing here in
the middle of my character, I'm going to draw
down onto the right, a rectangle, swipe down with
three fingers and cut that. Now we're going to use
the eraser and erase these markings here and the arm. Now we're going to use a
selection and go back to free hand and just grab the face features
and move them here. So you think about how big the face of the character
is facing to the side, I think that would be enough
and you keep it in line. So the eyes are there, they're in line with
this pink line. And let's try that. I'm
going to release it, and now I'm going
to go to my brush and I'm going to
finish off the face. See, the face is
kind of like square. So I want it to be kind of
like a square like that, too, but that's too flat of a head, so I need to make
it more rounded. So maybe like that. Maybe
here it goes up a bit more and try different shapes of the face until you end
up with something you like. I'm just going to fast forward
this so you see how many I make just until I find
something that's suitable. When do I know it's suitable? It's when I'm happy with it. This is something very personal. You will feel when it looks
good. I think I got it. Now we have to move
things around. So I'm keeping these together, moving it around together. I'm keeping the same distance between the snout and
the eye as I had here. The, now I can erase what's overlapping and I can make it because
now it's three D, you're seeing it from the side. Now I can make the
nose overlap a bit. Then I can go in here with the liquefied tool and
make this line perfect, move things around a bit
until I'm happy with it. And the ear is here to the
side, it would not be there. It would definitely
on top of the eye. I'm going to select
that ear and move it. I will probably be there. I want to make this line
a bit longer here. Now I want to make
another ear here because you would see the
other ear from the side. I'm keeping it the same shape. Now I'm going to do the body. Let's say the body
is like this and then here's the other leg and
now I can draw the hands. The hands end in this line. I can draw it like that and then I can even draw the
other hand like that. Now I'm adding the marking. Here is where the
grid is useful. The first one goes still here, this part of the heart.
Would be like that. Then here in this
line, there's dot. You wouldn't see
the other one and then you would see
half of this one. Then the whiskers,
I'm going to erase because they wouldn't be
there. They would be here. So Now I can use liquefy again and just finish making
all my lines look good. The body is probably
moved to the front part. I'm going to bring
it back a bit, so I can bear the
weight of the head. Now the eye is super round and it wouldn't look so
round from the side, so I'm going to select it
with free form selected, I'm going to squeeze it a bit
and move it forward a bit. And now we have the tail, which we couldn't see before. I think I want to
give it a big tail and make it curly and I
think I'm happy with that. Now what we're going to do is grab this one and duplicate it and then move it here so that we can make
the back facing one. There you raise everything that you wouldn't see from the back. I want to keep that marking there so I know where
it's coming from. But it obviously wouldn't
be the same in the back, just keep those lines there. Now I'm going to draw what
you see from the back. That marking should continue
and I want it to be a heart. Here it would have
the bottom part and then maybe the spots, it has more on the back. What if they glow when
it's using its magic. I don't know. Just keep adding things according to
the story of the character. Now here's the tail, the tail basically goes up here. What you would see from the back is something like that
because it's curled. Maybe it has some spots
here also, and that's it. I want to merge those three into the same layer and rename
that and call it turnaround. Now this is your last chance
to modify things here. Grab the liquefied tool and
I'm doing this in real life, you see all the iterations and changes that
it goes through. Because if you see
an artist do it and they do it right the
first time and that's it, that's probably not
how it came together. It was probably a
lot of iteration, so that's why in my classes, I like to leave these
parts that look like a bit of indecision going back and forth because
that's the process. I'm going to use the
liquefy here and I'm going to modify the face shape a bit. I'm not super happy with it
being such a long square. I want it to be more of
a rectangle to the top. I'm making this very big and I'm pulling
the whole head up. That looks so much better now. I have to do the
same thing here. See now where the ears end. I basically have to
pull the whole thing up also so that the
ears end up there, but also the top of the
head, it's now here, so I can make that a bit smaller and raise the top
of the head a bit. Make that smaller
and change the size until you're pulling
what you want to pull. Here, the eye got a bit smaller. I like that. I'm making these
eyes a tiny bit smaller. Again, make that as small as you need to so that you're only moving the areas that you want. I'm trying to make everything
line up perfectly. Now I have to fix this one
so it matches this one. I have to pull it
up I dip this one, so I'm pulling it up
till the same place, and then the years now I just want to make the
body a bit smaller, so I'm going to select
all the bodies. I'm going to push
them in like this. That way, the size of them is all changed at the same time, so they all end
up the same size. Now I'm just going to position them where they're
supposed to go. Use eraser and the pencil
to tidy these things up and then the pencil
to finish those lines. And then that way,
everything looks good. Okay, let's hide these lines
and see how this looks like. You can also now go to the canvas and hide
the drawing guide, and I am so much
happier with the shape, so I'm glad I took the time
to fix things at the end, so that now when I go
into the final character, I am totally happy with it. So don't be scared of
going back and forth, and if you don't like it, you just undo and go back
to what you had before. We're done with our
character turnaround and now in the next lesson, we're going to create
a different pose for the character. Mm hmm.
9. Pose: Now with our character and
the structure in place, we can start exploring
different poses because having our character
turnaround is great, but we want this character
to be expressive if you're going to use this character in a children's book
or in an animation, or you're going to
tell a story with it. You end up doing
different activities from different angles. So that's where you
start designing a pose. I'm going to show
you one pose and how I create that from my
character turnaround. For this, I'm just
thinking about how this character will
exist in the real world. How would it stand? Would it be super rigid or
be jumping and playful? Would it have its head down, sad or would it be magical and how will
it hold its flower? I'm thinking of all these things and just bringing
that post to life. I'm going to go to this color layer and I'm going to move it
here to the side. I'm going to move this
turnaround up here, so we have some space here to create the sketch for our pose. When you're deciding
what pose to create, choose an action that represents
your character the most. For example, mine uses
a magic flower to send love messages to people
so that they don't feel so alone and
they feel connected. I want to show her in the
moment where she's holding the flower and it's activating all its magical powers and then a message is
coming out from. So that's what I'm
going to create. I'm going to use
the information of this turnaround to create the sketch for that pose
and then we'll refine it. So I'll go to the
layer and I'll choose the pose that is closer
to the pose that I want. Because I want you to see
what I have in my head, I am going to put
the image here of the future when I already drew it so that you can see
what I have in my head. For that pose, the one that more closely resembles
it is this one. I'm going to grab
this one and I'm going to swipe down
and duplicate it, and I'm going to
drag it down here. And now I'm going to start
modifying it as much as I can so that all the
proportions are kept intact. Again, using the selection tool, I am going to move the head because I want
the head to be tilted. I'm going to tilt
the head like that. Then I'm going to
move the whole face features to the side a bit and this is
going to get messy. Don't worry, this
is just the base of our sketch because
I want to make these three quarters Basically, I want to rotate this to match
the rotation of the head. The middle of the head is here and then the eyes are here. That's why I put it there. Then obviously, the ear
will be also moved. Up here because the ears always
go in line with the eyes. That one would be moved there, and then this here is
also going to be moved. That one's going to
be in the back of the head back there. I'm going to put
it here for now. If you don't know
where something goes, just move it away. Now I'm going to start
fixing the shape of the head because
I can't leave it this rectangular basically because you'll see
that on the side, it's more rounded, so I need
to round it a bit more. Also to include the side
that can't be floating. I'm going to round it a
bit more and same here, the head won't be as square, it'll be more rounded. Then the body is maybe
two moved to the side, so I need to place it in a
place where it makes sense. Maybe there, more centered. Now I can move this here and
place it here in the back of the head and erase that part because it's in the back of the head so
you couldn't see it. This here, maybe I want to
rotate it a bit and I'm trying to keep all the proportions so that the character
stays consistent. That's why I am
modifying this and not just drawing it
from scratch again. These whiskers would now go here now I wanted
holding the flower, this hand would move
here, not here. Again, bear with me for a bit
with the ugly sketch face. Then this hand also would
be holding the flower. Then I don't want to
just standing there. I want this to be
more expressive, so I'm going to move
this feet rotate it, move it here, and
then move this one. It's jumping up in the air. And then make it a bit
more rounded, again, the same reason because
here it's more square, but here to the side,
it's more rounded. I would basically be
the middle of the body. Actually, this arm would
start closer to here, and then you could
see some part of the tail because now it's
not totally facing front, you'd see maybe this
part of the tail, it would be holding
the magic flower it's very messy right now, but it portrays the idea
and now it would have some light going here and then and then the magic love message
would appear here. Perfect. I'm going
to move that down a tiny bit now
that we have that, look at it smaller and look at it bigger and
see if it works, see if it looks consistent
with the character. Here I see that the face is too squished and this one
I made it way taller. I'm thinking I might have made the face too thick
because here I added to it, so I changed the proportion
I make it a bit bigger here, and then you can use the
liquefied tool there also. To fix that a tiny bit. Don't overdo it because you will be altering
the proportions too much and then it'll
be too different from your original character. There. Now we're going to
create the final sketch. For the final
sketch, I like doing this on its own canvas, just so we have a big in case you want to print
it or something. Let's go to the gallery
and create a new canvas. It's going to be 12 by 12. And I'm going to go back to that file and grab that
layer that we created, hold it and with your other
hand, go to the gallery, go to your new canvas, open the layers
and drop it there. There it is. I'm going to select it and make it as
big as I need to, as big as a canvas and place
it there in the middle. Now we're going to
use this to create a final sketch and that's what we're going to use to paint our final illustration
at the end. I'm going to make this
more transparent. I'm going to add a new layer. Now I'm going to
use my monoline. In the recent ones, you'll find your recent brushes, and I'm going to use a
monoline to ink this. Why? Because I want a super
smooth sketch and also because if you're creating a coloring book or a
stamp of your character, then you will want
these smooth lines. What I'm going to do
is just go around it. And if you create
some lines like that, don't worry because you can
use your liquefied tool very small at the end and
kind of smooth them out. See, my hands very shaky, so I have to do this if
I want perfect lines, but I also enjoy the
kind of hand drawn look. So I'm not too
worried about that. So I'm just going to
go around everything. I'm leaving this press here
so it creates an ellipse. I don't want it to
be so round here because it's not facing
totally forward. I need to fix that one a bit
because they need to match. Here you can also leave this
pressed to create arcs. This is very useful here. Let's fill this in and
see if they are matching. No. Maybe make this
one a bit smaller. See here the marking is
going to come like this. Now let's do the body. I'm just following that
ugly sketch I made before. The little tail. The flower I'm going to make
with a smaller brush. Here it has a marking of
the cloud in the belly, that would probably look
something like this. And finally, the mouth, I want to make
this even thinner. See, I made the tongue
a bit curved because now you're looking
at it from the side. Now I don't like this
overlapping line here, I'm going to erase it, make it small, the eraser. Same here. I'm just
perfecting it. Then here I want to use the liquefied tool very
small to fix this. Now, it's much smoother. I'm going to erase the
little lights in the eyes here and I'm going to draw the message that appears after
she uses her magic flower. I'm going to perfect this here. I'm going to hide my sketch. Now I think I'm going to do a new layer and just
draw this light. If it goes to the back and then here it goes to the front
and then to the message. I'll just close that shape
and fill it in and then here fill that in. Now I can make that
way more transparent. Then I can go into my sketch instead of erasing these parts that are covered by the light, I want to edit this in
a non destructive way. I'm going to add a mask. I tap there, I add a mask
and now everything that I paint on that mask with
white will be shown, everything shown right now. Whatever I paint with black, you can go here to
the classic view and tap here in the black. Whatever you paint with
black will be hidden. See, I'm painting this. Because it will be hidden behind that ray of light. Same this. The cool thing
about that mask is that if I don't like
that in the future, I'm like, no, I
don't really want that light to go around her. You can just go and turn off the mask and your
drawing is still there. That's non destructive editing
and it's really useful. One last thing is that I'm going to fill this
with black, the heart. I'm going to turn on my mask. I'm just going to add
the final details, which is that when she
uses her magic flower, little tiny magic flowers
appear where she's been so other people can have the power to send love
to their loved ones. I'm going to do that
in another layer, and I'm just going to add the indication of
little tiny flowers. And maybe little thoughts like
sparks of magic. And here. I'm missing some
whiskers because I think you can see a tiny bit
of whiskers from this side. Perfect. Now we have
our illustration and in the next lesson, we're going to color
it and finalize it.
10. Final Illustration Part 1: In this lesson,
we're going to start our final illustration and this is where our
character is going to come to life because now we have it in
our pose and now it's going to have its colors and it's going to be
rendered beautifully. The whole work here is done. We're not making any decisions. Everything has been
decided for now, so now it's just adding color. There's so many ways to
add color in Procreate. I usually work a lot in
digital watercolor style, but I'm thinking
I want this to be a bit more graphical something
you find in a video game, for example, that's a
style I'm going to follow. Let's start painting.
What I like to do is go to the gallery and
swipe to the left and duplicate this file just
because I like having that one there on its own
in case I want to use it, as I said, for black and white, coloring books or for
a stamp or something. Here I'm going to
color this one. I'm going to go here
and make sure that this is my active color
palette and drag it out. I'm going to merge all of these. I'm going to reduce the opacity. And I'm going to set it to multiply so that I'll be able to see what's
underneath it. Now I'm going to go
to this layer and I'm going to start building the shapes that make the character. Again, I'm using
my monoline brush because it's a very smooth brush that it's going to let me
have very smooth shapes. If you like, you can use
brushes with textures. I am going to establish a background for my
character first. Here in the background color, I want to choose a
dark background. I think I'm going to use that
green for now. Tap here. If you want to bring a reference image
here for your colors, you can go to the
gallery and go look for your colored image and then
take a screenshot of this. And then you go to
that screenshot and you can modify
it and then Preston, save two photos, and
then go to the gallery, go back to your file, and
here you can go to reference, turn it on, and choose an image. Important image.
Choose that one. There you have your
reference image and if you want to
make it smaller, make the image smaller and
then here from the corner, you can reduce the size of this square and then
make it a bit bigger. Perfect. Then I have to bring out my palette again because
I exited the canvas, so it puts it away. Let's start with the head. The head is pink. I'm going to make
this a bit bigger. I'm just going to go around Always use a liquefied
tool to your favor and then smooth those lines. Great. That's the head. Now I'm going to
create another layer and this time I'm going
to create this ear. I will draw the ear and I'm
going to make sure that I close that shape
so I can fill it in. Because that ear is
behind the head, I'm going to drag it underneath. Then I'm going to
create another layer and I'm going to make the tail. Close the shape, fill it in. And I can create
the legs there too, because the tails and the
legs are behind the body. So just continue
filling and tap there, and then I can create another
layer and make the body. Make sure to close that
shape, fill it in. That one you can also use a liquefied tool
to make it match. Perfect. And now we have to create
some layers on top. The flour goes on top of the
body and on top of the head. I will make that layer on top of everything and where
did my palette go? I'll bring it out
again. I'm going to paint my flower with
this green for now. I'm going to start with
the petals from the back, which are these two,
create another layer. Then I can see what's happening, I'm going to choose
a darker color, create this petal in
the front, fill it in. And then with another color, create these two
petals in the front. And fill those in. Then with the back petals, I can make these
leaves in the bottom. I'm going to choose this green. I'm choosing these
colors here for now, but I can change them later. Now we have the flour. Now on top of the flower,
we need the hands. We're going to go to
the last layer up here and create a new layer and I'm going to choose
a different color for the hands just so I can
see what's happening here. Fill that one in and then
this one and fill it in. I'm trying to make things
that color they actually are, but because you have to overlay different layers and
see what's happening, then it's easier to
use different colors, but these places where
there's not that problem, then it's easier to just
use the actual colors. I'm going to do the snout there and the white
part of the eyes. And fill those in. Then I'm going to
create another layer and then create the
rest of the eyes. I'm going to make that circle and then that circle and
then make this here, fill it in, fill it in, and I can erase the light. Now go back to the brush and
make the nose and the mouth. And I'm going to draw the
tongue in another layer. Here I can draw the whiskers, the eyebrows, basically things that are not touching each
other and the cheeks. In the next layer, I
can draw the tongue. Perfect. Now we have all the parts that we
need for our character. I like grouping it. We are keeping this
organized character. Now we're going to
create the envelope. And then another
layer for the heart. I'm following the sketch
closely in the character, the features and
everything because I want them to be where
they're supposed to be. So we keep the character
consistent with the turnaround. But for these things, I can basically just
follow the sketch loosely. Let's start coloring. I'm going to turn on Alpha
lock for every layer. That way, when I'm
painting on the layer, I'm just painting on that layer and I can't go out of the line, so it's really easy
to color this way. So now I'm going to
choose a brush that lets me add some shading
with a bit of texture. You can also create
shading with no texture. For example, if you go to air brushing and you
get a soft brush. Let's say here in the head, let me show you with
a super dark color so you see what's happening. You can create this
shading effect from dark to light when
you're pressing softly. But if you go to something like drawing and you grab
the Oberon brush, I think that's how you pronounce it and you reduce the opacity, you can create the same thing, but with texture, see? I like those textures. I'm
going to use this one. I like to start from
the back to the front. I am starting from this, which is the year. I'm making the shadows
with this darker pink. Phrasing the opacity,
I'm going to make it smaller and add that detail. You see, let me turn off the
sketch so you can see this. You will see that
it has some texture and I really like that. Let's turn on the sketch again and I have to do this
white area there. I'm going to choose that
and I'm going to do that with this
brush also so I get the texture let's turn off this sketch and
see how that looks. That looks cute, but it needs
to have some shadow there. I'm going to choose
the light pink and make it bigger and less Less dark and then
add a bit of shadow. Yeah, that looks better. Now let's bring back the
sketch and continue moving up. Now with the legs and the tail, the legs also have
that white area, so make the opacity
higher and let's add that then just
go darker here, reduce the opacity and reduce the opacity more
and then add the shadows. If it's really hard to
see with the sketch, you can go and make the
sketch way lighter. I just want you to see
what's happening here. Now for the tail, I'm just going to add a bit and then when we can
hide the sketch, we can come back in and
add some more shading. Then full opacity,
the cloud here. Then you can see it,
but I'm going to add some more shadow
on top of that. Then we have the head. The head has this tip of
the ear here that's pink, this white part of the ear, the little heart,
make your brush smaller and bigger so
you can color in faster. Then it has the
darker markings here, this one and it has these
white areas behind the eyes. So there and then
the eyebrows also, and then the flour,
I'm going to leave for last because I want to determine what color
to make it in a bit. This is the eyes, the snout. I'm going to add a tiny bit
of shading to the snout here. And the hands. The hands need to be
pink like light pink, so I'm going to color them all. Then they have this
white area here. Well, add some shading later. The eyes, I just want to add the pink eyebrows here, pink. Then just a tiny bit of
shading to the eyes. I'm going to make
this very transparent and use this green to
add some shades here, highlights basically because I want the eyes to
appear very glassy. That works. I want to do
that to the nose also. I'm going to make
this very small, it's shiny and we
have the tongue, so we can make it darker, maybe with this red, add
a little bit of shading here with this light pink. Then make this a bit
less opaque more opaque and just add the
little line in the middle. Now I'm going to
turn off the sketch and we're going to go back
in and shade some stuff. In the body, we need
to add some shadows so that we can tell
where the arms are. Let's go to the body and select this pink color and add some
shadows, make this bigger. It's not too big.
Add some shadows here underneath the arms. Then smooth it out here. If we want darker shadows, we can use this red also. Then in the body and
now in the legs and tail just so you can
differentiate them a bit more. And the tail. I'm going to go to the arms. I can add some light on the top because you cannot
shadows and you cannot light. Then we're going to go to
the head and grab the red. I can add a tiny bit of
shadow here behind this here. Just to give it more depth. I can make this smaller and add a tiny bit
of shadow under this note and then make it bigger than a tiny
bit of shadow here. This is just making it look
a tiny bit more treaty, so it's not so flat. This is just a matter of style, but I like using this yellow and adding some highlights
to some of the areas. Let's go back to that ear
and do the same here, and then to the legs
and tail and do the same. Then the body. I'm just adding some
lights so you can tell one part of the body from the
other then the arms here. Now, the only thing
to do is color the flower and this
and add the light. D.
11. Final Illustration Part 2: In this lesson, we're going to continue painting our character. You just keep going
back and forth and adding more
and more shadows. I'm going to add a tiny bit here just because the
heads looking a bit flat. I just want to make
this area here darker. I'm just giving it a tiny
bit of texture and color. Now, a tiny bit of this
light pink here in these areas will give it a lot of life because the white areas are looking too flat right now. I'm going to go to the back petals and
paint the petals here purple and the bottom leaves
should be a darker green. And then I'm going to do the same thing
with all the petals. I'm going to paint
them all purple. Now that they're all purple, I'm going to shade them
with a lighter purple, make the opacity lower and
make this a bit bigger. I'm just making these borders lighter so you can see
the petals in the back. Then I'll do that
with all the petals. Make the tips slighter. Then I can even go darker with a black light and add some depth here making
this color darker here. Then do that with
all the petals. I see now they look much more treedy then here for the leaves, I'm going to do the same thing. With this lighter color, I'm going to make
it lighter here, make this smaller and with
a lighter lighter color, make it way lighter here. Then I can make this
brush very thin and raise the opacity and I can
add some details. Maybe with this green, I can add a bit of details. Just because I love my
art being detailed and these illustrations looking
a bit simple for my taste. With this purple, I'm going to do the same thing to the petals. I'm going to add
another layer on top. I'm going to set this
layer to divide. I'm going to raise the
opacity and make it smaller. I'm going to add some little
magical stems to my flower. Now, I need to create a shadow underneath that
flower because it's looking very flat in the body, so I'm just going to go
to the body and take this pink and create
a shadow under. We just need to add
some shading to this. I'm going to use this
yellow because this is going to look like glowy, add some yellow here and I'm going to add
the little lines. Let's use this brown here for the lines because I
want them to be subtle. Then just a tiny bit of shading to the heart with
a lighter pink, just so it's not super flat. Now I need to add the light. I'm going to create a
new layer on top of everything and go to the luminance brushes and you can test any of these
and see what you like best. I'm using purple, but you
won't be able to see it. Make it less opaque. I'm just going to
create it like this. I am going to mask that light and using
the monoline brush, I'm going to pink with black wherever I want the
light to be in the back. If I want to make
that light yellow, I can add a mask on top and
set it to clipping mask. That way, everything
I paint here will be only affecting this layer. So if I choose yellow
and I drop it in there, it'll make the light yellow, and then I can go
here to the opacity and make it lighter. I want to grab my brush and
go back to the layer mask and delete this
part here because I want it to be coming
from behind this petal. Now, I just want to make
the magical flowers. I'm going to go to
this light brush again and make a new layer. I'm just going to create
these little flowers like the idea of these
little flowers that are growing where she used her powers and now
there's flowers there, little dots of magic. Finally, I want to
create a new layer on top and go to luminance
again and use this glimmer brush
and make it very small and then just add a
tiny bit of glimmer to this. That way, it makes it
look like more magical. I can add it here too, and maybe some
around the message. And then if I go to this layer with the light and we go here
and we choose pin light, it'll make it more shiny, more yellow and maybe
reduce the opacity a bit. Then the only thing
left to do is to change that background because I don't like it anymore, so I'll go here and
change the background, and I'm thinking more
of a teal dark color. We're done with our character, and in the next lesson, we're going to give it
some finishing touches.
12. Finishing Touches: Finally, we're going to add some final touches
to our illustration because it's almost done. These are just little
details to make our final illustration
a bit stronger. So the character is done, but at the end of
my illustrations, I always like
adding some sort of texture that's just a
personal preference. So I'm going to create a layer
on top of my illustration, and I'm going to choose
a brownish color. And you can add any
texture you want. I love using my paper texture from my watercolor brush set. If you want to grab that
whole set for free, I will leave it in
the class resources. I give it away to everybody that signs up to my newsletter. But it's not required
that it's this texture. You can add any
texture you want. I'm just going to fill the whole canvas without
lifting my pencil and you will see there that there's a
watercolor paper texture. I'm going to do it again
so it's more visible. See, I'm going to in so
you can see it here. Then I'm going to set
that layer to multiple. That way, it's ingrained
in the picture. It's very subtle, but
I love that effect. And finally, I like unifying all my colors so that
they look great together. The way I like to do that is
adding another layer on top. If you don't have enough
layers in your file, what you can do is you can start merging some layers
together, for example, you could merge these two and
you could merge the flour, things like that so that you
free up some layer space. I'm going to undo that because
I still have more layers. So let's go back to
unifying all the colors. In the top layer, I
am going to choose a green just because greens work really well with
my color palette, but you can try different colors and
see what you like best. When I touch on that
layer on the end, I love this effect. It's called divide and it
makes everything bluish, purple pink if you use
it with the green. But I'm going to
reduce the opacity a lot because that's my original. I just want to add a tiny
bit of this just to unify the colors and especially
those blacks aren't so black. See now they're a
very dark blue. I also want to give
it a magical effect, it's floating in
space, basically. I'm going to go down here and add a new layer and I'm going to bring
it to the bottom. There I am going to find
Percrate luminous brushes again, there's one called
Nebula and I love it. I'm going to choose a
purple for that and see, it creates space
effect with light, I really like it. I'm going to touch very softly because I want it to be very subtle and then reduce the size a bit to add a tiny
bit here to the bottom. And you can add as
much as you want. Maybe I want a tiny
bit here. There it is. Personally, I think it
looks more magical this way and it's a very easy
background to create. With that, our
character is complete. Look at it earlier, it has
done from me an idea in my head to being something that I can share with you and
share with the world, and that to me is magical. It doesn't matter how your
character ended up looking, you brought something
from your brain, something your mind created and you brought it into
the physical world, and that is an amazing thing. Feel very proud of your work. And know that there's
always space to grow. So if you did this, if you brought a
character to life, feel super proud of it and shared with me in
the project gallery, I would love to see
it, and I'm sure the other students would
love to see it too. Remember to leave
a class review and share this with your
friends and follow me here on Skillshare so you get notified when I
launch new classes. Remember that this is part
one of a two part class. Here we built it in Procreate. But in the next class, David is going to bring it into even more real life
into the tree dies space by designing
it in Nomad Sculpt. If you haven't
tried Nomad sculpt, it's a super cool
app and they've does a spectacular
job of explaining it. Check out the class. If you want to get access
to all my freebies, my newsletters, everything,
join my newsletter. I'll leave the link in the
description of the class. Thanks so much for creating with me and I'll see you soon. Bye.
 Sandra Mejia, Illustrator + Pattern Designer