Transcripts
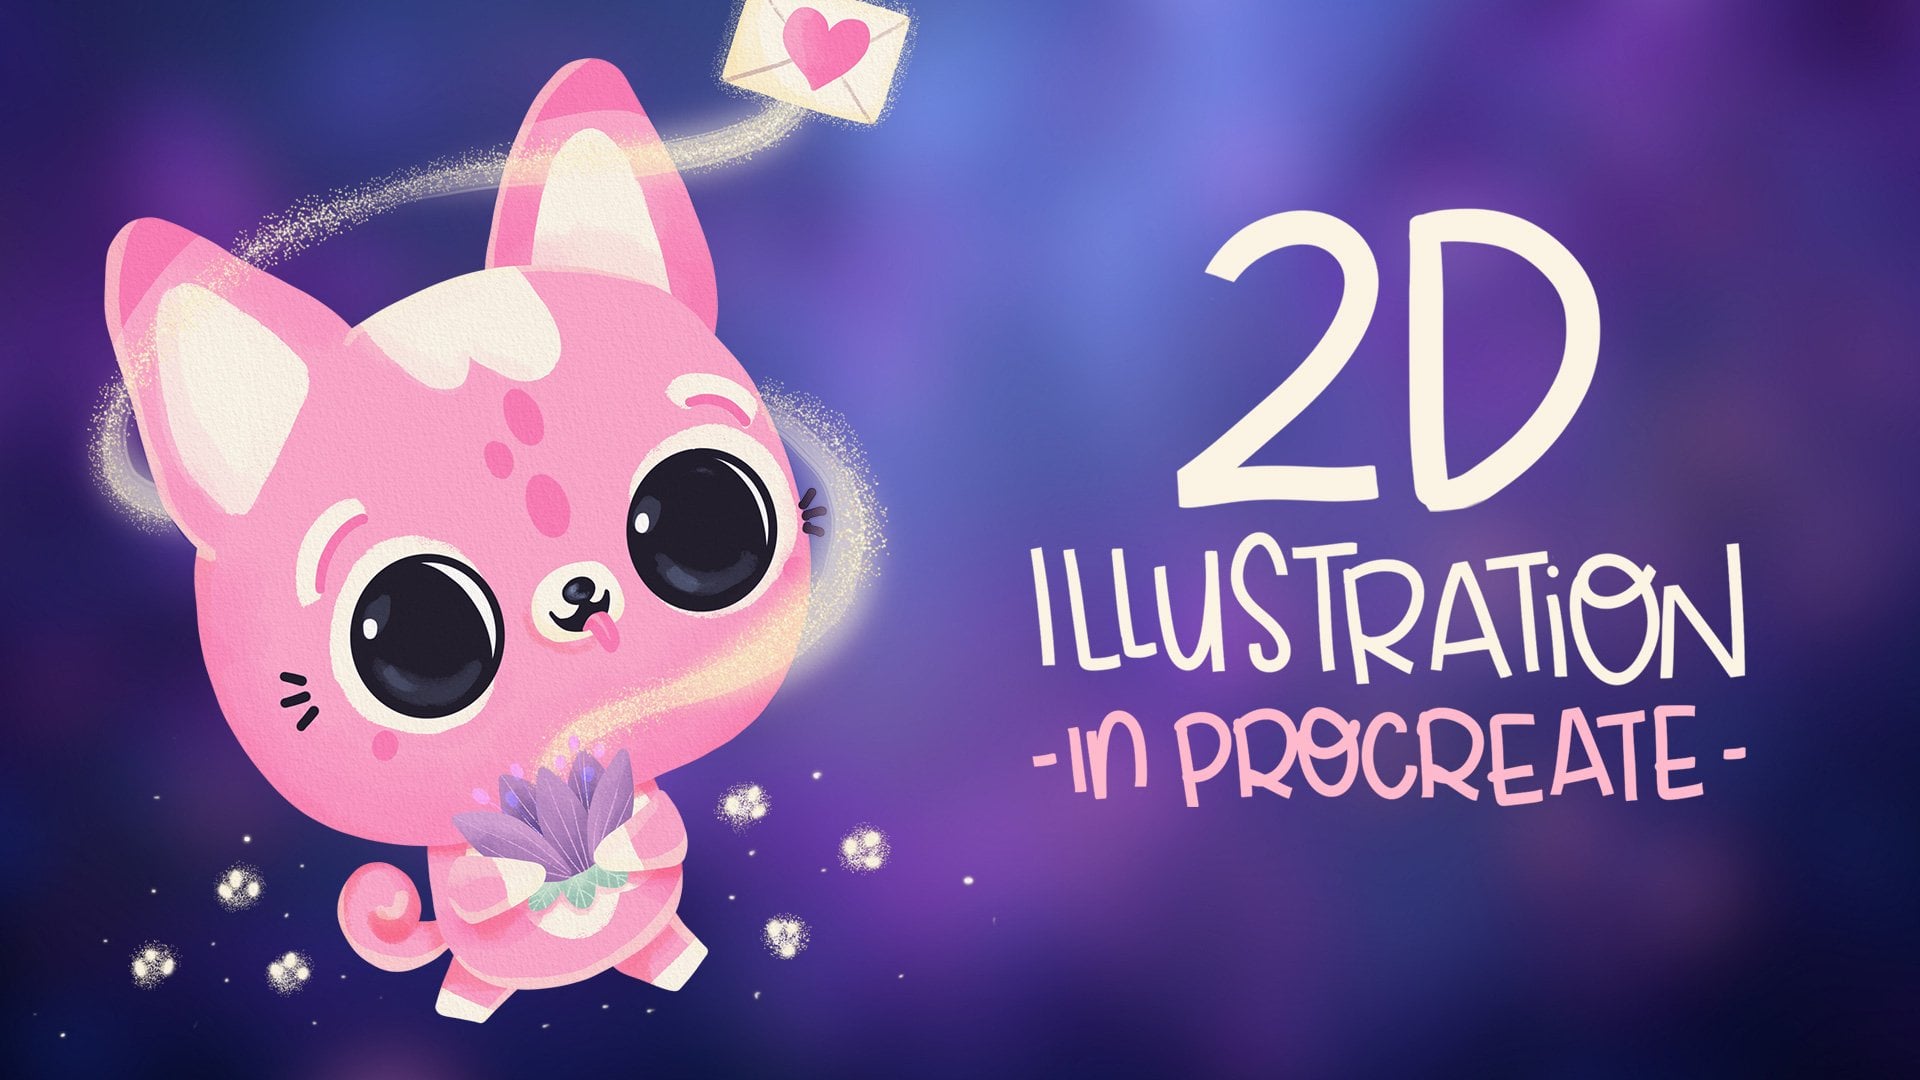
1. Intro: [MUSIC] I'm 40 now and nope, I haven't grown up. I love everything cute and then has always
translated into my art. For years, I've been using Procreate and watercolors to bring colorful and happy
characters and worlds to life. Hola, I'm Sandra Mejia
and I'm a Colombian Canadian freelance Illustrator
and Pattern Designer. I license my work to different companies
that have put my art in greeting cards, fabrics, kids products, home decor, and many
other products. It's always a happy day when
a company asked me to create my characters and little cute
animals for them to use. I have decided to
share my process and techniques for developing cute animal characters with you. I'll be using Procreate, but you can follow along with any design program
of your choice, or even with traditional media. If you're an illustrator, a pattern designer,
a graphic designer, or even a crafter, knowing how to draw animal
characters will open the doors to a bunch of
new exciting opportunities by creating greeting
cards, animations, kids books, patterns,
game design, packaging, or even
creating your own brand. By the end of this class, you'll know exactly how to
create characters that are truly yours and not a
copy of anybody else's. By the end of this class, you'll know how to design
the head and face, the body, and different
expressions and poses. We will talk about cuteness and personality, and as a bonus, I'll show you how you can add simple backgrounds to add
more to your character story. Finally, we'll add
some clothing and accessories to truly make
our character stand up. If you don't know how to draw or you're a beginner,
don't worry, you'll see how I design
my characters using very fast, and let's face
it, messy sketches. I'll explain every
part of the process. Even if you don't
know how to draw, we will just be using
very simple shapes, so anyone can create
a cute character. If you're a more
experienced artist, but you want to brush
up your skills, try my experimentation
method or see how I create my characters and how
you can make them your own, then this class is for you too. Join me and let's make a cute animal character
that's truly yours.
2. Why Animal Characters Are Important: In this lesson, we're
going to talk about the importance of knowing how
to draw animal characters. The good thing about animal
characters is that they can show personality
and tell a story, and they're easier to draw
than human characters, at least for me, and also more universal because they're not defined
by a specific gender, or race, or even age, so they can relate to more
audiences at the same time. If you're an illustrator,
having animal characters in your portfolio
is very important because it shows that
you can create art for greeting
cards, kids books, editorial illustrations for
a magazine, for example, or art for kids products. If you're a pattern designer, you can use your characters
to create whimsical patterns that can be applied to different
types of kids products, like clothing and
bedding, for example. If you're a graphic designer, you can use your animal
characters for logos, packaging design, and
even game assets. If you're a crafter, you can use these characters for handmade cards or even
polymer clay sculptures. Your imagination
is the limit here, but we need to make sure that the characters that
you create are truly yours and not a
copy of anybody else's. To find what your style is, we're going to take the
experimentation approach until we find the secret
combination of features, heads, expressions, bodies, and even accessories to convey
your style and personality. Having cute animal
characters in my portfolio has opened many doors
to me as an artist. Let's head on to the next lesson so we can start
with some heads and faces, and create
some characters for you to expand
your portfolio.
3. The Head & Face: In this lesson, we're going to explore different
head shapes and face features until we find one that works best for
each one of us. Grab your iPad, computer, pencils or tool of your
choice and let's get started. So this is our Procreate gallery and I'm going to
create a new layer. I'm going to tap here to
create a new canvas size. I usually like to work at 12 by 12 inches or in this case, let's make it rectangular, 10 by 15 inches
and make sure this is 300 ppi so it's great quality
if you want to print it. This gives me 45 layers. In color profile, I usually always
work with this for all my paid clients and I have
my time-lapse settings on. Here you can change
the resolution, I have it on good quality, so it's not huge. In Canvas properties, I usually don't touch anything and I just
leave it as it is. So I hit "Create" and we're
going to start with our head. If you're doing this
in traditional media, you should get some
sketchbook paper. Don't start with fancy paper because we're going
to sketch a lot. The good thing about
doing it digitally is that you can move
the features around, you can modify the shapes. My suggestion is
if you have access to a design program
like Procreate, that is amazing for
these, just do it. If not, just get a bunch of sketchbook paper and
it'll be okay also. So as I said, we're
going to draw with a bunch of basic shapes. I'm going to go to the Brush
Library and in sketching, I'm going to select Peppermint
or Narinder pencil. I really love those to sketch
and any color will work. Here, we're just going to be experimenting so
don't be scared. If you draw like these
several times and you leave your finger pressed and
your pencil pressed, it will create a round shape. Here you can edit the
shape and you get these points or you can edit it so you can have
a perfect circle. Then just stop here. You can have an oval also. Up here, let's make a triangle. I never like making sharp
corners in my characters. You can if you want to, but it will make them
a bit more aggressive. So we have these
basic shapes here, I'm just going to grab here and move them down a bit
so we have more room. What I wanted to do
is to experiment. Duplicate this layer, grab it, and move it down and
release it here. Then you can merge
those two layers. That way it will
be in one layer. You can add a layer on
top and we're going to start experimenting there. Here you can change the size of your brush so you can make it thinner or thicker and
this way you undo. I'm going to keep it big and
just start drawing the head. Initially, we'll
think of this as a flat shape and
then we will go to a 3-dimensional process where we can turn the heads around. But first, let's start
with flat shapes. Just start adding features
like the eyes and the nose and see what type of character
these shapes speaks to you. For example, this round head
for me might be a bear. I'm not being precise
here, I'm just sketching. So the bear would have
a snout like this, maybe it will have these
like these. You do eyebrows. We're using very
simple shapes here. Maybe it will have cheeks here. This one is a long
face. I don't know. Maybe it has long ears too. Maybe it has eyes here. Maybe it has a big
nose, smiley face. That's a friendly dog. What if this one has
a very big eyes? Try different shapes, different positions,
and don't censor it. For me, this is ugly like
this separation here, I don't like it personally, but I'm not going to
censor it right now. I'm just experimenting. Maybe it's like a koala. Then the koala will
have ears like this. See, I did not think
of this before. But as I'm drawing, my brain is trying to fill in the story of what's
happening there. This exercise is really great. If I have no ideas, I'll just start
filling in shapes like these and see
what comes out of it. For this one, you can try some cat eyes maybe, a little cat nose, cat face. Now that I'm looking
at him, he looks sly. I'm going to make some
eyebrows like these. Maybe it has little teeth
that are showing there. Then he'll have these ears. So I'm going to do
this again and do this as many times
as you need to. I promise that as
you start going, you're going to start getting some insights into
what you like, what type of face positioning you like and what
you don't like. For example, I'm going to try to make exactly the
same animal here, but changing the face features. I'm going to have a
bigger nose here, a different mouth,
maybe smaller ears. Just change the proportions and the position
of the features. With this one, let's maybe
see the eyes were down here. Let's make them up
here and do this. He had a big nose maybe we gave him a beautiful
smaller nose. Maybe his ears are even longer. Again, don't censor yourself. This one small eyes, big nose. I'm doing the opposite of here. Big eyes, I move
them down. Big nose. Maybe the mouth is attached. Maybe it has big ears. Then this koala, maybe the eyes are
closer together. He has a huge nose and a
little small mouth here. His ears are higher
up, his cheeks. Then this guy, this one's funny. We're going to give it
long eyes, a big nose. See now, he's friendly,
totally different character, same head shape, maybe
some little ears. So just with these basic
shapes you can see the different art styles
and personalities are starting to merge that you find that you have a
preference for some of them. Now from the different
roles you create, you can create as
many as you want. Select the ones you don't like. Between these two, maybe
I like this one better. I like this one better
so I'll choose this one. I like this one
better so this one. I like this one
better so this one. Here, I like this one
better too so this one. So what we're going
to do is grab the selection tool and make
sure free hand is selected. Then you can start moving
around the features. So I'm going to select the
eyes first. Select here. Free form is going to let you change the size and the shape. If you select uniform, you're only going to be
able to change the size. So make sure free
form is selected. Again, I'm experimenting. If you need to select each one individually just go ahead. Change them. Remember, they don't have to be
perfect right now. We're just trying to
find a style we like. I think I like them to have
their features down here. Now, I just want
to move the cheeks over so I'm going
to select each one, grab it, make it
smaller and round, or bring it closer to the eyes, and do the same to this one. Now, I want to move this ear because it's a bit lopsided, and I can erase, make
it a bit smaller. I like that, then do
that to all of them. You can select the full
face and move it around, just that it makes
it look way better. You can also draw in
different things. So I think this guy would
benefit from a bigger nose. Actually, it gave me vibes
of it being like a piggy, so I can erase features
and modify them. I can also change the
ears, for example. I think that how big ears look. Maybe he has little cheeks here, and maybe I just want to
lower this a tiny bit. That's so much better. Now, this one, let's see. I think it's the
nose that I don't like on the mouth
because I like the eyes. So I'm going to make it wider. That's cute. I would
never have drawn that mouth there like this, but I'm liking it. I might just try moving
everything down a bit, maybe up. Well, that one is
cute. I like that. This one, I don't know,
it has personality. But there's something
I don't like, and I think it's the eyes because I can never
make them like this. But for the sake of the
exercise, we're experimenting. We need to try different things. Even if you've made
characters the same way for a long time, don't be scared to experiment. Because I feel like these happy accidents are
what make your art girl. It looks mean that way. Maybe we should separate
his eyes a bit. What happens if I
make this smaller? No, maybe bigger, no, maybe move it down. See, that's a totally
different character, that mean if I
have it like that. I'm going to put it there, and now they've changed a lot. What you can do now
with the ones you like is go to the Adjustments menu and choose Liquify. Here, you'll get a menu. Push, lets you move
things around, and see it moved up bit, undo. You can change the size here, and then you can
move whole areas. Pinch will make things smaller, that's so big, is
affecting my other face. So in pinch, you can
make things smaller. They get pinched. So maybe, 43, yeah. So I'm shrinking all my face. I'm going to leave that one like that and maybe erase these ears, and maybe more of these, lower. Now, I can grab this one and go ahead and select Liquify
again, and expand. It's the opposite, so I'd
like to expand the features. If you reduce the size, you
can expand each feature. What if this one
have bigger eyes? I liked that better. You can also move things
down with this one, then this one, I want
to pinch just the eyes, and maybe push them up a bit. Don't be scared to play
around with it because this is the cool thing
about digital art, you can always undo. Also, if it starts getting
very deformed like these, you can just go back to
your pencil and go over it. See this gave me a
different eye shape that I haven't considered. Maybe move this up. Yeah. I'm liking that too. So now, after you've done
this a lot and you've found something you think could be your style and is
speaking to you, just choose a character that is asking for you to
bring it to life. For me, right now, it's between these two. I wish I had you guys here
right now so you could help me choose because I
like them both so much. I think I'm going to
go with the piggy. Now we have our faces here. If you want to create
more of these, just duplicate
this bottom layer, select that here
and move it down, and then you can keep
creating more shapes and faces until you find one
that you're happy with. Don't move forward unless you're happy with
your character. What I like to do now
is go to the Gallery, and I'm going to show you how to create these little
folders here. I just create a new file, select the square, and I will just
choose the color I want and fill that first
layer with that color. Then add a new layer and
choose a contrasting color. I'm going to use a 6B pencil, raise the opacity so
it's not transparent, I have it at the maximum
size, and just exit. Go back to the Gallery, and you can just grab this one here and put it on top
of our cute animals, and I have created a stack. So If I go into
the cute animals, I'll have everything
here organized. So what I want to do is
duplicate this file, so I keep my experiments here for the next time I
want to go over them, and I go here and I'm going to delete everything
I don't need anymore. I'm going to delete this
extra layer we created, and I'm going to merge these two layers so that
everything is in one layer, and graph my selection tool, select just my piggy, swipe down with three fingers, cut and paste, and what that does is it has created one
layer just for my piggy. So now I can go back and
delete my first layer, and this is it all alone. I'm going to make him a bit
bigger and move him here, and then I'm going
to duplicate him, I'm going to add three
of them for row, merge those three, duplicate that layer, and move it there. That way we have six heads so we can experiment
with our bodies.
4. The Body: [MUSIC] We can't just
have a floating head. So in this lesson we're going to focus on giving our
character a body. So we have our six heads here, and now we're going to start experimenting with the bodies. Again, we're going to start
using the same basic shapes. So maybe a circle, an oval, another triangle, a
rectangle, now a square. See, I'm making one of the shapes bigger
than the others. [NOISE] If you make both
shapes the same size, it won't look as good, if you make the head bigger, it would be cuter, if you make the head smaller, it'll be less cute. I like cute animals but you can make them
however you want. Maybe I'll actually make
this one like a weird shape, then we can try to
see how that looks. Because the idea here
is to push yourself out of your comfort zone and
what you do every time. Because if you always
do the same thing, you're never going to
get different results. Once you start drawing these, you can decide to
change the size. I want to have mine, have a huge head and a
small body in this case. So I'm going to reduce the size, and I'm going to add
very basic limbs. Usually my characters have
very basic limbs anyway. I'm going to add a tail there even if it's not on this side, just to start giving it
more biggie personality, and I'm going to start
altering the proportions. What it has super long
hands and short feet? Or this one maybe
it has very chubby, big hands and very wide feet? This one might have small arms, small feet, [NOISE] I
forgot, the little tail. Can also change the
size of the tail. The longer the limbs, the easier it is to
make it change poses. Because when you have
little tiny hands for example like these, and they raise their hands, they're not going to be able to touch the top of their heads. But if you have long limbs, then it's easier to make them touch the top of their head. Don't worry about
that right now, but just so you have in mind. I feel like he needs like super long muscular limbs
and maybe tiny legs. I am showing you
exactly how I draw. This is how I do sketches. Some artists have
these very beautiful, perfect sketches, I don't. I think if you don't worry
yourself about that right now, and you just focus on the
experimentation process; having fun, pushing yourself
out of the comfort zone, you'll find that you develop
your style way faster, that drawing becomes fun. Now I'm going to look at them, and you can do this as
many times as you want. It doesn't have to be six times, I just don't want it to be
a super extra long class. But you can see that their personalities are
starting to emerge. For example, if you compare these little one and
these little one, which one do you think
goes to the gym? Or which one do you think
could defend a whole village? I think this one for sure. I can see this one being a mom. I'm starting to imagine her carrying a cake or
something like, "I baked something
for you guys." She has like a little apron. You probably don't see the
same things that I'm seeing. I'm showing you how my
brain is working right now and how you should just
let your brain roam free. There's no right or
wrong answer here. This one is not giving
me any personality. This one looks
[LAUGHTER] like one of those balloons as you wrap up, could be a funny
character to develop. This was in-between
this one and this one, but I like the short limbs better because it
makes it cuter. This one is something I did
not think would appeal to me, but it's calling
me, and the mom. I don't want this one, or this one or this one, I am in-between these three. If it was my normal style, I would for sure use this one. But just because
this one started generating that story about it being a mom that's baking, I am going to choose this one. Again, I'm going to
go to the gallery, swipe left, duplicate,
and go into that file. I am going to
flatten everything, select my character, swipe with three fingers
down, cut and paste. Now I'm going to delete
the layer I don't need. [MUSIC] In here is
the [inaudible] Now, the thing that we can
make it look a bit more interesting by turning
it around a bit.
5. Flat -vs- 3/4 View: [MUSIC] In this lesson,
I'm going to show you how I turn my characters
around the beat, like a 3/4 view so they're not always facing directly
towards the front. I love characters facing
directly to the front, but this is a preference, so you choose what
you like best. I'm going to duplicate
this character and move it here and I'm going to erase the face features
and the limbs. I'm going to keep just
that basic shape. I'm going to duplicate that
basic shape several times. Then again, duplicate it. I'm seeing those guides there
because I have snapping on. If you're not seeing the guides and you want to line them up, just turn on snapping. I'm going to merge everything together and create
one layer on top. This is not a flat object. This could be your style
and if you want to create characters that are just front facing, that's
totally okay. I like to create a lot
of mine like that. But I'm going to
teach you how to see them in a
three-dimensional space. You have to imagine each shape as a
three-dimensional object. Everybody knows that a
triangle is like that. If I round the corners, then I'll have
something like this. This is the middle of the face and same with the body. I have provided a download that shows the basic
geometry turnaround, and you can practice
with that if you want. [MUSIC] This is a
rounded rectangle. We know that rectangles
are like this. When they're 3D,
they are like this. Now, this is our basic shape as seen a bit from this side. I like to add my middle of the face here just
so it guides me. I'm going to touch the end and reduce the
opacity of this layer, which is my guide right now, and I'm going to create another layer on top to
create the features. Right now it's very useful if you go through your Actions, Canvas, Drawing Guide. You can edit your drawing guide by making the little
squares smaller, so the grid size
smaller and hit "Done". Now this can guide us. First start with the nose, which is in the middle. You're seeing everything
from the side so you can see a bit of
the side of the nose. Again, it's a simple shape. The nose is like that. This is the side and
this is the front, and now the eyes. Try to gauge the distance here. These ones are
different distances, but it doesn't matter, because right now we're in
the sketch stage still. The mouth. You can start making
design choices right now. If you're thinking
the mouth is so big, you can modify it. Nothing is set. You can play with these
as much as you want. Now I'm going to add
the ears and see this part is the side, so the ear will actually
go out from here, so have that in mind
and add the ears here. I want to flatten
the head a bit. Also, these sides, I want them more rounded. You can always go back to the first layer
and delete things. Now go back to the top layer
and start adding your limbs. The limbs will come out from
here and then from here. This one, you can
only see a bit. The legs will come up from here. I'll have this middle
here just so I know. The tail will be
coming from the back. That's how [inaudible]
and give it a bit of a
three-dimensional look. You can push this more. Just always draw
the basic shapes. I'm going to turn off that
layer and I'm going to delete this here so we're a
bit more organized. I just saw we forgot
the eyebrows. [MUSIC] This is looking great so let's move on to giving our characters some expressions so it can tell some some
stories. [MUSIC]
6. Expressions: [MUSIC] Expressions
convey emotions, impulses help you tell stories. In this lesson, we're
going to focus on giving our characters
different expressions. For these, Internet
is your friend. Try researching expressions
or you can even take your own pictures
and draw from them. Don't laugh. If you're
taking your own pictures, try to exaggerate
the expressions and pauses so you can focus on
them when you're drawing, and this will make
it much easier. [MUSIC] I always like to start with the nose because
it's in the middle usually. Then I can start
adding my features. Let's start creating
different scenarios. Let's say she's really mad. This is the yelling mom. Let's say she has
red cheeks here. She's very mad and her
ears are perked up. Her arms are like one square, 2,3,4,5,6 in length,
and they start here. Let's say around here. She's really mad and she
has her clothes faced. Maybe she has one leg in there. Now this one, start with
the nose. Maybe she's sad. Again, as in the first
time, I'm experimenting, I don't know if these are
the features I like for her, but this is all a
game right now. Let's say she's holding
a little tissue. Maybe her legs are
closer together. Her tail is sad. Well, here we forgot the tail. Maybe the tail is like these. Let's make her all excited here. Maybe she's scared. Keep moving features around until
you feel that it's conveying the emotion
you want it to convey. Let's make her asleep. I feel like the ears
would be very relaxed, the face is very relaxed. Now we have different
expressions and you can have as
many as you want. Just experiment until you find a combination that
feels good for you. For example, I like
all these expressions, but I don't like this one. What I can do is just
focus on that one. Select the adjustments,
go to liquefy, and I can start pinching, and expanding, and
moving things around. I can push these lower. I can make them out smaller, and I can use the Selection to hold some of the
features around. Maybe the most smaller and the eyebrows
smaller like this, and I want to move the whole
set of features down a bit. Just because I feel
that if she's mad, they will condense like
lower. I forgot this one. That looks better for me, and now I'm happy with the
set of expressions I have. I'm going to go back
to this first layer, take the opacity up, and merge everything together. Now I'm going to choose
one of the expressions, so we add clothing and
accessories on our background. I'm going to choose this one, but I'm going to make
the arms like this. Yes. Now we're going to go to the gallery,
duplicate this file, select this one, cut and paste, and delete this layer. Now I'm going to go to my Canvas and erase the drawing guide because I don't want it anymore. [MUSIC] Great. This
is looking good. So let's move on to
posing our characters.
7. Poses: Posing is a very complex
subject on its own so I'm only going to be
touching on some basics here. I suggest if you want to dive deeply into this that you take the base character that
we will be creating today and just
practice drawing it in as many poses as possible following
real-life reference images. Also since this is grading
cute characters for products and not brand-new
made-up stories or books, you don't need to create different poses with
your characters where they stay consistent,
so it's a bit easier. Now that we have this one here
I want to show you how to create more dynamic
poses but before, I'm thinking that this is
not going to look good once, I add pants, for example,
say this is the waste and the pants are
going to look weird. I'm going to modify it a bit. The reason why we have created all these sketches and have
not painted anything or colored anything is because
what you want to be concentrating on at this point
is making these decisions. If you start coloring at first, you're going
to waste a lot of time because once
you start moving your character around,
creating expressions, adding clothing and
accessories you might want to change
things and right now I haven't wasted a lot of time but if I had
rendered and colored this character already so
many times I would have wasted all that time because now I'm not liking
the body anymore. Keep everything
very simple right now, this is why
I'm keeping it raw. I'm not making it
overly pretty to teach a class I'm just showing
you exactly how I work. I think I'm going to go back to my usual small body, big head. I think that's
just my style so I don't feel comfortable
doing it any other way. I'm going to press
here freeform so I can actually, transform
the dimensions here because I want
to squish the body some more and I like
that so much better. I'm going to set it
there and I'm going to go around it a bit. Maybe the waist is here, maybe the legs are like this. This one is in the
back because it's facing a bit towards this side. The arm, we might
just see it coming out like this maybe from here. Then I can erase some of these parts really fast just
to see how it's looking. I like that so much
better already. I'm going to bring this down a bit and I'm going to squish
using liquefy and push. I'm going to squish
the head down a bit. Then make it smaller just
to squish this part here. Yes, I like that so
much better now. Again it's all about your
taste and your style. This might not be
better for you. You might like the other
one better but this is why you have to experiment and find out what
works best for you. For me, it's this one right
now and what I'm going to do is show you how to
create some dynamic poses. This class is not
intended to show your characters like
with turnarounds and developed characters for
kids books, illustrations. It's more of how to
use cute animals in static settings
because I feel like there's a lot of classes on that already but there's
not a lot of classes for people that
just want to draw stickers or create
a t-shirt that has a character or a
greeting card with a character or a logo
for our character. Sorry, a character for a logo. This is why I decided to
focus this class on this. I am going to show you
a tiny bit on how to develop poses as I said
that'll be a class on its own. Let's just see some basics
here with tilting the head. Always draw these lines so you know where the
front of your face is. The nose would go here for
example and create a line. Now make your character
follow that line. The body is always like a
bean so this is the back and this is the waist and this
would be the middle line. One arm would be here and the other one would
be back there and a long leg would be coming out of here and the
other one back there. You can say it's
dancing for example. Again, this only became easy
to me once I practiced a lot. You can draw and draw, you can look at references, and always keep the
basic shapes in mind. The ear would be here
and then you can just refine the lines until you're
happy with how it looks. Let's try another one. I'm
doing random things here. That is an exercise
you can do again like draw out ahead in
any position you want. Let's say this is the middle and it's looking down so
this would be very low. Sorry, I forgot the mouth. Let's say it has its size
short and it's asleep. Now it makes the bean shape
and let's try if this works. Maybe it has one arm here. The other arm would be here, one of the legs would be here and the other one
would be back there. Then you can start
refining these. Let's see how that looks. This looks weird here so
maybe curve it like that. This is the waist and there
you have it it's sleeping. You could also create
poses with intention for example let's say it's here. Let's make the face
here, the ears. Let's say it's sitting
down so the little body would be like this and then
the bean would be squashed. This is the middle of the
body and this is the waist. One arm here, then one leg here, and
then the other one there. Let's say it's
drinking some coffee and then the other hand
is holding this here. I'm going to erase this here so you can see what I'm doing. Maybe he can be
sitting like this with his legs folded and
he can be having a picnic. Just practice with
this bean shape. You can elongate it if
you have a long body, you can deform it as
much as you want. I'm just practice
and practice having these simple shapes in mind and looking at references
if that helps you. Then, you can always
go in here and modify stuff for example the head is too small I think so I'm going to make
it a bit bigger. You can tilt it more for
more dramatic poses. This is a great thing
about the sketches because you can modify
everything you want. Wow, now our characters are almost done and we just
need to give them some clothes and accessories to complete their personality. Let's move on to the next
lesson and draw those.
8. Accessories & Clothes: Anything else that you add to your character like
clothes, accessories, and backgrounds are
pieces of information that you're sharing
with the viewer so they can understand
the character a bit more. In this lesson, let's focus
on clothes and accessories. Before you begin adding
things that just look pretty, ask yourself about your
character's personality and its story. Is it a sailor or a doctor? Does it live in cold
or warm weather? Is it strong or weak? Some of these decisions
have already been made when we created the
heads and bodies, but some need to be made now. Just come up with a simple story in your head about who
your character is, and where it leaves, its occupation or personality, or whatever you want to
transmit to the viewer, and use this to choose its
clothing and accessories. I'm going to go to gallery,
swipe left, duplicate, and in this file I'm just
going to select this one, cut and paste, and then I'm
going to delete this layer, and I'm going to make
it a bit bigger. I'm going to duplicate this one, let's say we're going
to have three of them. Duplicate that one again. That's great. I'm going to merge them all so they're in the same layer and I'm going to create
a new layer on top. I'm going to grab another color, for example, this red. I'm going to start
writing things for each of their personalities. Let's do with this one what I
said I thought about first. Remember, I had that
idea about making it a mom that liked to bake, so let's say that likes to bake, lives in cold weather,
loves springs. Let's say this one
is on vacation, tropical destination,
loves pina colada. Let's say this one
loves reading, lives in a rainy area, and it's young and playful. You can write as
much as you want to determine the personality
of your character. I'm going to go here
and select in painting, "Nikko Rull", that's one of my
favorite Procreate brushes. I'm going to start
adding some accessories according to the story
I created for them. Again, I'm being very
messy and fast here. Let's say she has oven mitts. You can use other colors. I'm going to drag my
palette out of here, so it's easier to
grab the colors. Let's say she has an apron
that goes like this, and here it's tied. She's going to be
holding a cookie tray, maybe she has some
macaroons in there. She has big blushy cheeks because she's been baking
and she's hot now. Now, this one is on vacation in a tropical island and
loves pina colada so obviously she's
going to the beach. Should she have her sunglasses here or should she
be wearing them? Since I'm creating
these on a layer on top of my basic sketch, I can just go ahead
and erase things and not ruin my
sketch underneath. Let's say she's wearing them. She's going to have
a swimsuit here. Should we give her a full
swimsuit or a bikini? I think I'm making it look cute because then we can see
the little belly button. Now, for the most important
thing, her pina colada. Let's give it a
cute umbrella here. She is obviously super suntanned so she
has her red cheeks. You can add a little tote
bag, whatever you want. This is your story and you're supposed
to have fun with it, unless it's a client
that told you she's going to have to
be holding a pina colada and a tote bag and
have sunglasses and you have to figure out
how to put all that in there. But for now, this is
just your imagination and whatever you love. She loves readings, she could have a different
pair of glasses. Again, if you don't know
how to draw something, just look online, see how it looks, and just try it, but keep it very basic
with very simple shapes. It doesn't have to
be super realistic. Give her some books here. She leaves here in a rainy area so we can give her an umbrella
so maybe if I do this, she can have this
little umbrella here and I can move that arm. You just go into the outer
layer, delete this arm. I'll make it hold it and I'm
going to go to the top layer just so we could see the
hand there holding it. Probably a little hoodie also. I'll give her cheeks just
because it's cold and rainy and my nose gets red when
it's cold and rainy. Remember how I said I
wanted to make it cooking and be a mom and she's
baking actually, now I'm really liking these
two even more than this one. But I feel this
one is super cool so I'm going to develop this one and show you how I
paint it and render it.
9. Adding Color: At this point, you can
choose to clean up your sketch and leave
your character like this. Or you can color it in and add
some textures and details. It's all up to you. I'm going to show you how
I paint my characters. We're going to do what
we do every time, we duplicate this file. Now we're going to
merge the layers. Select this one, three fingers down,
cut and paste, and erase this layer. I want to make this file
ready for social media. So I'm going to make it square. Go here to actions,
canvas, crop and resize. Here in Settings I'm going
to make it 12 by 12 inches. This is a size I
work on every time I'm working on a square file, make sure it's 300 DPI so
you can print them later and hit "Done." Now it looks a bit
tiny for these, so I'm just going to expand it. You never want to expand
artwork that's final this way because it will get pixelated. But since it's a sketch,
it doesn't matter. I think that size is perfect. What I'm going to do
is go to this layer. I'm going to rename it. Now I'm going to start being more organized
in my files. This would be the sketch. In the other files I
showed you in that phase, I don't care about organization,
prettiness, anything. I'm just concentrating
on generating ideas and creating a
character that I love. Now I'm going to start
being very organized and professional in case
this is for a client, I want to have
everything super pretty and the more organized
your file is, the happier your client is. Or even you, if
it's just for you, you'll be happy you're going to be organized with your files. I'm going to touch
here on the end and reduce the opacity. I'm going to start
creating some layers, dragging them underneath. I'm going to start filling
out the basic shapes. You can do this in
just one layer, or you can do this
in multiple layers. But I like to do is keep
everything on separate layers because what this allows me to
do is modify the character, give it different clothing's, positions very easily without having to redraw
the whole thing. But whatever process
suits your needs, just go ahead and
do it that way. I'm going to start
with the body. I'm going to get my
palette out here again. If you want to
download this palette, it's going to be available
in the class resources and also some worksheets that you can download
for your reference. See that I'm going
past the neck line, like the neck line is
here and I'm going past. That is if I want to move the
head later shifted a bit, I won't see like a
white area here. I'm keeping the legs
in the same layer, but the hands I'm going to
make in separate layers. I'm just going to color this in. You could drop the
color in like this. But what I like about Nikko rule is that it
gives us some texture. I don't want so much texture, so I go back in. But if I fill it in
with color like that, it just gives us a
solid background. I don't like that so much. If that is the look,
you're going for, go ahead and do it. It's definitely faster than
coloring all these scene. Now I'm going to
create the head. You don't see where
you're going here. You can always turn
off these body layer. That way you make sure the head looks very nice and pretty. I'm going to add the ears. You can also just reduce
the opacity of this. The other ear I'm going to
add underneath the head. Just because that
one's in the back. Now I'm going to bring
the head back up to its full opacity and
rename these layers. This is the left ear, this is the right ear. I'm going to bring
back the body. But I'm going to make
it sort of transparent so I can draw the arms. So on top of the body
I make a new layer and I'm going to make this arm. I think I want to give it like
a little pinky finger here. Pinky no, Tomb. So it can actually
grab the book. I'm also going to
make this hand here. I'm going to bring the body
back up to its full opacity. Underneath the body, I'm going
to create the other arm. I'm going to create
the little tail. Now we have our base body here. I'm going to rename
these layers, right arm and tail. This one, left arm. You can group these
layers by selecting one and then swiping to the right
on the other ones and group. Then you can rename
that Group 2 and say B. Now I'm going to go and
add the facial features. I don't want so much
texture in the eye, so I'm coloring it twice. I'm trying to make them match, but I don't want them to
be exactly the same shape like I could
duplicate this shape, but I think they have
more personality if they're not exact. I'm going to create this
now with this darker color. That works. The eyebrows. Let's try it in with this color. Yeah, I think that looks good. I'm going to add a bit of
white here in the eyes. I just loved doing this
and the little nostrils. Great. So this is the face. If you don't have too many
layers available in your iPad, you can combine
things in one layer. For example the face could
have the umbrella also because they are not touching, so it will be easy to
move them around later. For now, I'm just going
to create another layer. I'm going to create
the umbrella. Now I'm going to be a bit
more careful about my shape. But again, I'm not
being a perfectionist, which I really I'm and have
struggled with that a lot. But that's the reason why I love creating
characters so much, because this is where
it can let myself lose and play around
and experiment. I feel because you some
more playful style, everything is possible. There's no right
or wrong things. You can always use the eraser and that's the cool
thing about digital. I'm going to draw the
handle in another layer because that layer has to
go underneath this hand. That hand was here. Yeah, so I need to draw that
one on top of this layer. Handle. I like that, but I'm going to turn the
umbrella around a bit. I'm going back to the
umbrella and rotating it. I think that looks better. I'm just going to fix
this area here a beat. Now we have to create the
classes and the code. Then we'll make the book
on top of the court. Now I'm going to create another
layer here for the court. I'm going to add the rain
boots to this layer also, just because they're
not touching. Then it would be easy
to move them around individually just by
using the selection tool, this one, the selection tool. Because we have to save layers and I can even
create the classes. Now we need to move this
left arm out of this group and on top of the code so
that we can actually see it. I'm going to create
another layer on top. Here I'm going to create
this leave or detect. If you can't see
what you're doing, just turn off the
layer for the jacket, and color this in. I now turn on the jacket
layer again and rename it. Now here on top
of the right arm. But underneath all this and
we need to create a layer that's going to be the
right arm on the hoodie. Now I'm going to
give it some pants. I need to paint on
top of the body, but under the court, if I paint here in
the handle layer, it will work perfectly. I'm going to rename
it handle and pants. I'm going to give it some pants. I can see I have some holes in my yellow jacket so
I can fix that later or you can leave it like that and just enjoy the texture. Finally, the last thing
we need is books. The books have to
be under the arm and on top of the court. So they have to be here. Rename these two book. That's it. We have our base layers, so I'm going to turn off
the super ugly sketch. Now we can start having
fun with our character. Now that we're done
with the flat colors, let's go to the next lesson and add some textures and I
need those to make it better.
10. Adding Textures: [MUSIC] Perfect, we're almost done now. Now, we're going to add some textures on details
to our character. This is how I do it,
but I encourage you to find a way that suits
your style the best. Experiment with
different textures, some ways to add
details until you find your preferred way and this way they will be
just your style. For rendering, I'm going
to create Alpha Locks. What Alpha Lock does is
if you swipe right with two fingers and you
paint over that layer, this is the book it will only paint on that layer and not
spill over other layers. This is great for shading, and I'm going to use
only one brush for this. I still have my Nikko Rull brush on and I'm going to
reduce the opacity a lot. I have it like 13 percent, make it a tiny bit bigger, and I'm going to start
shading everything. I'm going to create an
alpha lock for every layer. I'm going to start
from the bottom up. This is just a preference so
there is no reason I just like doing it this way because it feels like
it's more organized. I have a darker shade for each color so for example
for the pink in the pig, I have these darker shade and that's what I'm
going to use here. I am in the right arm and tail. Here, just a bit of shadow there and a bit
of shadow in the tail. This is optional. You can just go ahead and
draw outlines on top details. You can leave it like these. You can make it look
flat like this. I just love adding
textures to my drawings. Now I'm going to go
to their right arm. I'm going to add some
lighter areas to it. Some darker areas with
this orange maybe. Then go to the body, which we can't see much. They handle of the pants. You can also make
it smaller and be very intentional as to where
you're putting your lines. Use this to separate areas. For the handle, maybe add
some light here on this side. Now we go to the right
ear and the head. I'm going to add some more here and maybe a
lighter area here on the eyes. Just so we bring some attention to the middle of the face, and then the left ear. In the face, I'm just going
to add a bit of texture to the nose and a tiny bit with this dark green
to the eyes here. Just so they have some light. Also, I just realized
I want to create another layer to add some
reflections to the glasses. It looks like it
actually has glass in there and I'm going to
add some cheeks to it. Now for the umbrella. Then here we have the
code body that loss is on the boots so let's
start with the glasses. Let's differentiate the
leg of the glasses here. Maybe a bit here and I'm just going to add some
shadows here so they look a bit more
three-dimensional. I'm seeing the code body is
like digging into the head here and I don't
want that so I'm going to erase a
little bit here. Yeah, I like that better. I'm going to start
adding some shadows. There'll be a shadow
here under the head. Here under this arm, the book, and just some texture here
and then same for the boots. Then the book, the left arm I want to add this light shade
here so you can really see the difference
between it and they arm. I'm going to make it dark
here and then light here. If you have these holes here in the jacket and
they're bothering, you, just go back to that layer, swipe to the right
and I like using this smudge tool and just
smudge and they go away. Now I'm going to turn
the alpha lock on again. I think we're done with
our basic textures. Now, what I like to do
is create another layer, set this layer to multiply, and then use a thin brush. You can go here to recent, you'll see a recent brushes, choose a Narinder
pencil again or whatever thin brush you wanted and I'm going to create some details so for
example for the jacket, maybe it has some bottoms here. Maybe it has some stitches. I feel like these little
details bring it to life. Maybe it has pockets, and here, maybe it
has a little logo. I want to move that around. This is why it's great to
do it in a separate layer. In these multiply layer, I draw everything that would be darker than the
color underneath. Maybe some hairs here. Maybe some little tips
here for the umbrella. The little tips that
save your eyes when you're walking down
the street supposedly. I'm using a very
limited palette here. This is to keep it easy. If you want to go into each layer and add some
patterns, for example, you can go into the umbrella, create a layer on
top, click on it. Clipping mask. That way you
will only paint on top of the umbrella and you can
create some patterns for it. See that everything
I'm drawing is very simple shapes so
everybody can draw this. It's just putting in the
extra effort of adding more details that makes your illustration come together and the more you practice, the easier it will be to draw
other more complex things. The cool thing about doing it in a separate layer is that
if you don't like it, you can just delete it or that you can use a blending
modes here by touching the N. You can start moving them around and seeing if
there's a cool effect. That's pretty because it changes color here where
there's more light. I always like to go through
all of them just to see what unexpected
effects come up. I think that's my favorite one and I think I'm going to do
the same thing for the pants. I'll go here to the pants, create another layer,
clipping mask. I'm just going to give
them some texture. Again, I'm going to touch the N and go through all of them. I think I like this one. You can also change
the transparency of it by reducing the opacity so it's not so
bright for example. Great. We said it had a fun personality so
find the boots here. Create another layer. If you don't have
more layers you can always draw on this layer, clipping mask and then
just start painting. [MUSIC] I think they need
something dark down here so that they stand out. Finally, I'm going to go
to the layer on top of the book and add some text. Make it something related
to the illustration for example New York city maps. Finally, I'm going to remove this logo here
because I don't like it and I'm just going to add another layer here and
add a little rainy cloud. [MUSIC] Now I'm happy with how this looks so let's move
on to the next lesson and create a simple background
for our illustration.
11. Final Details: [MUSIC] In this lesson,
we're going to use a simple background to
convey even more information about our character and add some finishing touches
to our illustration. I'm going to show you
my little trick to make all the colors look
like they belong together. Now, we're just going to create a very simple background to give more information
for our character. If you don't have
any more layers, what you can do is go to the
Gallery, swipe to the left, duplicate this file, go to the new file, and
just flatten it. I'm going to delete
the sketch layer too. Now you have your character
in just one layer. Here, you can change
the background color. You can try different colors. I like this green color. I'm going to create a new
layer and drag it underneath the pig, rename it Water. I'm just going to use my Nikko Rull, use blue and just create
some water here. Then I can also go
on top of the pig, create another layer,
and add some rain. The reason I'm creating
this on top is so that it can go on top
of the umbrella. There is our cute
animal character. I have a little secret. On top of every
illustration I create, I create a new layer. You can use any color you want. I like yellow. Just drag the color to
fill the whole layer, go to the Layers panel and start playing with
the blending modes. Reduce the opacity so
it's not so overwhelming. Go over them until
you find something you like and try it
with different colors, see what suits your style. But what this does
is that it unifies the colors so they all look
like they belong together. See these makes that more muted. If that's the style you like, that is one option. I usually like the Multiply, Darken, or Color Burn. These ensures all your
colors match together. It's done. Now you can go
here to the Actions, Share. You can save it as a Procreate
file or a Photoshop file, a PDF, a JPEG, a PNG, or a TIFF. I'm going to save it as a JPEG
and save it to my images. There it is. Now that we're done with
our illustration, let's go to the next lesson to discuss your class project.
12. Class Project: [MUSIC] I hope you're inspired to create your
own characters now. It's time for you to practice
what you've learned. Go through the experimentation
exercises and choose the character that
appeals the most to you and develop it
to a finished stage. Post it in the class
project and tell us a bit more about
your character. Make sure to look at your
classmates' projects and comment on them too. Now let's go wrap
things up. [MUSIC]
13. Final Thoughts: [MUSIC] You've done
it. You've created your own cute animal
character that is truly yours and
fits your style. Remember to practice
drawing it as much as you can so that
the choices we made here on the process becomes second nature and when you
feel comfortable with these, you can expand this
knowledge to create even more characters
that all look like they belong in the
same universe. Don't be afraid to always keep
experimenting and adapting this style of your characters
as the more you practice, the more they will evolve. I hope you're feeling great
about your creations and are super-excited to add your new friends
through your portfolio. Remember to post
any questions or comments in the
class area and post your projects so your classmates and I can see them
and review them. Follow me here on Skillshare
to stay up to date with new classes and follow me on
Instagram @artbysandramejia. [MUSIC] Remember to
review the class also and thanks for watching. I always appreciate your
constant support. Bye.
 Sandra Mejia, Illustrator + Pattern Designer