Transcripts
1. Introduction: Hello and welcome. In this course, I will show you how to roast coffee beans using a cast-iron skillet. We will go from raw green coffee beans, too ready to brew perfection in about 15 minutes. Using just a few simple tools, you'll get to see the coffee evolved through the roasting process, and you'll get to experience drinking fresh roasted coffee. We will go over picking the right equipment, how to find and choose green coffee, and how to roast it right in your kitchen. I am templates and I had been roasting coffee commercially for over five years. Join me today and let's learn the fascinating process of coffee roasting.
2. Equipment: We can roast coffee with just a few basic items. Most importantly, we need a cast iron skillet. This 10-inch one works great for a small batch of about half a pound. We don't want to use more coffee than we'll cover the pan with a single layer of bees. Also, it's important that the parent is as clean as possible. Any seasoning will important unpleasant flavor to the coffee. We also need a whisk for steering. A wooden spoon can also work, but a was keeps it stirred nice, uneven. Next we need a pan or bowl for cooling the coffee. And the thing that allows you to spread out the coffee after roasting, to cool it as quickly as possible. Finally, we need a heat source. This can be any type of range or burner, electrical propane, even a fireworks, great.
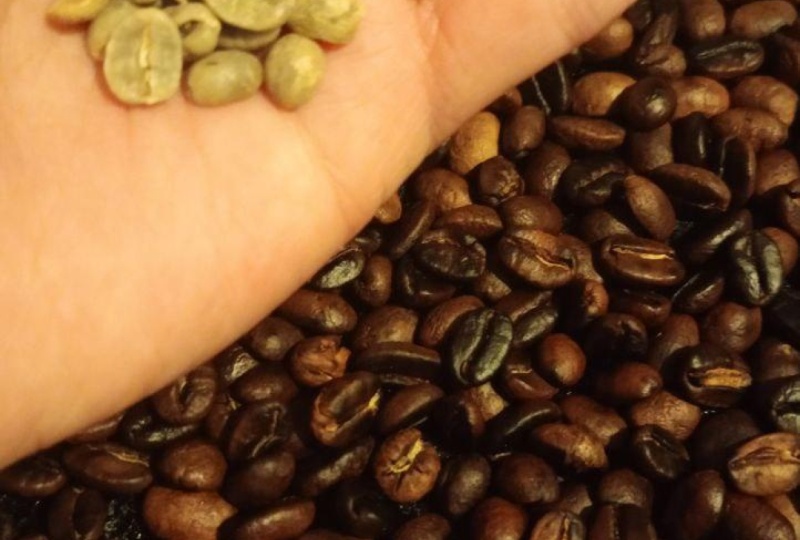
3. Pan Roast Coffee: To roast coffee, we must start with the raw green coffee bean. Coffee beans come from the seed of the fruit of a coffee tree. These cherries are processed to remove the outer layers of fruit and skin, leaving just the small, dense green seed that is a raw coffee bean. When we roast these, they expand in turn brown, resulting in the aromatic, tasty ready to brew coffee bean that we're familiar with. Green coffee beans can be easily purchased from a variety of sources online. Local coffee roasters are sometimes willing to sell small quantities of beans for the home row string as well. Some important things to look for when purchasing green coffee. A crop date, this is usually the year and season this coffee was picked. Green coffee remains good for much longer than roasted coffee. When stored away from extreme temperatures, sunlight and excessive moisture, they will remain fresh for about a year. The origin, this is where the coffee is from. This can be a country or region, a co-op or micro region, or even a single farm. The process, this can be broken into two large categories, natural and washed. Natural processes when the cherries are allowed to dry with the fruit on the beam before being removed. As expected, this results in a fruity, juicy you're tasting cup as it absorbs of flavors of the outer layers. But washed processes when the fruit is removed and the seed is allowed to dry by itself. These coffees are usually bit more consistent and flavor and future brighter, cleaner acidity. Variety or cultivar. This is the genetic strain of the trees that the beans came from. Much like grape varieties and wine, there are a huge range of coffee varieties. All have different properties and result in tastes in the final beans. Elevation, the elevation the coffee was grown at. Elevation plays a big part and the final flavor of the coffee bean, but it's not easy to make general statements like higher is better, but rather the synergy between altitude and the rest of the micro-climate where the trees are growing results in a specific flavor profile. Roast level. This is the suggested target roast level for these beans provided by the distributor. The degree of a roast is determined basically by how dark the beans have become, which is controlled by how long they are roasted. The terms city, full city, et cetera, are kind of rough estimates of the degree of a roast described by the color, length, and final temperature of the process. I pretty much ignore any recommended most levels on the bag and instead roast small sample batches of a new coffee at several different levels to see how the coffee tastes at each. My best advice is to try as many copies as possible. Take notes on each one you roast and brew and discover your favorites.
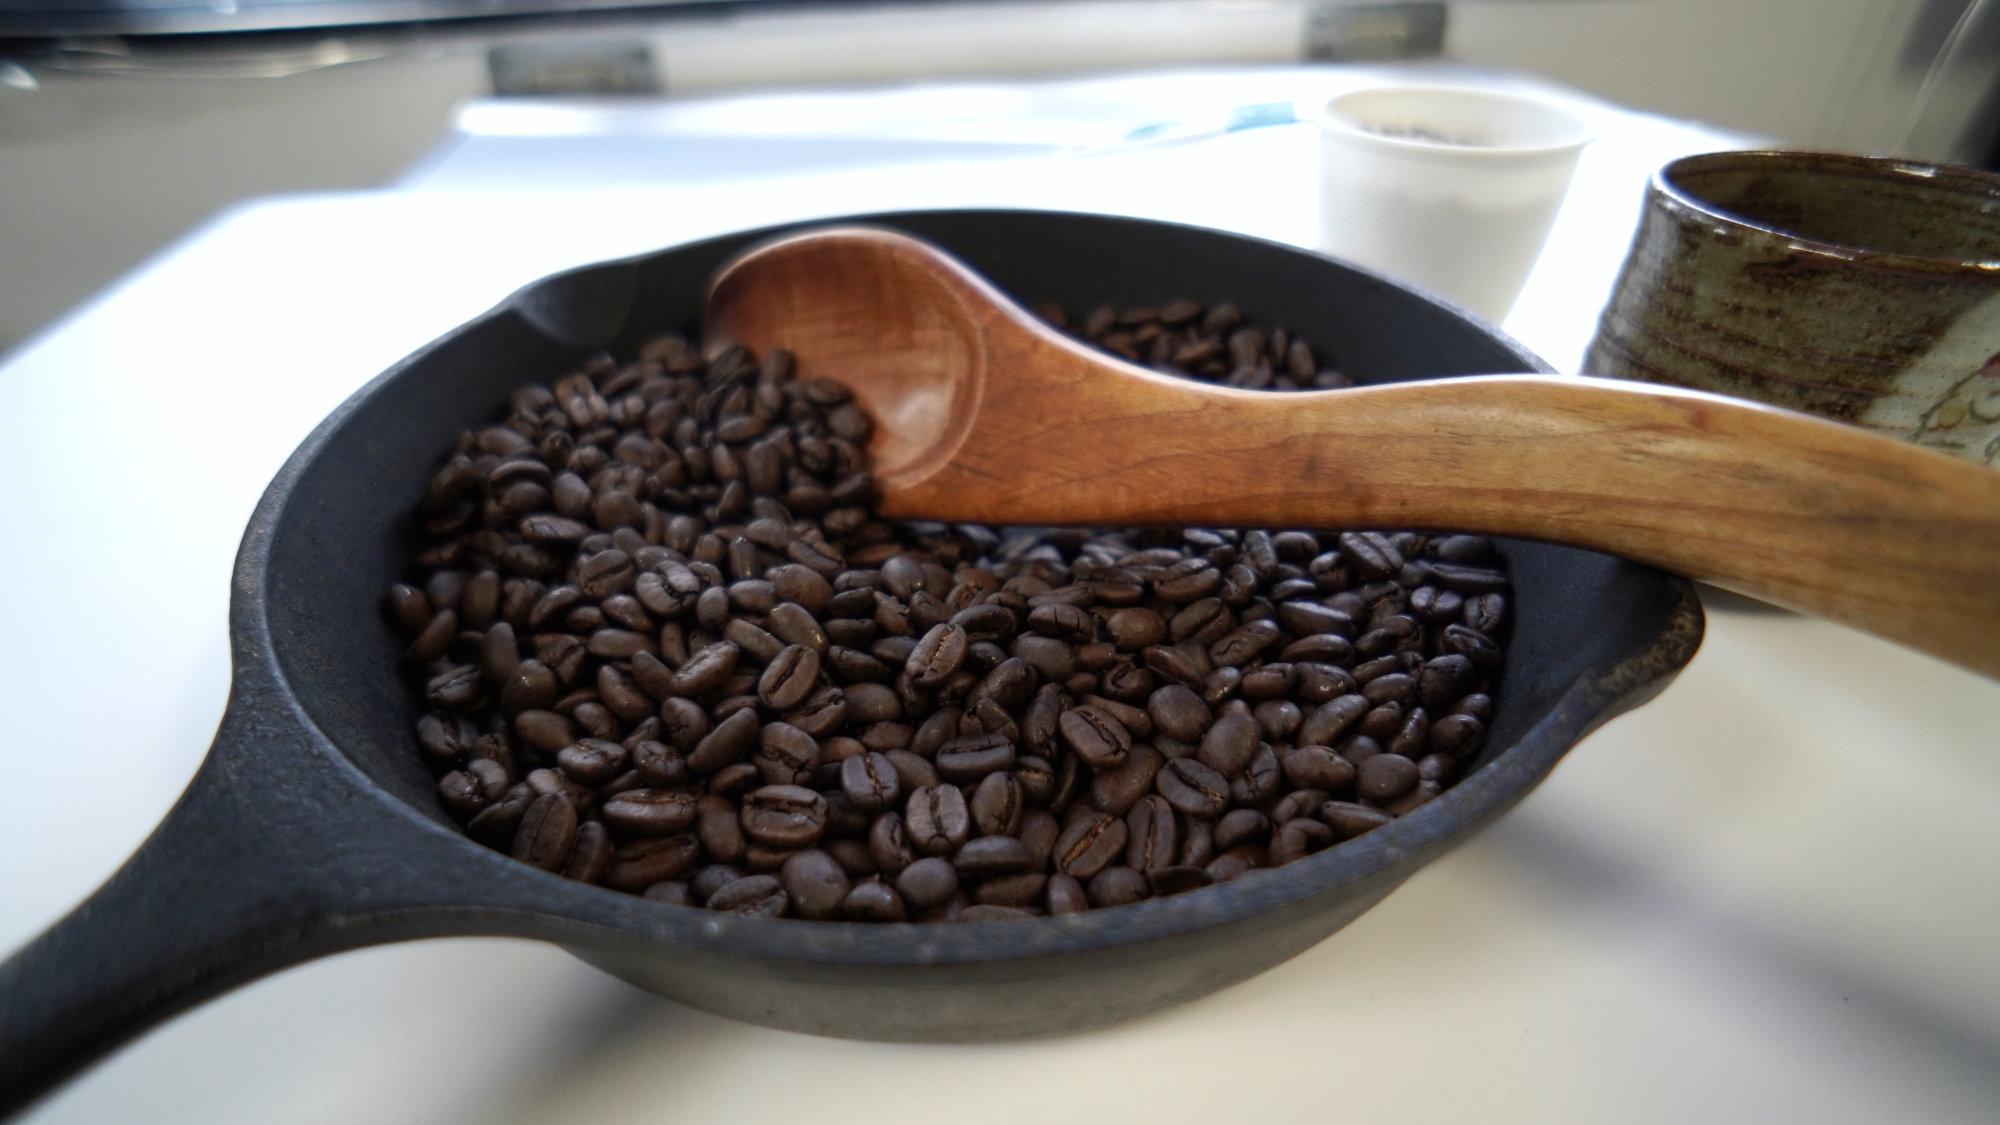
4. Roast: Start by measuring six ounces or about one cup of green coffee. Here we have our equipment ready or PAM, our coffee are whisk and our cooling tray. The first thing we want to do is preheat the PAM over a high-flying. We're going to leave it there for about a minute just to make sure it's nice and evenly warmed up before the coffee goes in. Let's add the coffee. Grab your whisk and have it ready in hand and begin stirring right after you pour. We will stir the coffee continuously throughout the roasting process. Stir using a spiral pattern starting on the outside of the pan and going towards the center. I've put a timer in the bottom right corner of the screen so we can track the progress of the roast over time. We are aiming for a medium roast coffee in this example, even with thorough stirring, it is difficult to get a highly consistent roast level across all the beans with the pan method. The slide unevenness results in a melodic of roast levels. This isn't entirely undesirable, however, as it increases the complexity of the cup, I can taste quite interesting and delicious. Little change will take place in these first few minutes. Just keep staring and gradually heat up the beans. At this point, you will start to see steam coming off of the beans. The lost water accounts for a substantial decrease in the weight of the coffee when we're done roasting. The coffee also starts to pale a bit in color. Over the next two to three minutes, you will see more steam coming off of the coffee and it will gradually start to become more yellow. The coffee starting to turn a deeper yellow as the sugars Carmelites around 325 degrees Fahrenheit, it smells a bit grassy to the beans are really starting to expand that this point, you can see the skin falling off as chaff into the pan. Eight minutes in the beans are starting to turn light brown. Some of them are reaching first crack. This is an audible cue that the main Fisher along the center of the bean is opening up. You will start to see more smoke at this stage. I'm going to turn the heat down just a little bit at this point to try keep the roast more even. Too much heat at this point could result in scorching the tips of the coffee beans. Ending now would result in a very light roast coffee. I'm going to turn off my ventilation fan for a little bit so you can hear the cracking behind the sound of the stirring. When most of the beans have finished first crack, this is usually a good spot to stop for a solid, well-developed light roast coffee. We're going to push it closer to the segment crack for our medium roast coffee. Second crack occurs when the cellular structure of the beam breaks open, releasing the trapped oil is inside. These beans will start to appear dark brown and glossy. There isn't always a clear distinction between first, second crack using the pan method. Because some of the beans that haven't gotten quite as much roasted are entering first crack. Well, some of the ones that have absorbed more heat are entering second crack and sometimes the two can blur together. You'll know you're entering second crack when the frequency and volume of the cracking sound is much more intense than the first crack. Some of the beans have clearly reached second crack at this point, there's a lot of smoke coming off and the cracking sound is very intense. We're going to push it just a little further for a nice deep medium roast. This is where we are going to end our Roast. Most of our beans are a well-developed golden brown. Using a hot pad or MIT, carefully grab the skeleton and poured the beans into your roasting tray. And make sure you shut off the heat to stirred the beans in the cooling tray for a minute or so to aid the cooling process. I'm going to take the beans outside to blow off some of the chaff. The CEF is that skin on the outside of the bean and in the center crack, we just want to get some of it off so it doesn't end up in our Brewer. Don't worry about getting all of it. Coffee needs to rest at least 12 hours after roasting, before brewing. And ideally up to about three days after roasting, you'll find the optimum flavor. So go ahead and put it in a bowl, and we'll wait at least 12 hours before brewing in the next video.
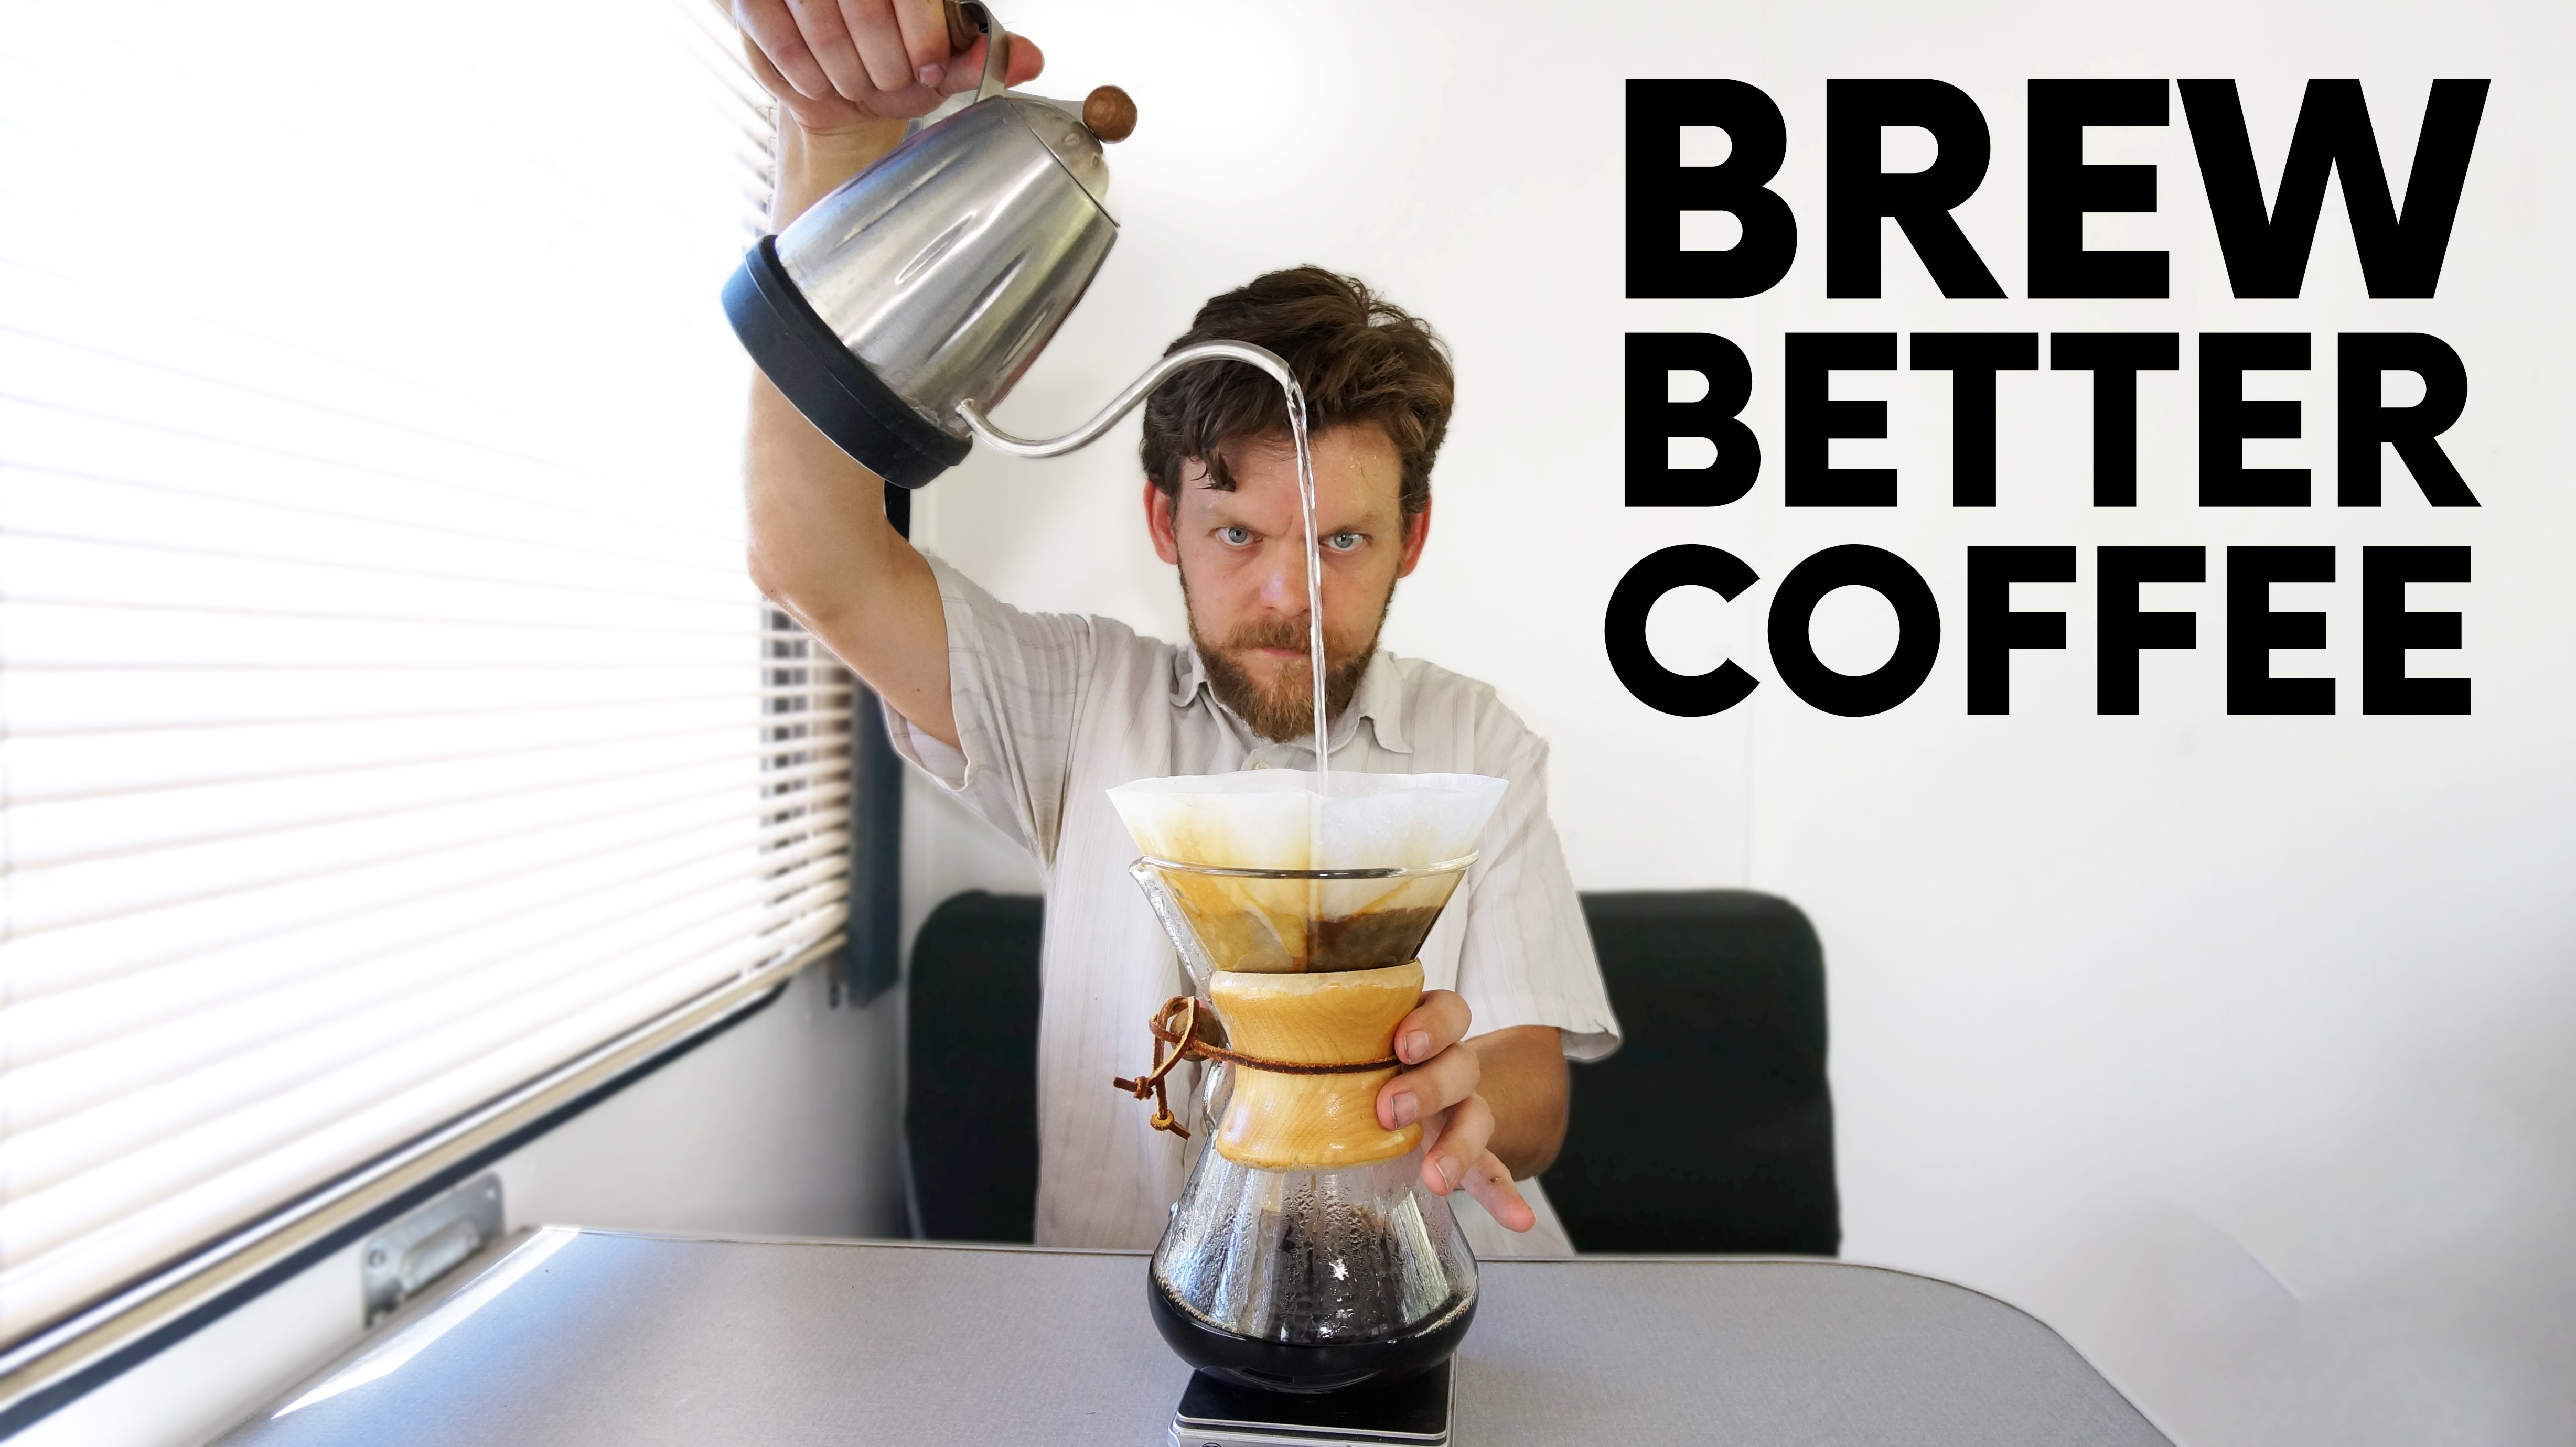
5. Brew: After letting the coffee rest for at least 24 hours, we are ready to brew. The coffee flavor will continue to get better for a few days after roasting. But at 24 hours, it should be very good. Always grind only what you need for each brew. I Brune with an arrow press here, but go ahead and use your favorite brewing method. Different roast levels can be optimized with slightly different brewing techniques. I cover this in more detail in my other coffee brewing courses, but a simplified way of looking at it is the darker the roast, the easier it extracts. Also the coffee continues to extract easier as it ages after roasting. If your coffee tastes a little bland, it probably needs to rest a bit more from the roasting process. Here we go. Enjoy.
6. Outro: Thank you for roasting with me today. I hope this course has been fun and informative. I also hope you continue to experiment with coffee roasting at home. Please let me know if you have any questions or comments. I really appreciate reviews. If you have the time to leave one. Thank you again and happy roasting.
 Tom Plets